No edit summary Tag: sourceedit |
Intangir Bot (talk | contribs) m (Bot: Changing template: Locat-stub) |
||
| (43 intermediate revisions by 10 users not shown) | |||
| Line 1: | Line 1: | ||
| − | {{sideicon|FFXIII}} |
+ | {{sideicon|prime=FFXIII|XIII2|FFAB|FFRK}} |
| + | {{Image needed|FFAB|maps from these time periods: |
||
| − | {{sideicon|XIII2}} |
||
| + | *000 AF (''FFXIII'' map, a separate one).}} |
||
| − | {{Images|maps from these time periods: |
||
| + | {{infobox location |
||
| − | *000 AF (''FFXIII'' map, a separate one). |
||
| + | |name=Yaschas Massif |
||
| − | *010 AF (01X AF, 100 AF, and 110 AF share the same map)}} |
||
| + | |release=FFXIII |
||
| − | [[File:Yaschas Massif.png|thumb|250px|right|The Yaschas Massif in ''Final Fantasy XIII''.]] |
||
| + | |japanese=ヤシャス山 |
||
| − | {{Q|Intimidating mountains tower over the harsh plains and tall vegetation, adding to the ominous atmosphere of this land found in the southern region of Gran Pulse. A short walk through the treacherous valley leads to the Paddra Ruins - the remains of what used to be one of the largest and most prosperous cities on Pulse. As with the Bresha Ruins, the area is filled with scientists and soldiers sent to investigate the location.|''Final Fantasy XIII-2'' online description.}} |
||
| + | |romaji=Yashasu-san |
||
| − | '''Yaschas Massif''' {{J|ヤシャス山|Yashasu-san|Mt. Yaschas}} is a location on [[Gran Pulse]] in ''[[Final Fantasy XIII]]'' and ''[[Final Fantasy XIII-2]]''. It is the site of the ruins of the city-nation of Paddra where the [[Farseers]] lived before it fell into ruin. Ten years after [[Catastrophe (Final Fantasy XIII)|the fall of Cocoon]], during ''[[Final Fantasy XIII-2]]'', soldiers and scientists from the [[Academy]] reside in the Paddra Ruins, the origin site of the numerous spacetime anomalies. |
||
| + | |lit=Mt. Yaschas |
||
| + | |image= |
||
| + | <gallery> |
||
| + | Yaschas Massif.png|0 AF |
||
| + | XIII-2 Yaschas Massif1.jpg|10 AF |
||
| + | Yaschas Massif XIII-2.jpg|1X AF |
||
| + | FFXIII-2 Yaschas Massif 110 AF - The Pass of Paddra.png|110 AF |
||
| + | </gallery> |
||
| + | |type=Region |
||
| + | |region=[[Gran Pulse]] |
||
| + | |affiliation=[[Farseer]]s, The [[Academy]] |
||
| + | |areas= |
||
| + | * The Deepgap |
||
| + | * The Pass of Paddra |
||
| + | * The Ascendant Scarp |
||
| + | * The Paddraean Archaeopolis |
||
| + | * The Tsubaddran Highlands |
||
| + | * The Tsumitran Basin |
||
| + | |residents= |
||
| + | * [[Farseers]] (formerly) |
||
| + | * The Academy |
||
| + | ** [[Hope Estheim]] |
||
| + | ** [[Alyssa Zaidelle]] |
||
| + | |items=*See [[#Treasure|Treasure]] |
||
| + | |enemies=*See [[#Enemies|Enemies]] |
||
| + | |quests= |
||
| + | '''Final Fantasy XIII''' |
||
| + | *Witness an optional scene with Hope and Vanille |
||
| + | *[[Missions (Final Fantasy XIII)|Missions]] |
||
| + | '''Final Fantasy XIII-2''' |
||
| + | *Make way to the Academy encampment and speak with Hope |
||
| + | *Open a [[Time Gate]] and solve the [[paradox]] affecting the area |
||
| + | *Return in an alternate timeline and watch the clear footage of the [[Oracle Drive]] |
||
| + | *Return in 100 and 110 AF to do sidequests for the [[Ruby of Grief|Rubies of Grief]] |
||
| + | }} |
||
| + | {{Quote|Intimidating mountains tower over the harsh plains and tall vegetation, adding to the ominous atmosphere of this land found in the southern region of Gran Pulse. A short walk through the treacherous valley leads to the Paddra Ruins - the remains of what used to be one of the largest and most prosperous cities on Pulse. As with the Bresha Ruins, the area is filled with scientists and soldiers sent to investigate the location.|''Final Fantasy XIII-2'' online description}} |
||
| + | '''Yaschas Massif''' is a location on [[Gran Pulse]] in ''[[Final Fantasy XIII]]'' and ''[[Final Fantasy XIII-2]]''. It is the site of the ruins of the city-nation of Paddra where the [[Farseers]] lived before it fell into ruin. Ten years after [[Catastrophe (Final Fantasy XIII)|the fall of Cocoon]], during ''[[Final Fantasy XIII-2]]'', soldiers and scientists from the [[Academy]] reside in the Paddra Ruins, the origin site of the numerous spacetime anomalies. |
||
| + | |||
| + | {{See|Ancient civilization}} |
||
| − | ==Datalog== |
+ | == Datalog == |
| − | {{See |
+ | {{See|Datalog (Final Fantasy XIII)/Locales/Final Fantasy XIII}} |
''This mountain group stretches across a southern region of Gran Pulse. The area's geography is diverse, consisting of scenic highplains, sheer escarpments, and deep fault valleys, with mammoth fallen trees a common sight across its landscape.'' |
''This mountain group stretches across a southern region of Gran Pulse. The area's geography is diverse, consisting of scenic highplains, sheer escarpments, and deep fault valleys, with mammoth fallen trees a common sight across its landscape.'' |
||
''At the massif's southernmost tip lies the ruin of the fallen city-state Paddra. Once the flourishing center of an advanced culture, it is now nothing more than a Cie'th-infested archaeopolis.'' |
''At the massif's southernmost tip lies the ruin of the fallen city-state Paddra. Once the flourishing center of an advanced culture, it is now nothing more than a Cie'th-infested archaeopolis.'' |
||
| − | {{See |
+ | {{See|Fragment/Academic Reward}} |
;''Travel Guide: Yaschas Massif'' |
;''Travel Guide: Yaschas Massif'' |
||
;''Area Information'' |
;''Area Information'' |
||
| Line 22: | Line 61: | ||
''The tough, mountainous terrain is a popular draw for mountaineers and other outdoor types. We recommend visiting Paddra, awe-inspiring even in ruins. Also worth a hike is the viewing platform next to the dormant fal'Cie.'' |
''The tough, mountainous terrain is a popular draw for mountaineers and other outdoor types. We recommend visiting Paddra, awe-inspiring even in ruins. Also worth a hike is the viewing platform next to the dormant fal'Cie.'' |
||
| − | ==Story== |
+ | == Story == |
{{spoiler}} |
{{spoiler}} |
||
Originally home to a tribe called the Farseers, Paddra was a nation ruled by [[Paddra Nsu-Yeul]] as both its seeress and priestess with [[Etro]] as Paddra's patron deity, while the rest of Gran Pulse worshiped [[Pulse]]. In the past, forced to go against her vows when Paddra's warriors could not defeat it, Yeul defeated a time-eating [[Ugallu (Final Fantasy XIII-2)|Ugallu]] that ended up in her time by sealing it away in the [[Void Beyond]]. Though this saved her home Yeul still foresaw the destruction of Paddra. After civil war destroyed the nation, Yeul renounced her position and left to wander Gran Pulse. |
Originally home to a tribe called the Farseers, Paddra was a nation ruled by [[Paddra Nsu-Yeul]] as both its seeress and priestess with [[Etro]] as Paddra's patron deity, while the rest of Gran Pulse worshiped [[Pulse]]. In the past, forced to go against her vows when Paddra's warriors could not defeat it, Yeul defeated a time-eating [[Ugallu (Final Fantasy XIII-2)|Ugallu]] that ended up in her time by sealing it away in the [[Void Beyond]]. Though this saved her home Yeul still foresaw the destruction of Paddra. After civil war destroyed the nation, Yeul renounced her position and left to wander Gran Pulse. |
||
[[File:Fang and Vanille Yaschas.PNG|thumb|left|Fang and Vanille at the ruins of Paddra.]] |
[[File:Fang and Vanille Yaschas.PNG|thumb|left|Fang and Vanille at the ruins of Paddra.]] |
||
| − | After Paddra has long been abandoned and in ruins only monsters and Cie'th wander its streets. A party of [[l'Cie]] |
+ | After Paddra has long been abandoned and in ruins only monsters and Cie'th wander its streets. A party of [[l'Cie]] escapes [[Cocoon (Final Fantasy XIII)|Cocoon]] and descends on Gran Pulse seeking a way to change their destiny and wipe their l'Cie brands clean. They can visit Yaschas Massif where Hope and [[Oerba Dia Vanille|Vanille]] talk about telling lies as a coping mechanism. At the Paddra Ruins, Vanille and [[Oerba Yun Fang|Fang]] recall some of their past and the mystery behind their brands. The l'Cie catch sight of the [[fal'Cie]] [[Dahaka (Final Fantasy XIII)|Dahaka]]—provided they have not already fought it—and decide to follow it towards [[Oerba]]. |
In 10 AF the Yaschas Massif is darkened by an eclipse caused by the fal'Cie [[Fenrir (Final Fantasy XIII-2)|Fenrir]], appearing centuries before its time due to a [[paradox]]. The Paddra Ruins are occupied by members of the Academy, including its leader, Hope, and his assistant, [[Alyssa Zaidelle]], as they research [[paradox]]es. Hope encounters [[Serah Farron|Serah]], [[Mog (Final Fantasy XIII-2)|Mog]], and [[Noel Kreiss|Noel]] after saving them from an [[Aloeidai]]. |
In 10 AF the Yaschas Massif is darkened by an eclipse caused by the fal'Cie [[Fenrir (Final Fantasy XIII-2)|Fenrir]], appearing centuries before its time due to a [[paradox]]. The Paddra Ruins are occupied by members of the Academy, including its leader, Hope, and his assistant, [[Alyssa Zaidelle]], as they research [[paradox]]es. Hope encounters [[Serah Farron|Serah]], [[Mog (Final Fantasy XIII-2)|Mog]], and [[Noel Kreiss|Noel]] after saving them from an [[Aloeidai]]. |
||
| Line 40: | Line 79: | ||
[[File:FF13-2 Crimson Orb.jpg|thumb|left|A Ruby of Grief in the Paddra Ruins.]] |
[[File:FF13-2 Crimson Orb.jpg|thumb|left|A Ruby of Grief in the Paddra Ruins.]] |
||
By 100 and 110 AF, mysterious objects called Rubies of Grief have appeared throughout the Yaschas Massif because Yeul's sealing of Ugallu caused a paradox that sucked people into rips in time. In place of the victims are Rubies of Grief, embodying their regrets, which Serah and Noel help pass on by fulfilling their requests. In 110 AF, they find an orb holding the memories of the Yeul who had banished Ugallu, the monster's seal having broken. By defeating the monster, Yeul's Ruby of Grief vanishes. |
By 100 and 110 AF, mysterious objects called Rubies of Grief have appeared throughout the Yaschas Massif because Yeul's sealing of Ugallu caused a paradox that sucked people into rips in time. In place of the victims are Rubies of Grief, embodying their regrets, which Serah and Noel help pass on by fulfilling their requests. In 110 AF, they find an orb holding the memories of the Yeul who had banished Ugallu, the monster's seal having broken. By defeating the monster, Yeul's Ruby of Grief vanishes. |
||
| − | {{ |
+ | {{clear}} |
{{Endspoiler}} |
{{Endspoiler}} |
||
| − | ==Areas== |
+ | == Areas == |
[[File:yaschas Paddra.jpg|thumb|Paddraean Archaeopolis in ''Final Fantasy XIII''.]] |
[[File:yaschas Paddra.jpg|thumb|Paddraean Archaeopolis in ''Final Fantasy XIII''.]] |
||
In ''Final Fantasy XIII'', the Yaschas Massif connects with the [[Vallis Media]]. Southern part stretches from east to west across a deep ravine and to navigate through that part, jumping is required. At the south-eastern side there are two plateaus: one on high ledge and other on the lower which requires walking down a narrow pass infested with [[Triffid (Final Fantasy XIII)|Triffids]]. At the west, there is a way in the valley which splits in two, eventually connecting again and leading into the ruins of Paddra, ancient capital of Gran Pulse. On the square at the end of the ruins there is a mysterious structure which houses [[Undying (Final Fantasy XIII)|Undying]] [[Vercingetorix]]. |
In ''Final Fantasy XIII'', the Yaschas Massif connects with the [[Vallis Media]]. Southern part stretches from east to west across a deep ravine and to navigate through that part, jumping is required. At the south-eastern side there are two plateaus: one on high ledge and other on the lower which requires walking down a narrow pass infested with [[Triffid (Final Fantasy XIII)|Triffids]]. At the west, there is a way in the valley which splits in two, eventually connecting again and leading into the ruins of Paddra, ancient capital of Gran Pulse. On the square at the end of the ruins there is a mysterious structure which houses [[Undying (Final Fantasy XIII)|Undying]] [[Vercingetorix]]. |
||
| Line 51: | Line 90: | ||
{|class="full-width" |
{|class="full-width" |
||
|width="50%" valign="top"| |
|width="50%" valign="top"| |
||
| − | ===''Final Fantasy XIII''=== |
+ | === ''Final Fantasy XIII-2'' === |
| − | *The |
+ | * The Pass of Paddra |
| + | * The Paddraean Archaeopolis |
||
| − | *The Pass of Paddra |
||
| − | *The Ascendant Scarp |
||
| − | *The Paddraean Archaeopolis |
||
| − | *The Tsubaddran Highlands |
||
| − | *The Tsumitran Basin |
||
| − | |width="50%" valign="top"| |
||
| − | ===''Final Fantasy XIII-2''=== |
||
| − | *The Pass of Paddra |
||
| − | *The Paddraean Archaeopolis |
||
|} |
|} |
||
| − | ==Treasure== |
+ | == Treasure == |
| − | ===''Final Fantasy XIII''=== |
+ | === ''Final Fantasy XIII'' === |
| − | {|class="half-width FFXIII table" |
+ | {|class="half-width FFXIII article-table" |
|-class="a" |
|-class="a" |
||
!width="200px"|Item |
!width="200px"|Item |
||
!width="250px"|Location |
!width="250px"|Location |
||
|- |
|- |
||
| − | !class="b"|[[ |
+ | !class="b"|[[Final Fantasy XIII components#Diabolic Tail|Diabolic Tail]] x9 |
|The Tsubaddran Highlands |
|The Tsubaddran Highlands |
||
|- |
|- |
||
| − | !class="b"|[[ |
+ | !class="b"|[[Final Fantasy XIII components#Esoteric Oil|Esoteric Oil]] x8 |
|The Ascendant Scarp |
|The Ascendant Scarp |
||
|- |
|- |
||
| − | !class="b"|[[ |
+ | !class="b"|[[Final Fantasy XIII accessories#Rune Bracelet|Rune Bracelet]] |
|The Ascendant Scarp |
|The Ascendant Scarp |
||
|- |
|- |
||
| Line 83: | Line 114: | ||
|The Ascendant Scarp |
|The Ascendant Scarp |
||
|- |
|- |
||
| − | !class="b"|[[ |
+ | !class="b"|[[Final Fantasy XIII components#Millerite|Millerite]] x2 |
|The Ascendant Scarp |
|The Ascendant Scarp |
||
|- |
|- |
||
| − | !class="b"|[[ |
+ | !class="b"|[[Final Fantasy XIII accessories#Watchman's Amulet|Watchman's Amulet]] |
|The Tsumitran Basin |
|The Tsumitran Basin |
||
|- |
|- |
||
| − | !class="b"|[[ |
+ | !class="b"|[[Final Fantasy XIII components#Millerite|Millerite]] |
|The Tsumitran Basin |
|The Tsumitran Basin |
||
|- |
|- |
||
| − | !class="b"|[[ |
+ | !class="b"|[[Final Fantasy XIII components#Glass Orb|Glass Orb]] |
|The Tsumitran Basin |
|The Tsumitran Basin |
||
|- |
|- |
||
| − | !class="b"|[[ |
+ | !class="b"|[[Final Fantasy XIII accessories#Mythril Bangle|Mythril Bangle]] |
|The Pass of Paddra |
|The Pass of Paddra |
||
|- |
|- |
||
| − | !class="b"|[[ |
+ | !class="b"|[[Final Fantasy XIII components#Rhodochrosite|Rhodochrosite]] |
|The Paddraean Archaeopolis |
|The Paddraean Archaeopolis |
||
|- |
|- |
||
| − | !class="b"|[[ |
+ | !class="b"|[[Final Fantasy XIII components#Spined Horn|Spined Horn]] x3 |
|The Paddraean Archaeopolis |
|The Paddraean Archaeopolis |
||
|- |
|- |
||
| − | !class="b"|[[ |
+ | !class="b"|[[Final Fantasy XIII accessories#Whistlewind Scarf|Whistlewind Scarf]] |
|The Paddraean Archaeopolis |
|The Paddraean Archaeopolis |
||
|- |
|- |
||
|} |
|} |
||
| − | ===''Final Fantasy XIII-2''=== |
+ | === ''Final Fantasy XIII-2'' === |
| − | ====10 AF==== |
+ | ==== 10 AF ==== |
| − | {|class="full-width XIII2 table" |
+ | {|class="full-width XIII2 article-table" |
|-class="a" |
|-class="a" |
||
!width="200px"|Item |
!width="200px"|Item |
||
| Line 117: | Line 148: | ||
!width="150px"|Requirements |
!width="150px"|Requirements |
||
|- |
|- |
||
| − | !class="b"|[[ |
+ | !class="b"|[[Final Fantasy XIII-2 accessories#Metal Armband|Metal Armband]] |
|The Pass of Paddra |
|The Pass of Paddra |
||
|Moogle Hunt |
|Moogle Hunt |
||
| Line 125: | Line 156: | ||
|None |
|None |
||
|- |
|- |
||
| − | !class="b"|10 [[ |
+ | !class="b"|10 [[Final Fantasy XIII-2 items#Power Chip|Power Chips]] |
|The Pass of Paddra |
|The Pass of Paddra |
||
|Moogle Throw |
|Moogle Throw |
||
| Line 133: | Line 164: | ||
|None |
|None |
||
|- |
|- |
||
| − | !class="b"|8 [[ |
+ | !class="b"|8 [[Final Fantasy XIII-2 items#Mana Sliver|Mana Slivers]] |
|The Pass of Paddra |
|The Pass of Paddra |
||
|None |
|None |
||
|- |
|- |
||
| − | !class="b"|[[ |
+ | !class="b"|[[Final Fantasy XIII-2 items#Tablet of Paddra|Tablet of Paddra]] |
|The Pass of Paddra (Box) |
|The Pass of Paddra (Box) |
||
|None |
|None |
||
|- |
|- |
||
| − | !class="b"|8 [[ |
+ | !class="b"|8 [[Final Fantasy XIII-2 items#Mana Bolt|Mana Bolts]] |
|The Pass of Paddra |
|The Pass of Paddra |
||
|None |
|None |
||
|- |
|- |
||
| − | !class="b"|[[ |
+ | !class="b"|[[Final Fantasy XIII-2 items#'Scars' Gate Seal|'Scars' Gate Seal]] |
|The Pass of Paddra (Box) |
|The Pass of Paddra (Box) |
||
|None |
|None |
||
|- |
|- |
||
| − | !class="b"|[[ |
+ | !class="b"|[[Final Fantasy XIII-2 items#Gysahl Greens|Gysahl Greens]] |
|The Pass of Paddra |
|The Pass of Paddra |
||
|None |
|None |
||
|- |
|- |
||
| − | !class="b"|[[ |
+ | !class="b"|[[Final Fantasy XIII-2 items#Unicorn Horn|Unicorn Horn]] |
|The Pass of Paddra |
|The Pass of Paddra |
||
|Moogle Throw |
|Moogle Throw |
||
| Line 161: | Line 192: | ||
|None |
|None |
||
|- |
|- |
||
| − | !class="b"|[[ |
+ | !class="b"|[[Final Fantasy XIII-2 accessories#Pearl Necklace|Pearl Necklace]] |
|The Pass of Paddra |
|The Pass of Paddra |
||
|Moogle Hunt |
|Moogle Hunt |
||
|- |
|- |
||
| − | !class="b"|[[ |
+ | !class="b"|[[Final Fantasy XIII-2 accessories#Serenity Satchel|Serenity Satchel]] |
|The Paddraean Archaeopolis |
|The Paddraean Archaeopolis |
||
|Moogle Hunt |
|Moogle Hunt |
||
|- |
|- |
||
| − | !class="b"|3 [[ |
+ | !class="b"|3 [[Final Fantasy XIII-2 items#Remedy|Remedies]] |
|The Paddraean Archaeopolis |
|The Paddraean Archaeopolis |
||
|None |
|None |
||
|- |
|- |
||
| − | !class="b"|[[ |
+ | !class="b"|[[Final Fantasy XIII-2 adornments#Carbuncle Figurine|Carbuncle Figurine]] |
|The Paddraean Archaeopolis |
|The Paddraean Archaeopolis |
||
|None |
|None |
||
| Line 181: | Line 212: | ||
|Moogle Hunt, Moogle Throw |
|Moogle Hunt, Moogle Throw |
||
|- |
|- |
||
| − | !class="b"|[[ |
+ | !class="b"|[[Final Fantasy XIII-2 items#Gysahl Greens|Gysahl Greens]] |
|The Paddraean Archaeopolis |
|The Paddraean Archaeopolis |
||
|Moogle Hunt |
|Moogle Hunt |
||
|- |
|- |
||
| − | !class="b"|[[ |
+ | !class="b"|[[Final Fantasy XIII-2 accessories#Warding Talisman|Warding Talisman]] |
|The Paddraean Archaeopolis |
|The Paddraean Archaeopolis |
||
|None |
|None |
||
|- |
|- |
||
| − | !class="b"|[[ |
+ | !class="b"|[[Final Fantasy XIII-2 items#Potion|Potion]] |
|The Pass of Paddra |
|The Pass of Paddra |
||
|Live Trigger Reward |
|Live Trigger Reward |
||
|- |
|- |
||
| − | !class="b"|[[ |
+ | !class="b"|[[Final Fantasy XIII-2 items#Fruit of Fenrir|Fruit of Fenrir]] |
|The Pass of Paddra (Box) |
|The Pass of Paddra (Box) |
||
|None |
|None |
||
|} |
|} |
||
| − | ====1X AF==== |
+ | ==== 1X AF ==== |
| − | {|class="full-width XIII2 table" |
+ | {|class="full-width XIII2 article-table" |
|-class="a" |
|-class="a" |
||
!width="200px"|Item |
!width="200px"|Item |
||
| Line 205: | Line 236: | ||
!width="150px"|Requirements |
!width="150px"|Requirements |
||
|- |
|- |
||
| − | !class="b"|[[ |
+ | !class="b"|[[Final Fantasy XIII-2 items#'Encounters' Gate Seal|'Encounters' Gate Seal]] (Box) |
|The Pass of Paddra |
|The Pass of Paddra |
||
|None |
|None |
||
|- |
|- |
||
| − | !class="b"|[[ |
+ | !class="b"|[[Final Fantasy XIII-2 items#Ivory Crystal|Ivory Crystal]] |
|The Pass of Paddra |
|The Pass of Paddra |
||
|None |
|None |
||
|- |
|- |
||
| − | !class="b"|[[ |
+ | !class="b"|[[Final Fantasy XIII-2 items#Onyx Crystal|Onyx Crystal]] |
|The Pass of Paddra |
|The Pass of Paddra |
||
|Moogle Hunt |
|Moogle Hunt |
||
|- |
|- |
||
| − | !class="b"|[[ |
+ | !class="b"|[[Final Fantasy XIII-2 items#Emerald Crystal|Emerald Crystal]] |
|The Pass of Paddra |
|The Pass of Paddra |
||
|Moogle Throw |
|Moogle Throw |
||
|- |
|- |
||
| − | !class="b"|[[ |
+ | !class="b"|[[Final Fantasy XIII-2 items#Old Battery|Old Battery]] |
|The Paddraean Archaeopolis |
|The Paddraean Archaeopolis |
||
|Moogle Throw |
|Moogle Throw |
||
|- |
|- |
||
| − | !class="b"|[[ |
+ | !class="b"|[[Final Fantasy XIII-2 adornments#Academic's Hat|Academic's Hat]]/[[Final Fantasy XIII-2 adornments#Red Silk Hat|Red Silk Hat]] |
|The Paddraean Archaeopolis |
|The Paddraean Archaeopolis |
||
|All Live Triggers |
|All Live Triggers |
||
| Line 238: | Line 269: | ||
|} |
|} |
||
| − | ====100 AF==== |
+ | ==== 100 AF ==== |
| − | {|class="full-width XIII2 table" |
+ | {|class="full-width XIII2 article-table" |
|-class="a" |
|-class="a" |
||
!width="200px"|Item |
!width="200px"|Item |
||
| Line 245: | Line 276: | ||
!width="150px"|Requirements |
!width="150px"|Requirements |
||
|- |
|- |
||
| − | !class="b"|[[ |
+ | !class="b"|[[Final Fantasy XIII-2 items#'Reminiscence' Gate Seal|'Reminiscence' Gate Seal]] |
|The Paddraean Archaeopolis |
|The Paddraean Archaeopolis |
||
|Moogle Throw |
|Moogle Throw |
||
|- |
|- |
||
| − | !class="b"|[[ |
+ | !class="b"|[[Final Fantasy XIII-2 items#Comm Device|Comm Device]] |
|The Pass of Paddra |
|The Pass of Paddra |
||
|Moogle Hunt |
|Moogle Hunt |
||
|- |
|- |
||
| − | !class="b"|[[ |
+ | !class="b"|[[Final Fantasy XIII-2 items#Picture Frame|Picture Frame]] |
|The Pass of Paddra |
|The Pass of Paddra |
||
|Moogle Hunt |
|Moogle Hunt |
||
|- |
|- |
||
| − | !class="b"|[[ |
+ | !class="b"|[[Final Fantasy XIII-2 weapons#Blessed Blade|Blessed Blade]] |
|The Pass of Paddra |
|The Pass of Paddra |
||
|None |
|None |
||
|- |
|- |
||
| − | !class="b"|[[ |
+ | !class="b"|[[Final Fantasy XIII-2 items#Graviton Core Epsilon|Graviton Core Epsilon]] |
|The Pass of Paddra |
|The Pass of Paddra |
||
|Moogle Hunt |
|Moogle Hunt |
||
|- |
|- |
||
| − | !class="b"|[[ |
+ | !class="b"|[[Final Fantasy XIII-2 items#Bulb of Hope|Bulb of Hope]] |
|The Paddraean Archaeopolis |
|The Paddraean Archaeopolis |
||
|Moogle Hunt |
|Moogle Hunt |
||
|- |
|- |
||
| − | !class="b"|[[ |
+ | !class="b"|[[Final Fantasy XIII-2 items#Sealed Tablet|Sealed Tablet]] |
|The Paddraean Archaeopolis |
|The Paddraean Archaeopolis |
||
|Moogle Throw |
|Moogle Throw |
||
|} |
|} |
||
| − | ====110 AF==== |
+ | ==== 110 AF ==== |
| − | {|class="full-width XIII2 table" |
+ | {|class="full-width XIII2 article-table" |
|-class="a" |
|-class="a" |
||
!width="200px"|Item |
!width="200px"|Item |
||
| Line 281: | Line 312: | ||
!width="150px"|Requirements |
!width="150px"|Requirements |
||
|- |
|- |
||
| − | !class="b"|[[ |
+ | !class="b"|[[Final Fantasy XIII-2 items#'Maleficence' Gate Seal|'Maleficence' Gate Seal]] |
|The Paddraean Archaeopolis (Box) |
|The Paddraean Archaeopolis (Box) |
||
|None |
|None |
||
|- |
|- |
||
| − | !class="b"|[[ |
+ | !class="b"|[[Final Fantasy XIII-2 items#Service Manual|Service Manual]] |
|The Paddraean Archaeopolis (Box) |
|The Paddraean Archaeopolis (Box) |
||
|Moogle Hunt |
|Moogle Hunt |
||
| Line 293: | Line 324: | ||
|Moogle Hunt |
|Moogle Hunt |
||
|- |
|- |
||
| − | !class="b"|[[ |
+ | !class="b"|[[Final Fantasy XIII-2 adornments#Terrorists' Mark|Terrorists' Mark]] |
|The Pass of Paddra (Box) |
|The Pass of Paddra (Box) |
||
|Moogle Hunt |
|Moogle Hunt |
||
|- |
|- |
||
| − | !class="b"|[[ |
+ | !class="b"|[[Final Fantasy XIII-2 items#Outdoor Watch|Outdoor Watch]] |
|The Pass of Paddra (Box) |
|The Pass of Paddra (Box) |
||
|Moogle Throw |
|Moogle Throw |
||
| Line 303: | Line 334: | ||
|} |
|} |
||
| − | ==Enemies== |
+ | == Enemies == |
| − | ===''Final Fantasy XIII''=== |
+ | === ''Final Fantasy XIII'' === |
| + | {{multicol-begin}} |
||
| − | <tabber> |
||
| − | The Tsubaddran Highlands |
+ | ;The Tsubaddran Highlands |
| − | *[[Leyak (Final Fantasy XIII)|Leyak]] x4 |
+ | * [[Leyak (Final Fantasy XIII)|Leyak]] x4 |
| − | *[[Gorgonopsid (Final Fantasy XIII)|Gorgonopsid]] x2 |
+ | * [[Gorgonopsid (Final Fantasy XIII)|Gorgonopsid]] x2 |
| − | *[[Gorgonopsid (Final Fantasy XIII)|Gorgonopsid]] x3 |
+ | * [[Gorgonopsid (Final Fantasy XIII)|Gorgonopsid]] x3 |
| − | *[[Triffid (Final Fantasy XIII)|Triffid]] x2 |
+ | * [[Triffid (Final Fantasy XIII)|Triffid]] x2 |
| − | *[[Triffid (Final Fantasy XIII)|Triffid]] x3 |
+ | * [[Triffid (Final Fantasy XIII)|Triffid]] x3 |
| − | *[[Ugallu (Final Fantasy XIII)|Ugallu]] (Mark 3) |
+ | * [[Ugallu (Final Fantasy XIII)|Ugallu]] (Mark 3) |
| + | {{multicol-separator}} |
||
| − | |-|The Tsumitran Basin= |
||
| + | ;The Tsumitran Basin |
||
| − | *[[Leyak (Final Fantasy XIII)|Leyak]] x3, [[Rangda (Final Fantasy XIII)|Rangda]] x2 |
||
| − | *[[ |
+ | * [[Leyak (Final Fantasy XIII)|Leyak]] x3, [[Rangda (Final Fantasy XIII)|Rangda]] x2 |
| − | *[[ |
+ | * [[Svarog (Final Fantasy XIII)|Svarog]], [[Triffid (Final Fantasy XIII)|Triffid]] x2 |
| − | *[[Behemoth King (Final Fantasy XIII)|Behemoth King]], [[Triffid (Final Fantasy XIII)|Triffid]] |
+ | * [[Behemoth King (Final Fantasy XIII)|Behemoth King]], [[Triffid (Final Fantasy XIII)|Triffid]] x2 |
| − | *[[Triffid (Final Fantasy XIII)|Triffid]] |
+ | * [[Behemoth King (Final Fantasy XIII)|Behemoth King]], [[Triffid (Final Fantasy XIII)|Triffid]] x3 |
| − | * |
+ | * [[Triffid (Final Fantasy XIII)|Triffid]] x4 |
| + | * [[Svarog (Final Fantasy XIII)|Svarog]], [[Gorgonopsid (Final Fantasy XIII)|Gorgonopsid]] x3 |
||
| − | *Rangda x3 |
||
| + | * Rangda x3 |
||
| − | *[[Edimmu]] (Mark 5) |
||
| + | * [[Edimmu]] (Mark 5) |
||
| − | |-|The Ascendant Scarp= |
||
| + | {{multicol-separator}} |
||
| − | *[[Triffid (Final Fantasy XIII)|Triffid]] x2, [[Alraune (Final Fantasy XIII)|Alraune]] x4 |
||
| + | ;The Ascendant Scarp |
||
| − | *[[Svarog (Final Fantasy XIII)|Svarog]] (two separate encounters) |
||
| − | *[[ |
+ | * [[Triffid (Final Fantasy XIII)|Triffid]] x2, [[Alraune (Final Fantasy XIII)|Alraune]] x4 |
| − | * |
+ | * [[Svarog (Final Fantasy XIII)|Svarog]] (two separate encounters) |
| − | *[[ |
+ | * [[Hybrid Flora]], [[Alraune (Final Fantasy XIII)|Alraune]] x3 |
| − | *[[ |
+ | * [[Hybrid Flora]], [[Triffid (Final Fantasy XIII)|Triffid]] x2 |
| − | * |
+ | * [[Munchkin (Final Fantasy XIII)|Munchkin]] x3 |
| − | *[[ |
+ | * [[Svarog (Final Fantasy XIII)|Svarog]], [[Alraune (Final Fantasy XIII)|Alraune]] x4 |
| + | * [[Adroa]] x4, [[Verdelet (Final Fantasy XIII)|Verdelet]] x2 (Mark 4) |
||
| − | |-|The Deepgap= |
||
| − | *[[Munchkin (Final Fantasy XIII)|Munchkin]] |
+ | * [[Ugallu (Final Fantasy XIII)|Ugallu]], [[Munchkin (Final Fantasy XIII)|Munchkin]] x4 (Mark 56) |
| + | {{multicol-separator}} |
||
| − | *[[Hybrid Flora]] x2 |
||
| + | ;The Deepgap |
||
| − | |-|The Pass of Paddra= |
||
| − | * |
+ | * [[Munchkin (Final Fantasy XIII)|Munchkin]] x5 |
| + | * [[Hybrid Flora]] x2 |
||
| − | *[[Triffid (Final Fantasy XIII)|Triffid]] x2, [[Alraune (Final Fantasy XIII)|Alraune]] x5 |
||
| + | {{multicol-separator}} |
||
| − | *[[Munchkin (Final Fantasy XIII)|Munchkin]] x3 |
||
| − | *[[Rangda (Final Fantasy XIII)|Rangda]], [[Leyak (Final Fantasy XIII)|Leyak]] x4 |
||
| − | *[[Munchkin (Final Fantasy XIII)|Munchkin]] x4 |
||
| − | *[[Munchkin Maestro (Final Fantasy XIII)|Munchkin Maestro]], [[Munchkin (Final Fantasy XIII)|Munchkin]] x3 |
||
| − | *[[Munchkin Maestro (Final Fantasy XIII)|Munchkin Maestro]], [[Munchkin (Final Fantasy XIII)|Munchkin]] x4 (Mark 6) |
||
| − | *[[Zirnitra (Final Fantasy XIII)|Zirnitra]], [[Alraune (Final Fantasy XIII)|Alraune]] x4 (Mark 53) |
||
| − | |-|The Paddraean Archaeopolis= |
||
| − | *[[Nelapsi (Final Fantasy XIII)|Nelapsi]] x2 |
||
| − | *[[Taxim (Final Fantasy XIII)|Taxim]] x2, [[Nelapsi (Final Fantasy XIII)|Nelapsi]] |
||
| − | *[[Taxim (Final Fantasy XIII)|Taxim]], [[Nelapsi (Final Fantasy XIII)|Nelapsi]] |
||
| − | *[[Taxim (Final Fantasy XIII)|Taxim]] x4 |
||
| − | *[[Bituitus]] (Mark 7) |
||
| − | *[[Vercingetorix]] (Mark 64) |
||
| − | </tabber> |
||
| − | |||
| − | ===''Final Fantasy XIII-2''=== |
||
| − | <tabber> |
||
| − | 10 AF= |
||
;The Pass of Paddra |
;The Pass of Paddra |
||
| − | *[[ |
+ | * [[Hybrid Flora]], [[Alraune (Final Fantasy XIII)|Alraune]] x4 |
| − | *[[ |
+ | * [[Triffid (Final Fantasy XIII)|Triffid]] x2, [[Alraune (Final Fantasy XIII)|Alraune]] x5 |
| − | *[[ |
+ | * [[Munchkin (Final Fantasy XIII)|Munchkin]] x3 |
| − | *[[ |
+ | * [[Rangda (Final Fantasy XIII)|Rangda]], [[Leyak (Final Fantasy XIII)|Leyak]] x4 |
| − | * |
+ | * [[Munchkin (Final Fantasy XIII)|Munchkin]] x4 |
| + | * [[Munchkin Maestro (Final Fantasy XIII)|Munchkin Maestro]], [[Munchkin (Final Fantasy XIII)|Munchkin]] x3 |
||
| − | *[[Spiranthes]] x3 |
||
| + | * [[Munchkin Maestro (Final Fantasy XIII)|Munchkin Maestro]], [[Munchkin (Final Fantasy XIII)|Munchkin]] x4 (Mark 6) |
||
| − | *[[Spiranthes]] x4 |
||
| − | *[[ |
+ | * [[Zirnitra (Final Fantasy XIII)|Zirnitra]], [[Alraune (Final Fantasy XIII)|Alraune]] x4 (Mark 53) |
| + | {{multicol-separator}} |
||
| − | *[[Uridimmu (Final Fantasy XIII-2)|Uridimmu]], [[Gandayaks]] |
||
| − | *[[Gandayaks]], [[Gahongas]] x2 |
||
| − | *[[Gandayaks]], [[Gahongas]] |
||
| − | *[[Gandayaks]] x2, [[Gahongas]] |
||
| − | |||
;The Paddraean Archaeopolis |
;The Paddraean Archaeopolis |
||
| + | * [[Nelapsi (Final Fantasy XIII)|Nelapsi]] x2 |
||
| − | *[[Aloeidai]] (Boss) |
||
| + | * [[Taxim (Final Fantasy XIII)|Taxim]] x2, [[Nelapsi (Final Fantasy XIII)|Nelapsi]] |
||
| − | |-|1X AF= |
||
| + | * [[Taxim (Final Fantasy XIII)|Taxim]], [[Nelapsi (Final Fantasy XIII)|Nelapsi]] |
||
| − | ;The Pass of Paddra |
||
| − | *[[ |
+ | * [[Taxim (Final Fantasy XIII)|Taxim]] x4 |
| + | * [[Bituitus]] (Mark 7) |
||
| − | *[[Mandrake (Final Fantasy XIII-2)|Mandrake]], [[Spiranthes]] x2 |
||
| + | * [[Vercingetorix]] (Mark 64) |
||
| − | *[[Mandrake (Final Fantasy XIII-2)|Mandrake]] x2, [[Gahongas]] |
||
| + | {{multicol-end}} |
||
| − | *[[Spiranthes]] x2, [[Uridimmu (Final Fantasy XIII-2)|Uridimmu]] x2 |
||
| − | *[[Spiranthes]] x3 |
||
| − | *[[Spiranthes]] x4 |
||
| − | *[[Uridimmu (Final Fantasy XIII-2)|Uridimmu]] x3 |
||
| − | *[[Uridimmu (Final Fantasy XIII-2)|Uridimmu]], [[Gandayaks]] |
||
| − | *[[Gandayaks]], [[Gahongas]] x2 |
||
| − | *[[Gandayaks]], [[Gahongas]] |
||
| − | *[[Gandayaks]] x2, [Gahongas]] |
||
| − | *[[Narasimha (Final Fantasy XIII-2)|Narasimha]] |
||
| − | *[[Necrosis (Final Fantasy XIII-2)|Necrosis]] x3 |
||
| − | *[[Gorgyra]] (Sidequest Target) |
||
| − | |-|100 AF= |
||
| − | ;The Pass of Paddra |
||
| − | *[[Clematis]], [[Crawler (Final Fantasy XIII-2)|Crawler]] x2 |
||
| − | *[[Clematis]] x2, [[Crawler (Final Fantasy XIII-2)|Crawler]] x2 |
||
| − | *[[Pitterpatter]] x3 |
||
| − | *[[Pitterpatter]] x4 |
||
| − | *[[Pitterpatter]] x5 |
||
| − | *[[Pitterpatter]] x2, [[Ahriman (Final Fantasy XIII-2)|Ahriman]] x2 |
||
| − | *[[Pitterpatter]] x2, [[Crawler (Final Fantasy XIII-2)|Crawler]] x2, Ahriman |
||
| − | *[[Pitterpatter]] x2, [[Crawler (Final Fantasy XIII-2)|Crawler]] x3 |
||
| − | *[[Pitterpatter]] x3, [[Crawler (Final Fantasy XIII-2)|Crawler]] x2 |
||
| − | *[[Bunkerbeast]] |
||
| − | *[[Bunkerbeast]], [[Ahriman (Final Fantasy XIII-2)|Ahriman]] x2 |
||
| − | *[[Green Chocobo (Final Fantasy XIII-2)|Green Chocobo]] |
||
| − | *[[Deathgaze (Final Fantasy XIII-2)|Deathgaze]] |
||
| − | |-|110 AF= |
||
| − | ;The Pass of Paddra |
||
| − | *[[Spiranthes]] x3 |
||
| − | *[[Spiranthes]] x3, [[Mandrake (Final Fantasy XIII-2)|Mandrake]] x2 |
||
| − | *[[Spiranthes]] x3, [[Chunerpeton]] x2 |
||
| − | *[[Imp (Final Fantasy XIII-2)|Imp]] x2 |
||
| − | *[[Imp (Final Fantasy XIII-2)|Imp]] x3 |
||
| − | *[[Imp (Final Fantasy XIII-2)|Imp]] x2, [[Mandrake (Final Fantasy XIII-2)|Mandrake]] x2 |
||
| − | *[[Imp (Final Fantasy XIII-2)|Imp]] x2, [[Chunerpeton]] x2 |
||
| − | *[[Imp (Final Fantasy XIII-2)|Imp]] x3, [[Mandrake (Final Fantasy XIII-2)|Mandrake]] x2 |
||
| − | *[[Mandrake (Final Fantasy XIII-2)|Mandrake]] x3 |
||
| − | *[[Chunerpeton]] x4 |
||
| − | *[[Chunerpeton]] x5 |
||
| − | *[[Green Chocobo (Final Fantasy XIII-2)|Green Chocobo]] |
||
| − | *[[Kanna Kamuy]] |
||
| − | *[[Ugallu (Final Fantasy XIII-2)|Ugallu]] (Sidequest Target) |
||
| − | </tabber> |
||
| + | === ''Final Fantasy XIII-2'' === |
||
| − | ==Musical themes== |
||
| + | {{multicol-begin}} |
||
| − | ===''Final Fantasy XIII''=== |
||
| + | ;10 AF |
||
| − | {{listen|filename=FFXIII - The Yaschas Massif.ogg|songname="The Yaschas Massif"}} |
||
| + | :The Pass of Paddra |
||
| − | The eponymous theme, "Yaschas Massif", plays here. It has the style of {{w|bossa nova}}. When played in-game, the tune comes to a distinct end before starting up again, as opposed to the normal practice of continuous looping. |
||
| + | * [[Feral Behemoth (Final Fantasy XIII-2)|Feral Behemoth]] |
||
| − | {{-}} |
||
| + | * [[Mandrake (Final Fantasy XIII-2)|Mandrake]] x2 |
||
| + | * [[Mandrake (Final Fantasy XIII-2)|Mandrake]], [[Spiranthes]] x2 |
||
| + | * [[Mandrake (Final Fantasy XIII-2)|Mandrake]] x2, [[Gahongas]] |
||
| + | * [[Spiranthes]] x2, [[Uridimmu (Final Fantasy XIII-2)|Uridimmu]] x2 |
||
| + | * [[Spiranthes]] x3 |
||
| + | * [[Spiranthes]] x4 |
||
| + | * [[Uridimmu (Final Fantasy XIII-2)|Uridimmu]] x3 |
||
| + | * [[Uridimmu (Final Fantasy XIII-2)|Uridimmu]], [[Gandayaks]] |
||
| + | * [[Gandayaks]], [[Gahongas]] x2 |
||
| + | * [[Gandayaks]], [[Gahongas]] |
||
| + | * [[Gandayaks]] x2, [[Gahongas]] |
||
| + | :The Paddraean Archaeopolis |
||
| + | * [[Aloeidai]] (Boss) |
||
| + | {{multicol-separator}} |
||
| + | ;1X AF |
||
| + | :The Pass of Paddra |
||
| + | * [[Mandrake (Final Fantasy XIII-2)|Mandrake]] x2 |
||
| + | * [[Mandrake (Final Fantasy XIII-2)|Mandrake]], [[Spiranthes]] x2 |
||
| + | * [[Mandrake (Final Fantasy XIII-2)|Mandrake]] x2, [[Gahongas]] |
||
| + | * [[Spiranthes]] x2, [[Uridimmu (Final Fantasy XIII-2)|Uridimmu]] x2 |
||
| + | * [[Spiranthes]] x3 |
||
| + | * [[Spiranthes]] x4 |
||
| + | * [[Uridimmu (Final Fantasy XIII-2)|Uridimmu]] x3 |
||
| + | * [[Uridimmu (Final Fantasy XIII-2)|Uridimmu]], [[Gandayaks]] |
||
| + | * [[Gandayaks]], [[Gahongas]] x2 |
||
| + | * [[Gandayaks]], [[Gahongas]] |
||
| + | * [[Gandayaks]] x2, [[Gahongas]] |
||
| + | * [[Narasimha (Final Fantasy XIII-2)|Narasimha]] |
||
| + | * [[Necrosis (Final Fantasy XIII-2)|Necrosis]] x3 |
||
| + | * [[Gorgyra]] (Sidequest Target) |
||
| + | {{multicol-separator}} |
||
| + | ;100 AF |
||
| + | :The Pass of Paddra |
||
| + | * [[Clematis]], [[Crawler (Final Fantasy XIII-2)|Crawler]] x2 |
||
| + | * [[Clematis]] x2, [[Crawler (Final Fantasy XIII-2)|Crawler]] x2 |
||
| + | * [[Pitterpatter]] x3 |
||
| + | * [[Pitterpatter]] x4 |
||
| + | * [[Pitterpatter]] x5 |
||
| + | * [[Pitterpatter]] x2, [[Ahriman (Final Fantasy XIII-2)|Ahriman]] x2 |
||
| + | * [[Pitterpatter]] x2, [[Crawler (Final Fantasy XIII-2)|Crawler]] x2, Ahriman |
||
| + | * [[Pitterpatter]] x2, [[Crawler (Final Fantasy XIII-2)|Crawler]] x3 |
||
| + | * [[Pitterpatter]] x3, [[Crawler (Final Fantasy XIII-2)|Crawler]] x2 |
||
| + | * [[Bunkerbeast]] |
||
| + | * [[Bunkerbeast]], [[Ahriman (Final Fantasy XIII-2)|Ahriman]] x2 |
||
| + | * [[Green Chocobo (Final Fantasy XIII-2)|Green Chocobo]] |
||
| + | * [[Deathgaze (Final Fantasy XIII-2)|Deathgaze]] |
||
| + | {{multicol-separator}} |
||
| + | ;110 AF |
||
| + | :The Pass of Paddra |
||
| + | * [[Spiranthes]] x3 |
||
| + | * [[Spiranthes]] x3, [[Mandrake (Final Fantasy XIII-2)|Mandrake]] x2 |
||
| + | * [[Spiranthes]] x3, [[Chunerpeton]] x2 |
||
| + | * [[Imp (Final Fantasy XIII-2)|Imp]] x2 |
||
| + | * [[Imp (Final Fantasy XIII-2)|Imp]] x3 |
||
| + | * [[Imp (Final Fantasy XIII-2)|Imp]] x2, [[Mandrake (Final Fantasy XIII-2)|Mandrake]] x2 |
||
| + | * [[Imp (Final Fantasy XIII-2)|Imp]] x2, [[Chunerpeton]] x2 |
||
| + | * [[Imp (Final Fantasy XIII-2)|Imp]] x3, [[Mandrake (Final Fantasy XIII-2)|Mandrake]] x2 |
||
| + | * [[Mandrake (Final Fantasy XIII-2)|Mandrake]] x3 |
||
| + | * [[Chunerpeton]] x4 |
||
| + | * [[Chunerpeton]] x5 |
||
| + | * [[Green Chocobo (Final Fantasy XIII-2)|Green Chocobo]] |
||
| + | * [[Kanna Kamuy]] |
||
| + | * [[Ugallu (Final Fantasy XIII-2)|Ugallu]] (Sidequest Target) |
||
| + | {{multicol-end}} |
||
| + | == Musical themes == |
||
| − | ===''Final Fantasy XIII-2''=== |
||
| + | === ''Final Fantasy XIII'' === |
||
| − | {{listen|filename=Eclipse.ogg|songname="Eclipse"}} |
||
| + | {{audio|filename=FFXIII - The Yaschas Massif.ogg|title="The Yaschas Massif"}} |
||
| + | The eponymous theme, "Yaschas Massif", plays here. It has the style of [[wikipedia:bossa nova|bossa nova]]. When played in-game, the tune comes to a distinct end before starting up again, as opposed to the normal practice of continuous looping. The track is included on the ''[[W/F: Music from Final Fantasy XIII -Gentle Reveries-]]'' album. |
||
| + | {{clear}} |
||
| + | |||
| + | === ''Final Fantasy XIII-2'' === |
||
| + | {{audio|filename=Eclipse.ogg|title="Eclipse"}} |
||
| + | {{Main|Eclipse (theme)}} |
||
"Eclipse" and "Eclipse ~Aggressive Mix~" are associated with the Yaschas Massif in 10 AF, and are composed by [[Mitsuto Suzuki]] with vocals performed by [[Michiyo Honda]]. The "~Aggressive Mix~" version plays whenever monsters appear. "Parallel Worlds" and its aggressive mix play in 1X AF. |
"Eclipse" and "Eclipse ~Aggressive Mix~" are associated with the Yaschas Massif in 10 AF, and are composed by [[Mitsuto Suzuki]] with vocals performed by [[Michiyo Honda]]. The "~Aggressive Mix~" version plays whenever monsters appear. "Parallel Worlds" and its aggressive mix play in 1X AF. |
||
| + | "[[Yeul's Theme]]" plays in a scene associated with Yeul in 1X AF. "[[Worlds Collide]]" plays in the battle against Aloeidai. |
||
| − | ;Lyrics |
||
| + | {{clear}} |
||
| − | :All your dreams come true |
||
| − | :In another dream you live |
||
| − | :Everywhere you go |
||
| − | :Would be the place where you belong |
||
| + | == Maps == |
||
| − | "Eclipse" from ''Final Fantasy XIII-2'' also appears in ''[[Theatrhythm Final Fantasy Curtain Call]]''. It also plays in the [[Jagd Woods]] near the [[Moogle Village (Lightning Returns)|Moogle Village]] at night in ''[[Lightning Returns: Final Fantasy XIII]]'', The "~Aggressive Mix~" also plays when near an enemy. |
||
| + | === ''Final Fantasy XIII'' === |
||
| − | {{-}} |
||
| + | A map of the [[Archylte Steppe]] (the top), the Vallis Media (the middle) and the Yaschas Massif (the bottom). |
||
| + | <gallery> |
||
| − | ==Maps== |
||
| + | FFXIII ArchylteSteppe YaschasMassif Map.jpg |
||
| − | {{col-begin}} |
||
| + | </gallery> |
||
| − | {{col-2}} |
||
| − | ===''Final Fantasy XIII''=== |
||
| − | A map of the [[Archylte Steppe]] (the top), the Vallis Media (the middle) and the Yaschas Massif (the bottom) for ''Final Fantasy XIII''. |
||
| − | [[File:FFXIII ArchylteSteppe YaschasMassif Map.jpg|300px|center]] |
||
| − | {{col-2}} |
||
| − | ===''Final Fantasy XIII-2''=== |
+ | === ''Final Fantasy XIII-2'' === |
| + | <gallery> |
||
| − | {{stub}} |
||
| + | File:Yaschas_Massif_01XAF_map.png|XIII-2 Map |
||
| − | {{col-end}} |
||
| + | </gallery> |
||
| + | {{Section}} |
||
| − | ==Other appearances== |
+ | == Other appearances == |
| − | ===''[[Final Fantasy Airborne Brigade]]''=== |
+ | === ''[[Final Fantasy Airborne Brigade]]'' === |
| + | <gallery> |
||
| − | {{sideicon|FFAB}} |
||
| − | + | FFAB Yaschas Massif FFXIII Special.png|Yaschas Massif (Special) [FFXIII]. |
|
| + | FFAB The Paddraean Archaeopolis FFXIII Special.png|The Paddraean Archaeopolis (Special) [FFXIII]. |
||
| − | {{Locat-stub|Final Fantasy Airborne Brigade}} |
||
| + | FFAB Yaschas Massif -AF010- FFXIII-2 Special.png|Yaschas Massif -AF010- (Special) [FFXIII-2]. |
||
| − | {{-}} |
||
| + | FFAB Yaschas Massif -AF110- FFXIII-2 Special.png|Yaschas Massif -AF110- (Special) [FFXIII-2]. |
||
| + | </gallery> |
||
| + | {{Location section|Final Fantasy Airborne Brigade}} |
||
| + | {{clear}} |
||
| − | ===''[[Final Fantasy Record Keeper]]''=== |
+ | === ''[[Final Fantasy Record Keeper]]'' === |
| + | ==== Yaschas Massif, Part 1 ==== |
||
| − | {{sideicon|FFRK}} |
||
| − | ====Yaschas Massif, Part 1==== |
||
[[File:FFRK Yaschas Massif, Part 1 FFXIII.png|right|150px]] |
[[File:FFRK Yaschas Massif, Part 1 FFXIII.png|right|150px]] |
||
| − | {{ |
+ | {{Location section|Final Fantasy Record Keeper}} |
| − | {{ |
+ | {{clear}} |
| − | ====Yaschas Massif, Part 2==== |
+ | ==== Yaschas Massif, Part 2 ==== |
[[File:FFRK Yaschas Massif, Part 2 FFXIII.png|right|150px]] |
[[File:FFRK Yaschas Massif, Part 2 FFXIII.png|right|150px]] |
||
| − | {{ |
+ | {{Location section|Final Fantasy Record Keeper}} |
| − | {{ |
+ | {{clear}} |
| − | ==Gallery== |
+ | == Gallery == |
| − | + | ;''Final Fantasy XIII'' |
|
| + | <gallery> |
||
| − | |File:Paddran_Society_Artwork.jpg|Concept Artwork. |
||
| + | Paddran_Society_Artwork.jpg|Concept Artwork. |
||
| − | |File:Yaschas2.jpg|Paddraean Archaeopolis (1). |
||
| − | + | Yaschas2.jpg|Paddraean Archaeopolis (1). |
|
| + | Yaschas Massif.jpg|Paddraean Archaeopolis (2). |
||
| − | |File:L'Cie_in_the_Yaschas_Massif.png|Sazh, Lightning, and Snow in the ruins of Paddra. |
||
| + | L'Cie_in_the_Yaschas_Massif.png|Sazh, Lightning, and Snow in the ruins of Paddra. |
||
| − | |File:Hope at yaschas massif.jpg|Hope in the Yaschas Massif. |
||
| + | Hope at yaschas massif.jpg|Hope in the Yaschas Massif. |
||
| − | |File:FFRK Yaschas Massif, Part 2 JP FFXIII.png|The Japanese dungeon image for ''Yaschas Massif, Part 2'' in ''Final Fantasy Record Keeper''. |
||
| + | FFRK Yaschas Massif, Part 2 JP FFXIII.png|The Japanese dungeon image for ''Yaschas Massif, Part 2'' in ''Final Fantasy Record Keeper''. |
||
| − | }} |
||
| + | </gallery> |
||
| − | {{Gallery|class=XIII2|title=''Final Fantasy XIII-2'' - 10 AF|collapse=hide |
||
| + | |||
| − | |File:Yaschas_Massif_camp_concept_art.jpg|Concept art of the Academy camp. |
||
| + | ;''Final Fantasy XIII-2'' - 10 AF |
||
| − | |File:XIII-2 Yaschas Massif1.jpg|The Pass of Paddra. |
||
| + | <gallery> |
||
| − | |File:FFXIII-2 Yashas Massif 10 AF - High Angle.png|High-angle view. |
||
| + | Yaschas_Massif_camp_concept_art.jpg|Concept art of the Academy camp. |
||
| − | |File:FFXIII-2 Yaschas Massif 010AF - The Pass of Paddra.png|The Pass of Paddra. |
||
| − | + | FFXIII-2 Yashas Massif 10 AF - High Angle.png|High-angle view. |
|
| − | + | FFXIII-2 Yaschas Massif 010AF - The Pass of Paddra.png|The Pass of Paddra. |
|
| − | + | FFXIII-2 Yashas Massif 10 AF - The Pass of Paddra.png|The Pass of Paddra. |
|
| + | FFXIII-2 Yashas Massif 10 AF - The Pass of Paddra 2.png|The Pass of Paddra. |
||
| − | |File:XIII-2 Yaschas Massif.jpg|Paddraean Archaeopolis. |
||
| + | Yaschas massif in dark.jpg|The Pass of Paddra. |
||
| − | |File:FFXIII-2 Yashas Massif 10 AF - Paddraean Archaeopolis.png|Paddraean Archaeopolis. |
||
| + | XIII-2 Yaschas Massif.jpg|Paddraean Archaeopolis. |
||
| − | |File:FFXIII-2 Yashas Massif 10 AF - Paddra Ruins.png|Paddra Ruins. |
||
| + | FFXIII-2 Yashas Massif 10 AF - Paddraean Archaeopolis.png|Paddraean Archaeopolis. |
||
| − | |File:Paddra ruins research site.jpg|Paddra Ruins. |
||
| − | + | FFXIII-2 Yashas Massif 10 AF - Paddra Ruins.png|Paddra Ruins. |
|
| + | Paddra ruins research site.jpg|Paddra Ruins. |
||
| − | }} |
||
| + | FFXIII-2 Yashas Massif 10 AF - fal'Cie statue.png|The fal'Cie statue. |
||
| − | {{Gallery|class=XIII2|title=''Final Fantasy XIII-2'' - 1X AF|collapse=hide |
||
| + | </gallery> |
||
| − | |File:Yaschas Massif path XIII-2.png|The Pass of Paddra. |
||
| + | |||
| − | |File:FFXIII-2 Yashas Massif 1X AF - The Pass of Paddra.png|The Pass of Paddra. |
||
| + | ;''Final Fantasy XIII-2'' - 1X AF |
||
| − | |File:Yaschas Massif XIII-2.jpg|Paddraean Archaeopolis. |
||
| + | <gallery> |
||
| − | }} |
||
| + | Yaschas Massif path XIII-2.png|The Pass of Paddra. |
||
| − | {{Gallery|class=XIII2|title=''Final Fantasy XIII-2'' - 100 AF|collapse=hide |
||
| − | + | FFXIII-2 Yashas Massif 1X AF - The Pass of Paddra.png|The Pass of Paddra. |
|
| + | </gallery> |
||
| − | |File:FFXIII-2 Yaschas Massif 100 AF - Paddraean Archaeopolis.png|Paddraean Archaeopolis. |
||
| + | |||
| − | }} |
||
| − | + | ;''Final Fantasy XIII-2'' - 100 AF |
|
| + | <gallery> |
||
| − | |File:FFXIII-2 Yaschas Massif 110 AF - The Pass of Paddra.png|The Pass of Paddra. |
||
| − | + | FFXIII-2 Yaschas Massif 100 AF - The Pass of Paddra.png|The Pass of Paddra. |
|
| − | + | FFXIII-2 Yaschas Massif 100 AF - Paddraean Archaeopolis.png|Paddraean Archaeopolis. |
|
| + | </gallery> |
||
| − | |File:FFXIII-2 Yaschas Massif 110 AF Spacetime Distortion.png|The spacetime distortion appears. |
||
| + | |||
| − | }} |
||
| + | ;''Final Fantasy XIII-2'' - 110 AF |
||
| + | <gallery> |
||
| + | FFXIII-2 Yaschas Massif 110 AF - Paddraean Archaeopolis.png|Paddraean Archaeopolis. |
||
| + | FFXIII-2 Serah & Noel with Rubies of Grief.png|The Rubies of Grief. |
||
| + | FFXIII-2 Yaschas Massif 110 AF Spacetime Distortion.png|The spacetime distortion appears. |
||
| + | </gallery> |
||
| + | |||
| + | == Trivia == |
||
| + | * Some of the Paddraean architecture resembles the remains of modern skyscrapers. |
||
| + | * The Paddraean Archaeopolis is a segment of a ruined cityscape. Should the player undertake the [[Cie'th Stone]] [[Missions (Final Fantasy XIII)|missions]] [[sidequest]], various entries under the [[Datalog (Final Fantasy XIII)/Analects|Analects]] section of the main menu attribute their text to Yeul. |
||
| + | * The scenes of Lightning fighting from the Oracle Drive of 10 AF are from the beginning of the [[Siege of Eden]] when she, [[Oerba Dia Vanille|Vanille]], [[Eidolon (Final Fantasy XIII)#Odin|Odin]], and [[Eidolon (Final Fantasy XIII)#Hecatoncheir|Hecatoncheir]] are battling [[PSICOM]] on the race track. |
||
| + | * When the player presses {{button|ps|triangle}}/{{button|xbox|y}} during Live Trigger in 1X AF while talking with Hope, Serah will reveal that Paddra was constructed 670 years before the events of ''Final Fantasy XIII''. No one asks how Serah knows that, but it is possible that the [[Eyes of Etro]] she possesses let her have memories that once belonged to Yeul. |
||
| + | * In ''Final Fantasy XIII-2'' in the Pass of Paddra area where the searchlights are employed to secure safe passage to the ruins, when an enemy group appears and the player character is within the light provided by the search light, the clock hand on the [[Mog Clock]] will stay still. |
||
| + | * In ''[[Dissidia 012 Final Fantasy]]'', there is a trade material called "Yaschas Massif Gravel". |
||
| + | {{navbox setting FFXIII}} |
||
| − | ==Trivia== |
||
| + | {{navbox setting XIII2}} |
||
| − | *Some of the Paddraean architecture resembles the remains of modern skyscrapers. |
||
| − | *The Paddraean Archaeopolis is a segment of a ruined cityscape. Should the player undertake the [[Cie'th Stone]] [[Missions (Final Fantasy XIII)|missions]] [[sidequest]], various entries under the [[Datalog/Analects]] section of the main menu attribute their text to Yeul. |
||
| − | *The scenes of Lightning fighting from the Oracle Drive of 10 AF are from the beginning of the [[Siege of Eden]] when she, [[Oerba Dia Vanille|Vanille]], [[Eidolon (Final Fantasy XIII)#Odin|Odin]], and [[Eidolon (Final Fantasy XIII)#Hecatoncheir|Hecatoncheir]] are battling [[PSICOM]] on the race track. |
||
| − | *When the player presses {{button|ps|triangle}}/{{button|xbox|y}} during Live Trigger in 1X AF while talking with Hope, Serah will reveal that Paddra was constructed 670 years before the events of ''Final Fantasy XIII''. No one asks how Serah knows that, but it is possible that the [[Eyes of Etro]] she possesses let her have memories that once belonged to Yeul. |
||
| − | *In ''Final Fantasy XIII-2'' in the Pass of Paddra area where the searchlights are employed to secure safe passage to the ruins, when an enemy group appears and the player character is within the light provided by the search light, the clock hand on the [[Mog Clock]] will stay still. |
||
| − | *In ''[[Dissidia 012 Final Fantasy]]'', there is a trade material called "Yaschas Massif Gravel". |
||
| − | {{FFXIII}} |
||
| − | {{XIII2}} |
||
[[de:Yašchas-Massiv]] |
[[de:Yašchas-Massiv]] |
||
[[Category:Mountains]] |
[[Category:Mountains]] |
||
| − | [[Category:Final Fantasy XIII |
+ | [[Category:Locations in Final Fantasy XIII]] |
| − | [[Category:Final Fantasy XIII-2 |
+ | [[Category:Locations in Final Fantasy XIII-2]] |
Revision as of 19:22, 13 January 2020
Template:Sideicon

I couldn't miss the chance to practice my drawing!
- 000 AF (FFXIII map, a separate one)..
Intimidating mountains tower over the harsh plains and tall vegetation, adding to the ominous atmosphere of this land found in the southern region of Gran Pulse. A short walk through the treacherous valley leads to the Paddra Ruins - the remains of what used to be one of the largest and most prosperous cities on Pulse. As with the Bresha Ruins, the area is filled with scientists and soldiers sent to investigate the location.
Final Fantasy XIII-2 online description
Yaschas Massif is a location on Gran Pulse in Final Fantasy XIII and Final Fantasy XIII-2. It is the site of the ruins of the city-nation of Paddra where the Farseers lived before it fell into ruin. Ten years after the fall of Cocoon, during Final Fantasy XIII-2, soldiers and scientists from the Academy reside in the Paddra Ruins, the origin site of the numerous spacetime anomalies.
Datalog
This mountain group stretches across a southern region of Gran Pulse. The area's geography is diverse, consisting of scenic highplains, sheer escarpments, and deep fault valleys, with mammoth fallen trees a common sight across its landscape.
At the massif's southernmost tip lies the ruin of the fallen city-state Paddra. Once the flourishing center of an advanced culture, it is now nothing more than a Cie'th-infested archaeopolis.
- Travel Guide: Yaschas Massif
- Area Information
The Yaschas Massif, in Pulse's southern reaches, is home to the ancient ruins of Paddra. Paddra was the only advanced civilization of ancient Gran Pulse, but after the War of Transgression between Pulse and Cocoon, it began a long decline that ended in its complete disappearance.
- From the Editor's Desk:
The tough, mountainous terrain is a popular draw for mountaineers and other outdoor types. We recommend visiting Paddra, awe-inspiring even in ruins. Also worth a hike is the viewing platform next to the dormant fal'Cie.
Story
Originally home to a tribe called the Farseers, Paddra was a nation ruled by Paddra Nsu-Yeul as both its seeress and priestess with Etro as Paddra's patron deity, while the rest of Gran Pulse worshiped Pulse. In the past, forced to go against her vows when Paddra's warriors could not defeat it, Yeul defeated a time-eating Ugallu that ended up in her time by sealing it away in the Void Beyond. Though this saved her home Yeul still foresaw the destruction of Paddra. After civil war destroyed the nation, Yeul renounced her position and left to wander Gran Pulse.
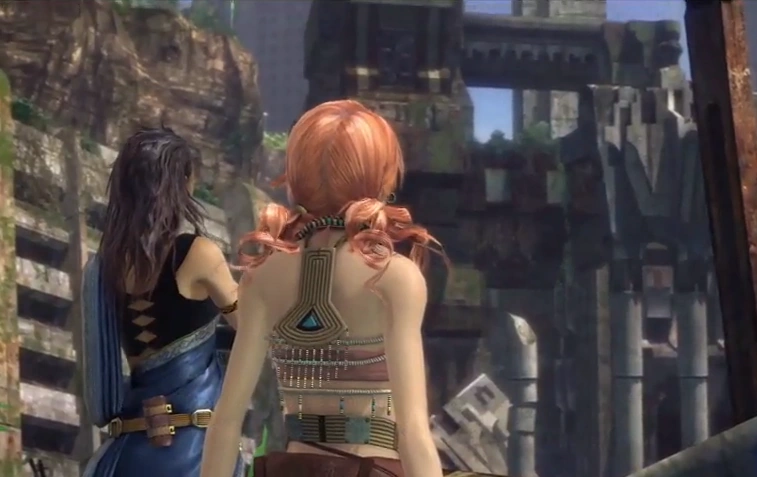
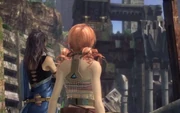
Fang and Vanille at the ruins of Paddra.
After Paddra has long been abandoned and in ruins only monsters and Cie'th wander its streets. A party of l'Cie escapes Cocoon and descends on Gran Pulse seeking a way to change their destiny and wipe their l'Cie brands clean. They can visit Yaschas Massif where Hope and Vanille talk about telling lies as a coping mechanism. At the Paddra Ruins, Vanille and Fang recall some of their past and the mystery behind their brands. The l'Cie catch sight of the fal'Cie Dahaka—provided they have not already fought it—and decide to follow it towards Oerba.
In 10 AF the Yaschas Massif is darkened by an eclipse caused by the fal'Cie Fenrir, appearing centuries before its time due to a paradox. The Paddra Ruins are occupied by members of the Academy, including its leader, Hope, and his assistant, Alyssa Zaidelle, as they research paradoxes. Hope encounters Serah, Mog, and Noel after saving them from an Aloeidai.

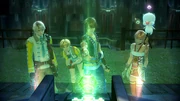
Noel activates the Paddra Ruins' Oracle Drive.
Hope tells them about the ruins' history and of Yeul, whom Hope believes was a title. He reveals an ancient recording device called the Oracle Drive, containing past visions of the events leading to the Day of Ragnarok, including blurred images of Lightning in Valhalla.
Noel and Serah travel through Historia Crux to solve the paradox affecting the Yaschas Massif and the Oracle Drive. Successful, they return to an alternate 10 AF called 1X AF where Fenrir is gone, and with it, the eclipse. Before Serah and Noel enter the ruins of Paddra, its former seeress, Yeul, appears and points Serah as being similar to herself in how they can both "show people the way". In resolving the paradox Hope and Alyssa's memories are modified, and Noel and Serah repeat their initial meeting with them.
Hope shows them the now-clear images of Lightning in Valhalla with the Oracle Drive and tells Noel and Serah that like them, he wants to change history, and not just to bring back Lightning but also Vanille, Fang, and his mother Nora. The Oracle Drive shows a prophecy that depicts Caius Ballad destroying the crystal pillar sending the crystallized Cocoon plummeting to the ground, and Hope, Noel, and Serah resolve to do whatever they can to prevent it.

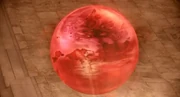
A Ruby of Grief in the Paddra Ruins.
By 100 and 110 AF, mysterious objects called Rubies of Grief have appeared throughout the Yaschas Massif because Yeul's sealing of Ugallu caused a paradox that sucked people into rips in time. In place of the victims are Rubies of Grief, embodying their regrets, which Serah and Noel help pass on by fulfilling their requests. In 110 AF, they find an orb holding the memories of the Yeul who had banished Ugallu, the monster's seal having broken. By defeating the monster, Yeul's Ruby of Grief vanishes.
Areas

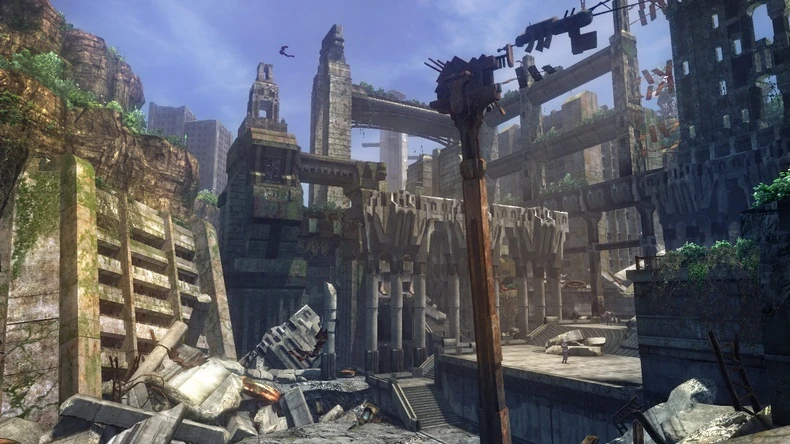
Paddraean Archaeopolis in Final Fantasy XIII.
In Final Fantasy XIII, the Yaschas Massif connects with the Vallis Media. Southern part stretches from east to west across a deep ravine and to navigate through that part, jumping is required. At the south-eastern side there are two plateaus: one on high ledge and other on the lower which requires walking down a narrow pass infested with Triffids. At the west, there is a way in the valley which splits in two, eventually connecting again and leading into the ruins of Paddra, ancient capital of Gran Pulse. On the square at the end of the ruins there is a mysterious structure which houses Undying Vercingetorix.
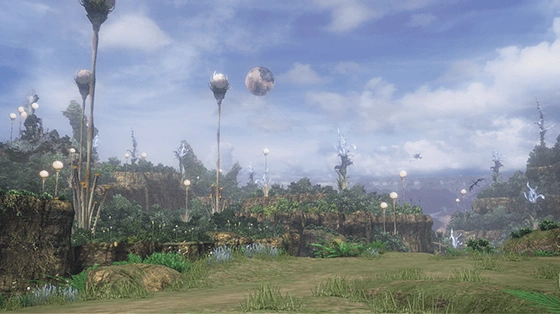
In Final Fantasy XIII-2, the Yaschas Massif is reduced in size possibly due to a paradox effect, allowing only the Pass of Paddra and ruins of Paddra to be visited. The Pass of Paddra had undergone some changes and now features more side paths which lead to the ruins. The ruins house a dormant, unnamed fal'Cie, which reacts to the Oracle Drive. The structure housing Vercingetorix is gone, possibly removed by researchers, and access to the upper levels of the ruins is granted.
Final Fantasy XIII-2
|
Treasure
Final Fantasy XIII
| Item | Location |
|---|---|
| Diabolic Tail x9 | The Tsubaddran Highlands |
| Esoteric Oil x8 | The Ascendant Scarp |
| Rune Bracelet | The Ascendant Scarp |
| 1,827 Gil | The Ascendant Scarp |
| Millerite x2 | The Ascendant Scarp |
| Watchman's Amulet | The Tsumitran Basin |
| Millerite | The Tsumitran Basin |
| Glass Orb | The Tsumitran Basin |
| Mythril Bangle | The Pass of Paddra |
| Rhodochrosite | The Paddraean Archaeopolis |
| Spined Horn x3 | The Paddraean Archaeopolis |
| Whistlewind Scarf | The Paddraean Archaeopolis |
Final Fantasy XIII-2
10 AF
| Item | Location | Requirements |
|---|---|---|
| Metal Armband | The Pass of Paddra | Moogle Hunt |
| 500 gil | The Pass of Paddra | None |
| 10 Power Chips | The Pass of Paddra | Moogle Throw |
| 960 gil | The Pass of Paddra | None |
| 8 Mana Slivers | The Pass of Paddra | None |
| Tablet of Paddra | The Pass of Paddra (Box) | None |
| 8 Mana Bolts | The Pass of Paddra | None |
| 'Scars' Gate Seal | The Pass of Paddra (Box) | None |
| Gysahl Greens | The Pass of Paddra | None |
| Unicorn Horn | The Pass of Paddra | Moogle Throw |
| 540 gil | The Pass of Paddra | None |
| Pearl Necklace | The Pass of Paddra | Moogle Hunt |
| Serenity Satchel | The Paddraean Archaeopolis | Moogle Hunt |
| 3 Remedies | The Paddraean Archaeopolis | None |
| Carbuncle Figurine | The Paddraean Archaeopolis | None |
| Pathos Jewel | The Paddraean Archaeopolis (Box) | Moogle Hunt, Moogle Throw |
| Gysahl Greens | The Paddraean Archaeopolis | Moogle Hunt |
| Warding Talisman | The Paddraean Archaeopolis | None |
| Potion | The Pass of Paddra | Live Trigger Reward |
| Fruit of Fenrir | The Pass of Paddra (Box) | None |
1X AF
| Item | Location | Requirements |
|---|---|---|
| 'Encounters' Gate Seal (Box) | The Pass of Paddra | None |
| Ivory Crystal | The Pass of Paddra | None |
| Onyx Crystal | The Pass of Paddra | Moogle Hunt |
| Emerald Crystal | The Pass of Paddra | Moogle Throw |
| Old Battery | The Paddraean Archaeopolis | Moogle Throw |
| Academic's Hat/Red Silk Hat | The Paddraean Archaeopolis | All Live Triggers |
| Mysterious Artefact | The Paddraean Archaeopolis | Moogle Hunt |
| 600 gil | The Paddraean Archaeopolis | Moogle Hunt |
100 AF
| Item | Location | Requirements |
|---|---|---|
| 'Reminiscence' Gate Seal | The Paddraean Archaeopolis | Moogle Throw |
| Comm Device | The Pass of Paddra | Moogle Hunt |
| Picture Frame | The Pass of Paddra | Moogle Hunt |
| Blessed Blade | The Pass of Paddra | None |
| Graviton Core Epsilon | The Pass of Paddra | Moogle Hunt |
| Bulb of Hope | The Paddraean Archaeopolis | Moogle Hunt |
| Sealed Tablet | The Paddraean Archaeopolis | Moogle Throw |
110 AF
| Item | Location | Requirements |
|---|---|---|
| 'Maleficence' Gate Seal | The Paddraean Archaeopolis (Box) | None |
| Service Manual | The Paddraean Archaeopolis (Box) | Moogle Hunt |
| 600 Gil | The Paddraean Archaeopolis | Moogle Hunt |
| Terrorists' Mark | The Pass of Paddra (Box) | Moogle Hunt |
| Outdoor Watch | The Pass of Paddra (Box) | Moogle Throw |
Enemies
Final Fantasy XIII
- The Tsubaddran Highlands
- Leyak x4
- Gorgonopsid x2
- Gorgonopsid x3
- Triffid x2
- Triffid x3
- Ugallu (Mark 3)
- The Tsumitran Basin
- Leyak x3, Rangda x2
- Svarog, Triffid x2
- Behemoth King, Triffid x2
- Behemoth King, Triffid x3
- Triffid x4
- Svarog, Gorgonopsid x3
- Rangda x3
- Edimmu (Mark 5)
- The Ascendant Scarp
- The Deepgap
- Munchkin x5
- Hybrid Flora x2
- The Pass of Paddra
- Hybrid Flora, Alraune x4
- Triffid x2, Alraune x5
- Munchkin x3
- Rangda, Leyak x4
- Munchkin x4
- Munchkin Maestro, Munchkin x3
- Munchkin Maestro, Munchkin x4 (Mark 6)
- Zirnitra, Alraune x4 (Mark 53)
Final Fantasy XIII-2
- 10 AF
- The Pass of Paddra
- Feral Behemoth
- Mandrake x2
- Mandrake, Spiranthes x2
- Mandrake x2, Gahongas
- Spiranthes x2, Uridimmu x2
- Spiranthes x3
- Spiranthes x4
- Uridimmu x3
- Uridimmu, Gandayaks
- Gandayaks, Gahongas x2
- Gandayaks, Gahongas
- Gandayaks x2, Gahongas
- The Paddraean Archaeopolis
- Aloeidai (Boss)
- 1X AF
- The Pass of Paddra
- 100 AF
- The Pass of Paddra
- Clematis, Crawler x2
- Clematis x2, Crawler x2
- Pitterpatter x3
- Pitterpatter x4
- Pitterpatter x5
- Pitterpatter x2, Ahriman x2
- Pitterpatter x2, Crawler x2, Ahriman
- Pitterpatter x2, Crawler x3
- Pitterpatter x3, Crawler x2
- Bunkerbeast
- Bunkerbeast, Ahriman x2
- Green Chocobo
- Deathgaze
- 110 AF
- The Pass of Paddra
- Spiranthes x3
- Spiranthes x3, Mandrake x2
- Spiranthes x3, Chunerpeton x2
- Imp x2
- Imp x3
- Imp x2, Mandrake x2
- Imp x2, Chunerpeton x2
- Imp x3, Mandrake x2
- Mandrake x3
- Chunerpeton x4
- Chunerpeton x5
- Green Chocobo
- Kanna Kamuy
- Ugallu (Sidequest Target)
Musical themes
Final Fantasy XIII
The eponymous theme, "Yaschas Massif", plays here. It has the style of bossa nova. When played in-game, the tune comes to a distinct end before starting up again, as opposed to the normal practice of continuous looping. The track is included on the W/F: Music from Final Fantasy XIII -Gentle Reveries- album.
Final Fantasy XIII-2
"Eclipse" and "Eclipse ~Aggressive Mix~" are associated with the Yaschas Massif in 10 AF, and are composed by Mitsuto Suzuki with vocals performed by Michiyo Honda. The "~Aggressive Mix~" version plays whenever monsters appear. "Parallel Worlds" and its aggressive mix play in 1X AF.
"Yeul's Theme" plays in a scene associated with Yeul in 1X AF. "Worlds Collide" plays in the battle against Aloeidai.
Maps
Final Fantasy XIII
A map of the Archylte Steppe (the top), the Vallis Media (the middle) and the Yaschas Massif (the bottom).
")
Final Fantasy XIII-2
")
Other appearances
Final Fantasy Airborne Brigade
![Yaschas Massif (Special) [FFXIII].](/wiki/File:FFAB_Yaschas_Massif_FFXIII_Special.png "FFAB Yaschas Massif FFXIII Special.png (11 KB)")
![The Paddraean Archaeopolis (Special) [FFXIII].](/wiki/File:FFAB_The_Paddraean_Archaeopolis_FFXIII_Special.png "FFAB The Paddraean Archaeopolis FFXIII Special.png (12 KB)")
![Yaschas Massif -AF010- (Special) [FFXIII-2].](/wiki/File:FFAB_Yaschas_Massif_-AF010-_FFXIII-2_Special.png "FFAB Yaschas Massif -AF010- FFXIII-2 Special.png (14 KB)")
![Yaschas Massif -AF110- (Special) [FFXIII-2].](/wiki/File:FFAB_Yaschas_Massif_-AF110-_FFXIII-2_Special.png "FFAB Yaschas Massif -AF110- FFXIII-2 Special.png (15 KB)")
Final Fantasy Record Keeper
Yaschas Massif, Part 1
Yaschas Massif, Part 2

Gallery
- Final Fantasy XIII
")
")
")
")
")
")
- Final Fantasy XIII-2 - 10 AF
")
")
")
")
")
")
")
")
")
")
")
- Final Fantasy XIII-2 - 1X AF
")
")
- Final Fantasy XIII-2 - 100 AF
")
")
- Final Fantasy XIII-2 - 110 AF
")
")
")
Trivia
- Some of the Paddraean architecture resembles the remains of modern skyscrapers.
- The Paddraean Archaeopolis is a segment of a ruined cityscape. Should the player undertake the Cie'th Stone missions sidequest, various entries under the Analects section of the main menu attribute their text to Yeul.
- The scenes of Lightning fighting from the Oracle Drive of 10 AF are from the beginning of the Siege of Eden when she, Vanille, Odin, and Hecatoncheir are battling PSICOM on the race track.
- When the player presses
 / during Live Trigger in 1X AF while talking with Hope, Serah will reveal that Paddra was constructed 670 years before the events of Final Fantasy XIII. No one asks how Serah knows that, but it is possible that the Eyes of Etro she possesses let her have memories that once belonged to Yeul.
 - In Final Fantasy XIII-2 in the Pass of Paddra area where the searchlights are employed to secure safe passage to the ruins, when an enemy group appears and the player character is within the light provided by the search light, the clock hand on the Mog Clock will stay still.
- In Dissidia 012 Final Fantasy, there is a trade material called "Yaschas Massif Gravel".