mNo edit summary Tag: sourceedit |
(infobox add) Tag: sourceedit |
||
| Line 1: | Line 1: | ||
{{sideicon|FFIII}} |
{{sideicon|FFIII}} |
||
| + | {{Location |
||
| − | [[File:FFIII - World of Darkness.png|thumb|right|250px|The World of Darkness (iOS).]] |
||
| + | |name=World of Darkness |
||
| ⚫ | |||
| + | |release=FFIII |
||
| + | |japanese=闇の世界 |
||
| + | |romaji=Yami no Sekai |
||
| + | |lit= |
||
| + | |image=FFIII - World of Darkness.png |
||
| + | |type=[[Final dungeon (term)|Final dungeon]], [[point of no return]] |
||
| + | |region=[broader area] |
||
| + | |affiliation=[affiliated faction, list chronologically in bullet point form if it changes] |
||
| + | |residents=[important PCs/NPCs found] |
||
| + | |items=*[[List of Final Fantasy III armor#Ribbon|Ribbon]] x4 |
||
| + | |enemies=<div class="collapsible collapsed"><strong class="header">First area:</strong> |
||
| + | *[[Kage]] |
||
| + | *[[Shadow Master (Final Fantasy III)|Shadow Master]] |
||
| + | *[[Yormungand]] |
||
| + | </div> |
||
| + | <div class="collapsible collapsed"><strong class="header">Water crystal:</strong> |
||
| + | *[[Kage]] |
||
| + | *[[Yormungand]] |
||
| + | *[[Queen Scylla (Final Fantasy III)|Queen Scylla]] |
||
| + | *[[Xande's Clone (Final Fantasy III)|Xande's Clone]] (monster-in-a-box) |
||
| + | *[[Echidna (Final Fantasy III)|Echidna]] (boss) |
||
| + | </div> |
||
| + | <div class="collapsible collapsed"><strong class="header">Air crystal:</strong> |
||
| + | *[[Kage]] |
||
| + | *[[Shadow Master (Final Fantasy III)|Shadow Master]] |
||
| + | *[[Yormungand]] |
||
| + | *[[Xande's Clone (Final Fantasy III)|Xande's Clone]] (monster-in-a-box) |
||
| + | *[[Cerberus (Final Fantasy III)|Cerberus]] (boss) |
||
| + | </div> |
||
| + | <div class="collapsible collapsed"><strong class="header">Fire crystal:</strong> |
||
| + | *[[Kage]] |
||
| + | *[[Shadow Master (Final Fantasy III)|Shadow Master]] |
||
| + | *[[Yormungand]] |
||
| + | *[[Xande's Clone (Final Fantasy III)|Xande's Clone]] (monster-in-a-box) |
||
| + | *[[Two Headed Dragon (Final Fantasy III)|Two Headed Dragon]] (boss) |
||
| + | </div> |
||
| + | <div class="collapsible collapsed"><strong class="header">Earth crystal:</strong> |
||
| + | *[[Garm (Final Fantasy III)|Garm]] |
||
| + | *[[Kage]] |
||
| + | *[[Shadow Master (Final Fantasy III)|Shadow Master]] |
||
| + | *[[Queen Scylla (Final Fantasy III)|Queen Scylla]] |
||
| + | *[[Xande's Clone (Final Fantasy III)|Xande's Clone]] (monster-in-a-box) |
||
| + | *[[Ahriman (Final Fantasy III)|Ahriman]] (boss) |
||
| + | </div> |
||
| + | <div class="collapsible collapsed"><strong class="header">Cloud of Darkness:</strong> |
||
| + | *[[Garm (Final Fantasy III)|Garm]] |
||
| + | *[[Hydra (Final Fantasy III)|Hydra]] |
||
| + | *[[Thor (Final Fantasy III)|Thor]] |
||
| + | *[[Twin Dragon]] |
||
| + | *[[Queen Scylla (Final Fantasy III)|Queen Scylla]] |
||
| + | *[[Cloud of Darkness (boss)|Cloud of Darkness]] (boss) |
||
| + | </div> |
||
| + | |quests=*Defeating the [[Cloud of Darkness]] |
||
| + | }} |
||
| ⚫ | |||
The dungeon's layout mostly consists of paths made out of dark energy, surrounded by a black void. |
The dungeon's layout mostly consists of paths made out of dark energy, surrounded by a black void. |
||
| Line 9: | Line 64: | ||
The name ''World of Darkness'' was also used to refer to the surface world before [[Luneth]]'s party went down there. |
The name ''World of Darkness'' was also used to refer to the surface world before [[Luneth]]'s party went down there. |
||
| − | == |
+ | ==Items== |
{|class="half-width FFIII table" style="text-align:center" |
{|class="half-width FFIII table" style="text-align:center" |
||
|-class="a" |
|-class="a" |
||
| Line 15: | Line 70: | ||
!Location |
!Location |
||
|- |
|- |
||
| − | !class="b"|[[ |
+ | !class="b"|[[List of Final Fantasy III armor#Ribbon|Ribbon]] |
|[[Cerberus (Final Fantasy III)|Cerberus's]] area. Guarded by [[Xande's Clone (Final Fantasy III)|Xande's Clone]]. |
|[[Cerberus (Final Fantasy III)|Cerberus's]] area. Guarded by [[Xande's Clone (Final Fantasy III)|Xande's Clone]]. |
||
|- |
|- |
||
| − | !class="b"|[[ |
+ | !class="b"|[[List of Final Fantasy III armor#Ribbon|Ribbon]] |
|[[Echidna (Final Fantasy III)|Echidna's]] area. Guarded by [[Xande's Clone (Final Fantasy III)|Xande's Clone]]. |
|[[Echidna (Final Fantasy III)|Echidna's]] area. Guarded by [[Xande's Clone (Final Fantasy III)|Xande's Clone]]. |
||
|- |
|- |
||
| − | !class="b"|[[ |
+ | !class="b"|[[List of Final Fantasy III armor#Ribbon|Ribbon]] |
|[[Ahriman (Final Fantasy III)|Ahriman's]] area. Guarded by [[Xande's Clone (Final Fantasy III)|Xande's Clone]], |
|[[Ahriman (Final Fantasy III)|Ahriman's]] area. Guarded by [[Xande's Clone (Final Fantasy III)|Xande's Clone]], |
||
|- |
|- |
||
| − | !class="b"|[[ |
+ | !class="b"|[[List of Final Fantasy III armor#Ribbon|Ribbon]] |
|[[Two Headed Dragon (Final Fantasy III)|Two Headed Dragon]]'s area. Guarded by [[Xande's Clone (Final Fantasy III)|Xande's Clone]]. |
|[[Two Headed Dragon (Final Fantasy III)|Two Headed Dragon]]'s area. Guarded by [[Xande's Clone (Final Fantasy III)|Xande's Clone]]. |
||
|} |
|} |
||
==Enemies== |
==Enemies== |
||
| ⚫ | |||
| − | <tabber> |
||
| ⚫ | |||
*[[Shadow Master (Final Fantasy III)|Shadow Master]] x2 |
*[[Shadow Master (Final Fantasy III)|Shadow Master]] x2 |
||
*[[Kage]] x2 |
*[[Kage]] x2 |
||
*[[Yormungand]] |
*[[Yormungand]] |
||
| − | + | ;Water crystal area |
|
*[[Kage]] x2 |
*[[Kage]] x2 |
||
*[[Yormungand]] |
*[[Yormungand]] |
||
| Line 40: | Line 94: | ||
*[[Xande's Clone (Final Fantasy III)|Xande's Clone]] (monster-in-a-box) |
*[[Xande's Clone (Final Fantasy III)|Xande's Clone]] (monster-in-a-box) |
||
*[[Echidna (Final Fantasy III)|Echidna]] (Boss) |
*[[Echidna (Final Fantasy III)|Echidna]] (Boss) |
||
| − | + | ;Air crystal area |
|
*[[Kage]] x2 |
*[[Kage]] x2 |
||
*[[Shadow Master (Final Fantasy III)|Shadow Master]], [[Kage]] |
*[[Shadow Master (Final Fantasy III)|Shadow Master]], [[Kage]] |
||
| Line 46: | Line 100: | ||
*[[Xande's Clone (Final Fantasy III)|Xande's Clone]] (monster-in-a-box) |
*[[Xande's Clone (Final Fantasy III)|Xande's Clone]] (monster-in-a-box) |
||
*[[Cerberus (Final Fantasy III)|Cerberus]] (Boss) |
*[[Cerberus (Final Fantasy III)|Cerberus]] (Boss) |
||
| − | + | ;Fire crystal area |
|
*[[Shadow Master (Final Fantasy III)|Shadow Master]] x2 |
*[[Shadow Master (Final Fantasy III)|Shadow Master]] x2 |
||
*[[Kage]] x2 |
*[[Kage]] x2 |
||
| Line 52: | Line 106: | ||
*[[Xande's Clone (Final Fantasy III)|Xande's Clone]] (monster-in-a-box) |
*[[Xande's Clone (Final Fantasy III)|Xande's Clone]] (monster-in-a-box) |
||
*[[Two Headed Dragon (Final Fantasy III)|Two Headed Dragon]] (Boss) |
*[[Two Headed Dragon (Final Fantasy III)|Two Headed Dragon]] (Boss) |
||
| − | + | ;Earth crystal area |
|
*[[Shadow Master (Final Fantasy III)|Shadow Master]], [[Kage]] |
*[[Shadow Master (Final Fantasy III)|Shadow Master]], [[Kage]] |
||
*[[Queen Scylla (Final Fantasy III)|Queen Scylla]] |
*[[Queen Scylla (Final Fantasy III)|Queen Scylla]] |
||
| Line 58: | Line 112: | ||
*[[Xande's Clone (Final Fantasy III)|Xande's Clone]] (monster-in-a-box) |
*[[Xande's Clone (Final Fantasy III)|Xande's Clone]] (monster-in-a-box) |
||
*[[Ahriman (Final Fantasy III)|Ahriman]] (Boss) |
*[[Ahriman (Final Fantasy III)|Ahriman]] (Boss) |
||
| − | + | ;Cloud of Darkness area |
|
*[[Queen Scylla (Final Fantasy III)|Queen Scylla]] |
*[[Queen Scylla (Final Fantasy III)|Queen Scylla]] |
||
*[[Garm (Final Fantasy III)|Garm]] |
*[[Garm (Final Fantasy III)|Garm]] |
||
| Line 65: | Line 119: | ||
*[[Hydra (Final Fantasy III)|Hydra]] |
*[[Hydra (Final Fantasy III)|Hydra]] |
||
*[[Cloud of Darkness (boss)|Cloud of Darkness]] (Boss) |
*[[Cloud of Darkness (boss)|Cloud of Darkness]] (Boss) |
||
| − | </tabber> |
||
==Battle Background== |
==Battle Background== |
||
Revision as of 16:44, 13 May 2016
Template:Sideicon Template:Location The World of Darkness, also known as the Dark World, is the final dungeon in Final Fantasy III where the party fights the Cloud of Darkness and several other enemies. It is a point of no return.
The dungeon's layout mostly consists of paths made out of dark energy, surrounded by a black void.
To defeat the Cloud of Darkness, the party must first find the Warriors of the Dark to weaken the final boss. To find each of them, they must first battle the bosses: Echidna, Ahriman, Cerberus and Two Headed Dragon.
The name World of Darkness was also used to refer to the surface world before Luneth's party went down there.
Items
| Item | Location |
|---|---|
| Ribbon | Cerberus's area. Guarded by Xande's Clone. |
| Ribbon | Echidna's area. Guarded by Xande's Clone. |
| Ribbon | Ahriman's area. Guarded by Xande's Clone, |
| Ribbon | Two Headed Dragon's area. Guarded by Xande's Clone. |
Enemies
- First area
- Shadow Master x2
- Kage x2
- Yormungand
- Water crystal area
- Kage x2
- Yormungand
- Queen Scylla
- Xande's Clone (monster-in-a-box)
- Echidna (Boss)
- Air crystal area
- Kage x2
- Shadow Master, Kage
- Yormungand
- Xande's Clone (monster-in-a-box)
- Cerberus (Boss)
- Fire crystal area
- Shadow Master x2
- Kage x2
- Yormungand
- Xande's Clone (monster-in-a-box)
- Two Headed Dragon (Boss)
- Earth crystal area
- Shadow Master, Kage
- Queen Scylla
- Garm
- Xande's Clone (monster-in-a-box)
- Ahriman (Boss)
- Cloud of Darkness area
- Queen Scylla
- Garm
- Thor x2
- Twin Dragon
- Hydra
- Cloud of Darkness (Boss)
Battle Background
Open Area

Crystal rooms

Musical themes
Template:Listen
The background theme that plays in the World of Darkness is called "Dark Crystal". An arrangement of this track was included in the "Dark Cloud" track from the album Final Fantasy III: Eternal Legend of the Wind.
Other appearances
Final Fantasy XIV
Template:Sideicon The World of Darkness is the last part of the Crystal Tower quest line where the player will finally confront the Cloud of Darkness.
Dissidia Final Fantasy
Template:Sideicon
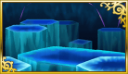
The World of Darkness.
The World of Darkness is the representative arena of Final Fantasy III. Here, the Onion Knight fights the Cloud of Darkness to save Terra Branford. It is also the site of the first cutscene for Cloud's, Cecil's, and Squall Leonhart's storylines, and is where Tidus and Firion split up. In Firion's storyline, he fights Ultimecia directly afterwards.
The World of Darkness consists of a polygonal dark crystalline area with many tall pillars and tendrils of dark energy circling the arena. Characters can use Quickmove to grind over the energy bars or to run up the pillars. In the background at one end of the stage, a staircase descends from nothingness. The arena's Ω form periodically shifts form to one of two other areas of the Final Fantasy III.
Depending on how close the characters are to each other when the shift occurs, the arena will shift to a small, closed-in area with a series of square pillars and platforms rising in the center, or a large open area consisting of transparent platforms connected by bars of dark energy hovering over a Banish Trap. Depending on which alternate area the characters are teleported to, the Bravery pool will rapidly increase depending on the distance of the two characters from each other. After a period of time, the arena shifts back to its default appearance.
The battlegen item obtained through stage destruction in this area is Sealed Darkness.
Dissidia 012 Final Fantasy
Template:Sideicon The World of Darkness returns as an arena. In the 12th cycle, this is where Laguna encounters the Cloud of Darkness.
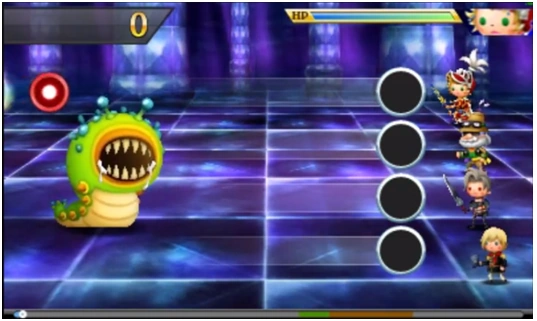
Theatrhythm Final Fantasy
Template:Sideicon
The World of Darkness appears as the Battle Music Sequence for "Battle 2", both from Final Fantasy III and Final Fantasy IV, the latter as downloadable content.
Theatrhythm Final Fantasy Curtain Call
Template:Sideicon
The World of Darkness
The World of the Darkness returns as the BMS for both songs.
Final Fantasy Airborne Brigade
Template:Sideicon
Gallery
Template:Gallery
Trivia
- Developers planned to add a save point in the Dark World entrance while developing the NES version, but ignored that idea, as they thought it would make the final dungeon too simple. It was kept this way for the 3D remakes.
Template:FFIII Template:Dissidia Template:D012