I recommend a team with Lightning, Snow and Fang. They should be pretty advanced in their crystariums, with Fang being a Synergist and Medic. When its Inertial Barrier goes up, it's immune to almost every debuff except Imperil and Slow. Get those on it then switch to Prudent Planning and buff everyone up with at least 5 buffs. Fang can possibly get those spells to -Ra level if you leveled her up enough. When that's done, switch to Tri-disaster and stagger it. When it's staggered, switch to Infiltration and get more debuffs on it, then switch to Aggression and take out a chunk of its HP. Repeat if necessary.
This is supposed to take you 8:53 min, but you can easily kill them off in less than a minute. You should start out with Aggression then Blitz em all. Done.
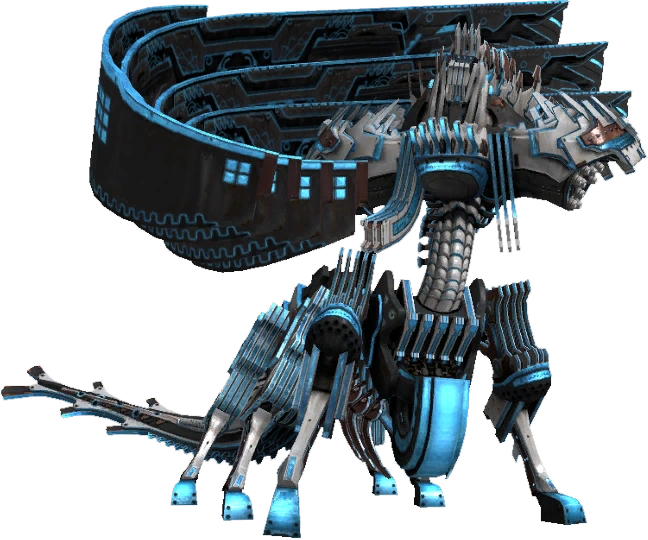
You've fought this guy a few times right? This should be pretty easy. Start out with our favorite paradigm, Guerilla. Attack the Centaurion Blade when it appears. Once it's gone, stagger the Tyrant and end it.
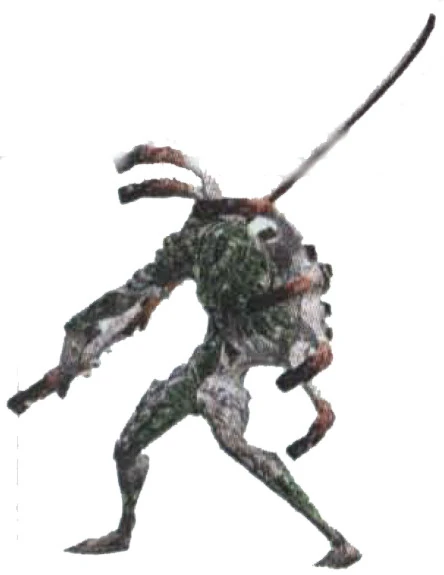
Start out with Guerilla and get some debuffs on it, then stagger it. If it's not staggered by the time it reaches half HP, it will stand and regain it's HP. If that happens, continue to stagger it and then Launch and you should have him.
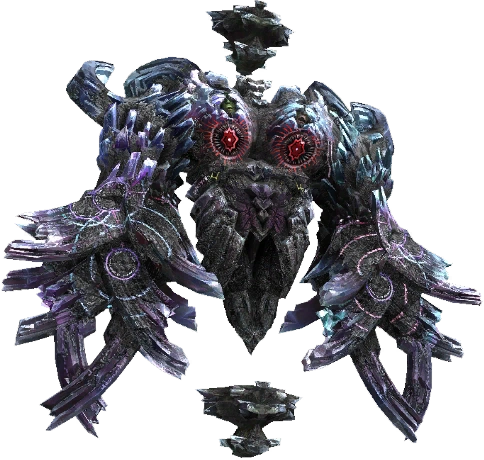
This is probably one of the longest battles you will ever fight. It's not very hard though, you just need to use Snow as a distraction most of the time. Your party should be very advanced in their crystariums. You can only get 4 debuffs on him: Deprotect, Deshell, Slow, and Curse. You should have over 5 buffs on your party throughout most of the battle. Add in an En- spell to your people too, just for fun. Now that everything is prepared, switch between Mystic Tower and Offensive Screen. It's pretty much impossible to stagger him, but get him up to at least 300% to make things go faster. The buffs and debuffs won't last long so you'll have to switch often. Make sure the stagger gauge doesn't drop to 0 when you're using Prudent Planning.
When he loses about 1/5 of his HP, he'll use Unrelenting Blade where he'll pull a large red sword from his chest. It's scarier than it actually is. When he gets to around half HP, he'll use Peerless Blade which is, again, scarier than it actually is. With that, he'll also use Meditation, which will kill someone if they are not a Sentinel. You shouldn't worry too much though, he'll attack Snow throughout 99% of the battle. This method should take around 10 minutes. If you take 20 minutes he will use Doom.
Use a Deceptisol to make things easier. Do I really need to repeat myself? There's 4 leeches and those are easily taken out by a few Blitz attacks. Then there's that Zirnitra again so just follow the other methods that are already there.
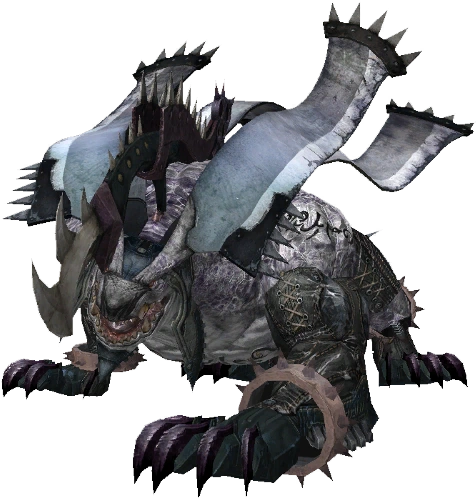
This battle gives you no choice but to use Random Instant Chain. You should equip at least 2 people with the equipment to do so. Use a Fortisol and Aegisol. You should buff yourselves up with Enfire too. I also recommend using Sazh. The Gigantuar is immune to all debuffs except Daze, which doesn't last long anyway, so Saboteurs are a no. Cerberus is the best way to go. 10,000 Needles can cause Fog, Pain or both.
Yes, we have to fight another one of these things. This time there are multiple Picochus in the beginning of the battle. Take those out first, then go with the strategy you went with the last time you fought this. Otherwise you might be lucky enough for that Random Instant Chain to work this time (or a 2nd time if it already did >.>).
Not very hard, you've fought Munchkins before and this guy was easy last time. If your people are wonderfully strong you should only need to use Aggression (or any other offensive paradigm depending on your party).