Yesterday, December 7, 2007 — a date which will live in infamy — my, BlueHighwind's Final Fantasy X Walkthrough was suddenly and deliberately attacked by naval and air forces of the Empire of Japan. I ask that you, Space Monkies, declare that since the unprovoked and dastardly attack by Japan on Friday, that a state of war now exists between this walkthrough and the Japanese Empire.
Mushroom Rock Road[]
Seymour tries his best to give an inspirational speech, however since he has all the eloquence and auditory ability of a Jar Jar Binks he fails miserably. By now its obvious to everyone here that if Seymour is in command then they're all pretty much guaranteed to die horribly.
Wakka however starts complaining about how this how operation is violating Yevon's bizarre little fear of Machina. Yuna shuts his ugly ass up though (what the hell is up with his wiggly hair?). Seymour comes over to pretend to be respectful to Auron, however Auron just ignores his freaky-hair and walks by coldly — and badassly. Tidus also hates Seymour, mostly because he's the only competition that Tidus has to Yuna's gulley hole. Considering just how badly Tidus has been striking out lately, I wouldn't be surprised if Seymour actually manages to beat him to the prize.
As you head in the same direction we've been going all Pilgrimage — straight, you'll run into three dudes hanging by the rocks. They'll give you an Ether, a Hi-Potion, and two Phoenix Downs. As you go forward some Crusader in a surprisingly un-ridiculous outfit tells you to head to the Command Center. Seymour wants to get some alone time with Yuna. Take the branch road North. Oh and if you need any items, O'aka is right there to take your Gil.
Save your game and talk to the mindless NPC for a Hi-Potion. Go up to the little design on the ground and press ![]() to get the lift working. The path here is slightly more windy but still its just a linear path. When you see the Chocobo go directly North to find dead end with a Chest with 1,000 Gil and an NPC with ten Potions. What a nice creature posing to be a human being. NPCs aren't human, they're pathetic bits of code in the general shape of a human that say the same thing over and over again. They are abominations and I wish this game would let me kill them.
to get the lift working. The path here is slightly more windy but still its just a linear path. When you see the Chocobo go directly North to find dead end with a Chest with 1,000 Gil and an NPC with ten Potions. What a nice creature posing to be a human being. NPCs aren't human, they're pathetic bits of code in the general shape of a human that say the same thing over and over again. They are abominations and I wish this game would let me kill them.
Head South a bit and you'll find that the path continues to the right. Follow it and you'll find a Chest with a Remedy. As the path winds and turns in its snaking way North Shelinda will appear, more out of place on a battlefield than a Black guy at a Ku Klux Klan rally. If you keep on talking to her she'll eventually offer to fully heal your party. If you take the offer your party will not only be returned to perfect health, but this sex starved nun will actually have a full orgasm from the effort. Man, that chick, all that chick needs is to get out of those ugly green clothes and a nice humping. Tidus, you're not going to get any of that Yuna pussy any time soon (because you're a fucking loser), why don't you settle? I can take Yuna.
Keep on trucking until you come to place where you walk under a cliff. Here you'll find a Hi-Potion next to the support rock. After that its just a little jog to the next water lift thingy. Talk to the random penis hanging around for an X-Potion. When the path reaches a fork, first go West and take the lift down to find a Serene Armlet. Head back to the fork and now go North. As you continue up, you'll see a little branch on the main path in the shape of a fishing hook. Take it to reach the Al Bhed Primer Vol. X. Keep on going straight until you find another lift. Hit ![]() to reach the last platform. Go around and talk to guy here for a Mega-Potion.
to reach the last platform. Go around and talk to guy here for a Mega-Potion.
Save and go South to start yet another series of discussion cut-scenes. What fun! Wakka will get really pissed about this whole plan, mostly because he's a racist pig deserving of a nice stay in Auschwitz. Also hasn't Wakka noticed in the ten years since Yuna moved to Besaid that she's half Al Bhed? Fuck, she has two different colored eyes, it would the biggest fucking idiot in the whole world not to catch that! Oh wait, this Wakka we're talking about, so I can understand how he'd miss it. Wakka beats up the Crusader guy because of something about his dead brother. I don't care. What I do care about is the hilarious way that Lulu's hair clips right through her shoulder in the scene. A classic in bad programming.
Once the scene is over, Save again and take the mechanical lift up. Go down and run around the corner to find the Al Bhed artillery all set up. Wakka goes to kick one but only winds up breaking his foot (What, is he stupid? Yes). Since they are no items or goodies in this area, go around to the next screen. Once again Wakka bitches about Machina. Okay, we got it, we got it. You're a racist fuck and you hate Machina, we know. Now shut up already.
Head right but before you enter the tent be sure to visit O'aka for some items. Continue and you'll meet a disgruntled soldier unhappy that he's been kept out of the fight. Tell him to join the front lines and enter the tent. Here we meet Maester Kinoc, a fat man who reminds me of Elmer Fudd in more than a few ways. Auron is pretty pissed to see that his old friend is now a Maester. Save and run down to the guy standing on the blinking red arrow on your mini-map and say "Yes" if you're ready for the melee to begin.
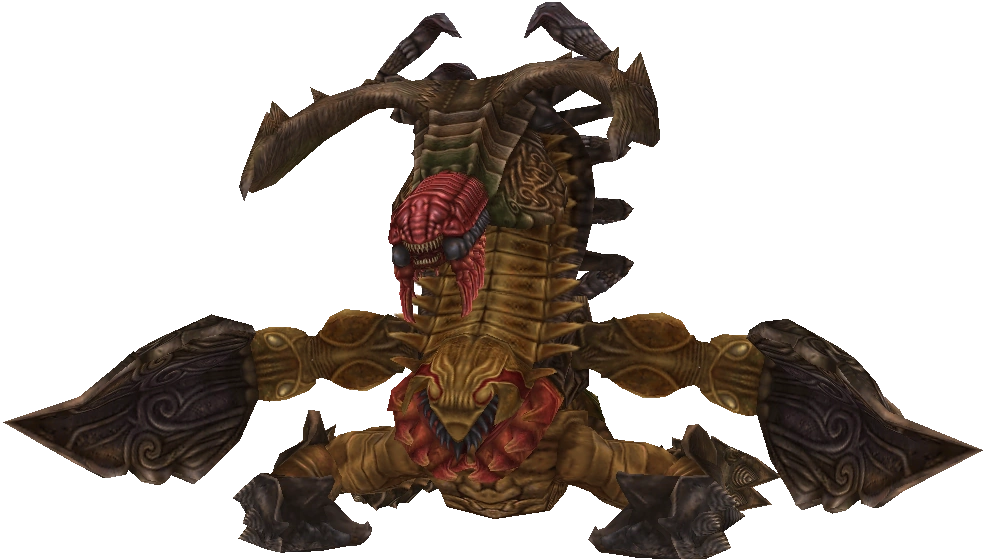
Unfortunately the plan falls apart (big surprise there) and the Sinspawn escape. Get ready to fight the hardest boss so far:
| ||||||||||||||||||
|
| ||||||||||||||||||
| ||||||||||||||||||
|
Strategy: This is the hardest boss we've faced so far. If you've just been bullshitting your way through the game up til now this will be a rude awakening. First off focus all your fire power upon the head. Gui's head can fire out "Poison" spells that will really cause ruin in your ranks. So kill it first and kill it fast. Have Tidus "Haste" Lulu so that she can blast some "Fira" spells. Wakka should attack physically. Eventually the head will die meaning that we can now focus our attacks upon the arms. In this next round, have Tidus "Haste" Auron so he can take one of these things down in just two hits. The arms regenerate though, so keep that in mind. Once the arms are down, we can focus our strikes upon the body. Auron's "Power Break" is amazing in this battle. It deals tons of damage and destroys this monster's attacking power. Gui's only interesting attack is "Demi" which can't kill you, but you should use Yuna to heal up your party if your HP goes down too low. This fight is really long more than anything else. | ||||||||||||||||||
After the fight ends, the big guy himself comes marching in. "Huh huh, you're all going to die." All the Al Bhed cannons in the world won't save this operation now. The Crusaders managed to be as effective at stopping Sin as the Japanese Military is at stopping Godzilla. Totally random thought: where did the JSDF get those cool laser cannons in those movies? It always bugged me.
After that Gui awakes for another round. Huh, you want more, ay? Alright, I've give you another ass whooping.
| ||||||||||||||||||
|
| ||||||||||||||||||
| ||||||||||||||||||
|
Strategy: Everything that was tough about the last fight has now been cut down to child size. Gui's HP and pretty much all his stats have been halved and you also get to use Seymour for this one and only battle. Same strategy as before, only now you Seymour's extra spicy Magic. His "Fira" can down Gui's head in a single strike. And his White Magic isn't anything to sneeze at either, "Cura" is wonderfully effective. If you don't have anything to do in this fight, you can spend a good ten minute building up Seymour's Overdrive, Requiem. Its not really worth the effort though. You should have no problem destroying Gui this time. Kick his Sinful ass. | ||||||||||||||||||
I find it kind of wierd that the game gives Seymour about 10 Sphere Points even though we'll never use him again. Why give EXP to a character that can never use it?
The Al Bhed attempt to take Sin down with a giant laser canon. However the gain from this valiant effort is only two things: jack and squat. They all die in a horrible fiery cataclysm and despite the awfulness of the outcome, I can't help but feel a little proud that I was right.
After the battle something absolutely incredible happens: despite the casualties certainly being in the thousands, not a single named character kicks the bucket. Take Tidus up Northwest to find a dying soldier. After the soldier succumbs to his or her injuries Tidus goes running after Sin in a quixotic attempt to kill his father that will certainly end in torn up Tidus guts washing ashore a few hours later. Instead of a painful death that he so rightfully deserves Tidus gets a lot of weird flashbacks and halluncinations.
When Tidus finally stops crying go and Save your game. Head forward to watch the real star of this show, Auron calls his old Maester friend on being a cowardly bastard. Seymour tries to flirt with Yuna, however his technique is even worse then Tidus's (a feat I thought was impossible) and so strikes out faster than blind dude swinging with a popsicle stick. Once that's all done make Tidus run West to rejoin his party.
Finally we're back on out Pilgrimage. Save up. Run forward and talk to all the survivors to get various items. There really isn't much of interest on this road, however on the right side of the road you'll find the Al Bhed Primer Vol. XI. Keep your eyes open for it, we don't want to miss one now. Also in the first alcove you'll find a Bright Bangle. After a while you'll reach a fork, go East to reach the Djose Temple.
Djose Temple[]
Head up the path to find the Chocobo Knight chick who tells you her tale of woe. Thanks to her incompetent command, all her troops were slaughtered, and all but one of her Chocobo were crushed. I couldn't give less of a damn about the NPCs but to loose some many Chocobo is a true tragedy. We can only blame the brilliant tactical command of Ms. Patton here for this great loss.
When you reach the Temple itself you'll find that Crusader guy, who survived purely thanks to the fact that he has a name and the Character Shield that comes with it. Go past him to find a Chest with four Ability Spheres. Save up and enter the building next to the save point to find a nice Item/Weapon Shop.
With the preparations done enter the Temple to begin our quest for the next Aeon. First you'll meet up with some sadly poorly misshapen NPCs (man the programmers in this game were lazy). Go up to the Cloister of Trials and prepare for a tough one. This is probably the most difficult Cloister in the whole game, however that's not saying much.
First put the two Djose Spheres into both inserts on the door in front of you. Run forward and push the pedestal right onto a little circle in the ground. Then grab the two Djose Spheres from the front of the room and insert them into the recesses near the pedestal's new location. This will charge up the Djose Sphere on the pedestal and make it what I call a "Super Djose Sphere".
Take the Super Sphere to the right recess in the front of the room (or the one that links to the door). This will open up the door leading to a new room. Now take out those two Djose Spheres near the pedestal and put them on that very same pedestal. Move this object into the large chasm and drop it off the into void. Thanks to the electricity jolting everywhere the pedestal will float, allowing you to jump across and push a stone object forward into place so that you light up a part of the design.
Hop back to the last room and step on the blinking white dot to move the pedestal back to the center of the room. Take the two Djose Spheres and bring them to the inserts in the very first room to light up two more parts of the Yevon Symbol. Go back up and grab the Super Djose Sphere and put it in the recess on the left. This will finish the design and allow you to lift up to the second level.
Continue your travel through the Trials on the next page.