Side Quests
Third and final time we'll be going and doing Side quests and some of these will be long and difficult but the rewards will be amazing. So, let's start with an easy close one, getting a new card! Save, then head back into the airship. Laguna actually holds Squall's card, so challenge him and make sure the random rule isn't spread! Easy enough right? Also notice how Squalls card (the numbers) are opposite of Seifers? Pretty cool for Rivals to have rival cards huh?
Also a note that if you missed getting the Alexander card on the Lunar base you can still get it from Piet. There's a small island south of Tear's Point outside Esthar's wall which is called the Abadan plains. You can't see the crash site there but if you walk around on the island you'll find it with Piet and the crashed escape pod, and the Alexander card you can win. Alright, then let's get to some other quests done.
Islands Closest to Heaven and Hell
Hell...
...and Heaven
There's two islands, one on the tip of the landmass the furthest west you can go and one the furthest north-east you can go. Hopefully the maps help. These are the islands closest to Heaven and Hell. Make sure when you land you have ENC-NONE equipped or you'll die. All of the monsters here are level 100 and will wreck your party (we'll be back later for power leveling). The reason we're here now is there's a ton of hidden draw points here that hold the best magic in the game. Once you draw the magic it takes some time to refresh so do both islands now to start stocking up on these amazing spells and check back as we're side-questing to get more. Here's the list of what you can get from each:
Island Closest to Heaven Draw Points
- Aura (x3)
- Flare (x3)
- Full-Life (x3)
- Holy (x2)
- Meteor (x4)
- Quake (x2)
- Tornado (x2)
- Triple (x3)
- Ultima (x3)
Island Closest to Hell Draw Points
- Aura (x5)
- Flare (x3)
- Full-Life (x4)
- Holy (x4)
- Meteor (x4)
- Quake (x2)
- Triple (x6)
- Ultima (x5)
Obel Lake
- Where
- All Over
- Difficulty
- Easy
- Rewards
- Good
Alright, this quest shouldn't have any fights, so start off by equipping the Enc-None ability to make it go smoother. Next head to Timber. North of the city is a spit of land surrounded by a lake. Head to the edge in the middle of the lake, and click ![]() to get a menu with a couple choices. Choose the second option "Try humming" several times until a shadowy creature in the lake comes and talks to you. Talk to him again and he'll ask a favor, so we need to find his friend Mr. Monkey. Jump in your airship and head to the forests west of Dollet and run around until you find Mr. Monkey. After you talk to him, head back to the lake, and the shadowy creature will give you a bunch of leads to track down.
to get a menu with a couple choices. Choose the second option "Try humming" several times until a shadowy creature in the lake comes and talks to you. Talk to him again and he'll ask a favor, so we need to find his friend Mr. Monkey. Jump in your airship and head to the forests west of Dollet and run around until you find Mr. Monkey. After you talk to him, head back to the lake, and the shadowy creature will give you a bunch of leads to track down.
- Take a break at the railroad bridge
- At the beach in Balamb something special washes ashore at times
- Take some time off at Eldbeak Peninsula
- You'll find something on an island east of Timber, too.
- There's also something on top of a mountain with a lake and a cavern
- Back in the day, south of here, there used to be a small but beautiful village surrounded by deep forests. Everyone lived a happy life there.
- Mr. Monkey had a rock like this I think...
Fist up, head away from the lake, then come back and keep throwing rocks until you get the message "The rock skipped many, many times." Head back up to Dollet and find Mr. Monkey again and throw rocks at him until he throws one back. It will have the message U R H A E O on it.
Next head back to Timber, then to a small island east of there, just north of the bridge across. Search on Mandy Beach to find another stone reading R E A I D R.
Now head back to Balamb and search the beach. There will be a lot of rocks here, but eventually you'll find the one with the inscription S T S L R M.
The final rock is on top of one of the ridges Northwest of Timber. It's just a bit south of where Galbadia Garden was and you'll see water coming out of the rock just below you. Search and you'll find a birds nest. You'll have to fight off the birds, and then you'll get the rock with E A S N P D on it.
Now head back to the lake and the creature will line the stones up properly and you'll see a message if you read downward starting on the right. So, now we'll be heading for the Mordred Plains which is the large plain north of Esthar (actually over the cliff and barrier to the north). Here you'll find a bunch of rocks that will give you directions but the trick is that the red faced-rock will always lie, so do the opposite of what it's telling you to. For example, when it says "The treasure isn't here" check again to find it. You'll find a Three Stars which teaches a GF the Expendx3-1 ability (allowing you to use triple magic for 1 spell).
Now head to the little jut of land sticking out into the ocean northwest of Balamb, on the upper continent. Search here to find another inscription to get another clue. Now head back to the lake to confirm with the shadowy creature. From here head to the south of Esthar and there's a small island there (north and slightly west of Cactuar island) where you can find a Luck-J Scroll. This items is what the while quest was about. It will let us be able to teach a GF to Luck-J ability and enable all our characters to junction magic to their luck (we'll be going over GF enhancements in a bit). First, we have another side quest to hit.
Alien Encounter
- Where
- All Over
- Difficulty
- Easy
- Rewards
- Good
First, make sure you have 5 elixirs in your inventory. Now, we need to go watch 4 Alien encounters. You can see them even with Enc-None equipped, so leave it on for now. The first one is by Winhill, so head there. Wander around east of the city until you see in. Next is the beach east of Timber, so head to Timber and wander the beach. Next head down the the Centra continent and on the eastern part just below the island where we found the Luck-J scroll, in the desert you'll see another one. Finally head to the small section of land east of Trabia Garden where we rode the chocobo into the water. Just east of there is a small island, so land there to see the 4th encounter. Now, head east and land on the bluff that is just north of the final chocobo forest. Here you'll be attacked by the UFO, so beat it up and you'll win a Aegis Amulet. Now head back to where Balamb Garden originally was, make sure you have the item command equipped and walk around the crater to get into a fight with the alien. He'll ask for elixer, so give him 5 and you'll win getting his card (the level 5 card we were missing).
Bone Quest
Ok next we're going to Dollet to do a quest I mentioned back on disk 1 but said it would have much better rewards now. Once you're in Dollet go to the pub then down a screen. Here you'll you'll find the dog you helped way back in disk 1 and a boy. Talk to him (the boy, not the dog) and he'll go inside the building. Follow him inside and check the painting, then talk to the boy. Note that in the picture you'll see a bone. The painting shows somewhere in Dollet so go to that place and find the dog with the bone and look under the bone for some items. Start by going outside and [insert directions] to the town square. Talk to the dog and look under the bone and you'll get a X-Potion. Go back to the painter's house and watch the scene before checking the painting when it's done and talking to the boy. Go outside and [insert directions] to the pub area where you can talk to it again and check under the bone to get a Mega-Potion. Go back to the painter's house and check the painting, then talk to the boy. Head outside and you'll see the dog. Talk to it and check under the bone to get a Elixir.
Cactuar Island
- Where
- Island south of Esthar
- Difficulty
- Medium
- Rewards
- Great
Alright, this island is located south of Esthar off the eastern coast of the southern (Centra) continent. You'll know you're on the right one because a Large Cactuar will keep appearing and disappearing from the island. This island is full of...you guessed it, Cactuars! These guys are very hard to hit (they avoid you attacks a lot) and can hit you for 1000 damage but have little life (one to two hits worth) and give 20 AP for each one you kill enabling you to learn GF skills really easily. Squall's attacks will always hit, so if you can't seem to beat them before they run away, either boost Squalls Strength through junctioning better magic, or give him the darkside ability learned from Diablos which will increase him damage but take some of his life with each attack until you can straight out kill them. You can also increase your character's speed or give the the initiative ability to make them attack right off giving you a better chace of killing them. We'll use it for level up their abilities but first we want to get all the GF's we can, which will be most of the first side-quests we do here. It should be noted that groups of 1-2 appear on the outside and larger groups of 3-4 can appear on the desert, but the Jumbo Cactuar will also only appear in the desert, so if you're fighting them there, be careful not to run into the boss. The Large Cactuar is a GF we can get but make sure you're prepared before going into this battle!
First equip all your characters that will be attacking with water elemental damage as he's weak to water. Next make sure Alexander has the Revive ability learned. I didn't, so I quickly switched him over to it and beat 10 cactuars to learn it before switching him back. I would also recommend that if you do this, you also work on Leviathan's SumMag+ abilities at the same time as we'll be using it a lot in this boss fight and want it to be as powerful as we can. Once you've done that, equip the person junctioned with Alexander with Revive instead of magic (mine will be Squall). Also make sure that character doesn't have Leviathan. The third character should either have water magic junctioned to their physical attacks if they're a physical character or be ready to cast water magic if they're a magical character (move the water magic to the top of your magic list to make it easy). We're going to do one more thing to make this a bit easier. Have you noticed that bosses have never given you experience in this game? They give a ton of AP, but no experience. So, since they give no experience you can remove and Bonus abilities your characters have (My Squall has HP, Zell Str, and Selphie Mag, Vit and Spr) and replace them with other abilities without worrying about leveling up to give your fight a boost against bosses. We haven't done this so far (though you may have done so) because so far the bosses really haven't been hard enough to need to do so. However, the upcoming bosses are optional, and can be very difficult, so keep this in mind. Also, with the Jumbo Cactuar, there's nothing useful to steal, so I'll be getting rid of Mug too. My Squall has Revive, Mag+40%, HP+80% and Luck+50%. Zell has HP+40%, Vit+40% (all the bosses attacks are physical) and STR+40%. Selphie has Mag+40%, Vit+40% and Spd+40%. Anyway, once you get done with your preparations, save and then go run into the boss to get the fight started.
| Boss Battle: Jumbo Cactuar |

This is probably one of the most difficult bosses we've fought so far. I do want it noted that thought I've rated this boss a 5, meaning you'll have to try it more than once, if you've prepared, you should be able to do it in a single try. As you can see by the preparations above, it's not something to just walk into and I'll explain why. First (and most importantly) the Jumbo Cactuar will randomly counter-attack any damage he takes with his 10,000 Needles attack, which will do 10,000 damage to the character who hurt him and cannot be reduced. Seeing as the max we can have is 9,999 life, this will always kill the person. The Jumbo Cactuar is also very fast and his physical attacks hurt (though with high Vit and HP, your characters shouldn't get beat up too much). Start off by drawing metldown from him and using it to reduce his physical defenses. Squall will be reviving the other characters the whole match and as he'll never attack, he shouldn't get killed off. If his HP gets low, make sure one of the other two heal him back to full. Your other two characters will be the ones dealing damage. The one with Leviathan should be summoning it constantly and it should be doing massive damage. Mine was doing about 5500 damage at the time with a good boost. Your third character will either be attacking physically with water magic junctioned or flat out using water magic to attack him. So, I had Zell attacking and he was doing about 8000 damage a hit. When either of these two gets countered and killed, have your character with revive bring them back and keep going. This guys has a lot of life, so this can take a while. There's one more trick about this battle that pushed it up to a 5. A message will flash on the screen saying it's hesitating which means he's at 5% HP. At this point if you drop it to below 2% of it's max health without killing it will run away forcing you to fight it again, so you want to use nothing but your strongest attacks. If your attacks aren't doing 7,000+ damage, another option is to use Aura on Squall and use his limit break, which does a lot of damage and has a special animation and finisher in this fight. Another option is to cast triple or summon Cerberus and then triple cast water with your best magic user. You can also just stick with Leviathan if he's doing a bunch of damage. You can celebrate once he falls, as you have a new GF! |
Guardian Force - Jumbo Cactuar

This is one of the first GF's we'll get with both a powerful attack and amazing support abilities. So, first let's go over his attack. He uses his 1,000 needles, dealing 1,000 damage for every 10 levels he has. This means once he's level 100 he'll be doing 10,000 damage that can't be reduced in any way. Him and Diablos will be two of your most damaging GF's once they hit those high levels. Now to his support abilities. He comes with all five Stat Bonus abilities already learned. So, as we've been using 3 characters for most of the game, you've probably noticed that your other three (Rinoa, Quistis and Irvine in my case) are very underleveled. This is becase when we power-level them up (which isn't that hard), we'll equip this GF on them and they'll have 4 abilities slots enabling us to majorly boost 4 of their stats. He also has two rare junction abilities (Eva and Luck) which will let us junction magic to those stats as well. We'll get just enough of these rare junction abilities through side quests to be able to do this with all your characters but him being able to learn both helps us immensely. His only other interesting ability is Kamikaze. This ability will remove the character that uses it from the battle but do damage equal to his HP*6, meaning it can do just shy of 60,000 damage. This, along with Maxed level Cactar GF and Eden are the only attacks that can break the damage limit in the game. With the luck boost you can get on him too, you can get a critical on Kamikaze doing close to 90,000 damage and combined with his Initiative ability which enables you to go first, you become an instant kill bomb. It's actually a viable strategy to use against the boss of the game, so we'll keep that in mind for later.
- Order I learn abilities in:
- Eva-J
- Luck-J
- Kamikaze
- Initiative
- Luck+50%
- Eva+30%
- GFHP+10%
- GFHP+20%
- GFHP+30%
- Move-HP Up
- Expendx2-1
- Defend
- Auto-Potion
Remember to save, and re-equip your normal abilities (Mug, Bonuses, etc) and give this GF to Zell. If you're wondering, I gave Zell Mug, STR Bonus and Vit bonus to make him a strong physical attacked and defender at the end of the game.
Doomtrain
Now that you've got him, we're going to get the GF Doomtrain next but we can start this right here! So, we need at least two GF abilities for this. Make sure Tonberry has learned Call Shop and Alexander Med LV Up (which comes from Med-Data). Tonberry should also be working on Familiar for another side-quest we'll do soon. Once you have these, use your call shop ability to make sure you have 60 Remedy items (and if you have Familiar) at least 5 Elixirs. You can get both from the "Esthar Shop!!!". Use the new Med LV Up ability to turn the 60 Remedy's into 6 Remedy+ items. Now, we need 6 Malboro Tentacles and 6 Steel Pipes. You can get the steel Pipes from refining Elastoid cards or stealing them from Wendigos around where Galbadia Garden used to be (between Dollet and Dueling city by the big red circle). The Malboro Tentacles will be a bit harder. You get 1 for each 4 cards you have or you can steal or win them from the Malboro monsters.
I had all my pipes from card playing but if you don't get those first. The Malboro monsters used to be found in the Esthar area and they're the reason we equipped the Enc-None ability while moving around this area. However, since the lunar cry has happened, they're not there any longer. Now you'll have to fly your airship north towards the forests there and land on one of the cliffs. The malboros are in the forests, though there are also other enemies. In this game, as soon as they can, they'll use their Bad Breath ability to hit you with every status effect and unless you kill them before they do it, or have protection from some of these, it will probably mean you're whole party will die. So, land in Esthar and go to your ST-Def junctions of your characters. We'll be junctioning magic to negate as many of their status effects as we can, so do it in this order: Sleep, Confuse, Berserk(except for Zell), Pain, Esuna. Selphie's Full Cure Limit Break is a quick way to cure all of the party from status effects or you can use Siren's Treatment command to get rid of the status effects also. If you need confuse, you can also find Imps in the Esthar area to draw it from. We need a total of 9 (6 for our new GF, 2 for Quistis' Ultimate Weapon, and 1 to teach the move to Quistis), so while your fighting make sure you save often.
Here's another strategy that I use for fighting Malboros: I had Squall (with his 4 St-Def slots) with Confuse, Sleep, Berserk and Silence and I swapped Quistis out for Selphie and kept her HP low (just don't heal her after junctioning her. When attacked, I used Squall to cast Esuna on Quistis, then used her Limit Break Degenerator to kill it quickly. I actually got 8 Malboro tentacles from the first one I killed and had 1 from refining cards. When you're done, you can use your Solomon Ring to get the GF Doomtrain.
Guardian Force - Doomtrain

This GF is the one you'll use to inflict status effects on enemies. When you attack it's type is poison making it good against human enemies and it inflicts the poison, darkness, silence, berserk, sleep, doom, curse, petrify and VIT0 statuses. So, even if enemies are immune to some of these or even poison, we'll be using it on most bosses to make them a bit easier. For junctions, it has both the ST-Def-x4 AND Elem-Def-x4 which is great. He has the junk shop ability allowing us to improve our weapons from anywhere. He also had the Forbid-RF ability to help us get some interesting items.
- Order I learn abilities in:
- Boost
- ST-Def-x4
- Elem-Defx4
- Forbid Med-RF
- SumMag+10%
- SumMag+20%
- SumMag+30%
- SumMag+40%
- GFHP+10%
- GFHP+20%
- GFHP+30%
- GFHP+40%
- Darkside
- Absorb
- Auto-Shell
If you've looked at Zell's defensive junctions recently you'll know that this is going to him. Alright, we're only missing 2 GF's and they're both in the same place. We'll go get one of them now but there's a whole dungeon separating us from the second, so we'll do a couple things before getting the final one.
Deep Sea Research Center
Alright, as we won't be here long I'm not going to bother to put all the monsters and such you can find here until we come back for a second visit. So, first we need to find the place. As with most secret dungeons, it's in the corner of the map (where all 4 corners connect really), though mostly on the south-west corner. Head there in your airship. You technically can find this place with your Garden but can't get in. Prep before you go in by giving your party Elemental Defenses in this order: Thunder, Wind, Fire. Also make sure you don't have fire, thunder, earth or wind on your Elem-Atk-J. I took the time to head back to cactuar island and learn Elem-Def-x4 with Alexander and Doomtrain. Also note that Enc-Half and Enc-None don't work here.
Once you've landed, you'll walk down a path and unto the facility. Zell will explain that it was a mobile research facility where they were trying to develop a draw system. Interesting huh? Once you head in DON'T MOVE! See the core in the middle that's glowing? When it's light is lit, if you'll move you'll have a random encounter and the monsters here are very nasty. So, wait until it's dark, then take one or two steps forward and stop again. Do this all the way until you get to the core. At the Core, the GF Bahamut will ask you a series of questions and after each answer you'll have to fight a Ruby Dragon, like the ones we fought with Laguna...only higher level. You can also stock up on Meteor magic from these high level dragons. Remember, if you get low on HP you can use Selphie's Limit Break to bring you back to full. If you get the answers to the questions correctly you'll get a new question and if not you'll still have to fight the dragon and then get the same question again. So, if you answer correctly, you'll have to fight 2 Ruby Dragons, reminiscent of the 2 Behemoths you have to fight before Bahamunt in Final Fantasy IV. Anyway, here's the answers to the questions:
- "So you wish to challenge me..." - "It's not our will to fight"
- "Begging me for mercy?" - "Never"
- "Damned imbeciles. Why do you wish to fight?" - Select the third hidden option which is under "None of your business" The actual answer is "It's our nature".
| Boss Battle: Bahamut |
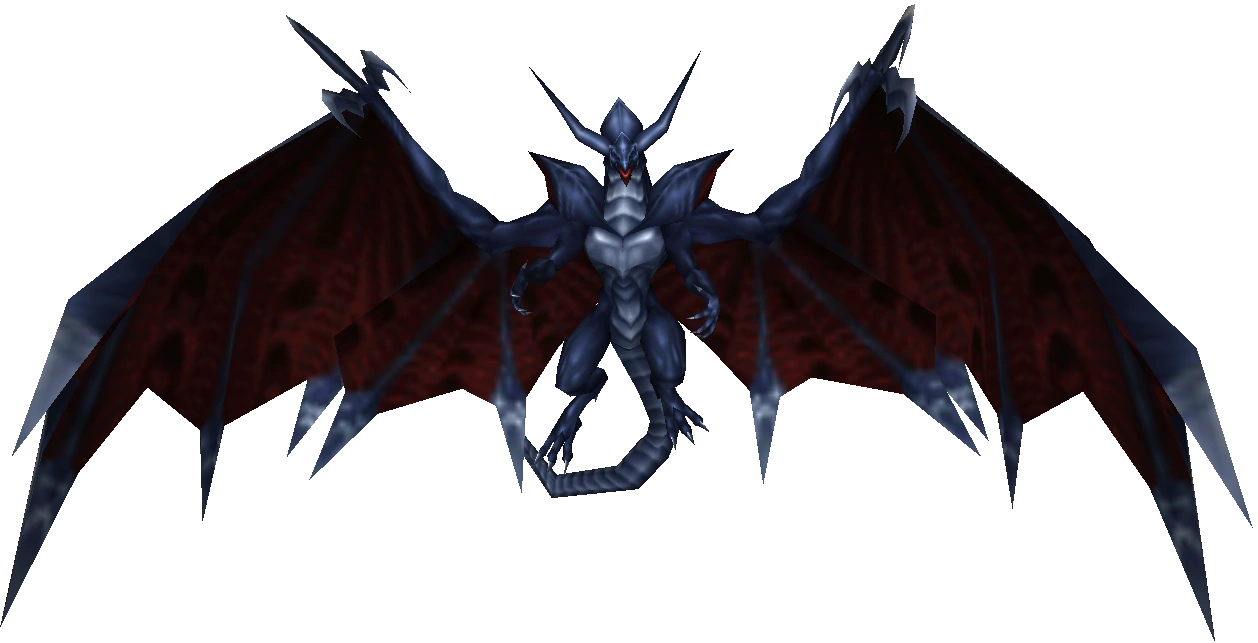
This guy can be quite difficult if you don't know what you're doing...luckily I do. First, summon doomtrain while he's talking as there's a couple important status effects we need to get on him. First is Blind as half of his attacks are physical and he's fast, so this helps us a lot. The second is Vit0 which reduces his physical defense to 0 making him take a lot more damage from our physical attacks. If Blind misses, have your character with Pain junctioned attack him to make sure it's inflicted. Next steal the Hyper Wrist from him while your other characters get Shell set up. His magic is mostly Thunder and Wind, so if you're protected from those elements you won't take as much damage. However, his ultimate attack Megaflare is non-elemental and Shell will help reduce it's damage as well. Once he does it, have everyone draw Curaga from the GF and heal themselves or Full-Life if needed. Hit him with your best damage, though don't use Brothers, Quetzacotl or Pandemona as he won't take damage from them. GF's work well as do physical attacks. Squall's limit break has another special animation against this boss, so you can use aura and do that also. You'll also get his card for defeating him. |
One Bahamut falls, head back to your ship and head out. We'll come back later once we're better prepared. Let's take a look at our new GF:
Guardian Force - Bahamut

Bahamut's attack is non-elemental and doesn't do a whole lot of damage but it is long enough to boost it close to the 250 maximum to give it a real punch. His best ability is the Abilityx4 which allows you to have 4 abilities equipped on a character (which is the max) like 4 Bonus abilities when leveling. We'll be passing Bahamut around for this exact purpose, so we can get as powerful as possible. He also has the Rare Item ability which gives you a much greater change to get rare drops from fights. Finally he has the Mug ability, so now you can have two characters with it.
- Order I learn abilities in:
- Boost
- Rare Item
- Mug
- SumMag+10%
- SumMag+20%
- SumMag+30%
- SumMag+40%
- GFHP+10%
- GFHP+20%
- GFHP+30%
- GFHP+40%
- Move-HP Up
- Auto-Protect
- Expendx2-1
Technically Selphie will be getting this GF but when we go to power-level our characters a bit, this one will be moved around so everyone can take advantage of the 4 ability slots but for now give him to Selphie.
Alright, so we've finished most of the side-quests in the game. We have a couple more but as they're both long and drawn out, we'll do them on the next page.
| Final Fantasy VIII Walkthrough by Bond em7 | ||
| Previous page | Main - Char - HD - Basics - 1 - 2 - 3 - 4 - 5 - 6 - 7 - 8 - 9 | Next page |
| 10 - 11 - 12 - 13 - 14 - 15 - 16 - 17 - 18 - 19 - 20 - 21 - 22 - 23 - 24 - 25 - 26 | ||