Intangir Bot (talk | contribs) m (→Sarda, the Omnipotent Jackass: update walkthrough category, replaced: Final Fantasy walkthrough → Final Fantasy Walkthrough) |
m (relinking) |
||
| Line 3: | Line 3: | ||
==Melmond== |
==Melmond== |
||
| − | [[File: |
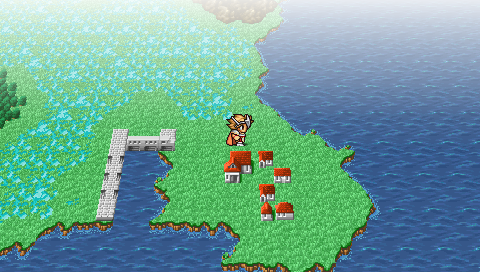
+ | [[File:Melmond - WM.png|thumb|left|Yet another picture of a town.]] |
In the beginning of the walkthrough, way back before choosing characters, I told you some of the button commands. One of them was B+SELECT. Use that now to get a full screen version of the map of the world. You will be traveling a short distance to get to Melmond, only a short distance west. Pass by the whirlpool as you do not need to visit it yet. You will possibly see the town without my help, but it is directly north-west of the small meaningless island directly west of the Aldean Sea. The town even has its own dock for you. Once you enter, you see a wreckage worthy of a nuclear explosion, and you are standing at ground zero. You see gravestones all around the town, "decaying" earth, and some shops. |
In the beginning of the walkthrough, way back before choosing characters, I told you some of the button commands. One of them was B+SELECT. Use that now to get a full screen version of the map of the world. You will be traveling a short distance to get to Melmond, only a short distance west. Pass by the whirlpool as you do not need to visit it yet. You will possibly see the town without my help, but it is directly north-west of the small meaningless island directly west of the Aldean Sea. The town even has its own dock for you. Once you enter, you see a wreckage worthy of a nuclear explosion, and you are standing at ground zero. You see gravestones all around the town, "decaying" earth, and some shops. |
||
| Line 31: | Line 31: | ||
| Boss Type = Boss |
| Boss Type = Boss |
||
| Name = Vampire |
| Name = Vampire |
||
| − | | Image = [[Image: |
+ | | Image = [[Image:Vampire psp.png]] |
| HP = 280 |
| HP = 280 |
||
| Weak = '''<font color=red>Fire</font> , <font color=white>Holy</font>''' |
| Weak = '''<font color=red>Fire</font> , <font color=white>Holy</font>''' |
||
| Line 41: | Line 41: | ||
{{-}} |
{{-}} |
||
| − | <center>[[File: |
+ | <center>[[File:FFI victory A.gif]]</center> |
We must be at Staples, because that was easy! (Ohh, commercial joke) Anyway, get the Star Ruby out of the chest and teleport out of the dungeon. I would hate to walk out on my own. Go back to Melmond, rest up, and realize that nothing has changed. People are still dead, the earth is still decaying, and someone must be behind this besides Vampire. We can avenge these people again when we find Vampire again much later on. |
We must be at Staples, because that was easy! (Ohh, commercial joke) Anyway, get the Star Ruby out of the chest and teleport out of the dungeon. I would hate to walk out on my own. Go back to Melmond, rest up, and realize that nothing has changed. People are still dead, the earth is still decaying, and someone must be behind this besides Vampire. We can avenge these people again when we find Vampire again much later on. |
||
Revision as of 00:37, 25 October 2012
I'm back from my extended wiki break everybody. This is Ninja of Wind with another page of my incredible walkthrough that is not up for deletion even if it has that sign on the front cover. This summer has been busy between counseling summer camp, doing summer work for school, swim team practices, and finding extra time to relax, I just haven't been able to come back to this in a while. I hope this page is as good as ever.
Melmond
Yet another picture of a town.
In the beginning of the walkthrough, way back before choosing characters, I told you some of the button commands. One of them was B+SELECT. Use that now to get a full screen version of the map of the world. You will be traveling a short distance to get to Melmond, only a short distance west. Pass by the whirlpool as you do not need to visit it yet. You will possibly see the town without my help, but it is directly north-west of the small meaningless island directly west of the Aldean Sea. The town even has its own dock for you. Once you enter, you see a wreckage worthy of a nuclear explosion, and you are standing at ground zero. You see gravestones all around the town, "decaying" earth, and some shops.
Let's help these people out economically by visiting a shop or two. In the white magic shop, buy only the healing spells as they will come in handy in the upcoming dungeon. That is: Curaga, Life, and Healara. Now pay a visit to the black magic shop. Scourge will never ever in a million years work, so buy everything else. I think this is the first example of this in the game, but I'm not sure: the red mage's limited magic capabilities are showing through. He can neither learn Scourge, nor Teleport until his class is updated. I told you the red mage sucks.
Everyone in the town is scared to death of the vampire that attacked their village. He also happens to have the most feared name among his kind, Vampire. Anyway, just go west and south along the continent until you get to the Cavern of Earth.
Cavern of Earth
It hits you so hard, you'll get stoned.
This cavern isn't just a geology lesson in the making, it also holds the most annoying, yet deadly, monster you've seen so far. This is the Cockatrice, which can turn your allies into stone with a mere touch. Bring gold needles and run like hell if you see one. This is one of the most annoying and tiresome dungeons in the game, mostly because you have to <spoilers>go through it twice</spoilers>. OK, so I'll do my best to give you a layout of where to go in this horrid dungeon.
First off, there is a section on the first floor that extends from directly west of the entrance to slightly south of the entrance: Do not go there under ANY circumstances until you are sure you are leveled high enough and want a challenge. That stretch of dungeon will give you a battle with a hill gigas literally every step. I accidentally went that way when I first came to the dungeon, and by the time I figured out what was going on, I decided that I might as well go the entire way. I barely made it out alive, but I had leveled considerably. So the first way that you actually want to go is north to a nice treasure, back to the stairs, go east, taking the first path south to get more treasure, then the second path south will get you to the second floor.
The second floor is riddled with twists and turns, so follow my directions exactly. Take the north path first, then take the first turn south. Turn east on the first chance you get and follow the passage until you get to a door with some pretty good treasure. Take the path south and follow it around, then back up to the north and the stairs to the third floor.
Go east from the starting point and continue until you find the door with a sleeping bag inside. Then go north from the door. Going around in a spiral, you will find 3 more doors. Behind door number 1, you will find a sparkling treasure of 3400 Gil. Behind door number 3, you will find a lovely prize of 1020 Gil. Unfortunately for you if you picked door number 2, it has nothing.
You finally reach the door with our foe. This foe is a bat hanging in mid air while explaining philosophical concepts to you. Then he transforms into Vampire (or Vampire transforms back from bat). Either way, you've got a fight on your hands.
| Boss Fight: | Vampire | - Ninja of Wind | |||||||

|
HP: 280 Difficulty: Easy |
Weak To: Fire , Holy Resistant To: None | |||||||
| Strategy: Finally, a weakness we can exploit. But unfortunatly, Vampire = Garland X 2. (Math fact: 0 X 2 is still 0) Keep on hitting him with your physical attackers, nuking him with your black mage, healing yourself with your white mage, and making your red mage cut himself out of depression because of his uselessness, Vampire will melt in your hands like butter. | |||||||||
We must be at Staples, because that was easy! (Ohh, commercial joke) Anyway, get the Star Ruby out of the chest and teleport out of the dungeon. I would hate to walk out on my own. Go back to Melmond, rest up, and realize that nothing has changed. People are still dead, the earth is still decaying, and someone must be behind this besides Vampire. We can avenge these people again when we find Vampire again much later on.

The Omnipotent Jackass in person.
Sarda, the Omnipotent Jackass
Take the Star Ruby to the cave north of the Cavern of Earth and west of Melmond. It is on the same land mass as Melmond, so you'll find it eventually. Give the Star Ruby to the giant rock creature guarding the inside of the cave. Go south in the cave to take this guy's treasure as payback, then head up the stairs to get to the World Map again. Follow the path south until you get to the tip of the peninsula, where another cave is sitting. Inside is a sage named Sadda, on other versions and in the 8-bit Theater his name is Sarda. He tells you that our old friend Vampire wasn't the one behind Melmond rotting, a guy named Litch was. He then gives you an earth rod and tells you to go back to the Cavern of Earth to look for clues, Scooby-Doo style. So now its back to that pain in the ass cavern.