mNo edit summary Tag: Visual edit |
Intangir Bot (talk | contribs) m (→''[[Final Fantasy VII]]'': link fixing, replaced: Bugenhagen → Geisel Bugenhagen) |
||
| (166 intermediate revisions by 22 users not shown) | |||
| Line 1: | Line 1: | ||
| − | {{sideicon|FFI|FFII|FFIII|FFIV|IVTAY|FFV|FFVI|FFVII|FFVIII|FFIX|FFX|FFXI|FFXII|XIIRW|FFXIII|XIII2|LR|FFXIV|FFXV|FFT|Type0|FFMQ|VagrS|FFA|FFL|FFL2|FFL3|DFF2008|D012}} |
||
[[File:Dissidia-UltimaWeapon.png|thumb|right|Cloud's Ultima Weapon, the classic example of an ultimate weapon.]] |
[[File:Dissidia-UltimaWeapon.png|thumb|right|Cloud's Ultima Weapon, the classic example of an ultimate weapon.]] |
||
{{Nameless}} |
{{Nameless}} |
||
| Line 13: | Line 12: | ||
The ''Dawn of Souls'' release adds several new weapons, among them the [[Final Fantasy weapons#Ultima Weapon|Ultima Weapon]], whose attack power is bound to the wielder's current [[HP (stat)|HP]], and thus can reach an attack power of 99, far surpassing any other weapon. It can be equipped by every advanced job. |
The ''Dawn of Souls'' release adds several new weapons, among them the [[Final Fantasy weapons#Ultima Weapon|Ultima Weapon]], whose attack power is bound to the wielder's current [[HP (stat)|HP]], and thus can reach an attack power of 99, far surpassing any other weapon. It can be equipped by every advanced job. |
||
| − | In the ''[[Final Fantasy 20th Anniversary|20th Anniversary]]'' version, new pieces of equipment were added as rewards for the [[Labyrinth of Time]] sidequest, but only one weapon surpasses the Ultima Weapon in attack power: the [[Final Fantasy weapons#Barbarian Sword|Barbarian Sword]]. It can be equipped by [[Warrior (Final Fantasy)|Warriors, Knights]], [[Red Mage (Final Fantasy)|Red Mages, and Red Wizards]]. |
+ | In the ''[[Final Fantasy 20th Anniversary|20th Anniversary]]'' version, new pieces of equipment were added as rewards for the [[Labyrinth of Time]] sidequest, but only one weapon surpasses the Ultima Weapon in attack power: the [[Final Fantasy weapons#Barbarian Sword|Barbarian's Sword]]. It can be equipped by [[Warrior (Final Fantasy)|Warriors, Knights]], [[Red Mage (Final Fantasy)|Red Mages, and Red Wizards]]. |
===''[[Final Fantasy II]]''=== |
===''[[Final Fantasy II]]''=== |
||
| Line 22: | Line 21: | ||
{|class="half-width FFII article-table" style="text-align:center" |
{|class="half-width FFII article-table" style="text-align:center" |
||
| + | |- |
||
| − | |-class="a" |
||
!Character |
!Character |
||
!Weapon |
!Weapon |
||
!Type |
!Type |
||
|- |
|- |
||
| − | ! |
+ | ![[Minwu (Final Fantasy II)|Minwu]] |
|[[Stardust Rod#Final Fantasy II|Stardust Rod]] |
|[[Stardust Rod#Final Fantasy II|Stardust Rod]] |
||
|[[Staff (weapon type)|Staff]] |
|[[Staff (weapon type)|Staff]] |
||
|- |
|- |
||
| − | ! |
+ | ![[Scott (Final Fantasy II)|Scott]] |
|[[Final Fantasy II weapons#Wild Rose|Wild Rose]] |
|[[Final Fantasy II weapons#Wild Rose|Wild Rose]] |
||
|[[Sword (weapon type)|Sword]] |
|[[Sword (weapon type)|Sword]] |
||
|- |
|- |
||
| − | ! |
+ | ![[Ricard Highwind|Ricard]] |
|[[Dragon Whisker#Final Fantasy II|Wyvern's Lance]] |
|[[Dragon Whisker#Final Fantasy II|Wyvern's Lance]] |
||
|[[Spear (weapon type)|Spear]] |
|[[Spear (weapon type)|Spear]] |
||
|- |
|- |
||
| − | ! |
+ | ![[Josef (Final Fantasy II)|Josef]] |
|[[Bracer]]s |
|[[Bracer]]s |
||
|[[Gauntlet (equipment type)|Gauntlet]] |
|[[Gauntlet (equipment type)|Gauntlet]] |
||
| Line 47: | Line 46: | ||
{|class="half-width FFII article-table" style="text-align:center" |
{|class="half-width FFII article-table" style="text-align:center" |
||
| + | |- |
||
| − | |-class="a" |
||
!Character |
!Character |
||
!Weapon |
!Weapon |
||
!Type |
!Type |
||
|- |
|- |
||
| − | ! |
+ | ![[Firion]] |
|[[Ragnarok (weapon)#Final Fantasy II|Ragnarok]] |
|[[Ragnarok (weapon)#Final Fantasy II|Ragnarok]] |
||
|[[Sword (weapon type)|Sword]] |
|[[Sword (weapon type)|Sword]] |
||
|- |
|- |
||
| − | ! |
+ | ![[Maria (Final Fantasy II)|Maria]] |
|[[Artemis Bow#Final Fantasy II|Artemis Bow]] |
|[[Artemis Bow#Final Fantasy II|Artemis Bow]] |
||
|[[Bow (weapon type)|Bow]] |
|[[Bow (weapon type)|Bow]] |
||
|- |
|- |
||
| − | ! |
+ | ![[Guy]] |
|[[Gigantaxe#Final Fantasy II|Gigantaxe]] |
|[[Gigantaxe#Final Fantasy II|Gigantaxe]] |
||
|[[Axe (weapon type)|Axe]] |
|[[Axe (weapon type)|Axe]] |
||
|- |
|- |
||
| − | ! |
+ | ![[Leon (Final Fantasy II)|Leon]] |
|[[Longinus (weapon)#Final Fantasy II|Longinus]] |
|[[Longinus (weapon)#Final Fantasy II|Longinus]] |
||
|[[Spear (weapon type)|Spear]] |
|[[Spear (weapon type)|Spear]] |
||
|- |
|- |
||
| − | ! |
+ | ![[Minwu (Final Fantasy II)|Minwu]] |
|[[Staff of Light#Final Fantasy II|Staff of Light]] |
|[[Staff of Light#Final Fantasy II|Staff of Light]] |
||
|[[Staff (weapon type)|Staff]] |
|[[Staff (weapon type)|Staff]] |
||
|- |
|- |
||
| − | ! |
+ | ![[Josef (Final Fantasy II)|Josef]] |
|[[Dragon Claws (weapon)#Final Fantasy II|Dragon Claws]] |
|[[Dragon Claws (weapon)#Final Fantasy II|Dragon Claws]] |
||
|[[Dagger (weapon type)|Knife]] |
|[[Dagger (weapon type)|Knife]] |
||
|- |
|- |
||
| − | ! |
+ | ![[Gordon (Final Fantasy II)|Gordon]] |
|[[Gungnir (weapon)#Final Fantasy II|Gungnir]] |
|[[Gungnir (weapon)#Final Fantasy II|Gungnir]] |
||
|[[Spear (weapon type)|Spear]] |
|[[Spear (weapon type)|Spear]] |
||
|- |
|- |
||
| − | ! |
+ | ![[Leila]] |
|[[Dancing Dagger (weapon)#Final Fantasy II|Dancing Dagger]] |
|[[Dancing Dagger (weapon)#Final Fantasy II|Dancing Dagger]] |
||
|[[Dagger (weapon type)|Knife]] |
|[[Dagger (weapon type)|Knife]] |
||
|- |
|- |
||
| − | ! |
+ | ![[Ricard Highwind|Ricard]] |
|[[Abel's Lance#Final Fantasy II|Abel's Lance]] |
|[[Abel's Lance#Final Fantasy II|Abel's Lance]] |
||
|[[Spear (weapon type)|Spear]] |
|[[Spear (weapon type)|Spear]] |
||
| Line 95: | Line 94: | ||
A character's equipment is limited by their [[Final Fantasy III jobs|job]]. The most powerful weapon is the [[Shuriken (weapon)|Shuriken]], which always deals 9999 damage, but can only be used by [[Ninja (Final Fantasy III job)|Ninja]], and is consumed upon use. However, several other powerful weapons are available. |
A character's equipment is limited by their [[Final Fantasy III jobs|job]]. The most powerful weapon is the [[Shuriken (weapon)|Shuriken]], which always deals 9999 damage, but can only be used by [[Ninja (Final Fantasy III job)|Ninja]], and is consumed upon use. However, several other powerful weapons are available. |
||
| − | In the original release, the strongest weapon was the [[Final Fantasy III weapons#Onion Sword|Onion Sword]], which could be equipped by the namesake [[Onion Knight (Final Fantasy III)|Onion Knight]]. Many weapons of comparable power to the Onion Sword, and accessible to many jobs, can be found at [[Eureka ( |
+ | In the original release, the strongest weapon was the [[Final Fantasy III weapons#Onion Sword|Onion Sword]], which could be equipped by the namesake [[Onion Knight (Final Fantasy III)|Onion Knight]]. Many weapons of comparable power to the Onion Sword, and accessible to many jobs, can be found at [[Eureka (Final Fantasy III)|Eureka]], each protected by strong bosses. |
{|class="half-width FFIII article-table" style="text-align:center" |
{|class="half-width FFIII article-table" style="text-align:center" |
||
| + | |- |
||
| − | |-class="a" |
||
!Weapon |
!Weapon |
||
!Type |
!Type |
||
!Boss |
!Boss |
||
|- |
|- |
||
| − | ! |
+ | ![[Moonring Blade (weapon)#Final Fantasy III|Moonring Blade]] |
|[[throwing weapon|Thrown]] |
|[[throwing weapon|Thrown]] |
||
|[[Amon (Final Fantasy III)|Amon]] |
|[[Amon (Final Fantasy III)|Amon]] |
||
|- |
|- |
||
| − | ! |
+ | ![[Masamune (weapon)#Final Fantasy III|Masamune]] |
|[[Katana (weapon type)|Dark Blade]] |
|[[Katana (weapon type)|Dark Blade]] |
||
|[[Kunoichi (Final Fantasy III)|Kunoichi]] |
|[[Kunoichi (Final Fantasy III)|Kunoichi]] |
||
|- |
|- |
||
| − | ! |
+ | ![[Excalibur (weapon)#Final Fantasy III|Excalibur]] |
|[[Sword (weapon type)|Sword]] |
|[[Sword (weapon type)|Sword]] |
||
|[[General (Final Fantasy III)|General]] |
|[[General (Final Fantasy III)|General]] |
||
|- |
|- |
||
| − | ! |
+ | ![[Ragnarok (weapon)#Final Fantasy III|Ragnarok]] |
|[[Sword (weapon type)|Sword]] |
|[[Sword (weapon type)|Sword]] |
||
|[[Guardian (Final Fantasy III)|Guardian]] |
|[[Guardian (Final Fantasy III)|Guardian]] |
||
|- |
|- |
||
| − | ! |
+ | ![[Final Fantasy III weapons#Elder Staff|Elder Staff]] |
|[[Staff (weapon type)|Staff]] |
|[[Staff (weapon type)|Staff]] |
||
|[[Scylla (Final Fantasy III)|Scylla]] |
|[[Scylla (Final Fantasy III)|Scylla]] |
||
| Line 130: | Line 129: | ||
;Legendary Smith weapons |
;Legendary Smith weapons |
||
{|class="half-width FFIII article-table" style="text-align:center" |
{|class="half-width FFIII article-table" style="text-align:center" |
||
| + | |- |
||
| − | |-class="a" |
||
!Job |
!Job |
||
!Weapon |
!Weapon |
||
!Type |
!Type |
||
|- |
|- |
||
| − | ! |
+ | ![[Warrior (Final Fantasy III)|Warrior]] |
|[[Gigantaxe#Final Fantasy III|Gigantic Axe]] |
|[[Gigantaxe#Final Fantasy III|Gigantic Axe]] |
||
|[[Axe (weapon type)|Axe]] |
|[[Axe (weapon type)|Axe]] |
||
|- |
|- |
||
| − | ! |
+ | ![[Black Mage (Final Fantasy III)|Black Mage]] |
|[[Lilith Rod#Final Fantasy III|Lilith Rod]] |
|[[Lilith Rod#Final Fantasy III|Lilith Rod]] |
||
|[[Rod (weapon type)|Rod]] |
|[[Rod (weapon type)|Rod]] |
||
|- |
|- |
||
| − | ! |
+ | ![[Thief (Final Fantasy III)|Thief]] |
| − | |[[Gladius |
+ | |[[Gladius (Final Fantasy III)|Gladius]] |
|[[Dagger (weapon type)|Dagger]] |
|[[Dagger (weapon type)|Dagger]] |
||
|- |
|- |
||
| − | ! |
+ | ![[Knight (Final Fantasy III)|Knight]] |
|[[Save the Queen#Final Fantasy III|Save the Queen]] |
|[[Save the Queen#Final Fantasy III|Save the Queen]] |
||
|[[Sword (weapon type)|Sword]] |
|[[Sword (weapon type)|Sword]] |
||
|- |
|- |
||
| − | ! |
+ | ![[Ranger (Final Fantasy III)|Ranger]] |
|[[Artemis Bow#Final Fantasy III|Artemis Bow]] |
|[[Artemis Bow#Final Fantasy III|Artemis Bow]] |
||
|[[Bow (weapon type)|Bow]] |
|[[Bow (weapon type)|Bow]] |
||
|- |
|- |
||
| − | ! |
+ | ![[Scholar (Final Fantasy III)|Scholar]] |
|[[Final Fantasy III weapons#Omnitome|Omnitome]] |
|[[Final Fantasy III weapons#Omnitome|Omnitome]] |
||
|[[Book (weapon type)|Book]] |
|[[Book (weapon type)|Book]] |
||
|- |
|- |
||
| − | ! |
+ | ![[Geomancer (Final Fantasy III)|Geomancer]] |
|[[Final Fantasy III weapons#Blessed Bell|Blessed Bell]] |
|[[Final Fantasy III weapons#Blessed Bell|Blessed Bell]] |
||
|[[Bell (weapon type)|Bell]] |
|[[Bell (weapon type)|Bell]] |
||
|- |
|- |
||
| − | ! |
+ | ![[Dark Knight (Final Fantasy III)|Dark Knight]] |
|[[Ame no Murakumo (weapon)#Final Fantasy III|Murakumo]] |
|[[Ame no Murakumo (weapon)#Final Fantasy III|Murakumo]] |
||
|[[Katana (weapon type)|Dark Blade]] |
|[[Katana (weapon type)|Dark Blade]] |
||
|- |
|- |
||
| − | ! |
+ | ![[Dragoon (Final Fantasy III)|Dragoon]] |
|[[Final Fantasy III weapons#Magic Lance|Magic Lance]] |
|[[Final Fantasy III weapons#Magic Lance|Magic Lance]] |
||
|[[Spear (weapon type)|Spear]] |
|[[Spear (weapon type)|Spear]] |
||
|- |
|- |
||
| − | ! |
+ | ![[Viking (Final Fantasy III)|Viking]] |
|[[Final Fantasy III weapons#Mighty Hammer|Mighty Hammer]] |
|[[Final Fantasy III weapons#Mighty Hammer|Mighty Hammer]] |
||
|[[Hammer (weapon type)|Hammer]] |
|[[Hammer (weapon type)|Hammer]] |
||
|- |
|- |
||
| − | ! |
+ | ![[Devout (Final Fantasy III)|Devout]] |
|[[Holy Rod#Final Fantasy III|Holy Wand]] |
|[[Holy Rod#Final Fantasy III|Holy Wand]] |
||
|[[Staff (weapon type)|Staff]] |
|[[Staff (weapon type)|Staff]] |
||
|- |
|- |
||
| − | ! |
+ | ![[Magus (Final Fantasy III)|Magus]] |
|[[Final Fantasy III weapons#Millennium Rod|Millennium Rod]] |
|[[Final Fantasy III weapons#Millennium Rod|Millennium Rod]] |
||
|[[Rod (weapon type)|Rod]] |
|[[Rod (weapon type)|Rod]] |
||
|- |
|- |
||
| − | ! |
+ | ![[Ninja (Final Fantasy III job)|Ninja]] |
|[[Muramasa (weapon)#Final Fantasy III|Muramasa]] |
|[[Muramasa (weapon)#Final Fantasy III|Muramasa]] |
||
|[[Katana (weapon type)|Dark Blade]] |
|[[Katana (weapon type)|Dark Blade]] |
||
|- |
|- |
||
| − | ! |
+ | ![[Sage (Final Fantasy III)|Sage]] |
|[[Sage's Staff#Final Fantasy III|Sage Staff]] |
|[[Sage's Staff#Final Fantasy III|Sage Staff]] |
||
|[[Staff (weapon type)|Staff]] |
|[[Staff (weapon type)|Staff]] |
||
|- |
|- |
||
| − | ! |
+ | ![[Onion Knight (Final Fantasy III)|Onion Knight]] |
|[[Final Fantasy III weapons#Onion Blade|Onion Blade]] |
|[[Final Fantasy III weapons#Onion Blade|Onion Blade]] |
||
|[[Sword (weapon type)|Sword]] |
|[[Sword (weapon type)|Sword]] |
||
| Line 199: | Line 198: | ||
====2D versions==== |
====2D versions==== |
||
[[File:FF4-Ragnarok-DS.png|right|Ragnarok.]] |
[[File:FF4-Ragnarok-DS.png|right|Ragnarok.]] |
||
| − | The ultimate weapons for the main final party can be found at the [[Lunar Subterrane]], the [[Final dungeon (term)|final dungeon]]. Both [[Rosa Joanna Farrell/Gameplay|Rosa]] and [[Rydia/Gameplay|Rydia]] have access to a pair of weapons that each maximize their physical and magical prowess, however, only one of the two can be found as treasure, while the other is a [[Item drop|drop]] from a [[ |
+ | The ultimate weapons for the main final party can be found at the [[Lunar Subterrane]], the [[Final dungeon (term)|final dungeon]]. Both [[Rosa Joanna Farrell/Gameplay|Rosa]] and [[Rydia/Gameplay|Rydia]] have access to a pair of weapons that each maximize their physical and magical prowess, however, only one of the two can be found as treasure, while the other is a [[Item drop|drop]] from a [[random encounter]]ed enemy. Meanwhile, [[Cecil Harvey/Gameplay|Cecil]], [[Kain Highwind/Gameplay|Kain]], and [[Edge Geraldine/Gameplay|Edge]] can find weapons that optimize their melee skill. |
{|class="half-width FFIV article-table" style="text-align:center" |
{|class="half-width FFIV article-table" style="text-align:center" |
||
| + | |- |
||
| − | |-class="a" |
||
!Character |
!Character |
||
!Weapon |
!Weapon |
||
| Line 208: | Line 207: | ||
!Acquisition |
!Acquisition |
||
|- |
|- |
||
| − | ! |
+ | ![[Kain Highwind/Gameplay|Kain]] |
|[[Final Fantasy IV weapons#Holy Lance|Holy Lance]] |
|[[Final Fantasy IV weapons#Holy Lance|Holy Lance]] |
||
|[[Spear (weapon type)|Spear]] |
|[[Spear (weapon type)|Spear]] |
||
| − | |'''Find:''' [[Lunar Subterrane]] (defeat [[Plague Horror (Final Fantasy IV)|Plague Horror]]) |
+ | |'''Find:''' [[Lunar Subterrane]] (defeat [[Plague Horror (Final Fantasy IV 2D)|Plague Horror]]) |
|- |
|- |
||
| − | ! |
+ | ! rowspan="2"|[[Rydia/Gameplay|Rydia]] |
|[[Final Fantasy IV weapons#Dragon Whisker|Dragon Whisker]] |
|[[Final Fantasy IV weapons#Dragon Whisker|Dragon Whisker]] |
||
|[[Whip (weapon type)|Whip]] |
|[[Whip (weapon type)|Whip]] |
||
| − | |'''Drop:''' [[Blue Dragon (Final Fantasy IV)|Blue Dragon]], [[Fiend Dragon (Final Fantasy IV)|Fiend Dragon]] |
+ | |'''Drop:''' [[Blue Dragon (Final Fantasy IV 2D)|Blue Dragon]], [[Fiend Dragon (Final Fantasy IV)|Fiend Dragon]] |
|- |
|- |
||
|[[Final Fantasy IV weapons#Stardust Rod|Stardust Rod]] |
|[[Final Fantasy IV weapons#Stardust Rod|Stardust Rod]] |
||
|[[Rod (weapon type)|Rod]] |
|[[Rod (weapon type)|Rod]] |
||
| − | |'''Find:''' [[Lunar Subterrane]] (defeat [[Behemoth (Final Fantasy IV)|Behemoth]]) |
+ | |'''Find:''' [[Lunar Subterrane]] (defeat [[Behemoth (Final Fantasy IV 2D)|Behemoth]]) |
|- |
|- |
||
| − | ! |
+ | ![[Cecil Harvey/Gameplay|Cecil]] |
|[[Final Fantasy IV weapons#Ragnarok|Ragnarok]] |
|[[Final Fantasy IV weapons#Ragnarok|Ragnarok]] |
||
|[[Sword (weapon type)|Sword]] |
|[[Sword (weapon type)|Sword]] |
||
| − | |'''Find:''' [[Lunar Subterrane]] (defeat [[Dark Bahamut (Final Fantasy IV)|Dark Bahamut]]) |
+ | |'''Find:''' [[Lunar Subterrane]] (defeat [[Dark Bahamut (Final Fantasy IV 2D)|Dark Bahamut]]) |
|- |
|- |
||
| − | ! |
+ | ! rowspan="2"|[[Rosa Joanna Farrell/Gameplay|Rosa]] |
|[[Final Fantasy IV weapons#Artemis Bow#|Artemis Bow]] |
|[[Final Fantasy IV weapons#Artemis Bow#|Artemis Bow]] |
||
|[[Bow (weapon type)|Bow]] |
|[[Bow (weapon type)|Bow]] |
||
| − | |'''Drop:''' [[Moonmaiden (Final Fantasy IV)|Moonmaiden]] |
+ | |'''Drop:''' [[Moonmaiden (Final Fantasy IV 2D)|Moonmaiden]] |
|- |
|- |
||
|[[Final Fantasy IV weapons#Sage's Staff|Sage's Staff]] |
|[[Final Fantasy IV weapons#Sage's Staff|Sage's Staff]] |
||
| Line 236: | Line 235: | ||
|'''Find:''' [[Lunar Subterrane]] |
|'''Find:''' [[Lunar Subterrane]] |
||
|- |
|- |
||
| − | ! |
+ | ! rowspan="2"|[[Edge Geraldine/Gameplay|Edge]] |
|[[Final Fantasy IV weapons#Murasame|Murasame]] |
|[[Final Fantasy IV weapons#Murasame|Murasame]] |
||
|[[Katana (weapon type)|Katana]] |
|[[Katana (weapon type)|Katana]] |
||
| − | |'''Find:''' [[Lunar Subterrane]] (defeat [[White Dragon (Final Fantasy IV)|White Dragon]]) |
+ | |'''Find:''' [[Lunar Subterrane]] (defeat [[White Dragon (Final Fantasy IV 2D)|White Dragon]]) |
|- |
|- |
||
|[[Final Fantasy IV weapons#Masamune|Masamune]] |
|[[Final Fantasy IV weapons#Masamune|Masamune]] |
||
|[[Katana (weapon type)|Katana]] |
|[[Katana (weapon type)|Katana]] |
||
| − | |'''Find:''' [[Lunar Subterrane]] (defeat [[Ogopogo]]) |
+ | |'''Find:''' [[Lunar Subterrane]] (defeat [[Ogopogo (Final Fantasy IV 2D)|Ogopogo]]) |
|} |
|} |
||
| Line 251: | Line 250: | ||
{|class="half-width FFIV article-table" style="text-align:center" |
{|class="half-width FFIV article-table" style="text-align:center" |
||
| + | |- |
||
| − | |-class="a" |
||
!Character |
!Character |
||
!Weapon |
!Weapon |
||
| Line 257: | Line 256: | ||
!Obtained |
!Obtained |
||
|- |
|- |
||
| − | ! |
+ | ! rowspan="2"|[[Yang Fang Leiden/Gameplay|Yang]] |
|[[Final Fantasy IV weapons#Dragon Claws|Dragon Claws]] |
|[[Final Fantasy IV weapons#Dragon Claws|Dragon Claws]] |
||
|[[Knuckle|Claws]] |
|[[Knuckle|Claws]] |
||
| Line 266: | Line 265: | ||
|Treasure |
|Treasure |
||
|- |
|- |
||
| − | ! |
+ | ![[Edward Chris von Muir/Gameplay|Edward]] |
|[[Final Fantasy IV weapons#Loki's Lute|Loki's Lute]] |
|[[Final Fantasy IV weapons#Loki's Lute|Loki's Lute]] |
||
|[[Harp (weapon type)|Harp]] |
|[[Harp (weapon type)|Harp]] |
||
|Treasure |
|Treasure |
||
|- |
|- |
||
| − | ! |
+ | ![[Rydia/Gameplay|Rydia]] |
|[[Final Fantasy IV weapons#Mystic Whip|Mystic Whip]] |
|[[Final Fantasy IV weapons#Mystic Whip|Mystic Whip]] |
||
|[[Whip (weapon type)|Whip]] |
|[[Whip (weapon type)|Whip]] |
||
|Treasure |
|Treasure |
||
|- |
|- |
||
| − | ! |
+ | ![[Cecil Harvey/Gameplay|Cecil]] |
|[[Final Fantasy IV weapons#Lightbringer|Lightbringer]] |
|[[Final Fantasy IV weapons#Lightbringer|Lightbringer]] |
||
|[[Sword (weapon type)|Sword]] |
|[[Sword (weapon type)|Sword]] |
||
|Cecil's Trial |
|Cecil's Trial |
||
|- |
|- |
||
| − | ! |
+ | ![[Rosa Joanna Farrell/Gameplay|Rosa]] |
|[[Final Fantasy IV weapons#Perseus Bow|Perseus Bow]] |
|[[Final Fantasy IV weapons#Perseus Bow|Perseus Bow]] |
||
|[[Bow (weapon type)|Bow]] |
|[[Bow (weapon type)|Bow]] |
||
|Treasure |
|Treasure |
||
|- |
|- |
||
| − | ! |
+ | ! rowspan="2"|[[Edge Geraldine/Gameplay|Edge]] |
|[[Final Fantasy IV weapons#Sasuke's Katana|Sasuke's Katana]] |
|[[Final Fantasy IV weapons#Sasuke's Katana|Sasuke's Katana]] |
||
|[[Katana (weapon type)|Katana]] |
|[[Katana (weapon type)|Katana]] |
||
|Treasure |
|Treasure |
||
|- |
|- |
||
| − | |[[Final Fantasy IV weapons# |
+ | |[[Final Fantasy IV weapons#Mutsunokami|Mutsunokami]] |
|[[Katana (weapon type)|Katana]] |
|[[Katana (weapon type)|Katana]] |
||
|Treasure |
|Treasure |
||
|- |
|- |
||
| − | ! |
+ | ![[Kain Highwind/Gameplay|Kain]] |
|[[Final Fantasy IV weapons#Abel's Lance|Abel's Lance]] |
|[[Final Fantasy IV weapons#Abel's Lance|Abel's Lance]] |
||
|[[Spear (weapon type)|Spear]] |
|[[Spear (weapon type)|Spear]] |
||
|Kain's Trial |
|Kain's Trial |
||
|- |
|- |
||
| − | ! |
+ | ![[Cid Pollendina/Gameplay|Cid]] |
|[[Final Fantasy IV weapons#Flare Sledgehammer|Flare Sledgehammer]] |
|[[Final Fantasy IV weapons#Flare Sledgehammer|Flare Sledgehammer]] |
||
|[[Hammer (weapon type)|Hammer]] |
|[[Hammer (weapon type)|Hammer]] |
||
|Cid's Trial |
|Cid's Trial |
||
|- |
|- |
||
| − | ! |
+ | ![[Palom/Gameplay|Palom]] |
|[[Final Fantasy IV weapons#Asura's Rod|Asura's Rod]] |
|[[Final Fantasy IV weapons#Asura's Rod|Asura's Rod]] |
||
|[[Rod (weapon type)|Rod]] |
|[[Rod (weapon type)|Rod]] |
||
|Treasure |
|Treasure |
||
|- |
|- |
||
| − | ! |
+ | ![[Porom/Gameplay|Porom]] |
|[[Final Fantasy IV weapons#Nirvana|Nirvana]] |
|[[Final Fantasy IV weapons#Nirvana|Nirvana]] |
||
|[[Staff (weapon type)|Staff]] |
|[[Staff (weapon type)|Staff]] |
||
| Line 319: | Line 318: | ||
The five final characters' ultimate weapons were significantly changed: while Kain, Cecil and Edge's respective weapons were powered, Rosa's [[Final Fantasy IV 3D weapons#Artemis Bow|Artemis Bow]] and Rydia's [[Final Fantasy IV 3D weapons#Dragon Whisker|Dragon Whisker]] lost their penalties to magic stats, and the [[Final Fantasy IV 3D weapons#Sage's Staff|Sage's Staff]] became weaker than the [[Final Fantasy IV 3D weapons#Rune Staff|Rune Staff]] in every aspect. |
The five final characters' ultimate weapons were significantly changed: while Kain, Cecil and Edge's respective weapons were powered, Rosa's [[Final Fantasy IV 3D weapons#Artemis Bow|Artemis Bow]] and Rydia's [[Final Fantasy IV 3D weapons#Dragon Whisker|Dragon Whisker]] lost their penalties to magic stats, and the [[Final Fantasy IV 3D weapons#Sage's Staff|Sage's Staff]] became weaker than the [[Final Fantasy IV 3D weapons#Rune Staff|Rune Staff]] in every aspect. |
||
| − | The remake also added a new ultimate weapon |
+ | The remake also added a new ultimate weapon equippable by both Cecil and Kain, the [[Final Fantasy IV 3D weapons#Onion Sword|Onion Sword]]. |
====''[[Final Fantasy IV: The After Years]]''==== |
====''[[Final Fantasy IV: The After Years]]''==== |
||
| − | The best weapons of each type are available in the final [[chapter]] at the [[Subterrane]] and [[Depths]] of the [[True Moon]], and are obtained as rewards for defeating certain bosses in those areas. |
+ | The best weapons of each type are available in the final [[chapter]] at the [[Subterrane]] and [[Depths (The After Years)|Depths]] of the [[True Moon]], and are obtained as rewards for defeating certain bosses in those areas. |
{|class="half-width IVTAY article-table" style="text-align:center" |
{|class="half-width IVTAY article-table" style="text-align:center" |
||
| + | |- |
||
| − | |-class="a" |
||
!Type |
!Type |
||
!Weapon |
!Weapon |
||
!Enemy |
!Enemy |
||
|- |
|- |
||
| − | ! |
+ | ![[Axe (weapon type)|Axe]] |
|[[Final Fantasy IV: The After Years weapons#Gigant Axe|Gigant Axe]] |
|[[Final Fantasy IV: The After Years weapons#Gigant Axe|Gigant Axe]] |
||
|[[Iron Giant (The After Years)|Iron Giant]] |
|[[Iron Giant (The After Years)|Iron Giant]] |
||
|- |
|- |
||
| − | ! |
+ | ![[Boomerang (weapon type)|Boomerang]] |
|[[Final Fantasy IV: The After Years weapons#Rising Sun|Rising Sun]] |
|[[Final Fantasy IV: The After Years weapons#Rising Sun|Rising Sun]] |
||
|[[Marilith (The After Years)|Marilith]] |
|[[Marilith (The After Years)|Marilith]] |
||
|- |
|- |
||
| − | ! |
+ | ![[Bow (weapon type)|Bow]] |
|[[Final Fantasy IV: The After Years weapons#Perseus Bow|Perseus Bow]] |
|[[Final Fantasy IV: The After Years weapons#Perseus Bow|Perseus Bow]] |
||
|[[Echidna (The After Years)|Echidna]] |
|[[Echidna (The After Years)|Echidna]] |
||
|- |
|- |
||
| − | ! |
+ | ! rowspan="2"|[[Knuckle|Claws]] |
|[[Final Fantasy IV: The After Years weapons#Dragon Claws|Dragon Claws]] |
|[[Final Fantasy IV: The After Years weapons#Dragon Claws|Dragon Claws]] |
||
|[[Tiamat (The After Years)|Tiamat]] |
|[[Tiamat (The After Years)|Tiamat]] |
||
| Line 349: | Line 348: | ||
|[[King Behemoth (The After Years)|King Behemoth]] |
|[[King Behemoth (The After Years)|King Behemoth]] |
||
|- |
|- |
||
| − | ! |
+ | ![[Dagger (weapon type)|Dagger]] |
|[[Final Fantasy IV: The After Years weapons#Assassin's Dagger|Assassin's Dagger]] |
|[[Final Fantasy IV: The After Years weapons#Assassin's Dagger|Assassin's Dagger]] |
||
|[[Lich (The After Years)|Lich]] |
|[[Lich (The After Years)|Lich]] |
||
|- |
|- |
||
| − | ! |
+ | ![[Hammer (weapon type)|Hammer]] |
|[[Final Fantasy IV: The After Years weapons#Thor's Hammer|Thor's Hammer]] |
|[[Final Fantasy IV: The After Years weapons#Thor's Hammer|Thor's Hammer]] |
||
|[[Cerberus (The After Years)|Cerberus]] |
|[[Cerberus (The After Years)|Cerberus]] |
||
|- |
|- |
||
| − | ! |
+ | ![[Harp (weapon type)|Harp]] |
|[[Final Fantasy IV: The After Years weapons#Loki's Harp|Loki's Harp]] |
|[[Final Fantasy IV: The After Years weapons#Loki's Harp|Loki's Harp]] |
||
|[[Beelzebub (The After Years)|Beelzebub]] |
|[[Beelzebub (The After Years)|Beelzebub]] |
||
|- |
|- |
||
| − | ! |
+ | ![[Holy sword (weapon type)|Holy Sword]] |
|[[Final Fantasy IV: The After Years weapons#Ragnarok|Ragnarok]] |
|[[Final Fantasy IV: The After Years weapons#Ragnarok|Ragnarok]] |
||
|[[Nova Dragon (The After Years)|Nova Dragon]] |
|[[Nova Dragon (The After Years)|Nova Dragon]] |
||
|- |
|- |
||
| − | ! |
+ | ![[Katana (weapon type)|Katana]] |
|[[Final Fantasy IV: The After Years weapons#Mutsunokami|Mutsunokami]] |
|[[Final Fantasy IV: The After Years weapons#Mutsunokami|Mutsunokami]] |
||
|[[Ghost Train (The After Years)|Ghost Train]] |
|[[Ghost Train (The After Years)|Ghost Train]] |
||
|- |
|- |
||
| − | ! |
+ | ![[Rod (weapon type)|Rod]] |
|[[Final Fantasy IV: The After Years weapons#Stardust Rod|Stardust Rod]] |
|[[Final Fantasy IV: The After Years weapons#Stardust Rod|Stardust Rod]] |
||
|[[Scarmiglione (The After Years)|Scarmiglione]] |
|[[Scarmiglione (The After Years)|Scarmiglione]] |
||
|- |
|- |
||
| − | ! |
+ | ![[Spear (weapon type)|Spear]] |
|[[Final Fantasy IV: The After Years weapons#Holy Lance|Holy Lance]] |
|[[Final Fantasy IV: The After Years weapons#Holy Lance|Holy Lance]] |
||
|[[Twinhead Dragon]] |
|[[Twinhead Dragon]] |
||
|- |
|- |
||
| − | ! |
+ | ![[Staff (weapon type)|Staff]] |
|[[Final Fantasy IV: The After Years weapons#Seraphim Mace|Seraphim Mace]] |
|[[Final Fantasy IV: The After Years weapons#Seraphim Mace|Seraphim Mace]] |
||
|[[Astaroth (The After Years)|Astaroth]] |
|[[Astaroth (The After Years)|Astaroth]] |
||
|- |
|- |
||
| − | ! |
+ | ![[Sword (weapon type)|Sword]] |
|[[Final Fantasy IV: The After Years weapons#Ultima Weapon|Ultima Weapon]] |
|[[Final Fantasy IV: The After Years weapons#Ultima Weapon|Ultima Weapon]] |
||
|[[Ultima Weapon (The After Years)|Ultima Weapon]] |
|[[Ultima Weapon (The After Years)|Ultima Weapon]] |
||
|- |
|- |
||
| − | ! |
+ | ![[Whip (weapon type)|Whip]] |
|[[Final Fantasy IV: The After Years weapons#Mystic Whip|Mystic Whip]] |
|[[Final Fantasy IV: The After Years weapons#Mystic Whip|Mystic Whip]] |
||
|[[Leviathan (The After Years boss)|Leviathan]] |
|[[Leviathan (The After Years boss)|Leviathan]] |
||
| Line 392: | Line 391: | ||
=== ''[[Final Fantasy V]]'' === |
=== ''[[Final Fantasy V]]'' === |
||
[[File:FF5-GaiaBell-Field.png|thumb|right|The Gaia Bell.]] |
[[File:FF5-GaiaBell-Field.png|thumb|right|The Gaia Bell.]] |
||
| − | {{See |
+ | {{See|Sealed Weapons}} |
There are twelve weapons known as "Sealed Weapons" held in Kuza, the [[Sealed Castle]]. [[Boomerang (weapon type)|Boomerang]] is the only weapon type not to have a corresponding Sealed Weapon. However, these are not the most powerful weapons. |
There are twelve weapons known as "Sealed Weapons" held in Kuza, the [[Sealed Castle]]. [[Boomerang (weapon type)|Boomerang]] is the only weapon type not to have a corresponding Sealed Weapon. However, these are not the most powerful weapons. |
||
| Line 398: | Line 397: | ||
* [[Final Fantasy V weapons#Apollo's Harp|Apollo's Harp]] can be wielded by [[Bard (Final Fantasy V)|Bards]] and [[Freelancer (Final Fantasy V)|Freelancers]], has 42 Attack, deals extra damage against the [[Enemy type|undead and demons]], and ignores [[row]]. |
* [[Final Fantasy V weapons#Apollo's Harp|Apollo's Harp]] can be wielded by [[Bard (Final Fantasy V)|Bards]] and [[Freelancer (Final Fantasy V)|Freelancers]], has 42 Attack, deals extra damage against the [[Enemy type|undead and demons]], and ignores [[row]]. |
||
* The [[Final Fantasy V weapons#Excalibur|Excalibur]] can be used by Freelancers, [[Knight (Final Fantasy V)|Knights]], and [[Gladiator (Final Fantasy V)|Gladiators]], boosts Attack by 107 and Strength by 5, and is Holy-elemental. |
* The [[Final Fantasy V weapons#Excalibur|Excalibur]] can be used by Freelancers, [[Knight (Final Fantasy V)|Knights]], and [[Gladiator (Final Fantasy V)|Gladiators]], boosts Attack by 107 and Strength by 5, and is Holy-elemental. |
||
| − | * The [[Final Fantasy V weapons#Rune Axe|Rune Axe]], wielded by Freelancers, Gladiators, and [[Berserker (Final Fantasy V job)|Berserkers]], raises Strength by 68 and Magic by 3, and uses MP to always hit [[ |
+ | * The [[Final Fantasy V weapons#Rune Axe|Rune Axe]], wielded by Freelancers, Gladiators, and [[Berserker (Final Fantasy V job)|Berserkers]], raises Strength by 68 and Magic by 3, and uses MP to always hit [[critical hit|critical]]. |
* [[Final Fantasy V weapons#Yoichi's Bow|Yoichi's Bow]] can be used by Freelancers, Gladiators, and [[Ranger (Final Fantasy V)|Rangers]]. It ignores row, has a 30% chance of critical hit, and raises Attack by 98, and Strength and Speed by 3. |
* [[Final Fantasy V weapons#Yoichi's Bow|Yoichi's Bow]] can be used by Freelancers, Gladiators, and [[Ranger (Final Fantasy V)|Rangers]]. It ignores row, has a 30% chance of critical hit, and raises Attack by 98, and Strength and Speed by 3. |
||
* [[Final Fantasy V weapons#Sasuke's Katana|Sasuke's Katana]] is wielded by [[Ninja (Final Fantasy V job)|Ninjas]] and Freelancers. It may block attacks and has 96 Attack and 3 Speed. |
* [[Final Fantasy V weapons#Sasuke's Katana|Sasuke's Katana]] is wielded by [[Ninja (Final Fantasy V job)|Ninjas]] and Freelancers. It may block attacks and has 96 Attack and 3 Speed. |
||
| Line 410: | Line 409: | ||
The most powerful weapons are obtained by defeating a strong boss or finding them from the bonus dungeon introduced in ''[[Finest Fantasy for Advance|Final Fantasy V Advance]]'': [[Sealed Temple (Final Fantasy V)|Sealed Temple]]. |
The most powerful weapons are obtained by defeating a strong boss or finding them from the bonus dungeon introduced in ''[[Finest Fantasy for Advance|Final Fantasy V Advance]]'': [[Sealed Temple (Final Fantasy V)|Sealed Temple]]. |
||
| − | [[Final Fantasy V weapons#Rune Chime|Rune Chime]] was the most powerful bell in the SNES/PS versions, won from [[Baldanders]], but [[Final Fantasy V weapons#Tinklebell|Tinklebell]] in the ''Advance'' |
+ | [[Final Fantasy V weapons#Rune Chime|Rune Chime]] was the most powerful bell in the SNES/PS versions, won from [[Baldanders]], but [[Final Fantasy V weapons#Tinklebell|Tinklebell]] in the ''Advance'' and discontinued mobile/Steam versions is more powerful and is obtained by defeating the [[Twintania (Final Fantasy V)|Twintania]]. |
| − | [[Final Fantasy V weapons#Artemis' Bow|Artemis' Bow]] was the most powerful bow in the SNES/PS versions, found in the [[Istory Falls]] or stolen from [[Dragon Aevis (Final Fantasy V)|Dragon Aevis]], but in the ''Advance'' |
+ | [[Final Fantasy V weapons#Artemis' Bow|Artemis' Bow]] was the most powerful bow in the SNES/PS/PR versions, found in the [[Istory Falls]] or stolen from [[Dragon Aevis (Final Fantasy V)|Dragon Aevis]], but in the ''Advance'' and discontinued mobile/Steam releases, [[Final Fantasy V weapons#Fairy's Bow|Fairy's Bow]] is more powerful and is obtained by defeating [[Grand Aevis (Final Fantasy V)|Grand Aevis]]. |
| − | In the SNES/PS versions [[Final Fantasy V weapons#Murakumo|Murakumo]] is the most powerful katana, stolen from [[Yojimbo (Final Fantasy V)|Yojimbo]] or the final boss, but [[Final Fantasy V weapons#Mutsunokami|Mutsunokami]] is the most powerful katana in the ''Advance'' |
+ | In the SNES/PS/PR versions [[Final Fantasy V weapons#Murakumo|Murakumo]] is the most powerful katana, stolen from [[Yojimbo (Final Fantasy V)|Yojimbo]] or the final boss, but [[Final Fantasy V weapons#Mutsunokami|Mutsunokami]] is the most powerful katana in the ''Advance'' and the discontinued mobile/Steam versions, and is found in Sealed Temple Lethe Court - Shadowed Gate. |
| − | In the SNES/PS versions [[Final Fantasy V weapons#Ragnarok|Ragnarok]] was the most powerful knight sword, obtained by defeating [[Shinryu (Final Fantasy V)|Shinryu]] in the final dungeon, or stealing from the final boss, [[Neo Exdeath (Final Fantasy V)|Neo Exdeath]]. The ''Advance'' |
+ | In the SNES/PS/PR versions [[Final Fantasy V weapons#Ragnarok|Ragnarok]] was the most powerful knight sword, obtained by defeating [[Shinryu (Final Fantasy V)|Shinryu]] in the final dungeon, or stealing from the final boss, [[Neo Exdeath (Final Fantasy V)|Neo Exdeath]]. The ''Advance'' and discontinued mobile/Steam versions have an even more powerful sword, the [[Final Fantasy V weapons#Apocalypse|Apocalypse]], found from the Sealed Temple. |
| − | [[Final Fantasy V weapons#Man-Eater|Man-Eater]] |
+ | [[Final Fantasy V weapons#Man-Eater|Man-Eater]] is the most powerful knife in SNES/PS/PR versions, stolen from [[Alchymia]] or found in the [[Interdimensional Rift (Final Fantasy V field)|Interdimensional Rift]], but the [[Gladius (Final Fantasy V)|Gladius]] surpasses it in the ''Advance'' and discontinued mobile/Steam versions, being found from the Arena in Sealed Temple. |
| − | [[Final Fantasy V weapons#Demon's Rod|Demon's Rod]] is the most powerful rod in the ''Advance'' |
+ | [[Final Fantasy V weapons#Demon's Rod|Demon's Rod]] is the most powerful rod in the ''Advance'' and discontinued mobile/Steam versions, found in Sealed Temple. [[Final Fantasy V weapons#Kagenui|Kagenui]] is the most powerful short sword, found in the Sealed Temple Heart of Ronka B1 area. |
| + | [[Final Fantasy V weapons#Dragon Lance|Dragon Lance]] is the most powerful spear in the SNES/PS/PR versions, stolen from [[Crystal Dragon (Final Fantasy V)|Crystal Dragon]], [[Jura Aevis (Final Fantasy V)|Jura Aevis]], or Neo Exdeath's middle section, but it is surpassed by the [[Final Fantasy V weapons#Longinus|Longinus]] in the ''Advance'' and discontinued mobile/Steam versions, found in Sealed Temple Hall of Tranquility area. |
||
| − | [[Final Fantasy V weapons#Kagenui|Kagenui]] is the most powerful short sword, found in the Sealed Temple Heart of Ronka B1 area. |
||
| − | [[Final Fantasy V weapons# |
+ | [[Final Fantasy V weapons#Judgment Staff|Judgment Staff]] is the most powerful staff in the SNES/PS/PR versions, stolen from [[Black Warlock]], [[Istory Lythos]] or [[Exdeath (boss)|Exdeath]], but is surpassed by the [[Final Fantasy V weapons#Mace of Zeus|Mace of Zeus]] in the ''Advance'' and discontinued mobile/Steam versions, found from the Ruined Shrine in the Sealed Temple. |
| − | [[Final Fantasy V weapons# |
+ | Regular swords don't have a Sealed Weapon. In the SNES/PS/PR versions [[Final Fantasy V weapons#Enhancer|Enhancer]] is the strongest sword, stolen from a [[Sword Dancer]] or found in Istory Falls or Interdimensional Rift. In the ''Advance'' and discontinued mobile/Steam versions, [[Final Fantasy V weapons#Ultima Weapon|Ultima Weapon]] is the strongest sword, obtained from the superboss [[Neo Shinryu]]. |
| − | |||
| − | Regular swords don't have a Sealed Weapon. In the SNES/PS versions [[Final Fantasy V weapons#Enhancer|Enhancer]] was the strongest sword, stolen from a [[Sword Dancer]] or found in Istory Falls or Interdimensional Rift. In the ''Advance''/mobile/Steam versions [[Final Fantasy V weapons#Ultima Weapon|Ultima Weapon]] is the strongest sword, obtained from the superboss [[Neo Shinryu]]. |
||
Finally, [[Final Fantasy V weapons#Dragon's Whisker|Dragon's Whisker]] is the strongest whip, obtained from [[Stingray (Final Fantasy V)|Stingray]] and stolen from Shinryu. |
Finally, [[Final Fantasy V weapons#Dragon's Whisker|Dragon's Whisker]] is the strongest whip, obtained from [[Stingray (Final Fantasy V)|Stingray]] and stolen from Shinryu. |
||
=== ''[[Final Fantasy VI]]'' === |
=== ''[[Final Fantasy VI]]'' === |
||
| − | [[File:Lightbringer |
+ | [[File:Lightbringer from FFVI SNES.png|right|The Lightbringer.]] |
| − | The [[Final Fantasy VI |
+ | The [[Lightbringer (Final Fantasy VI)|Lightbringer]] and the [[Ragnarok (Final Fantasy VI weapon)|Ragnarok]] are the two strongest weapons with the [[Ultima Weapon (Final Fantasy VI weapon)|Ultima Weapon]] third due to its power being based on the wielder's current HP and the level. The Lightbringer has an attack power of 255, gives + to all stats, and +50% to Evasion and Magic Evasion, as well as dealing critical hits using [[MP (stat)|MP]], being Holy-elemental and [[Added Ability|randomly casting Holy]], dealing the same damage from the back [[row]], and having a perfect hit rate. It can be obtained by betting the Ragnarok in the [[Dragon's Neck Coliseum|Coliseum]]. |
| − | The Ultima Weapon can be found in the [[Cave to the Sealed Gate]] in the [[World of Balance]]. |
+ | The Ultima Weapon can be found in the [[Cave to the Sealed Gate]] in the [[World of Balance]]. It pierces defense and deals more damage based on the user's current HP, and eventually becomes the most powerful weapon at high enough [[level]]s. At lower levels and HP, it can often be outclassed by other weapons. |
| − | In the ''[[Finest Fantasy for Advance|Advance]]'' |
+ | In the ''[[Finest Fantasy for Advance|Advance]]'' and 2014 versions, all characters except for [[Gau (Final Fantasy VI party member)|Gau]] and [[Umaro (Final Fantasy VI party member)|Umaro]] have unique ultimate weapons found in the [[Dragons' Den]], obtained after defeating a certain boss within, or alternatively by betting another ultimate weapon in the Dragon's Neck Coliseum. None of the weapons are statistically better than the Lightbringer, however. |
| − | *[[Terra |
+ | *[[Terra (Final Fantasy VI party member)|Terra's]] [[Apocalypse (Final Fantasy VI)|Apocalypse]] has an attack power of 250, gives +7 boosts for Strength and Magic and +20% boosts for Evasion and Magic Evasion, and consumes MP when attacking for a critical hit. It is won by defeating [[Red Dragon (Final Fantasy VI)|Red Dragon]] or by betting the Save the Queen in the Coliseum. |
| − | *[[Locke |
+ | *[[Locke (Final Fantasy VI party member)|Locke's]] [[Zwill Crossblade (Final Fantasy VI)|Zwill Crossblade]] has an attack power of 220, gives +3 boosts for Strength and Stamina, a +7 boost for Speed, a +30% boost for Evasion, and a +20% boost for Magic Evasion, is Wind-elemental, and [[Add Status|randomly inflicts]] [[Sleep (Final Fantasy VI status)|Sleep]] when attacking. It is obtained by defeating [[Gold Dragon (Final Fantasy VI)|Gold Dragon]] or by betting the Oborozuki in the Coliseum. |
| − | *[[Edgar |
+ | *[[Edgar (Final Fantasy VI party member)|Edgar's]] [[Longinus (Final Fantasy VI)|Longinus]] has an attack power of 235 and gives a +7 boost for Strength and +3 boosts for Speed and Stamina, however, no damage bonus is granted for [[Jump (Final Fantasy VI)|Jump]]. It is won by defeating [[Storm Dragon (Final Fantasy VI)|Storm Dragon]] or by betting the [[Gungnir (Final Fantasy VI)|Gungnir]] in the Coliseum. |
| − | *[[Sabin |
+ | *[[Sabin (Final Fantasy VI party member)|Sabin's]] [[Godhand (Final Fantasy VI)|Godhand]] has an attack power of 220, gives +7 boosts for Strength and Stamina and a +3 boost for Speed, and is Holy-elemental. It is won by defeating [[Earth Dragon (Final Fantasy VI)|Earth Dragon]] or by betting the [[Zanmato (Final Fantasy VI)|Zanmato]] in the Coliseum. |
| − | *[[Shadow (Final Fantasy VI) |
+ | *[[Shadow (Final Fantasy VI party member)|Shadow's]] [[Oborozuki (Final Fantasy VI)|Oborozuki]] has an attack power of 225 and gives +7 boosts for Strength and Speed, a +50% boost for Evasion, and a +10% boost for Magic Evasion. It is won by defeating [[Flan Princess (Final Fantasy VI)|Flan Princess]] or by betting the Zwill Crossblade in the Coliseum. |
| − | *[[Cyan |
+ | *[[Cyan (Final Fantasy VI party member)|Cyan's]] [[Zanmato (Final Fantasy VI)|Zanmato]] has an attack power of 245, gives +7 boosts for Strength and Stamina and a +30% boost for Evasion, and is Holy-elemental. It is won by defeating [[Holy Dragon (Final Fantasy VI)|Holy Dragon]] or by betting the Godhand in the Coliseum. |
| − | *[[Celes |
+ | *[[Celes (Final Fantasy VI party member)|Celes's]] [[Save the Queen (Final Fantasy VI)|Save the Queen]] has an attack power of 240, gives +7 boosts for Stamina and Magic and +40% boosts for Evasion and Magic Evasion, and consumes MP when attacking for a critical hit. It is won by defeating [[Blue Dragon (Final Fantasy VI)|Blue Dragon]] or by betting the Apocalypse in the Coliseum. |
| − | *[[Setzer |
+ | *[[Setzer (Final Fantasy VI party member)|Setzer's]] [[Final Trump (Final Fantasy VI)|Final Trump]] has an attack power of 215, gives +4 boosts for Speed and Stamina and a +3 boost for Strength, and consumes MP when attacking for a critical hit. It is won by defeating [[Ice Dragon (Final Fantasy VI)|Ice Dragon]] or by betting the Scorpion Tail in the Coliseum. |
| − | *[[Mog (Final Fantasy VI) |
+ | *[[Mog (Final Fantasy VI party member)|Mog's]] [[Gungnir (Final Fantasy VI)|Gungnir]] has an attack power of 240 and gives +7 boosts for Stamina and Magic, however no damage bonus is granted for [[Jump (Final Fantasy IX)|Jump]]. It is won by defeating [[Neslug (Final Fantasy VI)|Neslug]] or by betting the Longinus in the Coliseum. |
| − | *[[Strago |
+ | *[[Strago (Final Fantasy VI party member)|Strago's]] [[Stardust Rod (Final Fantasy VI)|Stardust Rod]] has an attack power of 180, gives a +7 boost for Magic and a +4 boost for Stamina, and randomly casts [[Meteor (Final Fantasy VI)|Meteor]] when attacking. It is found in a chest in the Dragons' Den or by betting the Angel Brush in the Coliseum. |
| − | *[[Relm |
+ | *[[Relm (Final Fantasy VI party member)|Relm's]] [[Angel Brush (Final Fantasy VI)|Angel Brush]] has an attack power of 170, gives +7 boosts for Magic and Speed, and randomly casts [[Confuse (Final Fantasy VI)|Confuse]] when attacking. It is won by defeating [[Plague (Final Fantasy VI)|Plague]] or by betting the Stardust Rod in the Coliseum. |
| − | *[[Gogo (Final Fantasy VI) |
+ | *[[Gogo (Final Fantasy VI party member)|Gogo's]] [[Scorpion Tail (Final Fantasy VI)|Scorpion Tail]] has an attack power of 225, gives +4 for Strength, Speed, Stamina, and Magic, and is Poison-elemental, thus it may randomly cast [[Bio (Final Fantasy VI)|Bio]] when attacking. It is won by defeating [[Skull Dragon (Final Fantasy VI)|Skull Dragon]] or by betting the Final Trump in the Coliseum. |
=== ''[[Final Fantasy VII]]'' === |
=== ''[[Final Fantasy VII]]'' === |
||
| Line 457: | Line 454: | ||
Ultimate weapons are distinguishable for having unique damage algorithms, as well as eight linked [[Materia (Final Fantasy VII)|Materia]] slots with zero Materia growth. Because of the weapons' unique damage algorithms, the damage they deal can be lower than that of other weapons under certain circumstances, making them not always the ideal weapon to equip. Unlike most other damage modifiers, each character's ultimate weapon applies the damage modifier after all other modifiers, instead of modifying the attack strength of the weapon itself. |
Ultimate weapons are distinguishable for having unique damage algorithms, as well as eight linked [[Materia (Final Fantasy VII)|Materia]] slots with zero Materia growth. Because of the weapons' unique damage algorithms, the damage they deal can be lower than that of other weapons under certain circumstances, making them not always the ideal weapon to equip. Unlike most other damage modifiers, each character's ultimate weapon applies the damage modifier after all other modifiers, instead of modifying the attack strength of the weapon itself. |
||
| − | [[Cloud |
+ | [[Cloud (Final Fantasy VII party member)|Cloud's]] ultimate weapon is the [[Ultima Weapon (Final Fantasy VII)|Ultima Weapon]], dropped by the [[Ultimate Weapon (Final Fantasy VII)|Ultimate Weapon]] boss. It deals more damage based on how close Cloud is to full HP. |
:<math>[ 1 + ( 48 \times \text{Cloud's current HP percentage} ) ] \over 16</math> |
:<math>[ 1 + ( 48 \times \text{Cloud's current HP percentage} ) ] \over 16</math> |
||
This "raw damage" is then modified by the attack's strength (1 if it is a normal attack) and other modifiers. At full HP, the weapon would deal 4x damage and 1x damage at about 1/3rd HP. |
This "raw damage" is then modified by the attack's strength (1 if it is a normal attack) and other modifiers. At full HP, the weapon would deal 4x damage and 1x damage at about 1/3rd HP. |
||
| − | [[Barret |
+ | [[Barret (Final Fantasy VII party member)|Barret's]] ultimate weapon, the [[Missing Score (Final Fantasy VII)|Missing Score]], is found inside the [[Sister Ray]] just before battling [[Helletic Hojo]], but Barret must be in the [[party]] to receive it. It deals more damage the more [[Ability Points|AP]] the Materia loaded onto it contain. Because of its unique damage algorithm, Missing Score is subject to the [[Damage overflow glitch in Final Fantasy VII|overflow glitch]] that can let Barret kill any opponent in one hit. |
| − | :<math>[1 + ( Total |
+ | :<math>[1 + ( Total~AP~on~Weapon / 10,000 )] / 16</math> |
| − | [[ |
+ | [[Master Magic]], [[Master Command]], [[Master Summon (Final Fantasy VII)|Master Summon]], [[Enemy Skill (Final Fantasy VII)|Enemy Skill]], and [[Underwater (Final Fantasy VII)|Underwater]] Materia do not add to this formula. |
| − | [[Tifa |
+ | [[Tifa (Final Fantasy VII party member)|Tifa's]] ultimate weapon is the [[Premium Heart (Final Fantasy VII)|Premium Heart]] obtained by examining a machine in the abandoned building that has a sign "ITEM" outside in [[Wall Market (Final Fantasy VII field)|Wall Market]]. It can be obtained after the player has found the [[Final Fantasy VII items#Key to Sector 5|Key to Midgar]] buried in [[Bone Village (field)|Bone Village]], which becomes available when Cloud and Tifa rejoin the party. |
The damage that is dealt by Premium Heart is calculated as follows: |
The damage that is dealt by Premium Heart is calculated as follows: |
||
| − | :<math>Power = [ 1 + (Tifa's |
+ | :<math>Power = [ 1 + (Tifa's~Limit~Level \times Limit~Bar~Units / 16] / 16</math> |
| − | The maximum Limit Bar Units is 255 regardless of [[Limit (Final Fantasy VII)|Limit]] level (the Limit level simply adjusts the rate at which the bar fills). When the bar is full, the weapon does roughly 1–4x of its normal damage depending on the Limit level, and would do 1/16 of that damage when the Limit bar is empty. Unlike most weapon damage modifiers, this modifier |
+ | The maximum Limit Bar Units is 255 regardless of [[Limit (Final Fantasy VII)|Limit]] level (the Limit level simply adjusts the rate at which the bar fills). When the bar is full, the weapon does roughly 1–4x of its normal damage depending on the Limit level, and would do 1/16 of that damage when the Limit bar is empty. Unlike most weapon damage modifiers, this modifier does not solely adjust the weapon's attack power, but the character's final attack power, which includes Tifa's [[Final Fantasy VII stats#Strength|Strength]] and weapon attack bonus. |
| − | There may be a bug with the formula as the way it is written, the "1" value has almost no effect. If the formula was instead : <math>Power = 1 + [ (Tifa's |
+ | There may be a bug with the formula as the way it is written, the "1" value has almost no effect. If the formula was instead : <math>Power = 1 + [ (Tifa's~Limit~Level \times Limit~Bar~Units / 16 / 16 ] </math>, the weapon would do 1x its normal damage when the Limit bar is empty and up to 5x damage with a full level 4 Limit gauge. The actual formula causes Tifa to do less than normal damage unless her Limit bar is at least 1/4th full at Limit level 4, which many players consider worse than a non-ultimate weapon. The [[God's Hand (Final Fantasy VII)|God's Hand]], Tifa's "second best" weapon, has 255% accuracy, which makes it ideal to use with [[Deathblow (Final Fantasy VII)|Deathblow]] for an automatic critical hit. Tifa's [[Powersoul (Final Fantasy VII)|Powersoul]] deals double damage if Tifa's in [[Near-death]] status, and if Tifa has [[Death-sentence]] status it quadruples the damage. Both multipliers stack. Powersoul can be found in [[Mt. Nibel (Final Fantasy VII field)|Mt. Nibel]] in the area [[Materia Keeper (Final Fantasy VII)|Materia Keeper]] is fought. Another of Tifa's weapons, the [[Master Fist (Final Fantasy VII)|Master Fist]], deals more damage the more status ailments Tifa is afflicted with, and can be found in [[Shinra Bldg. (Final Fantasy VII field)|Shinra Bldg.]] shop in Part II. |
| − | [[ |
+ | [[Aeris (Final Fantasy VII party member)|Aeris's]] ultimate weapon, [[Princess Guard (Final Fantasy VII)|Princess Guard]], can be found in room four of the clock room in the [[Temple of the Ancients (field)|Temple of the Ancients]]. It is the only ultimate weapon that has Materia growth and has fewer than eight linked Materia slots. It deals more damage if her allies are [[Knocked Out|KO'd]]. |
| − | :<math>Damage = Damage |
+ | :<math>Damage = Damage \times (1 + Number~of~Allies~in~Death~Status)</math> |
| − | The [[Final Fantasy VII |
+ | The [[Limited Moon (Final Fantasy VII)|Limited Moon]], [[Red XIII (Final Fantasy VII party member)|Red XIII]]'s ultimate weapon, is found by talking to [[Geisel Bugenhagen]] at [[Cosmo Canyon (Final Fantasy VII field)|Cosmo Canyon]] in the endgame with Red XIII in the party. It deals more damage based on how close Red XIII is to full MP. |
| − | :<math>Power = [(3 |
+ | :<math>Power = [(3 \times Power \times Red~XIII's~MP) / Red~XIII's~Max~MP] + 1</math> |
| − | [[Yuffie |
+ | [[Yuffie (Final Fantasy VII party member)|Yuffie's]] ultimate weapon, the [[Conformer (Final Fantasy VII)|Conformer]], can be found in the [[Sunken Gelnika (field)|Sunken Gelnika]], accessible via the [[Submarine (Final Fantasy VII transportation)|submarine]]. It does more damage the higher level the opponents are, and ignores the [[Morph (Final Fantasy VII ability)|Morph]] damage penalty. When used against allies it deals 1 HP damage but there is no attack sound and no damage numbers are displayed. |
| − | :<math>Power = Target |
+ | :<math>Power = Target~level / 16</math> |
| − | [[Cait Sith (Final Fantasy VII) |
+ | [[Cait Sith (Final Fantasy VII party member)|Cait Sith's]] ultimate weapon, the [[HP Shout (Final Fantasy VII)|HP Shout]], can be found on the 64th floor of the [[Shinra Bldg. (Final Fantasy VII field)|Shinra Bldg.]] The megaphone can only be obtained after Cait Sith becomes a playable character, so it cannot be obtained until the party revisits the headquarters in Part 2. It deals more damage based on how close Cait Sith is to full HP. |
| − | :<math>Power = [(3 |
+ | :<math>Power = [(3 \times Power \times Cait~Sith's~HP) / Cait~Sith's~Max~HP] + 1</math> |
| − | The [[Final Fantasy VII |
+ | The [[Death Penalty (Final Fantasy VII)|Death Penalty]], [[Vincent (Final Fantasy VII party member)|Vincent's]] ultimate weapon, is found in [[??? (Final Fantasy VII field)|???]]. The player must trigger a storyline event there by visiting the cave behind the waterfall near [[Nibelheim (Final Fantasy VII field)|Nibelheim]] with both Cloud and Vincent in the party (with a colored [[Chocobo (Final Fantasy VII)|chocobo]] or the [[Submarine (Final Fantasy VII transportation)|submarine]]), and then win 2 to 11 [[Final Fantasy VII battle system#Random encounters|random encounter]]s and return to the cave to obtain the weapon. Death Penalty's power is boosted after every enemy Vincent kills. Due to a [[Damage overflow glitch in Final Fantasy VII|damage overflow glitch]], if enough enemies are killed, the Death Penalty can kill any enemy with a single hit, including [[superboss]]es. |
| − | :<math>Power = [10 + ( |
+ | :<math>Power = [10 + (Vincent's~Kills / 128) ] / 16</math> |
This is then modified by the attack's power; for normal attacks, the multiplier is 1.0. For a plot graph of this formula [http://www.wolframalpha.com/input/?i=plot+%28%2816%28X\128%29%29+\16%29+%2B+10,+X%3D0...65535 see here]. To reach a base 1.0 damage multiplier, Vincent would need 768 kills. To get 4.0 damage multiplier, Vincent needs 6,912 kills. |
This is then modified by the attack's power; for normal attacks, the multiplier is 1.0. For a plot graph of this formula [http://www.wolframalpha.com/input/?i=plot+%28%2816%28X\128%29%29+\16%29+%2B+10,+X%3D0...65535 see here]. To reach a base 1.0 damage multiplier, Vincent would need 768 kills. To get 4.0 damage multiplier, Vincent needs 6,912 kills. |
||
| Line 496: | Line 493: | ||
The number of Vincent's kills is capped at <math>65535 = 2^{16} - 1</math>, but, as the division by 128 is actually a right bits shift by 7 (logarithm in base 2 of 128), only the quotient is considered. This means the Power stat raises by <math>(Technique Power)/16</math> every 128 kills; in particular the maximum power is granted as soon as Vincent has killed <math>65408 = 128 * 511</math> enemies, since <math>128 * 512 = 65536</math>, which is greater than the cap. For a physical attack the Technique Power is always 16, therefore in that scenario the maximum power is <math>511 + 10 = 521</math>. |
The number of Vincent's kills is capped at <math>65535 = 2^{16} - 1</math>, but, as the division by 128 is actually a right bits shift by 7 (logarithm in base 2 of 128), only the quotient is considered. This means the Power stat raises by <math>(Technique Power)/16</math> every 128 kills; in particular the maximum power is granted as soon as Vincent has killed <math>65408 = 128 * 511</math> enemies, since <math>128 * 512 = 65536</math>, which is greater than the cap. For a physical attack the Technique Power is always 16, therefore in that scenario the maximum power is <math>511 + 10 = 521</math>. |
||
| − | [[Cid |
+ | [[Cid (Final Fantasy VII party member)|Cid's]] ultimate weapon, the [[Venus Gospel (Final Fantasy VII)|Venus Gospel]], can be obtained by talking to the man who was staring at the [[Shinra No. 26|rocket]] at [[Rocket Town (Final Fantasy VII field)|Rocket Town]] after it has been launched from "[[What Aeris Left Behind]]" onward. If the player speaks to the man three times, he will give the player Cid's ultimate weapon. It deals more damage based on how close Cid is to full MP. |
| − | :<math>Power = [(3 |
+ | :<math>Power = [(3 \times Power \times Cid's~MP) / Cid's~Max~MP] + 1</math> |
=== ''[[Final Fantasy VIII]]'' === |
=== ''[[Final Fantasy VIII]]'' === |
||
[[File:ShootingStar-ffviii-rinoa.png|right|thumb|150px|The Shooting Star.]] |
[[File:ShootingStar-ffviii-rinoa.png|right|thumb|150px|The Shooting Star.]] |
||
| − | As it is not a requisite to read the corresponding [[Weapons Monthly]] magazines before the weapons can be modeled in a [[junk shop]], the characters' ultimate weapons can be crafted as early as the player collects the required items (often |
+ | As it is not a requisite to read the corresponding [[Weapons Monthly]] magazines before the weapons can be modeled in a [[Junk shop (Final Fantasy VIII)|junk shop]], the characters' ultimate weapons can be crafted as early as the player collects the required items (often done easier by [[Refine|modifying]] [[Triple Triad (Final Fantasy VIII)|Triple Triad]] cards). This means everyone but [[Irvine (Final Fantasy VIII party member)|Irvine]] can potentially obtain their strongest weapon on disc 1 (before the end of the [[Deling City]] parade). |
| − | However, the weapons' attack stats are not significant due to the [[Junction system]], making only [[Squall |
+ | However, the weapons' attack stats are not significant due to the [[Junction system]], making only [[Squall (Final Fantasy VIII party member)|Squall's]] [[Lion Heart (Final Fantasy VIII weapon)|Lion Heart]] and [[Selphie (Final Fantasy VIII party member)|Selphie's]] [[Strange Vision (Final Fantasy VIII)|Strange Vision]] notable among them; Lion Heart for providing Squall his ultimate [[Renzokuken (Final Fantasy VIII)|Renzokuken]] technique, and Strange Vision having natural 255% accuracy. |
| − | Squall's Lion Heart requires [[Final Fantasy VIII |
+ | Squall's Lion Heart requires [[Adamantine (Final Fantasy VIII)|Adamantine]] x1, [[Dragon Fang (Final Fantasy VIII)|Dragon Fang]] x4 and [[Pulse Ammo (Final Fantasy VIII)|Pulse Ammo]] x12 to make, and costs 2,000 gil. Adamantine can be obtained from [[Adamantoise (Final Fantasy VIII)|Adamantoises]] on [[beach]]es north of [[Dollet]] or by modifying [[Minotaur (Final Fantasy VIII card)|Minotaur's card]]. Dragon Fangs are obtained from LV1–19 [[Grendel (Final Fantasy VIII)|Grendels]], LV20–29 [[T-Rexaur]]s, and [[Blue Dragon (Final Fantasy VIII)|Blue Dragons]] of any level. Pulse Ammo must be [[refine]]d with [[Ifrit (Final Fantasy VIII)|Ifrit's]] Ammo-RF from [[Energy Crystal]]s (easiest obtained from [[Elnoyle]]s or their [[Elnoyle (card)|cards]] earlier on), [[Laser Cannon (Final Fantasy VIII)|Laser Cannons]] and [[Power Generator (Final Fantasy VIII)|Power Generators]]. |
| − | [[Rinoa |
+ | [[Rinoa (Final Fantasy VIII gameplay)|Rinoa's]] [[Shooting Star (Final Fantasy VIII)|Shooting Star]] requires [[Windmill (Final Fantasy VIII)|Windmill]] x2, [[Regen Ring (Final Fantasy VIII)|Regen Ring]] x1, [[Force Armlet (Final Fantasy VIII)|Force Armlet]] x1, Energy Crystal x2 and costs 1,000 gil. Windmills can be dropped from [[Thrustaevis (Final Fantasy VIII)|Thrustaevis]] or refined from [[Abyss Worm (Final Fantasy VIII card)|Abyss Worm cards]]. Regen Rings can be dropped from [[Vysage]] or refined from [[Chimera (Final Fantasy VIII card)|Chimera cards]]. A Force Armlet can be obtained from [[X-ATM092]], a high-level [[Ochu (Final Fantasy VIII)|Ochu]], or the second [[Edea (boss)|Edea]] fight. |
| − | [[Zell |
+ | [[Zell (Final Fantasy VIII party member)|Zell's]] [[Ehrgeiz (Final Fantasy VIII)|Ehrgeiz]] requires Adamantine x1, [[Dragon Skin (Final Fantasy VIII)|Dragon Skin]] x4, [[Fury Fragment (Final Fantasy VIII)|Fury Fragment]] x1 and costs 800 gil. Dragon Skins can be obtained from [[Anacondaur (Final Fantasy VIII)|Anacondaur]] or a low-level [[Grendel (Final Fantasy VIII)|Grendel]]. A Fury Fragment can be obtained from a higher-level Grendel or refined from [[Blue Dragon (Final Fantasy VIII card)|Blue Dragon cards]]. |
| − | [[Quistis |
+ | [[Quistis (Final Fantasy VIII party member)|Quistis's]] [[Save the Queen (Final Fantasy VIII)|Save the Queen]] requires [[Malboro Tentacle (Final Fantasy VIII)|Malboro Tentacle]] x2, [[Sharp Spike]] x4, Energy Crystal x4 and costs 800 gil. Malboro Tentacles can be refined from [[Malboro (Final Fantasy VIII card)|Malboro cards]] or received directly from them. Sharp Spikes can drop from [[Armadodo]] or be refined from [[Grand Mantis (card)|Grand Mantis]] and [[Death Claw (Final Fantasy VIII card)|Death Claw]] cards. |
| − | Selphie's Strange Vision requires Adamantine x1, [[Final Fantasy VIII |
+ | Selphie's Strange Vision requires Adamantine x1, [[Star Fragment (Final Fantasy VIII)|Star Fragment]] x3, [[Curse Spike]] x2 and costs 800 gil. Star Fragments can be refined from [[Iron Giant (Final Fantasy VIII card)|Iron Giant cards]] or received directly from them. Curse Spikes can be refined from [[Tri-Face (card)|Tri-Face cards]]. |
| − | Irvine's [[Final Fantasy VIII |
+ | Irvine's [[Exeter (Final Fantasy VIII)|Exeter]] requires [[Dino Bone]] x2, [[Moon Stone (Final Fantasy VIII)|Moon Stone]] x1, Star Fragment x2, [[Screw]] x18 and costs 800 gil. Dino Bones can be refined from [[Armadodo (card)|Armadodo]], [[T-Rexaur (card)|T-Rexaur]], or [[Sacred (Final Fantasy VIII card)|Sacred]] cards. Moon Stones are dropped by [[Elnoyle]], [[Imp (Final Fantasy VIII)|Imp]], and [[Torama (Final Fantasy VIII)|Torama]], all of which cannot be encountered until Disc 3. |
=== ''[[Final Fantasy IX]]'' === |
=== ''[[Final Fantasy IX]]'' === |
||
[[File:Ultima Weapon FFIX.png|right|thumb|150px|The Ultima Weapon.]] |
[[File:Ultima Weapon FFIX.png|right|thumb|150px|The Ultima Weapon.]] |
||
| − | [[Zidane |
+ | [[Zidane (Final Fantasy IX party member)|Zidane's]] ultimate weapon is the [[Ultima Weapon (Final Fantasy IX)|Ultima Weapon]] found in an unmarked [[Chocobo Hot and Cold#Hidden treasures|chocobo bubble]] on the site where the [[Shimmering Island]] used to be. After the party obtains the ''[[Invincible (Final Fantasy IX)|Invincible]]'' the island will be gone, but will still be marked on the map. If the player dives with [[Choco]] (by using a [[Final Fantasy IX items#Dead Pepper|Dead Pepper]] exactly on the right spot), they can find the Ultima Weapon. It teaches [[Flee (Final Fantasy IX)|Flee]] and inflicts the [[Sleep (Final Fantasy IX status effect)|Sleep]] status when used with [[Soul Blade (Final Fantasy IX)|Soul Blade]]. |
| − | [[Final Fantasy IX |
+ | [[Tiger Racket (Final Fantasy IX)|Tiger Racket]] is the strongest racket usable by both [[Dagger (Final Fantasy IX gameplay)|Dagger]] and [[Eiko (Final Fantasy IX party member)|Eiko]]. It is obtained from the bubble below [[Quan's Dwelling]]. The player must enter Quan's Dwelling and look down from the ledge after they have trained Choco to dark blue color. It teaches [[Dispel (Final Fantasy IX)|Dispel]] and is [[Wind (Final Fantasy IX element)|Wind]]-elemental. However, Dagger and Eiko being mage-type characters means their physical attack will always be weak, and thus [[Magic Racket (Final Fantasy IX)|Magic Racket]] with its +2 Magic and [[Elemental Affinity#Final Fantasy IX|boost]] to [[Holy (Final Fantasy IX element)|Holy]] damage may be more useful. |
| − | Dagger's other ultimate weapon is the [[Final Fantasy IX |
+ | Dagger's other ultimate weapon is the [[Whale Whisker (Final Fantasy IX)|Whale Whisker]], found after uncovering [[Chocograph]] 18, Ocean. It teaches [[Curaga (Final Fantasy IX)|Curaga]] and [[Life (Final Fantasy IX)|Life]]. |
| − | Eiko's other ultimate weapon is the [[Final Fantasy IX |
+ | Eiko's other ultimate weapon is the [[Angel Flute (Final Fantasy IX)|Angel Flute]], found in the Past room in [[Memoria (Final Fantasy IX)|Memoria]]. It teaches Eiko [[Esuna (Final Fantasy IX)|Esuna]] and Curaga, as well as her strongest spell, [[Holy (Final Fantasy IX)|Holy]]. |
| − | [[ |
+ | [[Steiner (Final Fantasy IX gameplay)|Steiner's]] ultimate weapon is the [[Excalibur II (Final Fantasy IX)|Excalibur II]] found in Memoria if the player inspects the pillar in the Gate to Space room with less than 12 hours on the game clock. It is Holy-elemental and teaches [[Minus Strike (Final Fantasy IX)|Minus Strike]], [[Climhazzard (Final Fantasy IX)|Climhazzard]] and [[Stock Break (Final Fantasy IX)|Stock Break]]. Because of the arduous challenge to obtain this weapon, Steiner's second best weapon, the [[Ragnarok (Final Fantasy IX)|Ragnarok]], is often considered his other ultimate weapon. Found in the Chocograph 21, Outer Island, Ragnarok inflicts the [[Slow (Final Fantasy IX status effect)|Slow]] status when used with the [[Add Status (Final Fantasy IX)|Add Status]] ability, and teaches [[Shock (Final Fantasy IX)|Shock]] and [[Thunder Slash (Final Fantasy IX)|Thunder Slash]]. |
| − | [[Vivi |
+ | [[Vivi (Final Fantasy IX party member)|Vivi's]] ultimate weapon is the [[Mace of Zeus (Final Fantasy IX)|Mace of Zeus]] found in Memoria's Stairs room. It inflicts the [[Mini (Final Fantasy IX status effect)|Mini]] status when used with Add Status, and teaches [[Doomsday (Final Fantasy IX)|Doomsday]], Vivi's most powerful [[Blk Mag (Final Fantasy IX)|Black Magic]] spell. |
| − | [[Freya |
+ | [[Freya (Final Fantasy IX party member)|Freya's]] ultimate weapon is the [[Dragon's Hair (Final Fantasy IX)|Dragon's Hair]] found at the [[Chocobo Hot and Cold#Hidden treasures|mountain crack]] (by feeding Choco a Dead Pepper at the correct spot) northwest of [[Oeilvert]]. It teaches the [[Dragon Breath (Final Fantasy IX)|Dragon Breath]] ability. |
| − | [[Quina |
+ | [[Quina (Final Fantasy IX party member)|Quina's]] ultimate weapon is the [[Gastro Fork (Final Fantasy IX)|Gastro Fork]] obtained after [[frog catching|catching]] 99 frogs in [[Qu's Marsh|the marshes]] and defeating [[Quale (boss)|the boss]] that appears. It inflicts the [[Stop (Final Fantasy IX status effect)|Stop]] status with Add Status ability and teaches [[High Tide (Final Fantasy IX)|High Tide]]. |
| − | [[Amarant |
+ | [[Amarant (Final Fantasy IX gameplay)|Amarant's]] ultimate weapon is the [[Rune Claws (Final Fantasy IX)|Rune Claws]] found in the Time Interval room in Memoria. It inflicts the [[Darkness (Final Fantasy IX status effect)|Darkness]] status with Add Status ability and teaches [[Spare Change (Final Fantasy IX)|Spare Change]], [[Demi Shock (Final Fantasy IX)|Demi Shock]] and [[Revive (Final Fantasy IX)|Revive]]. |
Obtaining ultimate weapons yields [[Final Fantasy IX achievements and trophies|achievements/trophies]] in the versions that support an [[achievements]] system. |
Obtaining ultimate weapons yields [[Final Fantasy IX achievements and trophies|achievements/trophies]] in the versions that support an [[achievements]] system. |
||
| Line 542: | Line 539: | ||
[[File:FFX Weapon - Onion Knight.png|right|thumb|150px|The Onion Knight doll.]] |
[[File:FFX Weapon - Onion Knight.png|right|thumb|150px|The Onion Knight doll.]] |
||
{{Main|Celestial Weapon}} |
{{Main|Celestial Weapon}} |
||
| − | The ultimate weapons are called "Celestial Weapons," and each of the seven permanent party members has one. The weapons are actually detrimental when first obtained, as they carry the No AP ability. To overcome this, each weapon must be enhanced using two corresponding key items, each named for a celestial body corresponding to the character: Sun, Moon, Mercury, Venus, Mars, Jupiter and Saturn. |
+ | The ultimate weapons are called "Celestial Weapons," and each of the seven permanent party members has one. The weapons are actually detrimental when first obtained, as they carry the No AP ability. To overcome this, each weapon must be enhanced using two corresponding key items (crests and sigils), each named for a celestial body corresponding to the character: Sun, Moon, Mercury, Venus, Mars, Jupiter and Saturn. |
The Celestial Weapons are obtained by performing a task (although the Celestial Mirror key item must be obtained first), while the Crests are found in treasure chests and the Sigils are won by excelling in [[minigame]]s and sidequests. When fully enhanced, the Celestial Weapons have four abilities, which are generally complementary to the wielder's personality and/or default combat style. |
The Celestial Weapons are obtained by performing a task (although the Celestial Mirror key item must be obtained first), while the Crests are found in treasure chests and the Sigils are won by excelling in [[minigame]]s and sidequests. When fully enhanced, the Celestial Weapons have four abilities, which are generally complementary to the wielder's personality and/or default combat style. |
||
| − | With the exception of [[Tidus |
+ | With the exception of [[Tidus (Final Fantasy X party member)|Tidus]]'s and [[Rikku (Final Fantasy X party member)|Rikku]]'s weapons, each Celestial Weapon allows a certain [[Aeon (Final Fantasy X)|aeon]] to [[Break Damage Limit|break the damage limit]]. Celestial Weapons ignore the defense of enemies when attacking physically. The [[Ultima Weapon (weapon)|Caladbolg]], [[Celestial Weapon#World Champion|World Champion]], [[Celestial Weapon#Spirit Lance|Spirit Lance]], and [[Celestial Weapon#Godhand|Godhand]] do damage based on how close their wielders' are to full HP. The [[Celestial Weapon#Masamune|Masamune]] does damage based on how low its wielder's HP is. [[Celestial Weapon#Onion Knight|Onion Knight]] and [[Celestial Weapon#Nirvana|Nirvana]] do damage based on how close their wielders' are to full MP. |
While the game's Customization feature makes it possible for players to manually create weapons with the same abilities as the Celestial Weapons, any such weapons will not take on the Celestial Weapons' names. They will not ignore defense, have any effect on aeons, or have the damage vary in different circumstances. |
While the game's Customization feature makes it possible for players to manually create weapons with the same abilities as the Celestial Weapons, any such weapons will not take on the Celestial Weapons' names. They will not ignore defense, have any effect on aeons, or have the damage vary in different circumstances. |
||
| Line 552: | Line 549: | ||
=== ''[[Final Fantasy XI]]'' === |
=== ''[[Final Fantasy XI]]'' === |
||
[[File:FFXI Almace.png|right|thumb|150px|The Almace.]] |
[[File:FFXI Almace.png|right|thumb|150px|The Almace.]] |
||
| − | ''Final Fantasy XI'' does not feature singular ultimate weapons, due to its great variety of equipment and customization, but there are five particular sets of unique and powerful weapons that are highly prized and extremely difficult to obtain: the [[Relic Weapon (equipment)|Relic Weapons]], the [[Mythic Weapon]]s, the [[Empyrean Weapon]]s, the [[Ergon Weapon]]s, and the [[Aeonic Weapon]]s. All five varieties require a large amount of time, gil, or teamwork, often some combination of the three, to obtain, and all three types provide the wielder with extraordinary power and a unique [[ |
+ | ''Final Fantasy XI'' does not feature singular ultimate weapons, due to its great variety of equipment and customization, but there are five particular sets of unique and powerful weapons that are highly prized and extremely difficult to obtain: the [[Relic Weapon (equipment)|Relic Weapons]], the [[Mythic Weapon]]s, the [[Empyrean Weapon]]s, the [[Ergon Weapon]]s, and the [[Aeonic Weapon]]s. All five varieties require a large amount of time, gil, or teamwork, often some combination of the three, to obtain, and all three types provide the wielder with extraordinary power and a unique [[Final Fantasy XI weapon skills|weapon skill]]. Each type of ultimate weapon is associated with the content of a particular expansion or group of expansions. |
==== Relic Weapons ==== |
==== Relic Weapons ==== |
||
{{Main|Relic Weapon (equipment)}} |
{{Main|Relic Weapon (equipment)}} |
||
| − | Relic Weapons can only be obtained by traveling into the realm of [[Dynamis]] to collect the basic variety of relic weapon. The player must upgrade the weapon by giving a goblin certain items and ancient currency obtained within Dynamis. Due to the exceptionally high amount of currency required to upgrade relic weapons, people often need to purchase ancient currency from other players to acquire them within a reasonable time frame. Relic weapons are divided by weapon type. Relic weapons are the ultimate weapon type associated with ''[[Final Fantasy XI: Rise of the Zilart]]'' and ''[[Final Fantasy XI: Chains of Promathia]]''; accordingly, jobs released from the ''[[Final Fantasy XI: Treasures of Aht Urhgan|Treasures of Aht Urhgan]]'' expansion pack and beyond are incapable of wielding them. |
+ | Relic Weapons can only be obtained by traveling into the realm of [[Dynamis (Final Fantasy XI)|Dynamis]] to collect the basic variety of relic weapon. The player must upgrade the weapon by giving a goblin certain items and ancient currency obtained within Dynamis. Due to the exceptionally high amount of currency required to upgrade relic weapons, people often need to purchase ancient currency from other players to acquire them within a reasonable time frame. Relic weapons are divided by weapon type. Relic weapons are the ultimate weapon type associated with ''[[Final Fantasy XI: Rise of the Zilart]]'' and ''[[Final Fantasy XI: Chains of Promathia]]''; accordingly, jobs released from the ''[[Final Fantasy XI: Treasures of Aht Urhgan|Treasures of Aht Urhgan]]'' expansion pack and beyond are incapable of wielding them. |
==== Mythic Weapons ==== |
==== Mythic Weapons ==== |
||
| Line 573: | Line 570: | ||
{{Main|Aeonic Weapon}} |
{{Main|Aeonic Weapon}} |
||
Aeonic weapons are the ultimate weapon type associated with the final expansion, ''[[Final Fantasy XI: Rhapsodies of Vana'diel]]''. Unlike the other ultimate weapon types, which require immense quantities of a specific upgrade item (ancient currency for relics, alexandrite for mythic, heavy metal plates for empyrean, and high-purity bayld for ergon), aeonic weapons require that the strongest [[Notorious Monster]]s be defeated without the aid of Primeval Brew. Since one must have extremely powerful equipment to manage this, aeonic weapons virtually require that at least one of the other, more expensive, ultimate weapons be completed first. Because there are no more expansions, and hence no more jobs, after ''Rhapsodies of Vana'diel'', aeonic weapons can be equipped by every job. Like relic weapons, they are grouped by weapon type rather than by job. |
Aeonic weapons are the ultimate weapon type associated with the final expansion, ''[[Final Fantasy XI: Rhapsodies of Vana'diel]]''. Unlike the other ultimate weapon types, which require immense quantities of a specific upgrade item (ancient currency for relics, alexandrite for mythic, heavy metal plates for empyrean, and high-purity bayld for ergon), aeonic weapons require that the strongest [[Notorious Monster]]s be defeated without the aid of Primeval Brew. Since one must have extremely powerful equipment to manage this, aeonic weapons virtually require that at least one of the other, more expensive, ultimate weapons be completed first. Because there are no more expansions, and hence no more jobs, after ''Rhapsodies of Vana'diel'', aeonic weapons can be equipped by every job. Like relic weapons, they are grouped by weapon type rather than by job. |
||
| + | |||
| + | ==== Ambuscade Weapons ==== |
||
| + | {{Main|Ambuscade Weapon}} |
||
| + | Ambuscade weapons are earned through Ambuscade, a battlefield with new content monthly. They are the least complex weapons to obtain, only requiring a player to earn points by repeatedly completing relatively simple battles for all but one item, which is obtained through old battle content. They are the easiest weapons to obtain, with it possible to get even without amazing end-game gear if one is willing to invest the time. |
||
===''[[Final Fantasy XII]]''=== |
===''[[Final Fantasy XII]]''=== |
||
| Line 578: | Line 579: | ||
Each weapon type can be considered to have an "ultimate" version. New ultimate weapons were added to the ''Zodiac'' versions. |
Each weapon type can be considered to have an "ultimate" version. New ultimate weapons were added to the ''Zodiac'' versions. |
||
| − | The [[Zodiac Spear (Final Fantasy XII)|Zodiac Spear]] is the strongest weapon and spear with 150 Attack Power. In the original version, it is found in the [[Necrohol of Nabudis]] when the player |
+ | The [[Zodiac Spear (Final Fantasy XII)|Zodiac Spear]] is the strongest weapon and spear with 150 Attack Power. In the original version, it is found in the [[Necrohol of Nabudis]] when the player does not open any of the unmarked [[Zodiac Spear (Final Fantasy XII)#Requirements|forbidden chests]]. Zodiac Spear can also be found in a random [[Treasure (Final Fantasy XII)|treasure]] in the [[Henne Mines]], but it has very low chance to spawn (1/1000). In the ''Zodiac'' versions, the forbidden chest concept was removed. Zodiac Spear is not available through the [[Rare Game]] quest and remains as a treasure in the Henne Mines. |
| − | Another notable weapon is the [[Tournesol (Final Fantasy XII)|Tournesol]], the ultimate greatsword. |
+ | Another notable weapon is the [[Tournesol (Final Fantasy XII)|Tournesol]], the ultimate greatsword. Though not as strong as the Zodiac Spear, with an Attack Power of 140, it has higher Evade and a better chance of dealing [[Hit (term)#Final Fantasy XII|hit combos]]. It can be obtained by selling [[Loot (Final Fantasy XII)#Gemsteel|Gemsteel]] x3, [[Loot (Final Fantasy XII)#Empyreal Soul|Empyreal Soul]] x3 and [[Loot (Final Fantasy XII)#Serpentarius|Serpentarius]] x3, and purchased for 600,000 gil at the [[Bazaar (Final Fantasy XII)|bazaar]]. Acquiring these items themselves involves an arduous series of crafting within the bazaar (see the [[Tournesol (Final Fantasy XII)|Tournesol article]] for a guide for how to obtain). |
| − | The [[Wyrmhero Blade (Final Fantasy XII)|Wyrmhero Blade]] is another powerful greatsword with |
+ | The [[Wyrmhero Blade (Final Fantasy XII)|Wyrmhero Blade]] is another powerful greatsword with an Attack Power of 130 and a very high Evade of 50. It can be obtained by collecting Lu Shang's Badge from the [[Fishing (Final Fantasy XII)|fishing]] minigame, the Godslayer's Badge from slaying [[Yiazmat (Final Fantasy XII)|Yiazmat]], and the Omega Badge from slaying [[Omega Mark XII]], and then selling them; the weapon will then appear in the bazaar for purchase. It has a lower attack power than the Tournesol and a very slow [[Charge Time|charge time]], which, coupled with its difficult requirements, severely limits its usefulness. However, it has inherent [[Bravery (stat)|Bravery]] and [[Faith (status)|Faith]], and the highest combo rate of 80%, giving it an edge in some circumstances over the Tournesol and other ultimate weapons. It also does not have a license requirement. Though mainly a [[trophy item]], the Wyrmhero Blade is more useful in the ''Zodiac'' versions where the damage cap is removed, it can be wielded by any job, and it can be used effectively in [[Trial Mode]]. It can also be obtained from Trial Mode, meaning the player can potentially get one as early as they can beat [[Trial Mode#50|Stage 50]]. |
====Original version==== |
====Original version==== |
||
| Line 594: | Line 595: | ||
[[Grand Mace (Final Fantasy XII)|Grand Mace]] is the ultimate mace with 72 Attack Power and reward for the [[Pylraster (Final Fantasy XII)|Pylraster]] hunt. |
[[Grand Mace (Final Fantasy XII)|Grand Mace]] is the ultimate mace with 72 Attack Power and reward for the [[Pylraster (Final Fantasy XII)|Pylraster]] hunt. |
||
| − | [[Euclid's Sextant]] is the ultimate measure with 35 Attack Power that |
+ | [[Euclid's Sextant]] is the ultimate measure with 35 Attack Power that grants the [[Bubble (status)|Bubble]] status to whatever it hits. It is a reward for [[Wild Malboro]] hunt and found in a chest on the [[Cerobi Steppe]] ([[Diamond Armlet (Final Fantasy XII)|Diamond Armlet]] is needed). |
| − | [[Masamune (Final Fantasy XII)|Masamune]] is the ultimate katana and has the highest chance to deal hit combos, especially when coupled with the [[Final Fantasy XII |
+ | [[Masamune (Final Fantasy XII)|Masamune]] is the ultimate katana and has the highest chance to deal hit combos, especially when coupled with the [[Genji Gloves (Final Fantasy XII)|Genji Gloves]] accessory. This makes it useful for enemies that have damage caps, such as the later stages of Yiazmat, where combo abilities are more useful than Attack Power. Masamune is reward for the [[Gilgamesh (Final Fantasy XII boss)|Gilgamesh]] hunt, or by selling [[Gemsteel (Final Fantasy XII)|Gemsteel]] x2, [[Orichalcum (Final Fantasy XII)|Orichalcum]] x3, and [[Mallet (Final Fantasy XII)|Mallet]] x2 and bought from the bazaar for 350,000 gil. |
| − | [[Yagyu Darkblade]] is the strongest ninja sword, dropped by the [[Rare Game|rare game]] [[Bombshell (Final Fantasy XII)|Bombshell]]. |
+ | [[Yagyu Darkblade (Final Fantasy XII)|Yagyu Darkblade]] is the strongest ninja sword, dropped by the [[Rare Game|rare game]] [[Bombshell (Final Fantasy XII)|Bombshell]]. |
[[Whale Whisker (Final Fantasy XII)|Whale Whisker]] is the ultimate pole. It can be bought from the bazaar for 60,000 gil after selling [[Loot (Final Fantasy XII)#Mythril|Mythril]] x3, [[Loot (Final Fantasy XII)#Corpse Fly|Corpse Fly]] x3 and [[Loot (Final Fantasy XII)#Aquarius Gem|Aquarius Gem]] x4. |
[[Whale Whisker (Final Fantasy XII)|Whale Whisker]] is the ultimate pole. It can be bought from the bazaar for 60,000 gil after selling [[Loot (Final Fantasy XII)#Mythril|Mythril]] x3, [[Loot (Final Fantasy XII)#Corpse Fly|Corpse Fly]] x3 and [[Loot (Final Fantasy XII)#Aquarius Gem|Aquarius Gem]] x4. |
||
| − | [[Rod of Faith (Final Fantasy XII)|Rod of Faith]] is the ultimate rod. It is obtainable on [[Mt Bur-Omisace]] after [[Behemoth King (Final Fantasy XII)|Behemoth King]] hunt. It |
+ | [[Rod of Faith (Final Fantasy XII)|Rod of Faith]] is the ultimate rod. It is obtainable on [[Mt Bur-Omisace]] after [[Behemoth King (Final Fantasy XII)|Behemoth King]] hunt. It cannot be blocked or parried by enemies. |
[[Staff of the Magi (Final Fantasy XII)|Staff of the Magi]] is the ultimate staff stolen from [[Luxollid]]. It [[Elemental Affinity|boosts]] Holy damage by 50%. |
[[Staff of the Magi (Final Fantasy XII)|Staff of the Magi]] is the ultimate staff stolen from [[Luxollid]]. It [[Elemental Affinity|boosts]] Holy damage by 50%. |
||
| − | [[Sagittarius (Final Fantasy XII)|Sagittarius]] is the ultimate bow bought from the bazaar for 60,000 gil by selling [[Loot (Final Fantasy XII)#Beastlord Horn|Beastlord Horn]] x3, [[Loot (Final Fantasy XII)#Moon Ring|Moon Ring]] x3 and [[Loot (Final Fantasy XII)|Sagittarius Gem]] x4. The [[Final Fantasy XII |
+ | [[Sagittarius (Final Fantasy XII)|Sagittarius]] is the ultimate bow bought from the bazaar for 60,000 gil by selling [[Loot (Final Fantasy XII)#Beastlord Horn|Beastlord Horn]] x3, [[Loot (Final Fantasy XII)#Moon Ring|Moon Ring]] x3 and [[Loot (Final Fantasy XII)|Sagittarius Gem]] x4. The [[Artemis Arrows (Final Fantasy XII)|Artemis Arrows]] are the ultimate arrows, bought for 15,000 gil from the bazaar after selling [[Loot (Final Fantasy XII)#Vampyr Fang|Vampyr Fang]] x2, [[Loot (Final Fantasy XII)#Dorsal Fin|Dorsal Fin]] x2, and [[Loot (Final Fantasy XII)#Gemini Gem|Gemini Gem]] x3. In the ''Zodiac'', the arrows are much cheaper at 1280 gil and require the [[Great Serpent's Fang (Final Fantasy XII)|Great Serpent's Fangs]] instead of Vampyr Fangs. |
| − | [[Gastrophetes (Final Fantasy XII)|Gastrophetes]] is the ultimate crossbow stolen from [[Pallicant]], or bought from the Outfitters Shop in [[Phon Coast]] (part of Hunt Club sidequest; must give 25 trophies to Atak). The [[ |
+ | [[Gastrophetes (Final Fantasy XII)|Gastrophetes]] is the ultimate crossbow stolen from [[Pallicant]], or bought from the Outfitters Shop in [[Phon Coast]] (part of Hunt Club sidequest; must give 25 trophies to Atak). The [[Grand Bolts]] are the ultimate bolts bought for 15,000 gil (original) or 1,680 gil (''Zodiac'') from the bazaar after selling [[Wrath of God]] x2, [[Ring Wyrm Liver]] x2 and [[Capricorn Gem]] x3. |
| − | [[Fomalhaut (Final Fantasy XII)|Fomalhaut]] is the ultimate gun found from a random treasure in the [[Lhusu Mines]] in the room [[Antlion (Final Fantasy XII)|Antlion]] is found. It can also be found from Henne Mines Phase 2, [[Pharos (Final Fantasy XII)|Pharos]] and Cerobi Steppe. The [[ |
+ | [[Fomalhaut (Final Fantasy XII)|Fomalhaut]] is the ultimate gun found from a random treasure in the [[Lhusu Mines]] in the room [[Antlion (Final Fantasy XII)|Antlion]] is found. It can also be found from Henne Mines Phase 2, [[Pharos (Final Fantasy XII)|Pharos]] and Cerobi Steppe. The [[Windslicer Shot]] and [[Dark Shot (Final Fantasy XII)|Dark Shot]] tie for the strongest ammo. |
| − | [[Volcano (Final Fantasy XII)|Volcano]] is the ultimate hand-bomb and reward for the [[Catoblepas (Final Fantasy XII)|Catoblepas]] hunt. The [[ |
+ | [[Volcano (Final Fantasy XII)|Volcano]] is the ultimate hand-bomb and reward for the [[Catoblepas (Final Fantasy XII)|Catoblepas]] hunt. The [[Castellanos]] is the ultimate bomb bought for 12,000 gil from the bazaar after selling [[Loot (Final Fantasy XII)#Bomb Fragment|Bomb Fragment]] x3, [[Loot (Final Fantasy XII)#Frog Oil|Frog Oil]] x2 and [[Loot (Final Fantasy XII)#Aries Gem|Aries Gem]] x3. |
====''Zodiac'' versions==== |
====''Zodiac'' versions==== |
||
| Line 624: | Line 625: | ||
[[Tula]] is the new strongest crossbow. It is obtained in Pharos at Ridorana - Second Ascent. |
[[Tula]] is the new strongest crossbow. It is obtained in Pharos at Ridorana - Second Ascent. |
||
| − | [[Seitengrat (Final Fantasy XII)|Seitengrat]] is the new strongest bow with 224 Attack Power and |
+ | [[Seitengrat (Final Fantasy XII)|Seitengrat]] is the new strongest bow with 224 Attack Power, 75 Evade, and a very high attack range and critical hit rate. It is by far the strongest weapon, but is only obtained from an invisible chest on a [[Skyferry]] with a very low spawn rate (0.01%). Like the Great Trango, the Seitengrat is invisible when equipped. It has no license and can thus be wielded by anyone. |
[[Mithuna]] is the new strongest gun bought from the bazaar by selling [[Loot (Final Fantasy XII)#Emperor Scale|Emperor Scale]] x2, [[Loot (Final Fantasy XII)#Earth Crystal|Earth Crystal]] x3 and [[Loot (Final Fantasy XII)#Silver Liquid|Silver Liquids]] x3. |
[[Mithuna]] is the new strongest gun bought from the bazaar by selling [[Loot (Final Fantasy XII)#Emperor Scale|Emperor Scale]] x2, [[Loot (Final Fantasy XII)#Earth Crystal|Earth Crystal]] x3 and [[Loot (Final Fantasy XII)#Silver Liquid|Silver Liquids]] x3. |
||
| Line 642: | Line 643: | ||
====''[[Final Fantasy XII: Revenant Wings]]''==== |
====''[[Final Fantasy XII: Revenant Wings]]''==== |
||
[[File:RW Anastasia.jpg|thumb|Anastasia]] |
[[File:RW Anastasia.jpg|thumb|Anastasia]] |
||
| − | The [[Anastasia]] can be considered [[Vaan |
+ | The [[Anastasia]] can be considered [[Vaan (Revenant Wings party member)|Vaan's]] ultimate weapon, obtained as part of the storyline after the events in the World of Illusion. It is not initially the strongest available weapon, but its stats are boosted every time the [[Midlight's Deep (Revenant Wings)|Midlight's Deep]] dungeon is completed. Eventually, it is possible to boost the Anastasia's stats so high Vaan can take out [[Yiazmat (Revenant Wings)|Yiazmat]] alone. |
Other best weapons for characters are crafted with the help of [[Recipe Book]]s, but the weapons' stats depend on the items the player uses and the questions they answer when making the weapon. A series of unsellable weapons exist, but they grant no stat boosts and are usually outclassed by customizable weapons. Some have unique attributes that make them occasionally favorable, such as a particular element or a range ability. |
Other best weapons for characters are crafted with the help of [[Recipe Book]]s, but the weapons' stats depend on the items the player uses and the questions they answer when making the weapon. A series of unsellable weapons exist, but they grant no stat boosts and are usually outclassed by customizable weapons. Some have unique attributes that make them occasionally favorable, such as a particular element or a range ability. |
||
| − | {{ |
+ | {{clear}} |
=== ''[[Final Fantasy XIII]]'' === |
=== ''[[Final Fantasy XIII]]'' === |
||
| Line 653: | Line 654: | ||
There are a few traits all ultimate weapons have in common regardless of which weapon they were upgraded from: they all require a [[Final Fantasy XIII components#Trapezohedron|Trapezohedron]] to be upgraded from the tier two weapon, and they all have the ability "ATB: +1" along with any other passive abilities, increasing the character's [[Command Synergy Battle#ATB Gauge|ATB gauge]] slots by one. As a penalty, wielding an ultimate weapon drastically decreases target times in battle, making it difficult to get higher [[Battle Results#Final Fantasy XIII|battle rankings]]. |
There are a few traits all ultimate weapons have in common regardless of which weapon they were upgraded from: they all require a [[Final Fantasy XIII components#Trapezohedron|Trapezohedron]] to be upgraded from the tier two weapon, and they all have the ability "ATB: +1" along with any other passive abilities, increasing the character's [[Command Synergy Battle#ATB Gauge|ATB gauge]] slots by one. As a penalty, wielding an ultimate weapon drastically decreases target times in battle, making it difficult to get higher [[Battle Results#Final Fantasy XIII|battle rankings]]. |
||
| − | Ultimate weapons have no synthesized abilities. |
+ | Ultimate weapons have no synthesized abilities. They also have high EXP requirements to level up, all needing more than a million EXP to reach their max level, and many needing more than a million and a half, in contrast to lower-tier weapons, which only need a few hundred thousand EXP to max out. |
Below is the ultimate weapon for each character: |
Below is the ultimate weapon for each character: |
||
| − | * [[Lightning (Final Fantasy XIII) |
+ | * [[Lightning (Final Fantasy XIII party member)|Lightning]]: [[Omega Weapon (weapon)|Omega Weapon]] |
| − | * [[Sazh |
+ | * [[Sazh (Final Fantasy XIII party member)|Sazh]]: [[Total Eclipses]] |
| − | * [[Snow |
+ | * [[Snow (Final Fantasy XIII party member)|Snow]]: [[Save the Queen]] |
| − | * [[Hope |
+ | * [[Hope (Final Fantasy XIII party member)|Hope]]: [[Final Fantasy XIII weapons#Nue|Nue]] |
| − | * [[ |
+ | * [[Vanille (Final Fantasy XIII party member)|Vanille]]: [[Nirvana]] |
* [[Oerba Yun Fang|Fang]]: [[Kain's Lance (weapon)|Kain's Lance]] |
* [[Oerba Yun Fang|Fang]]: [[Kain's Lance (weapon)|Kain's Lance]] |
||
| Line 668: | Line 669: | ||
{|class="half-width XIII2 article-table" style="text-align:center" |
{|class="half-width XIII2 article-table" style="text-align:center" |
||
| + | |- |
||
| − | |-class="a" |
||
!width="150px" rowspan="2"|Passive Ability |
!width="150px" rowspan="2"|Passive Ability |
||
!width="300px" colspan="2"|Character |
!width="300px" colspan="2"|Character |
||
| − | |-class="a" |
||
| − | !width="150px"|[[Serah Farron/Gameplay|Serah]] |
||
| − | !width="150px"|[[Noel Kreiss/Gameplay|Noel]] |
||
|- |
|- |
||
| + | !width="150px"|[[Serah (Final Fantasy XIII-2 party member)|Serah]] |
||
| − | !class="b"|Chain Bonus Lv. 5 |
||
| + | !width="150px"|[[Noel (Final Fantasy XIII-2 party member)|Noel]] |
||
| + | |- |
||
| + | !Chain Bonus Lv. 5 |
||
|[[Final Fantasy XIII-2 weapons#Gandiva|Gandiva]]<hr/>[[File:FFXIII-2 Strength Icon.png|15x15px|link=Strength]] 72, [[File:FFXIII-2 Magic Icon.png|15x15px|link=Magic Power|Magic]] 120 |
|[[Final Fantasy XIII-2 weapons#Gandiva|Gandiva]]<hr/>[[File:FFXIII-2 Strength Icon.png|15x15px|link=Strength]] 72, [[File:FFXIII-2 Magic Icon.png|15x15px|link=Magic Power|Magic]] 120 |
||
|[[Final Fantasy XIII-2 weapons#Grasitha|Grasitha]]<hr/>[[File:FFXIII-2 Strength Icon.png|15x15px|link=Strength]] 120, [[File:FFXIII-2 Magic Icon.png|15x15px|link=Magic Power|Magic]] 72 |
|[[Final Fantasy XIII-2 weapons#Grasitha|Grasitha]]<hr/>[[File:FFXIII-2 Strength Icon.png|15x15px|link=Strength]] 120, [[File:FFXIII-2 Magic Icon.png|15x15px|link=Magic Power|Magic]] 72 |
||
|- |
|- |
||
| − | ! |
+ | !ATB Speed: +50% |
|[[Final Fantasy XIII-2 weapons#Indrajit|Indrajit]]<hr/>[[File:FFXIII-2 Strength Icon.png|15x15px|link=Strength]] 64, [[File:FFXIII-2 Magic Icon.png|15x15px|link=Magic Power|Magic]] 80 |
|[[Final Fantasy XIII-2 weapons#Indrajit|Indrajit]]<hr/>[[File:FFXIII-2 Strength Icon.png|15x15px|link=Strength]] 64, [[File:FFXIII-2 Magic Icon.png|15x15px|link=Magic Power|Magic]] 80 |
||
|[[Final Fantasy XIII-2 weapons#Romulus and Remus|Romulus and Remus]]<hr/>[[File:FFXIII-2 Strength Icon.png|15x15px|link=Strength]] 80, [[File:FFXIII-2 Magic Icon.png|15x15px|link=Magic Power|Magic]] 64 |
|[[Final Fantasy XIII-2 weapons#Romulus and Remus|Romulus and Remus]]<hr/>[[File:FFXIII-2 Strength Icon.png|15x15px|link=Strength]] 80, [[File:FFXIII-2 Magic Icon.png|15x15px|link=Magic Power|Magic]] 64 |
||
|- |
|- |
||
| − | ! |
+ | !ATB +1 |
|[[Final Fantasy XIII-2 weapons#Sagittarius|Sagittarius]]<hr/>[[File:FFXIII-2 Strength Icon.png|15x15px|link=Strength]] 115, [[File:FFXIII-2 Magic Icon.png|15x15px|link=Magic Power|Magic]] 160 |
|[[Final Fantasy XIII-2 weapons#Sagittarius|Sagittarius]]<hr/>[[File:FFXIII-2 Strength Icon.png|15x15px|link=Strength]] 115, [[File:FFXIII-2 Magic Icon.png|15x15px|link=Magic Power|Magic]] 160 |
||
|[[Final Fantasy XIII-2 weapons#Mac an Luin|Mac an Luin]]<hr/>[[File:FFXIII-2 Strength Icon.png|15x15px|link=Strength]] 160, [[File:FFXIII-2 Magic Icon.png|15x15px|link=Magic Power|Magic]] 115 |
|[[Final Fantasy XIII-2 weapons#Mac an Luin|Mac an Luin]]<hr/>[[File:FFXIII-2 Strength Icon.png|15x15px|link=Strength]] 160, [[File:FFXIII-2 Magic Icon.png|15x15px|link=Magic Power|Magic]] 115 |
||
|- |
|- |
||
| − | ! |
+ | !Improved [[Stagger (Final Fantasy XIII)|Stagger]] |
|[[Final Fantasy XIII-2 weapons#Arcus Chronica|Arcus Chronica]]<hr/>[[File:FFXIII-2 Strength Icon.png|15x15px|link=Strength]] 140, [[File:FFXIII-2 Magic Icon.png|15x15px|link=Magic Power|Magic]] 200 |
|[[Final Fantasy XIII-2 weapons#Arcus Chronica|Arcus Chronica]]<hr/>[[File:FFXIII-2 Strength Icon.png|15x15px|link=Strength]] 140, [[File:FFXIII-2 Magic Icon.png|15x15px|link=Magic Power|Magic]] 200 |
||
|[[Final Fantasy XIII-2 weapons#In Paradisum|In Paradisum]]<hr/>[[File:FFXIII-2 Strength Icon.png|15x15px|link=Strength]] 200, [[File:FFXIII-2 Magic Icon.png|15x15px|link=Magic Power|Magic]] 140 |
|[[Final Fantasy XIII-2 weapons#In Paradisum|In Paradisum]]<hr/>[[File:FFXIII-2 Strength Icon.png|15x15px|link=Strength]] 200, [[File:FFXIII-2 Magic Icon.png|15x15px|link=Magic Power|Magic]] 140 |
||
|- |
|- |
||
| − | ! |
+ | !Fragment Energy |
|[[Final Fantasy XIII-2 weapons#Odinbolt|Odinbolt]]<hr/>[[File:FFXIII-2 Strength Icon.png|15x15px|link=Strength]] {{foot|Varies|Strength is equal to percentage of Fragments obtained, plus 40, with an additional bonus of 80 if all Fragments are obtained.}}, [[File:FFXIII-2 Magic Icon.png|15x15px|link=Magic Power|Magic]] {{foot|Varies|Magic is equal to percentage of Fragments obtained, plus 40, with an additional bonus of 80 if all Fragments are obtained.}} |
|[[Final Fantasy XIII-2 weapons#Odinbolt|Odinbolt]]<hr/>[[File:FFXIII-2 Strength Icon.png|15x15px|link=Strength]] {{foot|Varies|Strength is equal to percentage of Fragments obtained, plus 40, with an additional bonus of 80 if all Fragments are obtained.}}, [[File:FFXIII-2 Magic Icon.png|15x15px|link=Magic Power|Magic]] {{foot|Varies|Magic is equal to percentage of Fragments obtained, plus 40, with an additional bonus of 80 if all Fragments are obtained.}} |
||
|[[Final Fantasy XIII-2 weapons#Odinblade|Odinblade]]<hr/>[[File:FFXIII-2 Strength Icon.png|15x15px|link=Strength]] {{foot|Varies|Strength is equal to percentage of Fragments obtained, plus 40, with an additional bonus of 80 if all Fragments are obtained.}}, [[File:FFXIII-2 Magic Icon.png|15x15px|link=Magic Power|Magic]] {{foot|Varies|Magic is equal to percentage of Fragments obtained, plus 40, with an additional bonus of 80 if all Fragments are obtained.}} |
|[[Final Fantasy XIII-2 weapons#Odinblade|Odinblade]]<hr/>[[File:FFXIII-2 Strength Icon.png|15x15px|link=Strength]] {{foot|Varies|Strength is equal to percentage of Fragments obtained, plus 40, with an additional bonus of 80 if all Fragments are obtained.}}, [[File:FFXIII-2 Magic Icon.png|15x15px|link=Magic Power|Magic]] {{foot|Varies|Magic is equal to percentage of Fragments obtained, plus 40, with an additional bonus of 80 if all Fragments are obtained.}} |
||
|} |
|} |
||
| − | ===''[[Lightning Returns: Final Fantasy XIII]]''=== |
+ | ====''[[Lightning Returns: Final Fantasy XIII]]''==== |
| − | The [[Crimson Blitz (weapon)|Crimson Blitz]] transforms into the [[Lightning Returns |
+ | The [[Crimson Blitz (weapon)|Crimson Blitz]] transforms into the [[Ultima Weapon (Lightning Returns)|Ultima Weapon]] when the player completes the Four Trials in [[Luxerion Cathedral|God's Sanctum]] on the [[Lightning Returns: Final Fantasy XIII days|Final Day]]. It has by far the best stats, but it is only obtained right before the [[Bhunivelze (boss)|final boss]], and it cannot be brought to a [[New Game Plus]] playthrough. |
=== ''[[Final Fantasy XIV]]'' === |
=== ''[[Final Fantasy XIV]]'' === |
||
[[File:FFXIV Artemis Bow.png|right|thumb|150px|The Artemis Bow.]] |
[[File:FFXIV Artemis Bow.png|right|thumb|150px|The Artemis Bow.]] |
||
| + | Each major release has its own set of ultimate weapons for each job, which can be upgraded throughout their respective patch cycles to maintain their status as the top weapons for that release. They can be identified by the purple coloration used in their icon to denote their rarity, with purple being exclusive to these weapons, though weaker iterations of the weapons may lack this. |
||
| − | {{Main|Relic Weapon (Final Fantasy XIV)}} |
||
| − | Relic Weapons can be obtained through the "A Relic Reborn" quest, available after both the Main Scenario and job quests have been completed. The quest is repeatable for all weapon types, but players can only do one version of the quest at a time. To flag the quest again, they must either finish the current quest or abandon it. |
||
| + | The individual sets of weapons each have their own collectives names and processes to acquire them, which are unlocked after completing the final main scenario quests from their initial release. They then each have unique progession system to upgrade them through various stages. The [[Final Fantasy XIV (version 1.0)|original release]] featured [[Relic Weapon (Final Fantasy XIV)|Relic Weapons]], which were carried over in ''A Realm Reborn'' where they can be upgraded to [[Zodiac Weapon]]s. ''[[Final Fantasy XIV: Heavensward|Heavensward]]'' features [[Anima Weapon]]s, ''[[Final Fantasy XIV: Stormblood|Stormblood]]'' features [[Eureka Weapon]]s, ''[[Final Fantasy XIV: Shadowbringers|Shadowbringers]]'' features [[Resistance Weapon]]s, and ''[[Final Fantasy XIV: Endwalker|Endwalker]]'' features [[Manderville Weapon]]s. Despite their unique names, Relic Weapon is often used as a catch-all term by the playerbase for all such weapons. |
||
| − | Relic weapons can be upgraded to more powerful Zenith, Atma, Animus, Novus and Nexus versions through a series of quests. Once a Nexus weapon is obtained, it can be transformed into its corresponding Zodiac weapon by collecting four required upgrade materials, then finally upgraded into its finished Zodiac Zeta form. Once a relic has reached its Novus version, its secondary stats can be customized. |
||
| + | ====''Final Fantasy XIV: A Realm Reborn''==== |
||
| − | {|class="full-width FFXIV article-table" style="text-align:center" |
||
| + | {{main|Relic Weapon|Zodiac Weapon}} |
||
| − | |-class="a" |
||
| + | {|class="FFXIV article-table" |
||
| + | |- |
||
!Job |
!Job |
||
| − | !Relic |
+ | !Stage 1 (Relic) |
| + | !Stage 2 (Zenith) |
||
| − | !Zodiac |
||
| + | !Stage 3 (Atma) |
||
| − | !Anima |
||
| + | !Stage 4 (Animus) |
||
| + | !Stage 5 (Novus) |
||
| + | !Stage 6 (Nexus) |
||
| + | !Stage 7 (Zodiac) |
||
| + | !Stage 8 (Zeta) |
||
|- |
|- |
||
| − | ! |
+ | !{{icon|ffxiv|discipline|Paladin}} |
| − | |Curtana/Holy Shield |
+ | |{{icon|ffxiv|gladiator's arm|Curtana}}<br/>{{icon|ffxiv|shield|Holy Shield}} |
| + | |{{icon|ffxiv|gladiator's arm|Curtana Zenith}}<br/>{{icon|ffxiv|shield|Holy Shield Zenith}} |
||
| − | |Excalibur/Aegis Shield |
||
| + | |{{icon|ffxiv|gladiator's arm|Curtana Atma}}<br/>{{icon|ffxiv|shield|Holy Shield Atma}} |
||
| − | |Almace/Ancile |
||
| + | |{{icon|ffxiv|gladiator's arm|Curtana Animus}}<br/>{{icon|ffxiv|shield|Holy Shield Animus}} |
||
| + | |{{icon|ffxiv|gladiator's arm|Curtana Novus}}<br/>{{icon|ffxiv|shield|Holy Shield Novus}} |
||
| + | |{{icon|ffxiv|gladiator's arm|Curtana Nexus}}<br/>{{icon|ffxiv|shield|Holy Shield Nexus}} |
||
| + | |{{icon|ffxiv|gladiator's arm|Excalibur}}<br/>{{icon|ffxiv|shield|Aegis Shield}} |
||
| + | |{{icon|ffxiv|gladiator's arm|Excalibur Zeta}}<br/>{{icon|ffxiv|shield|Aegis Shield Zeta}} |
||
|- |
|- |
||
| − | ! |
+ | !{{icon|ffxiv|discipline|Warrior}} |
| − | |Bravura |
+ | |{{icon|ffxiv|marauder's arm|Bravura}} |
| + | |{{icon|ffxiv|marauder's arm|Bravura Zenith}} |
||
| − | |Ragnarok |
||
| + | |{{icon|ffxiv|marauder's arm|Bravura Atma}} |
||
| − | |Ukonvasara |
||
| + | |{{icon|ffxiv|marauder's arm|Bravura Animus}} |
||
| + | |{{icon|ffxiv|marauder's arm|Bravura Novus}} |
||
| + | |{{icon|ffxiv|marauder's arm|Bravura Nexus}} |
||
| + | |{{icon|ffxiv|marauder's arm|Ragnarok}} |
||
| + | |{{icon|ffxiv|marauder's arm|Ragnarok Zeta}} |
||
|- |
|- |
||
| + | !{{icon|ffxiv|discipline|White Mage}} |
||
| − | !class="b"|Monk |
||
| + | |{{icon|ffxiv|two-handed conjurer's arm|Thyrus}} |
||
| − | |Sphairai |
||
| + | |{{icon|ffxiv|two-handed conjurer's arm|Thyrus Zenith}} |
||
| − | |Kaiser Knuckles |
||
| + | |{{icon|ffxiv|two-handed conjurer's arm|Thyrus Atma}} |
||
| − | |Verethragna |
||
| + | |{{icon|ffxiv|two-handed conjurer's arm|Thyrus Animus}} |
||
| + | |{{icon|ffxiv|two-handed conjurer's arm|Thyrus Novus}} |
||
| + | |{{icon|ffxiv|two-handed conjurer's arm|Thyrus Nexus}} |
||
| + | |{{icon|ffxiv|two-handed conjurer's arm|Nirvana}} |
||
| + | |{{icon|ffxiv|two-handed conjurer's arm|Nirvana Zeta}} |
||
|- |
|- |
||
| + | !{{icon|ffxiv|discipline|Scholar}} |
||
| − | !class="b"|Dragoon |
||
| + | |{{icon|ffxiv|scholar's arm|Omnilex}} |
||
| − | |Gae Bolg |
||
| + | |{{icon|ffxiv|scholar's arm|Omnilex Zenith}} |
||
| − | |Longinus |
||
| + | |{{icon|ffxiv|scholar's arm|Omnilex Atma}} |
||
| − | |Rhongomiant |
||
| + | |{{icon|ffxiv|scholar's arm|Omnilex Animus}} |
||
| + | |{{icon|ffxiv|scholar's arm|Omnilex Novus}} |
||
| + | |{{icon|ffxiv|scholar's arm|Omnilex Nexus}} |
||
| + | |{{icon|ffxiv|scholar's arm|Last Resort}} |
||
| + | |{{icon|ffxiv|scholar's arm|Last Resort Zeta}} |
||
|- |
|- |
||
| + | !{{icon|ffxiv|discipline|Monk}} |
||
| − | !class="b"|Bard |
||
| + | |{{icon|ffxiv|pugilist's arm|Sphairai}} |
||
| − | |Artemis Bow |
||
| + | |{{icon|ffxiv|pugilist's arm|Sphairai Zenith}} |
||
| − | |Yoichi Bow |
||
| + | |{{icon|ffxiv|pugilist's arm|Sphairai Atma}} |
||
| − | |Gandiva |
||
| + | |{{icon|ffxiv|pugilist's arm|Sphairai Animus}} |
||
| + | |{{icon|ffxiv|pugilist's arm|Sphairai Novus}} |
||
| + | |{{icon|ffxiv|pugilist's arm|Sphairai Nexus}} |
||
| + | |{{icon|ffxiv|pugilist's arm|Kaiser Knuckles}} |
||
| + | |{{icon|ffxiv|pugilist's arm|Kaiser Knuckles Zeta}} |
||
|- |
|- |
||
| + | !{{icon|ffxiv|discipline|Dragoon}} |
||
| − | !class="b"|Ninja |
||
| + | |{{icon|ffxiv|lancer's arm|Gae Bolg}} |
||
| − | |Yoshimitsu |
||
| + | |{{icon|ffxiv|lancer's arm|Gae Bolg Zenith}} |
||
| − | |Sasuke's Blades |
||
| + | |{{icon|ffxiv|lancer's arm|Gae Bolg Atma}} |
||
| − | |Kannagi |
||
| + | |{{icon|ffxiv|lancer's arm|Gae Bolg Animus}} |
||
| + | |{{icon|ffxiv|lancer's arm|Gae Bolg Novus}} |
||
| + | |{{icon|ffxiv|lancer's arm|Gae Bolg Nexus}} |
||
| + | |{{icon|ffxiv|lancer's arm|Longinus}} |
||
| + | |{{icon|ffxiv|lancer's arm|Longinus Zeta}} |
||
|- |
|- |
||
| + | !{{icon|ffxiv|discipline|Ninja}} |
||
| − | !class="b"|Black Mage |
||
| + | |{{icon|ffxiv|rogue's arm|Yoshimitsu}} |
||
| − | |Stardust Rod |
||
| + | |{{icon|ffxiv|rogue's arm|Yoshimitsu Zenith}} |
||
| − | |Lilith Rod |
||
| + | |{{icon|ffxiv|rogue's arm|Yoshimitsu Atma}} |
||
| − | |Hvergelmir |
||
| + | |{{icon|ffxiv|rogue's arm|Yoshimitsu Animus}} |
||
| + | |{{icon|ffxiv|rogue's arm|Yoshimitsu Novus}} |
||
| + | |{{icon|ffxiv|rogue's arm|Yoshimitsu Nexus}} |
||
| + | |{{icon|ffxiv|rogue's arm|Sasuke's Blades}} |
||
| + | |{{icon|ffxiv|rogue's arm|Sasuke's Blades Zeta}} |
||
|- |
|- |
||
| + | !{{icon|ffxiv|discipline|Bard}} |
||
| − | !class="b"|White Mage |
||
| + | |{{icon|ffxiv|archer's arm|Artemis Bow}} |
||
| − | |Thyrus |
||
| + | |{{icon|ffxiv|archer's arm|Artemis Bow Zenith}} |
||
| − | |Nirvana |
||
| + | |{{icon|ffxiv|archer's arm|Artemis Bow Atma}} |
||
| − | |Majestas |
||
| + | |{{icon|ffxiv|archer's arm|Artemis Bow Animus}} |
||
| + | |{{icon|ffxiv|archer's arm|Artemis Bow Novus}} |
||
| + | |{{icon|ffxiv|archer's arm|Artemis Bow Nexus}} |
||
| + | |{{icon|ffxiv|archer's arm|Yoichi Bow}} |
||
| + | |{{icon|ffxiv|archer's arm|Yoichi Bow Zeta}} |
||
|- |
|- |
||
| + | !{{icon|ffxiv|discipline|Black Mage}} |
||
| − | !class="b"|Scholar |
||
| + | |{{icon|ffxiv|two-handed thaumaturge's arm|Stardust Rod}} |
||
| − | |Omnilex |
||
| + | |{{icon|ffxiv|two-handed thaumaturge's arm|Stardust Rod Zenith}} |
||
| − | |Last Resort |
||
| + | |{{icon|ffxiv|two-handed thaumaturge's arm|Stardust Rod Atma}} |
||
| − | |Tetrabiblos |
||
| + | |{{icon|ffxiv|two-handed thaumaturge's arm|Stardust Rod Animus}} |
||
| + | |{{icon|ffxiv|two-handed thaumaturge's arm|Stardust Rod Novus}} |
||
| + | |{{icon|ffxiv|two-handed thaumaturge's arm|Stardust Rod Nexus}} |
||
| + | |{{icon|ffxiv|two-handed thaumaturge's arm|Lilith Rod}} |
||
| + | |{{icon|ffxiv|two-handed thaumaturge's arm|Lilith Rod Zeta}} |
||
|- |
|- |
||
| − | ! |
+ | !{{icon|ffxiv|discipline|Summoner}} |
| − | |Veil of Wiyu |
+ | |{{icon|ffxiv|arcanist's grimoire|The Veil of Wiyu}} |
| + | |{{icon|ffxiv|arcanist's grimoire|The Veil of Wiyu Zenith}} |
||
| − | |Apocalypse |
||
| + | |{{icon|ffxiv|arcanist's grimoire|The Veil of Wiyu Atma}} |
||
| − | |Draconomicon |
||
| + | |{{icon|ffxiv|arcanist's grimoire|The Veil of Wiyu Animus}} |
||
| + | |{{icon|ffxiv|arcanist's grimoire|The Veil of Wiyu Novus}} |
||
| + | |{{icon|ffxiv|arcanist's grimoire|The Veil of Wiyu Nexus}} |
||
| + | |{{icon|ffxiv|arcanist's grimoire|Apocalypse}} |
||
| + | |{{icon|ffxiv|arcanist's grimoire|Apocalypse Zeta}} |
||
|- |
|- |
||
| + | |} |
||
| − | !class="b"|Dark Knight |
||
| + | |||
| − | | |
||
| + | ====''[[Final Fantasy XIV: Heavensward]]''==== |
||
| − | | |
||
| + | {{main|Anima Weapon}} |
||
| − | |Nothung |
||
| + | {|class="FFXIV article-table" |
||
|- |
|- |
||
| + | !Job |
||
| − | !class="b"|Machinist |
||
| + | !Stage 1 (Animated) |
||
| − | | |
||
| + | !Stage 2 (Awoken) |
||
| − | | |
||
| + | !Stage 3 |
||
| − | |Armageddon |
||
| + | !Stage 4 (Hyperconductive) |
||
| + | !Stage 5 |
||
| + | !Stage 6 (Sharpened) |
||
| + | !Stage 7 |
||
| + | !Stage 8 (Lux) |
||
|- |
|- |
||
| + | !{{icon|ffxiv|discipline|Paladin}} |
||
| − | !class="b"|Astrologian |
||
| + | |{{icon|ffxiv|gladiator's arm|Animated Hauteclaire}}<br/>{{icon|ffxiv|shield|Animated Prytwen}} |
||
| − | | |
||
| + | |{{icon|ffxiv|gladiator's arm|Hauteclaire Awoken}}<br/>{{icon|ffxiv|shield|Prytwen Awoken}} |
||
| − | | |
||
| + | |{{icon|ffxiv|gladiator's arm|Almace}}<br/>{{icon|ffxiv|shield|Ancile}} |
||
| − | |Deneb |
||
| + | |{{icon|ffxiv|gladiator's arm|Hyperconductive Almace}}<br/>{{icon|ffxiv|shield|Hyperconductive Ancile}} |
||
| + | |{{icon|ffxiv|gladiator's arm|Sword of the Twin Thegns}}<br/>{{icon|ffxiv|shield|Shield of the Twin Thegns}} |
||
| + | |{{icon|ffxiv|gladiator's arm|Sharpened Sword of the Twin Thegns}}<br/>{{icon|ffxiv|shield|Sharpened Shield of the Twin Thegns}} |
||
| + | |{{icon|ffxiv|gladiator's arm|Aettir}}<br/>{{icon|ffxiv|shield|Priwen}} |
||
| + | |{{icon|ffxiv|gladiator's arm|Aettir Lux}}<br/>{{icon|ffxiv|shield|Priwen Lux}} |
||
| + | |- |
||
| + | !{{icon|ffxiv|discipline|Warrior}} |
||
| + | |{{icon|ffxiv|marauder's arm|Animated Parashu}} |
||
| + | |{{icon|ffxiv|marauder's arm|Parashu Awoken}} |
||
| + | |{{icon|ffxiv|marauder's arm|Ukonvasara}} |
||
| + | |{{icon|ffxiv|marauder's arm|Hyperconductive Ukonvasara}} |
||
| + | |{{icon|ffxiv|marauder's arm|Axe of the Blood Emperor}} |
||
| + | |{{icon|ffxiv|marauder's arm|Sharpened Axe of the Blood Emperor}} |
||
| + | |{{icon|ffxiv|marauder's arm|Minos}} |
||
| + | |{{icon|ffxiv|marauder's arm|Minos Lux}} |
||
| + | |- |
||
| + | !{{icon|ffxiv|discipline|Dark Knight}} |
||
| + | |{{icon|ffxiv|dark knight's arm|Animated Deathbringer}} |
||
| + | |{{icon|ffxiv|dark knight's arm|Deathbringer Awoken}} |
||
| + | |{{icon|ffxiv|dark knight's arm|Nothung}} |
||
| + | |{{icon|ffxiv|dark knight's arm|Hyperconductive Nothung}} |
||
| + | |{{icon|ffxiv|dark knight's arm|Guillotine of the Tyrant}} |
||
| + | |{{icon|ffxiv|dark knight's arm|Sharpened Guillotine of the Tyrant}} |
||
| + | |{{icon|ffxiv|dark knight's arm|Cronus}} |
||
| + | |{{icon|ffxiv|dark knight's arm|Cronus Lux}} |
||
| + | |- |
||
| + | !{{icon|ffxiv|discipline|White Mage}} |
||
| + | |{{icon|ffxiv|two-handed conjurer's arm|Animated Seraph Cane}} |
||
| + | |{{icon|ffxiv|two-handed conjurer's arm|Seraph Cane Awoken}} |
||
| + | |{{icon|ffxiv|two-handed conjurer's arm|Majestas}} |
||
| + | |{{icon|ffxiv|two-handed conjurer's arm|Hyperconductive Majestas}} |
||
| + | |{{icon|ffxiv|two-handed conjurer's arm|Cane of the White Tsar}} |
||
| + | |{{icon|ffxiv|two-handed conjurer's arm|Sharpened Cane of the White Tsar}} |
||
| + | |{{icon|ffxiv|two-handed conjurer's arm|Sindri}} |
||
| + | |{{icon|ffxiv|two-handed conjurer's arm|Sindri Lux}} |
||
| + | |- |
||
| + | !{{icon|ffxiv|discipline|Scholar}} |
||
| + | |{{icon|ffxiv|scholar's arm|Animated Elements}} |
||
| + | |{{icon|ffxiv|scholar's arm|Elements Awoken}} |
||
| + | |{{icon|ffxiv|scholar's arm|Tetrabiblos}} |
||
| + | |{{icon|ffxiv|scholar's arm|Hyperconductive Tetrabiblos}} |
||
| + | |{{icon|ffxiv|scholar's arm|Word of the Magnate}} |
||
| + | |{{icon|ffxiv|scholar's arm|Sharpened Word of the Magnate}} |
||
| + | |{{icon|ffxiv|scholar's arm|Anabasis}} |
||
| + | |{{icon|ffxiv|scholar's arm|Anabasis Lux}} |
||
| + | |- |
||
| + | !{{icon|ffxiv|discipline|Astrologian}} |
||
| + | |{{icon|ffxiv|astrologian's arm|Animated Atlas}} |
||
| + | |{{icon|ffxiv|astrologian's arm|Atlas Awoken}} |
||
| + | |{{icon|ffxiv|astrologian's arm|Deneb}} |
||
| + | |{{icon|ffxiv|astrologian's arm|Hyperconductive Deneb}} |
||
| + | |{{icon|ffxiv|astrologian's arm|Sphere of the Last Heir}} |
||
| + | |{{icon|ffxiv|astrologian's arm|Sharpened Sphere of the Last Heir}} |
||
| + | |{{icon|ffxiv|astrologian's arm|Canopus}} |
||
| + | |{{icon|ffxiv|astrologian's arm|Canopus Lux}} |
||
| + | |- |
||
| + | !{{icon|ffxiv|discipline|Monk}} |
||
| + | |{{icon|ffxiv|pugilist's arm|Animated Rising Suns}} |
||
| + | |{{icon|ffxiv|pugilist's arm|Rising Suns Awoken}} |
||
| + | |{{icon|ffxiv|pugilist's arm|Verethragna}} |
||
| + | |{{icon|ffxiv|pugilist's arm|Hyperconductive Verethragna}} |
||
| + | |{{icon|ffxiv|pugilist's arm|Sultan's Fists}} |
||
| + | |{{icon|ffxiv|pugilist's arm|Sharpened Sultan's Fists}} |
||
| + | |{{icon|ffxiv|pugilist's arm|Nyepels}} |
||
| + | |{{icon|ffxiv|pugilist's arm|Nyepels Lux}} |
||
| + | |- |
||
| + | !{{icon|ffxiv|discipline|Dragoon}} |
||
| + | |{{icon|ffxiv|lancer's arm|Animated Brionac}} |
||
| + | |{{icon|ffxiv|lancer's arm|Brionac Awoken}} |
||
| + | |{{icon|ffxiv|lancer's arm|Rhongomiant}} |
||
| + | |{{icon|ffxiv|lancer's arm|Hyperconductive Rhongomiant}} |
||
| + | |{{icon|ffxiv|lancer's arm|Trident of the Overlord}} |
||
| + | |{{icon|ffxiv|lancer's arm|Sharpened Trident of the Overlord}} |
||
| + | |{{icon|ffxiv|lancer's arm|Areadbhar}} |
||
| + | |{{icon|ffxiv|lancer's arm|Areadbhar Lux}} |
||
| + | |- |
||
| + | !{{icon|ffxiv|discipline|Ninja}} |
||
| + | |{{icon|ffxiv|rogue's arm|Animated Yukimitsu}} |
||
| + | |{{icon|ffxiv|rogue's arm|Yukimitsu Awoken}} |
||
| + | |{{icon|ffxiv|rogue's arm|Kannagi}} |
||
| + | |{{icon|ffxiv|rogue's arm|Hyperconductive Kannagi}} |
||
| + | |{{icon|ffxiv|rogue's arm|Spurs of the Thorn Prince}} |
||
| + | |{{icon|ffxiv|rogue's arm|Sharpened Spurs of the Thorn Prince}} |
||
| + | |{{icon|ffxiv|rogue's arm|Sandungs}} |
||
| + | |{{icon|ffxiv|rogue's arm|Sandungs Lux}} |
||
| + | |- |
||
| + | !{{icon|ffxiv|discipline|Bard}} |
||
| + | |{{icon|ffxiv|archer's arm|Animated Berimbau}} |
||
| + | |{{icon|ffxiv|archer's arm|Berimbau Awoken}} |
||
| + | |{{icon|ffxiv|archer's arm|Gandiva}} |
||
| + | |{{icon|ffxiv|archer's arm|Hyperconductive Gandiva}} |
||
| + | |{{icon|ffxiv|archer's arm|Bow of the Autarch}} |
||
| + | |{{icon|ffxiv|archer's arm|Sharpened Bow of the Autarch}} |
||
| + | |{{icon|ffxiv|archer's arm|Terpander}} |
||
| + | |{{icon|ffxiv|archer's arm|Terpander Lux}} |
||
| + | |- |
||
| + | !{{icon|ffxiv|discipline|Machinist}} |
||
| + | |{{icon|ffxiv|machinist's arm|Animated Ferdinand}} |
||
| + | |{{icon|ffxiv|machinist's arm|Ferdinand Awoken}} |
||
| + | |{{icon|ffxiv|machinist's arm|Armageddon}} |
||
| + | |{{icon|ffxiv|machinist's arm|Hyperconductive Armageddon}} |
||
| + | |{{icon|ffxiv|machinist's arm|Flame of the Dynast}} |
||
| + | |{{icon|ffxiv|machinist's arm|Sharpened Flame of the Dynast}} |
||
| + | |{{icon|ffxiv|machinist's arm|Deathlocke}} |
||
| + | |{{icon|ffxiv|machinist's arm|Deathlocke Lux}} |
||
| + | |- |
||
| + | !{{icon|ffxiv|discipline|Black Mage}} |
||
| + | |{{icon|ffxiv|two-handed thaumaturge's arm|Animated Lunaris Rod}} |
||
| + | |{{icon|ffxiv|two-handed thaumaturge's arm|Lunaris Rod Awoken}} |
||
| + | |{{icon|ffxiv|two-handed thaumaturge's arm|Hvergelmir}} |
||
| + | |{{icon|ffxiv|two-handed thaumaturge's arm|Hyperconductive Hvergelmir}} |
||
| + | |{{icon|ffxiv|two-handed thaumaturge's arm|Rod of the Black Khan}} |
||
| + | |{{icon|ffxiv|two-handed thaumaturge's arm|Sharpened Rod of the Black Khan}} |
||
| + | |{{icon|ffxiv|two-handed thaumaturge's arm|Kaladanda}} |
||
| + | |{{icon|ffxiv|two-handed thaumaturge's arm|Kaladanda Lux}} |
||
| + | |- |
||
| + | !{{icon|ffxiv|discipline|Summoner}} |
||
| + | |{{icon|ffxiv|arcanist's grimoire|Animated Almandal}} |
||
| + | |{{icon|ffxiv|arcanist's grimoire|Almandal Awoken}} |
||
| + | |{{icon|ffxiv|arcanist's grimoire|Draconomicon}} |
||
| + | |{{icon|ffxiv|arcanist's grimoire|Hyperconductive Draconomicon}} |
||
| + | |{{icon|ffxiv|arcanist's grimoire|Book of the Mad Queen}} |
||
| + | |{{icon|ffxiv|arcanist's grimoire|Sharpened Book of the Mad Queen}} |
||
| + | |{{icon|ffxiv|arcanist's grimoire|Mimesis}} |
||
| + | |{{icon|ffxiv|arcanist's grimoire|Mimesis Lux}} |
||
| + | |- |
||
| + | |} |
||
| + | |||
| + | ====''[[Final Fantasy XIV: Stormblood]]''==== |
||
| + | {{main|Eureka Weapon}} |
||
| + | {|class="FFXIV article-table" |
||
| + | |- |
||
| + | !Job |
||
| + | !Stage 1 (Antiquated) |
||
| + | !Stage 2-4 (Base (+1/+2)) |
||
| + | !Stage 5 (Anemos) |
||
| + | !Stage 6-7 (Pagos (+1)) |
||
| + | !Stage 8-10 (Elemental (+1/+2)) |
||
| + | !Stage 11 (Pyros) |
||
| + | !Stage 12-13 (Hydatos (+1)) |
||
| + | !Stage 14 |
||
| + | !Stage 15 (Eureka) |
||
| + | !Stage 16 (Physeos) |
||
| + | |- |
||
| + | !{{icon|ffxiv|discipline|Paladin}} |
||
| + | |{{icon|ffxiv|gladiator's arm|Antiquated Galatyn}}<br/>{{icon|ffxiv|shield|Antiquated Evalach}} |
||
| + | |{{icon|ffxiv|gladiator's arm|Galatyn}} (+1/+2)<br/>{{icon|ffxiv|shield|Evalach}} (+1/+2) |
||
| + | |{{icon|ffxiv|gladiator's arm|Galatyn Anemos}}<br/>{{icon|ffxiv|shield|Evalach Anemos}} |
||
| + | |{{icon|ffxiv|gladiator's arm|Galatyn Pagos}} (+1)<br/>{{icon|ffxiv|shield|Evalach Pagos}} (+1) |
||
| + | |{{icon|ffxiv|gladiator's arm|Elemental Sword}} (+1/+2)<br/>{{icon|ffxiv|shield|Elemental Shield}} (+1/+2) |
||
| + | |{{icon|ffxiv|gladiator's arm|Pyros Sword}}<br/>{{icon|ffxiv|shield|Pyros Shield}} |
||
| + | |{{icon|ffxiv|gladiator's arm|Hydatos Sword}} (+1)<br/>{{icon|ffxiv|shield|Hydatos Shield}} (+1) |
||
| + | |{{icon|ffxiv|gladiator's arm|Antea}}<br/>{{icon|ffxiv|shield|Bellerophon}} |
||
| + | |{{icon|ffxiv|gladiator's arm|Antea Eureka}}<br/>{{icon|ffxiv|shield|Bellerophon Eureka}} |
||
| + | |{{icon|ffxiv|gladiator's arm|Antea Physeos}}<br/>{{icon|ffxiv|shield|Bellerophon Physeos}} |
||
| + | |- |
||
| + | !{{icon|ffxiv|discipline|Warrior}} |
||
| + | |{{icon|ffxiv|marauder's arm|Antiquated Farsha}} |
||
| + | |{{icon|ffxiv|marauder's arm|Farsha}} (+1/+2) |
||
| + | |{{icon|ffxiv|marauder's arm|Farsha Anemos}} |
||
| + | |{{icon|ffxiv|marauder's arm|Farsha Pagos}} (+1) |
||
| + | |{{icon|ffxiv|marauder's arm|Elemental Battleaxe}} (+1/+2) |
||
| + | |{{icon|ffxiv|marauder's arm|Pyros Battleaxe}} |
||
| + | |{{icon|ffxiv|marauder's arm|Hydatos Battleaxe}} (+1) |
||
| + | |{{icon|ffxiv|marauder's arm|Shamash}} |
||
| + | |{{icon|ffxiv|marauder's arm|Shamash Eureka}} |
||
| + | |{{icon|ffxiv|marauder's arm|Shamash Physeos}} |
||
| + | |- |
||
| + | !{{icon|ffxiv|discipline|Dark Knight}} |
||
| + | |{{icon|ffxiv|dark knight's arm|Antiquated Caladbolg}} |
||
| + | |{{icon|ffxiv|dark knight's arm|Caladbolg}} (+1/+2) |
||
| + | |{{icon|ffxiv|dark knight's arm|Caladbolg Anemos}} |
||
| + | |{{icon|ffxiv|dark knight's arm|Caladbolg Pagos}} (+1) |
||
| + | |{{icon|ffxiv|dark knight's arm|Elemental Guillotine}} (+1/+2) |
||
| + | |{{icon|ffxiv|dark knight's arm|Pyros Guillotine}} |
||
| + | |{{icon|ffxiv|dark knight's arm|Hydatos Guillotine}} (+1) |
||
| + | |{{icon|ffxiv|dark knight's arm|Xiphias}} |
||
| + | |{{icon|ffxiv|dark knight's arm|Xiphias Eureka}} |
||
| + | |{{icon|ffxiv|dark knight's arm|Xiphias Physeos}} |
||
| + | |- |
||
| + | !{{icon|ffxiv|discipline|White Mage}} |
||
| + | |{{icon|ffxiv|two-handed conjurer's arm|Antiquated Aymur}} |
||
| + | |{{icon|ffxiv|two-handed conjurer's arm|Aymur}} (+1/+2) |
||
| + | |{{icon|ffxiv|two-handed conjurer's arm|Aymur Anemos}} |
||
| + | |{{icon|ffxiv|two-handed conjurer's arm|Aymur Pagos}} (+1) |
||
| + | |{{icon|ffxiv|two-handed conjurer's arm|Elemental Cane}} (+1/+2) |
||
| + | |{{icon|ffxiv|two-handed conjurer's arm|Pyros Cane}} |
||
| + | |{{icon|ffxiv|two-handed conjurer's arm|Hydatos Cane}} (+1) |
||
| + | |{{icon|ffxiv|two-handed conjurer's arm|Rose Couverte}} |
||
| + | |{{icon|ffxiv|two-handed conjurer's arm|Rose Couverte Eureka}} |
||
| + | |{{icon|ffxiv|two-handed conjurer's arm|Rose Couverte Physeos}} |
||
| + | |- |
||
| + | !{{icon|ffxiv|discipline|Scholar}} |
||
| + | |{{icon|ffxiv|scholar's arm|Antiquated Organum}} |
||
| + | |{{icon|ffxiv|scholar's arm|Organum}} (+1/+2) |
||
| + | |{{icon|ffxiv|scholar's arm|Organum Anemos}} |
||
| + | |{{icon|ffxiv|scholar's arm|Organum Pagos}} (+1) |
||
| + | |{{icon|ffxiv|scholar's arm|Elemental Codex}} (+1/+2) |
||
| + | |{{icon|ffxiv|scholar's arm|Pyros Codex}} |
||
| + | |{{icon|ffxiv|scholar's arm|Hydatos Codex}} (+1) |
||
| + | |{{icon|ffxiv|scholar's arm|Jebat}} |
||
| + | |{{icon|ffxiv|scholar's arm|Jebat Eureka}} |
||
| + | |{{icon|ffxiv|scholar's arm|Jebat Physeos}} |
||
| + | |- |
||
| + | !{{icon|ffxiv|discipline|Astrologian}} |
||
| + | |{{icon|ffxiv|astrologian's arm|Antiquated Pleiades}} |
||
| + | |{{icon|ffxiv|astrologian's arm|Pleiades}} (+1/+2) |
||
| + | |{{icon|ffxiv|astrologian's arm|Pleiades Anemos}} |
||
| + | |{{icon|ffxiv|astrologian's arm|Pleiades Pagos}} (+1) |
||
| + | |{{icon|ffxiv|astrologian's arm|Elemental Astrometer}} (+1/+2) |
||
| + | |{{icon|ffxiv|astrologian's arm|Pyros Astrometer}} |
||
| + | |{{icon|ffxiv|astrologian's arm|Hydatos Astrometer}} (+1) |
||
| + | |{{icon|ffxiv|astrologian's arm|Albireo}} |
||
| + | |{{icon|ffxiv|astrologian's arm|Albireo Eureka}} |
||
| + | |{{icon|ffxiv|astrologian's arm|Albireo Physeos}} |
||
| + | |- |
||
| + | !{{icon|ffxiv|discipline|Monk}} |
||
| + | |{{icon|ffxiv|pugilist's arm|Antiquated Sudarshana Chakra}} |
||
| + | |{{icon|ffxiv|pugilist's arm|Sudarshana Chakra}} (+1/+2) |
||
| + | |{{icon|ffxiv|pugilist's arm|Sudarshana Chakra Anemos}} |
||
| + | |{{icon|ffxiv|pugilist's arm|Sudarshana Chakra Pagos}} (+1) |
||
| + | |{{icon|ffxiv|pugilist's arm|Elemental Knuckles}} (+1/+2) |
||
| + | |{{icon|ffxiv|pugilist's arm|Pyros Knuckles}} |
||
| + | |{{icon|ffxiv|pugilist's arm|Hydatos Knuckles}} (+1) |
||
| + | |{{icon|ffxiv|pugilist's arm|Dumuzis}} |
||
| + | |{{icon|ffxiv|pugilist's arm|Dumuzis Eureka}} |
||
| + | |{{icon|ffxiv|pugilist's arm|Dumuzis Physeos}} |
||
| + | |- |
||
| + | !{{icon|ffxiv|discipline|Dragoon}} |
||
| + | |{{icon|ffxiv|lancer's arm|Antiquated Ryunohige}} |
||
| + | |{{icon|ffxiv|lancer's arm|Ryunohige}} (+1/+2) |
||
| + | |{{icon|ffxiv|lancer's arm|Ryunohige Anemos}} |
||
| + | |{{icon|ffxiv|lancer's arm|Ryunohige Pagos}} (+1) |
||
| + | |{{icon|ffxiv|lancer's arm|Elemental Lance}} (+1/+2) |
||
| + | |{{icon|ffxiv|lancer's arm|Pyros Lance}} |
||
| + | |{{icon|ffxiv|lancer's arm|Hydatos Lance}} (+1) |
||
| + | |{{icon|ffxiv|lancer's arm|Daboya}} |
||
| + | |{{icon|ffxiv|lancer's arm|Daboya Eureka}} |
||
| + | |{{icon|ffxiv|lancer's arm|Daboya Physeos}} |
||
| + | |- |
||
| + | !{{icon|ffxiv|discipline|Ninja}} |
||
| + | |{{icon|ffxiv|rogue's arm|Antiquated Nagi}} |
||
| + | |{{icon|ffxiv|rogue's arm|Nagi}} (+1/+2) |
||
| + | |{{icon|ffxiv|rogue's arm|Nagi Anemos}} |
||
| + | |{{icon|ffxiv|rogue's arm|Nagi Pagos}} (+1) |
||
| + | |{{icon|ffxiv|rogue's arm|Elemental Knives}} (+1/+2) |
||
| + | |{{icon|ffxiv|rogue's arm|Pyros Knives}} |
||
| + | |{{icon|ffxiv|rogue's arm|Hydatos Knives}} (+1) |
||
| + | |{{icon|ffxiv|rogue's arm|Kasasagi}} |
||
| + | |{{icon|ffxiv|rogue's arm|Kasasagi Eureka}} |
||
| + | |{{icon|ffxiv|rogue's arm|Kasasagi Physeos}} |
||
| + | |- |
||
| + | !{{icon|ffxiv|discipline|Samurai}} |
||
| + | |{{icon|ffxiv|samurai's arm|Antiquated Kiku-ichimonji}} |
||
| + | |{{icon|ffxiv|samurai's arm|Kiku-ichimonji}} (+1/+2) |
||
| + | |{{icon|ffxiv|samurai's arm|Kiku-ichimonji Anemos}} |
||
| + | |{{icon|ffxiv|samurai's arm|Kiku-ichimonji Pagos}} (+1) |
||
| + | |{{icon|ffxiv|samurai's arm|Elemental Blade}} (+1/+2) |
||
| + | |{{icon|ffxiv|samurai's arm|Pyros Blade}} |
||
| + | |{{icon|ffxiv|samurai's arm|Hydatos Blade}} (+1) |
||
| + | |{{icon|ffxiv|samurai's arm|Torigashira}} |
||
| + | |{{icon|ffxiv|samurai's arm|Torigashira Eureka}} |
||
| + | |{{icon|ffxiv|samurai's arm|Torigashira Physeos}} |
||
| + | |- |
||
| + | !{{icon|ffxiv|discipline|Bard}} |
||
| + | |{{icon|ffxiv|archer's arm|Antiquated Failnaught}} |
||
| + | |{{icon|ffxiv|archer's arm|Failnaught}} (+1/+2) |
||
| + | |{{icon|ffxiv|archer's arm|Failnaught Anemos}} |
||
| + | |{{icon|ffxiv|archer's arm|Failnaught Pagos}} (+1) |
||
| + | |{{icon|ffxiv|archer's arm|Elemental Harp Bow}} (+1/+2) |
||
| + | |{{icon|ffxiv|archer's arm|Pyros Harp Bow}} |
||
| + | |{{icon|ffxiv|archer's arm|Hydatos Harp Bow}} (+1) |
||
| + | |{{icon|ffxiv|archer's arm|Circinae}} |
||
| + | |{{icon|ffxiv|archer's arm|Circinae Eureka}} |
||
| + | |{{icon|ffxiv|archer's arm|Circinae Physeos}} |
||
| + | |- |
||
| + | !{{icon|ffxiv|discipline|Machinist}} |
||
| + | |{{icon|ffxiv|machinist's arm|Antiquated Outsider}} |
||
| + | |{{icon|ffxiv|machinist's arm|Outsider}} (+1/+2) |
||
| + | |{{icon|ffxiv|machinist's arm|Outsider Anemos}} |
||
| + | |{{icon|ffxiv|machinist's arm|Outsider Pagos}} (+1) |
||
| + | |{{icon|ffxiv|machinist's arm|Elemental Handgonne}} (+1/+2) |
||
| + | |{{icon|ffxiv|machinist's arm|Pyros Handgonne}} |
||
| + | |{{icon|ffxiv|machinist's arm|Hydatos Handgonne}} (+1) |
||
| + | |{{icon|ffxiv|machinist's arm|Mollfrith}} |
||
| + | |{{icon|ffxiv|machinist's arm|Mollfrith Eureka}} |
||
| + | |{{icon|ffxiv|machinist's arm|Mollfrith Physeos}} |
||
| + | |- |
||
| + | !{{icon|ffxiv|discipline|Black Mage}} |
||
| + | |{{icon|ffxiv|two-handed thaumaturge's arm|Antiquated Vanargand}} |
||
| + | |{{icon|ffxiv|two-handed thaumaturge's arm|Vanargand}} (+1/+2) |
||
| + | |{{icon|ffxiv|two-handed thaumaturge's arm|Vanargand Anemos}} |
||
| + | |{{icon|ffxiv|two-handed thaumaturge's arm|Vanargand Pagos}} (+1) |
||
| + | |{{icon|ffxiv|two-handed thaumaturge's arm|Elemental Rod}} (+1/+2) |
||
| + | |{{icon|ffxiv|two-handed thaumaturge's arm|Pyros Rod}} |
||
| + | |{{icon|ffxiv|two-handed thaumaturge's arm|Hydatos Rod}} (+1) |
||
| + | |{{icon|ffxiv|two-handed thaumaturge's arm|Paikea}} |
||
| + | |{{icon|ffxiv|two-handed thaumaturge's arm|Paikea Eureka}} |
||
| + | |{{icon|ffxiv|two-handed thaumaturge's arm|Paikea Physeos}} |
||
| + | |- |
||
| + | !{{icon|ffxiv|discipline|Summoner}} |
||
| + | |{{icon|ffxiv|arcanist's grimoire|Antiquated Lemegeton}} |
||
| + | |{{icon|ffxiv|arcanist's grimoire|Lemegeton}} (+1/+2) |
||
| + | |{{icon|ffxiv|arcanist's grimoire|Lemegeton Anemos}} |
||
| + | |{{icon|ffxiv|arcanist's grimoire|Lemegeton Pagos}} (+1) |
||
| + | |{{icon|ffxiv|arcanist's grimoire|Elemental Grimoire}} (+1/+2) |
||
| + | |{{icon|ffxiv|arcanist's grimoire|Pyros Grimoire}} |
||
| + | |{{icon|ffxiv|arcanist's grimoire|Hydatos Grimoire}} (+1) |
||
| + | |{{icon|ffxiv|arcanist's grimoire|Tuah}} |
||
| + | |{{icon|ffxiv|arcanist's grimoire|Tuah Eureka}} |
||
| + | |{{icon|ffxiv|arcanist's grimoire|Tuah Physeos}} |
||
| + | |- |
||
| + | !{{icon|ffxiv|discipline|Red Mage}} |
||
| + | |{{icon|ffxiv|red mage's arm|Antiquated Murgleis}} |
||
| + | |{{icon|ffxiv|red mage's arm|Murgleis}} (+1/+2) |
||
| + | |{{icon|ffxiv|red mage's arm|Murgleis Anemos}} |
||
| + | |{{icon|ffxiv|red mage's arm|Murgleis Pagos}} (+1) |
||
| + | |{{icon|ffxiv|red mage's arm|Elemental Tuck}} (+1/+2) |
||
| + | |{{icon|ffxiv|red mage's arm|Pyros Tuck}} |
||
| + | |{{icon|ffxiv|red mage's arm|Hydatos Tuck}} (+1) |
||
| + | |{{icon|ffxiv|red mage's arm|Brunello}} |
||
| + | |{{icon|ffxiv|red mage's arm|Brunello Eureka}} |
||
| + | |{{icon|ffxiv|red mage's arm|Brunello Physeos}} |
||
| + | |- |
||
| + | |} |
||
| + | |||
| + | ====''[[Final Fantasy XIV: Shadowbringers]]''==== |
||
| + | {{main|Resistance Weapon}} |
||
| + | {|class="FFXIV article-table" |
||
| + | |- |
||
| + | !Job |
||
| + | !Stage 1 (Resistance) |
||
| + | !Stage 2 (Augmented Resistance) |
||
| + | !Stage 3 (Recollection) |
||
| + | !Stage 4 (Law's Order) |
||
| + | !Stage 5 (Augmented Law's Order) |
||
| + | !Stage 6 (Blade's) |
||
| + | |- |
||
| + | !{{icon|ffxiv|discipline|Paladin}} |
||
| + | |{{icon|ffxiv|gladiator's arm|Honorbound}}<br/>{{icon|ffxiv|shield|Tenacity}} |
||
| + | |{{icon|ffxiv|gladiator's arm|Augmented Honorbound}}<br/>{{icon|ffxiv|shield|Augmented Tenacity}} |
||
| + | |{{icon|ffxiv|gladiator's arm|Honorbound Recollection}}<br/>{{icon|ffxiv|shield|Tenacity Recollection}} |
||
| + | |{{icon|ffxiv|gladiator's arm|Law's Order Bastard Sword}}<br/>{{icon|ffxiv|shield|Law's Order Kite Shield}} |
||
| + | |{{icon|ffxiv|gladiator's arm|Augmented Law's Order Bastard Sword}}<br/>{{icon|ffxiv|shield|Augmented Law's Order Kite Shield}} |
||
| + | |{{icon|ffxiv|gladiator's arm|Blade's Honor}}<br/>{{icon|ffxiv|shield|Blade's Fortitude}} |
||
| + | |- |
||
| + | !{{icon|ffxiv|discipline|Warrior}} |
||
| + | |{{icon|ffxiv|marauder's arm|Skullrender}} |
||
| + | |{{icon|ffxiv|marauder's arm|Augmented Skullrender}} |
||
| + | |{{icon|ffxiv|marauder's arm|Skullrender Recollection}} |
||
| + | |{{icon|ffxiv|marauder's arm|Law's Order Labrys}} |
||
| + | |{{icon|ffxiv|marauder's arm|Augmented Law's Order Labrys}} |
||
| + | |{{icon|ffxiv|marauder's arm|Blade's Valor}} |
||
| + | |- |
||
| + | !{{icon|ffxiv|discipline|Dark Knight}} |
||
| + | |{{icon|ffxiv|dark knight's arm|Woeborn}} |
||
| + | |{{icon|ffxiv|dark knight's arm|Augmented Woeborn}} |
||
| + | |{{icon|ffxiv|dark knight's arm|Woeborn Recollection}} |
||
| + | |{{icon|ffxiv|dark knight's arm|Law's Order Zweihander}} |
||
| + | |{{icon|ffxiv|dark knight's arm|Augmented Law's Order Zweihander}} |
||
| + | |{{icon|ffxiv|dark knight's arm|Blade's Justice}} |
||
| + | |- |
||
| + | !{{icon|ffxiv|discipline|Gunbreaker}} |
||
| + | |{{icon|ffxiv|gunbreaker's arm|Crownsblade}} |
||
| + | |{{icon|ffxiv|gunbreaker's arm|Augmented Crownsblade}} |
||
| + | |{{icon|ffxiv|gunbreaker's arm|Crownsblade Recollection}} |
||
| + | |{{icon|ffxiv|gunbreaker's arm|Law's Order Manatrigger}} |
||
| + | |{{icon|ffxiv|gunbreaker's arm|Augmented Law's Order Manatrigger}} |
||
| + | |{{icon|ffxiv|gunbreaker's arm|Blade's Resolve}} |
||
| + | |- |
||
| + | !{{icon|ffxiv|discipline|White Mage}} |
||
| + | |{{icon|ffxiv|two-handed conjurer's arm|Ingrimm}} |
||
| + | |{{icon|ffxiv|two-handed conjurer's arm|Augmented Ingrimm}} |
||
| + | |{{icon|ffxiv|two-handed conjurer's arm|Ingrimm Recollection}} |
||
| + | |{{icon|ffxiv|two-handed conjurer's arm|Law's Order Cane}} |
||
| + | |{{icon|ffxiv|two-handed conjurer's arm|Augmented Law's Order Cane}} |
||
| + | |{{icon|ffxiv|two-handed conjurer's arm|Blade's Mercy}} |
||
| + | |- |
||
| + | !{{icon|ffxiv|discipline|Scholar}} |
||
| + | |{{icon|ffxiv|scholar's arm|Akademos}} |
||
| + | |{{icon|ffxiv|scholar's arm|Augmented Akademos}} |
||
| + | |{{icon|ffxiv|scholar's arm|Akademos Recollection}} |
||
| + | |{{icon|ffxiv|scholar's arm|Law's Order Codex}} |
||
| + | |{{icon|ffxiv|scholar's arm|Augmented Law's Order Codex}} |
||
| + | |{{icon|ffxiv|scholar's arm|Blade's Wisdom}} |
||
| + | |- |
||
| + | !{{icon|ffxiv|discipline|Astrologian}} |
||
| + | |{{icon|ffxiv|astrologian's arm|Solstice}} |
||
| + | |{{icon|ffxiv|astrologian's arm|Augmented Solstice}} |
||
| + | |{{icon|ffxiv|astrologian's arm|Solstice Recollection}} |
||
| + | |{{icon|ffxiv|astrologian's arm|Law's Order Astrometer}} |
||
| + | |{{icon|ffxiv|astrologian's arm|Augmented Law's Order Astrometer}} |
||
| + | |{{icon|ffxiv|astrologian's arm|Blade's Providence}} |
||
| + | |- |
||
| + | !{{icon|ffxiv|discipline|Monk}} |
||
| + | |{{icon|ffxiv|pugilist's arm|Samsara}} |
||
| + | |{{icon|ffxiv|pugilist's arm|Augmented Samsara}} |
||
| + | |{{icon|ffxiv|pugilist's arm|Samsara Recollection}} |
||
| + | |{{icon|ffxiv|pugilist's arm|Law's Order Knuckles}} |
||
| + | |{{icon|ffxiv|pugilist's arm|Augmented Law's Order Knuckles}} |
||
| + | |{{icon|ffxiv|pugilist's arm|Blade's Serenity}} |
||
| + | |- |
||
| + | !{{icon|ffxiv|discipline|Dragoon}} |
||
| + | |{{icon|ffxiv|lancer's arm|Dreizack}} |
||
| + | |{{icon|ffxiv|lancer's arm|Augmented Dreizack}} |
||
| + | |{{icon|ffxiv|lancer's arm|Dreizack Recollection}} |
||
| + | |{{icon|ffxiv|lancer's arm|Law's Order Spear}} |
||
| + | |{{icon|ffxiv|lancer's arm|Augmented Law's Order Spear}} |
||
| + | |{{icon|ffxiv|lancer's arm|Blade's Glory}} |
||
| + | |- |
||
| + | !{{icon|ffxiv|discipline|Ninja}} |
||
| + | |{{icon|ffxiv|rogue's arm|Honeshirazu}} |
||
| + | |{{icon|ffxiv|rogue's arm|Augmented Honeshirazu}} |
||
| + | |{{icon|ffxiv|rogue's arm|Honeshirazu Recollection}} |
||
| + | |{{icon|ffxiv|rogue's arm|Law's Order Knives}} |
||
| + | |{{icon|ffxiv|rogue's arm|Augmented Law's Order Knives}} |
||
| + | |{{icon|ffxiv|rogue's arm|Blade's Subtlety}} |
||
| + | |- |
||
| + | !{{icon|ffxiv|discipline|Samurai}} |
||
| + | |{{icon|ffxiv|samurai's arm|Hoshikiri}} |
||
| + | |{{icon|ffxiv|samurai's arm|Augmented Hoshikiri}} |
||
| + | |{{icon|ffxiv|samurai's arm|Hoshikiri Recollection}} |
||
| + | |{{icon|ffxiv|samurai's arm|Law's Order Samurai Blade}} |
||
| + | |{{icon|ffxiv|samurai's arm|Augmented Law's Order Samurai Blade}} |
||
| + | |{{icon|ffxiv|samurai's arm|Blade's Fealty}} |
||
| + | |- |
||
| + | !{{icon|ffxiv|discipline|Bard}} |
||
| + | |{{icon|ffxiv|archer's arm|Brilliance}} |
||
| + | |{{icon|ffxiv|archer's arm|Augmented Brilliance}} |
||
| + | |{{icon|ffxiv|archer's arm|Brilliance Recollection}} |
||
| + | |{{icon|ffxiv|archer's arm|Law's Order Composite Bow}} |
||
| + | |{{icon|ffxiv|archer's arm|Augmented Law's Order Composite Bow}} |
||
| + | |{{icon|ffxiv|archer's arm|Blade's Muse}} |
||
| + | |- |
||
| + | !{{icon|ffxiv|discipline|Machinist}} |
||
| + | |{{icon|ffxiv|machinist's arm|Lawman}} |
||
| + | |{{icon|ffxiv|machinist's arm|Augmented Lawman}} |
||
| + | |{{icon|ffxiv|machinist's arm|Lawman Recollection}} |
||
| + | |{{icon|ffxiv|machinist's arm|Law's Order Revolver}} |
||
| + | |{{icon|ffxiv|machinist's arm|Augmented Law's Order Revolver}} |
||
| + | |{{icon|ffxiv|machinist's arm|Blade's Ingenuity}} |
||
| + | |- |
||
| + | !{{icon|ffxiv|discipline|Dancer}} |
||
| + | |{{icon|ffxiv|dancer's arm|Enchufla}} |
||
| + | |{{icon|ffxiv|dancer's arm|Augmented Enchufla}} |
||
| + | |{{icon|ffxiv|dancer's arm|Enchufla Recollection}} |
||
| + | |{{icon|ffxiv|dancer's arm|Law's Order Chakrams}} |
||
| + | |{{icon|ffxiv|dancer's arm|Augmented Law's Order Chakrams}} |
||
| + | |{{icon|ffxiv|dancer's arm|Blade's Euphoria}} |
||
| + | |- |
||
| + | !{{icon|ffxiv|discipline|Black Mage}} |
||
| + | |{{icon|ffxiv|two-handed thaumaturge's arm|Soulscourge}} |
||
| + | |{{icon|ffxiv|two-handed thaumaturge's arm|Augmented Soulscourge}} |
||
| + | |{{icon|ffxiv|two-handed thaumaturge's arm|Soulscourge Recollection}} |
||
| + | |{{icon|ffxiv|two-handed thaumaturge's arm|Law's Order Rod}} |
||
| + | |{{icon|ffxiv|two-handed thaumaturge's arm|Augmented Law's Order Rod}} |
||
| + | |{{icon|ffxiv|two-handed thaumaturge's arm|Blade's Fury}} |
||
| + | |- |
||
| + | !{{icon|ffxiv|discipline|Summoner}} |
||
| + | |{{icon|ffxiv|arcanist's grimoire|Espiritus}} |
||
| + | |{{icon|ffxiv|arcanist's grimoire|Augmented Espiritus}} |
||
| + | |{{icon|ffxiv|arcanist's grimoire|Espiritus Recollection}} |
||
| + | |{{icon|ffxiv|arcanist's grimoire|Law's Order Index}} |
||
| + | |{{icon|ffxiv|arcanist's grimoire|Augmented Law's Order Index}} |
||
| + | |{{icon|ffxiv|arcanist's grimoire|Blade's Acumen}} |
||
| + | |- |
||
| + | !{{icon|ffxiv|discipline|Red Mage}} |
||
| + | |{{icon|ffxiv|red mage's arm|Talekeeper}} |
||
| + | |{{icon|ffxiv|red mage's arm|Augmented Talekeeper}} |
||
| + | |{{icon|ffxiv|red mage's arm|Talekeeper Recollection}} |
||
| + | |{{icon|ffxiv|red mage's arm|Law's Order Rapier}} |
||
| + | |{{icon|ffxiv|red mage's arm|Augmented Law's Order Rapier}} |
||
| + | |{{icon|ffxiv|red mage's arm|Blade's Temperance}} |
||
| + | |- |
||
| + | |} |
||
| + | |||
| + | ====''[[Final Fantasy XIV: Endwalker]]''==== |
||
| + | {{main|Manderville Weapon}} |
||
| + | {|class="FFXIV article-table" |
||
| + | |- |
||
| + | !Job |
||
| + | !Stage 1 (Manderville) |
||
| + | |- |
||
| + | !{{icon|ffxiv|discipline|Paladin}} |
||
| + | |{{icon|ffxiv|gladiator's arm|Manderville Sword}}<br/>{{icon|ffxiv|shield|Manderville Kite Shield}} |
||
| + | |- |
||
| + | !{{icon|ffxiv|discipline|Warrior}} |
||
| + | |{{icon|ffxiv|marauder's arm|Manderville Axe}} |
||
| + | |- |
||
| + | !{{icon|ffxiv|discipline|Dark Knight}} |
||
| + | |{{icon|ffxiv|dark knight's arm|Manderville Zweihander}} |
||
| + | |- |
||
| + | !{{icon|ffxiv|discipline|Gunbreaker}} |
||
| + | |{{icon|ffxiv|gunbreaker's arm|Manderville Gunblade}} |
||
| + | |- |
||
| + | !{{icon|ffxiv|discipline|White Mage}} |
||
| + | |{{icon|ffxiv|two-handed conjurer's arm|Manderville Cane}} |
||
| + | |- |
||
| + | !{{icon|ffxiv|discipline|Scholar}} |
||
| + | |{{icon|ffxiv|scholar's arm|Manderville Codex}} |
||
| + | |- |
||
| + | !{{icon|ffxiv|discipline|Astrologian}} |
||
| + | |{{icon|ffxiv|astrologian's arm|Manderville Torquetum}} |
||
| + | |- |
||
| + | !{{icon|ffxiv|discipline|Sage}} |
||
| + | |{{icon|ffxiv|sage's arm|Manderville Milpreves}} |
||
| + | |- |
||
| + | !{{icon|ffxiv|discipline|Monk}} |
||
| + | |{{icon|ffxiv|pugilist's arm|Manderville Knuckles}} |
||
| + | |- |
||
| + | !{{icon|ffxiv|discipline|Dragoon}} |
||
| + | |{{icon|ffxiv|lancer's arm|Manderville Spear}} |
||
| + | |- |
||
| + | !{{icon|ffxiv|discipline|Ninja}} |
||
| + | |{{icon|ffxiv|rogue's arm|Manderville Knives}} |
||
| + | |- |
||
| + | !{{icon|ffxiv|discipline|Samurai}} |
||
| + | |{{icon|ffxiv|samurai's arm|Manderville Samurai Blade}} |
||
| + | |- |
||
| + | !{{icon|ffxiv|discipline|Reaper}} |
||
| + | |{{icon|ffxiv|reaper's arm|Manderville Scythe}} |
||
| + | |- |
||
| + | !{{icon|ffxiv|discipline|Bard}} |
||
| + | |{{icon|ffxiv|archer's arm|Manderville Harp Bow}} |
||
| + | |- |
||
| + | !{{icon|ffxiv|discipline|Machinist}} |
||
| + | |{{icon|ffxiv|machinist's arm|Manderville Revolver}} |
||
| + | |- |
||
| + | !{{icon|ffxiv|discipline|Dancer}} |
||
| + | |{{icon|ffxiv|dancer's arm|Manderville Chakrams}} |
||
| + | |- |
||
| + | !{{icon|ffxiv|discipline|Black Mage}} |
||
| + | |{{icon|ffxiv|two-handed thaumaturge's arm|Manderville Rod}} |
||
| + | |- |
||
| + | !{{icon|ffxiv|discipline|Summoner}} |
||
| + | |{{icon|ffxiv|arcanist's grimoire|Manderville Index}} |
||
| + | |- |
||
| + | !{{icon|ffxiv|discipline|Red Mage}} |
||
| + | |{{icon|ffxiv|red mage's arm|Manderville Rapier}} |
||
|- |
|- |
||
|} |
|} |
||
===''[[Final Fantasy XV]]''=== |
===''[[Final Fantasy XV]]''=== |
||
| − | There are numerous weapon types, each of which can be considered to have an ultimate weapon. [[Noctis |
+ | There are numerous weapon types, each of which can be considered to have an ultimate weapon. [[Noctis (Final Fantasy XV party member)|Noctis]] can wield every weapon, and the one-handed swords and the [[Royal arms (Final Fantasy XV)|royal arms]] are exclusive to him. |
The [[Final Fantasy XV weapons#Ultima Blade|Ultima Blade]] was Noctis's strongest weapon in the main game, and the second strongest weapon overall until the [[Final Fantasy XV weapons#Gaze of the Vortex|Gaze of the Vortex]] was introduced in [[Final Fantasy XV patches|patch 1.27]]. [[Final Fantasy XV weapons#Balmung|Balmung]] was previously Noctis's strongest one-handed sword obtained from an optional dungeon in the post-game. The Gaze of the Vortex is the best weapon in the game after patch 1.27, dealing x1.5 damage when airstepping and always dealing critical hits. [[Final Fantasy XV weapons#Ragnarok|Ragnarok]] is a season pass weapon that empowers [[warp-strike]]s, making it easily the strongest weapon in almost any situation. |
The [[Final Fantasy XV weapons#Ultima Blade|Ultima Blade]] was Noctis's strongest weapon in the main game, and the second strongest weapon overall until the [[Final Fantasy XV weapons#Gaze of the Vortex|Gaze of the Vortex]] was introduced in [[Final Fantasy XV patches|patch 1.27]]. [[Final Fantasy XV weapons#Balmung|Balmung]] was previously Noctis's strongest one-handed sword obtained from an optional dungeon in the post-game. The Gaze of the Vortex is the best weapon in the game after patch 1.27, dealing x1.5 damage when airstepping and always dealing critical hits. [[Final Fantasy XV weapons#Ragnarok|Ragnarok]] is a season pass weapon that empowers [[warp-strike]]s, making it easily the strongest weapon in almost any situation. |
||
| − | [[Final Fantasy XV weapons#Hyperion|Hyperion]] was the strongest greatsword for Noctis and [[Gladiolus |
+ | [[Final Fantasy XV weapons#Hyperion|Hyperion]] was the strongest greatsword for Noctis and [[Gladiolus (Final Fantasy XV party member)|Gladiolus]] in the main game until the addition of [[Final Fantasy XV weapons#Pain of the Vortex|Pain of the Vortex]] in patch 1.27. Other stronger greatswords can be found in the Chapter 15 optional dungeons, including the [[Final Fantasy XV weapons#Apocalypse|Apocalypse]] found in the [[Balouve Mines]] maze and [[Final Fantasy XV weapons#Duel Code|Duel Code]] found in the [[Daurell Caverns]] maze. Hyperion, Apocalypse and Duel Code all have unique conditions to boost their power beyond their Attack Power values. Hyperion gains +15% damage per additional enemy within 65 feet radius (max +100%). Apocalypse becomes stronger the less health the wielder has. Duel Code has a +50% damage boost to lone enemies within 65 feet radius. This means which deals the most damage is situational. Pain of the Vortex deals more damage for aerial attacks, but greatswords are ground-based weapons. It always deals critical hits like all "Vortex" weapons, but since greatswords' greatest boon is their strong [[link-strike]]s, with Critical: Link [[Ascension (Final Fantasy XV)|Ascension]] upgrade the other greatswords also rise to the task. |
| − | [[Final Fantasy XV weapons#Radiant Lance|Radiant Lance]] is the strongest spear in the main game for Noctis and [[Ignis |
+ | [[Final Fantasy XV weapons#Radiant Lance|Radiant Lance]] or [[Final Fantasy XV weapons#Drain Lance III|Drain Lance III]] is the strongest spear in the main game for Noctis and [[Ignis (Final Fantasy XV party member)|Ignis]]. The Radiant Lance can be purchased at the Meldacio Hunter HQ or at Hammerhead in Chapter 14; it has the highest Strength rating of main-game spears, but is Light-elemental and thus deals weaker damage to non-[[Daemon (Final Fantasy XV)|daemon]] enemies. The Drain Lance III is obtained by giving Cid [[Treasures (Final Fantasy XV)#Coeurl Whisker|Coeurl Whiskers]] to upgrade the [[Final Fantasy XV weapons#Drain Lance II|Drain Lance II]], which is obtained by using a [[Rusted Bit]] to upgrade the [[Final Fantasy XV weapons#Drain Lance|Drain Lance]], which is itself obtained in Chapter 1; it is non-elemental, and thus deals more damage than the Radiant Lance unless the enemy takes neutral damage or greater from Light attacks. The strongest spear overall is [[Final Fantasy XV weapons#Flayer|Flayer]], found in [[Steyliff Grove]] maze. |
| − | [[Final Fantasy XV weapons#Ulric's Kukris|Ulric's Kukris]] were the best daggers in the main game for Noctis and Ignis, obtained by returning to the opening area of [[Insomnia]] and defeating a level 85 [[psychomancer]]. [[Final Fantasy XV weapons#Plumes of the Vortex|Plumes of the Vortex]] is the new best daggers added in patch 1.27. The previous best daggers were the [[Final Fantasy XV weapons#Zwill Crossblade|Zwill Crossblades]], obtained in Chapter 15 from [[Randolph |
+ | [[Final Fantasy XV weapons#Ulric's Kukris|Ulric's Kukris]] were the best daggers in the main game for Noctis and Ignis, obtained by returning to the opening area of [[Insomnia]] and defeating a level 85 [[psychomancer]]. [[Final Fantasy XV weapons#Plumes of the Vortex|Plumes of the Vortex]] is the new best daggers added in patch 1.27. The previous best daggers were the [[Final Fantasy XV weapons#Zwill Crossblade|Zwill Crossblades]], obtained in Chapter 15 from [[Randolph (Final Fantasy XV)|Randolph's]] quests that have great attack stat and the trait of dealing x1.8 damage when the wielder is at full health. Plumes of the Vortex always deal critical hits and x1.5 damage in aerial combat and can be used alongside royal arms without losing the damage boost. |
[[Final Fantasy XV weapons#Abandon of the Vortex|Abandon of the Vortex]], added in patch 1.27, is the strongest gun, dealing boosted damage to vulnerable foes and breaking off enemy appendages with ease (though not as good as [[Final Fantasy XV weapons#Cerberus|Cerberus]]), always dealing critical hits. The previous best gun was [[Final Fantasy XV weapons#Death Penalty|Death Penalty]] that also has a small chance to inflict instant death. |
[[Final Fantasy XV weapons#Abandon of the Vortex|Abandon of the Vortex]], added in patch 1.27, is the strongest gun, dealing boosted damage to vulnerable foes and breaking off enemy appendages with ease (though not as good as [[Final Fantasy XV weapons#Cerberus|Cerberus]]), always dealing critical hits. The previous best gun was [[Final Fantasy XV weapons#Death Penalty|Death Penalty]] that also has a small chance to inflict instant death. |
||
| − | Shields are used as weapons. The best shield in the main game is [[Final Fantasy XV weapons#Black Prince|Black Prince]], bought from [[Meldacio Hunter HQ]] and in Chapter 14. Even if the [[Final Fantasy XV weapons#Power Shield|Power Shield]] has one point more Attack power, it |
+ | Shields are used as weapons. The best shield in the main game is [[Final Fantasy XV weapons#Black Prince|Black Prince]], bought from [[Meldacio Hunter HQ]] and in Chapter 14. Even if the [[Final Fantasy XV weapons#Power Shield|Power Shield]] has one point more Attack power, it does not have nearly as good stat boosts as the Black Prince. The best shield overall is the [[Final Fantasy XV weapons#Ziedrich|Ziedrich]], obtained in Chapter 15 from Randolph's quests. |
The best machinery weapons are obtained by upgrading them with [[Cid Sophiar]], the best being [[Final Fantasy XV weapons#Drillbreaker Plus|Drillbreaker Plus]]. |
The best machinery weapons are obtained by upgrading them with [[Cid Sophiar]], the best being [[Final Fantasy XV weapons#Drillbreaker Plus|Drillbreaker Plus]]. |
||
The royal arms are special weapons that drain Noctis's health when used as normal weapons and are used at once during [[Armiger]]. Equipping them bestows both status boosts and penalties, and thus their usefulness tends to be situational. |
The royal arms are special weapons that drain Noctis's health when used as normal weapons and are used at once during [[Armiger]]. Equipping them bestows both status boosts and penalties, and thus their usefulness tends to be situational. |
||
| + | |||
| + | === ''[[Final Fantasy XVI]]'' === |
||
| + | |||
| + | |||
| + | Gotterdammerung is the strongest weapon during the first playthrough, and is attain through a lengthy process through forging. The materials for this requiring the player to acquire strong weapons such as Ragnarok and items from S rank notorious monsters. However Gotterdammerung will be overshadowed by weapons achieved during New game plus Final Fantasy Mode. |
||
| + | |||
| + | When playing Final Fantasy Mode access to the games true Ultimate Weapon is available, Ultima Weapon. Just like Gotterdammerung it requires a lengthy process to attain including a reforge Gotterdammerung. |
||
===''[[Final Fantasy Tactics]]''=== |
===''[[Final Fantasy Tactics]]''=== |
||
| Line 806: | Line 1,415: | ||
{|class="half-width FFT article-table" style="text-align:center" |
{|class="half-width FFT article-table" style="text-align:center" |
||
| + | |- |
||
| − | |-class="a" |
||
!style="width:10%"|Weapon |
!style="width:10%"|Weapon |
||
!style="width:5%"|Type |
!style="width:5%"|Type |
||
!style="width:50%"|Obtain |
!style="width:50%"|Obtain |
||
|- |
|- |
||
| − | ! |
+ | ![[Final Fantasy Tactics weapons#Golden Axe|Golden Axe]] |
|Axe |
|Axe |
||
|'''Find:''' [[Melee (Tactics)|Melee]], [[Rendezvous]] |
|'''Find:''' [[Melee (Tactics)|Melee]], [[Rendezvous]] |
||
|- |
|- |
||
| − | ! |
+ | ![[Final Fantasy Tactics weapons#Fallingstar Bag|Fallingstar Bag]] |
|Bag |
|Bag |
||
|'''Poach:''' [[Pig (Tactics)|Wild Boar]]<br/>'''Find:''' [[Rendezvous]] |
|'''Poach:''' [[Pig (Tactics)|Wild Boar]]<br/>'''Find:''' [[Rendezvous]] |
||
|- |
|- |
||
| − | ! |
+ | ![[Final Fantasy Tactics weapons#Omnilex|Omnilex]] |
|Book |
|Book |
||
|'''Poach:''' [[Malboro (Tactics)|Greater Malboro]]<br/>'''Find:''' [[Rendezvous]]<br/>'''[[Sticky Fingers (ability)|Catch]]:''' Level 95+ Ninja |
|'''Poach:''' [[Malboro (Tactics)|Greater Malboro]]<br/>'''Find:''' [[Rendezvous]]<br/>'''[[Sticky Fingers (ability)|Catch]]:''' Level 95+ Ninja |
||
|- |
|- |
||
| − | ! |
+ | ![[Final Fantasy Tactics weapons#Sagittarius Bow|Sagittarius Bow]] |
|Bow |
|Bow |
||
|'''Find:''' [[Rendezvous]] |
|'''Find:''' [[Rendezvous]] |
||
|- |
|- |
||
| − | ! |
+ | ![[Final Fantasy Tactics weapons#Wyrmweave Silk|Wyrmweave Silk]] |
|Cloth |
|Cloth |
||
|'''Poach:''' [[Hydra (Tactics)|Tiamat]]<br/>'''Find:''' [[Rendezvous]] |
|'''Poach:''' [[Hydra (Tactics)|Tiamat]]<br/>'''Find:''' [[Rendezvous]] |
||
|- |
|- |
||
| − | ! |
+ | ![[Final Fantasy Tactics weapons#Gastrophetes|Gastrophetes]] |
|Crossbow |
|Crossbow |
||
|'''Buy:''' Various [[Outfitter]]s (during [[Chapter]] 4) - 20,000 gil<br/>'''Find:''' [[Battle of Fort Besselat]]<br/>'''Rare Treasure:''' Limberry Castle Undercroft |
|'''Buy:''' Various [[Outfitter]]s (during [[Chapter]] 4) - 20,000 gil<br/>'''Find:''' [[Battle of Fort Besselat]]<br/>'''Rare Treasure:''' Limberry Castle Undercroft |
||
|- |
|- |
||
| − | ! |
+ | ![[Final Fantasy Tactics weapons#Valhalla|Valhalla]] |
|Fell Sword |
|Fell Sword |
||
|'''Find:''' [[Rendezvous]] |
|'''Find:''' [[Rendezvous]] |
||
|- |
|- |
||
| − | ! |
+ | ![[Final Fantasy Tactics weapons#Vesper|Vesper]] |
|Flail |
|Flail |
||
|'''Find:''' [[Melee (Tactics)|Melee]] |
|'''Find:''' [[Melee (Tactics)|Melee]] |
||
|- |
|- |
||
| − | ! |
+ | ![[Final Fantasy Tactics weapons#Blaster|Blaster]] |
|Gun |
|Gun |
||
|'''[[Steal]]:''' Various units<br/>'''Find:''' [[Rendezvous]] |
|'''[[Steal]]:''' Various units<br/>'''Find:''' [[Rendezvous]] |
||
|- |
|- |
||
| − | ! |
+ | ![[Final Fantasy Tactics weapons#Fairie Harp|Fairie Harp]] |
|Instrument |
|Instrument |
||
|'''Poach:''' [[Treant (Tactics)|Treant]]<br/>'''Find:''' [[Rendezvous]] |
|'''Poach:''' [[Treant (Tactics)|Treant]]<br/>'''Find:''' [[Rendezvous]] |
||
|- |
|- |
||
| − | ! |
+ | ![[Final Fantasy Tactics weapons#Chirijiraden|Chirijiraden]] |
|Katana |
|Katana |
||
|'''Find:''' [[Midlight's Deep (Tactics)|Midlight's Deep]]<br/>'''Find:''' [[Rendezvous]]<br/>'''[[Sticky Fingers (ability)|Catch]]:''' Level 96+ Ninja |
|'''Find:''' [[Midlight's Deep (Tactics)|Midlight's Deep]]<br/>'''Find:''' [[Rendezvous]]<br/>'''[[Sticky Fingers (ability)|Catch]]:''' Level 96+ Ninja |
||
|- |
|- |
||
| − | ! |
+ | ![[Final Fantasy Tactics weapons#Zwill Straightblade|Zwill Straightblade]] |
|Knife |
|Knife |
||
|'''Poach:''' [[Ahriman (Tactics)|Plague Horror]]<br/>'''Find:''' [[Melee (Tactics)|Melee]]<br/>'''[[Sticky Fingers (ability)|Catch]]:''' Level 95+ Ninja |
|'''Poach:''' [[Ahriman (Tactics)|Plague Horror]]<br/>'''Find:''' [[Melee (Tactics)|Melee]]<br/>'''[[Sticky Fingers (ability)|Catch]]:''' Level 95+ Ninja |
||
|- |
|- |
||
| − | ! |
+ | ![[Final Fantasy Tactics weapons#Chaos Blade|Chaos Blade]] |
|Knight's Sword |
|Knight's Sword |
||
|'''Treasure:''' [[Midlight's Deep (Tactics)|Midlight's Deep]]<br/>'''Find:''' [[Rendezvous]]<br/>'''[[Sticky Fingers (ability)|Catch]]:''' Level 98-99 Ninja |
|'''Treasure:''' [[Midlight's Deep (Tactics)|Midlight's Deep]]<br/>'''Find:''' [[Rendezvous]]<br/>'''[[Sticky Fingers (ability)|Catch]]:''' Level 98-99 Ninja |
||
|- |
|- |
||
| − | ! |
+ | ![[Final Fantasy Tactics weapons#Moonsilk Blade|Moonsilk Blade]] |
|Ninja Blade |
|Ninja Blade |
||
|'''Find:''' [[Melee (Tactics)|Melee]] |
|'''Find:''' [[Melee (Tactics)|Melee]] |
||
|- |
|- |
||
| − | ! |
+ | ![[Final Fantasy Tactics weapons#Whale Whisker|Whale Whisker]] |
|Pole |
|Pole |
||
|'''Poach:''' [[Hydra (Tactics)|Tiamat]]<br/>'''Find:''' [[Melee (Tactics)|Melee]]<br/>'''[[Sticky Fingers (ability)|Catch]]:''' Level 96+ Ninja |
|'''Poach:''' [[Hydra (Tactics)|Tiamat]]<br/>'''Find:''' [[Melee (Tactics)|Melee]]<br/>'''[[Sticky Fingers (ability)|Catch]]:''' Level 96+ Ninja |
||
|- |
|- |
||
| − | ! |
+ | ![[Final Fantasy Tactics weapons#Crown Sceptre|Crown Sceptre]] |
|Rod |
|Rod |
||
|'''Find:''' [[Rendezvous]] |
|'''Find:''' [[Rendezvous]] |
||
|- |
|- |
||
| − | ! |
+ | ![[Final Fantasy Tactics weapons#Javelin "II"|Javelin "II"]] |
|Polearm |
|Polearm |
||
|'''[[Sticky Fingers (ability)|Catch]]:''' Level 97+ Ninja |
|'''[[Sticky Fingers (ability)|Catch]]:''' Level 97+ Ninja |
||
|- |
|- |
||
| − | ! |
+ | ![[Final Fantasy Tactics weapons#Staff of the Magi|Staff of the Magi]] |
|Stave |
|Stave |
||
|'''Treasure:''' [[Midlight's Deep (Tactics)|Midlight's Deep]] |
|'''Treasure:''' [[Midlight's Deep (Tactics)|Midlight's Deep]] |
||
|- |
|- |
||
| − | ! |
+ | ![[Final Fantasy Tactics weapons#Onion Sword|Onion Sword]] |
|Sword |
|Sword |
||
|'''Find:''' [[Melee (Tactics)|Melee]] |
|'''Find:''' [[Melee (Tactics)|Melee]] |
||
| Line 907: | Line 1,516: | ||
*[[Rem Tokimiya]]: [[Final Fantasy Type-0 weapons#Orichalcum Dirks|Orichalcum Dirks]] |
*[[Rem Tokimiya]]: [[Final Fantasy Type-0 weapons#Orichalcum Dirks|Orichalcum Dirks]] |
||
| − | The "second best" weapons are the ultimate weapons in second playthrough as True Gilgamesh cannot be fought yet, but the [[difficulty level#Final Fantasy Type-0|Finis]] difficulty level is available. They cost 60,000 gil and become available in the [[Akademeia]] Armory shop after completing a specific [[Missions (Type-0)|mission]] in Finis difficulty. In the PSP version, they could also be unlocked by exchanging for 10 tickets on the Square Enix Members site. They have high attack power, not far behind the "true" ultimate weapons. |
+ | The "second best" weapons are the ultimate weapons in a second playthrough as True Gilgamesh cannot be fought yet, but the [[difficulty level#Final Fantasy Type-0|Finis]] difficulty level is available. They cost 60,000 gil and become available in the [[Akademeia]] Armory shop after completing a specific [[Missions (Type-0)|mission]] in Finis difficulty. In the PSP version, they could also be unlocked by exchanging for 10 tickets on the Square Enix Members site. They have high attack power, not far behind the "true" ultimate weapons. |
| − | *Ace's [[Final Fantasy Type-0 weapons#Crazy Eights|Crazy Eights]] is unlocked after completing [[ |
+ | *Ace's [[Final Fantasy Type-0 weapons#Crazy Eights|Crazy Eights]] is unlocked after completing [[Mission Under Ceasefire]] on Finis difficulty. |
| − | *Deuce's [[Lamia's Flute]] is unlocked after completing [[ |
+ | *Deuce's [[Lamia's Flute]] is unlocked after completing [[Covering the Cadets]] in Finis difficulty. |
| − | *Trey's [[Artemis Bow|Artemis' Bow]] is unlocked after completing [[ |
+ | *Trey's [[Artemis Bow|Artemis' Bow]] is unlocked after completing [[The Retreat from Roshana]] on Finis difficulty. |
| − | *Cater's [[Final Fantasy Type-0 weapons#Marvelous Shout|Marvelous Shout]] is unlocked after completing [[ |
+ | *Cater's [[Final Fantasy Type-0 weapons#Marvelous Shout|Marvelous Shout]] is unlocked after completing [[A Fog-Laden Foray]] on Finis difficulty. |
| − | *Cinque's [[Seraphim's Mace|Seraphim Mace]] is unlocked after completing [[ |
+ | *Cinque's [[Seraphim's Mace|Seraphim Mace]] is unlocked after completing [[Operation MA Demolition (Type-0 mission)|Operation MA Demolition]] on Finis difficulty. |
| − | *Sice's [[Final Fantasy Type-0 weapons#Shambhala|Shambhala]] is unlocked after completing [[ |
+ | *Sice's [[Final Fantasy Type-0 weapons#Shambhala|Shambhala]] is unlocked after completing [[The Clash in the Caverns]] on Finis difficulty. |
| − | *Seven's [[Final Fantasy Type-0 weapons#Beastmaster|Beastmaster]] is unlocked after completing [[ |
+ | *Seven's [[Final Fantasy Type-0 weapons#Beastmaster|Beastmaster]] is unlocked after completing [[Operation Vulturnus]] on Finis difficulty. |
| − | *Eight's [[Kaiser Knuckles]] are unlocked after completing [[ |
+ | *Eight's [[Kaiser Knuckles]] are unlocked after completing [[The Infiltration of Iscah]] on Finis difficulty. |
| − | *Nine's [[Kain's Lance (weapon)|Kain's Lance]] is unlocked after completing [[ |
+ | *Nine's [[Kain's Lance (weapon)|Kain's Lance]] is unlocked after completing [[The Keziah Diversion]] on Finis difficulty. |
| − | *Jack's [[Mutsunokami]] is unlocked after completing [[ |
+ | *Jack's [[Mutsunokami]] is unlocked after completing "[[Operation Breakthrough]]" on Finis difficulty. Raises Jack's HP by 30%. |
| − | *Queen's [[Final Fantasy Type-0 weapons#Phantasmal Blade|Phantasmal Blade]] is unlocked after completing [[ |
+ | *Queen's [[Final Fantasy Type-0 weapons#Phantasmal Blade|Phantasmal Blade]] is unlocked after completing "[[Secret Agents Zero]]" on Finis difficulty. |
| − | *King's [[Valkyrie (weapon)|Valkyries]] are unlocked after completing [[ |
+ | *King's [[Valkyrie (weapon)|Valkyries]] are unlocked after completing "[[The Last Line of Defense]]" on Finis difficulty. |
| − | *Machina's [[Final Fantasy Type-0 weapons#Dreadnaughts|Dreadnaughts]] are unlocked after [[ |
+ | *Machina's [[Final Fantasy Type-0 weapons#Dreadnaughts|Dreadnaughts]] are unlocked after "[[Machina's Struggle]]" on Finis difficulty. Can inflict Instant Death. |
| − | *Rem's [[Assassin's Dagger (weapon)|Assassin's Daggers]] are unlocked after completing [[ |
+ | *Rem's [[Assassin's Dagger (weapon)|Assassin's Daggers]] are unlocked after completing [[United Front]] on Finis difficulty. Can inflict Instant Death. |
| − | In first playthrough, the best weapons the player can get become available in the SPP Post after landing 300 [[Killsight]] strikes with a character. These weapons also provide [[EXP bonus abilities|double EXP]]. |
+ | In a first playthrough, the best weapons the player can get become available in the SPP Post after landing 300 [[Killsight]] strikes with a character. These weapons also provide [[EXP bonus abilities|double EXP]]. |
=== ''[[Final Fantasy Mystic Quest]]'' === |
=== ''[[Final Fantasy Mystic Quest]]'' === |
||
| Line 951: | Line 1,560: | ||
The Sage Cane is the ultimate staff-type weapon, gained through combining two Bishop's Crosier blades. |
The Sage Cane is the ultimate staff-type weapon, gained through combining two Bishop's Crosier blades. |
||
| − | The |
+ | The ultimate material, Damascus, can only be gained through combining weapons with Holy Win or Rhomphaia dropped from the Iron Maiden, carefully crafting weapons made from the material into its ultimate weapon form, or carefully crafting various weapons from lesser materials and certain categories into Damascus, with the exception of the Hand of Light. The material provides an excellent Damage Points pool, the highest stat boosts to any equipment, and a high and even Affinity rating to all enemy types, at the tradeoff of a low Phantom Points pool. |
=== ''[[Final Fantasy Adventure]]'' === |
=== ''[[Final Fantasy Adventure]]'' === |
||
| Line 966: | Line 1,575: | ||
=== ''[[Final Fantasy Legend III]]'' === |
=== ''[[Final Fantasy Legend III]]'' === |
||
| − | {{See |
+ | {{See|Mystic Sword (Legend III)}} |
There are four swords known as "Mystic Swords": [[Final Fantasy Legend III weapons#Durend|Durend]], [[Final Fantasy Legend III weapons#Xcalibr|Xcalibr]], [[Final Fantasy Legend III weapons#Masmune|Masmune]], and [[Final Fantasy Legend III weapons#Emperor|Emperor]]. They can be found across Pureland and deal double damage against certain bosses and [[undead]] enemies. They can harm even enemies who are strong against [[Physical (element)|physical damage]]. |
There are four swords known as "Mystic Swords": [[Final Fantasy Legend III weapons#Durend|Durend]], [[Final Fantasy Legend III weapons#Xcalibr|Xcalibr]], [[Final Fantasy Legend III weapons#Masmune|Masmune]], and [[Final Fantasy Legend III weapons#Emperor|Emperor]]. They can be found across Pureland and deal double damage against certain bosses and [[undead]] enemies. They can harm even enemies who are strong against [[Physical (element)|physical damage]]. |
||
=== ''[[Dissidia Final Fantasy (2008)|Dissidia Final Fantasy]]'' (2008) === |
=== ''[[Dissidia Final Fantasy (2008)|Dissidia Final Fantasy]]'' (2008) === |
||
| − | Each character has an exclusive level 100 weapon, with the exception of [[Cecil Harvey |
+ | Each character has an exclusive level 100 weapon, with the exception of [[Cecil Harvey (Dissidia PSP)|Cecil]], who has two. While these weapons are given the "exclusive" classification, they are based on other weapon types in terms of offered stats, such as [[Firion (Dissidia PSP)|Firion's]] weapons giving a penalty to Defense in the manner of spears. The level 100 weapons thus have stats equal to or surpassing the other strongest weapons in their category. They also bear additional stat boosts and a support ability that increases the likelihood of critical hits in different circumstances. As allusions to the character's home title, the level 100 weapons are often named after their strongest weapon in their original game, or refer to them in some way, such as [[Kefka Palazzo (Dissidia PSP)|Kefka's]] weapon being named [[Dancing Mad (weapon)|Dancing Mad]] after his [[Dancing Mad (theme)|final boss theme]]. |
| − | These level 100 weapons can only be traded for in the [[Shop (Dissidia)|shop]] in a three-stage series of exchanges. Each character has three exclusive weapons, the other two approximately level 50 and level 90. Acquiring the level 100 weapon involves trading the level 90 weapon and other trade items, and getting the level 90 weapon needs the level 50 weapon. The level 50 weapons can be traded for with a variety of generic equipment. A handful also demand unique level 1 weapons exclusive to their character, such as [[Cloud Strife |
+ | These level 100 weapons can only be traded for in the [[Shop (Dissidia)|shop]] in a three-stage series of exchanges. Each character has three exclusive weapons, the other two approximately level 50 and level 90. Acquiring the level 100 weapon involves trading the level 90 weapon and other trade items, and getting the level 90 weapon needs the level 50 weapon. The level 50 weapons can be traded for with a variety of generic equipment. A handful also demand unique level 1 weapons exclusive to their character, such as [[Cloud Strife (Dissidia PSP)|Cloud's]] [[Buster Sword]]. |
The Ultimate Weapon also exists as a special level 99 weapon. The only equipment piece able to be equipped by all characters, the Ultima Weapon has +69 ATK, the highest in the game outside the exclusive weapons and the level 100 axes, and has a unique effect that grants the user +2 to ATK, DEF, and LUK when they are at full HP. This effective boost of +71 ATK is the highest of any weapon. |
The Ultimate Weapon also exists as a special level 99 weapon. The only equipment piece able to be equipped by all characters, the Ultima Weapon has +69 ATK, the highest in the game outside the exclusive weapons and the level 100 axes, and has a unique effect that grants the user +2 to ATK, DEF, and LUK when they are at full HP. This effective boost of +71 ATK is the highest of any weapon. |
||
==== ''[[Dissidia 012 Final Fantasy]]'' ==== |
==== ''[[Dissidia 012 Final Fantasy]]'' ==== |
||
| − | Each character once again has three exclusive weapons that must be traded for in sequence, from level 30 to level 90, to level 100. Some characters also have level 1 exclusive weapons needed for their level 30 weapons. [[Lightning ( |
+ | Each character once again has three exclusive weapons that must be traded for in sequence, from level 30 to level 90, to level 100. Some characters also have level 1 exclusive weapons needed for their level 30 weapons. [[Lightning (Dissidia PSP)|Lightning]] and Cecil have two level 100 weapons. The individual stats of returning weapons are rebalanced. |
The Ultima Weapon also returns as a level 100 weapon and +68 ATK. It bears the same effects as before, but other weapons have innately higher ATK boosts with other stat modifiers, so its power is comparatively less than the original game. |
The Ultima Weapon also returns as a level 100 weapon and +68 ATK. It bears the same effects as before, but other weapons have innately higher ATK boosts with other stat modifiers, so its power is comparatively less than the original game. |
||
| Line 994: | Line 1,603: | ||
FF5-SasukeKatana-Field.png|Sasuke's Katana in ''[[Final Fantasy V]]''. |
FF5-SasukeKatana-Field.png|Sasuke's Katana in ''[[Final Fantasy V]]''. |
||
FF5-YoichiBow-Field.png|Yoichi Bow in ''[[Final Fantasy V]]''. |
FF5-YoichiBow-Field.png|Yoichi Bow in ''[[Final Fantasy V]]''. |
||
| − | Zwill Crossblade |
+ | Zwill Crossblade from FFVI SNES.png|Zwill Crossblade in ''[[Final Fantasy VI]]''. |
| − | Save the Queen |
+ | Save the Queen from FFVI SNES.png|Save the Queen in ''[[Final Fantasy VI]]''. |
| − | Longinus |
+ | Longinus from FFVI SNES.png|Longinus in ''[[Final Fantasy VI]]''. |
| − | Gungnir |
+ | Gungnir from FFVI SNES.png|Gungnir in ''[[Final Fantasy VI]]''. |
| − | Oborozuki |
+ | Oborozuki from FFVI SNES.png|Oborozuki in ''[[Final Fantasy VI]]''. |
| − | Zanmato |
+ | Zanmato from FFVI SNES.png|Zanmato in ''[[Final Fantasy VI]]''. |
| − | Stardust Rod |
+ | Stardust Rod from FFVI GBA.png|Stardust Rod in ''[[Final Fantasy VI]]''. |
| − | Godhand |
+ | Godhand from FFVI SNES.png|Godhand in ''[[Final Fantasy VI]]''. |
| − | + | Final Trump from FFVI SNES.png|Final Trump in ''[[Final Fantasy VI]]''. |
|
| − | Scorpion Tail |
+ | Scorpion Tail from FFVI SNES.png|Scorpion Tail in ''[[Final Fantasy VI]]''. |
| − | Angel Brush |
+ | Angel Brush from FFVI SNES.png|Angel Brush in ''[[Final Fantasy VI]]''. |
| − | + | Ultima Weapon from FFVII concept art.png|Ultima Weapon in ''[[Final Fantasy VII]]''. |
|
| − | + | Missing Score FF7.png|Missing Score in ''[[Final Fantasy VII]]''. |
|
| − | + | Premium Heart FF7.png|Premium Heart in ''[[Final Fantasy VII]]''. |
|
| − | + | FF7 Conformer.jpg|Conformer in ''[[Final Fantasy VII]]''. |
|
| − | + | FF7 HP shout.jpg|HP Shout in ''[[Final Fantasy VII]]''. |
|
| − | + | Death Penalty from FFVII concept art.png|Death Penalty in ''[[Final Fantasy VII]]''. |
|
| − | + | FF7 Venus gospel.jpg|Venus Gospel in ''[[Final Fantasy VII]]''. |
|
LionHeart-ffviii-squall.png|Lionheart in ''[[Final Fantasy VIII]]''. |
LionHeart-ffviii-squall.png|Lionheart in ''[[Final Fantasy VIII]]''. |
||
Ehrgeiz-ffviii-zell.png|Ehrgeiz in ''[[Final Fantasy VIII]]''. |
Ehrgeiz-ffviii-zell.png|Ehrgeiz in ''[[Final Fantasy VIII]]''. |
||
| Line 1,020: | Line 1,629: | ||
FFIX Excalibur II Art.png|Excalibur II in ''[[Final Fantasy IX]]''. |
FFIX Excalibur II Art.png|Excalibur II in ''[[Final Fantasy IX]]''. |
||
Mace of Zeus FFIX.png|Mace of Zeus in ''[[Final Fantasy IX]]''. |
Mace of Zeus FFIX.png|Mace of Zeus in ''[[Final Fantasy IX]]''. |
||
| − | Dragon |
+ | Dragon's Hair.png|Dragon's Hair in ''[[Final Fantasy IX]]''. |
Gastro Fork FFIX.png|Gastro Fork in ''[[Final Fantasy IX]]''. |
Gastro Fork FFIX.png|Gastro Fork in ''[[Final Fantasy IX]]''. |
||
Rune Claws FFIX.png|Rune Claw in ''[[Final Fantasy IX]]''. |
Rune Claws FFIX.png|Rune Claw in ''[[Final Fantasy IX]]''. |
||
FFX Weapon - Caladbolg.png|Caladbolg in ''[[Final Fantasy X]]''. |
FFX Weapon - Caladbolg.png|Caladbolg in ''[[Final Fantasy X]]''. |
||
| − | + | FFX Weapon - World Champion.png|World Champion in ''[[Final Fantasy X]]''. |
|
FFX Weapon - Nirvana.png|Nirvana in ''[[Final Fantasy X]]''. |
FFX Weapon - Nirvana.png|Nirvana in ''[[Final Fantasy X]]''. |
||
| − | + | FFX Weapon - Spirit Lance.png|Spirit Lance in ''[[Final Fantasy X]]''. |
|
FFX Weapon - Masamune.png|Masamune in ''[[Final Fantasy X]]''. |
FFX Weapon - Masamune.png|Masamune in ''[[Final Fantasy X]]''. |
||
FFX Weapon - Godhand.png|Godhand in ''[[Final Fantasy X]]''. |
FFX Weapon - Godhand.png|Godhand in ''[[Final Fantasy X]]''. |
||
| Line 1,053: | Line 1,662: | ||
FFXIII Nirvana.png|Nirvana in ''[[Final Fantasy XIII]]''. |
FFXIII Nirvana.png|Nirvana in ''[[Final Fantasy XIII]]''. |
||
XIII kains lance.png|Kain's Lance in ''[[Final Fantasy XIII]]''. |
XIII kains lance.png|Kain's Lance in ''[[Final Fantasy XIII]]''. |
||
| − | FFXIII- |
+ | FFXIII-2 Gandiva.png|Gandiva in ''[[Final Fantasy XIII-2]]''. |
Noel Grasitha.png|Grasitha in ''[[Final Fantasy XIII-2]]''. |
Noel Grasitha.png|Grasitha in ''[[Final Fantasy XIII-2]]''. |
||
| − | FFXIII- |
+ | FFXIII-2 Indrajit.png|Indrajit in ''[[Final Fantasy XIII-2]]''. |
Noel Romulus & Remus.png|Romulus & Remus in ''[[Final Fantasy XIII-2]]''. |
Noel Romulus & Remus.png|Romulus & Remus in ''[[Final Fantasy XIII-2]]''. |
||
| − | FFXIII- |
+ | FFXIII-2 Sagittarius.png|Sagittarius in ''[[Final Fantasy XIII-2]]''. |
| − | + | Noel Mac an Luin.png|Mac an Luin in ''[[Final Fantasy XIII-2]]''. |
|
| − | + | Noel In Paradisum.png|In Paradisum in ''[[Final Fantasy XIII-2]]''. |
|
| − | + | Serah Odin Bolt.png|Odinbolt in ''[[Final Fantasy XIII-2]]''. |
|
| − | + | Noel Odin Blade.png|Odinblade in ''[[Final Fantasy XIII-2]]''. |
|
| − | + | FFXIV Bravura.jpg|Bravura in ''[[Final Fantasy XIV]]''. |
|
| − | + | FFXIV Curtana.png|Curtana in ''[[Final Fantasy XIV]]''. |
|
SphairaiXIV.png|Sphairai in ''[[Final Fantasy XIV]]''. |
SphairaiXIV.png|Sphairai in ''[[Final Fantasy XIV]]''. |
||
| − | + | FFXIV Gae Bolg.png|Gae Bolg in ''[[Final Fantasy XIV]]''. |
|
| − | + | Yoshimitsu from Final Fantasy XIV icon.png|Yoshimitsu in ''[[Final Fantasy XIV]]''. |
|
| − | + | FFXIV Thyrus.png|Thyrus in ''[[Final Fantasy XIV]]''. |
|
| − | + | FFXIV Stardust Rod.png|Stardust Rod in ''[[Final Fantasy XIV]]''. |
|
| − | + | Omnilex from Final Fantasy XIV icon.png|Omnilex in ''[[Final Fantasy XIV]]''. |
|
| − | + | The Veil of Wiyu from Final Fantasy XIV icon.png|The Veil of Wiyu in ''[[Final Fantasy XIV]]''. |
|
FFT Golden Axe.png|Golden Axe in ''[[Final Fantasy Tactics]]''. |
FFT Golden Axe.png|Golden Axe in ''[[Final Fantasy Tactics]]''. |
||
FFT Fallingstar Bag.gif|Fallingstar Bag in ''[[Final Fantasy Tactics]]''. |
FFT Fallingstar Bag.gif|Fallingstar Bag in ''[[Final Fantasy Tactics]]''. |
||
| Line 1,102: | Line 1,711: | ||
</gallery> |
</gallery> |
||
| − | {{navbox recurring |
+ | {{navbox recurring}} |
{{navbox weapons}} |
{{navbox weapons}} |
||
| Line 1,108: | Line 1,717: | ||
[[pt-br:Arma Suprema (Termo)]] |
[[pt-br:Arma Suprema (Termo)]] |
||
[[Category:Weapons]] |
[[Category:Weapons]] |
||
| − | [[Category:Recurring gameplay |
+ | [[Category:Recurring gameplay components]] |
Latest revision as of 08:48, 24 March 2024
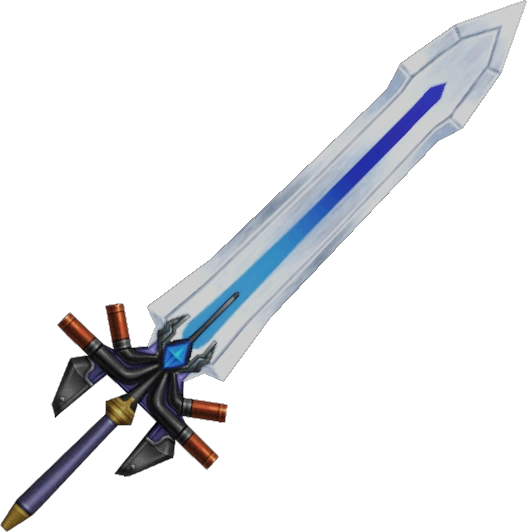
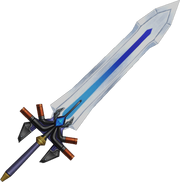
Cloud's Ultima Weapon, the classic example of an ultimate weapon.
An ultimate weapon (最終武器, Saishuu Buki?, lit. last weapon) is a widely used term to refer to a single weapon model that objectively surpasses all others of its kind in both usefulness and power. In most installments of the Final Fantasy series, each type of weapon features a single ultimate weapon, and it is possible to pinpoint an ultimate weapon from each available weapon type in the game.
Ultimate weapons are often unique and available through sidequests, which may range from item creation to being found at the defeat of optional bosses and/or optional dungeons. In most cases, the series' most powerful weapons have recurred even if in name only. Re-releases commonly offer new ultimate weapons not present in the games' original releases.
Appearances[]
Final Fantasy[]
The Masamune.
Until the Dawn of Souls release for the Game Boy Advance, the best weapon was the Masamune, which had the greatest attack power and could be equipped by every job. However, the Excalibur could easily deliver more damage despite its lower attack power due to being effective against all weaknesses.
The Dawn of Souls release adds several new weapons, among them the Ultima Weapon, whose attack power is bound to the wielder's current HP, and thus can reach an attack power of 99, far surpassing any other weapon. It can be equipped by every advanced job.
In the 20th Anniversary version, new pieces of equipment were added as rewards for the Labyrinth of Time sidequest, but only one weapon surpasses the Ultima Weapon in attack power: the Barbarian's Sword. It can be equipped by Warriors, Knights, Red Mages, and Red Wizards.
Final Fantasy II[]
The best weapons changed with successive re-releases. Until the Dawn of Souls release, the best weapon was the Masamune, which, like all weapons, could be equipped by every character; however, unlike every other weapon, it gave no penalties to magic accuracy, reflecting how it could be used by every class in the original Final Fantasy.
In the Dawn of Souls release the playable characters of the new Soul of Rebirth storyline received exclusive weapons, obtainable at the Unknown Palace:
| Character | Weapon | Type |
|---|---|---|
| Minwu | Stardust Rod | Staff |
| Scott | Wild Rose | Sword |
| Ricard | Wyvern's Lance | Spear |
| Josef | Bracers | Gauntlet |
In the 20th Anniversary release for the PlayStation Portable and mobile platforms, new ultimate weapons were released for every playable character of the main storyline, obtainable through the Arcane Labyrinth sidequest.
| Character | Weapon | Type |
|---|---|---|
| Firion | Ragnarok | Sword |
| Maria | Artemis Bow | Bow |
| Guy | Gigantaxe | Axe |
| Leon | Longinus | Spear |
| Minwu | Staff of Light | Staff |
| Josef | Dragon Claws | Knife |
| Gordon | Gungnir | Spear |
| Leila | Dancing Dagger | Knife |
| Ricard | Abel's Lance | Spear |
As in the Dawn of Souls release, the playable characters of the Soul of Rebirth mode will keep their equipment from a normal cleared save, and as such, it is possible to keep Minwu's, Josef's and Ricard's weapons from the Arcane Labyrinth, considering they had them equipped as they left the party.
Final Fantasy III[]
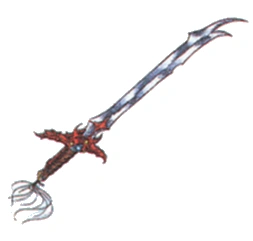

The Onion Sword.
A character's equipment is limited by their job. The most powerful weapon is the Shuriken, which always deals 9999 damage, but can only be used by Ninja, and is consumed upon use. However, several other powerful weapons are available.
In the original release, the strongest weapon was the Onion Sword, which could be equipped by the namesake Onion Knight. Many weapons of comparable power to the Onion Sword, and accessible to many jobs, can be found at Eureka, each protected by strong bosses.
| Weapon | Type | Boss |
|---|---|---|
| Moonring Blade | Thrown | Amon |
| Masamune | Dark Blade | Kunoichi |
| Excalibur | Sword | General |
| Ragnarok | Sword | Guardian |
| Elder Staff | Staff | Scylla |
The 3D remake adds new sidequests involving a new character, the Legendary Smith, that yield new powerful job-exclusive weapons and armor by maxing a job's level with any character. A new ultimate weapon, the Ultima Weapon, offers significantly greater stat boosts than the Onion Sword at the expense of one unit of attack power. Each of the mentioned weapons can only be obtained once.
Additionally, the spear Gungnir, which can be stolen from Odin, is as powerful as any of the aforementioned weapons.
- Legendary Smith weapons
Final Fantasy IV[]
2D versions[]
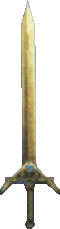
The ultimate weapons for the main final party can be found at the Lunar Subterrane, the final dungeon. Both Rosa and Rydia have access to a pair of weapons that each maximize their physical and magical prowess, however, only one of the two can be found as treasure, while the other is a drop from a random encountered enemy. Meanwhile, Cecil, Kain, and Edge can find weapons that optimize their melee skill.
| Character | Weapon | Type | Acquisition |
|---|---|---|---|
| Kain | Holy Lance | Spear | Find: Lunar Subterrane (defeat Plague Horror) |
| Rydia | Dragon Whisker | Whip | Drop: Blue Dragon, Fiend Dragon |
| Stardust Rod | Rod | Find: Lunar Subterrane (defeat Behemoth) | |
| Cecil | Ragnarok | Sword | Find: Lunar Subterrane (defeat Dark Bahamut) |
| Rosa | Artemis Bow | Bow | Drop: Moonmaiden |
| Sage's Staff | Staff | Find: Lunar Subterrane | |
| Edge | Murasame | Katana | Find: Lunar Subterrane (defeat White Dragon) |
| Masamune | Katana | Find: Lunar Subterrane (defeat Ogopogo) |
The Advance and Complete Collection releases add two bonus dungeons. The Cave of Trials contains powerful weapons for the returning party members that could rejoin Cecil's party at Mysidia's Tower of Prayers after the defeat of the Giant of Babil.
A new post-game optional dungeon, the Lunar Ruins, contains powerful and exclusive weapons for each character, obtained in treasure chests or as rewards from the dungeon's character-specific trials.
| Character | Weapon | Type | Obtained |
|---|---|---|---|
| Yang | Dragon Claws | Claws | Treasure |
| Tiger Fangs | Claws | Treasure | |
| Edward | Loki's Lute | Harp | Treasure |
| Rydia | Mystic Whip | Whip | Treasure |
| Cecil | Lightbringer | Sword | Cecil's Trial |
| Rosa | Perseus Bow | Bow | Treasure |
| Edge | Sasuke's Katana | Katana | Treasure |
| Mutsunokami | Katana | Treasure | |
| Kain | Abel's Lance | Spear | Kain's Trial |
| Cid | Flare Sledgehammer | Hammer | Cid's Trial |
| Palom | Asura's Rod | Rod | Treasure |
| Porom | Nirvana | Staff | Treasure |
3D versions[]
The five final characters' ultimate weapons were significantly changed: while Kain, Cecil and Edge's respective weapons were powered, Rosa's Artemis Bow and Rydia's Dragon Whisker lost their penalties to magic stats, and the Sage's Staff became weaker than the Rune Staff in every aspect.
The remake also added a new ultimate weapon equippable by both Cecil and Kain, the Onion Sword.
Final Fantasy IV: The After Years[]
The best weapons of each type are available in the final chapter at the Subterrane and Depths of the True Moon, and are obtained as rewards for defeating certain bosses in those areas.
Final Fantasy V[]

The Gaia Bell.
There are twelve weapons known as "Sealed Weapons" held in Kuza, the Sealed Castle. Boomerang is the only weapon type not to have a corresponding Sealed Weapon. However, these are not the most powerful weapons.
- Assassin's Dagger has 78 Attack and a 25% chance to inflict Instant Death. It can be used by all jobs except Monks and White Mages.
- Apollo's Harp can be wielded by Bards and Freelancers, has 42 Attack, deals extra damage against the undead and demons, and ignores row.
- The Excalibur can be used by Freelancers, Knights, and Gladiators, boosts Attack by 107 and Strength by 5, and is Holy-elemental.
- The Rune Axe, wielded by Freelancers, Gladiators, and Berserkers, raises Strength by 68 and Magic by 3, and uses MP to always hit critical.
- Yoichi's Bow can be used by Freelancers, Gladiators, and Rangers. It ignores row, has a 30% chance of critical hit, and raises Attack by 98, and Strength and Speed by 3.
- Sasuke's Katana is wielded by Ninjas and Freelancers. It may block attacks and has 96 Attack and 3 Speed.
- The Sage Staff can be used by Freelancers, White Mages, Time Mages, Red Mages, Chemists, Oracles, and Mimes. It only has 50 Attack, but raises the power of Holy-elemental attacks while equipped, deals double damage to the Undead, and casts Raise when used as an item.
- Masamune, used by Freelancers, Gladiators, and Samurai, has a 15% chance of critical hits, has the user always go first, has 104 Attack, and casts Haste when used as an item.
- The Magus Rod, wielded by Freelancers, Mimes, Time Mages, Black Mages, Blue Mages, Red Mages, and Necromancers, only has 37 Attack, but increases the power of attacks of every element by the wielder except Water and Holy.
- The Holy Lance is Holy-elemental and boasts 107 Attack and 3 Strength. It can be used by Freelancers, Gladiators, and Dragoons.
- Gaia's Bell, used by Freelancers and Geomancers, has just 32 Attack, but boosts Earth-elemental attacks by the user and has a 25% chance of casting Quake instead of attacking.
- Lastly, the Fire Lash is the sealed Beastmaster weapon and can be also used by Freelancers. It boosts Attack by 79, and Strength and Speed by 2. It ignores row and has a 32% chance of casting Firaga when attacking.
The most powerful weapons are obtained by defeating a strong boss or finding them from the bonus dungeon introduced in Final Fantasy V Advance: Sealed Temple.
Rune Chime was the most powerful bell in the SNES/PS versions, won from Baldanders, but Tinklebell in the Advance and discontinued mobile/Steam versions is more powerful and is obtained by defeating the Twintania.
Artemis' Bow was the most powerful bow in the SNES/PS/PR versions, found in the Istory Falls or stolen from Dragon Aevis, but in the Advance and discontinued mobile/Steam releases, Fairy's Bow is more powerful and is obtained by defeating Grand Aevis.
In the SNES/PS/PR versions Murakumo is the most powerful katana, stolen from Yojimbo or the final boss, but Mutsunokami is the most powerful katana in the Advance and the discontinued mobile/Steam versions, and is found in Sealed Temple Lethe Court - Shadowed Gate.
In the SNES/PS/PR versions Ragnarok was the most powerful knight sword, obtained by defeating Shinryu in the final dungeon, or stealing from the final boss, Neo Exdeath. The Advance and discontinued mobile/Steam versions have an even more powerful sword, the Apocalypse, found from the Sealed Temple.
Man-Eater is the most powerful knife in SNES/PS/PR versions, stolen from Alchymia or found in the Interdimensional Rift, but the Gladius surpasses it in the Advance and discontinued mobile/Steam versions, being found from the Arena in Sealed Temple.
Demon's Rod is the most powerful rod in the Advance and discontinued mobile/Steam versions, found in Sealed Temple. Kagenui is the most powerful short sword, found in the Sealed Temple Heart of Ronka B1 area.
Dragon Lance is the most powerful spear in the SNES/PS/PR versions, stolen from Crystal Dragon, Jura Aevis, or Neo Exdeath's middle section, but it is surpassed by the Longinus in the Advance and discontinued mobile/Steam versions, found in Sealed Temple Hall of Tranquility area.
Judgment Staff is the most powerful staff in the SNES/PS/PR versions, stolen from Black Warlock, Istory Lythos or Exdeath, but is surpassed by the Mace of Zeus in the Advance and discontinued mobile/Steam versions, found from the Ruined Shrine in the Sealed Temple.
Regular swords don't have a Sealed Weapon. In the SNES/PS/PR versions Enhancer is the strongest sword, stolen from a Sword Dancer or found in Istory Falls or Interdimensional Rift. In the Advance and discontinued mobile/Steam versions, Ultima Weapon is the strongest sword, obtained from the superboss Neo Shinryu.
Finally, Dragon's Whisker is the strongest whip, obtained from Stingray and stolen from Shinryu.
Final Fantasy VI[]
The Lightbringer and the Ragnarok are the two strongest weapons with the Ultima Weapon third due to its power being based on the wielder's current HP and the level. The Lightbringer has an attack power of 255, gives + to all stats, and +50% to Evasion and Magic Evasion, as well as dealing critical hits using MP, being Holy-elemental and randomly casting Holy, dealing the same damage from the back row, and having a perfect hit rate. It can be obtained by betting the Ragnarok in the Coliseum.
The Ultima Weapon can be found in the Cave to the Sealed Gate in the World of Balance. It pierces defense and deals more damage based on the user's current HP, and eventually becomes the most powerful weapon at high enough levels. At lower levels and HP, it can often be outclassed by other weapons.
In the Advance and 2014 versions, all characters except for Gau and Umaro have unique ultimate weapons found in the Dragons' Den, obtained after defeating a certain boss within, or alternatively by betting another ultimate weapon in the Dragon's Neck Coliseum. None of the weapons are statistically better than the Lightbringer, however.
- Terra's Apocalypse has an attack power of 250, gives +7 boosts for Strength and Magic and +20% boosts for Evasion and Magic Evasion, and consumes MP when attacking for a critical hit. It is won by defeating Red Dragon or by betting the Save the Queen in the Coliseum.
- Locke's Zwill Crossblade has an attack power of 220, gives +3 boosts for Strength and Stamina, a +7 boost for Speed, a +30% boost for Evasion, and a +20% boost for Magic Evasion, is Wind-elemental, and randomly inflicts Sleep when attacking. It is obtained by defeating Gold Dragon or by betting the Oborozuki in the Coliseum.
- Edgar's Longinus has an attack power of 235 and gives a +7 boost for Strength and +3 boosts for Speed and Stamina, however, no damage bonus is granted for Jump. It is won by defeating Storm Dragon or by betting the Gungnir in the Coliseum.
- Sabin's Godhand has an attack power of 220, gives +7 boosts for Strength and Stamina and a +3 boost for Speed, and is Holy-elemental. It is won by defeating Earth Dragon or by betting the Zanmato in the Coliseum.
- Shadow's Oborozuki has an attack power of 225 and gives +7 boosts for Strength and Speed, a +50% boost for Evasion, and a +10% boost for Magic Evasion. It is won by defeating Flan Princess or by betting the Zwill Crossblade in the Coliseum.
- Cyan's Zanmato has an attack power of 245, gives +7 boosts for Strength and Stamina and a +30% boost for Evasion, and is Holy-elemental. It is won by defeating Holy Dragon or by betting the Godhand in the Coliseum.
- Celes's Save the Queen has an attack power of 240, gives +7 boosts for Stamina and Magic and +40% boosts for Evasion and Magic Evasion, and consumes MP when attacking for a critical hit. It is won by defeating Blue Dragon or by betting the Apocalypse in the Coliseum.
- Setzer's Final Trump has an attack power of 215, gives +4 boosts for Speed and Stamina and a +3 boost for Strength, and consumes MP when attacking for a critical hit. It is won by defeating Ice Dragon or by betting the Scorpion Tail in the Coliseum.
- Mog's Gungnir has an attack power of 240 and gives +7 boosts for Stamina and Magic, however no damage bonus is granted for Jump. It is won by defeating Neslug or by betting the Longinus in the Coliseum.
- Strago's Stardust Rod has an attack power of 180, gives a +7 boost for Magic and a +4 boost for Stamina, and randomly casts Meteor when attacking. It is found in a chest in the Dragons' Den or by betting the Angel Brush in the Coliseum.
- Relm's Angel Brush has an attack power of 170, gives +7 boosts for Magic and Speed, and randomly casts Confuse when attacking. It is won by defeating Plague or by betting the Stardust Rod in the Coliseum.
- Gogo's Scorpion Tail has an attack power of 225, gives +4 for Strength, Speed, Stamina, and Magic, and is Poison-elemental, thus it may randomly cast Bio when attacking. It is won by defeating Skull Dragon or by betting the Final Trump in the Coliseum.
Final Fantasy VII[]

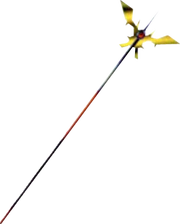
The Princess Guard.
Ultimate weapons are distinguishable for having unique damage algorithms, as well as eight linked Materia slots with zero Materia growth. Because of the weapons' unique damage algorithms, the damage they deal can be lower than that of other weapons under certain circumstances, making them not always the ideal weapon to equip. Unlike most other damage modifiers, each character's ultimate weapon applies the damage modifier after all other modifiers, instead of modifying the attack strength of the weapon itself.
Cloud's ultimate weapon is the Ultima Weapon, dropped by the Ultimate Weapon boss. It deals more damage based on how close Cloud is to full HP.
![{\displaystyle [1+(48\times {\text{Cloud's current HP percentage}})] \over 16}](https://services.fandom.com/mathoid-facade/v1/media/math/render/svg/c5aa37956ed1a9d9f1dbbdb0109b023c8d28eaee)
This "raw damage" is then modified by the attack's strength (1 if it is a normal attack) and other modifiers. At full HP, the weapon would deal 4x damage and 1x damage at about 1/3rd HP.
Barret's ultimate weapon, the Missing Score, is found inside the Sister Ray just before battling Helletic Hojo, but Barret must be in the party to receive it. It deals more damage the more AP the Materia loaded onto it contain. Because of its unique damage algorithm, Missing Score is subject to the overflow glitch that can let Barret kill any opponent in one hit.
![{\displaystyle [1+(Total~AP~on~Weapon/10,000)]/16}](https://services.fandom.com/mathoid-facade/v1/media/math/render/svg/e5c617bbab028496bd50c69fb14b7378fe7fae40)
Master Magic, Master Command, Master Summon, Enemy Skill, and Underwater Materia do not add to this formula.
Tifa's ultimate weapon is the Premium Heart obtained by examining a machine in the abandoned building that has a sign "ITEM" outside in Wall Market. It can be obtained after the player has found the Key to Midgar buried in Bone Village, which becomes available when Cloud and Tifa rejoin the party.
The damage that is dealt by Premium Heart is calculated as follows:
![{\displaystyle Power=[1+(Tifa's~Limit~Level\times Limit~Bar~Units/16]/16}](https://services.fandom.com/mathoid-facade/v1/media/math/render/svg/7acc9f60e66f1a1d1f3b6c2cfa64819680789e27)
The maximum Limit Bar Units is 255 regardless of Limit level (the Limit level simply adjusts the rate at which the bar fills). When the bar is full, the weapon does roughly 1–4x of its normal damage depending on the Limit level, and would do 1/16 of that damage when the Limit bar is empty. Unlike most weapon damage modifiers, this modifier does not solely adjust the weapon's attack power, but the character's final attack power, which includes Tifa's Strength and weapon attack bonus.
There may be a bug with the formula as the way it is written, the "1" value has almost no effect. If the formula was instead : , the weapon would do 1x its normal damage when the Limit bar is empty and up to 5x damage with a full level 4 Limit gauge. The actual formula causes Tifa to do less than normal damage unless her Limit bar is at least 1/4th full at Limit level 4, which many players consider worse than a non-ultimate weapon. The God's Hand, Tifa's "second best" weapon, has 255% accuracy, which makes it ideal to use with Deathblow for an automatic critical hit. Tifa's Powersoul deals double damage if Tifa's in Near-death status, and if Tifa has Death-sentence status it quadruples the damage. Both multipliers stack. Powersoul can be found in Mt. Nibel in the area Materia Keeper is fought. Another of Tifa's weapons, the Master Fist, deals more damage the more status ailments Tifa is afflicted with, and can be found in Shinra Bldg. shop in Part II.
![{\displaystyle Power=1+[(Tifa's~Limit~Level\times Limit~Bar~Units/16/16]}](https://services.fandom.com/mathoid-facade/v1/media/math/render/svg/56b89c1d1bc789fb23dcfb086d81233119b73260)
Aeris's ultimate weapon, Princess Guard, can be found in room four of the clock room in the Temple of the Ancients. It is the only ultimate weapon that has Materia growth and has fewer than eight linked Materia slots. It deals more damage if her allies are KO'd.

The Limited Moon, Red XIII's ultimate weapon, is found by talking to Geisel Bugenhagen at Cosmo Canyon in the endgame with Red XIII in the party. It deals more damage based on how close Red XIII is to full MP.
![{\displaystyle Power=[(3\times Power\times Red~XIII's~MP)/Red~XIII's~Max~MP]+1}](https://services.fandom.com/mathoid-facade/v1/media/math/render/svg/f0a10002dc63288091c1870660b6f92f66082bb1)
Yuffie's ultimate weapon, the Conformer, can be found in the Sunken Gelnika, accessible via the submarine. It does more damage the higher level the opponents are, and ignores the Morph damage penalty. When used against allies it deals 1 HP damage but there is no attack sound and no damage numbers are displayed.

Cait Sith's ultimate weapon, the HP Shout, can be found on the 64th floor of the Shinra Bldg. The megaphone can only be obtained after Cait Sith becomes a playable character, so it cannot be obtained until the party revisits the headquarters in Part 2. It deals more damage based on how close Cait Sith is to full HP.
![{\displaystyle Power=[(3\times Power\times Cait~Sith's~HP)/Cait~Sith's~Max~HP]+1}](https://services.fandom.com/mathoid-facade/v1/media/math/render/svg/9d721075eaa7d3a0cc5a0de9862a5b64e7d515c1)
The Death Penalty, Vincent's ultimate weapon, is found in ???. The player must trigger a storyline event there by visiting the cave behind the waterfall near Nibelheim with both Cloud and Vincent in the party (with a colored chocobo or the submarine), and then win 2 to 11 random encounters and return to the cave to obtain the weapon. Death Penalty's power is boosted after every enemy Vincent kills. Due to a damage overflow glitch, if enough enemies are killed, the Death Penalty can kill any enemy with a single hit, including superbosses.
![{\displaystyle Power=[10+(Vincent's~Kills/128)]/16}](https://services.fandom.com/mathoid-facade/v1/media/math/render/svg/e60d2ad3e8d886e1a6437af2becb22c51f3099c2)
This is then modified by the attack's power; for normal attacks, the multiplier is 1.0. For a plot graph of this formula see here. To reach a base 1.0 damage multiplier, Vincent would need 768 kills. To get 4.0 damage multiplier, Vincent needs 6,912 kills.
The number of Vincent's kills is capped at , but, as the division by 128 is actually a right bits shift by 7 (logarithm in base 2 of 128), only the quotient is considered. This means the Power stat raises by every 128 kills; in particular the maximum power is granted as soon as Vincent has killed enemies, since , which is greater than the cap. For a physical attack the Technique Power is always 16, therefore in that scenario the maximum power is .


Cid's ultimate weapon, the Venus Gospel, can be obtained by talking to the man who was staring at the rocket at Rocket Town after it has been launched from "What Aeris Left Behind" onward. If the player speaks to the man three times, he will give the player Cid's ultimate weapon. It deals more damage based on how close Cid is to full MP.
![{\displaystyle Power=[(3\times Power\times Cid's~MP)/Cid's~Max~MP]+1}](https://services.fandom.com/mathoid-facade/v1/media/math/render/svg/4574e4b803abdeef390e0f6fdb6a9223ea928dde)
Final Fantasy VIII[]
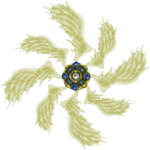
The Shooting Star.
As it is not a requisite to read the corresponding Weapons Monthly magazines before the weapons can be modeled in a junk shop, the characters' ultimate weapons can be crafted as early as the player collects the required items (often done easier by modifying Triple Triad cards). This means everyone but Irvine can potentially obtain their strongest weapon on disc 1 (before the end of the Deling City parade).
However, the weapons' attack stats are not significant due to the Junction system, making only Squall's Lion Heart and Selphie's Strange Vision notable among them; Lion Heart for providing Squall his ultimate Renzokuken technique, and Strange Vision having natural 255% accuracy.
Squall's Lion Heart requires Adamantine x1, Dragon Fang x4 and Pulse Ammo x12 to make, and costs 2,000 gil. Adamantine can be obtained from Adamantoises on beaches north of Dollet or by modifying Minotaur's card. Dragon Fangs are obtained from LV1–19 Grendels, LV20–29 T-Rexaurs, and Blue Dragons of any level. Pulse Ammo must be refined with Ifrit's Ammo-RF from Energy Crystals (easiest obtained from Elnoyles or their cards earlier on), Laser Cannons and Power Generators.
Rinoa's Shooting Star requires Windmill x2, Regen Ring x1, Force Armlet x1, Energy Crystal x2 and costs 1,000 gil. Windmills can be dropped from Thrustaevis or refined from Abyss Worm cards. Regen Rings can be dropped from Vysage or refined from Chimera cards. A Force Armlet can be obtained from X-ATM092, a high-level Ochu, or the second Edea fight.
Zell's Ehrgeiz requires Adamantine x1, Dragon Skin x4, Fury Fragment x1 and costs 800 gil. Dragon Skins can be obtained from Anacondaur or a low-level Grendel. A Fury Fragment can be obtained from a higher-level Grendel or refined from Blue Dragon cards.
Quistis's Save the Queen requires Malboro Tentacle x2, Sharp Spike x4, Energy Crystal x4 and costs 800 gil. Malboro Tentacles can be refined from Malboro cards or received directly from them. Sharp Spikes can drop from Armadodo or be refined from Grand Mantis and Death Claw cards.
Selphie's Strange Vision requires Adamantine x1, Star Fragment x3, Curse Spike x2 and costs 800 gil. Star Fragments can be refined from Iron Giant cards or received directly from them. Curse Spikes can be refined from Tri-Face cards.
Irvine's Exeter requires Dino Bone x2, Moon Stone x1, Star Fragment x2, Screw x18 and costs 800 gil. Dino Bones can be refined from Armadodo, T-Rexaur, or Sacred cards. Moon Stones are dropped by Elnoyle, Imp, and Torama, all of which cannot be encountered until Disc 3.
Final Fantasy IX[]

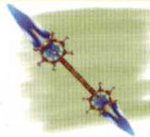
The Ultima Weapon.
Zidane's ultimate weapon is the Ultima Weapon found in an unmarked chocobo bubble on the site where the Shimmering Island used to be. After the party obtains the Invincible the island will be gone, but will still be marked on the map. If the player dives with Choco (by using a Dead Pepper exactly on the right spot), they can find the Ultima Weapon. It teaches Flee and inflicts the Sleep status when used with Soul Blade.
Tiger Racket is the strongest racket usable by both Dagger and Eiko. It is obtained from the bubble below Quan's Dwelling. The player must enter Quan's Dwelling and look down from the ledge after they have trained Choco to dark blue color. It teaches Dispel and is Wind-elemental. However, Dagger and Eiko being mage-type characters means their physical attack will always be weak, and thus Magic Racket with its +2 Magic and boost to Holy damage may be more useful.
Dagger's other ultimate weapon is the Whale Whisker, found after uncovering Chocograph 18, Ocean. It teaches Curaga and Life.
Eiko's other ultimate weapon is the Angel Flute, found in the Past room in Memoria. It teaches Eiko Esuna and Curaga, as well as her strongest spell, Holy.
Steiner's ultimate weapon is the Excalibur II found in Memoria if the player inspects the pillar in the Gate to Space room with less than 12 hours on the game clock. It is Holy-elemental and teaches Minus Strike, Climhazzard and Stock Break. Because of the arduous challenge to obtain this weapon, Steiner's second best weapon, the Ragnarok, is often considered his other ultimate weapon. Found in the Chocograph 21, Outer Island, Ragnarok inflicts the Slow status when used with the Add Status ability, and teaches Shock and Thunder Slash.
Vivi's ultimate weapon is the Mace of Zeus found in Memoria's Stairs room. It inflicts the Mini status when used with Add Status, and teaches Doomsday, Vivi's most powerful Black Magic spell.
Freya's ultimate weapon is the Dragon's Hair found at the mountain crack (by feeding Choco a Dead Pepper at the correct spot) northwest of Oeilvert. It teaches the Dragon Breath ability.
Quina's ultimate weapon is the Gastro Fork obtained after catching 99 frogs in the marshes and defeating the boss that appears. It inflicts the Stop status with Add Status ability and teaches High Tide.
Amarant's ultimate weapon is the Rune Claws found in the Time Interval room in Memoria. It inflicts the Darkness status with Add Status ability and teaches Spare Change, Demi Shock and Revive.
Obtaining ultimate weapons yields achievements/trophies in the versions that support an achievements system.
Final Fantasy X[]

The Onion Knight doll.
The ultimate weapons are called "Celestial Weapons," and each of the seven permanent party members has one. The weapons are actually detrimental when first obtained, as they carry the No AP ability. To overcome this, each weapon must be enhanced using two corresponding key items (crests and sigils), each named for a celestial body corresponding to the character: Sun, Moon, Mercury, Venus, Mars, Jupiter and Saturn.
The Celestial Weapons are obtained by performing a task (although the Celestial Mirror key item must be obtained first), while the Crests are found in treasure chests and the Sigils are won by excelling in minigames and sidequests. When fully enhanced, the Celestial Weapons have four abilities, which are generally complementary to the wielder's personality and/or default combat style.
With the exception of Tidus's and Rikku's weapons, each Celestial Weapon allows a certain aeon to break the damage limit. Celestial Weapons ignore the defense of enemies when attacking physically. The Caladbolg, World Champion, Spirit Lance, and Godhand do damage based on how close their wielders' are to full HP. The Masamune does damage based on how low its wielder's HP is. Onion Knight and Nirvana do damage based on how close their wielders' are to full MP.
While the game's Customization feature makes it possible for players to manually create weapons with the same abilities as the Celestial Weapons, any such weapons will not take on the Celestial Weapons' names. They will not ignore defense, have any effect on aeons, or have the damage vary in different circumstances.
Final Fantasy XI[]
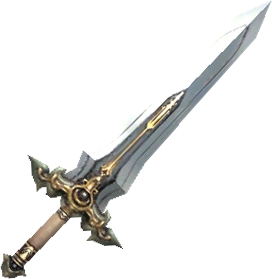
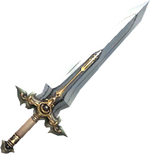
The Almace.
Final Fantasy XI does not feature singular ultimate weapons, due to its great variety of equipment and customization, but there are five particular sets of unique and powerful weapons that are highly prized and extremely difficult to obtain: the Relic Weapons, the Mythic Weapons, the Empyrean Weapons, the Ergon Weapons, and the Aeonic Weapons. All five varieties require a large amount of time, gil, or teamwork, often some combination of the three, to obtain, and all three types provide the wielder with extraordinary power and a unique weapon skill. Each type of ultimate weapon is associated with the content of a particular expansion or group of expansions.
Relic Weapons[]
Relic Weapons can only be obtained by traveling into the realm of Dynamis to collect the basic variety of relic weapon. The player must upgrade the weapon by giving a goblin certain items and ancient currency obtained within Dynamis. Due to the exceptionally high amount of currency required to upgrade relic weapons, people often need to purchase ancient currency from other players to acquire them within a reasonable time frame. Relic weapons are divided by weapon type. Relic weapons are the ultimate weapon type associated with Final Fantasy XI: Rise of the Zilart and Final Fantasy XI: Chains of Promathia; accordingly, jobs released from the Treasures of Aht Urhgan expansion pack and beyond are incapable of wielding them.
Mythic Weapons[]
Mythic Weapons, arguably harder to obtain than any other type of weapon, randomly drop in their base version from bosses in the Nyzul Isle investigation missions. To upgrade the weapon, the player must first obtain the Captain rank in Salaheem's Sentinels. Then, the player may begin a long series of quests to upgrade the weapon. Few mythic weapons have been fully upgraded, partly because the weapon is the most difficult to obtain, and partly because there is a quest available to teach the players the weapon skill attached to the mythic weapon. Mythic weapons are divided by the job the weapon is designed for, and each weapon contains a different weapon skill. Mythic weapons are the ultimate weapon type associated with the Treasures of Aht Urhgan expansion, but two more were added when Final Fantasy XI: Wings of the Goddess was released for the Wings of the Goddess jobs. However, no more mythic weapons were added after that point for the remaining jobs.
Empyrean Weapons[]
Empyrean Weapons are designed to be upgraded through a variety of trials involving slaying creatures or Notorious Monsters a number of times, sometimes under certain conditions. As the weapon becomes stronger, the trials required to upgrade the weapon become harder, often requiring groups to complete. Although the empyrean weapons were the cheapest variety of weapon to obtain, they also require a lot of work. Like relic weapons, empyrean weapons are grouped by weapon type rather than by job. Empyrean weapons are the ultimate weapon type associated with the Abyssea expansions, and accordingly they cannot be wielded by the jobs released after that.
Ergon Weapons[]
Ergon weapons are the equivalent of mythic weapons for the Final Fantasy XI: Seekers of Adoulin jobs Geomancer and Rune Fencer. There are only two of them. Each involves a unique quest and the acquisition of numerous items from Adoulin content.
Aeonic Weapons[]
Aeonic weapons are the ultimate weapon type associated with the final expansion, Final Fantasy XI: Rhapsodies of Vana'diel. Unlike the other ultimate weapon types, which require immense quantities of a specific upgrade item (ancient currency for relics, alexandrite for mythic, heavy metal plates for empyrean, and high-purity bayld for ergon), aeonic weapons require that the strongest Notorious Monsters be defeated without the aid of Primeval Brew. Since one must have extremely powerful equipment to manage this, aeonic weapons virtually require that at least one of the other, more expensive, ultimate weapons be completed first. Because there are no more expansions, and hence no more jobs, after Rhapsodies of Vana'diel, aeonic weapons can be equipped by every job. Like relic weapons, they are grouped by weapon type rather than by job.
Ambuscade Weapons[]
Ambuscade weapons are earned through Ambuscade, a battlefield with new content monthly. They are the least complex weapons to obtain, only requiring a player to earn points by repeatedly completing relatively simple battles for all but one item, which is obtained through old battle content. They are the easiest weapons to obtain, with it possible to get even without amazing end-game gear if one is willing to invest the time.
Final Fantasy XII[]

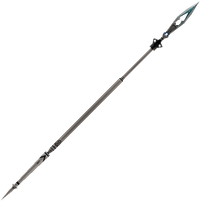
The Zodiac Spear.
Each weapon type can be considered to have an "ultimate" version. New ultimate weapons were added to the Zodiac versions.
The Zodiac Spear is the strongest weapon and spear with 150 Attack Power. In the original version, it is found in the Necrohol of Nabudis when the player does not open any of the unmarked forbidden chests. Zodiac Spear can also be found in a random treasure in the Henne Mines, but it has very low chance to spawn (1/1000). In the Zodiac versions, the forbidden chest concept was removed. Zodiac Spear is not available through the Rare Game quest and remains as a treasure in the Henne Mines.
Another notable weapon is the Tournesol, the ultimate greatsword. Though not as strong as the Zodiac Spear, with an Attack Power of 140, it has higher Evade and a better chance of dealing hit combos. It can be obtained by selling Gemsteel x3, Empyreal Soul x3 and Serpentarius x3, and purchased for 600,000 gil at the bazaar. Acquiring these items themselves involves an arduous series of crafting within the bazaar (see the Tournesol article for a guide for how to obtain).
The Wyrmhero Blade is another powerful greatsword with an Attack Power of 130 and a very high Evade of 50. It can be obtained by collecting Lu Shang's Badge from the fishing minigame, the Godslayer's Badge from slaying Yiazmat, and the Omega Badge from slaying Omega Mark XII, and then selling them; the weapon will then appear in the bazaar for purchase. It has a lower attack power than the Tournesol and a very slow charge time, which, coupled with its difficult requirements, severely limits its usefulness. However, it has inherent Bravery and Faith, and the highest combo rate of 80%, giving it an edge in some circumstances over the Tournesol and other ultimate weapons. It also does not have a license requirement. Though mainly a trophy item, the Wyrmhero Blade is more useful in the Zodiac versions where the damage cap is removed, it can be wielded by any job, and it can be used effectively in Trial Mode. It can also be obtained from Trial Mode, meaning the player can potentially get one as early as they can beat Stage 50.
Original version[]
Durandal is the ultimate one-handed sword with 99 Attack Power. It is bought from the bazaar for 21,600 gil by selling Lifewick x3, Emperor Scale x2, and Leshach Halcyon x1.
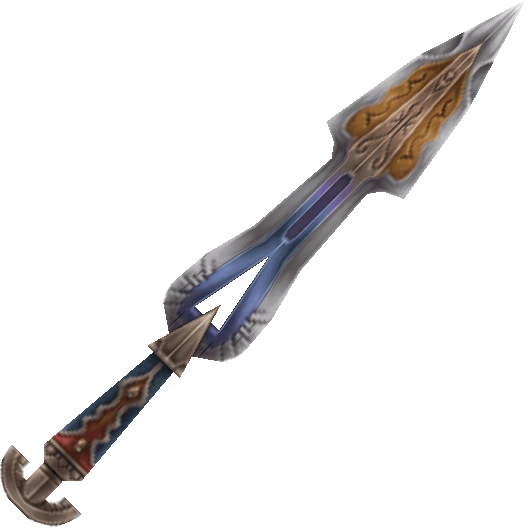
Danjuro is the ultimate dagger with 80 Attack Power, and is notorious for how difficult it is to obtain. It is dropped by the Larva Eater (rare).
Scorpion Tail is the ultimate weapon in the axes and hammers category with 119 Attack Power. It is bought from the bazaar for 60,000 gil after selling Charged Gizzard x3, Wyrm Bone x3 and Scorpio Gem x4.
Grand Mace is the ultimate mace with 72 Attack Power and reward for the Pylraster hunt.
Euclid's Sextant is the ultimate measure with 35 Attack Power that grants the Bubble status to whatever it hits. It is a reward for Wild Malboro hunt and found in a chest on the Cerobi Steppe (Diamond Armlet is needed).
Masamune is the ultimate katana and has the highest chance to deal hit combos, especially when coupled with the Genji Gloves accessory. This makes it useful for enemies that have damage caps, such as the later stages of Yiazmat, where combo abilities are more useful than Attack Power. Masamune is reward for the Gilgamesh hunt, or by selling Gemsteel x2, Orichalcum x3, and Mallet x2 and bought from the bazaar for 350,000 gil.
Yagyu Darkblade is the strongest ninja sword, dropped by the rare game Bombshell.
Whale Whisker is the ultimate pole. It can be bought from the bazaar for 60,000 gil after selling Mythril x3, Corpse Fly x3 and Aquarius Gem x4.
Rod of Faith is the ultimate rod. It is obtainable on Mt Bur-Omisace after Behemoth King hunt. It cannot be blocked or parried by enemies.
Staff of the Magi is the ultimate staff stolen from Luxollid. It boosts Holy damage by 50%.
Sagittarius is the ultimate bow bought from the bazaar for 60,000 gil by selling Beastlord Horn x3, Moon Ring x3 and Sagittarius Gem x4. The Artemis Arrows are the ultimate arrows, bought for 15,000 gil from the bazaar after selling Vampyr Fang x2, Dorsal Fin x2, and Gemini Gem x3. In the Zodiac, the arrows are much cheaper at 1280 gil and require the Great Serpent's Fangs instead of Vampyr Fangs.
Gastrophetes is the ultimate crossbow stolen from Pallicant, or bought from the Outfitters Shop in Phon Coast (part of Hunt Club sidequest; must give 25 trophies to Atak). The Grand Bolts are the ultimate bolts bought for 15,000 gil (original) or 1,680 gil (Zodiac) from the bazaar after selling Wrath of God x2, Ring Wyrm Liver x2 and Capricorn Gem x3.
Fomalhaut is the ultimate gun found from a random treasure in the Lhusu Mines in the room Antlion is found. It can also be found from Henne Mines Phase 2, Pharos and Cerobi Steppe. The Windslicer Shot and Dark Shot tie for the strongest ammo.
Volcano is the ultimate hand-bomb and reward for the Catoblepas hunt. The Castellanos is the ultimate bomb bought for 12,000 gil from the bazaar after selling Bomb Fragment x3, Frog Oil x2 and Aries Gem x3.
Zodiac versions[]

Vaan striking with Great Trango.
The Zodiac versions introduce some new weapons, some of which surpass the old ultimate weapons.
Great Trango is the new ultimate one-handed sword that is even stronger than the Zodiac Spear and has a very high combo rate. It is a rare steal from Zodiark or a random treasure in Subterra B3F southeast room. Notably, the weapon is invisible.
Kumbha is the new stronger version of Masamune. It is obtained by selling the same items to the bazaar as was needed in the original Final Fantasy XII. Unlike the Masamune, the Kumbha is a one-handed sword, meaning it can be used with a shield.
Tula is the new strongest crossbow. It is obtained in Pharos at Ridorana - Second Ascent.
Seitengrat is the new strongest bow with 224 Attack Power, 75 Evade, and a very high attack range and critical hit rate. It is by far the strongest weapon, but is only obtained from an invisible chest on a Skyferry with a very low spawn rate (0.01%). Like the Great Trango, the Seitengrat is invisible when equipped. It has no license and can thus be wielded by anyone.
Mithuna is the new strongest gun bought from the bazaar by selling Emperor Scale x2, Earth Crystal x3 and Silver Liquids x3.
Mina is the new strongest dagger that drops from Larva Eater. This weapon is identical in appearance to the Danjuro, which it replaces completely in this version.
Vrscika is the new strongest hammer that has a katana-like combo rate. It can be obtained from the bazaar after selling the same items as needed in Final Fantasy XII for the regular Scorpion Tail.
Kanya is the new strongest pole bought from the bazaar by selling the same items to the bazaar as was needed for the regular Whale Whisker in the original Final Fantasy XII.
Makara is the new strongest hand-bomb, found in Henne Mines Phase 2.
Mesa is the new strongest ninja sword, bought from the bazaar by selling Coeurl Whisker x2, Sickle-Blade x2 and Cancer Gem x3.
Bone of Byblos is the new ultimate mace found in Lhusu Mines - Site 5, and stolen from Yiazmat.
Final Fantasy XII: Revenant Wings[]

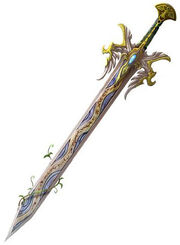
Anastasia
The Anastasia can be considered Vaan's ultimate weapon, obtained as part of the storyline after the events in the World of Illusion. It is not initially the strongest available weapon, but its stats are boosted every time the Midlight's Deep dungeon is completed. Eventually, it is possible to boost the Anastasia's stats so high Vaan can take out Yiazmat alone.
Other best weapons for characters are crafted with the help of Recipe Books, but the weapons' stats depend on the items the player uses and the questions they answer when making the weapon. A series of unsellable weapons exist, but they grant no stat boosts and are usually outclassed by customizable weapons. Some have unique attributes that make them occasionally favorable, such as a particular element or a range ability.
Final Fantasy XIII[]
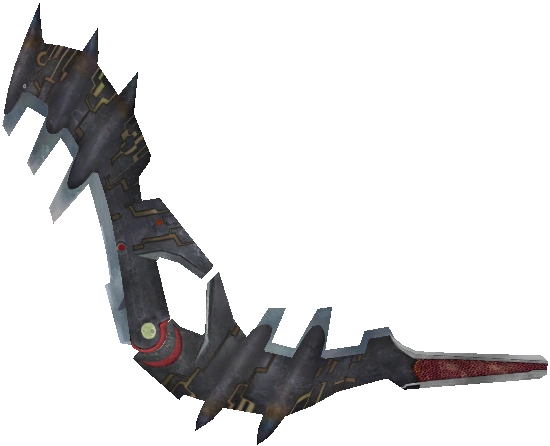
Hope's ultimate weapon, Nue.
The upgrading system allows any lesser weapon to be upgraded to the same ultimate weapon on the third tier of power. The ultimate weapon's stats and passive ability depend on the properties of the lesser weapon used as a base. No version of an ultimate weapon is objectively the best due to the differences in stats and abilities they offer.
There are a few traits all ultimate weapons have in common regardless of which weapon they were upgraded from: they all require a Trapezohedron to be upgraded from the tier two weapon, and they all have the ability "ATB: +1" along with any other passive abilities, increasing the character's ATB gauge slots by one. As a penalty, wielding an ultimate weapon drastically decreases target times in battle, making it difficult to get higher battle rankings.
Ultimate weapons have no synthesized abilities. They also have high EXP requirements to level up, all needing more than a million EXP to reach their max level, and many needing more than a million and a half, in contrast to lower-tier weapons, which only need a few hundred thousand EXP to max out.
Below is the ultimate weapon for each character:
- Lightning: Omega Weapon
- Sazh: Total Eclipses
- Snow: Save the Queen
- Hope: Nue
- Vanille: Nirvana
- Fang: Kain's Lance
Final Fantasy XIII-2[]

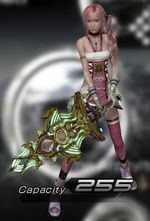
Serah with the Arcus Chronica.
Unlike in Final Fantasy XIII, weapons don't level up; instead there are usually more powerful versions of existing ones with higher bonuses to Strength and Magic and augmented weapon bonus.
| Passive Ability | Character | |
|---|---|---|
| Serah | Noel | |
| Chain Bonus Lv. 5 | Gandiva |
Grasitha |
| ATB Speed: +50% | Indrajit |
Romulus and Remus |
| ATB +1 | Sagittarius |
Mac an Luin |
| Improved Stagger | Arcus Chronica |
In Paradisum |
| Fragment Energy | Odinbolt |
Odinblade |
Lightning Returns: Final Fantasy XIII[]
The Crimson Blitz transforms into the Ultima Weapon when the player completes the Four Trials in God's Sanctum on the Final Day. It has by far the best stats, but it is only obtained right before the final boss, and it cannot be brought to a New Game Plus playthrough.
Final Fantasy XIV[]
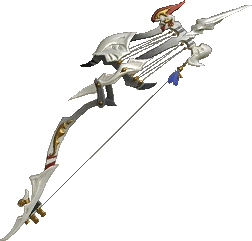
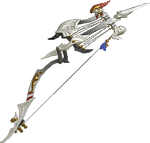
The Artemis Bow.
Each major release has its own set of ultimate weapons for each job, which can be upgraded throughout their respective patch cycles to maintain their status as the top weapons for that release. They can be identified by the purple coloration used in their icon to denote their rarity, with purple being exclusive to these weapons, though weaker iterations of the weapons may lack this.
The individual sets of weapons each have their own collectives names and processes to acquire them, which are unlocked after completing the final main scenario quests from their initial release. They then each have unique progession system to upgrade them through various stages. The original release featured Relic Weapons, which were carried over in A Realm Reborn where they can be upgraded to Zodiac Weapons. Heavensward features Anima Weapons, Stormblood features Eureka Weapons, Shadowbringers features Resistance Weapons, and Endwalker features Manderville Weapons. Despite their unique names, Relic Weapon is often used as a catch-all term by the playerbase for all such weapons.
Final Fantasy XIV: A Realm Reborn[]
Final Fantasy XIV: Heavensward[]
Final Fantasy XIV: Stormblood[]
Final Fantasy XIV: Shadowbringers[]
| Job | Stage 1 (Resistance) | Stage 2 (Augmented Resistance) | Stage 3 (Recollection) | Stage 4 (Law's Order) | Stage 5 (Augmented Law's Order) | Stage 6 (Blade's) |
|---|---|---|---|---|---|---|
Final Fantasy XIV: Endwalker[]
| Job | Stage 1 (Manderville) |
|---|---|
| Manderville Sword Manderville Kite Shield | |
| Manderville Axe | |
| Manderville Zweihander | |
| Manderville Gunblade | |
| Manderville Cane | |
| Manderville Codex | |
| Manderville Torquetum | |
| Manderville Milpreves | |
| Manderville Knuckles | |
| Manderville Spear | |
| Manderville Knives | |
| Manderville Samurai Blade | |
| Manderville Scythe | |
| Manderville Harp Bow | |
| Manderville Revolver | |
| Manderville Chakrams | |
| Manderville Rod | |
| Manderville Index | |
| Manderville Rapier |
Final Fantasy XV[]
There are numerous weapon types, each of which can be considered to have an ultimate weapon. Noctis can wield every weapon, and the one-handed swords and the royal arms are exclusive to him.
The Ultima Blade was Noctis's strongest weapon in the main game, and the second strongest weapon overall until the Gaze of the Vortex was introduced in patch 1.27. Balmung was previously Noctis's strongest one-handed sword obtained from an optional dungeon in the post-game. The Gaze of the Vortex is the best weapon in the game after patch 1.27, dealing x1.5 damage when airstepping and always dealing critical hits. Ragnarok is a season pass weapon that empowers warp-strikes, making it easily the strongest weapon in almost any situation.
Hyperion was the strongest greatsword for Noctis and Gladiolus in the main game until the addition of Pain of the Vortex in patch 1.27. Other stronger greatswords can be found in the Chapter 15 optional dungeons, including the Apocalypse found in the Balouve Mines maze and Duel Code found in the Daurell Caverns maze. Hyperion, Apocalypse and Duel Code all have unique conditions to boost their power beyond their Attack Power values. Hyperion gains +15% damage per additional enemy within 65 feet radius (max +100%). Apocalypse becomes stronger the less health the wielder has. Duel Code has a +50% damage boost to lone enemies within 65 feet radius. This means which deals the most damage is situational. Pain of the Vortex deals more damage for aerial attacks, but greatswords are ground-based weapons. It always deals critical hits like all "Vortex" weapons, but since greatswords' greatest boon is their strong link-strikes, with Critical: Link Ascension upgrade the other greatswords also rise to the task.
Radiant Lance or Drain Lance III is the strongest spear in the main game for Noctis and Ignis. The Radiant Lance can be purchased at the Meldacio Hunter HQ or at Hammerhead in Chapter 14; it has the highest Strength rating of main-game spears, but is Light-elemental and thus deals weaker damage to non-daemon enemies. The Drain Lance III is obtained by giving Cid Coeurl Whiskers to upgrade the Drain Lance II, which is obtained by using a Rusted Bit to upgrade the Drain Lance, which is itself obtained in Chapter 1; it is non-elemental, and thus deals more damage than the Radiant Lance unless the enemy takes neutral damage or greater from Light attacks. The strongest spear overall is Flayer, found in Steyliff Grove maze.
Ulric's Kukris were the best daggers in the main game for Noctis and Ignis, obtained by returning to the opening area of Insomnia and defeating a level 85 psychomancer. Plumes of the Vortex is the new best daggers added in patch 1.27. The previous best daggers were the Zwill Crossblades, obtained in Chapter 15 from Randolph's quests that have great attack stat and the trait of dealing x1.8 damage when the wielder is at full health. Plumes of the Vortex always deal critical hits and x1.5 damage in aerial combat and can be used alongside royal arms without losing the damage boost.
Abandon of the Vortex, added in patch 1.27, is the strongest gun, dealing boosted damage to vulnerable foes and breaking off enemy appendages with ease (though not as good as Cerberus), always dealing critical hits. The previous best gun was Death Penalty that also has a small chance to inflict instant death.
Shields are used as weapons. The best shield in the main game is Black Prince, bought from Meldacio Hunter HQ and in Chapter 14. Even if the Power Shield has one point more Attack power, it does not have nearly as good stat boosts as the Black Prince. The best shield overall is the Ziedrich, obtained in Chapter 15 from Randolph's quests.
The best machinery weapons are obtained by upgrading them with Cid Sophiar, the best being Drillbreaker Plus.
The royal arms are special weapons that drain Noctis's health when used as normal weapons and are used at once during Armiger. Equipping them bestows both status boosts and penalties, and thus their usefulness tends to be situational.
Final Fantasy XVI[]
Gotterdammerung is the strongest weapon during the first playthrough, and is attain through a lengthy process through forging. The materials for this requiring the player to acquire strong weapons such as Ragnarok and items from S rank notorious monsters. However Gotterdammerung will be overshadowed by weapons achieved during New game plus Final Fantasy Mode.
When playing Final Fantasy Mode access to the games true Ultimate Weapon is available, Ultima Weapon. Just like Gotterdammerung it requires a lengthy process to attain including a reforge Gotterdammerung.
Final Fantasy Tactics[]
The ultimate weapon in each weapon category is obtained exclusively in the PlayStation Portable Multiplayer modes, only a few able to be obtained during normal gameplay. Each weapon's ultimate weapon is listed below.
In the mobile version, the extra items introduced in the PSP version obtained from the Melee and Rendezvous are unlocked after beating the game. After the credits have finished rolling, the game will auto-save, and the PSP items will appear in the Poachers' Den.
| Weapon | Type | Obtain |
|---|---|---|
| Golden Axe | Axe | Find: Melee, Rendezvous |
| Fallingstar Bag | Bag | Poach: Wild Boar Find: Rendezvous |
| Omnilex | Book | Poach: Greater Malboro Find: Rendezvous Catch: Level 95+ Ninja |
| Sagittarius Bow | Bow | Find: Rendezvous |
| Wyrmweave Silk | Cloth | Poach: Tiamat Find: Rendezvous |
| Gastrophetes | Crossbow | Buy: Various Outfitters (during Chapter 4) - 20,000 gil Find: Battle of Fort Besselat Rare Treasure: Limberry Castle Undercroft |
| Valhalla | Fell Sword | Find: Rendezvous |
| Vesper | Flail | Find: Melee |
| Blaster | Gun | Steal: Various units Find: Rendezvous |
| Fairie Harp | Instrument | Poach: Treant Find: Rendezvous |
| Chirijiraden | Katana | Find: Midlight's Deep Find: Rendezvous Catch: Level 96+ Ninja |
| Zwill Straightblade | Knife | Poach: Plague Horror Find: Melee Catch: Level 95+ Ninja |
| Chaos Blade | Knight's Sword | Treasure: Midlight's Deep Find: Rendezvous Catch: Level 98-99 Ninja |
| Moonsilk Blade | Ninja Blade | Find: Melee |
| Whale Whisker | Pole | Poach: Tiamat Find: Melee Catch: Level 96+ Ninja |
| Crown Sceptre | Rod | Find: Rendezvous |
| Javelin "II" | Polearm | Catch: Level 97+ Ninja |
| Staff of the Magi | Stave | Treasure: Midlight's Deep |
| Onion Sword | Sword | Find: Melee |
Final Fantasy Type-0[]
The ultimate weapon for each character is obtained during the third playthrough by defeating True Gilgamesh. They all have attack power in the sixties or seventies.
Each character's ultimate weapon is listed below:
- Ace: Black Trump (can inflict Instant Death)
- Deuce: Elysian Whistle (provides all magic +60)
- Trey: Yoichi's Bow (can inflict Instant Death)
- Cater: MTek-ZERO
- Cinque: Thor's Hammer
- Sice: Tezcatlipoca
- Seven: Brynhildr
- Eight: Demon Fists
- Nine: Lance of Longinus
- Jack: Genji Blade
- Queen: Celestial Saber
- King: Quicksilvers
- Machina Kunagiri: Twin Excaliburs
- Rem Tokimiya: Orichalcum Dirks
The "second best" weapons are the ultimate weapons in a second playthrough as True Gilgamesh cannot be fought yet, but the Finis difficulty level is available. They cost 60,000 gil and become available in the Akademeia Armory shop after completing a specific mission in Finis difficulty. In the PSP version, they could also be unlocked by exchanging for 10 tickets on the Square Enix Members site. They have high attack power, not far behind the "true" ultimate weapons.
- Ace's Crazy Eights is unlocked after completing Mission Under Ceasefire on Finis difficulty.
- Deuce's Lamia's Flute is unlocked after completing Covering the Cadets in Finis difficulty.
- Trey's Artemis' Bow is unlocked after completing The Retreat from Roshana on Finis difficulty.
- Cater's Marvelous Shout is unlocked after completing A Fog-Laden Foray on Finis difficulty.
- Cinque's Seraphim Mace is unlocked after completing Operation MA Demolition on Finis difficulty.
- Sice's Shambhala is unlocked after completing The Clash in the Caverns on Finis difficulty.
- Seven's Beastmaster is unlocked after completing Operation Vulturnus on Finis difficulty.
- Eight's Kaiser Knuckles are unlocked after completing The Infiltration of Iscah on Finis difficulty.
- Nine's Kain's Lance is unlocked after completing The Keziah Diversion on Finis difficulty.
- Jack's Mutsunokami is unlocked after completing "Operation Breakthrough" on Finis difficulty. Raises Jack's HP by 30%.
- Queen's Phantasmal Blade is unlocked after completing "Secret Agents Zero" on Finis difficulty.
- King's Valkyries are unlocked after completing "The Last Line of Defense" on Finis difficulty.
- Machina's Dreadnaughts are unlocked after "Machina's Struggle" on Finis difficulty. Can inflict Instant Death.
- Rem's Assassin's Daggers are unlocked after completing United Front on Finis difficulty. Can inflict Instant Death.
In a first playthrough, the best weapons the player can get become available in the SPP Post after landing 300 Killsight strikes with a character. These weapons also provide double EXP.
Final Fantasy Mystic Quest[]
The statistically strongest weapon obtained by Benjamin is the Excalibur, with an attack power of 125 and a Speed boost of 5. The strongest weapons of the other weapon types remain useful depending on the enemy: the Giant's Axe and Mega Grenade do increased damage against specific enemies, with the Mega Grenade also hitting all enemies in battle; and the Dragon Claw can inflict a variety of ailments upon hitting, including Petrify and Fatal for a one-hit defeat.
Vagrant Story[]
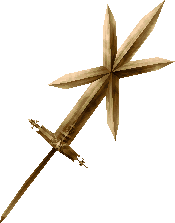
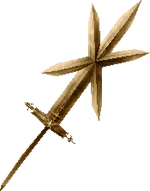
The Holy Win.
While most ultimate weapons are gained through forging them at workshops, certain categories will have a few variants of their ultimate weapon, these variants gained through only defeating various enemies bearing the weapon, and boasting stats that are up to the player to decide which is best for them. The kind of material the weapon is made of plays a great part, with Damascus weapons bearing the strongest properties.
The Jamadhar is the ultimate dagger-type weapon, gained by forging two Stilettos.
The Wakazashi is the ultimate forged sword-type weapon, gained through combining two Kophesh blades. The Rhomphaia is the ultimate dropped sword, dropped in Hagane, Silver, and Damascus variations by Dark Crusaders in the Iron Maiden dungeon.
The Rune Sword is the ultimate forged greatsword-type weapon, gained through combining two Nodachi blades. The Holy Win is the ultimate dropped greatsword, dropped by the Last Crusader in the Iron Maiden dungeon.
The War Maul is the ultimate mace-type weapon, gained through combining two Bec de Corbin blades, while the Crescent is the ultimate Axe-type weapon, gained through combining two Bullova blades.
The Halberd is the ultimate axe-type weapon, gained through combining two Double Blades.
The Destroyer is the ultimate forged great mace-type weapon, made through combining two Griever blades, while the Hand of Light is the ultimate dropped great mace, dropped by Minotaurs in Bronze, Iron, and Hagane variations throughout certain rooms in Lea Monde late in the game. The Hand of Light is the only weapon whose material cannot possibly achieve Damascus status due its size value, which overrides any weapon's material attributes in the forging process lower than its own, thus making it virtually impossible without the use of a cheat device.
The Brandestoc is the ultimate polearm-type weapon, gained through combining two Bardysh blades.
The Arbalest is the ultimate bow-type weapon, gained through combining two Siege Bow blades.
The Sage Cane is the ultimate staff-type weapon, gained through combining two Bishop's Crosier blades.
The ultimate material, Damascus, can only be gained through combining weapons with Holy Win or Rhomphaia dropped from the Iron Maiden, carefully crafting weapons made from the material into its ultimate weapon form, or carefully crafting various weapons from lesser materials and certain categories into Damascus, with the exception of the Hand of Light. The material provides an excellent Damage Points pool, the highest stat boosts to any equipment, and a high and even Affinity rating to all enemy types, at the tradeoff of a low Phantom Points pool.
Final Fantasy Adventure[]
The XCalibr is Sumo's strongest weapon. It has an attack power of 85 and cannot be sold. It is automatically obtained near the end of the final dungeon, making that location the only place it can be used.
The Final Fantasy Legend[]
The most powerful weapon is Glass. This extremely powerful sword breaks after every use in the Japanese version. For North American version, the sword was given 50 uses before it would break. It can be found in the Tower on the 21st floor.
Final Fantasy Legend II[]
The ultimate weapon is called Seven and it has a sword icon before its name. The sword has 7 use and also increases a Robot's HP by 144. The damage formula is the user's Str x15. The user will attack up to 7 times, depending on Agl against one group.
It drops from Haniwa (rare) located in the Central Shrine. Haniwa appears rarely and randomly in lowest area of the shrine. Haniwa functions as a superboss similar to Warmech from the original Final Fantasy, in that it appears rarely and randomly in a certain area, which happens to be the final area. It's a very dangerous enemy, but is arguably not as powerful as the final boss. It has a chance of dropping the sword, which Haniwa will occasionally use against the party during battle, and it will deal damage in the high thousands.
Final Fantasy Legend III[]
There are four swords known as "Mystic Swords": Durend, Xcalibr, Masmune, and Emperor. They can be found across Pureland and deal double damage against certain bosses and undead enemies. They can harm even enemies who are strong against physical damage.
Dissidia Final Fantasy (2008)[]
Each character has an exclusive level 100 weapon, with the exception of Cecil, who has two. While these weapons are given the "exclusive" classification, they are based on other weapon types in terms of offered stats, such as Firion's weapons giving a penalty to Defense in the manner of spears. The level 100 weapons thus have stats equal to or surpassing the other strongest weapons in their category. They also bear additional stat boosts and a support ability that increases the likelihood of critical hits in different circumstances. As allusions to the character's home title, the level 100 weapons are often named after their strongest weapon in their original game, or refer to them in some way, such as Kefka's weapon being named Dancing Mad after his final boss theme.
These level 100 weapons can only be traded for in the shop in a three-stage series of exchanges. Each character has three exclusive weapons, the other two approximately level 50 and level 90. Acquiring the level 100 weapon involves trading the level 90 weapon and other trade items, and getting the level 90 weapon needs the level 50 weapon. The level 50 weapons can be traded for with a variety of generic equipment. A handful also demand unique level 1 weapons exclusive to their character, such as Cloud's Buster Sword.
The Ultimate Weapon also exists as a special level 99 weapon. The only equipment piece able to be equipped by all characters, the Ultima Weapon has +69 ATK, the highest in the game outside the exclusive weapons and the level 100 axes, and has a unique effect that grants the user +2 to ATK, DEF, and LUK when they are at full HP. This effective boost of +71 ATK is the highest of any weapon.
Dissidia 012 Final Fantasy[]
Each character once again has three exclusive weapons that must be traded for in sequence, from level 30 to level 90, to level 100. Some characters also have level 1 exclusive weapons needed for their level 30 weapons. Lightning and Cecil have two level 100 weapons. The individual stats of returning weapons are rebalanced.
The Ultima Weapon also returns as a level 100 weapon and +68 ATK. It bears the same effects as before, but other weapons have innately higher ATK boosts with other stat modifiers, so its power is comparatively less than the original game.
Gallery[]
")
")
")
")
")
")
")
")
")
")
")
")
")
")
")
")
")
")
")
")
")
")
")
")
")
")
")
")
")
")
")
")
")
")
")
")
")
")
")
")
")
")
")
")
")
")
")
")
")
")
")
")
")
")
")
")
")
")
")
")
")
")
")
")
")
")
")
")
")
")
")
")
")
")