Intangir Bot (talk | contribs) m (Bot: Automated text replacement (-{{-}} +{{clear}})) |
|||
| (22 intermediate revisions by 8 users not shown) | |||
| Line 1: | Line 1: | ||
| ⚫ | |||
| ⚫ | |||
| + | {{infobox location |
||
| ⚫ | The '''Tower of Trials''' |
||
| + | |name=Tower of Trials |
||
| + | |release=IVTAY |
||
| + | |japanese=修練の塔 |
||
| + | |romaji=Shūren no Tō |
||
| + | |lit=Training Tower |
||
| + | |image=FFIV TAY iOS - Tower of Trials Entrance.png |
||
| + | |type=[[Tower (location)|Tower]] |
||
| + | |region=South of [[Troia]], [[Earth (Final Fantasy IV)|Overworld]] |
||
| + | |items={{collapsible text|header=Palom's Tale|content= |
||
| ⚫ | |||
| + | * [[Final Fantasy IV: The After Years items#Gold Needle|Gold Needle]] |
||
| + | * [[Final Fantasy IV: The After Years items#Phoenix Down|Phoenix Down]] x2 |
||
| + | * [[Final Fantasy IV: The After Years items#Echo Herbs|Echo Herbs]] x3 |
||
| + | * [[Final Fantasy IV: The After Years weapons#Holy Arrows|Holy Arrows]] |
||
| + | * [[Final Fantasy IV: The After Years items#Tent|Tent]] x2 |
||
| + | * [[Final Fantasy IV: The After Years weapons#Healing Staff|Healing Staff]] |
||
| + | * [[Final Fantasy IV: The After Years weapons#Sage's Miter|Sage's Miter]] |
||
| + | * [[Final Fantasy IV: The After Years items#Hermes Sandals|Hermes Sandals]] |
||
| + | * [[Final Fantasy IV: The After Years items#Cottage|Cottage]] |
||
| + | * [[Final Fantasy IV: The After Years items#Remedy|Remedy]] |
||
| + | * [[Final Fantasy IV: The After Years items#Dry Ether|Dry Ether]] |
||
| + | * [[Final Fantasy IV: The After Years items#Decoy|Decoy]] |
||
| + | * [[Final Fantasy IV: The After Years armor#Sage's Surplice|Sage's Surplice]] |
||
| ⚫ | |||
| + | {{collapsible text|header=Edge's Tale|content= |
||
| + | * [[Final Fantasy IV: The After Years weapons#Ice Arrows|Ice Arrows]] |
||
| + | * [[Final Fantasy IV: The After Years items#Ether|Ether]] x2 |
||
| + | * [[Final Fantasy IV: The After Years items#Potion|Potion]] x2 |
||
| + | * [[Final Fantasy IV: The After Years armor#Bronze Breastplate|Bronze Breastplate]] |
||
| + | * [[Final Fantasy IV: The After Years items#Tent|Tent]] |
||
| + | * [[Final Fantasy IV: The After Years weapons#Crossbow|Crossbow]] |
||
| + | * [[Final Fantasy IV: The After Years items#Eye Drops|Eye Drops]] |
||
| + | * [[Final Fantasy IV: The After Years items#Bronze Hourglass|Bronze Hourglass]] |
||
| + | * [[Final Fantasy IV: The After Years weapons#Thorn Whip|Thorn Whip]] |
||
| + | * [[Final Fantasy IV: The After Years items#Hi-Potion|Hi-Potion]] |
||
| + | * [[Final Fantasy IV: The After Years items#White Fang|White Fang]] |
||
| ⚫ | |||
| + | |enemies=Various, depends on story, see [[#Enemies|below]] |
||
| + | |quests= |
||
| + | *Training [[Leonora]] |
||
| ⚫ | |||
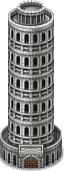
| ⚫ | The '''Tower of Trials''' is a location in ''[[Final Fantasy IV: The After Years]]''. It is a massive tower located to the south of [[Troia]], and can only be reached by airship or [[chocobo]] due to the surrounding rivers. It is visited by apprentices who wish to become [[Epopts (Final Fantasy IV)|Epopts]]. |
||
| − | ==Story== |
+ | == Story == |
{{Spoiler}} |
{{Spoiler}} |
||
| + | |||
| ⚫ | |||
[[File:TAY PSP Tower of Trials.png|right]] |
[[File:TAY PSP Tower of Trials.png|right]] |
||
| − | [[Palom]] is sent from [[Mysidia (Final Fantasy IV)|Mysidia]] to Troia to train [[Leonora]] and replace an ill Epopt who could not fulfill her duties. To do so they must scale the Tower of Trials and claim the Monastic Seal on the top floor. As they climb, Palom teaches Leonora the basic [[Fire ( |
+ | [[Palom]] is sent from [[Mysidia (Final Fantasy IV)|Mysidia]] to Troia to train [[Leonora]] and replace an ill Epopt who could not fulfill her duties. To do so they must scale the Tower of Trials and claim the Monastic Seal on the top floor. As they climb, Palom teaches Leonora the basic [[Fire (ability)|Fire]], [[Blizzard (ability)|Blizzard]] and [[Thunder (ability)|Thunder]] spells, though he also teases her about Epopts and her struggle to learn. |
At the end, they discover the Monastic Seal is simply an altar they had to reach at the top of the tower, thus ending the trial. Palom begins to mock the Epopts and the trial they were offered, but Leonora reprimands him before he apologizes. |
At the end, they discover the Monastic Seal is simply an altar they had to reach at the top of the tower, thus ending the trial. Palom begins to mock the Epopts and the trial they were offered, but Leonora reprimands him before he apologizes. |
||
Later in [[Edge Geraldine|Edge's]] Tale, [[Izayoi (The After Years)|Izayoi]] is dispatched to Troia to spy and hears about the tower. Investigating it, she lacks the magic to unseal the entrance and so scales the outer walls. However, the glow of the [[Tower of Babil]] catches her eye, and she returns to Edge. |
Later in [[Edge Geraldine|Edge's]] Tale, [[Izayoi (The After Years)|Izayoi]] is dispatched to Troia to spy and hears about the tower. Investigating it, she lacks the magic to unseal the entrance and so scales the outer walls. However, the glow of the [[Tower of Babil]] catches her eye, and she returns to Edge. |
||
| − | {{ |
+ | {{clear}} |
{{Endspoiler}} |
{{Endspoiler}} |
||
| − | ==Treasure== |
||
| ⚫ | |||
| − | *Ether x2 |
||
| − | *Gold Needle |
||
| − | *Phoenix Down x2 |
||
| − | *Echo Herbs x3 |
||
| − | *Holy Arrows |
||
| − | *Tent x2 |
||
| − | *Healing Staff |
||
| − | *Sage's Miter |
||
| − | *Hermes Sandals |
||
| − | *Cottage |
||
| − | *Remedy |
||
| − | *Dry Ether |
||
| − | *Decoy |
||
| − | *Sage's Surplice |
||
| − | == |
+ | == Items == |
| + | {{multicol-begin}} |
||
| − | *Ice Arrows |
||
| ⚫ | |||
| − | *Ether x2 |
||
| + | * [[Final Fantasy IV: The After Years items#Ether|Ether]] x2 |
||
| − | *Potion x2 |
||
| + | * [[Final Fantasy IV: The After Years items#Gold Needle|Gold Needle]] |
||
| − | *Bronze B.plate |
||
| + | * [[Final Fantasy IV: The After Years items#Phoenix Down|Phoenix Down]] x2 |
||
| − | *Tent |
||
| + | * [[Final Fantasy IV: The After Years items#Echo Herbs|Echo Herbs]] x3 |
||
| − | *Crossbow |
||
| + | * [[Final Fantasy IV: The After Years weapons#Holy Arrows|Holy Arrows]] |
||
| − | *Eye Drops |
||
| + | * [[Final Fantasy IV: The After Years items#Tent|Tent]] x2 |
||
| − | *Bronze Hourglass |
||
| + | * [[Final Fantasy IV: The After Years weapons#Healing Staff|Healing Staff]] |
||
| − | *Thorn Whip |
||
| + | * [[Final Fantasy IV: The After Years weapons#Sage's Miter|Sage's Miter]] |
||
| − | *Hi-Potion |
||
| + | * [[Final Fantasy IV: The After Years items#Hermes Sandals|Hermes Sandals]] |
||
| − | *White Fang |
||
| + | * [[Final Fantasy IV: The After Years items#Cottage|Cottage]] |
||
| + | * [[Final Fantasy IV: The After Years items#Remedy|Remedy]] |
||
| + | * [[Final Fantasy IV: The After Years items#Dry Ether|Dry Ether]] |
||
| + | * [[Final Fantasy IV: The After Years items#Decoy|Decoy]] |
||
| + | * [[Final Fantasy IV: The After Years armor#Sage's Surplice|Sage's Surplice]] |
||
| + | {{multicol-separator}} |
||
| + | ;Edge's Tale |
||
| + | * [[Final Fantasy IV: The After Years weapons#Ice Arrows|Ice Arrows]] |
||
| + | * [[Final Fantasy IV: The After Years items#Ether|Ether]] x2 |
||
| + | * [[Final Fantasy IV: The After Years items#Potion|Potion]] x2 |
||
| + | * [[Final Fantasy IV: The After Years armor#Bronze Breastplate|Bronze Breastplate]] |
||
| + | * [[Final Fantasy IV: The After Years items#Tent|Tent]] |
||
| + | * [[Final Fantasy IV: The After Years weapons#Crossbow|Crossbow]] |
||
| + | * [[Final Fantasy IV: The After Years items#Eye Drops|Eye Drops]] |
||
| + | * [[Final Fantasy IV: The After Years items#Bronze Hourglass|Bronze Hourglass]] |
||
| + | * [[Final Fantasy IV: The After Years weapons#Thorn Whip|Thorn Whip]] |
||
| + | * [[Final Fantasy IV: The After Years items#Hi-Potion|Hi-Potion]] |
||
| + | * [[Final Fantasy IV: The After Years items#White Fang|White Fang]] |
||
| + | {{multicol-end}} |
||
| − | == |
+ | == Enemies == |
| − | ===Palom's Tale=== |
+ | === Palom's Tale === |
:''Note: All battles marked "Event" are fought with Leonora only'' |
:''Note: All battles marked "Event" are fought with Leonora only'' |
||
| + | {{multicol-begin}} |
||
| − | {| border="0" cellpadding="0" cellspacing="0" width="660px" |
||
| + | ;1F |
||
| − | | valign="top" width="33%"| |
||
| ⚫ | |||
| − | '''1F''' |
||
| − | *[[ |
+ | * [[Red Mousse (The After Years)|Red Mousse]] x4 |
| − | *[[ |
+ | * [[Skeleton (The After Years)|Skeleton]] x4 |
| ⚫ | |||
| ⚫ | |||
| − | *[[ |
+ | * [[Mini Red]] (Event) |
| + | {{multicol-separator}} |
||
| ⚫ | |||
| + | ;2F |
||
| − | | valign="top" width="33%"| |
||
| ⚫ | |||
| − | '''2F''' |
||
| − | *[[ |
+ | * [[Cockatrice (The After Years enemy)|Cockatrice]] x3 |
| − | *[[ |
+ | * [[Red Mousse (The After Years)|Red Mousse]] x4 |
| − | *[[Red Mousse (The After Years)|Red Mousse]] |
+ | * [[Red Mousse (The After Years)|Red Mousse]] x5 |
| − | *[[ |
+ | * [[Skeleton (The After Years)|Skeleton]] x4 |
| ⚫ | |||
| ⚫ | |||
| + | {{multicol-separator}} |
||
| ⚫ | |||
| + | ;3F |
||
| − | | valign="top" width="33%"| |
||
| ⚫ | |||
| − | '''3F''' |
||
| − | *[[ |
+ | * [[Bomb (The After Years enemy)|Bomb]] x3 |
| − | *[[ |
+ | * [[Cockatrice (The After Years enemy)|Cockatrice]] x3 |
| − | *[[ |
+ | * [[Red Mousse (The After Years)|Red Mousse]] x5 |
| − | *[[ |
+ | * [[Skeleton (The After Years)|Skeleton]] x2, [[Spirit (The After Years)|Spirit]] x2 |
| − | *[[Skeleton (The After Years)|Skeleton]] |
+ | * [[Skeleton (The After Years)|Skeleton]] x4 |
| − | *[[ |
+ | * [[Soul (The After Years)|Soul]], [[Spirit (The After Years)|Spirit]] x3 |
| ⚫ | |||
| ⚫ | |||
| + | {{multicol-separator}} |
||
| ⚫ | |||
| + | ;4F |
||
| ⚫ | |||
| ⚫ | |||
| − | {| border="0" cellpadding="0" cellspacing="0" width="660px" |
||
| ⚫ | |||
| − | | valign="top" width="33%"| |
||
| ⚫ | |||
| − | '''4F''' |
||
| − | *[[ |
+ | * [[Cockatrice (The After Years enemy)|Cockatrice]] x3 |
| − | *[[ |
+ | * [[Red Mousse (The After Years)|Red Mousse]] x5 |
| − | *[[ |
+ | * [[Skeleton (The After Years)|Skeleton]] x2, [[Spirit (The After Years)|Spirit]] x2 |
| − | *[[ |
+ | * [[Soul (The After Years)|Soul]], [[Spirit (The After Years)|Spirit]] x3 |
| ⚫ | |||
| ⚫ | |||
| + | {{multicol-separator}} |
||
| ⚫ | |||
| + | ;5F |
||
| ⚫ | |||
| ⚫ | |||
| ⚫ | |||
| ⚫ | |||
| − | | valign="top" width="33%"| |
||
| ⚫ | |||
| − | '''5F''' |
||
| − | *[[ |
+ | * [[Bomb (The After Years enemy)|Bomb]] x3 |
| − | *[[ |
+ | * [[Cockatrice (The After Years enemy)|Cockatrice]] x2, [[Gargoyle (The After Years)|Gargoyle]] |
| − | *[[ |
+ | * [[Soul (The After Years)|Soul]], [[Spirit (The After Years)|Spirit]] x3 |
| − | *[[ |
+ | * [[Yellow Jelly (The After Years)|Yellow Jelly]] x4 |
| − | *[[ |
+ | * [[Yellow Jelly (The After Years)|Yellow Jelly]] x5 |
| + | * [[Thunder Doll]] (Event) |
||
| ⚫ | |||
| + | {{multicol-separator}} |
||
| − | *[[Yellow Jelly (The After Years)|Yellow Jelly]] x4 |
||
| + | ;6F |
||
| − | *[[Yellow Jelly (The After Years)|Yellow Jelly]] x5 |
||
| + | * [[Bloodbones (The After Years)|Bloodbones]], [[Skeleton (The After Years)|Skeleton]] x2, [[Spirit (The After Years)|Spirit]] |
||
| ⚫ | |||
| ⚫ | |||
| − | | valign="top" width="33%"| |
||
| + | * [[Bomb (The After Years enemy)|Bomb]] x2, [[Spirit (The After Years)|Spirit]] x2 |
||
| − | '''6F''' |
||
| − | *[[ |
+ | * [[Cockatrice (The After Years enemy)|Cockatrice]] x2, [[Gargoyle (The After Years)|Gargoyle]] |
| − | * |
+ | * [[Gargoyle (The After Years)|Gargoyle]] x2 |
| − | *[[ |
+ | * [[Red Mousse (The After Years)|Red Mousse]] x3, [[Yellow Jelly (The After Years)|Yellow Jelly]] x2 |
| − | *[[ |
+ | * [[Soul (The After Years)|Soul]], [[Spirit (The After Years)|Spirit]] x3 |
| ⚫ | |||
| ⚫ | |||
| + | {{multicol-separator}} |
||
| ⚫ | |||
| + | ;7F |
||
| ⚫ | |||
| + | * [[Bloodbones (The After Years)|Bloodbones]], [[Skeleton (The After Years)|Skeleton]] x2, [[Spirit (The After Years)|Spirit]] |
||
| ⚫ | |||
| + | * [[Bloodbones (The After Years)|Bloodbones]] x2, [[Soul (The After Years)|Soul]], [[Spirit (The After Years)|Spirit]] |
||
| ⚫ | |||
| + | * [[Bomb (The After Years enemy)|Bomb]] x2, [[Spirit (The After Years)|Spirit]] x2 |
||
| − | '''7F''' |
||
| − | *[[ |
+ | * [[Bomb (The After Years enemy)|Bomb]] x6 |
| − | *[[ |
+ | * [[Gargoyle (The After Years)|Gargoyle]] x2 |
| − | *[[ |
+ | * [[Red Mousse (The After Years)|Red Mousse]] x3, [[Yellow Jelly (The After Years)|Yellow Jelly]] x2 |
| − | *[[ |
+ | * [[Red Mousse (The After Years)|Red Mousse]] x3, [[Yellow Jelly (The After Years)|Yellow Jelly]] x3 |
| − | *[[ |
+ | * [[Yellow Jelly (The After Years)|Yellow Jelly]] x5 |
| + | {{multicol-end}} |
||
| ⚫ | |||
| ⚫ | |||
| − | *[[Yellow Jelly (The After Years)|Yellow Jelly]] x5 |
||
| − | ===Edge's Tale=== |
+ | === Edge's Tale === |
| + | {{multicol-begin}} |
||
| − | + | ;First Area |
|
| − | *[[Floating Eye (The After Years)|Floating Eye]] x2 |
||
| − | *[[ |
+ | * [[Floating Eye (The After Years)|Floating Eye]] x2 |
| − | * |
+ | * [[Helldiver (The After Years)|Helldiver]] x3 |
| + | * [[Larva (The After Years)|Larva]] x2, [[Eyewing Moth (The After Years)|Eyewing Moth]] x2 |
||
| + | {{multicol-separator}} |
||
| ⚫ | |||
| ⚫ | |||
| ⚫ | |||
| ⚫ | |||
| + | * [[Larva (The After Years)|Larva]] x2, [[Eyewing Moth (The After Years)|Eyewing Moth]] x2 |
||
| ⚫ | |||
| + | {{multicol-end}} |
||
| + | == Musical themes == |
||
| ⚫ | |||
| ⚫ | |||
| − | *[[Floating Eye (The After Years)|Floating Eye]] x2 |
||
| − | *[[Helldiver (The After Years)|Helldiver]] x3 |
||
| ⚫ | |||
| ⚫ | |||
| − | *[[Gargoyle (The After Years)|Gargoyle]], [[Cliff Eagle]] x2 |
||
| − | == |
+ | == Gallery == |
| + | <gallery> |
||
| ⚫ | |||
| ⚫ | |||
| ⚫ | |||
| ⚫ | |||
| ⚫ | |||
| + | TAY Wii Tower of Trials.jpg|''[[Final Fantasy IV: The After Years]]'' (Wii). |
||
| + | TAY PSP Tower of Trials Dungeon.png|Inside the Tower of Trials (PSP). |
||
| + | TAY PSP Tower of Trials 2.png|Tower of Trials outer walls in [[Izayoi (The After Years)|Izayoi's]] mission (PSP). |
||
| ⚫ | |||
| + | </gallery> |
||
| + | {{navbox setting IVTAY}} |
||
| − | ==Gallery== |
||
| − | {{Gallery |
||
| ⚫ | |||
| ⚫ | |||
| ⚫ | |||
| ⚫ | |||
| ⚫ | |||
| + | [[Category:Locations in Final Fantasy IV: The After Years]] |
||
| − | {{FFIV-2}} |
||
| ⚫ | |||
[[Category:Towers]] |
[[Category:Towers]] |
||
Revision as of 22:37, 8 January 2020
Template:Sideicon The Tower of Trials is a location in Final Fantasy IV: The After Years. It is a massive tower located to the south of Troia, and can only be reached by airship or chocobo due to the surrounding rivers. It is visited by apprentices who wish to become Epopts.
Story
Palom is sent from Mysidia to Troia to train Leonora and replace an ill Epopt who could not fulfill her duties. To do so they must scale the Tower of Trials and claim the Monastic Seal on the top floor. As they climb, Palom teaches Leonora the basic Fire, Blizzard and Thunder spells, though he also teases her about Epopts and her struggle to learn.
At the end, they discover the Monastic Seal is simply an altar they had to reach at the top of the tower, thus ending the trial. Palom begins to mock the Epopts and the trial they were offered, but Leonora reprimands him before he apologizes.
Later in Edge's Tale, Izayoi is dispatched to Troia to spy and hears about the tower. Investigating it, she lacks the magic to unseal the entrance and so scales the outer walls. However, the glow of the Tower of Babil catches her eye, and she returns to Edge.
Items
- Palom's Tale
- Edge's Tale
Enemies
Palom's Tale
- Note: All battles marked "Event" are fought with Leonora only
- 1F
- Bloodbones, Skeleton x3
- Red Mousse x4
- Skeleton x4
- Fire Doll (Event)
- Mini Red (Event)
- 2F
- Bloodbones, Skeleton x3
- Cockatrice x3
- Red Mousse x4
- Red Mousse x5
- Skeleton x4
- Mini Red x3 (Event)
- 3F
- Bloodbones, Skeleton x3
- Bomb x3
- Cockatrice x3
- Red Mousse x5
- Skeleton x2, Spirit x2
- Skeleton x4
- Soul, Spirit x3
- Blizzard Doll (Event)
- 4F
- Bloodbones, Skeleton x3
- Bloodbones x2, Soul x2
- Bomb x3
- Cockatrice x3
- Red Mousse x5
- Skeleton x2, Spirit x2
- Soul, Spirit x3
- Mini Blue x3 (Event)
- 5F
- Bloodbones x2, Skeleton x2
- Bloodbones x2, Soul x2
- Bomb x2, Spirit x2
- Bomb x3
- Cockatrice x2, Gargoyle
- Soul, Spirit x3
- Yellow Jelly x4
- Yellow Jelly x5
- Thunder Doll (Event)
- 6F
- Bloodbones, Skeleton x2, Spirit
- Bloodbones x2, Soul x2
- Bomb x2, Spirit x2
- Cockatrice x2, Gargoyle
- Gargoyle x2
- Red Mousse x3, Yellow Jelly x2
- Soul, Spirit x3
- Mini Yellow x3 (Event)
- 7F
- Bloodbones, Skeleton x2, Spirit
- Bloodbones x2, Soul, Spirit
- Bomb x2, Spirit x2
- Bomb x6
- Gargoyle x2
- Red Mousse x3, Yellow Jelly x2
- Red Mousse x3, Yellow Jelly x3
- Yellow Jelly x5
Edge's Tale
- First Area
- Floating Eye x2
- Helldiver x3
- Larva x2, Eyewing Moth x2
- Second Area
- Floating Eye x2
- Helldiver x3
- Cliff Eagle x3
- Larva x2, Eyewing Moth x2
- Gargoyle, Cliff Eagle x2
Musical themes
The theme that plays at the Tower of Trials is "Mt. Ordeals".
Gallery
")
")
")
")
")
")
")
")