Intangir Bot (talk | contribs) m (Bot: Automated text replacement (-Soldieress (Final Fantasy IV) +Soldieress (Final Fantasy IV 2D))) |
Intangir Bot (talk | contribs) m (Bot: Changing template: Locat-stub) |
||
| (44 intermediate revisions by 5 users not shown) | |||
| Line 1: | Line 1: | ||
{{sideicon|prime=FFIV|IVCCI|IVTAY|FFT|FFD2|TFF|TFFCC|FFAB|FFRK}} |
{{sideicon|prime=FFIV|IVCCI|IVTAY|FFT|FFD2|TFF|TFFCC|FFAB|FFRK}} |
||
| − | {{infobox location |
+ | {{infobox location |
|name=Tower of Babil |
|name=Tower of Babil |
||
| + | |release=FFIV |
||
|japanese=バブイルの塔 |
|japanese=バブイルの塔 |
||
|romaji=Babuiru no Tō |
|romaji=Babuiru no Tō |
||
| Line 11: | Line 12: | ||
*Various, see [[#Items|below]] |
*Various, see [[#Items|below]] |
||
|ffiv enemies= |
|ffiv enemies= |
||
| ⚫ | |||
| ⚫ | |||
| ⚫ | |||
| ⚫ | |||
*Various, see [[#Enemies|below]] |
*Various, see [[#Enemies|below]] |
||
|ffiv quests= |
|ffiv quests= |
||
| Line 27: | Line 24: | ||
* [[Android Soldier]] x3 (boss) |
* [[Android Soldier]] x3 (boss) |
||
* [[Deus Ex Machina (Final Fantasy IV -Interlude-)|Deus Ex Machina]] (boss) |
* [[Deus Ex Machina (Final Fantasy IV -Interlude-)|Deus Ex Machina]] (boss) |
||
| − | * [[Shiva (Final Fantasy IV -Interlude-)|Shiva]] (boss) |
+ | * [[Shiva (Final Fantasy IV -Interlude- enemy)|Shiva]] (boss) |
| − | * [[Ramuh (Final Fantasy IV -Interlude-)|Ramuh]] (boss) |
+ | * [[Ramuh (Final Fantasy IV -Interlude- enemy)|Ramuh]] (boss) |
| − | * [[Ifrit (Final Fantasy IV -Interlude-)|Ifrit]] (boss) |
+ | * [[Ifrit (Final Fantasy IV -Interlude- enemy)|Ifrit]] (boss) |
| − | * [[Titan (Final Fantasy IV -Interlude-)|Titan]] (boss) |
+ | * [[Titan (Final Fantasy IV -Interlude- enemy)|Titan]] (boss) |
| − | * [[Bahamut (Final Fantasy IV -Interlude-)|Bahamut]] (boss) |
+ | * [[Bahamut (Final Fantasy IV -Interlude- enemy)|Bahamut]] (boss) |
* [[Rydia? (boss)|Rydia?]] (final boss) |
* [[Rydia? (boss)|Rydia?]] (final boss) |
||
*Various, see [[#Enemies|below]] |
*Various, see [[#Enemies|below]] |
||
| Line 43: | Line 40: | ||
*Investigate the tower |
*Investigate the tower |
||
}} |
}} |
||
| − | {{ |
+ | {{Quote|A tower of this magnitude could not have been built by human hands.|[[Rosa Joanna Farrell|Rosa]]}} |
The '''Tower of Babil''', also known as the '''Tower of Bab-il''' or the '''Tower of Babel''', is a location in ''[[Final Fantasy IV]]''. It is a large [[Tower (location)|tower]] that stretches from the [[Earth (Final Fantasy IV)|Earth's]] Underworld to the Overworld. It is used by [[Golbez]] to summon the [[Giant of Babil]] from the [[Red Moon|Moon]] by collecting the [[Crystal (term)#Final Fantasy IV|Crystals]] from both worlds and bringing them to the tower. |
The '''Tower of Babil''', also known as the '''Tower of Bab-il''' or the '''Tower of Babel''', is a location in ''[[Final Fantasy IV]]''. It is a large [[Tower (location)|tower]] that stretches from the [[Earth (Final Fantasy IV)|Earth's]] Underworld to the Overworld. It is used by [[Golbez]] to summon the [[Giant of Babil]] from the [[Red Moon|Moon]] by collecting the [[Crystal (term)#Final Fantasy IV|Crystals]] from both worlds and bringing them to the tower. |
||
| Line 51: | Line 48: | ||
{{spoiler}} |
{{spoiler}} |
||
=== ''[[Final Fantasy IV]]'' === |
=== ''[[Final Fantasy IV]]'' === |
||
| ⚫ | |||
| − | |||
| ⚫ | |||
[[Cecil Harvey|Cecil]], [[Kain Highwind|Kain]], [[Rydia]], [[Rosa Joanna Farrell|Rosa]], and [[Yang Fang Leiden|Yang]] sneak into the lower half of the tower to retrieve the Crystals stolen by Golbez. They find Dr. Lugae and Rubicante preparing for war with the Overworld kingdom of [[Eblan]]. Rubicante escapes, but Cecil and his friends fight Dr. Lugae and his robotic son [[Barnabas]]. |
[[Cecil Harvey|Cecil]], [[Kain Highwind|Kain]], [[Rydia]], [[Rosa Joanna Farrell|Rosa]], and [[Yang Fang Leiden|Yang]] sneak into the lower half of the tower to retrieve the Crystals stolen by Golbez. They find Dr. Lugae and Rubicante preparing for war with the Overworld kingdom of [[Eblan]]. Rubicante escapes, but Cecil and his friends fight Dr. Lugae and his robotic son [[Barnabas]]. |
||
| − | After defeating them, they obtain the key to stopping the Super Cannon. They stop it, but Yang locks himself in the room and presumably perishes in the following explosion. During the escape from the tower, Golbez tries to make the bridge leading to it collapse from afar, but Cecil's party is saved by [[Cid Pollendina|Cid]] in the newly reinforced ''[[Enterprise (Final Fantasy IV)|Enterprise]] |
+ | After defeating them, they obtain the key to stopping the Super Cannon. They stop it, but Yang locks himself in the room and presumably perishes in the following explosion. During the escape from the tower, Golbez tries to make the bridge leading to it collapse from afar, but Cecil's party is saved by [[Cid Pollendina|Cid]] in the newly reinforced ''[[Enterprise (Final Fantasy IV)|Enterprise]]''. |
| − | [[File:Siege of Babil.png|left|thumb|The Tower in a cutscene (DS)]] |
+ | [[File:Siege of Babil.png|left|thumb|The Tower in a cutscene (DS).]] |
After another series of events, Cecil and his party meet [[Edge Geraldine|Edge]] and arrive at the upper half of the Tower of Babil where they meet the [[King and Queen of Eblan]] turned into [[Monster (term)|monsters]] by Lugae. Edge helps them return to their senses, and they are killed. Rubicante appears, and Edge loses control. Cecil and his friends defeat Rubicante and find the room with the Crystals but fall into a pitfall, leading back underground where they find an abandoned [[Red Wings]] airship. Edge christens the airship the ''[[Falcon (Final Fantasy IV)|Falcon]]'' and the party uses it to escape the tower. |
After another series of events, Cecil and his party meet [[Edge Geraldine|Edge]] and arrive at the upper half of the Tower of Babil where they meet the [[King and Queen of Eblan]] turned into [[Monster (term)|monsters]] by Lugae. Edge helps them return to their senses, and they are killed. Rubicante appears, and Edge loses control. Cecil and his friends defeat Rubicante and find the room with the Crystals but fall into a pitfall, leading back underground where they find an abandoned [[Red Wings]] airship. Edge christens the airship the ''[[Falcon (Final Fantasy IV)|Falcon]]'' and the party uses it to escape the tower. |
||
| Line 63: | Line 59: | ||
=== ''[[Final Fantasy IV -Interlude-]]'' === |
=== ''[[Final Fantasy IV -Interlude-]]'' === |
||
| − | |||
After rescuing Rydia from the [[Sealed Cave (Final Fantasy IV)|Sealed Cave]], Cecil, [[Palom]] and [[Porom]] head to the Tower of Babil's underground area. The tower glows mysteriously and Rydia speaks only of traveling to it. Meanwhile Edge explores the upper area on the surface, having seen the same glow. As Cecil and his comrades climb the tower, they battle elemental monsters that bestow Rydia her elemental [[Eidolon (Final Fantasy IV)|Eidolons]] [[Ramuh#Final Fantasy IV|Ramuh]], [[Shiva#Final Fantasy IV|Shiva]], [[Ifrit#Final Fantasy IV|Ifrit]] and [[Titan#Final Fantasy IV|Titan]]. Rydia disappears and three [[Android Soldier]]s attack Cecil and the twins, merging into the [[Deus Ex Machina (Final Fantasy IV -Interlude-)|Deus Ex Machina]]. Edge saves them and they continue up the tower. At the top they find Rydia, but Edge recognizes her as a fake. |
After rescuing Rydia from the [[Sealed Cave (Final Fantasy IV)|Sealed Cave]], Cecil, [[Palom]] and [[Porom]] head to the Tower of Babil's underground area. The tower glows mysteriously and Rydia speaks only of traveling to it. Meanwhile Edge explores the upper area on the surface, having seen the same glow. As Cecil and his comrades climb the tower, they battle elemental monsters that bestow Rydia her elemental [[Eidolon (Final Fantasy IV)|Eidolons]] [[Ramuh#Final Fantasy IV|Ramuh]], [[Shiva#Final Fantasy IV|Shiva]], [[Ifrit#Final Fantasy IV|Ifrit]] and [[Titan#Final Fantasy IV|Titan]]. Rydia disappears and three [[Android Soldier]]s attack Cecil and the twins, merging into the [[Deus Ex Machina (Final Fantasy IV -Interlude-)|Deus Ex Machina]]. Edge saves them and they continue up the tower. At the top they find Rydia, but Edge recognizes her as a fake. |
||
| Line 69: | Line 64: | ||
=== ''[[Final Fantasy IV: The After Years]]'' === |
=== ''[[Final Fantasy IV: The After Years]]'' === |
||
| ⚫ | |||
| − | |||
| ⚫ | Edge and the [[Eblan Four]] head to the pulsating Tower of Babil. Upon reaching the inners of the tower, Edge and the ninjas encounter the [[Maenad|Mysterious Girl]] who summons [[Ifrit (The After Years boss)|Ifrit]] after them. The ninjas escape onto the airship Rydia and [[Luca (Final Fantasy IV)|Luca]] are using. |
||
| − | [[File:FFIV TAY Tower of Babil.jpg|thumb|left|The Tower of Babil in ''[[Final Fantasy IV: The After Years|The After Years]]''.]] |
||
| ⚫ | |||
| ⚫ | Edge and the [[Eblan Four]] head to the pulsating Tower of Babil. Upon reaching the inners of the tower, Edge and the ninjas encounter the [[Maenad|Mysterious Girl]] who summons [[Ifrit (The After Years)|Ifrit]] after them. The ninjas escape onto the airship Rydia and [[Luca (Final Fantasy IV)|Luca]] are using. |
||
| ⚫ | |||
{{endspoiler}} |
{{endspoiler}} |
||
| Line 83: | Line 77: | ||
;B6 |
;B6 |
||
In this floor, Dr. Lugae is seeing Rubicante off, who is using the warper. The party encounters Dr. Lugae and Barnabas, whom they must fight. When they win, they will obtain Lugae's Key. Afterwards, the teleporter may be examined, and if prompted, will inform the player it is not working. |
In this floor, Dr. Lugae is seeing Rubicante off, who is using the warper. The party encounters Dr. Lugae and Barnabas, whom they must fight. When they win, they will obtain Lugae's Key. Afterwards, the teleporter may be examined, and if prompted, will inform the player it is not working. |
||
| − | {{ |
+ | {{clear}} |
[[File:Super Cannons ffiv ios.PNG|thumb|right|The party arrives in the control room.]] |
[[File:Super Cannons ffiv ios.PNG|thumb|right|The party arrives in the control room.]] |
||
;B9 |
;B9 |
||
After obtaining Lugae's Key back in B6, the party must use it to open the locked door, which is the second exit in the map. It is the cannon control room. The party will encounter three Goblin Captains controlling the cannons, and when the party defeats them, they destroy the cannons' controls. Yang stays behind to save the dwarves, but fails and is assumed dead until he is found in the [[Sylph Cave]]. |
After obtaining Lugae's Key back in B6, the party must use it to open the locked door, which is the second exit in the map. It is the cannon control room. The party will encounter three Goblin Captains controlling the cannons, and when the party defeats them, they destroy the cannons' controls. Yang stays behind to save the dwarves, but fails and is assumed dead until he is found in the [[Sylph Cave]]. |
||
| − | {{ |
+ | {{clear}} |
=== Upper half === |
=== Upper half === |
||
| Line 96: | Line 90: | ||
As Edge mourns his parents' death, Rubicante appears before them. Edge falsely accuses him of experimenting with his parents, and the party must face him. After Rubicante is defeated, he will congratulate the party and compliments them, saying that Golbez will see them as worthy opponents. Edge's Seneschal, along with two ninjas, arrive, searching for Rubicante, but Edge tells them that the job is finished. Seneschal thanks the party and asks them to take care of Edge. |
As Edge mourns his parents' death, Rubicante appears before them. Edge falsely accuses him of experimenting with his parents, and the party must face him. After Rubicante is defeated, he will congratulate the party and compliments them, saying that Golbez will see them as worthy opponents. Edge's Seneschal, along with two ninjas, arrive, searching for Rubicante, but Edge tells them that the job is finished. Seneschal thanks the party and asks them to take care of Edge. |
||
| − | {{ |
+ | {{clear}} |
[[File:Crystals in tower of babil ffiv ios.PNG|thumb|right|The earth's eight crystals, minus one dark crystal.]] |
[[File:Crystals in tower of babil ffiv ios.PNG|thumb|right|The earth's eight crystals, minus one dark crystal.]] |
||
;Crystal Room |
;Crystal Room |
||
| Line 102: | Line 96: | ||
In the 3D release of ''Final Fantasy IV'', this room is smaller and has only one chamber where all seven Crystals are kept together. As the chamber lies at the back of the room where the door ought to be, and the map for the floor is completed without showing it, the hallway in the back of the floor is likely removed in this version. |
In the 3D release of ''Final Fantasy IV'', this room is smaller and has only one chamber where all seven Crystals are kept together. As the chamber lies at the back of the room where the door ought to be, and the map for the floor is completed without showing it, the hallway in the back of the floor is likely removed in this version. |
||
| − | {{ |
+ | {{clear}} |
[[File:Falcon room tower of babil.PNG|thumb|right|The exit leading to the airship.]] |
[[File:Falcon room tower of babil.PNG|thumb|right|The exit leading to the airship.]] |
||
;B8 |
;B8 |
||
It is an unrevisitable portion of the floor. Once the player has taken the west exit, the entire tower will be unrevisitable. The exit will lead to a room with a Red Wings airship. The party will use it to escape, and regroup back in the [[Dwarven Castle]]. |
It is an unrevisitable portion of the floor. Once the player has taken the west exit, the entire tower will be unrevisitable. The exit will lead to a room with a Red Wings airship. The party will use it to escape, and regroup back in the [[Dwarven Castle]]. |
||
| − | {{ |
+ | {{clear}} |
== Items == |
== Items == |
||
=== ''Final Fantasy IV'' === |
=== ''Final Fantasy IV'' === |
||
| + | ;2D versions |
||
| ⚫ | |||
| ⚫ | |||
| − | ;Lower Section |
||
* 2,000 accumulated gil |
* 2,000 accumulated gil |
||
| − | * [[ |
+ | * [[Final Fantasy IV items#Hi-Potion|Hi-Potion]] x2 |
| − | * [[ |
+ | * [[Final Fantasy IV items#Ether|Ether]] |
| − | * [[ |
+ | * [[Final Fantasy IV items#Hi-Ether|Hi-Ether]] |
| − | * [[ |
+ | * [[Final Fantasy IV items#Phoenix Down|Phoenix Down]] x2 |
| − | * [[ |
+ | * [[Final Fantasy IV weapons#CarClaw|CatClaw]] |
| − | * [[ |
+ | * [[Final Fantasy IV weapons#Archer Bow|Archer Bow]] |
| − | * [[ |
+ | * [[Final Fantasy IV weapons#Ice Arrows|Ice Arrows]] x20 |
| − | * [[ |
+ | * [[Final Fantasy IV armor#Bandana|Bandana]] |
| − | * [[ |
+ | * [[Final Fantasy IV weapons#Icebrand|Icebrand]] (Monster-in-a-box: [[Security Eye (Final Fantasy IV 2D)|Security Eye]]) |
| − | * [[ |
+ | * [[Final Fantasy IV weapons#Ice Lance|Ice Lance]] (Monster-in-a-box: [[Security Eye (Final Fantasy IV 2D)|Security Eye]]) |
| − | * [[ |
+ | * [[Final Fantasy IV armor#Ice Shield|Ice Shield]] (Monster-in-a-box: [[Security Eye (Final Fantasy IV 2D)|Security Eye]]) |
| − | * [[ |
+ | * [[Final Fantasy IV armor#Ice Armor|Ice Armor]] (Monster-in-a-box: [[Security Eye (Final Fantasy IV 2D)|Security Eye]]) |
| − | |||
| − | ;Upper Section |
||
* 84,000 accumulated gil |
* 84,000 accumulated gil |
||
| − | * [[ |
+ | * [[Final Fantasy IV items#Mega-Potion|Mega-Potion]] x2 |
| − | * [[ |
+ | * [[Final Fantasy IV weapons#Ashura|Ashura]] |
| − | * [[ |
+ | * [[Final Fantasy IV weapons#Ogrekiller|Ogrekiller]] (Monster-in-a-box: [[Mad Ogre (Final Fantasy IV 2D)|Mad Ogre]] x4) |
| ⚫ | |||
| − | |||
| + | ;3D versions |
||
| − | ;Passage to the ''Falcon'' |
||
| + | *Emergency Exit |
||
| ⚫ | |||
| + | *Ether |
||
| + | *Hi-Potion x4 |
||
| + | *[[Final Fantasy IV 3D armor#Green Beret|Green Beret]] |
||
| + | *[[Final Fantasy IV 3D weapons#Icebrand|Icebrand]] (Monster-in-a-box: [[Security Eye (Final Fantasy IV 3D)|Security Eye]]) |
||
| + | *[[Final Fantasy IV 3D weapons#Ice Lance|Ice Lance]] (Monster-in-a-box: [[Security Eye (Final Fantasy IV 3D)|Security Eye]]) |
||
| + | *[[Final Fantasy IV 3D weapons#Cat Claws|Cat Claws]] |
||
| + | *Antarctic Wind |
||
| + | *[[Final Fantasy IV 3D weapons#Killer Bow|Killer Bow]] |
||
| + | *Phoenix Down |
||
| + | *[[Final Fantasy IV 3D armor#Ice Armor|Ice Armor]] (Monster-in-a-box: [[Security Eye (Final Fantasy IV 3D)|Security Eye]]) |
||
| + | *[[Final Fantasy IV 3D armor#Ice Shield|Ice Shield]] (Monster-in-a-box: [[Security Eye (Final Fantasy IV 3D)|Security Eye]]) |
||
| + | *Arctic Wind |
||
| + | *Dry Ether |
||
| + | *Silver Hourglass |
||
| + | *Unicorn Horn |
||
| + | *[[Final Fantasy IV 3D weapons#Ogrekiller|Ogrekiller]] (Monster-in-a-box: [[Mad Ogre (Final Fantasy IV 3D)|Mad Ogre]] x3) |
||
| + | *Lilith's Kiss |
||
| + | *[[Final Fantasy IV 3D weapons#Ashura|Ashura]] |
||
| + | *10000 gil |
||
| + | *Map completion: Antarctic Wind x5, Arctic Wind x3, White Fang, Hi-Potion x5, Remedy x5, Bomb Fragment x5, Bomb Crank x3, Red Fang x1, X-Potion x3, Elixir x1, Elixir x1, Ether x2 |
||
=== ''Final Fantasy IV -Interlude-'' === |
=== ''Final Fantasy IV -Interlude-'' === |
||
| − | * [[ |
+ | * [[Final Fantasy IV -Interlude- items#Ether|Ether]] |
| − | * [[ |
+ | * [[Final Fantasy IV -Interlude- items#X-Potion|X-Potion]] |
| − | * [[ |
+ | * [[Final Fantasy IV -Interlude- armor#Giant's Gloves|Giant's Gloves]] |
| − | * [[ |
+ | * [[Final Fantasy IV -Interlude- items#Phoenix Down|Phoenix Down]] |
| − | * [[ |
+ | * [[Final Fantasy IV -Interlude- items#Antarctic Wind|Antarctic Wind]] |
| − | * [[ |
+ | * [[Final Fantasy IV -Interlude- items#Potion|Potion]] |
| − | * [[ |
+ | * [[Final Fantasy IV -Interlude- items#Arctic Wind|Arctic Wind]] |
| − | * [[ |
+ | * [[Final Fantasy IV -Interlude- items#Hi-Potion|Hi-Potion]] x2 |
| − | * [[ |
+ | * [[Final Fantasy IV -Interlude- items#Dry Ether|Dry Ether]] |
| − | * [[ |
+ | * [[Final Fantasy IV -Interlude- weapons#Ice Arrows|Ice Arrows]] x20 |
| − | * [[ |
+ | * [[Final Fantasy IV -Interlude- armor#Green Beret|Green Beret]] |
| − | * [[ |
+ | * [[Final Fantasy IV -Interlude- weapons#Kiku-ichimonji|Kiku-ichimonji]] |
| − | * [[ |
+ | * [[Final Fantasy IV -Interlude- weapons#Killer Bow|Killer Bow]] |
| − | * [[ |
+ | * [[Final Fantasy IV -Interlude- items#Aegis Shield|Aegis Shield]] |
| − | * [[ |
+ | * [[Final Fantasy IV -Interlude- armor#Ribbon|Ribbon]] |
=== ''Final Fantasy IV: The After Years'' === |
=== ''Final Fantasy IV: The After Years'' === |
||
{{multicol-begin}} |
{{multicol-begin}} |
||
;Upper Section |
;Upper Section |
||
| − | * [[ |
+ | * [[Final Fantasy IV: The After Years items#Hi-Potion|Hi-Potion]] x3 |
| − | * [[ |
+ | * [[Final Fantasy IV: The After Years weapons#Great Bow|Great Bow]] |
| − | * [[ |
+ | * [[Final Fantasy IV: The After Years weapons#Battle Axe|Battle Axe]] |
| − | * [[ |
+ | * [[Final Fantasy IV: The After Years items#Ether|Ether]] |
| − | * [[ |
+ | * [[Final Fantasy IV: The After Years weapons#Cross Shuriken|Cross Shuriken]] |
| − | * [[ |
+ | * [[Final Fantasy IV: The After Years items#Potion|Potion]] |
| − | * [[ |
+ | * [[Final Fantasy IV: The After Years items#Ether|Ether]] |
| − | * [[ |
+ | * [[Final Fantasy IV: The After Years weapons#Kogarasu|Kogarasu]] |
| − | * [[ |
+ | * [[Final Fantasy IV: The After Years items#Tent|Tent]] |
| − | * [[ |
+ | * [[Final Fantasy IV: The After Years weapons#Chain Whip|Chain Whip]] |
{{multicol-separator}} |
{{multicol-separator}} |
||
;Lower Passage |
;Lower Passage |
||
| − | * [[ |
+ | * [[Final Fantasy IV: The After Years items#Ether|Ether]] |
| − | * [[ |
+ | * [[Final Fantasy IV: The After Years items#Phoenix Down|Phoenix Down]] |
| − | * [[ |
+ | * [[Final Fantasy IV: The After Years items#Elixir|Elixir]] |
{{multicol-end}} |
{{multicol-end}} |
||
== Enemies == |
== Enemies == |
||
=== ''[[Final Fantasy IV]]'' === |
=== ''[[Final Fantasy IV]]'' === |
||
| + | ;2D versions |
||
| − | {{multicol-begin}} |
||
| ⚫ | |||
| − | ;Lower Section |
||
| − | * [[Marionetteer (Final Fantasy IV 2D)| |
+ | * [[Marionetteer (Final Fantasy IV 2D)|Marionetteer]], [[Evil Doll (Final Fantasy IV 2D)|Evil Doll]] x3 |
| ⚫ | |||
* [[Magma Tortoise (Final Fantasy IV 2D)|Magma Tortoise]], [[Goblin Captain (Final Fantasy IV 2D)|Goblin Captain]] x2 |
* [[Magma Tortoise (Final Fantasy IV 2D)|Magma Tortoise]], [[Goblin Captain (Final Fantasy IV 2D)|Goblin Captain]] x2 |
||
* [[Goblin Captain (Final Fantasy IV 2D)|Goblin Captain]] x3 |
* [[Goblin Captain (Final Fantasy IV 2D)|Goblin Captain]] x3 |
||
| Line 187: | Line 196: | ||
* [[Flamehound (Final Fantasy IV 2D)|Flamehound]] x3 |
* [[Flamehound (Final Fantasy IV 2D)|Flamehound]] x3 |
||
* [[Flame Knight (Final Fantasy IV 2D)|Flame Knight]] x2 |
* [[Flame Knight (Final Fantasy IV 2D)|Flame Knight]] x2 |
||
| − | * [[Chimera (Final Fantasy IV)|Chimera]], [[Flame Knight (Final Fantasy IV 2D)|Flame Knight]] x2 |
+ | * [[Chimera (Final Fantasy IV 2D)|Chimera]], [[Flame Knight (Final Fantasy IV 2D)|Flame Knight]] x2 |
| − | * [[Chimera (Final Fantasy IV)|Chimera]] |
+ | * [[Chimera (Final Fantasy IV 2D)|Chimera]] |
| − | * [[Chimera (Final Fantasy IV)|Chimera]], [[White Mousse (Final Fantasy IV)|White Mousse]] x3 |
+ | * [[Chimera (Final Fantasy IV 2D)|Chimera]], [[White Mousse (Final Fantasy IV 2D)|White Mousse]] x3 |
| − | * [[Chimera (Final Fantasy IV)|Chimera]] x2 |
+ | * [[Chimera (Final Fantasy IV 2D)|Chimera]] x2 |
* [[Security Eye (Final Fantasy IV 2D)|Security Eye]] |
* [[Security Eye (Final Fantasy IV 2D)|Security Eye]] |
||
| − | * [[Stone Golem (Final Fantasy IV)|Stone Golem]], [[Medusa (Final Fantasy IV 2D)|Medusa]] |
+ | * [[Stone Golem (Final Fantasy IV 2D)|Stone Golem]], [[Medusa (Final Fantasy IV 2D)|Medusa]] |
* [[Mystery Egg (Final Fantasy IV 2D)|Mystery Egg]] (Hatches into [[Black Lizard (Final Fantasy IV 2D)|Black Lizard]]) |
* [[Mystery Egg (Final Fantasy IV 2D)|Mystery Egg]] (Hatches into [[Black Lizard (Final Fantasy IV 2D)|Black Lizard]]) |
||
| − | * [[White Mousse (Final Fantasy IV)|White Mousse]] x6 |
+ | * [[White Mousse (Final Fantasy IV 2D)|White Mousse]] x6 |
| − | * [[Doctor (Final Fantasy IV)|Dr. Lugae]], [[Barnabas]], [[Barnabas-Z]] (Boss) |
+ | * [[Doctor (Final Fantasy IV 2D)|Dr. Lugae]], [[Barnabas (Final Fantasy IV 2D)|Barnabas]], [[Barnabas-Z (Final Fantasy IV 2D)|Barnabas-Z]] (Boss) |
| − | * [[Dr. Lugae (Final Fantasy IV |
+ | * [[Dr. Lugae (Final Fantasy IV 2D)|Dr. Lugae]] (Boss) |
| − | {{multicol-separator}} |
||
| − | ;Upper Section |
||
* [[Balloon (Final Fantasy IV 2D)|Balloon]] x3 |
* [[Balloon (Final Fantasy IV 2D)|Balloon]] x3 |
||
* [[Balloon (Final Fantasy IV 2D)|Balloon]] x4 |
* [[Balloon (Final Fantasy IV 2D)|Balloon]] x4 |
||
| − | * [[Coeurl (Final Fantasy IV)| |
+ | * [[Coeurl (Final Fantasy IV 2D)|Coeurl]] x2 |
| − | * [[Coeurl (Final Fantasy IV)| |
+ | * [[Coeurl (Final Fantasy IV 2D)|Coeurl]] x3 |
| − | * [[Mad Ogre (Final Fantasy IV 2D)|Mad Ogre]], [[Coeurl (Final Fantasy IV)| |
+ | * [[Mad Ogre (Final Fantasy IV 2D)|Mad Ogre]], [[Coeurl (Final Fantasy IV 2D)|Coeurl]] x2 |
* [[Mad Ogre (Final Fantasy IV 2D)|Mad Ogre]] x2 |
* [[Mad Ogre (Final Fantasy IV 2D)|Mad Ogre]] x2 |
||
| − | * [[Mad Ogre (Final Fantasy IV 2D)|Mad Ogre]], [[Coeurl (Final Fantasy IV)| |
+ | * [[Mad Ogre (Final Fantasy IV 2D)|Mad Ogre]], [[Coeurl (Final Fantasy IV 2D)|Coeurl]], [[Balloon (Final Fantasy IV 2D)|Balloon]] x2 |
* [[Ghost Knight (Final Fantasy IV 2D)|Ghost Knight]] x3 |
* [[Ghost Knight (Final Fantasy IV 2D)|Ghost Knight]] x3 |
||
| − | * [[Sorcerer (Final Fantasy IV)|Sorcerer]], [[Ghost Knight (Final Fantasy IV 2D)|Ghost Knight]] x2 |
+ | * [[Sorcerer (Final Fantasy IV 2D)|Sorcerer]], [[Ghost Knight (Final Fantasy IV 2D)|Ghost Knight]] x2 |
| − | * [[Storm Anima (Final Fantasy IV)| |
+ | * [[Storm Anima (Final Fantasy IV 2D)|Storm Anima]] x2 |
| − | * [[Storm Anima (Final Fantasy IV)| |
+ | * [[Storm Anima (Final Fantasy IV 2D)|Storm Anima]], [[Naga (Final Fantasy IV 2D)|Naga]] x2 |
| − | * [[Storm Anima (Final Fantasy IV)| |
+ | * [[Storm Anima (Final Fantasy IV 2D)|Storm Anima]], [[Balloon (Final Fantasy IV 2D)|Balloon]] x3 |
* [[Mystery Egg (Final Fantasy IV 2D)|Mystery Egg]] (Hatches into [[Green Dragon (Final Fantasy IV 2D)|Green Dragon]]) |
* [[Mystery Egg (Final Fantasy IV 2D)|Mystery Egg]] (Hatches into [[Green Dragon (Final Fantasy IV 2D)|Green Dragon]]) |
||
| − | * [[Mystery Egg (Final Fantasy IV 2D)|Mystery Egg]] (Hatches into [[Lamia (Final Fantasy IV |
+ | * [[Mystery Egg (Final Fantasy IV 2D)|Mystery Egg]] (Hatches into [[Lamia (Final Fantasy IV 2D)|Lamia]]) |
| − | * [[Lamia (Final Fantasy IV |
+ | * [[Lamia (Final Fantasy IV 2D)|Lamia]], [[Coeurl (Final Fantasy IV 2D)|Coeurl]] x2 |
| − | * [[Lamia (Final Fantasy IV |
+ | * [[Lamia (Final Fantasy IV 2D)|Lamia]] x2, [[Coeurl (Final Fantasy IV 2D)|Coeurl]] x2 |
| − | * [[Lamia (Final Fantasy IV |
+ | * [[Lamia (Final Fantasy IV 2D)|Lamia]], [[Coeurl (Final Fantasy IV 2D)|Coeurl]], [[Mad Ogre (Final Fantasy IV 2D)|Mad Ogre]] |
* [[Mad Ogre (Final Fantasy IV 2D)|Mad Ogre]] x4 (Monster-in-a-box) |
* [[Mad Ogre (Final Fantasy IV 2D)|Mad Ogre]] x4 (Monster-in-a-box) |
||
| − | * [[King |
+ | * [[King of Eblan (Final Fantasy IV 2D)|King Eblan]], [[Queen of Eblan (Final Fantasy IV 2D)|Queen Eblan]] (Boss) |
| − | * [[Rubicante (Final Fantasy IV |
+ | * [[Rubicante (Final Fantasy IV 2D)|Rubicante]] (Boss) |
| ⚫ | |||
| − | {{multicol-separator}} |
||
| ⚫ | |||
| − | ;Passage to the ''Falcon'' |
||
| − | * [[ |
+ | * [[Storm Anima (Final Fantasy IV 2D)|Storm Anima]], [[Ghost Knight (Final Fantasy IV 2D)|Ghost Knight]], [[Coeurl (Final Fantasy IV 2D)|Coeurl]] x2 |
| ⚫ | |||
| ⚫ | |||
* [[Mythril Golem (Final Fantasy IV 2D)|Mythril Golem]] |
* [[Mythril Golem (Final Fantasy IV 2D)|Mythril Golem]] |
||
* [[Mythril Golem (Final Fantasy IV 2D)|Mythril Golem]] x2 |
* [[Mythril Golem (Final Fantasy IV 2D)|Mythril Golem]] x2 |
||
| − | * [[Mythril Golem (Final Fantasy IV 2D)|Mythril Golem]], [[Coeurl (Final Fantasy IV)| |
+ | * [[Mythril Golem (Final Fantasy IV 2D)|Mythril Golem]], [[Coeurl (Final Fantasy IV 2D)|Coeurl]] x2 |
* [[Mythril Golem (Final Fantasy IV 2D)|Mythril Golem]], [[Ghost Knight (Final Fantasy IV 2D)|Ghost Knight]] x2 |
* [[Mythril Golem (Final Fantasy IV 2D)|Mythril Golem]], [[Ghost Knight (Final Fantasy IV 2D)|Ghost Knight]] x2 |
||
| − | * [[Lamia Matriarch (Final Fantasy IV 2D)|Lamia Matriarch]], [[Mystery Egg (Final Fantasy IV 2D)|Mystery Egg]] x2 (Hatches into [[Lamia (Final Fantasy IV |
+ | * [[Lamia Matriarch (Final Fantasy IV 2D)|Lamia Matriarch]], [[Mystery Egg (Final Fantasy IV 2D)|Mystery Egg]] x2 (Hatches into [[Lamia (Final Fantasy IV 2D)|Lamia]] or [[Coeurl (Final Fantasy IV 2D)|Coeurl]]) |
* [[Green Dragon (Final Fantasy IV 2D)|Green Dragon]] |
* [[Green Dragon (Final Fantasy IV 2D)|Green Dragon]] |
||
| + | |||
| − | {{multicol-end}} |
||
| + | ;3D versions |
||
| + | *[[Flamehound (Final Fantasy IV 3D)|Flamehound]] x3 |
||
| + | *[[Flamehound (Final Fantasy IV 3D)|Flamehound]] x2, [[Black Lizard (Final Fantasy IV 3D)|Black Lizard]] x1 |
||
| + | *[[Flamehound (Final Fantasy IV 3D)|Flamehound]] x1 |
||
| + | *[[Goblin Captain (Final Fantasy IV 3D)|Goblin Captain]] x3 |
||
| + | *[[Security Eye (Final Fantasy IV 3D)|Security Eye]] x1 (Monster-in-a-box) |
||
| + | *[[Black Lizard (Final Fantasy IV 3D)|Black Lizard]] x3 |
||
| + | *[[Armadillo (Final Fantasy IV 3D)|Armadillo]] x3 |
||
| + | *[[Magma Tortoise (Final Fantasy IV 2D)|Magma Tortoise]] x1 |
||
| + | *[[Goblin Captain (Final Fantasy IV 3D)|Goblin Captain]] x4 |
||
| + | *[[Chimera (Final Fantasy IV 3D)|Chimera]] x1 |
||
| + | *[[Flamehound (Final Fantasy IV 3D)|Flamehound]] x2, [[Flame Knight (Final Fantasy IV 3D)|Flame Knight]] x1 |
||
| + | *[[White Mousse (Final Fantasy IV 2D)|White Mousse]] x3 |
||
| + | *[[Marionetteer (Final Fantasy IV 2D)|Marionetteer]] x1, [[Evil Doll (Final Fantasy IV 3D)|Evil Doll]] x2 |
||
| + | *[[Mystery Egg (Final Fantasy IV 3D)|Mystery Egg]] x1 (Hatches into [[Black Lizard (Final Fantasy IV 3D)|Black Lizard]]) |
||
| ⚫ | |||
| + | *[[Medusa (Final Fantasy IV 3D)|Medusa]] x2 |
||
| + | *[[Medusa (Final Fantasy IV 3D)|Medusa]] x1, [[Naga (Final Fantasy IV 3D)|Naga]] x1 |
||
| + | *[[Stone Golem (Final Fantasy IV 3D)|Stone Golem]] x2, [[Mythril Golem (Final Fantasy IV 3D)|Mythril Golem]] x1 |
||
| + | *[[Stone Golem (Final Fantasy IV 3D)|Stone Golem]] x1, [[Medusa (Final Fantasy IV 3D)|Medusa]] x1 |
||
| + | *[[Chimera (Final Fantasy IV 3D)|Chimera]] x2 |
||
| + | *[[Chimera (Final Fantasy IV 3D)|Chimera]] x1, [[Flame Knight (Final Fantasy IV 3D)|Flame Knight]] x2 |
||
| + | *[[Mystery Egg (Final Fantasy IV 3D)|Mystery Egg]] (Hatches into [[Green Dragon (Final Fantasy IV 3D)|Green Dragon]]) |
||
| + | *[[Stone Golem (Final Fantasy IV 3D)|Stone Golem]] x2 |
||
| + | *[[Stone Golem (Final Fantasy IV 3D)|Stone Golem]] x1, [[Skuldier (Final Fantasy IV 3D)|Skuldier]] x2 |
||
| + | *[[Stone Golem (Final Fantasy IV 3D)|Stone Golem]] x1, [[Skuldier (Final Fantasy IV 3D)|Skuldier]] x1, [[Leshy (Final Fantasy IV 3D)|Leshy]] x1 |
||
| + | *[[Stone Golem (Final Fantasy IV 3D)|Stone Golem]] x1 |
||
| + | *[[Blood Bat (Final Fantasy IV 3D)|Blood Bat]] x4 |
||
| + | *[[Ironback (Final Fantasy IV 3D)|Ironback]] x2 |
||
| + | *[[Ironback (Final Fantasy IV 3D)|Ironback]] x1, [[Armadillo (Final Fantasy IV 3D)|Armadillo]] x1, [[Black Lizard (Final Fantasy IV 3D)|Black Lizard]] x1 |
||
| + | *[[Skuldier (Final Fantasy IV 3D)|Skuldier]] x3, [[Leshy (Final Fantasy IV 3D)|Leshy]] x1 |
||
| + | *[[Skuldier (Final Fantasy IV 3D)|Skuldier]] x3 |
||
| ⚫ | |||
| ⚫ | |||
| + | *[[Sorcerer (Final Fantasy IV 3D)|Sorcerer]] x1, [[Ghost Knight (Final Fantasy IV 3D)|Ghost Knight]] x1, [[Coeurl (Final Fantasy IV 3D)|Coeurl]] x1 |
||
| + | *[[Sorcerer (Final Fantasy IV 3D)|Sorcerer]] x1, [[Coeurl (Final Fantasy IV 3D)|Coeurl]] x2 |
||
| + | *[[Mythril Golem (Final Fantasy IV 3D)|Mythril Golem]] x1, [[Ghost Knight (Final Fantasy IV 3D)|Ghost Knight]] x2 |
||
| + | *[[Lamia (Final Fantasy IV 3D)|Lamia]] x1, [[Coeurl (Final Fantasy IV 3D)|Coeurl]] x2 |
||
| + | *[[Coeurl (Final Fantasy IV 3D)|Coeurl]] x2 |
||
| + | *[[Mad Ogre (Final Fantasy IV 3D)|Mad Ogre]] x3 (monster-in-a-box) |
||
| + | *[[Mad Ogre (Final Fantasy IV 3D)|Mad Ogre]] x1, [[Coeurl (Final Fantasy IV 3D)|Coeurl]] x1, [[Balloon (Final Fantasy IV 3D)|Balloon]] x1 |
||
| + | *[[Mad Ogre (Final Fantasy IV 3D)|Mad Ogre]] x2, [[Sorcerer (Final Fantasy IV 3D)|Sorcerer]] x1 |
||
| + | *[[Mad Ogre (Final Fantasy IV 3D)|Mad Ogre]] x2, [[Coeurl (Final Fantasy IV 3D)|Coeurl]] x1 |
||
| + | *[[Lamia (Final Fantasy IV 3D)|Lamia]] x1, [[Coeurl (Final Fantasy IV 3D)|Coeurl]] x1, [[Sorcerer (Final Fantasy IV 3D)|Sorcerer]] x1 |
||
| + | *[[Lamia Matriarch (Final Fantasy IV 3D)|Lamia Matriarch]] x1 |
||
| + | *[[Storm Anima (Final Fantasy IV 3D)|Storm Anima]] x1, [[Balloon (Final Fantasy IV 3D)|Balloon]] x3 |
||
| + | *[[Balloon (Final Fantasy IV 3D)|Balloon]] x3 |
||
| + | *[[Mad Ogre (Final Fantasy IV 3D)|Mad Ogre]] x1, [[Lamia (Final Fantasy IV 3D)|Lamia]] x1 |
||
| + | *[[Green Dragon (Final Fantasy IV 3D)|Green Dragon]] x1 |
||
| + | *[[Storm Anima (Final Fantasy IV 3D)|Storm Anima]] x2, [[Ghost Knight (Final Fantasy IV 3D)|Ghost Knight]] x2 |
||
| + | *[[Storm Anima (Final Fantasy IV 3D)|Storm Anima]] x2, [[Ghost Knight (Final Fantasy IV 3D)|Ghost Knight]] x1 |
||
| + | *[[Storm Anima (Final Fantasy IV 3D)|Storm Anima]] x2 |
||
| + | *[[Storm Anima (Final Fantasy IV 3D)|Storm Anima]] x2, [[Lamia (Final Fantasy IV 3D)|Lamia]] x1 |
||
| + | *[[Storm Anima (Final Fantasy IV 3D)|Storm Anima]] x1, [[Balloon (Final Fantasy IV 3D)|Balloon]] x1, [[Mad Ogre (Final Fantasy IV 3D)|Mad Ogre]] x1 |
||
| + | *[[Ghost Knight (Final Fantasy IV 3D)|Ghost Knight]] x1, [[Coeurl (Final Fantasy IV 3D)|Coeurl]] x1, [[Lamia Matriarch (Final Fantasy IV 3D)|Lamia Matriarch]] x1 |
||
| + | *[[Ghost Knight (Final Fantasy IV 3D)|Ghost Knight]] x1, [[Coeurl (Final Fantasy IV 3D)|Coeurl]] x1, [[Storm Anima (Final Fantasy IV 3D)|Storm Anima]] x1 |
||
| + | *[[Ghost Knight (Final Fantasy IV 3D)|Ghost Knight]] x1, [[Coeurl (Final Fantasy IV 3D)|Coeurl]] x1, [[Balloon (Final Fantasy IV 3D)|Balloon]] x1 |
||
| ⚫ | |||
| ⚫ | |||
=== ''[[Final Fantasy IV -Interlude-]]'' === |
=== ''[[Final Fantasy IV -Interlude-]]'' === |
||
| Line 276: | Line 340: | ||
* [[Android Soldier]] x3 (Boss) |
* [[Android Soldier]] x3 (Boss) |
||
* [[Deus Ex Machina (Final Fantasy IV -Interlude-)|Deus Ex Machina]] (Boss) |
* [[Deus Ex Machina (Final Fantasy IV -Interlude-)|Deus Ex Machina]] (Boss) |
||
| − | * [[Shiva (Final Fantasy IV -Interlude-)|Shiva]] (Boss) |
+ | * [[Shiva (Final Fantasy IV -Interlude- enemy)|Shiva]] (Boss) |
| − | * [[Ramuh (Final Fantasy IV -Interlude-)|Ramuh]] (Boss) |
+ | * [[Ramuh (Final Fantasy IV -Interlude- enemy)|Ramuh]] (Boss) |
| − | * [[Ifrit (Final Fantasy IV -Interlude-)|Ifrit]] (Boss) |
+ | * [[Ifrit (Final Fantasy IV -Interlude- enemy)|Ifrit]] (Boss) |
| − | * [[Titan (Final Fantasy IV -Interlude-)|Titan]] (Boss) |
+ | * [[Titan (Final Fantasy IV -Interlude- enemy)|Titan]] (Boss) |
| − | * [[Bahamut (Final Fantasy IV -Interlude-)|Bahamut]] (Boss) |
+ | * [[Bahamut (Final Fantasy IV -Interlude- enemy)|Bahamut]] (Boss) |
* [[Rydia? (boss)|Rydia?]] (Final Boss) |
* [[Rydia? (boss)|Rydia?]] (Final Boss) |
||
{{multicol-end}} |
{{multicol-end}} |
||
| Line 314: | Line 378: | ||
* [[Cait Sith (The After Years)|Cait Sith]], [[Needlehog (The After Years)|Needlehog]] x3 |
* [[Cait Sith (The After Years)|Cait Sith]], [[Needlehog (The After Years)|Needlehog]] x3 |
||
* [[Cave Naga (The After Years)|Cave Naga]], [[Ettin Snake (The After Years)|Ettin Snake]] x2 |
* [[Cave Naga (The After Years)|Cave Naga]], [[Ettin Snake (The After Years)|Ettin Snake]] x2 |
||
| − | * [[Mindflayer (The After Years)|Mindflayer]], [[Needlehog (The After Years)|Needlehog]], [[Cait Sith (The After Years)|Cait Sith]] |
+ | * [[Mindflayer (The After Years enemy)|Mindflayer]], [[Needlehog (The After Years)|Needlehog]], [[Cait Sith (The After Years)|Cait Sith]] |
* [[Cave Bat (The After Years)|Cave Bat]] x3 |
* [[Cave Bat (The After Years)|Cave Bat]] x3 |
||
* [[Succubus (The After Years)|Succubus]], [[Cave Bat (The After Years)|Cave Bat]] x3 |
* [[Succubus (The After Years)|Succubus]], [[Cave Bat (The After Years)|Cave Bat]] x3 |
||
| Line 337: | Line 401: | ||
* [[Goblin Captain (The After Years)|Goblin Captain]] x3 |
* [[Goblin Captain (The After Years)|Goblin Captain]] x3 |
||
* [[Blood Bat (The After Years)|Blood Bat]] x3 |
* [[Blood Bat (The After Years)|Blood Bat]] x3 |
||
| − | * [[Mysterious Girl (boss)|Mysterious Girl]], [[Ifrit (The After Years)|Ifrit]] (Event) |
+ | * [[Mysterious Girl (boss)|Mysterious Girl]], [[Ifrit (The After Years boss)|Ifrit]] (Event) |
{{multicol-end}} |
{{multicol-end}} |
||
==== Lower passage ==== |
==== Lower passage ==== |
||
| − | * [[Ifrit (The After Years)|Ifrit]] (Cannot be won) |
+ | * [[Ifrit (The After Years boss)|Ifrit]] (Cannot be won) |
== Musical themes == |
== Musical themes == |
||
{{audio|filename=FFIV_Tower_of_Bab-il.ogg|title= "Tower of Babil" from ''Final Fantasy IV'' (DS)}} |
{{audio|filename=FFIV_Tower_of_Bab-il.ogg|title= "Tower of Babil" from ''Final Fantasy IV'' (DS)}} |
||
The background music inside the Tower of Babil is its eponymous theme. |
The background music inside the Tower of Babil is its eponymous theme. |
||
| − | {{ |
+ | {{clear}} |
== Other appearances == |
== Other appearances == |
||
=== ''[[Final Fantasy Tactics]]'' === |
=== ''[[Final Fantasy Tactics]]'' === |
||
| − | |||
[[File:Wonder - Tower of Babel.png|thumb|The Tower of Babel.]] |
[[File:Wonder - Tower of Babel.png|thumb|The Tower of Babel.]] |
||
| − | The Tower of Babel is mentioned as one of the [[Wonder (Tactics)#Tower of |
+ | The Tower of Babel is mentioned as one of the [[Wonder (Tactics)#Tower of Babel|wonders]]. It bears the following description: |
| − | {{ |
+ | {{Quote|A legendary tower that extends to the heavens from deep below the earth. Also called the Tower of the Colossi, this mighty spire withstood the Cataclysm, and is a priceless remnant of ancient civilization.}} |
| − | {{ |
+ | {{clear}} |
=== ''[[Final Fantasy Dimensions II]]'' === |
=== ''[[Final Fantasy Dimensions II]]'' === |
||
| + | [[File:FFLTnS Tower of Babil.png|150px|right|thumb|The Tower of Babil.]] |
||
| + | {{main|Babil Tower/Free-to-play}} |
||
| ⚫ | |||
| ⚫ | |||
| ⚫ | |||
| ⚫ | |||
| − | |||
| ⚫ | |||
<gallery> |
<gallery> |
||
FFLTnS Tower of Babil Battle.png|Battle inside the Tower of Babil. |
FFLTnS Tower of Babil Battle.png|Battle inside the Tower of Babil. |
||
</gallery> |
</gallery> |
||
| − | {{Locat-stub|Final Fantasy Dimensions II}} |
||
=== ''[[Theatrhythm Final Fantasy]]'' === |
=== ''[[Theatrhythm Final Fantasy]]'' === |
||
| − | |||
[[File:TFF - Tower of Babil FMS.png|thumb|right|The Tower of Babil in the background of a FMS stage.]] |
[[File:TFF - Tower of Babil FMS.png|thumb|right|The Tower of Babil in the background of a FMS stage.]] |
||
| − | The Tower of Babil appears in the [[Field Music Sequence |
+ | The Tower of Babil appears in the [[Field Music Sequence]] for the "[[Main Theme of FINAL FANTASY IV]]". The inside of the tower appears as the [[Battle Music Sequence|BMS]] for [[Battle With the Four Fiends]]. |
| − | {{ |
+ | {{clear}} |
==== ''[[Theatrhythm Final Fantasy Curtain Call]]'' ==== |
==== ''[[Theatrhythm Final Fantasy Curtain Call]]'' ==== |
||
| − | |||
[[File:Tower_of_Babil.png|thumb|right|The Tower of Babil.]] |
[[File:Tower_of_Babil.png|thumb|right|The Tower of Babil.]] |
||
The Tower of Babil returns in both Music Sequences. |
The Tower of Babil returns in both Music Sequences. |
||
| − | {{ |
+ | {{clear}} |
=== ''[[Final Fantasy Airborne Brigade]]'' === |
=== ''[[Final Fantasy Airborne Brigade]]'' === |
||
| − | |||
<gallery> |
<gallery> |
||
FFAB Tower of Babil FFIV.png| |
FFAB Tower of Babil FFIV.png| |
||
FFAB Tower of Babil FFIV Special.png| |
FFAB Tower of Babil FFIV Special.png| |
||
</gallery> |
</gallery> |
||
| − | {{ |
+ | {{Location section|Final Fantasy Airborne Brigade}} |
=== ''[[Final Fantasy Record Keeper]]'' === |
=== ''[[Final Fantasy Record Keeper]]'' === |
||
| − | |||
==== Tower of Babil - Depths ==== |
==== Tower of Babil - Depths ==== |
||
[[File:FFRK Tower of Babil - Depths FFIV.png|right|thumb|Painting image.]] |
[[File:FFRK Tower of Babil - Depths FFIV.png|right|thumb|Painting image.]] |
||
| Line 427: | Line 485: | ||
;Enemies |
;Enemies |
||
| − | * [[Black Knight (Final Fantasy IV 2D)|Black Knight]]{{foot|May appear in any normal battles |
+ | * [[Black Knight (Final Fantasy IV 2D)|Black Knight]]{{foot|May appear in any normal battles}} |
| − | * [[Medusa (Final Fantasy IV 2D)|Medusa]]{{foot|May appear in any normal battles |
+ | * [[Medusa (Final Fantasy IV 2D)|Medusa]]{{foot|May appear in any normal battles}} |
| − | * [[Purple Bavarois (Final Fantasy IV 2D)|Purple Bavarois]]{{foot|May appear in any normal battles |
+ | * [[Purple Bavarois (Final Fantasy IV 2D)|Purple Bavarois]]{{foot|May appear in any normal battles}} |
| − | * [[Soldieress (Final Fantasy IV 2D)|Soldieress]]{{foot|May appear in any normal battles |
+ | * [[Soldieress (Final Fantasy IV 2D)|Soldieress]]{{foot|May appear in any normal battles}} |
;Bosses |
;Bosses |
||
| − | * [[Doctor (Final Fantasy IV)|Lugae]]{{foot| |
+ | * [[Doctor (Final Fantasy IV 2D)|Lugae]]{{foot|Tower of Babil - 7th Level}} |
| − | * [[Barnabas (Final Fantasy IV)|Barnabas]]{{foot| |
+ | * [[Barnabas (Final Fantasy IV 2D)|Barnabas]]{{foot|Tower of Babil - 7th Level}} |
| − | * [[Barnabas-Z]]{{foot| |
+ | * [[Barnabas-Z (Final Fantasy IV 2D)|Barnabas-Z]]{{foot|If Barnabas is defeated before Lugae}} |
| − | * [[Dr. Lugae (Final Fantasy IV |
+ | * [[Dr. Lugae (Final Fantasy IV 2D)|Lugaeborg]]{{foot|Tower of Babil - 7th Level}} |
;Boss Target Score |
;Boss Target Score |
||
| Line 492: | Line 550: | ||
|} |
|} |
||
{{multicol-end}} |
{{multicol-end}} |
||
| − | {{ |
+ | {{clear}} |
==== Tower of Babil - Heights ==== |
==== Tower of Babil - Heights ==== |
||
| Line 531: | Line 589: | ||
;Enemies |
;Enemies |
||
| − | * [[Coeurl (Final Fantasy IV)|Coeurl]]{{foot|May appear in any normal battles |
+ | * [[Coeurl (Final Fantasy IV 2D)|Coeurl]]{{foot|May appear in any normal battles}} |
| − | * Medusa{{foot|May appear in any normal battles |
+ | * Medusa{{foot|May appear in any normal battles}} |
| − | * Purple Bavarois{{foot|May appear in any normal battles |
+ | * Purple Bavarois{{foot|May appear in any normal battles}} |
| − | * [[Steel Golem (Final Fantasy IV)|Steel Golem]]{{foot|May appear in any normal battles |
+ | * [[Steel Golem (Final Fantasy IV 2D)|Steel Golem]]{{foot|May appear in any normal battles}} |
;Bosses |
;Bosses |
||
| − | * [[King of Eblan (Final Fantasy IV)|King of Eblan]]{{foot| |
+ | * [[King of Eblan (Final Fantasy IV 2D)|King of Eblan]]{{foot|Tower of Babil - 6th Level}} |
| − | * [[Queen of Eblan (Final Fantasy IV)|Queen of Eblan]]{{foot| |
+ | * [[Queen of Eblan (Final Fantasy IV 2D)|Queen of Eblan]]{{foot|Tower of Babil - 6th Level}} |
| − | * [[Rubicante (Final Fantasy IV |
+ | * [[Rubicante (Final Fantasy IV 2D)|Rubicante]]{{foot|Tower of Babil - 8th Level}} |
;Boss Target Score |
;Boss Target Score |
||
| Line 601: | Line 659: | ||
|} |
|} |
||
{{multicol-end}} |
{{multicol-end}} |
||
| − | {{ |
+ | {{clear}} |
== Gallery == |
== Gallery == |
||
| Line 610: | Line 668: | ||
FFIV PSP Tower of Babil.png|Tower of Babil (PSP). |
FFIV PSP Tower of Babil.png|Tower of Babil (PSP). |
||
FFIV-Babil Crystal Room.png|Babil crystal room. |
FFIV-Babil Crystal Room.png|Babil crystal room. |
||
| ⚫ | |||
| ⚫ | |||
FFIV_Battle_Background_Tower_SNES.png|Battle background (SNES). |
FFIV_Battle_Background_Tower_SNES.png|Battle background (SNES). |
||
FFIV Tower Background GBA.png|Battle background (GBA). |
FFIV Tower Background GBA.png|Battle background (GBA). |
||
| Line 617: | Line 677: | ||
Tower_of_babil_victory_screen_ios.PNG|Victory screen (iOS). |
Tower_of_babil_victory_screen_ios.PNG|Victory screen (iOS). |
||
Tower of Babil DS Art.png|Akira Oguro artwork of the Tower of Babil (DS). |
Tower of Babil DS Art.png|Akira Oguro artwork of the Tower of Babil (DS). |
||
| − | FFIV Novel Color Art 10 - The Underworld.png| |
+ | FFIV Novel Color Art 10 - The Underworld.png|Tower of Babil in the Underworld, from the ''Final Fantasy IV'' official novelization. |
FFIV PSP Tower of Babil Cutscene.png|Tower of Babil in a cutscene (PSP). |
FFIV PSP Tower of Babil Cutscene.png|Tower of Babil in a cutscene (PSP). |
||
Falling down tower of babil.PNG|Falling down (DS/iOS). |
Falling down tower of babil.PNG|Falling down (DS/iOS). |
||
IV Interlude Rydia Learning Summon.png|Rydia relearning a summon in the Tower of Babil in ''[[Final Fantasy IV -Interlude-]]''. |
IV Interlude Rydia Learning Summon.png|Rydia relearning a summon in the Tower of Babil in ''[[Final Fantasy IV -Interlude-]]''. |
||
TAY Wii Tower of Babil.jpg|''[[Final Fantasy IV: The After Years]]'' (Wii). |
TAY Wii Tower of Babil.jpg|''[[Final Fantasy IV: The After Years]]'' (Wii). |
||
| − | FFRK Tower of Babil - Depths JP FFIV.png| |
+ | FFRK Tower of Babil - Depths JP FFIV.png|Japanese dungeon image for ''Tower of Babil - Depths'' in ''[[Final Fantasy Record Keeper]]''. |
| − | FFRK Tower of Babil - Heights JP FFIV.png| |
+ | FFRK Tower of Babil - Heights JP FFIV.png|Japanese dungeon image for ''Tower of Babil - Heights'' in ''[[Final Fantasy Record Keeper]]''. |
</gallery> |
</gallery> |
||
| Line 636: | Line 696: | ||
{{navbox setting IVTAY}} |
{{navbox setting IVTAY}} |
||
| ⚫ | |||
| ⚫ | |||
| ⚫ | |||
| ⚫ | |||
| ⚫ | |||
[[pt-br:Torre de Babil]] |
[[pt-br:Torre de Babil]] |
||
[[ru:Башня Бабиль]] |
[[ru:Башня Бабиль]] |
||
| + | [[Category:Locations in Final Fantasy IV]] |
||
| ⚫ | |||
| ⚫ | |||
| ⚫ | |||
| ⚫ | |||
Revision as of 18:43, 13 January 2020
Template:Sideicon
A tower of this magnitude could not have been built by human hands.
The Tower of Babil, also known as the Tower of Bab-il or the Tower of Babel, is a location in Final Fantasy IV. It is a large tower that stretches from the Earth's Underworld to the Overworld. It is used by Golbez to summon the Giant of Babil from the Moon by collecting the Crystals from both worlds and bringing them to the tower.
Summoning the Giant dooms the world. Dr. Lugae and Rubicante, the Archfiend of Fire, have made the tower their headquarters. They operate a "Super Cannon," which they use to fight the dwarves of the Underworld. The tower's origin remains unknown, although due to its architecture, technology and connection to the Red Moon, it is likely of Lunarian creation.
Story
Final Fantasy IV
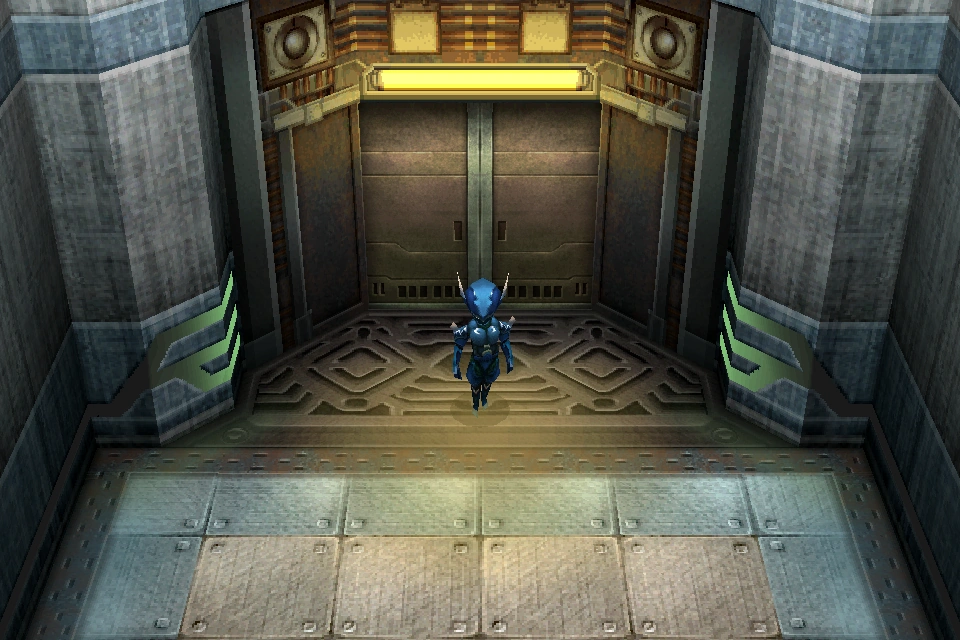

Kain in the Tower of Babil (iOS).
Cecil, Kain, Rydia, Rosa, and Yang sneak into the lower half of the tower to retrieve the Crystals stolen by Golbez. They find Dr. Lugae and Rubicante preparing for war with the Overworld kingdom of Eblan. Rubicante escapes, but Cecil and his friends fight Dr. Lugae and his robotic son Barnabas.
After defeating them, they obtain the key to stopping the Super Cannon. They stop it, but Yang locks himself in the room and presumably perishes in the following explosion. During the escape from the tower, Golbez tries to make the bridge leading to it collapse from afar, but Cecil's party is saved by Cid in the newly reinforced Enterprise.

The Tower in a cutscene (DS).
After another series of events, Cecil and his party meet Edge and arrive at the upper half of the Tower of Babil where they meet the King and Queen of Eblan turned into monsters by Lugae. Edge helps them return to their senses, and they are killed. Rubicante appears, and Edge loses control. Cecil and his friends defeat Rubicante and find the room with the Crystals but fall into a pitfall, leading back underground where they find an abandoned Red Wings airship. Edge christens the airship the Falcon and the party uses it to escape the tower.
Once Golbez acquires all the Crystals, the Tower of Babil becomes shielded and no longer accessible. Cecil, Rydia, Rosa, and Edge, along with the Lunarian Fusoya, arrive to deactivate the shield, but are too late. The Giant of Babil emerges, and must be destroyed. Afterward, the Tower cannot be entered at all.
Final Fantasy IV -Interlude-
After rescuing Rydia from the Sealed Cave, Cecil, Palom and Porom head to the Tower of Babil's underground area. The tower glows mysteriously and Rydia speaks only of traveling to it. Meanwhile Edge explores the upper area on the surface, having seen the same glow. As Cecil and his comrades climb the tower, they battle elemental monsters that bestow Rydia her elemental Eidolons Ramuh, Shiva, Ifrit and Titan. Rydia disappears and three Android Soldiers attack Cecil and the twins, merging into the Deus Ex Machina. Edge saves them and they continue up the tower. At the top they find Rydia, but Edge recognizes her as a fake.
Now known as Rydia?, the imposter summons her elemental Eidolons to attack the group, followed by Bahamut. The real Rydia arrives and returns Bahamut to his senses, forcing the imposter to fight the group herself with Black Magic. Defeated, the imposter fades and reports to an unseen entity that the "Eidolon system" is complete.
Final Fantasy IV: The After Years

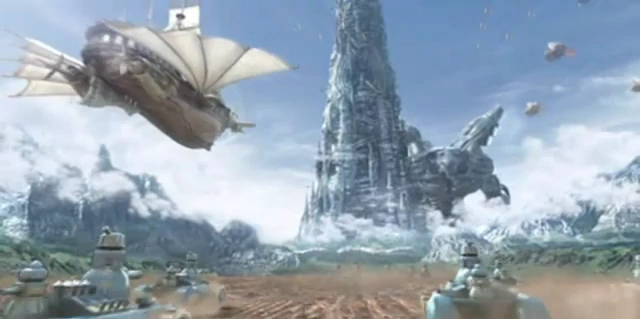
The Tower of Babil.
Edge and the Eblan Four head to the pulsating Tower of Babil. Upon reaching the inners of the tower, Edge and the ninjas encounter the Mysterious Girl who summons Ifrit after them. The ninjas escape onto the airship Rydia and Luca are using.
Locations
Lower half
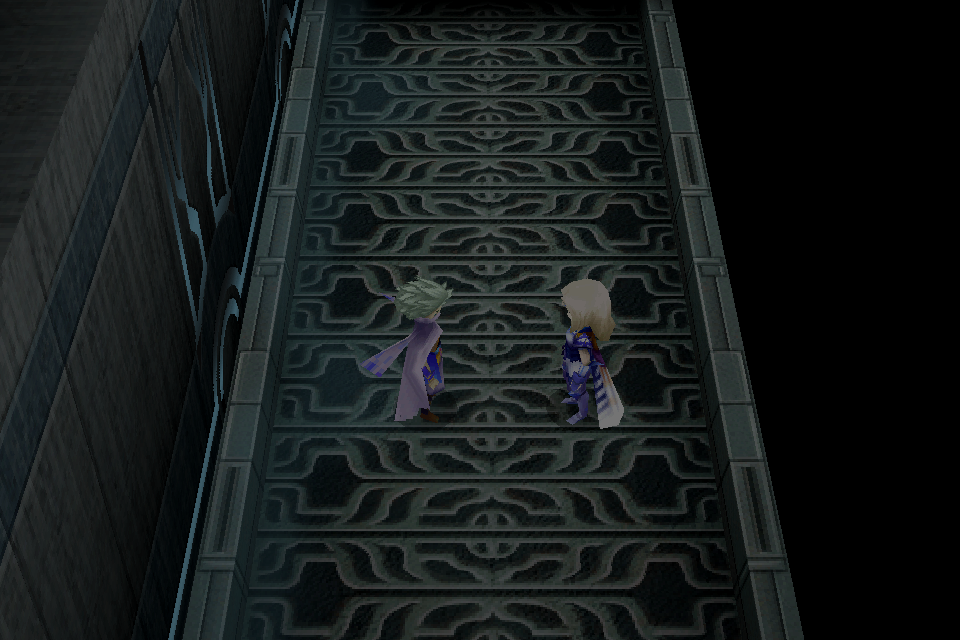

Edge teleports.
- B1
The tower's entrance is accessible only through Ninjutsu. Edge, the last addition to the party in Final Fantasy IV, warps them to start the climb, getting through the invisible barrier.

The nonfunctional warper.
- B6
In this floor, Dr. Lugae is seeing Rubicante off, who is using the warper. The party encounters Dr. Lugae and Barnabas, whom they must fight. When they win, they will obtain Lugae's Key. Afterwards, the teleporter may be examined, and if prompted, will inform the player it is not working.

The party arrives in the control room.
- B9
After obtaining Lugae's Key back in B6, the party must use it to open the locked door, which is the second exit in the map. It is the cannon control room. The party will encounter three Goblin Captains controlling the cannons, and when the party defeats them, they destroy the cannons' controls. Yang stays behind to save the dwarves, but fails and is assumed dead until he is found in the Sylph Cave.
Upper half
- B5
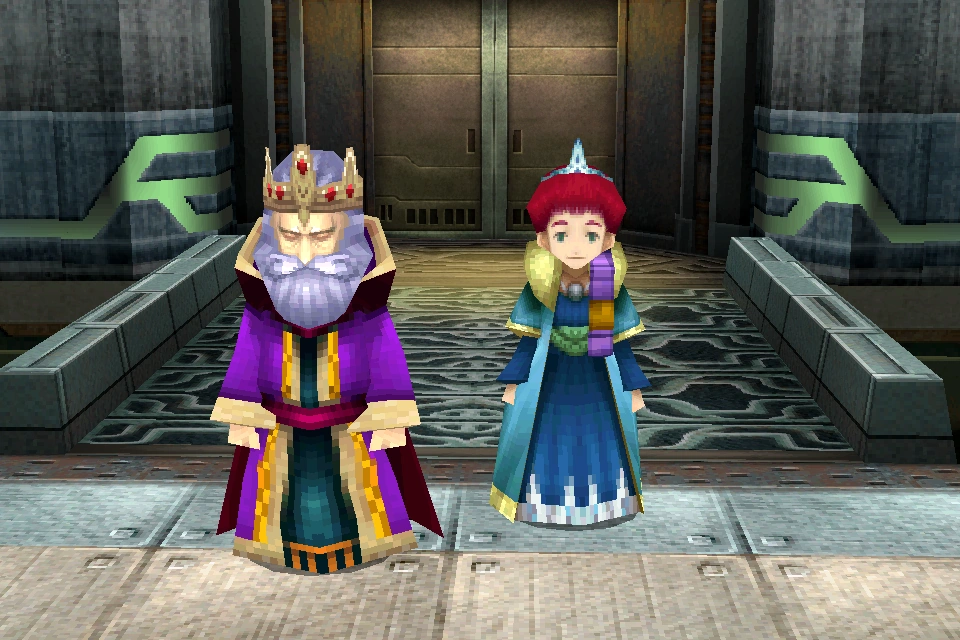
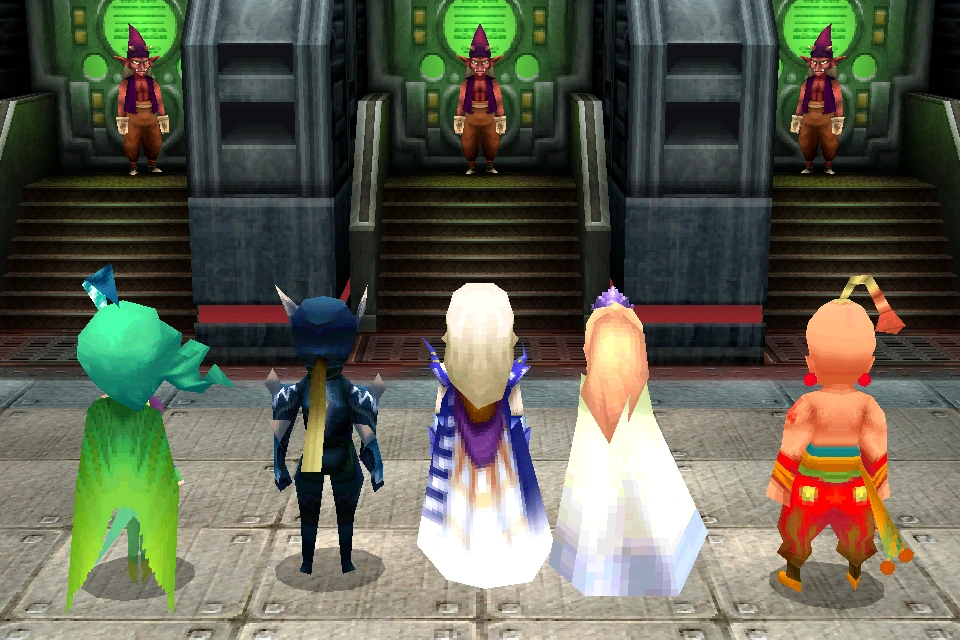
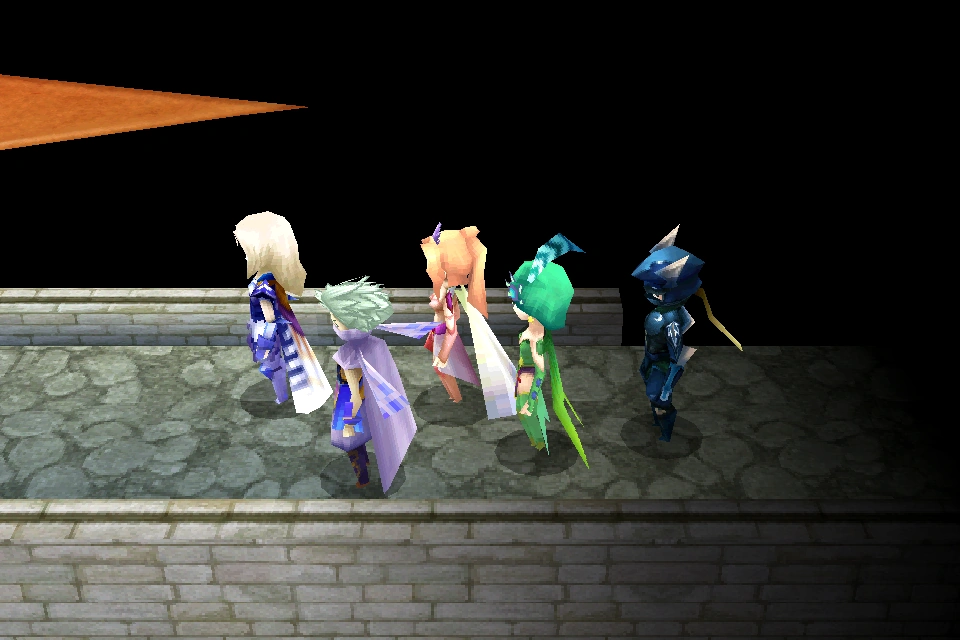
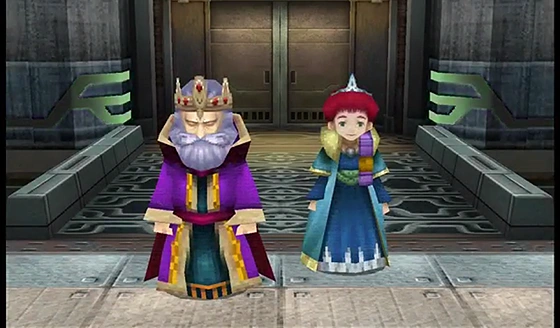
The King and Queen of Eblan confront Edge.
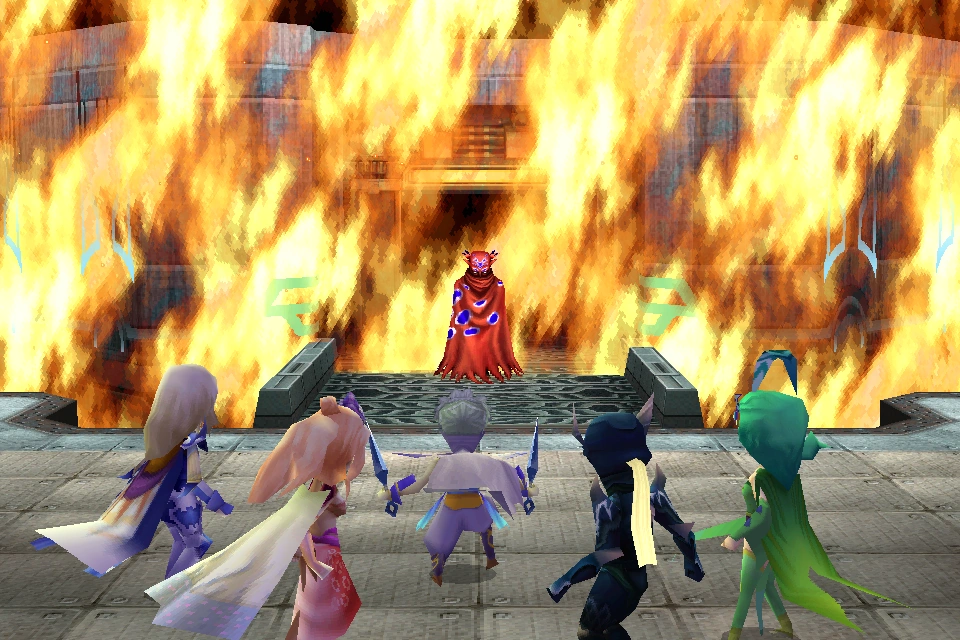
Rubicante challenges the party.
It is the floor where the King and Queen of Eblan, Edge's lost parents, appear. They tell Edge to come with them "to hell", and the player must fight them as Lugae has turned them into chimeras. It is a scripted battle and the second phase is unwinnable, as the royal couple decimate their inhuman selves while they are still lucid.
As Edge mourns his parents' death, Rubicante appears before them. Edge falsely accuses him of experimenting with his parents, and the party must face him. After Rubicante is defeated, he will congratulate the party and compliments them, saying that Golbez will see them as worthy opponents. Edge's Seneschal, along with two ninjas, arrive, searching for Rubicante, but Edge tells them that the job is finished. Seneschal thanks the party and asks them to take care of Edge.
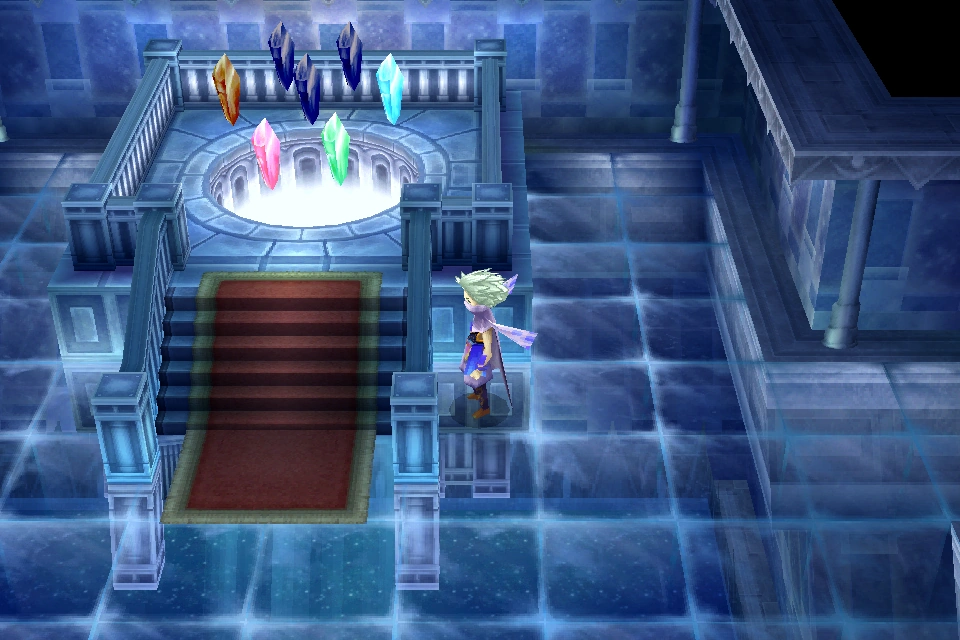

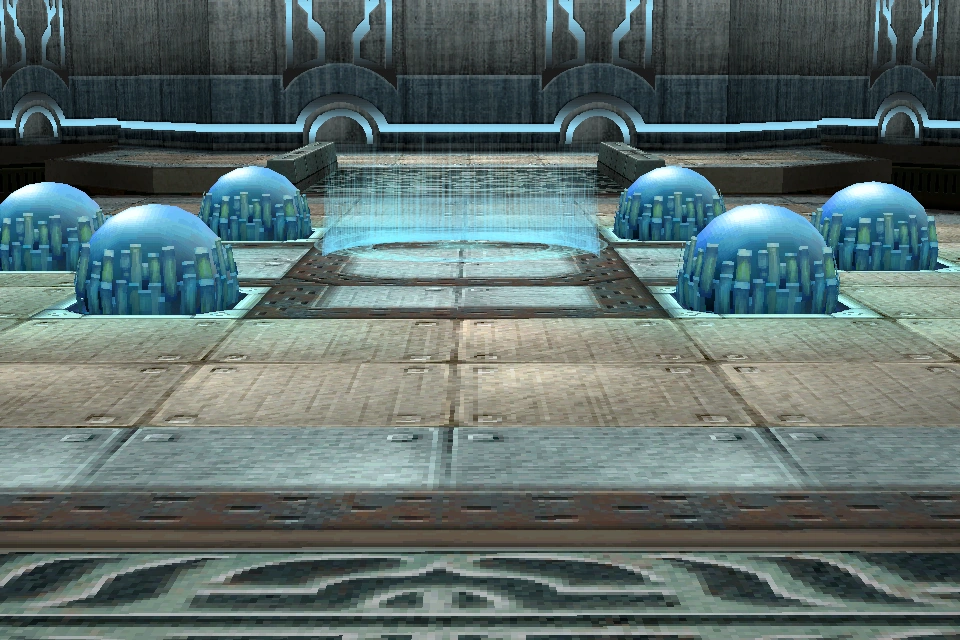
The earth's eight crystals, minus one dark crystal.
- Crystal Room
It is the room next to B5, and holds all of Earth's seven Crystals. As Cecil and the party approach to take them, they are caught in a trap and fall to a subterranean level of the tower. This is a large crystal room where all the Crystals stolen by Golbez are kept contains eight chambers for them, the top-most one of which is empty. While this makes sense, as Golbez lacks the final Crystal, the player never sees the empty chamber or the rest of the room beyond the entrance, as Cecil triggers a hidden pitfall and drops into the lower section of the tower upon entering. There is also a doorway at the back of the room leading to a short dead-end hallway, but the player normally can never reach or even see it.
In the 3D release of Final Fantasy IV, this room is smaller and has only one chamber where all seven Crystals are kept together. As the chamber lies at the back of the room where the door ought to be, and the map for the floor is completed without showing it, the hallway in the back of the floor is likely removed in this version.

The exit leading to the airship.
- B8
It is an unrevisitable portion of the floor. Once the player has taken the west exit, the entire tower will be unrevisitable. The exit will lead to a room with a Red Wings airship. The party will use it to escape, and regroup back in the Dwarven Castle.
Items
Final Fantasy IV
- 2D versions
- 2,000 accumulated gil
- Hi-Potion x2
- Ether
- Hi-Ether
- Phoenix Down x2
- CatClaw
- Archer Bow
- Ice Arrows x20
- Bandana
- Icebrand (Monster-in-a-box: Security Eye)
- Ice Lance (Monster-in-a-box: Security Eye)
- Ice Shield (Monster-in-a-box: Security Eye)
- Ice Armor (Monster-in-a-box: Security Eye)
- 84,000 accumulated gil
- Mega-Potion x2
- Ashura
- Ogrekiller (Monster-in-a-box: Mad Ogre x4)
- Hi-Potion x2
- 3D versions
- Emergency Exit
- Ether
- Hi-Potion x4
- Green Beret
- Icebrand (Monster-in-a-box: Security Eye)
- Ice Lance (Monster-in-a-box: Security Eye)
- Cat Claws
- Antarctic Wind
- Killer Bow
- Phoenix Down
- Ice Armor (Monster-in-a-box: Security Eye)
- Ice Shield (Monster-in-a-box: Security Eye)
- Arctic Wind
- Dry Ether
- Silver Hourglass
- Unicorn Horn
- Ogrekiller (Monster-in-a-box: Mad Ogre x3)
- Lilith's Kiss
- Ashura
- 10000 gil
- Map completion: Antarctic Wind x5, Arctic Wind x3, White Fang, Hi-Potion x5, Remedy x5, Bomb Fragment x5, Bomb Crank x3, Red Fang x1, X-Potion x3, Elixir x1, Elixir x1, Ether x2
Final Fantasy IV -Interlude-
- Ether
- X-Potion
- Giant's Gloves
- Phoenix Down
- Antarctic Wind
- Potion
- Arctic Wind
- Hi-Potion x2
- Dry Ether
- Ice Arrows x20
- Green Beret
- Kiku-ichimonji
- Killer Bow
- Aegis Shield
- Ribbon
Final Fantasy IV: The After Years
- Upper Section
- Lower Passage
Enemies
Final Fantasy IV
- 2D versions
- Marionetteer, Evil Doll x2
- Marionetteer, Evil Doll x3
- Magma Tortoise, Goblin Captain x2
- Goblin Captain x3
- Goblin Captain x4
- Magma Tortoise x2, Black Lizard x2
- Black Lizard x3
- Flame Knight, Flamehound x2
- Flamehound x3
- Flame Knight x2
- Chimera, Flame Knight x2
- Chimera
- Chimera, White Mousse x3
- Chimera x2
- Security Eye
- Stone Golem, Medusa
- Mystery Egg (Hatches into Black Lizard)
- White Mousse x6
- Dr. Lugae, Barnabas, Barnabas-Z (Boss)
- Dr. Lugae (Boss)
- Balloon x3
- Balloon x4
- Coeurl x2
- Coeurl x3
- Mad Ogre, Coeurl x2
- Mad Ogre x2
- Mad Ogre, Coeurl, Balloon x2
- Ghost Knight x3
- Sorcerer, Ghost Knight x2
- Storm Anima x2
- Storm Anima, Naga x2
- Storm Anima, Balloon x3
- Mystery Egg (Hatches into Green Dragon)
- Mystery Egg (Hatches into Lamia)
- Lamia, Coeurl x2
- Lamia x2, Coeurl x2
- Lamia, Coeurl, Mad Ogre
- Mad Ogre x4 (Monster-in-a-box)
- King Eblan, Queen Eblan (Boss)
- Rubicante (Boss)
- Sorcerer, Coeurl x2
- Storm Anima, Ghost Knight x2
- Storm Anima, Ghost Knight, Coeurl x2
- Mythril Golem
- Mythril Golem x2
- Mythril Golem, Coeurl x2
- Mythril Golem, Ghost Knight x2
- Lamia Matriarch, Mystery Egg x2 (Hatches into Lamia or Coeurl)
- Green Dragon
- 3D versions
- Flamehound x3
- Flamehound x2, Black Lizard x1
- Flamehound x1
- Goblin Captain x3
- Security Eye x1 (Monster-in-a-box)
- Black Lizard x3
- Armadillo x3
- Magma Tortoise x1
- Goblin Captain x4
- Chimera x1
- Flamehound x2, Flame Knight x1
- White Mousse x3
- Marionetteer x1, Evil Doll x2
- Mystery Egg x1 (Hatches into Black Lizard)
- Naga x2
- Medusa x2
- Medusa x1, Naga x1
- Stone Golem x2, Mythril Golem x1
- Stone Golem x1, Medusa x1
- Chimera x2
- Chimera x1, Flame Knight x2
- Mystery Egg (Hatches into Green Dragon)
- Stone Golem x2
- Stone Golem x1, Skuldier x2
- Stone Golem x1, Skuldier x1, Leshy x1
- Stone Golem x1
- Blood Bat x4
- Ironback x2
- Ironback x1, Armadillo x1, Black Lizard x1
- Skuldier x3, Leshy x1
- Skuldier x3
- Dr. Lugae, Barnabas, Barnabas-Z (boss)
- Dr. Lugae (boss)
- Sorcerer x1, Ghost Knight x1, Coeurl x1
- Sorcerer x1, Coeurl x2
- Mythril Golem x1, Ghost Knight x2
- Lamia x1, Coeurl x2
- Coeurl x2
- Mad Ogre x3 (monster-in-a-box)
- Mad Ogre x1, Coeurl x1, Balloon x1
- Mad Ogre x2, Sorcerer x1
- Mad Ogre x2, Coeurl x1
- Lamia x1, Coeurl x1, Sorcerer x1
- Lamia Matriarch x1
- Storm Anima x1, Balloon x3
- Balloon x3
- Mad Ogre x1, Lamia x1
- Green Dragon x1
- Storm Anima x2, Ghost Knight x2
- Storm Anima x2, Ghost Knight x1
- Storm Anima x2
- Storm Anima x2, Lamia x1
- Storm Anima x1, Balloon x1, Mad Ogre x1
- Ghost Knight x1, Coeurl x1, Lamia Matriarch x1
- Ghost Knight x1, Coeurl x1, Storm Anima x1
- Ghost Knight x1, Coeurl x1, Balloon x1
- King Eblan, Queen Eblan (Boss)
- Rubicante (boss)
Final Fantasy IV -Interlude-
- Upper Section
- Cait Sith x2
- Gray Bomb x3
- Gray Bomb x4
- Marionetteer, Black Knight
- Lilith
- Ogre x2
- Gigas Gator
- Lower Section
- Black Lizard x2
- Black Lizard x3
- Goblin Captain x2, Magma Tortoise
- Goblin Captain x4
- Marionetteer, Evil Doll x2
- Marionetteer, Evil Doll x3
- Flamehound x2
- Frostbeast x3
- Mystery Egg (Hatches into Black Lizard)
- Ghost Knight, Frostbeast x2
- Frostbeast x2, Flamehound x2
- Flamehound x2, Flame Knight x2
- Black Lizard, Ice Lizard x2
- Black Lizard, Magna Tortoise x2
- Ice Lizard x2, Magna Tortoise x2
- Chimera Brain
- Chimera Brain, Chimera
- Chimera, White Mousse x3
- Chimera, Flame Knight, Ghost Knight
- Chimera, Flamehound, Frostbeast
- Flame Knight, Chimera
- White Mousse x3, Purple Bavarois x3
- Medusa x2
- Security Eye
- Mythril Golem, Medusa
- White Mousse x3, Black Flan
- Frostbeast (Boss)
- Green Dragon (Boss)
- Flamehound (Boss)
- Tunneler (Boss)
- Android Soldier x3 (Boss)
- Deus Ex Machina (Boss)
- Shiva (Boss)
- Ramuh (Boss)
- Ifrit (Boss)
- Titan (Boss)
- Bahamut (Boss)
- Rydia? (Final Boss)
Final Fantasy IV: The After Years
Upper section
- B1F
- Proto Beam Cannon x2, Domovoi x2
- Proto Beam Cannon x2, Proto Clockwork
- Proto Clockwork, Proto Beam Cannon, Gatlinghog x2
- Spirit x3, Soul
- Proto Clockwork x2
- Proto Beam Cannon x2
- Soul x2
- Gray Bomb x4
- Belphegor x2 (Event)
- Flamehound x2 (Event)
- B2F
- Proto Clockwork x2
- Proto Clockwork, Proto Beam Cannon, Domovoi, Lilith
- Proto Beam Cannon x2, Proto Clockwork
- Spirit x3, Soul
- Gray Bomb x4
- Soul x2
- Soul x2
- Proto Beam Cannon x3
- Proto Clockwork x3 (Event)
- Frostbeast x2 (Event)
- B3F
- B4F
- B5F
- Purple Bavarois x2, Black Lizard
- Goblin Captain, Sorceress, Centaur Knight
- Armadillo x2
- Purple Bavarois x4
- Magma Tortoise, Black Lizard
- Goblin Captain x3
- Blood Bat x3
- Mysterious Girl, Ifrit (Event)
Lower passage
- Ifrit (Cannot be won)
Musical themes
The background music inside the Tower of Babil is its eponymous theme.
Other appearances
Final Fantasy Tactics

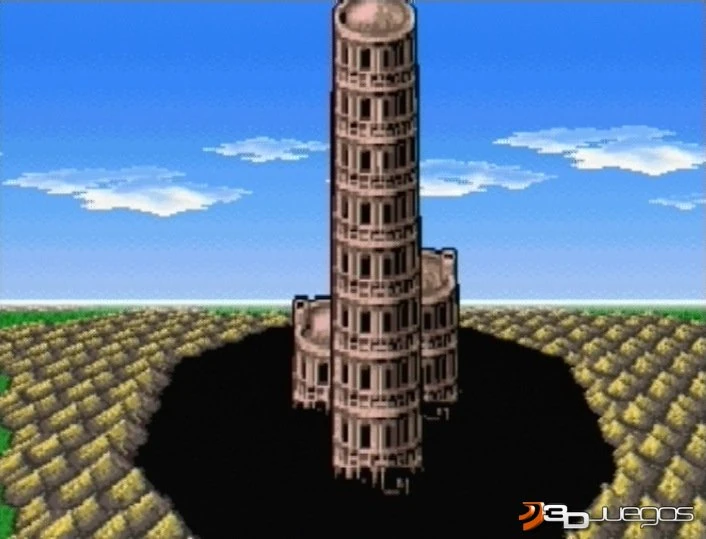
The Tower of Babel.
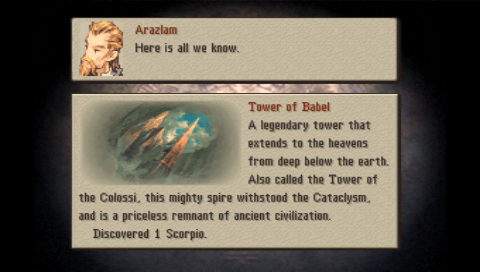
The Tower of Babel is mentioned as one of the wonders. It bears the following description:
A legendary tower that extends to the heavens from deep below the earth. Also called the Tower of the Colossi, this mighty spire withstood the Cataclysm, and is a priceless remnant of ancient civilization.
Final Fantasy Dimensions II


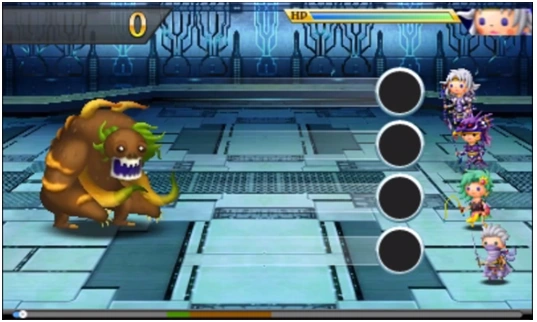
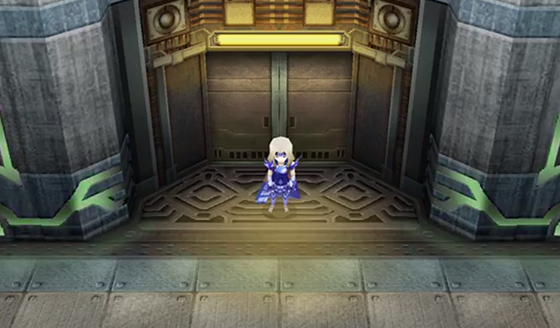
The Tower of Babil.
The Tower of Babil was a massive dungeon, where players would face off against many hoards of monsters to ascend to the next level of the tower. For completing each set of encounters, players earned components for upgrading their Signet.
A remix of the tower's theme from Final Fantasy IV served as the dungeon's battle music.
")
Theatrhythm Final Fantasy

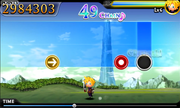
The Tower of Babil in the background of a FMS stage.
The Tower of Babil appears in the Field Music Sequence for the "Main Theme of FINAL FANTASY IV". The inside of the tower appears as the BMS for Battle With the Four Fiends.
Theatrhythm Final Fantasy Curtain Call

The Tower of Babil.
The Tower of Babil returns in both Music Sequences.
Final Fantasy Airborne Brigade
")
Final Fantasy Record Keeper
Tower of Babil - Depths

Painting image.
With three Dark Crystals already in his possession, Golbez now aims to take the fourth and final Crystal. The party seizes this opportunity to make an assault on the Tower of Babil and retrieve the stolen Crystals.
- Difficulty
- 26 (Classic)
- 50 (Elite)
- Layout
- Tower of Babil - 13th Level
- Stamina: 5 (Classic), 9 (Elite)
- Rounds: 2
- Tower of Babil - 12th Level
- Stamina: 5 (Classic), 9 (Elite)
- Rounds: 2
- Tower of Babil - 11th Level
- Stamina: 5 (Classic), 9 (Elite)
- Rounds: 3
- Tower of Babil - 10th Level
- Stamina: 5 (Classic), 9 (Elite)
- Rounds: 2
- Tower of Babil - 9th Level
- Stamina: 5 (Classic), 9 (Elite)
- Rounds: 2
- Tower of Babil - 8th Level
- Stamina: 5 (Classic), 9 (Elite)
- Rounds: 2
- Tower of Babil - 7th Level
- Boss Battle
- Stamina: 6 (Classic), 10 (Elite)
- Rounds: 1
- Tower of Babil - 6th Level
- Boss Battle
- Stamina: 6 (Classic), 10 (Elite)
- Rounds: 1
- Enemies
- Black Knight*May appear in any normal battles
- Medusa*May appear in any normal battles
- Purple Bavarois*May appear in any normal battles
- Soldieress*May appear in any normal battles
- Bosses
- Lugae*Tower of Babil - 7th Level
- Barnabas*Tower of Babil - 7th Level
- Barnabas-Z*If Barnabas is defeated before Lugae
- Lugaeborg*Tower of Babil - 7th Level
- Boss Target Score
- Lugae & Barnabas
- Exploit Barnabas's weakness to lightning attacks.
- Defeat Barnabas before he self-destructs.
- Lugaeborg
- Exploit Lugaeborg's weakness to lightning attacks.
- Classic Rewards
| Completion Type | Item | Quantity |
|---|---|---|
| First Time Completion | Mythril | 1 |
| Stamina Shard | 1 | |
| Completion Reward | Gil | 2,000 |
| Mastery Reward | Lesser Holy Orb | 5 |
| Stamina Shard | 2 |
- Elite Rewards
| Completion Type | Item | Quantity |
|---|---|---|
| First Time Completion | Mythril | 1 |
| Completion Reward | Gil | 12,000 |
| Mastery Reward | Greater White Orb | 3 |
Tower of Babil - Heights

Painting image.
In order to retrieve the Crystal, Edge joins Cecil's party as they make their way into the Overworld half of the Tower of Babil.
- Difficulty
- 27 (Classic)
- 55 (Elite)
- Layout
- Tower of Babil - 1st Level
- Stamina: 5 (Classic), 9 (Elite)
- Rounds: 2
- Tower of Babil - 2nd Level
- Stamina: 5 (Classic), 9 (Elite)
- Rounds: 2
- Tower of Babil - 3rd Level
- Stamina: 5 (Classic), 9 (Elite)
- Rounds: 3
- Tower of Babil - 4th Level
- Stamina: 5 (Classic), 9 (Elite)
- Rounds: 2
- Tower of Babil - 5th Level
- Stamina: 5 (Classic), 9 (Elite)
- Rounds: 2
- Tower of Babil - 6th Level
- Boss Level
- Stamina: 6 (Classic), 10 (Elite)
- Rounds: 1
- Tower of Babil - 7th Level
- Stamina: 5 (Classic), 9 (Elite)
- Rounds: 2
- Tower of Babil - 8th Level
- Boss Battle
- Stamina: 6 (Classic), 10 (Elite)
- Rounds: 1
- Enemies
- Coeurl*May appear in any normal battles
- Medusa*May appear in any normal battles
- Purple Bavarois*May appear in any normal battles
- Steel Golem*May appear in any normal battles
- Bosses
- King of Eblan*Tower of Babil - 6th Level
- Queen of Eblan*Tower of Babil - 6th Level
- Rubicante*Tower of Babil - 8th Level
- Boss Target Score
- King & Queen of Eblan
- Defeat the King of Eblan without being KO'd.
- Rubicante
- Classic Rewards
| Completion Type | Item | Quantity |
|---|---|---|
| First Time Completion | Mythril | 1 |
| Stamina Shard | 1 | |
| Completion Reward | Gil | 2,000 |
| Mastery Reward | Lesser Power Orb | 5 |
| Stamina Shard | 2 |
- Elite Rewards
| Completion Type | Item | Quantity |
|---|---|---|
| First Time Completion | Mythril | 1 |
| Stamina Shard | 1 | |
| Completion Reward | Gil | 12,000 |
| Mastery Reward | Greater Power Orb | 3 |
| Stamina Shard | 1 |
Gallery
")
")
")
")
")
")
")
")
")
")
")
")
")
")
")
")
")
")
")
")
")
Etymology
The Tower of Babil is named for the Tower of Babel. The Tower of Babel is from a story from the Book of Genesis in the Hebrew Scriptures/Old Testament/Torah, as well as other various ancient documents. The story tells of how early humanity began construction on a great tower that would extend to the heavens. However, God determined "nothing that they propose to do will now be impossible for them" so confused their language and scattered them over the face of all earth, leaving the tower and its city abandoned.
Trivia
- In the European Nintendo DS remake, Rubicante refers to the Crystals as being on the top floor of the tower, but when the party enters it through the Eblan Cave, they go down underground levels instead of going up. As such, when the pitfall opens under their feet, they only fall two floors at most.