(I wouldn't say so. Besides it's an opinion.) |
(→Minigames: added tower calibration minigame) |
||
| Line 195: | Line 195: | ||
==Minigames== |
==Minigames== |
||
| − | + | ===Lightning Dodge (''Final Fantasy X'')=== |
|
{|class="table" width="30%" |
{|class="table" width="30%" |
||
|- |
|- |
||
| Line 222: | Line 222: | ||
|[[List of Final Fantasy X Items#Venus Sigil|Venus Sigil]] |
|[[List of Final Fantasy X Items#Venus Sigil|Venus Sigil]] |
||
|} |
|} |
||
| + | |||
| − | *'''Tower Recalibration''' (''Final Fantasy X-2'') |
||
| − | + | ===Tower Recalibration (''Final Fantasy X-2'')=== |
|
| + | The lightning tower calibration minigame can be played in Chapter 2 and 3. To start the player must talk to the Al Bhed Technician by the first tower twice. The player receives prizes in Chapter 5 depending on how many times they calibrated a tower (maximum is 30). Doing this minigame gives no story completion %, nor is playing it needed for an [[Episode Complete]]. |
||
| + | |||
| + | The player has to enter a series of 30 randomly generated commands. The player has three chances per calibration to complete the tower and if they miss more than three times they will have to re-calibrate the tower since the beginning. The number of misses affects nothing as far as prizes are concerned. Once the player has successfully calibrated the whole tower the player can re-do it, but if the player already did all the 30 sequences once there is no need to do it again. The number of failed calibrations do not affect the player's calibration or prizes. |
||
| + | |||
| + | There are ten towers on the Thunder Plains. The first towers are easier and then it gets gradually harder. |
||
| + | |||
| + | '''How to play'''<br> |
||
| + | Rikku plays the "Appear and Disappear Calibration" where buttons temporarily appear on the screen and the player must press the combination on the screen to complete the sequence. If the player isn't fast enough they will miss. Rikku's towers are Towers #1, #4 and #7. In the first tower the button sequence appears in the middle of the player's screen, but in the others they appear in random locations around the player's field of vision. In the first tower the only buttons are the {{PS X symbol}}, {{PS O symbol}}, {{PS Square symbol}} and {{PS Triangle symbol}}, but Tower #4 adds the D-pad and Tower #7 adds {{PS R1 button}} and {{PS R2 button}} and the player must press two buttons simultaneously. The button sequences start slow but get faster toward the end. On Tower #7, after the 25th sequence, the commands appear onscreen for only 1.5 seconds. |
||
| + | |||
| + | Paine plays the "Avalanche Calibration" where the commands fall down in three rows |
||
| + | from top to bottom. There is a halfway mark where a command will flash and the player must press the button that flashed before the rows fall to the bottom. If the commands hits the bottom, or the player pressed the wrong button, it will be a miss. The speed will increase further into the calibration. Paine's towers are #2, #5 and #8. Tower #2 uses the {{PS X symbol}}, {{PS O symbol}}, {{PS Square symbol}} and {{PS Triangle symbol}} and the D-pad, and Tower #5 and #8 add {{PS R1 button}} and {{PS R2 button}}. |
||
| + | |||
| + | Yuna plays the "Forgotten Memories Calibration" where the player must remember the button sequences shown onscreen consisting of two phases: a Memory Phase, and an Input Phase. In the Memory Phase the commands appear once onscreen, then disappear while the new command appears. The player must remember the commands listed |
||
| + | in the sequence. The speed and number of commands will increase. In the Input phase the player has to input the commands that appeared in the Memory Phase. There is a time limit. If the player inputs the wrong command, or takes too long, it will be a miss. Yuna's towers are #3, #6, #9 and #10. In Towers #3 and #6 the number of commands in Memory Phase starts at two and increases into three an then four for the latter stages of calibration. In Tower #9 the number increases to five in the latter stages, and in Tower #10 to six. Tower #3 uses the {{PS X symbol}}, {{PS O symbol}}, {{PS Square symbol}} and {{PS Triangle symbol}} buttons, Tower #6 adds the D-pad, Tower #9 adds {{PS R1 button}} and {{PS R2 button}} and Tower #10 adds {{PS R2 button}} and {{PS L2 button}}. For a tip, the player can place their fingers on the buttons as they appear in the Memory Phase to better remember them for the Input Phase. Tower #10 is different because it is played in reverse. The easiest way to complete this tower is to use someone else to assist in memory and write down the commands that appear. The player can also write down the commands themselves if they're quick enough to pick the controller back up, or can hold the controller in one hand while using the other hand to write the commands down. Another way is to repeat the sequences out loud as they appear to help remember them better. |
||
| + | |||
| + | '''The Prizes'''<br> |
||
| + | The player receives the [[Garment Grid#Samurai's Honor|Samurai's Honor]] Garment Grid for completing all the towers. At least five of them must be calibrated the full 30 times. Misses do not affect anything. |
||
| + | |||
| + | For the individual towers the player can find a prize in a treasure chest that appears after defeating a fiend at each tower in Chapter 5. Each prize varies on the tower and the number of times they calibrated it. |
||
| + | |||
| + | {|class="full-width table" |
||
| + | |-class="X-2a" |
||
| + | !Tower |
||
| + | !0 - 5 |
||
| + | !6 - 14 |
||
| + | !15 - 24 |
||
| + | !25 - 29 |
||
| + | !30 |
||
| + | |- |
||
| + | !class="X-2b"|Tower #1 |
||
| + | |[[Ether]] |
||
| + | |[[Ether]] x2 |
||
| + | |[[Turbo Ether]] |
||
| + | |[[Turbo Ether]] x2 |
||
| + | |[[Elixir (Item)|Elixir]] |
||
| + | |- |
||
| + | !class="X-2b"|Tower #2 |
||
| + | |[[X-Potion]] |
||
| + | |[[Mega Potion]] x2 |
||
| + | |[[Elixir (Item)|Elixir]] |
||
| + | |[[Elixir (Item)|Elixir]] |
||
| + | |[[Megalixir]] |
||
| + | |- |
||
| + | !class="X-2b"|Tower #3 |
||
| + | |[[Mega Phoenix]] |
||
| + | |[[Mega Phoenix]] |
||
| + | |[[Elixir (Item)|Elixir]] |
||
| + | |[[Elixir (Item)|Elixir]] |
||
| + | |[[Megalixir]] |
||
| + | |- |
||
| + | !class="X-2b"|Tower #4 |
||
| + | |[[List of Final Fantasy X-2 Accessories#Power Wrist|Power Wrist]] |
||
| + | |[[List of Final Fantasy X-2 Accessories#Black Belt|Black Belt]] |
||
| + | |[[List of Final Fantasy X-2 Accessories#Hyper Wrist|Hyper Wrist]] |
||
| + | |[[List of Final Fantasy X-2 Accessories#Power Glove|Power Glove]] |
||
| + | |[[List of Final Fantasy X-2 Accessories#Champion Belt|Champion Belt]] |
||
| + | |- |
||
| + | !class="X-2b"|Tower #5 |
||
| + | |[[List of Final Fantasy X-2 Accessories#Silver Bracer|Silver Bracer]] |
||
| + | |[[List of Final Fantasy X-2 Accessories#Hypno Crown|Hypno Crown]] |
||
| + | |[[List of Final Fantasy X-2 Accessories#Gold Bracer|Gold Bracer]] |
||
| + | |[[List of Final Fantasy X-2 Accessories#Pixie Dust|Pixie Dust]] |
||
| + | |[[List of Final Fantasy X-2 Accessories#Regal Crown|Regal Crown]] |
||
| + | |- |
||
| + | !class="X-2b"|Tower #6 |
||
| + | |[[List of Final Fantasy X-2 Accessories#Yellow Ring|Yellow Ring]] |
||
| + | |[[List of Final Fantasy X-2 Accessories#Lightning Gleam|Lightning Gleam]] |
||
| + | |[[List of Final Fantasy X-2 Accessories#NulShock Ring|NulShock Ring]] |
||
| + | |[[List of Final Fantasy X-2 Accessories#Ochre Ring|Ochre Ring]] |
||
| + | |[[List of Final Fantasy X-2 Accessories#Electrocutioner|Electrocutioner]] |
||
| + | |- |
||
| + | !class="X-2b"|Tower #7 |
||
| + | |[[List of Final Fantasy X-2 Accessories#Blue Ring|Blue Ring]] |
||
| + | |[[List of Final Fantasy X-2 Accessories#Watery Gleam|Watery Gleam]] |
||
| + | |[[List of Final Fantasy X-2 Accessories#NulTide Ring|NulTide Ring]] |
||
| + | |[[List of Final Fantasy X-2 Accessories#Cerulean Ring|Cerulean Ring]] |
||
| + | |[[List of Final Fantasy X-2 Accessories#Short Circuit|Short Circuit]] |
||
| + | |- |
||
| + | !class="X-2b"|Tower #8 |
||
| + | |[[List of Final Fantasy X-2 Accessories#Red Ring|Red Ring]] |
||
| + | |[[List of Final Fantasy X-2 Accessories#Fiery Gleam|Fiery Gleam]] |
||
| + | |[[List of Final Fantasy X-2 Accessories#NulBlaze Ring|NulBlaze Ring]] |
||
| + | |[[List of Final Fantasy X-2 Accessories#Crimson Ring|Crimson Ring]] |
||
| + | |[[List of Final Fantasy X-2 Accessories#Freezerburn|Freezerburn]] |
||
| + | |- |
||
| + | !class="X-2b"|Tower #9 |
||
| + | |[[List of Final Fantasy X-2 Accessories#White Ring|White Ring]] |
||
| + | |[[List of Final Fantasy X-2 Accessories#Icy Gleam|Icy Gleam]] |
||
| + | |[[List of Final Fantasy X-2 Accessories#NulFrost Ring|NulFrost Ring]] |
||
| + | |[[List of Final Fantasy X-2 Accessories#Snow Ring|Snow Ring]] |
||
| + | |[[List of Final Fantasy X-2 Accessories#Sublimator|Sublimator]] |
||
| + | |- |
||
| + | !class="X-2b"|Tower #10 |
||
| + | |[[List of Final Fantasy X-2 Accessories#Tetra Band|Tetra Band]] |
||
| + | |[[List of Final Fantasy X-2 Accessories#Tetra Gloves|Tetra Gloves]] |
||
| + | |[[List of Final Fantasy X-2 Accessories#Tetra Guard|Tetra Guard]] |
||
| + | |[[List of Final Fantasy X-2 Accessories#Tetra Bracelet|Tetra Bracelet]] |
||
| + | |[[Ribbon]] |
||
| + | |} |
||
==''Final Fantasy X-2'' [[Missions (Final Fantasy X-2)|Missions]]== |
==''Final Fantasy X-2'' [[Missions (Final Fantasy X-2)|Missions]]== |
||
Revision as of 16:41, 25 December 2012
Thunder Plains in-game.
Plains of lightning, plains of thunder, those who cross are torn asunder.
Maechen
This lightning never stops, best to keep going.
Auron
The (Thunder Plains, 雷平原?, lit. Kaminari-heigen), also known as the Gandof Thunder Plains, is a long open barren landscape connecting Guadosalam to Macalania Woods in Final Fantasy X and Final Fantasy X-2. It is constantly bombarded by lightning and thunder.
Long ago, the plains were a traveler's nightmare, until an Al Bhed named Bilghen set up several towers to serve as lightning rods. Ironically, he was in the process of setting up the final tower when he was struck by lightning and killed. In Final Fantasy X the plains are still treacherous, but the towers draw most of the lightning away.
Story
Template:Spoilers
Final Fantasy X
Rikku being scared of lightning.
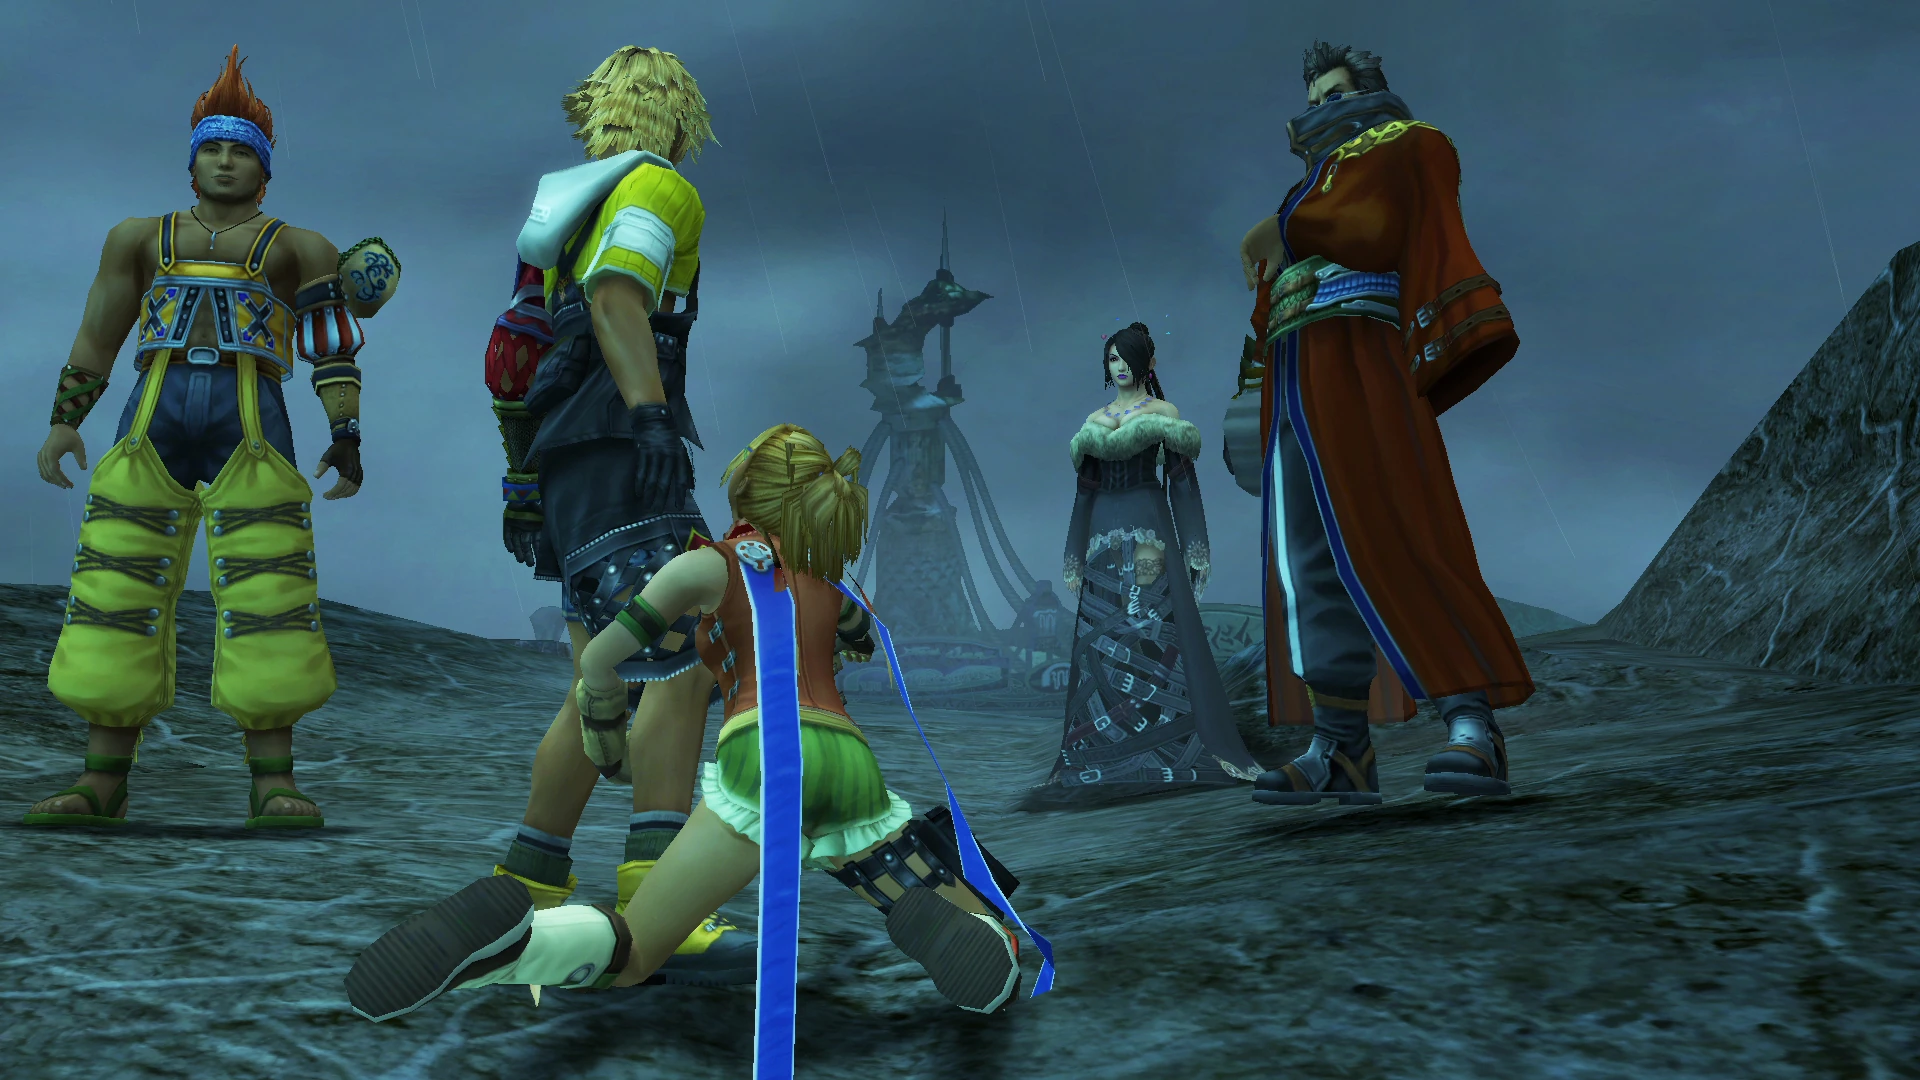
Rikku is reluctant to pass the plains due to a severe case of astraphobia, eventually becoming so terrified she collapses on the ground and seizes Tidus by the leg. The party travels across the plains on Yuna's pilgrimage to Zanarkand and camp at the Travel Agency during their journey, where Yuna watches the sphere given to her by Jyscal Guado's unsent form, and makes up her mind to marry Seymour.
Affection Mechanics
- Outside the Travel Agency, if Tidus enters the Travel Agency before Auron concedes to Rikku, Rikku's affection value increases by eight.
- Speaking to Rikku inside the Travel Agency before meeting Yuna in her room increases Rikku's affection value by eight.
- After speaking to Rikku inside the Travel Agency, Rin enters the foyer. If Tidus speaks with him, Rin will ask "Would that be Sir Auron by any chance?" Replying "Nope, wrong guy" will increase Auron's affection value by eight.
- As in every other location, when the party is spread out, the one Tidus talks to first gains affection points.
Final Fantasy X-2
Following the start of the Eternal Calm, the Al Bhed have repaired the lightning towers to make the area safe for travelers, although the repairs do not seem to have completely stabilized them.

The clouds parting.
The only recorded time the endless storm across the Thunder Plains ceases is when Yuna sings "1000 Words" on the deck of the Celsius during Final Fantasy X-2. Shortly after the song starts, the rain stops, and by the end, the clouds have parted and the sun shines down on the barren plains. By the time she awakes in the airship's cabin, the storm had resumed.
Episode Complete
In order to get Episode Complete for the Thunder Plains the player must fulfill the following criteria:
- Chapter 1 - Yuna must tell Cid she doesn't agree with him having made Zanarkand into a tourist attraction at the Zanarkand Chamber of the Fayth.
- Chapter 2, 3 – The player must find and speak with Cid on the Thunder Plains.
- Chapter 4 – The player must complete the concert events.
- Chapter 5 - The player must rescue Cid from the cave.
The lightning calibration minigame isn't required for either Episode Complete, nor 100% game completion.
Areas
- Thunder Plains - South
- Thunder Plains Travel Agency
- Thunder Plains - North
Secret Areas
- Note: These are only available in Final Fantasy X-2.
- Thunder Dungeon 2
- New Cave
Template:Sec-stub
Shops
Final Fantasy X
Rin's Travel Agency
| Item | Cost |
|---|---|
| Potion | 50 gil |
| Phoenix Down | 100 gil |
| Antidote | 50 gil |
| Eye Drops | 50 gil |
| Echo Screen | 50 gil |
| Soft | 50 gil |
| Grenade | 300 gil |
| Map | 50 gil |
| Equipment | User | Cost |
|---|---|---|
| Baroque Sword | Tidus | 825 gil |
| Ductile Rod | Yuna | 825 gil |
| Switch Hitter | Wakka | 825 gil |
| Variable Mog | Lulu | 825 gil |
| Halberd | Kimahri | 1,650 gil |
| Shimmering Blade | Auron | 1,650 gil |
| Devastator | Rikku | 825 gil |
| Yellow Shield | Tidus | 2,475 gil |
| Yellow Ring | Yuna | 2,475 gil |
| Yellow Armguard | Wakka | 2,475 gil |
| Yellow Bangle | Lulu | 2,475 gil |
| Yellow Armlet | Kimahri | 2,475 gil |
| Yellow Bracer | Auron | 2,475 gil |
| Yellow Targe | Rikku | 2,475 gil |
Final Fantasy X-2
Chapters 1 - 2
| Item | Cost | Chapters Available |
|---|---|---|
| Potion | 50 | All |
| Hi-Potion | 500 | CH 3+ |
| Phoenix Down | 100 | All |
| Antidote | 50 | All |
| Eye Drops | 50 | All |
| Echo Screen | 50 | All |
| Soft | 50 | All |
| Holy Water | 300 | All |
| Lightning Gleam | 3,000 | All |
| Yellow Ring | 3,000 | All |
| NulShock Ring | 8,000 | All |
Minigames
Lightning Dodge (Final Fantasy X)
| Dodges | Prize |
|---|---|
| 5 | X-Potion x2 |
| 10 | Mega-Potion x2 |
| 20 | MP Sphere x2 |
| 50 | Strength Sphere x3 |
| 100 | HP Sphere x3 |
| 150 | Megalixir x4 |
| 200 | Venus Sigil |
Tower Recalibration (Final Fantasy X-2)
The lightning tower calibration minigame can be played in Chapter 2 and 3. To start the player must talk to the Al Bhed Technician by the first tower twice. The player receives prizes in Chapter 5 depending on how many times they calibrated a tower (maximum is 30). Doing this minigame gives no story completion %, nor is playing it needed for an Episode Complete.
The player has to enter a series of 30 randomly generated commands. The player has three chances per calibration to complete the tower and if they miss more than three times they will have to re-calibrate the tower since the beginning. The number of misses affects nothing as far as prizes are concerned. Once the player has successfully calibrated the whole tower the player can re-do it, but if the player already did all the 30 sequences once there is no need to do it again. The number of failed calibrations do not affect the player's calibration or prizes.
There are ten towers on the Thunder Plains. The first towers are easier and then it gets gradually harder.
How to play
Rikku plays the "Appear and Disappear Calibration" where buttons temporarily appear on the screen and the player must press the combination on the screen to complete the sequence. If the player isn't fast enough they will miss. Rikku's towers are Towers #1, #4 and #7. In the first tower the button sequence appears in the middle of the player's screen, but in the others they appear in random locations around the player's field of vision. In the first tower the only buttons are the Template:PS X symbol, Template:PS O symbol, Template:PS Square symbol and Template:PS Triangle symbol, but Tower #4 adds the D-pad and Tower #7 adds Template:PS R1 button and Template:PS R2 button and the player must press two buttons simultaneously. The button sequences start slow but get faster toward the end. On Tower #7, after the 25th sequence, the commands appear onscreen for only 1.5 seconds.
Paine plays the "Avalanche Calibration" where the commands fall down in three rows from top to bottom. There is a halfway mark where a command will flash and the player must press the button that flashed before the rows fall to the bottom. If the commands hits the bottom, or the player pressed the wrong button, it will be a miss. The speed will increase further into the calibration. Paine's towers are #2, #5 and #8. Tower #2 uses the Template:PS X symbol, Template:PS O symbol, Template:PS Square symbol and Template:PS Triangle symbol and the D-pad, and Tower #5 and #8 add Template:PS R1 button and Template:PS R2 button.
Yuna plays the "Forgotten Memories Calibration" where the player must remember the button sequences shown onscreen consisting of two phases: a Memory Phase, and an Input Phase. In the Memory Phase the commands appear once onscreen, then disappear while the new command appears. The player must remember the commands listed in the sequence. The speed and number of commands will increase. In the Input phase the player has to input the commands that appeared in the Memory Phase. There is a time limit. If the player inputs the wrong command, or takes too long, it will be a miss. Yuna's towers are #3, #6, #9 and #10. In Towers #3 and #6 the number of commands in Memory Phase starts at two and increases into three an then four for the latter stages of calibration. In Tower #9 the number increases to five in the latter stages, and in Tower #10 to six. Tower #3 uses the Template:PS X symbol, Template:PS O symbol, Template:PS Square symbol and Template:PS Triangle symbol buttons, Tower #6 adds the D-pad, Tower #9 adds Template:PS R1 button and Template:PS R2 button and Tower #10 adds Template:PS R2 button and Template:PS L2 button. For a tip, the player can place their fingers on the buttons as they appear in the Memory Phase to better remember them for the Input Phase. Tower #10 is different because it is played in reverse. The easiest way to complete this tower is to use someone else to assist in memory and write down the commands that appear. The player can also write down the commands themselves if they're quick enough to pick the controller back up, or can hold the controller in one hand while using the other hand to write the commands down. Another way is to repeat the sequences out loud as they appear to help remember them better.
The Prizes
The player receives the Samurai's Honor Garment Grid for completing all the towers. At least five of them must be calibrated the full 30 times. Misses do not affect anything.
For the individual towers the player can find a prize in a treasure chest that appears after defeating a fiend at each tower in Chapter 5. Each prize varies on the tower and the number of times they calibrated it.
| Tower | 0 - 5 | 6 - 14 | 15 - 24 | 25 - 29 | 30 |
|---|---|---|---|---|---|
| Tower #1 | Ether | Ether x2 | Turbo Ether | Turbo Ether x2 | Elixir |
| Tower #2 | X-Potion | Mega Potion x2 | Elixir | Elixir | Megalixir |
| Tower #3 | Mega Phoenix | Mega Phoenix | Elixir | Elixir | Megalixir |
| Tower #4 | Power Wrist | Black Belt | Hyper Wrist | Power Glove | Champion Belt |
| Tower #5 | Silver Bracer | Hypno Crown | Gold Bracer | Pixie Dust | Regal Crown |
| Tower #6 | Yellow Ring | Lightning Gleam | NulShock Ring | Ochre Ring | Electrocutioner |
| Tower #7 | Blue Ring | Watery Gleam | NulTide Ring | Cerulean Ring | Short Circuit |
| Tower #8 | Red Ring | Fiery Gleam | NulBlaze Ring | Crimson Ring | Freezerburn |
| Tower #9 | White Ring | Icy Gleam | NulFrost Ring | Snow Ring | Sublimator |
| Tower #10 | Tetra Band | Tetra Gloves | Tetra Guard | Tetra Bracelet | Ribbon |
Final Fantasy X-2 Missions
Chapter Four
Concert Clean-Up
- Note: This is a compulsory mission which is required to complete the game.
A fiend has crawled out from beneath the earth. Exterminate it so concertgoers can listen to your song without any distractions!
- Objective: Defeat the boss fiend.
- Unlock: Becomes available after "Where's Tobli" mission.
- Reward: Black Ring accessory.
Chapter Five
A Fallen Genius?
- Note: This is not a compulsory mission, thus is not required to complete the game.
Frenzied fiends are feeding off the energy stored in the lightning rod towers. Destroy every last one of the fiends clinging to the towers.
- Objective: Defeat the fiends at each tower.
- Unlock: Becomes available at the beginning of Chapter Five.
- Reward: Valiant Lustre Garment Grid, an Al Bhed Primer.
Treasure
Final Fantasy X
- Kimahri's Celestial Weapon, the Spirit Lance, is located by activating the mysterious Cactuar Stones scattered around the plains.
- The Venus Sigil for Lulu's Celestial Weapon is received after successfully dodging 200 consecutive lightning bolts.
- The Jecht Sphere for Auron's Overdrive can be found in Thunder Plains - South near the second tower from the north exit to Rin's Agency.
Enemy Formations
Final Fantasy X
- Aerouge, Buer, Gold Element
- Aerouge, Kusariqqu, Melusine
- Aerouge x2, Larva
- Buer, Kusariqqu, Gold Element
- Buer, Gold Element, Melusine
- Buer x2, Iron Giant
- Gold Element, Larva
- Iron Giant
- Larva x2
- Qactuar
- Qactuar x2
- Qactuar x3
- Dark Ixion (Boss) (International + PAL only)
Final Fantasy X-2
Chapter 1
- Ochu, Chocobo
Chapter 2
- Armet, Bicocette x2
- Armet, Chocobo
- Bicocette, Gold Elemental, Lesser Drake
- Bicocette, Lesser Drake x2
- Chocobo
- Gold Elemental x3
Chapter 3
Chapter 4
Chapter 5
- Humbaba (Boss)
- Machina Panzer, Watcher-A, Watcher-R, Watcher-S (Boss)
Template:Sec-stub
Musical Themes
Template:Listen
The eponymous "Thunder Plains" plays on the plains. "Thunder Plains" was one of sixteen tracks chosen from the original soundtrack to be rearranged by Masashi Hamauzu on the Piano Collections: Final Fantasy X album.
In Final Fantasy X-2, the theme is again called "Thunder Plains".
Gallery
Template:Gallery
Template:FFX Template:FFX-2