mNo edit summary |
mNo edit summary |
||
| Line 429: | Line 429: | ||
!class="b"|003 |
!class="b"|003 |
||
|[[Skeleton (Final Fantasy IX)|Skeleton]] |
|[[Skeleton (Final Fantasy IX)|Skeleton]] |
||
| − | ! |
+ | !class="b"|023 |
|[[Antlion (Final Fantasy IX)|Antlion]] |
|[[Antlion (Final Fantasy IX)|Antlion]] |
||
| − | ! |
+ | !class="b"|043 |
|[[Gargoyle (Final Fantasy IX)|Gargoyle]] |
|[[Gargoyle (Final Fantasy IX)|Gargoyle]] |
||
| − | ! |
+ | !class="b"|063 |
|[[Atomos (Creature)#Final Fantasy IX|Atomos]] |
|[[Atomos (Creature)#Final Fantasy IX|Atomos]] |
||
| − | ! |
+ | !class="b"|083 |
|''[[Invincible (Final Fantasy IX)#Tetra Master|Invincible]]'' |
|''[[Invincible (Final Fantasy IX)#Tetra Master|Invincible]]'' |
||
|- |
|- |
||
| − | ! |
+ | !class="b"|004 |
|[[Flan (Final Fantasy IX)|Flan]] |
|[[Flan (Final Fantasy IX)|Flan]] |
||
| − | ! |
+ | !class="b"|024 |
|[[Cactuar (Final Fantasy IX)|Cactuar]] |
|[[Cactuar (Final Fantasy IX)|Cactuar]] |
||
| − | ! |
+ | !class="b"|044 |
|[[Vepal]] |
|[[Vepal]] |
||
| − | ! |
+ | !class="b"|064 |
|[[Odin#Final Fantasy IX|Odin]] |
|[[Odin#Final Fantasy IX|Odin]] |
||
| − | ! |
+ | !class="b"|084 |
| − | | |
+ | |[[Cargo Ship (Final Fantasy IX)#Tetra Master|Cargo Ship]] |
|- |
|- |
||
| − | ! |
+ | !class="b"|005 |
|[[Zaghnol]] |
|[[Zaghnol]] |
||
| − | ! |
+ | !class="b"|025 |
|[[Gimme Cat]] |
|[[Gimme Cat]] |
||
| − | ! |
+ | !class="b"|045 |
|[[Grimlock]] |
|[[Grimlock]] |
||
| − | ! |
+ | !class="b"|065 |
|[[Leviathan#Final Fantasy IX|Leviathan]] |
|[[Leviathan#Final Fantasy IX|Leviathan]] |
||
| − | ! |
+ | !class="b"|085 |
|''[[Hilda Garde#Hilda Garde I|Hilda Garde I]]'' |
|''[[Hilda Garde#Hilda Garde I|Hilda Garde I]]'' |
||
|- |
|- |
||
| − | ! |
+ | !class="b"|006 |
|[[Lizard Man (Final Fantasy IX)|Lizard Man]] |
|[[Lizard Man (Final Fantasy IX)|Lizard Man]] |
||
| − | ! |
+ | !class="b"|026 |
|[[Ragtime Mouse|Ragtimer]] ({{foot|Ragtime Mouse|Name in the English PAL release}}) |
|[[Ragtime Mouse|Ragtimer]] ({{foot|Ragtime Mouse|Name in the English PAL release}}) |
||
| − | ! |
+ | !class="b"|046 |
|[[Tonberry (Final Fantasy IX)|Tonberry]] |
|[[Tonberry (Final Fantasy IX)|Tonberry]] |
||
| − | ! |
+ | !class="b"|066 |
|[[Bahamut#Final Fantasy IX|Bahamut]] |
|[[Bahamut#Final Fantasy IX|Bahamut]] |
||
| − | ! |
+ | !class="b"|086 |
|''[[Red Rose#Tetra Master|Red Rose]]'' |
|''[[Red Rose#Tetra Master|Red Rose]]'' |
||
|- |
|- |
||
| − | ! |
+ | !class="b"|007 |
|[[Zombie (Final Fantasy IX)|Zombie]] |
|[[Zombie (Final Fantasy IX)|Zombie]] |
||
| − | ! |
+ | !class="b"|027 |
|[[Hedgehog Pie (Final Fantasy IX)|Hedgehog Pie]] |
|[[Hedgehog Pie (Final Fantasy IX)|Hedgehog Pie]] |
||
| − | ! |
+ | !class="b"|047 |
|[[Veteran (Final Fantasy IX)|Veteran]] |
|[[Veteran (Final Fantasy IX)|Veteran]] |
||
| − | ! |
+ | !class="b"|067 |
|[[Ark (Summon)|Ark]] |
|[[Ark (Summon)|Ark]] |
||
| − | ! |
+ | !class="b"|087 |
|''[[Prima Vista#Tetra Master|Theater Ship]]'' |
|''[[Prima Vista#Tetra Master|Theater Ship]]'' |
||
|- |
|- |
||
| − | ! |
+ | !class="b"|008 |
|[[Bomb (Final Fantasy IX)|Bomb]] |
|[[Bomb (Final Fantasy IX)|Bomb]] |
||
| − | ! |
+ | !class="b"|028 |
|[[Ralvuimago]] |
|[[Ralvuimago]] |
||
| − | ! |
+ | !class="b"|048 |
|[[Garuda (Final Fantasy IX)|Garuda]] |
|[[Garuda (Final Fantasy IX)|Garuda]] |
||
| − | ! |
+ | !class="b"|068 |
|[[Fenrir (Summon)#Final Fantasy IX|Fenrir]] |
|[[Fenrir (Summon)#Final Fantasy IX|Fenrir]] |
||
| − | ! |
+ | !class="b"|088 |
|''[[List of Airships#Viltgance|Viltgance]]'' |
|''[[List of Airships#Viltgance|Viltgance]]'' |
||
|- |
|- |
||
| − | ! |
+ | !class="b"|009 |
|[[Ironite (Final Fantasy IX)|Ironite]] |
|[[Ironite (Final Fantasy IX)|Ironite]] |
||
| − | ! |
+ | !class="b"|029 |
|[[Ochu (Final Fantasy IX)|Ochu]] |
|[[Ochu (Final Fantasy IX)|Ochu]] |
||
| − | ! |
+ | !class="b"|049 |
|[[Malboro (Final Fantasy IX)|Malboro]] |
|[[Malboro (Final Fantasy IX)|Malboro]] |
||
| − | ! |
+ | !class="b"|069 |
|[[Maduin#Final Fantasy IX|Madeen]] |
|[[Maduin#Final Fantasy IX|Madeen]] |
||
| − | ! |
+ | !class="b"|089 |
|[[Chocobo#Final Fantasy IX|Chocobo]] |
|[[Chocobo#Final Fantasy IX|Chocobo]] |
||
|- |
|- |
||
| − | ! |
+ | !class="b"|010 |
|[[Sahagin (Final Fantasy IX)|Sahagin]] |
|[[Sahagin (Final Fantasy IX)|Sahagin]] |
||
| − | ! |
+ | !class="b"|030 |
|[[Troll (Final Fantasy IX)|Troll]] |
|[[Troll (Final Fantasy IX)|Troll]] |
||
| − | ! |
+ | !class="b"|050 |
|[[Mover (Final Fantasy IX)|Mover]] |
|[[Mover (Final Fantasy IX)|Mover]] |
||
| − | ! |
+ | !class="b"|070 |
|[[Alexander (Summon)#Final Fantasy IX|Alexander]] |
|[[Alexander (Summon)#Final Fantasy IX|Alexander]] |
||
| − | ! |
+ | !class="b"|090 |
|[[Fat Chocobo#Final Fantasy IX|Fat Chocobo]] |
|[[Fat Chocobo#Final Fantasy IX|Fat Chocobo]] |
||
|- |
|- |
||
| − | ! |
+ | !class="b"|011 |
|[[Yeti (Final Fantasy IX)|Yeti]] |
|[[Yeti (Final Fantasy IX)|Yeti]] |
||
| − | ! |
+ | !class="b"|031 |
|[[Blazer Beetle (Final Fantasy IX)|Blazer Beetle]] |
|[[Blazer Beetle (Final Fantasy IX)|Blazer Beetle]] |
||
| − | ! |
+ | !class="b"|051 |
|[[Abadon (Final Fantasy IX)|Abadon]] |
|[[Abadon (Final Fantasy IX)|Abadon]] |
||
| − | ! |
+ | !class="b"|071 |
|[[Excalibur II#Final Fantasy IX|Excalibur II]] |
|[[Excalibur II#Final Fantasy IX|Excalibur II]] |
||
| − | ! |
+ | !class="b"|091 |
|[[Mog#Final Fantasy IX|Mog]] |
|[[Mog#Final Fantasy IX|Mog]] |
||
|- |
|- |
||
| − | ! |
+ | !class="b"|012 |
|[[Mimic (Final Fantasy IX)|Mimic]] |
|[[Mimic (Final Fantasy IX)|Mimic]] |
||
| − | ! |
+ | !class="b"|032 |
|[[Abomination]] |
|[[Abomination]] |
||
| − | ! |
+ | !class="b"|052 |
|[[Behemoth (Final Fantasy IX)|Behemoth]] |
|[[Behemoth (Final Fantasy IX)|Behemoth]] |
||
| − | ! |
+ | !class="b"|072 |
|[[Ultima Weapon (Weapon)#Final Fantasy IX|Ultima Weapon]] |
|[[Ultima Weapon (Weapon)#Final Fantasy IX|Ultima Weapon]] |
||
| − | ! |
+ | !class="b"|092 |
|[[Toad (Ability)#Final Fantasy IX|Frog]] |
|[[Toad (Ability)#Final Fantasy IX|Frog]] |
||
|- |
|- |
||
| − | ! |
+ | !class="b"|013 |
|[[Wyerd (Final Fantasy IX)|Wyerd]] |
|[[Wyerd (Final Fantasy IX)|Wyerd]] |
||
| − | ! |
+ | !class="b"|033 |
|[[Zemzelett (Final Fantasy IX)|Zemzelett]] |
|[[Zemzelett (Final Fantasy IX)|Zemzelett]] |
||
| − | ! |
+ | !class="b"|053 |
|[[Iron Man (Final Fantasy IX)|Iron Man]] |
|[[Iron Man (Final Fantasy IX)|Iron Man]] |
||
| − | ! |
+ | !class="b"|073 |
|[[Masamune (Weapon)#Final Fantasy IX|Masamune]] |
|[[Masamune (Weapon)#Final Fantasy IX|Masamune]] |
||
| − | ! |
+ | !class="b"|093 |
|[[Oglop]] |
|[[Oglop]] |
||
|- |
|- |
||
| − | ! |
+ | !class="b"|014 |
|[[Mandragora (Final Fantasy IX)|Mandragora]] |
|[[Mandragora (Final Fantasy IX)|Mandragora]] |
||
| − | ! |
+ | !class="b"|034 |
|[[Stroper (Final Fantasy IX)|Stroper]] |
|[[Stroper (Final Fantasy IX)|Stroper]] |
||
| − | ! |
+ | !class="b"|054 |
|[[Nova Dragon (Final Fantasy IX)|Nova Dragon]] |
|[[Nova Dragon (Final Fantasy IX)|Nova Dragon]] |
||
| − | ! |
+ | !class="b"|074 |
|[[Elixir (Item)#Final Fantasy IX|Elixir]] |
|[[Elixir (Item)#Final Fantasy IX|Elixir]] |
||
| − | ! |
+ | !class="b"|094 |
|[[Alexandria]] |
|[[Alexandria]] |
||
|- |
|- |
||
| − | ! |
+ | !class="b"|015 |
|[[Crawler (Final Fantasy IX)|Crawler]] |
|[[Crawler (Final Fantasy IX)|Crawler]] |
||
| − | ! |
+ | !class="b"|035 |
|[[Tantarian]] |
|[[Tantarian]] |
||
| − | ! |
+ | !class="b"|055 |
|[[Ozma]] |
|[[Ozma]] |
||
| − | ! |
+ | !class="b"|075 |
|[[Dark Matter (Item)#Final Fantasy IX|Dark Matter]] |
|[[Dark Matter (Item)#Final Fantasy IX|Dark Matter]] |
||
| − | ! |
+ | !class="b"|095 |
|[[Lindblum (Final Fantasy IX)|Lindblum]] |
|[[Lindblum (Final Fantasy IX)|Lindblum]] |
||
|- |
|- |
||
| − | ! |
+ | !class="b"|016 |
|[[Sand Scorpion]] |
|[[Sand Scorpion]] |
||
| − | ! |
+ | !class="b"|036 |
|[[Grand Dragon]] |
|[[Grand Dragon]] |
||
| − | ! |
+ | !class="b"|056 |
|[[Hades (Final Fantasy IX)|Hades]] |
|[[Hades (Final Fantasy IX)|Hades]] |
||
| − | ! |
+ | !class="b"|076 |
|[[Ribbon (Equipment)#Final Fantasy IX|Ribbon]] |
|[[Ribbon (Equipment)#Final Fantasy IX|Ribbon]] |
||
| − | ! |
+ | !class="b"|096 |
|[[Twin Moons (Final Fantasy IX)|Twin Moons]] |
|[[Twin Moons (Final Fantasy IX)|Twin Moons]] |
||
|- |
|- |
||
| − | ! |
+ | !class="b"|017 |
|[[Nymph (Final Fantasy IX)|Nymph]] |
|[[Nymph (Final Fantasy IX)|Nymph]] |
||
| − | ! |
+ | !class="b"|037 |
|[[Feather Circle]] |
|[[Feather Circle]] |
||
| − | ! |
+ | !class="b"|057 |
|[[Holy (Ability)#Final Fantasy IX|Holy]] |
|[[Holy (Ability)#Final Fantasy IX|Holy]] |
||
| − | ! |
+ | !class="b"|077 |
|[[List of Final Fantasy IX Weapons#Rackets|Tiger Racket]] |
|[[List of Final Fantasy IX Weapons#Rackets|Tiger Racket]] |
||
| − | ! |
+ | !class="b"|097 |
|[[Gargant]] |
|[[Gargant]] |
||
|- |
|- |
||
| − | ! |
+ | !class="b"|018 |
|[[Sand Golem]] |
|[[Sand Golem]] |
||
| − | ! |
+ | !class="b"|038 |
|[[Hecteyes (Final Fantasy IX)|Hecteyes]] |
|[[Hecteyes (Final Fantasy IX)|Hecteyes]] |
||
| − | ! |
+ | !class="b"|058 |
|[[Meteor (Ability)#Final Fantasy IX|Meteor]] |
|[[Meteor (Ability)#Final Fantasy IX|Meteor]] |
||
| − | ! |
+ | !class="b"|078 |
|[[Save the Queen#Final Fantasy IX|Save the Queen]] |
|[[Save the Queen#Final Fantasy IX|Save the Queen]] |
||
| − | ! |
+ | !class="b"|098 |
|[[Namingway]] |
|[[Namingway]] |
||
|- |
|- |
||
| − | ! |
+ | !class="b"|019 |
|[[Zuu (Final Fantasy IX)|Zuu]] |
|[[Zuu (Final Fantasy IX)|Zuu]] |
||
| − | ! |
+ | !class="b"|039 |
|[[Ogre (Final Fantasy IX)|Ogre]] |
|[[Ogre (Final Fantasy IX)|Ogre]] |
||
| − | ! |
+ | !class="b"|059 |
|[[Flare (Ability)#Final Fantasy IX|Flare]] |
|[[Flare (Ability)#Final Fantasy IX|Flare]] |
||
| − | ! |
+ | !class="b"|079 |
|[[Genji Equipment#Final Fantasy IX|Genji]] |
|[[Genji Equipment#Final Fantasy IX|Genji]] |
||
| − | ! |
+ | !class="b"|099 |
|[[Boco]] |
|[[Boco]] |
||
|- |
|- |
||
| − | ! |
+ | !class="b"|020 |
|[[Dragonfly (Final Fantasy IX)|Dragonfly]] |
|[[Dragonfly (Final Fantasy IX)|Dragonfly]] |
||
| − | ! |
+ | !class="b"|040 |
|[[Armstrong (Final Fantasy IX)|Armstrong]] |
|[[Armstrong (Final Fantasy IX)|Armstrong]] |
||
| − | ! |
+ | !class="b"|060 |
|[[Shiva#Final Fantasy IX|Shiva]] |
|[[Shiva#Final Fantasy IX|Shiva]] |
||
| − | ! |
+ | !class="b"|080 |
|[[Mythril Equipment#Final Fantasy IX|Mythril Sword]] |
|[[Mythril Equipment#Final Fantasy IX|Mythril Sword]] |
||
| − | ! |
+ | !class="b"|100 |
| − | | |
+ | |[[Airship (Term)#Tetra Master|Airship]] |
|} |
|} |
||
| Line 634: | Line 634: | ||
{{FFIX}} |
{{FFIX}} |
||
{{Minigames}} |
{{Minigames}} |
||
| − | |||
[[es:Tetra Master]] |
[[es:Tetra Master]] |
||
Revision as of 20:06, 6 August 2014
Template:Sideicon
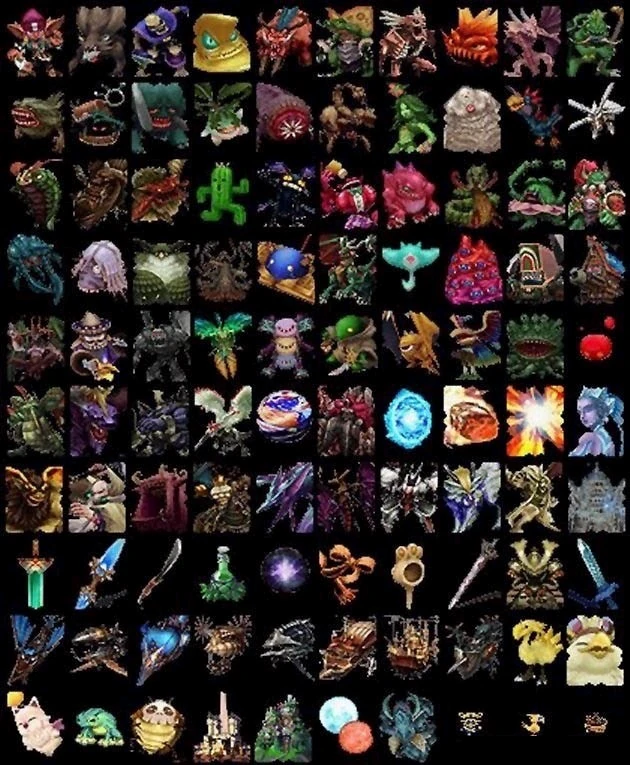
The images from all 100 cards.
Tetra Master (クアッドミスト, Kuaddo Misuto?, lit. Quad Mist) is the card game in Final Fantasy IX. Conceived by Hiroyuki Ito, the card game is not an essential part of the game but provides light relief to the storyline and allows the player to interact with minor characters in a different way. Tetra Master is separate from the main story, and progression in the game does not affect achievement in the storyline, and vice versa, apart from one case where the player must battle with Regent Cid.
Following Final Fantasy VIII's Triple Triad, Tetra Master is the second of the series to introduce a card minigame. Unlike Triple Triad, the cards cannot be turned into items and the player will not receive usable rewards other than more cards from playing the game.
Tetra Master was developed into an online stand-alone title a few years after Final Fantasy IX's release. This formally launched as part of PlayOnline on October 28, 2003 and required a one dollar monthly subscription. The service failed to gain popularity and the availability of online Tetra Master ended on December 31, 2010.
Game structure
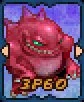
Tetra Master is played between two players on a four-by-four square grid of blank spaces, where cards are placed as the game progresses. Cards are pictured with various characters, monsters or other items mainly from Final Fantasy IX, which are familiar to the player. Each card features four values written across the card, and may have arrows along the sides or in the corners. The following image is an example of a traditional Tetra Master card:
The basis of the game is for cards on the grid to challenge adjacent cards, whereby the values written on the card are assessed to decide the winner.
Card values
Every card has four values, or stats. In the example card above, the card has the stats 3-P-6-0. Each stat relates to the card's strength. The second value (P) is always an alphabetical value, while the other three stats increase on a hexadecimal range, meaning they can range from 0-9, then through letters A-F.
- The first value is for the power of the card. (3 above)
- The second value is for the battle class of the card. (P above)
- The third value is for the physical defense of the card. (6 above)
- The fourth value is for the magical defense of the card. (0 above)
Each of the stats for power, physical defense and magical defense increase on a hexadecimal scale, with 0 being the weakest and F being the strongest.
Each of the stats represent a range of possible hit points.
| Value | Min | Max |
|---|---|---|
| 0 | 000 | 015 |
| 1 | 016 | 031 |
| 2 | 032 | 047 |
| 3 | 048 | 063 |
| 4 | 064 | 079 |
| 5 | 080 | 095 |
| 6 | 096 | 111 |
| 7 | 112 | 127 |
| 8 | 128 | 143 |
| 9 | 144 | 159 |
| A | 160 | 175 |
| B | 176 | 191 |
| C | 192 | 207 |
| D | 208 | 223 |
| E | 224 | 239 |
| F | 240 | 255 |
Whenever a card's value is assessed a random value is chosen between the minimum and maximum numbers that correspond to the value. For example, if a card has a value of "A", the strength of that value may be between 160 and 175. The minimum for a card's value is calculated by multiplying the base value to be considered by sixteen.
For example:
- 16 x A (10) = 160
Power stat
The first value on the card is the power stat. This is the card's offensive value. The example card (right) has a power stat of 3, which means its actual value is a number chosen between 48 - 63 HP.
Battle class stat
The second value on the card is the battle class stat. This value is not based on the hexadecimal scale above, but instead is one of four classes. This stat is represented by the letters P, M, X, and A.
- P is a Physical battle class
- M is a Magical battle class
- X is a Flexible battle class
- A is an Assault battle class
The card's battle class determines how the values are assessed in card battles.
These all affect which stat the attacking card attacks. P will attack the Physical Defense stat, while M will attack the Magical Defense stat. The other two have more obscure effects as they are rarer. X will attack the lowest of the two defenses and A will attack the lowest value on the card.
Physical defense stat
The third value on the card is the physical defense stat. This is the card's defensive value when facing physical attacks. The example card has a 6, so this may be equal to anywhere between 96 - 111 HP.
Magical defense stat
The fourth value on the card is the magical defense stat. This is the card's defensive value when facing magical attacks. The example card has a 0, so this may be equal to anywhere between 0 - 15 HP.
Card arrows
As well as its stat values, each card may have a set of arrows in any of eight directions. These points are usually referred to by using the traditional points on a compass (eg. north, northwest, west, etc.)
The card above possesses two arrows at west and east on the card. The arrows come into play when cards are in an attack situation. An attack on a card may only be made when an arrow on the challenging card is facing the resting card on the grid.
There are a few scenarios where the arrows will not affect anything when played:
- The first card played will not affect other cards.
- When a card is played next to another card, but has no arrows pointing to the opposing card.
- A card is already on the board with an arrow pointing to a square and a new card is placed in that square, but the new card doesn't have an arrow pointing to the first card.
Card battles only occur when a card with an arrow is placed facing adjacent to an enemy card with an arrow facing back.
Gameplay
Player challenges an NPC to a card game.
Each player has five cards, neither knowing the other player's hand. A coin-flip decides which of the two players shall begin.
Grid blocks
Before the game commences, up to six grid-blocks can be placed on the game grid randomly. These will blank that grid square out of game play. Blocks simply prevent a card from being placed in its grid square. Any arrow facing a grid block is useless.
A card is played
Once the game is set up, the starting player may play his first card at any unoccupied grid square on the board. After the first card is played, the opposition may play a card, and game continues with player turns alternating in this fashion.
Neutral card play
If a card is placed next to another card, they may interact. Should neither of the cards have arrows facing each other, there is no interaction. This is a neutral card play.
Card capture
Should the challenging card have an arrow facing a resting card, while the resting card has no arrow facing in the opposing direction, the resting card is taken.
Card battles
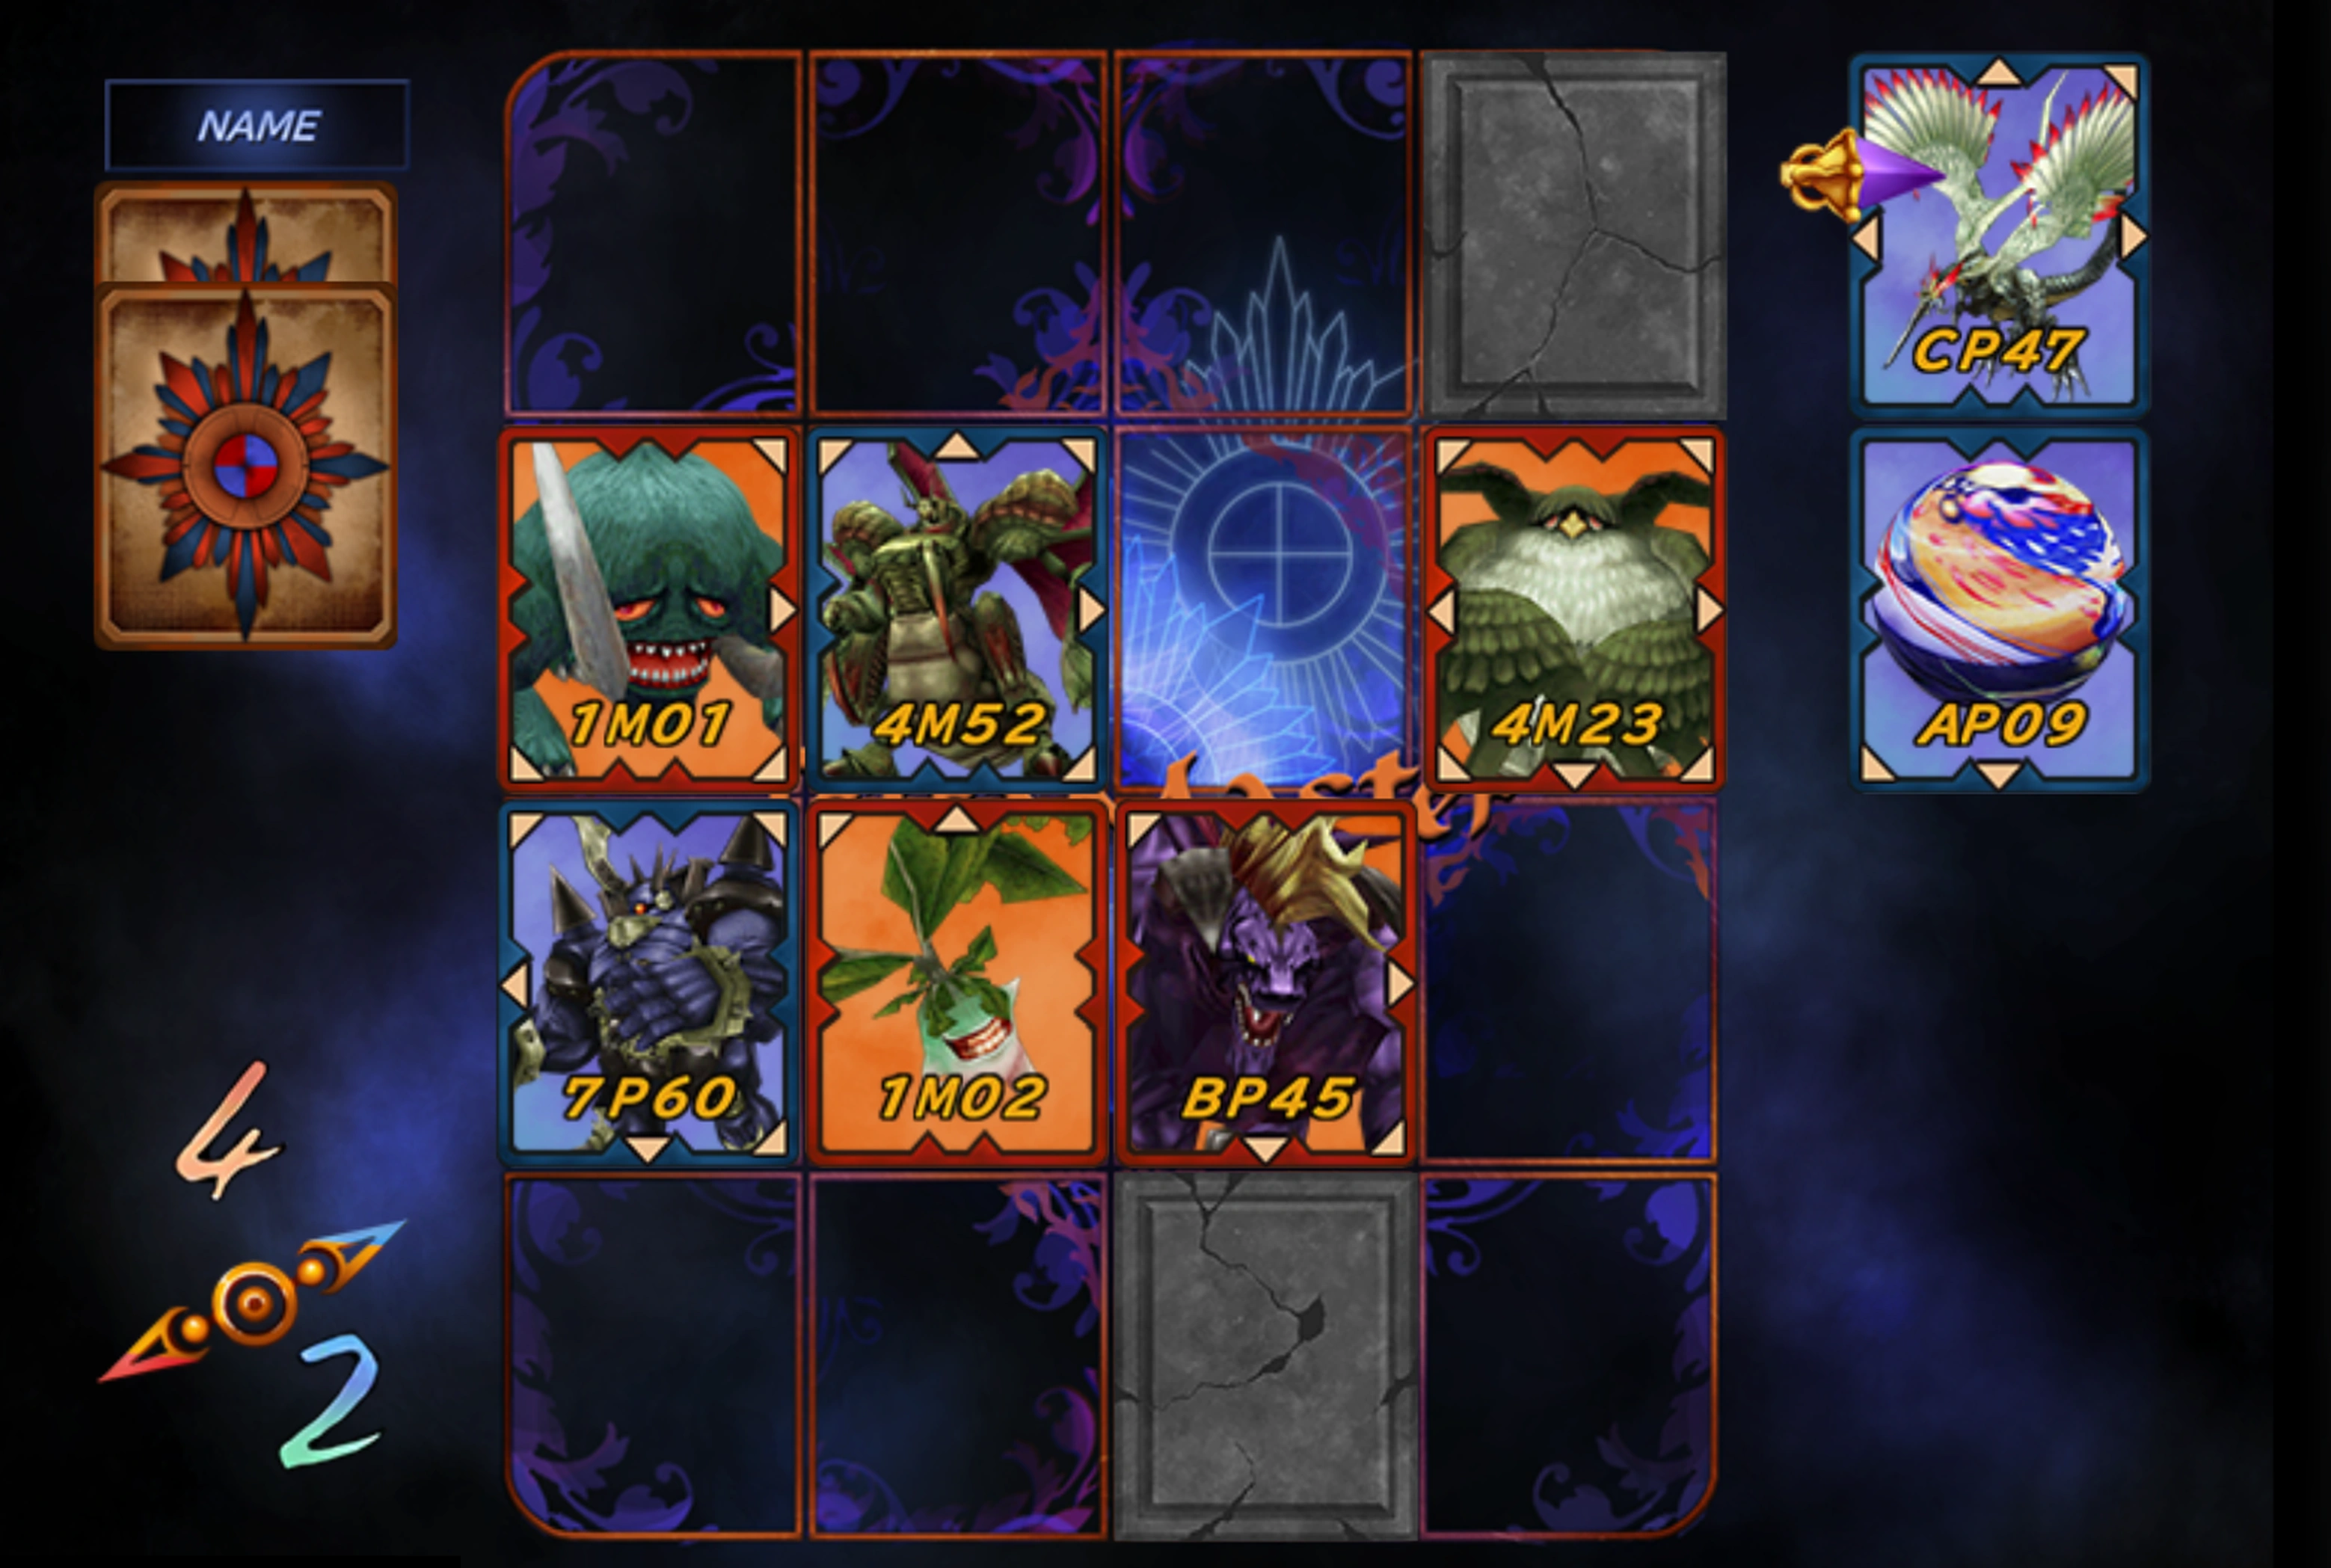

Card battle in progress.
Should the challenging card have an arrow facing a resting card, while the resting card has an arrow facing in the opposing direction, a card battle takes place (if there are two or more such target resting cards, it falls to the challenger to select which is battled first. This may have consequences for combos).
Cards may randomly upgrade their battle class (from P or M to X, or from X to A) upon winning a card battle.
It is in these situations that the card stats are used.
- The first two values are used for the challenging card.
- The last two values are used for the resting card.
Physical battle
If the challenging card has a battle class stat of P (physical), the power value of this card challenges the physical defense of the resting card. For an example of this, see below:
| Challenging card | Resting card |
|---|---|
| 4P51 | 6M05 |
In the scenario above, the challenging card's power value (4) is assessed against the physical defense of the resting card (0). The challenging card would be a heavy favorite to capture the resting card.
Magical battle
If the challenging card has a battle class stat of M (magical), the power value of this card challenges the magical defense of the resting card. This works with the same principle of a physical battle.
Flexible battle
If the challenging card has a battle class stat of X (flexible), the power value of this card challenges the weaker of the two defenses of the resting card.
Assault battle
If the challenging card has a battle class stat of A (assault), the strongest of all three values on this card challenges the weakest of all three values of the resting card.
Battle mathematics
When a card battle takes place, the winner is decided upon in three phases. Each of the phases are discussed below using the following example:
Card A Card B 5P33 attacks 2M10
- Phase 1:
- The challenging card's power value is randomly chosen within the stat range.
- say, 85 (stat 5 = between 80 and 95)
- The defending card's defense value is randomly chosen within the stat range.
- The challenging card's battle class is physical so physical defense is chosen.
- say, 23 (stat 1 = between 16 and 31)
- Phase 2:
- Next, a random number is chosen between 0 and the power value chosen for the challenging card (85).
- This is the actual attack score.
- say, 71
- A random number is chosen between 0 and the defense value chosen for the defending card (23).
- This is the actual defense score.
- say, 3
- Phase 3:
- The scores from phase 2 are subtracted from the stat values in phase 1.
- Card A: 85 - 71 = 14
- Card B: 23 - 3 = 20
- The highest difference wins the card battle.
In the scenario above, even Card B, with low stats, was able to defeat Card A.
Combos
A combo (short for combination) is a series of card take-overs that stem from one. When a card is defeated and captured in a battle, any enemy cards pointed at by the arrows of the defeated card are also captured. If the player loses the battle, they also lose control of all their own cards that the attacking card has arrows pointed at.
Strategies
Tetra Master's gameplay skill is hard to judge due to its element of randomness. The following are various strategies that advanced players often use in gameplay.
Grid blocks
Every game may have up to six grid blocks preventing cards from being placed there, or none at all. These sometimes create spots where one or two cards can be placed in complete immunity - when a corner of the grid is free, while the surrounding grid squares are blocked. Weak cards or cards with less useful arrow arrangements are better off with such immunity. Cards placed there cannot be captured, and therefore cannot be lost by the player at the end of the game.
Grid blocks may act as strongholds. In some possible arrangements on the grid, there is only one way to challenge a card protected by grid blocks. Cards semi-protected by grid blocks can become immune by the protection of another card. If the card has no arrows facing the protected card, the card cannot be captured by direct attack nor any combo move.
Selecting a good hand
Selecting a useful set of cards can sway the game in a player's favor. Cards with many arrows may seem useful because they can carry various challenges. But these may not be a favorable choice for some players, as they also leave themselves and others victims to combo moves.
Some players may choose to select cards with arrows only on a certain side or corner of the card. These cards are useful because they are less likely to be involved in combo moves, and may hold immunity of cards wedged in a corner.
Combos
The more skilled players choose to use combos to gain sudden advantage during the game. In these situations, a player may appear to be losing, when in fact he may be arranging his arrows in a way where he can reclaim all of his captured cards.
Some players chose a weak card with arrows pointing every side (or most sides) to make the opponent take control of it and then retake it to make a big combo, making the player able to control up to eight cards without much effort. Cards like Fang, Bomut, Flan, Bom are the most likely to be used as the "bait" because they are dropped by many monsters and tend to have low stats.
Winning and Losing
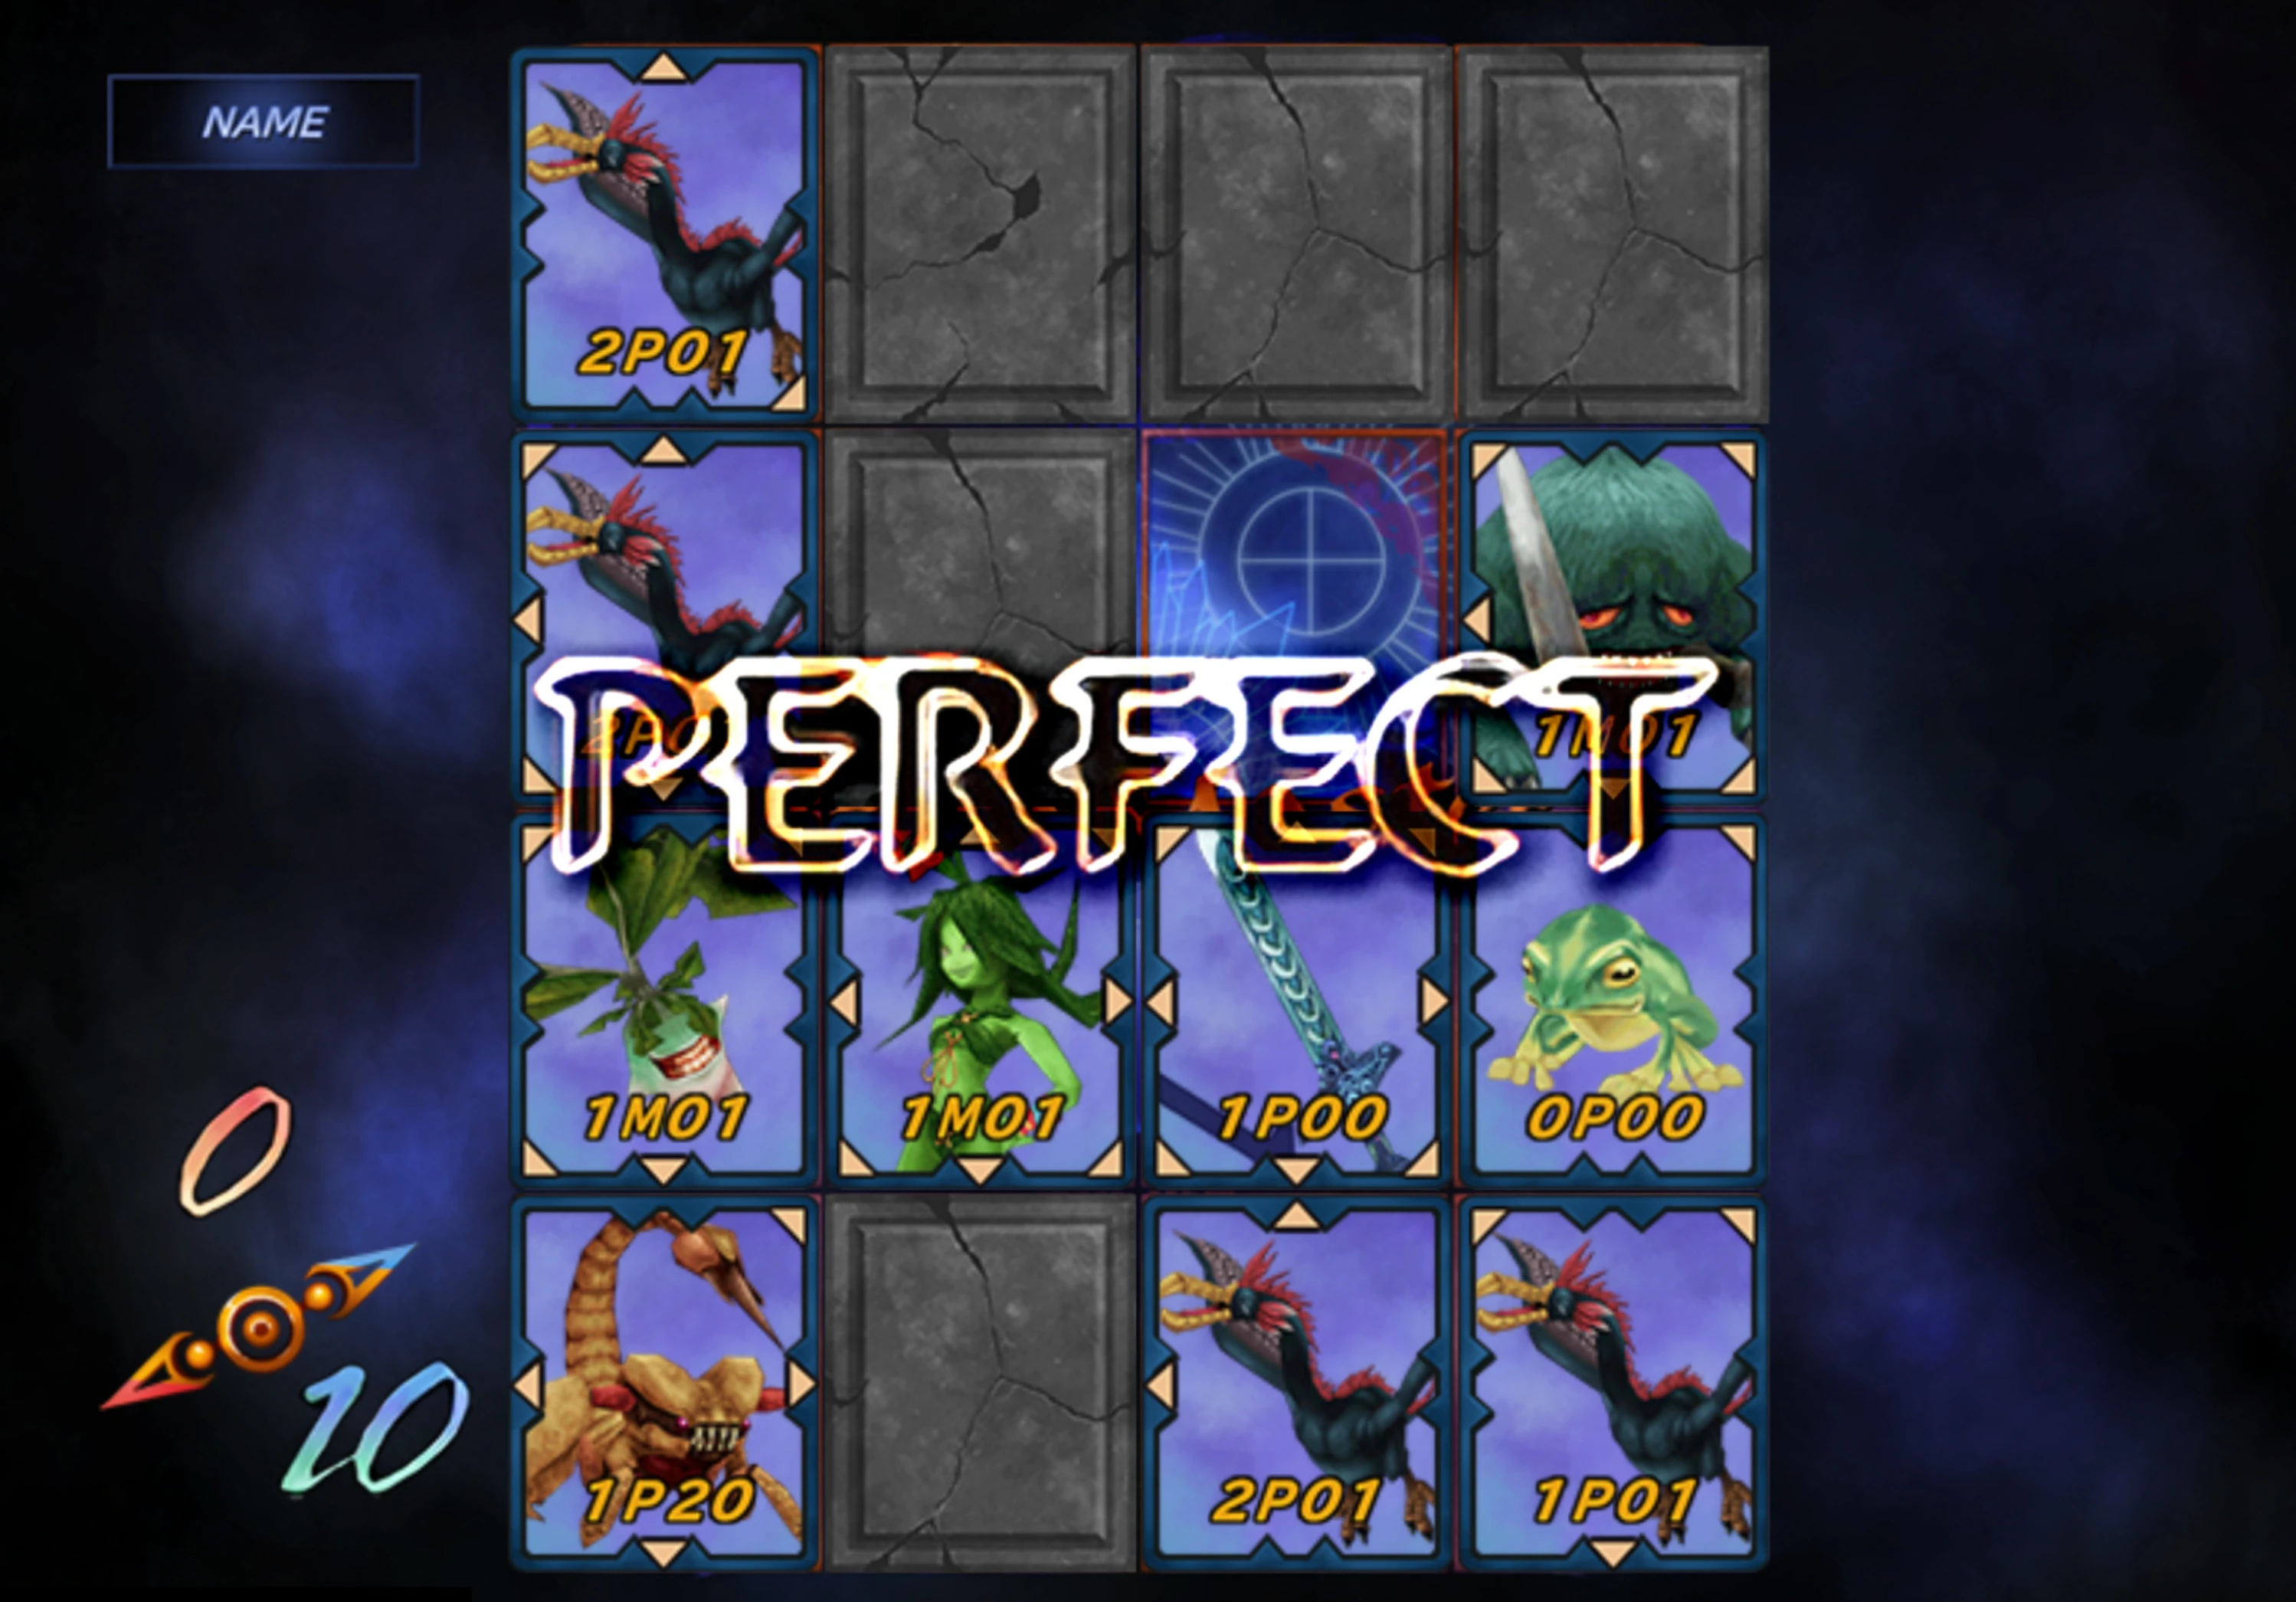
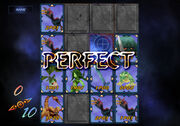
Perfect Win.
The player who controls the most cards when all cards have been placed is declared the winner. The winning player may take one of the cards from the opposition's set, but only one which was captured during the game. If the player wanted a specific card, a priority of his gameplay must be the final control of that card to allow it as a choice of prize after the game.
A game win is declared "perfect" if either player succeeds in controlling all of the cards at the end of a game. In this situation the winner claims all of his own cards and the opposition's cards as his prize.
Both players finishing with an equal number of cards results in a draw. This usually triggers a rematch, but that is not a necessity.
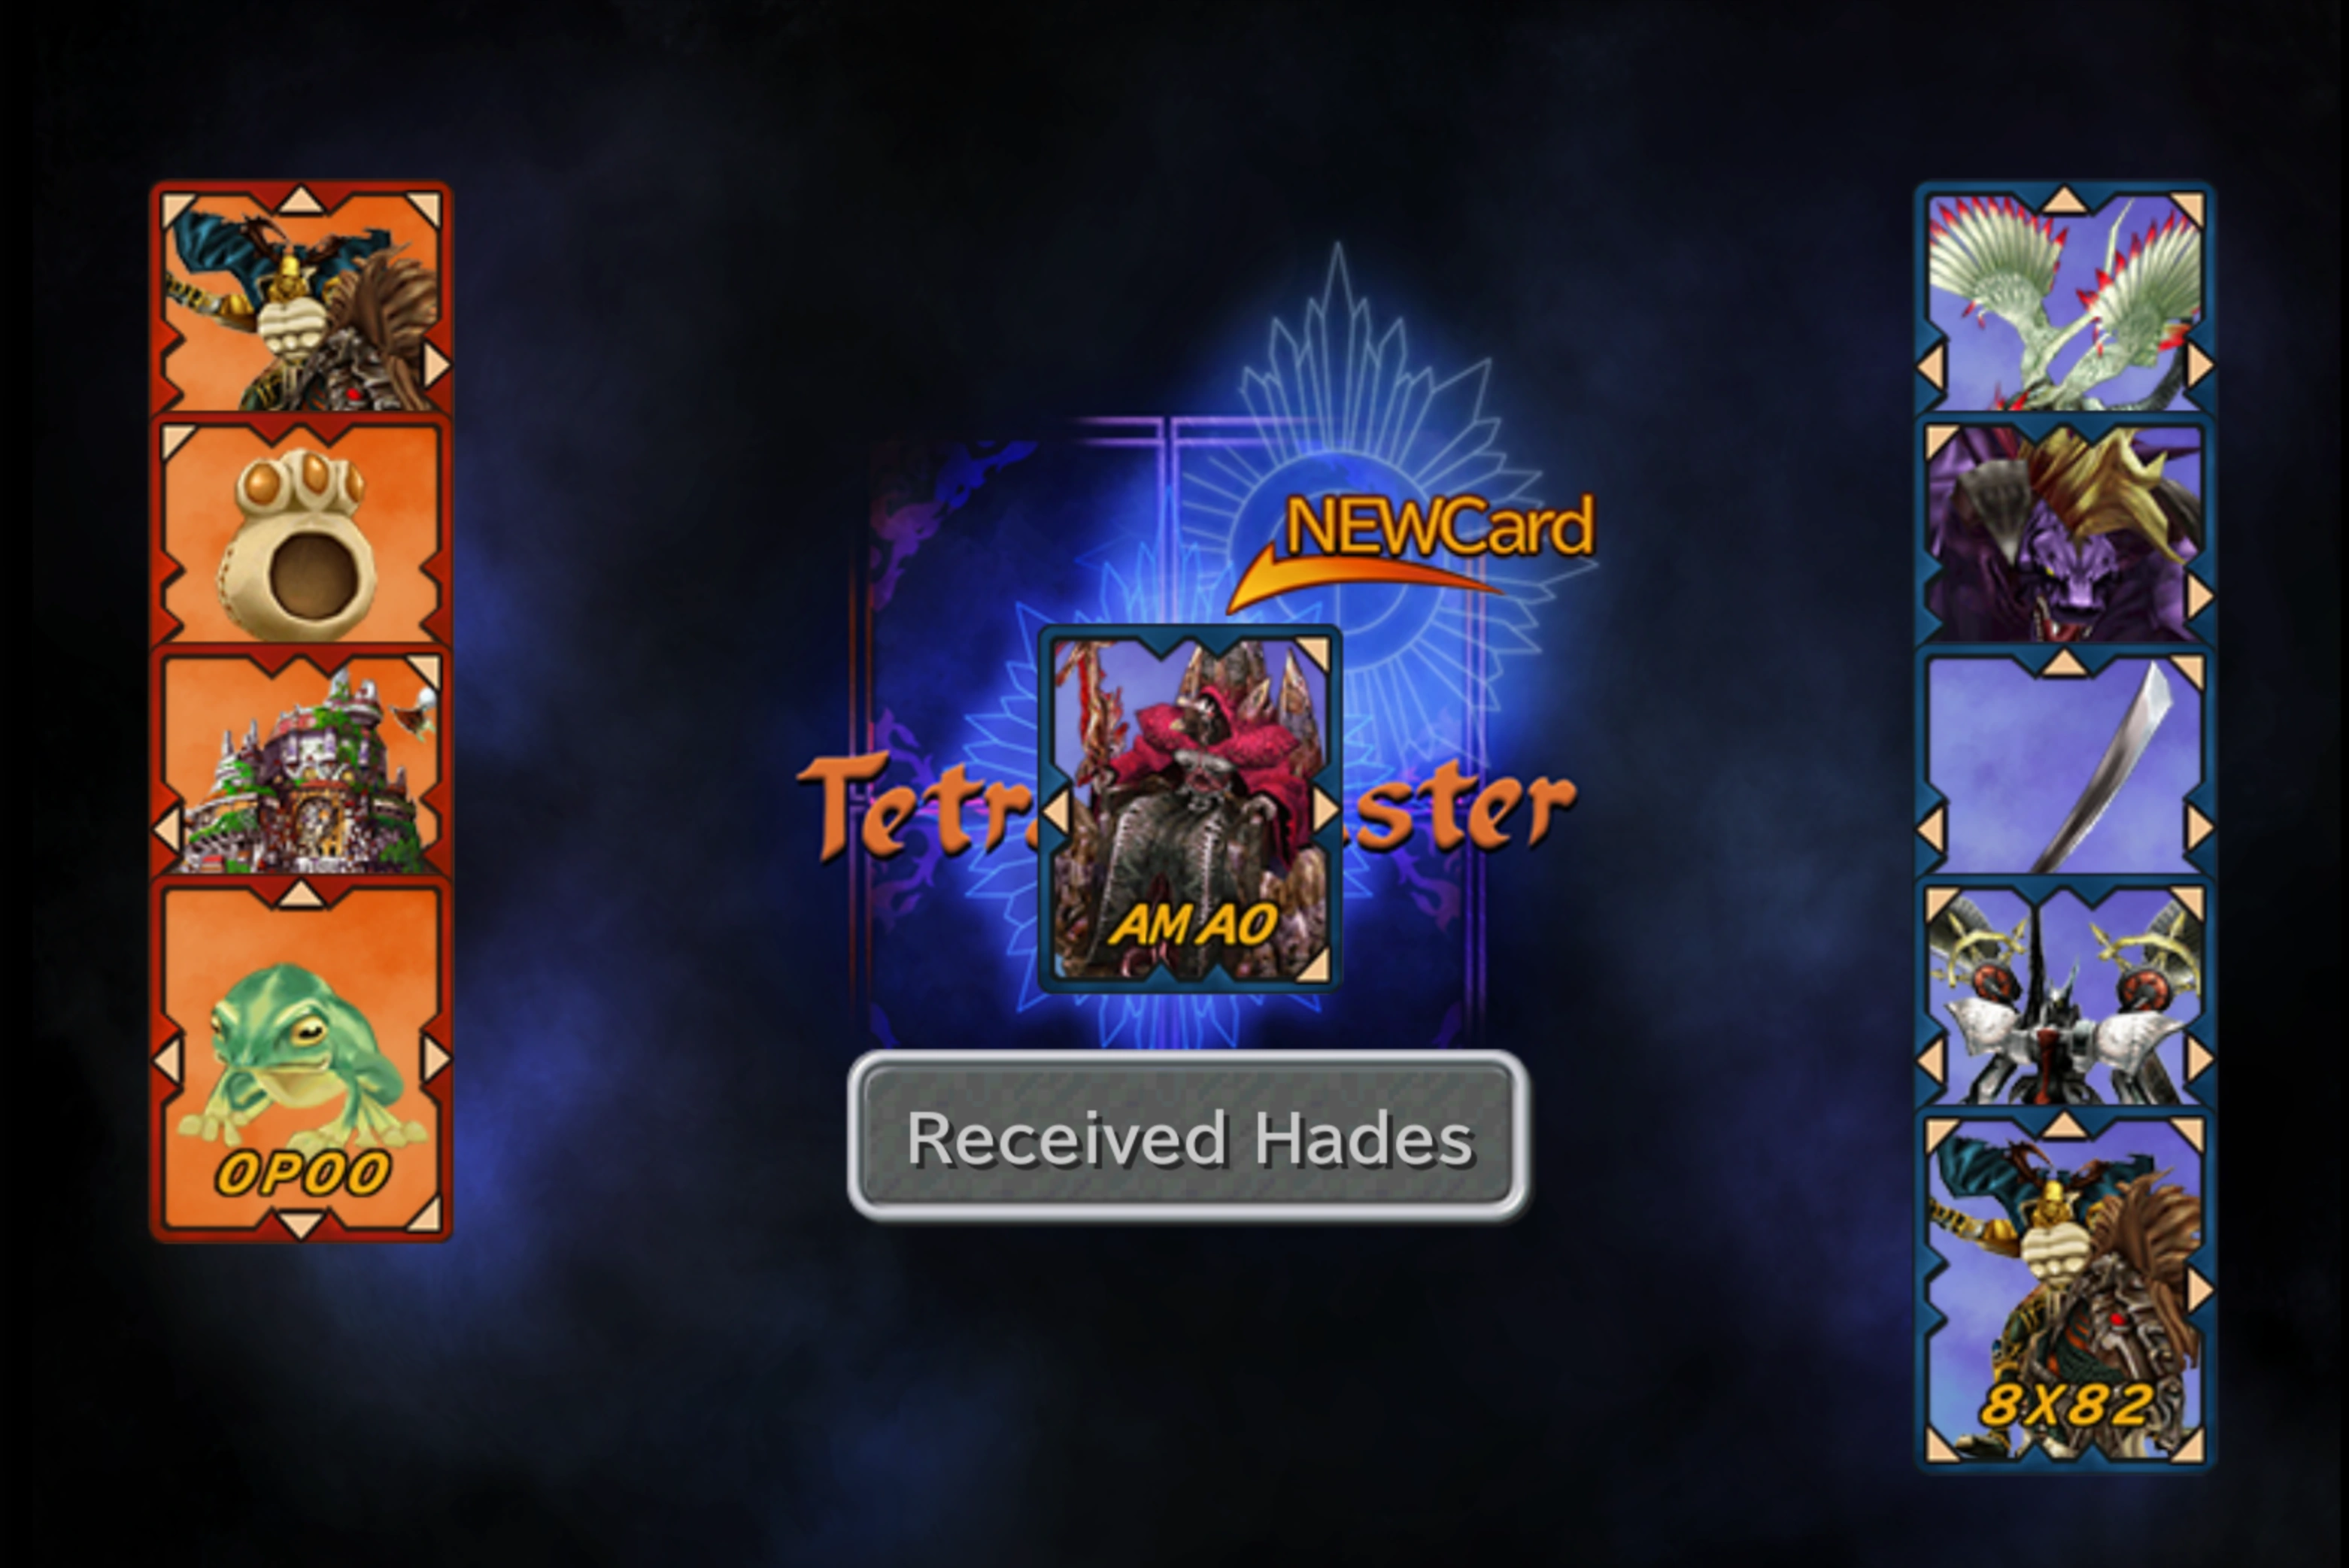

Player wins a new card.
If the player loses a card by being beaten in a game of Tetra Master, and then immediately plays a second game with the same character, the character is likely to have the lost card in his playing deck; the game gives the player a chance to reclaim the lost card. If the player lost all his cards, they are lost forever. If a player's card is taken by an opponent, the player cannot only regain the card but regain infinite copies of the card if they keep playing the same opponent. If a player loses a card to an opponent and the opponent uses it in their next hand and the card levels up, and the player doesn't claim the card back in that game and replays the same opponent, they will again play the card but the stat boost will not be retained; the card is always played in the condition the player lost it.
When the player wins there is a slight chance a card can upgrade. Receiving a higher attack power within limits per card, an X type (if attack type is currently P or M), an A attack type (if attack type is currently X), one higher physical defense within limits per card, or one higher magical defense within limits per card.
Collector's level
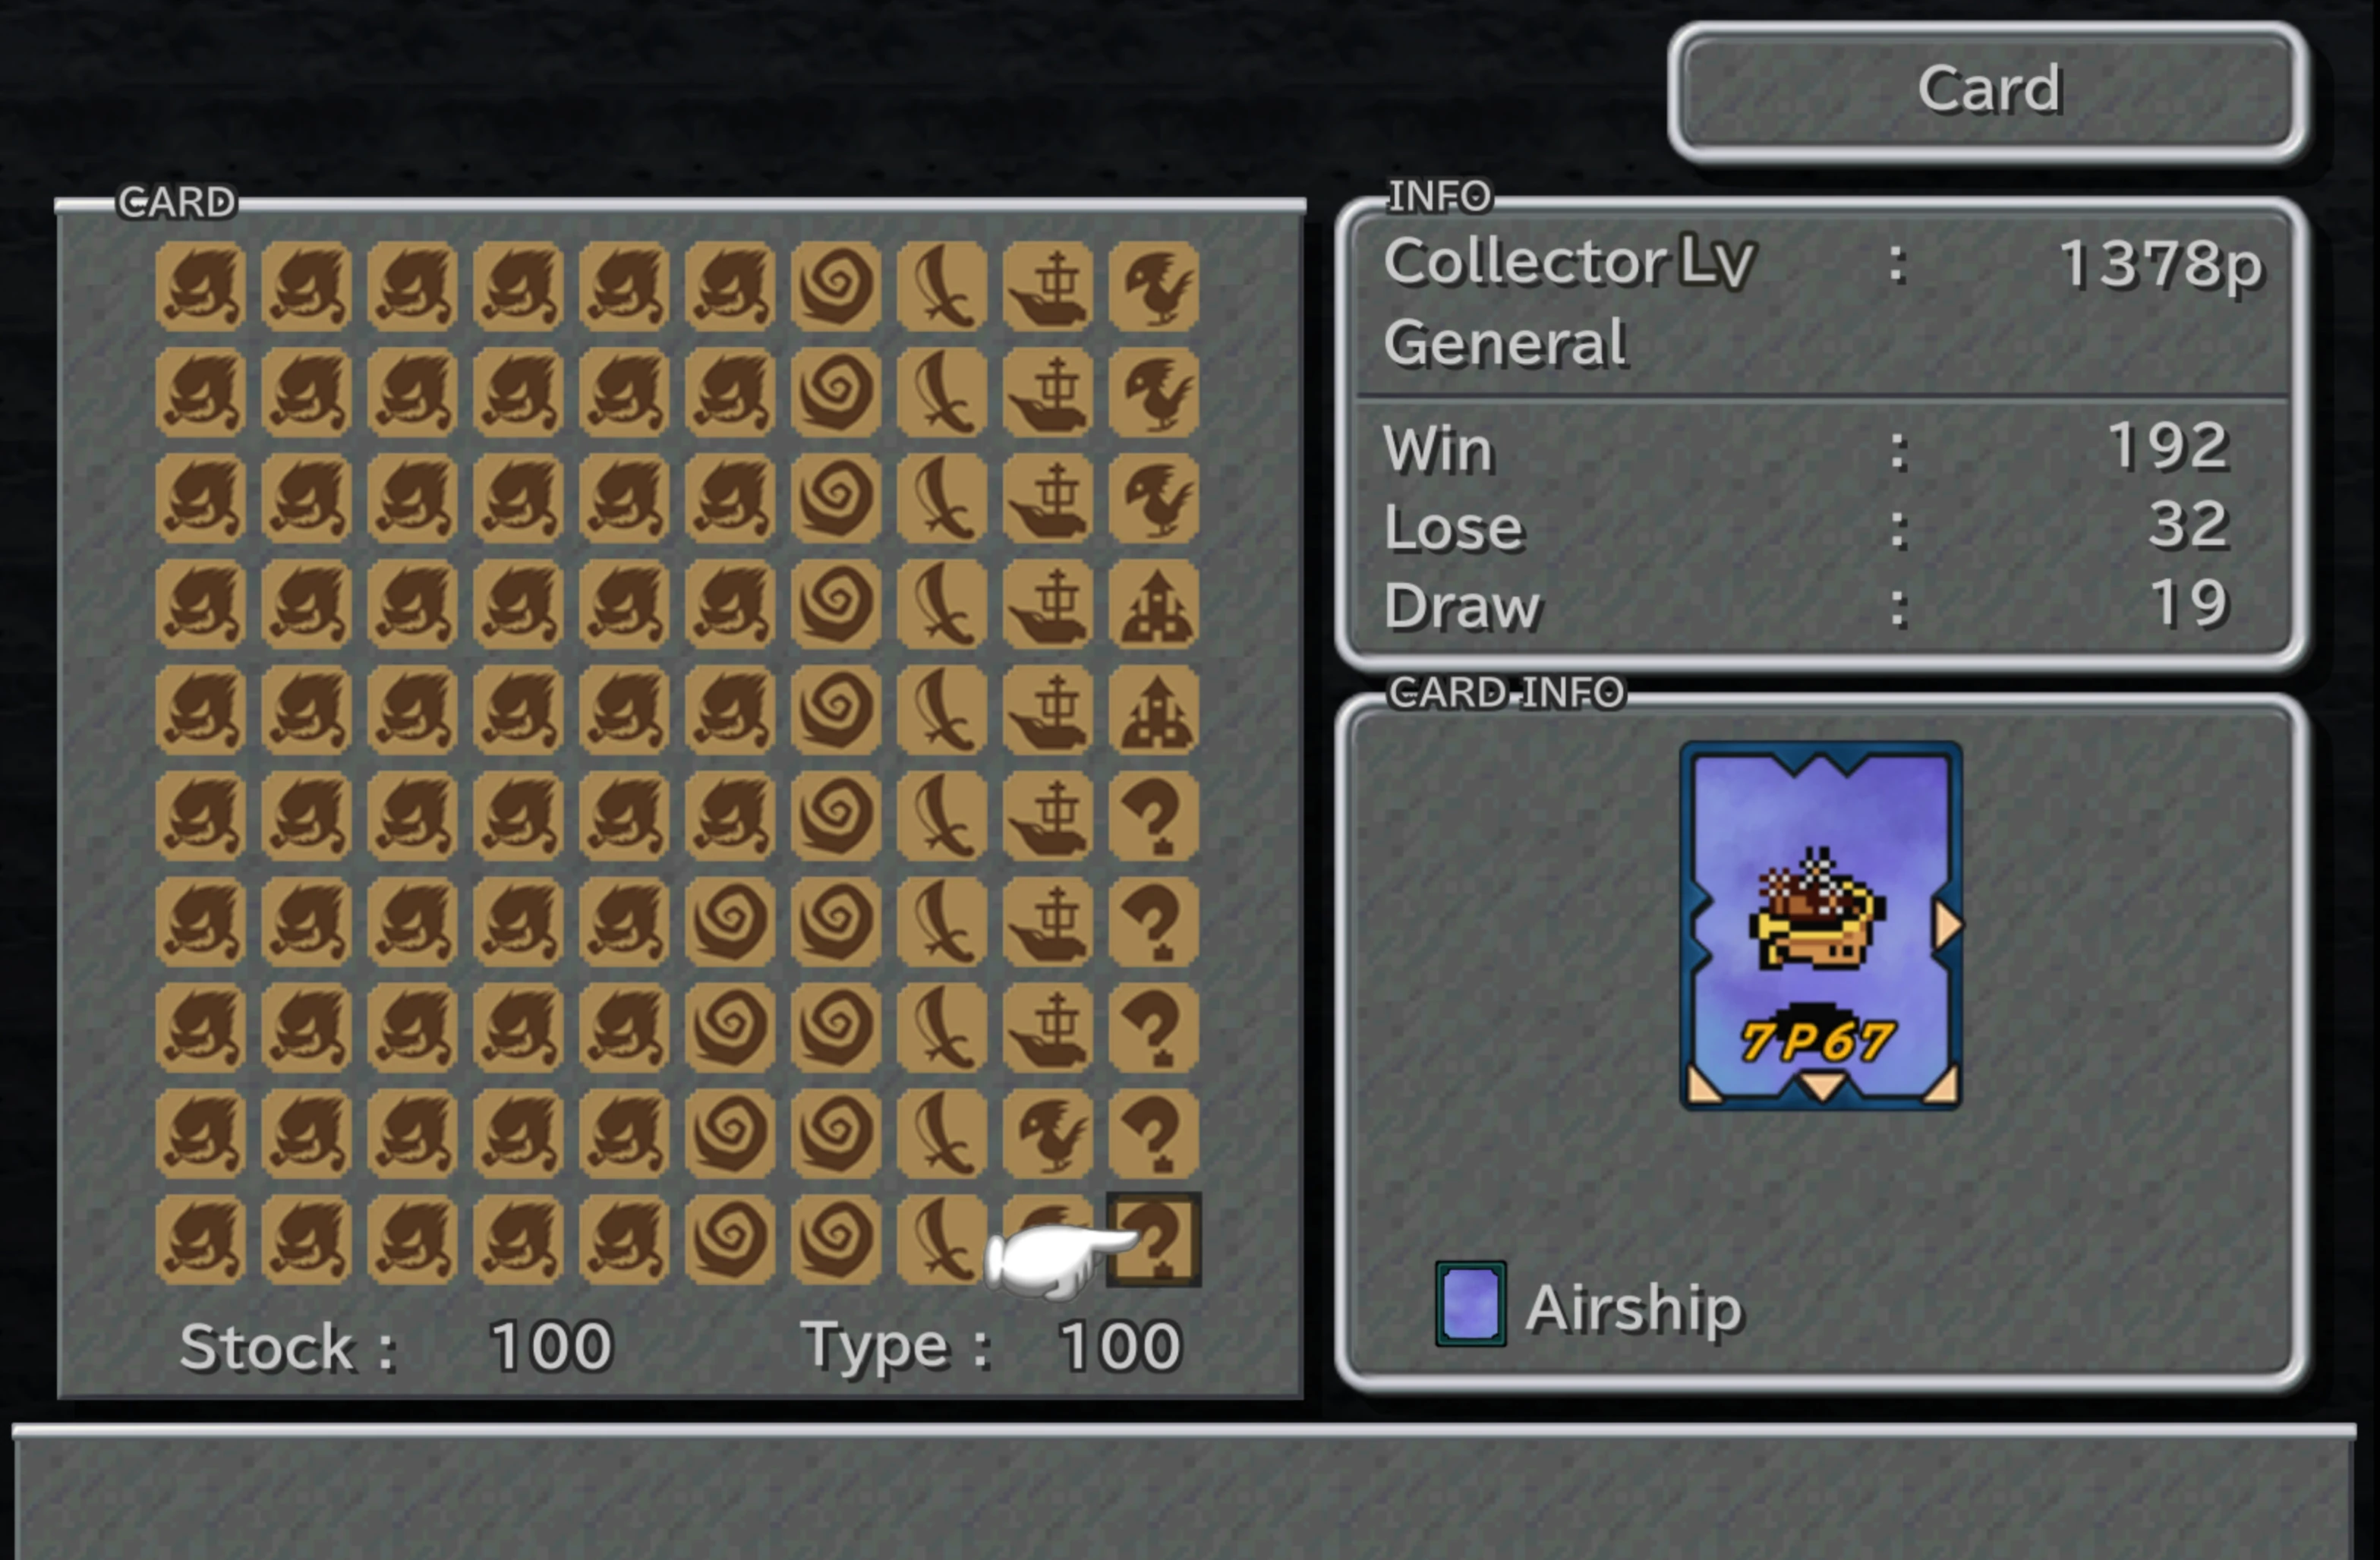

A full deck.
The player's collector's level depends upon the number of unique cards they own. There are 100 unique cards in total, some of which are hard to obtain. Many players elect to go to extreme lengths to achieve a full deck so to have mastered the game. Because some cards can only be obtained once, the ability to reclaim a lost card (described above) is invaluable. Many of the unique cards are only available during sidequests or alterations to the storyline, but there are usually at least two opportunities to receive each card (an example of this is Namingway, which can be found in the Desert Palace, but can also be won in the Treno Card Tournament, depending on the player's actions).
To achieve the highest collector's level is the ultimate feat in the game. The requirements are as follows:
- The player must collect one of every card in the game.
- Every card must have a different arrow pattern.
- All cards must be built up to a battle class of "A".
| Points | Title | Points | Title |
|---|---|---|---|
| 0-299 | Beginner | 1350-1359 | Champion |
| 300-399 | Novice | 1360-1369 | Analyst |
| 400-499 | Player | 1370-1379 | General |
| 500-599 | Senior | 1380-1389 | Expert |
| 600-699 | Fan | 1390-1399 | Shark |
| 700-799 | Leader | 1400-1419 | Specialist |
| 800-899 | Coach | 1420-1469 | Elder |
| 900-999 | Advisor | 1470-1499 | Dominator |
| 1000-1099 | Director | 1500-1549 | Maestro |
| 1100-1199 | Dealer | 1550-1599 | King |
| 1200-1249 | Trader | 1600-1649 | Wizard |
| 1250-1299 | Commander | 1650-1679 | Authority |
| 1300-1319 | Doctor | 1680-1689 | Emperor |
| 1320-1329 | Professor | 1690-1697 | Pro |
| 1330-1339 | Veteran | 1698-1699 | Master |
| 1340-1349 | Freak | 1700 | (see below) |
If a player reaches the highest collector's level, a glitch occurs and the card rank will not be displayed. Instead, the game displays the message: "Would you like to discard this card?"
Online version

Yuna in Tetra Master.
Tetra Master's online incarnation introduced a variety of features: competitive modes for up to three players; new cards based on characters from Final Fantasy IX and Final Fantasy X; and special locations on game boards that could make cards more powerful or capture lines of cards with an electrical blast. The game contained an original soundtrack and employed characters from Final Fantasy IX, such as Quina Quen and Beatrix, as computer-controlled opponents.
Upon creating a Tetra Master account, players were prompted to join one of three groups: the Warriors Guild, which specialized in weapon cards with high offense; the Voyagers Guild, which specialized in airship and building cards with high defense; or the Summoners Guild, which specialized in eidolon and magic cards. This was intended to encourage trade between players since they would not have been able to obtain every card by themselves.
Players accumulated currency and leveled up their cards as they played the game. Winnings could be spent on themed booster packs containing random cards or used at auctions to bid on specific pieces. Like the original minigame, a victorious player could claim a card from the opponent's hand. In three player matches the winner could take a card from each opponent and the runner-up could take a card from the least successful contender.
The Tetra Master online service was discontinued on December 31st, 2010. The game has no offline component and thus can no longer be played.
PlayOnline gallery
Template:Gallery
The card game in real life
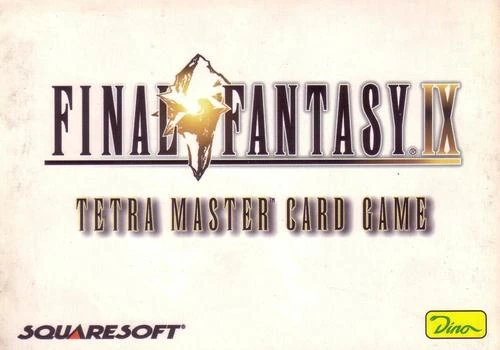
Cover art of the Tetra Master set.


Tetra Master set.
An actual Tetra Master game was released for a short time in Europe, published by Dino in 2001. It was different from other card games of the type, because instead of buying booster packs, the player bought one set of the cards; every set came with the same cards. Each set comes with 120 cards, two ten-sided dice, a German manual (there is also a black-and-white English translation, but this may or may not come standard), a double-sided playing board featuring two scenes from Final Fantasy IX, ten yellow counters and ten red counters.
The game rules are the same with a few modifications so that it can be adequately used on paper.
Bonus cards
No card has an X or A type normally; there are instead bonus X and A attribute cards that, if drawn, can be applied to the card the player plays for its fight. Each set comes with five X cards and three A cards. There are also collector level cards; there are eight in each set, represented as levels. The player starts at level one, and upon defeating their opponent, they remove the top Level One card to reveal the Level Two card. First to Level eight is the winner of the game.
The levels are:
- Beginner
- Novice
- Player
- Fan
- Leader
- Coach
- Advisor
- Director
Each set comes with five block cards both players can place at the start of a round. Each set contains two damage cross referencing cards; to use this card, the player compares the attacker's attacking value (left) to the defender's defending value (top) and the number that the columns intersect on is what the attacker must roll, that number or higher. The player uses one dice as the tens digit and one as the ones digit, which colors are chosen before the roll so the attacker cannot cheat.
Taking opponent's cards on winning is optional.
Other than these few rule modifications the game plays the same.
Cards
See individual pages for info on how to acquire said card. Enemies usually drop their own card after battle. If the player's card quota is full, enemies stop dropping cards and the player cannot acquire more cards before discarding old ones. If the player finds a card in a Chocograph treasure while their card quota is full, the card is lost, but can be reclaimed by finishing the chocobo sidequest and talking to the Fat Chocobo in Chocobo's Paradise.
| List of Cards | |||||||||
|---|---|---|---|---|---|---|---|---|---|
| 001 | Goblin | 021 | Carrion Worm | 041 | Ash | 061 | Ifrit | 081 | Blue Narciss |
| 002 | Fang | 022 | Cerberus | 042 | Wraith | 062 | Ramuh | 082 | Hilda Garde III |
| 003 | Skeleton | 023 | Antlion | 043 | Gargoyle | 063 | Atomos | 083 | Invincible |
| 004 | Flan | 024 | Cactuar | 044 | Vepal | 064 | Odin | 084 | Cargo Ship |
| 005 | Zaghnol | 025 | Gimme Cat | 045 | Grimlock | 065 | Leviathan | 085 | Hilda Garde I |
| 006 | Lizard Man | 026 | Ragtimer (Ragtime MouseName in the English PAL release) | 046 | Tonberry | 066 | Bahamut | 086 | Red Rose |
| 007 | Zombie | 027 | Hedgehog Pie | 047 | Veteran | 067 | Ark | 087 | Theater Ship |
| 008 | Bomb | 028 | Ralvuimago | 048 | Garuda | 068 | Fenrir | 088 | Viltgance |
| 009 | Ironite | 029 | Ochu | 049 | Malboro | 069 | Madeen | 089 | Chocobo |
| 010 | Sahagin | 030 | Troll | 050 | Mover | 070 | Alexander | 090 | Fat Chocobo |
| 011 | Yeti | 031 | Blazer Beetle | 051 | Abadon | 071 | Excalibur II | 091 | Mog |
| 012 | Mimic | 032 | Abomination | 052 | Behemoth | 072 | Ultima Weapon | 092 | Frog |
| 013 | Wyerd | 033 | Zemzelett | 053 | Iron Man | 073 | Masamune | 093 | Oglop |
| 014 | Mandragora | 034 | Stroper | 054 | Nova Dragon | 074 | Elixir | 094 | Alexandria |
| 015 | Crawler | 035 | Tantarian | 055 | Ozma | 075 | Dark Matter | 095 | Lindblum |
| 016 | Sand Scorpion | 036 | Grand Dragon | 056 | Hades | 076 | Ribbon | 096 | Twin Moons |
| 017 | Nymph | 037 | Feather Circle | 057 | Holy | 077 | Tiger Racket | 097 | Gargant |
| 018 | Sand Golem | 038 | Hecteyes | 058 | Meteor | 078 | Save the Queen | 098 | Namingway |
| 019 | Zuu | 039 | Ogre | 059 | Flare | 079 | Genji | 099 | Boco |
| 020 | Dragonfly | 040 | Armstrong | 060 | Shiva | 080 | Mythril Sword | 100 | Airship |
Trivia
- Tetra Master is the name of a Garment Grid in Final Fantasy X-2.
External Links
Template:FFIX Template:Minigames