Template:Sideicon
Command menu.
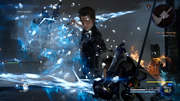
Techniques are special abilities usable by party members in Final Fantasy XV. They somewhat hearken to Limit Break systems from previous games in the series.
Mechanics
Techniques are acquired via the Ascension Grid, and can be used in battle by pressing ![]() or
or ![]() when using the Type A control scheme. Using a Technique for the first time earns the Brother-in-Arms achievement/trophy.
when using the Type A control scheme. Using a Technique for the first time earns the Brother-in-Arms achievement/trophy.
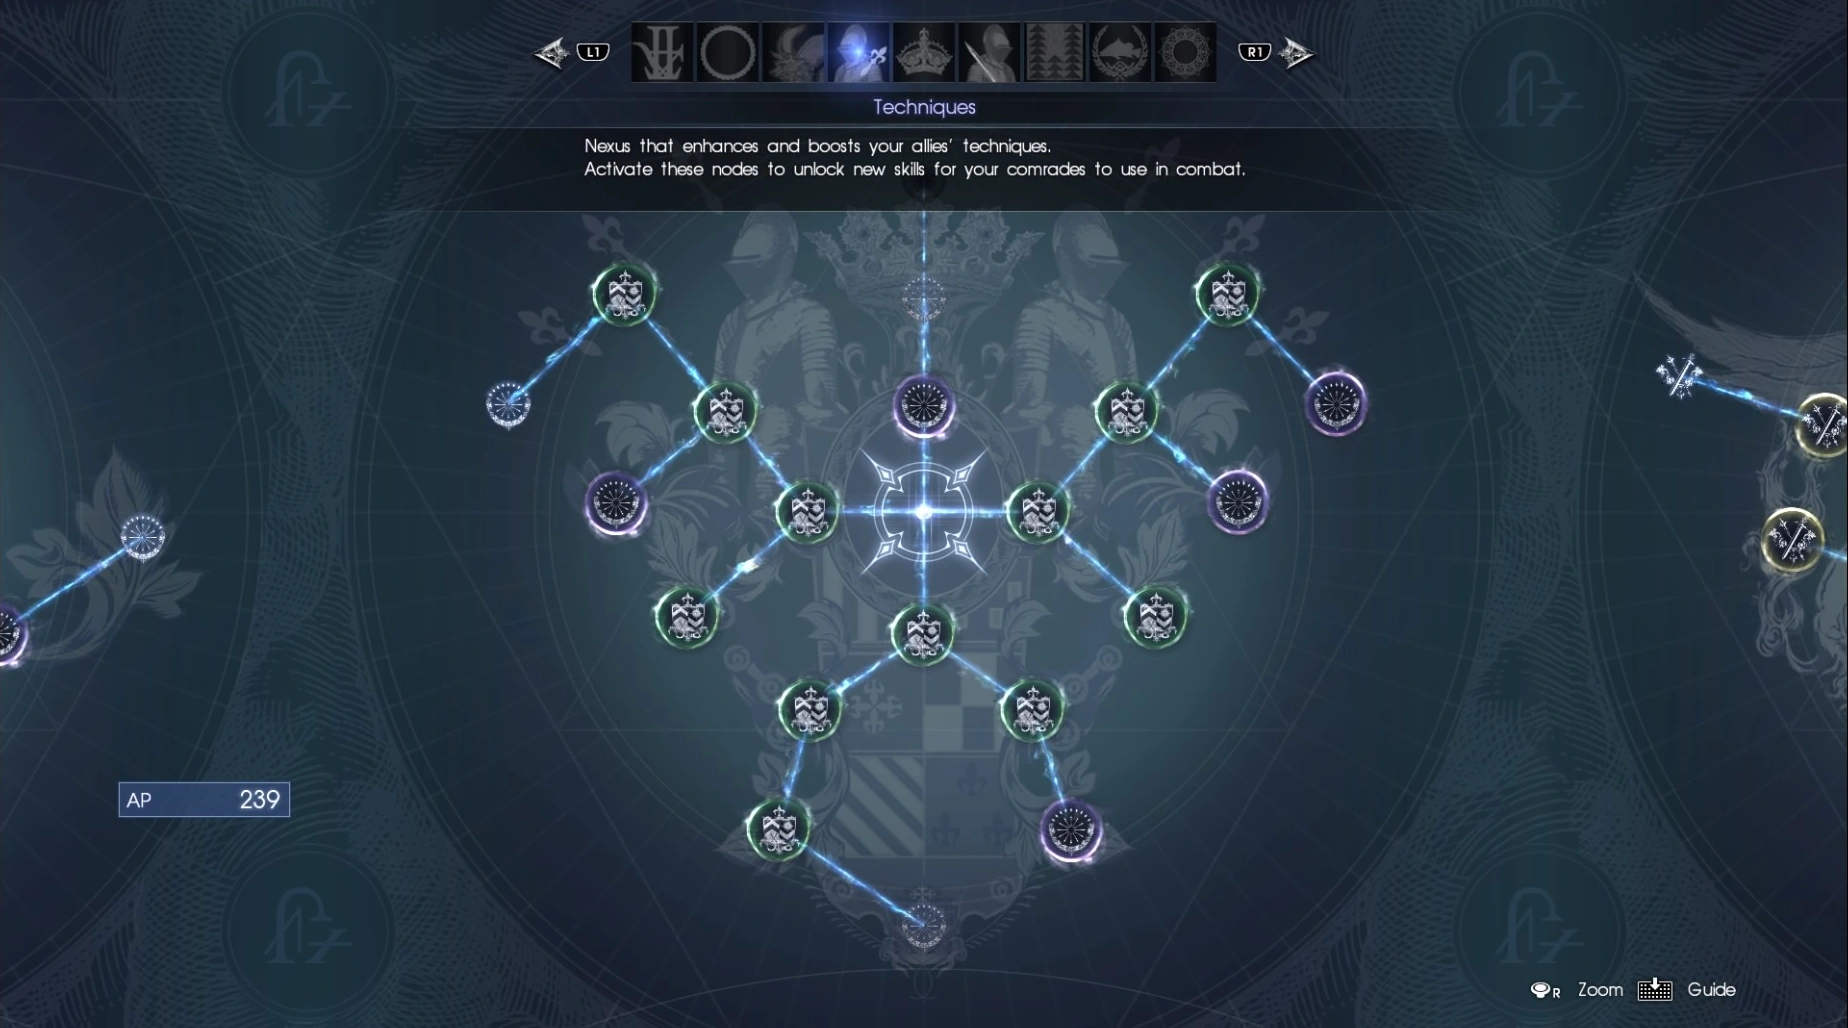
Techniques tree in the Ascension menu.
Each character has one base technique available at the start. Some techniques level up with use; each time they do, their power and critical rate increase. Critical techniques, indicated by a yellow bar rather than a green one, have strengthened effects. Some recipes will be favored by a party member, guaranteeing critical versions from them (or in Noctis's case, boosting the tech bar replenish rate). Techniques can be swapped with the Gear option in the main menu. Guests' techniques cannot be changed, nor do they appear in the Ascension, but they can be leveled up with repeated use.
Techniques require an available target and their usage is mandated by the tech bar, a gauge that starts to fill when engaging a battle zone, and fills over time during battle. It is segmented into three, and the bar must first fill to either the first, second, or third to use a specific technique. The tech bar's fill rate can be upgraded via the Ascension Grid.
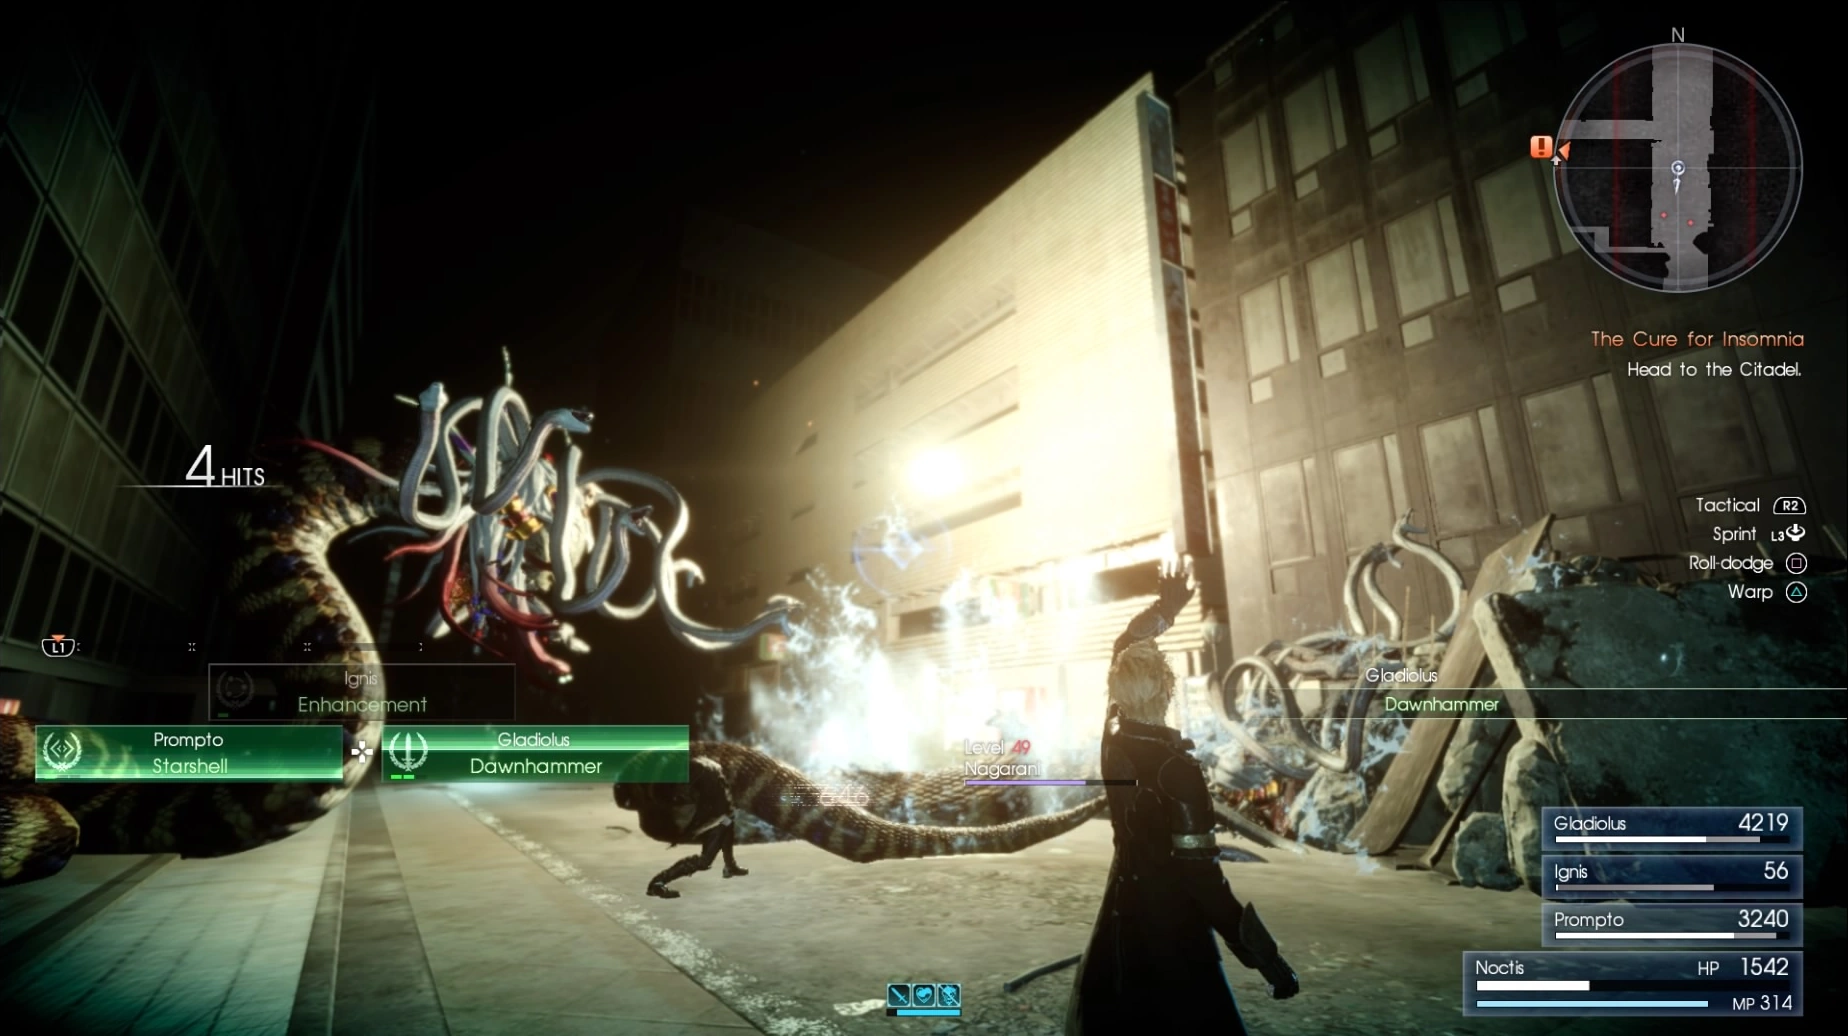
Noctis does not have his own techniques, but he can execute a follow-up attack to some of others' techniques. The characters involved in the technique, as well as Noctis, are invulnerable to damage during the tech animation. Some 1- or 2-bar techniques (Tempest, Piercer, Dawnhammer, Cyclone, Libra Elementia, Starshell, Snapshot, Gravisphere, and Recoil) can be performed simultaneously, but the player won't be able to perform the follow-up attack to the prior technique.
Gladiolus's techniques damage enemies, and often break appendages, making them vulnerable to further harm. Ignis's techniques aid the player by healing, providing warp points, and bestowing elemental buffs. Prompto's techniques are ranged, from shooting through enemies from afar, to using flares to weaken enemies, to using his photography skills in battle (in addition to the photos he takes automatically).
When the ability to play as the other party members is unlocked, they gain the same techniques available to them in their respective DLC episodes. Like in the DLC, these techniques will never trigger critically. Noctis, Ignis, and Prompto have their tech bars fill even when not playing as them, while Gladiolus retains his vigor level when switching to another character, then back to him. All of these reset after a battle.
|
|
|
|
|
|
| ||||||||||||||||||
|
|
|
|
|
| ||||||||||||||||||
|
|
|
|
|
| ||||||||||||||||||
|
| Technique | Cost | Effect | Character |
|---|---|---|---|
Tempest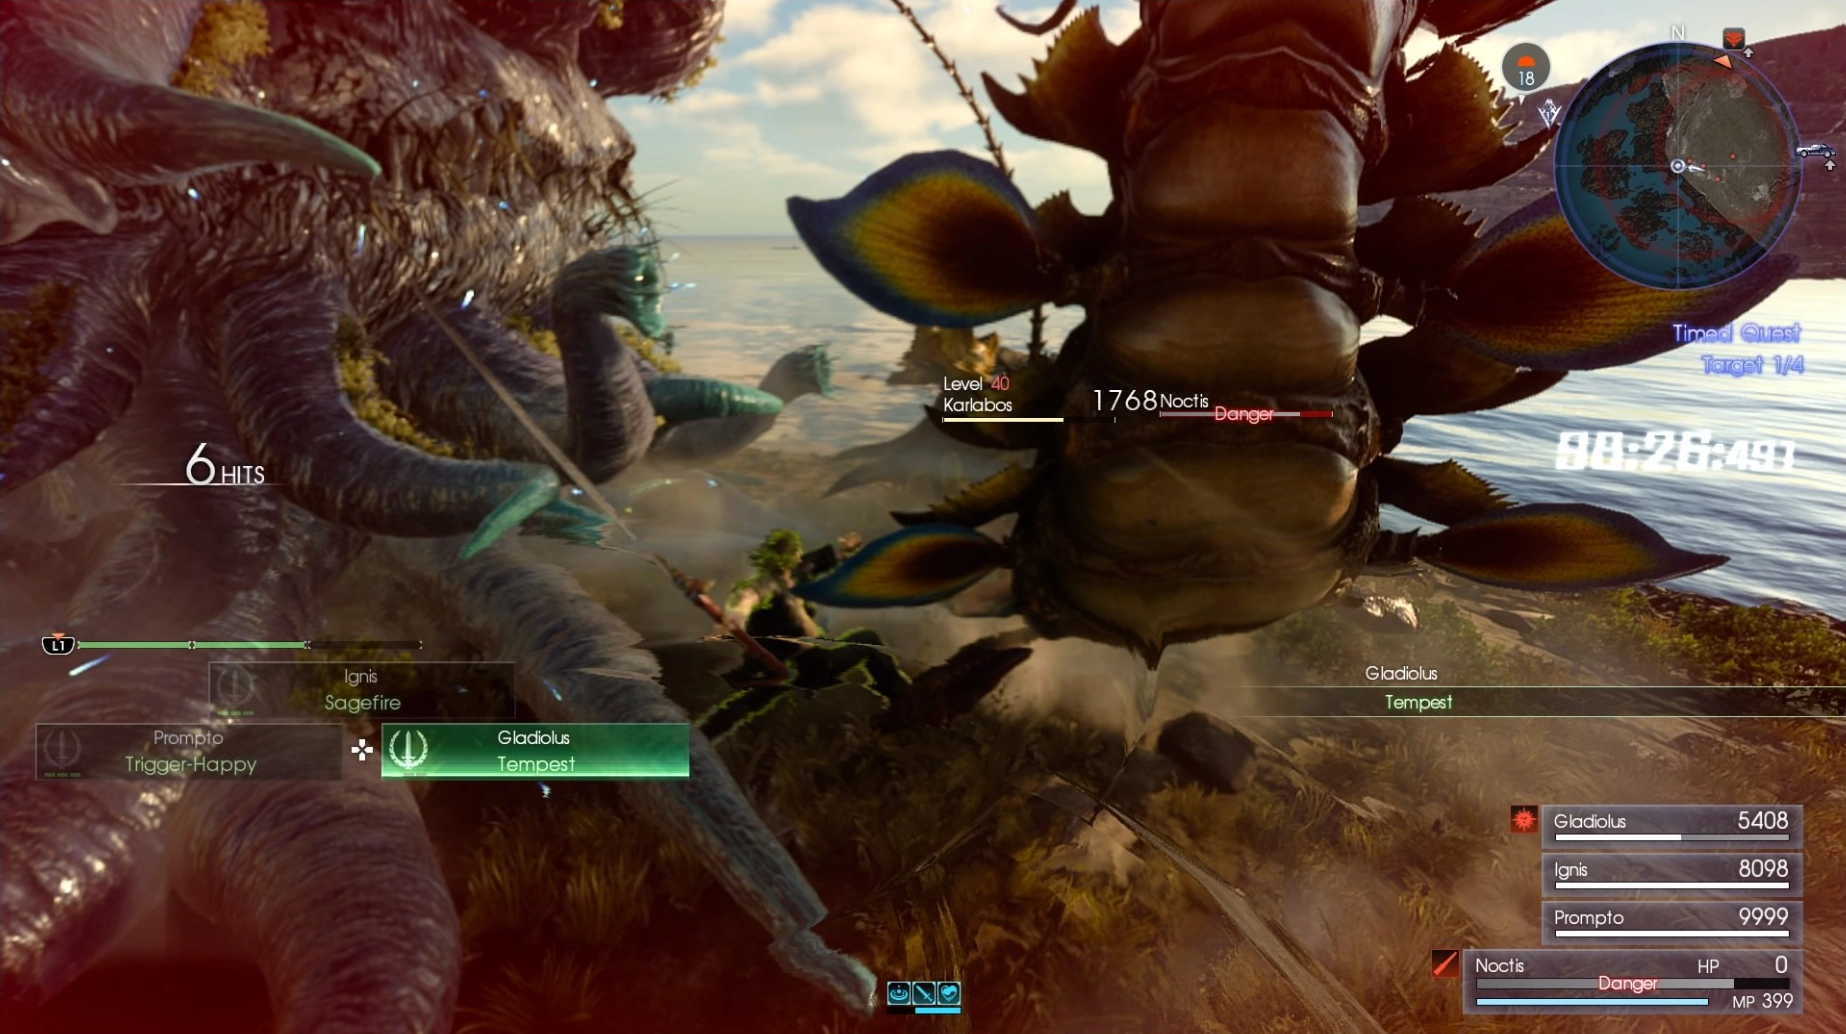
|
1 | Unleash a pair of sweeping area attacks with a greatsword. Critical version adds a third swing. Can be followed up with an attack from Noctis. | Gladiolus |
Mark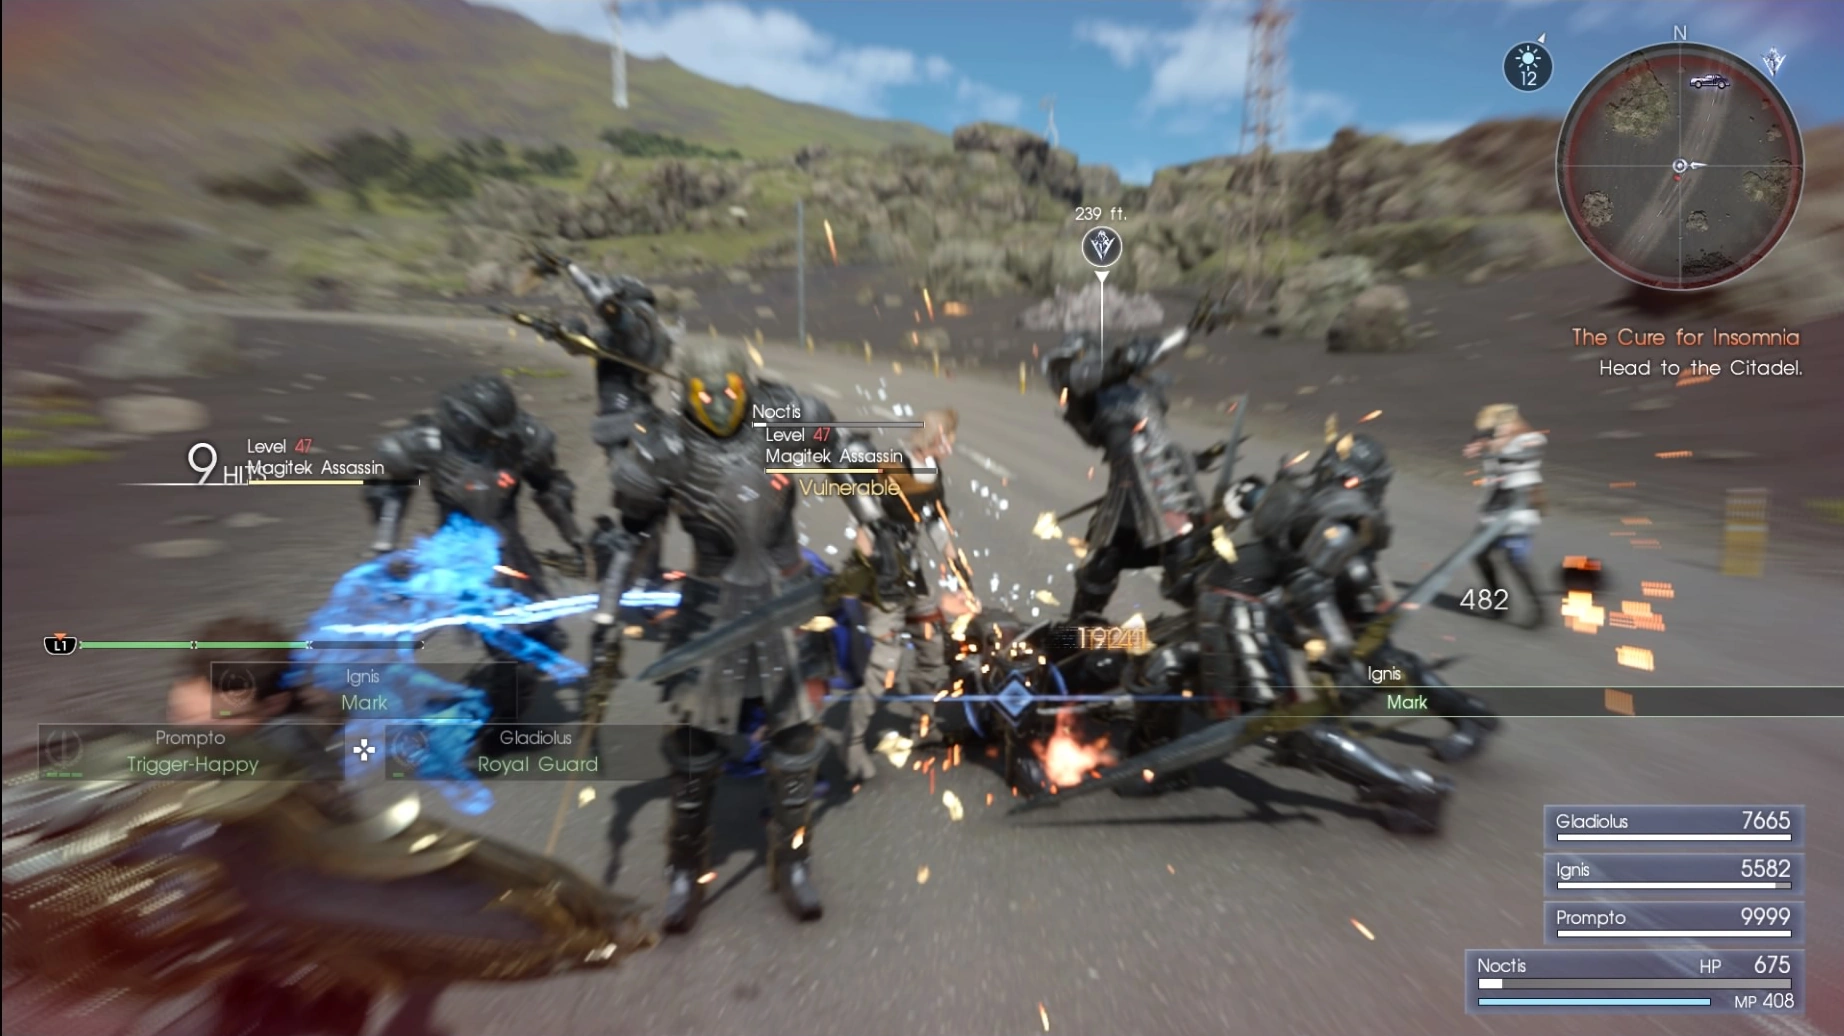
|
1 | Throws daggers at up to four nearby enemies. Noctis automatically warp-strikes them in succession with daggers with an optional finisher. Doesn't grant AP unlike regular warp-strike kills. Can be followed up with an attack from Noctis. | Ignis |
Piercer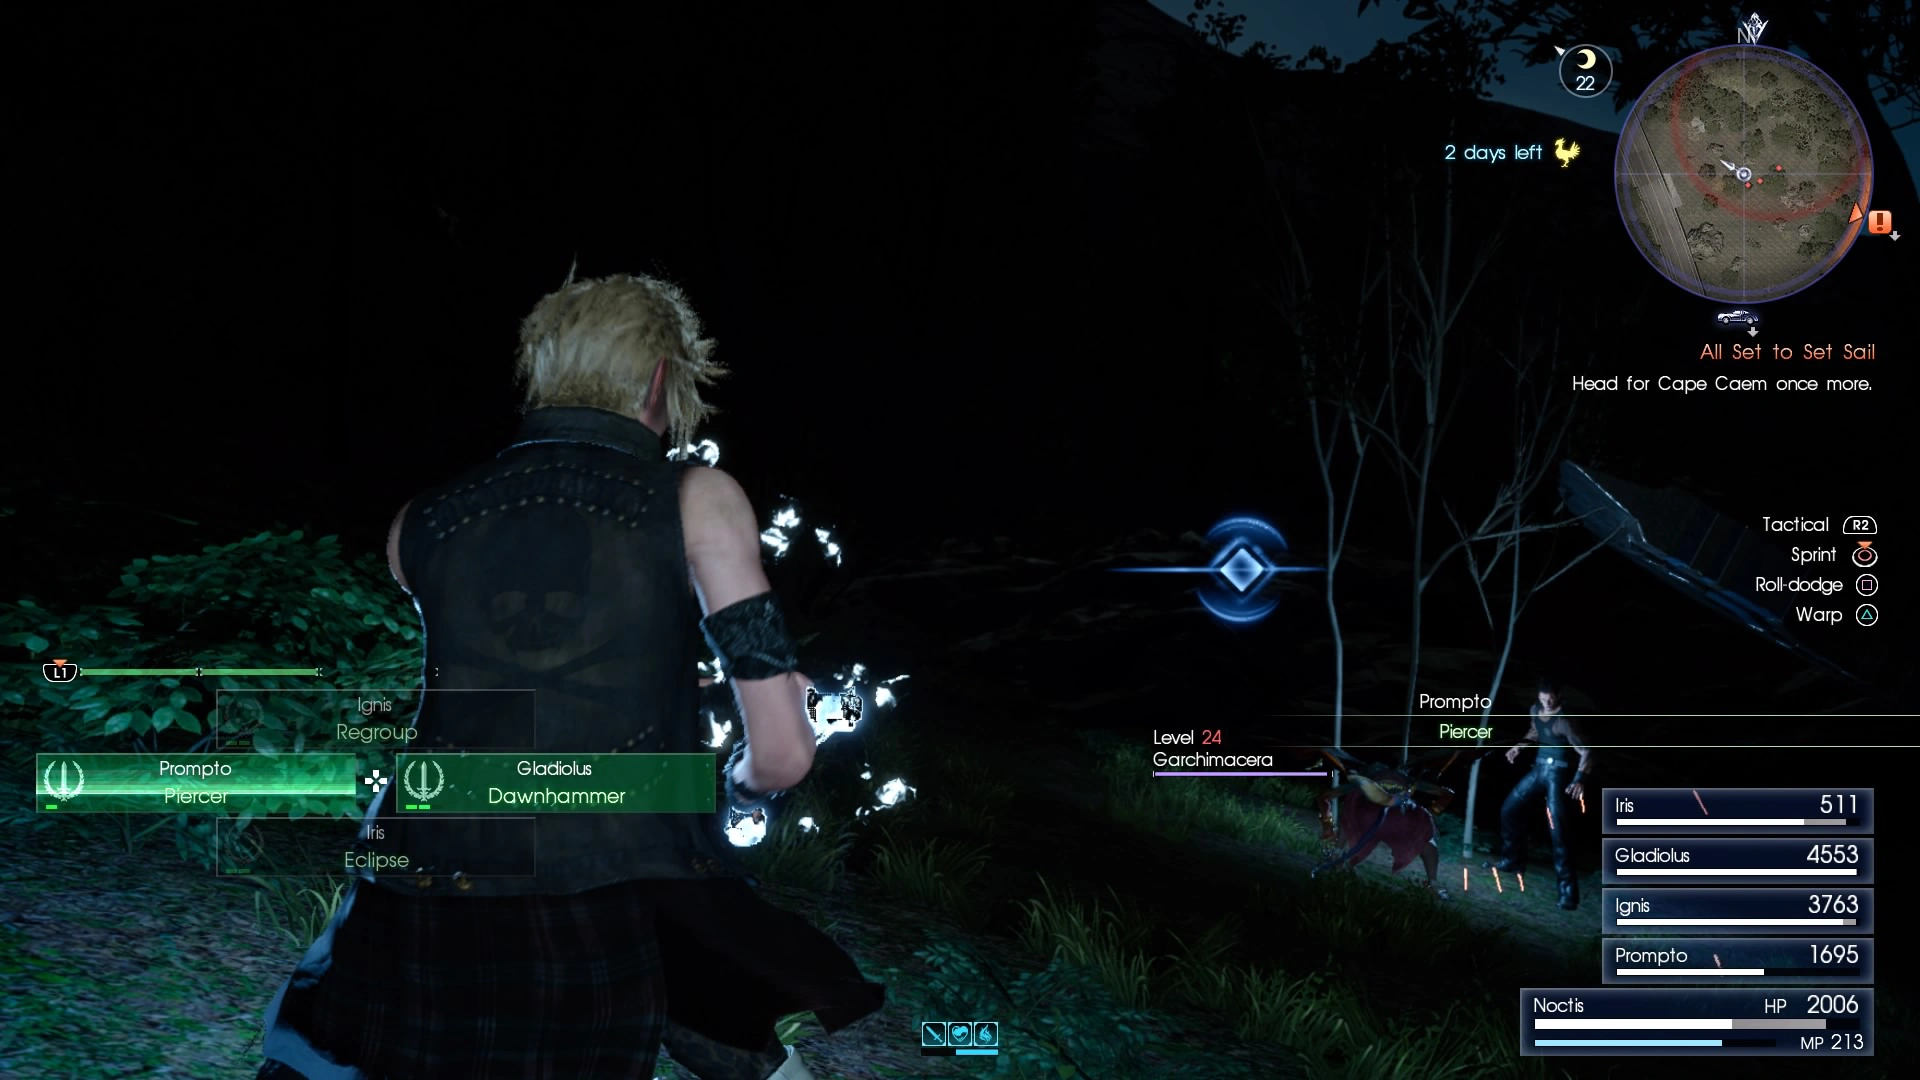
|
1 | Pierce target with a firearm to hit multiple enemies in a line. May inflict Compromised, reducing enemy defense. Decent at destroying appendages and staggering foes. Can be followed up with an attack from Noctis. | Prompto |
Dawnhammer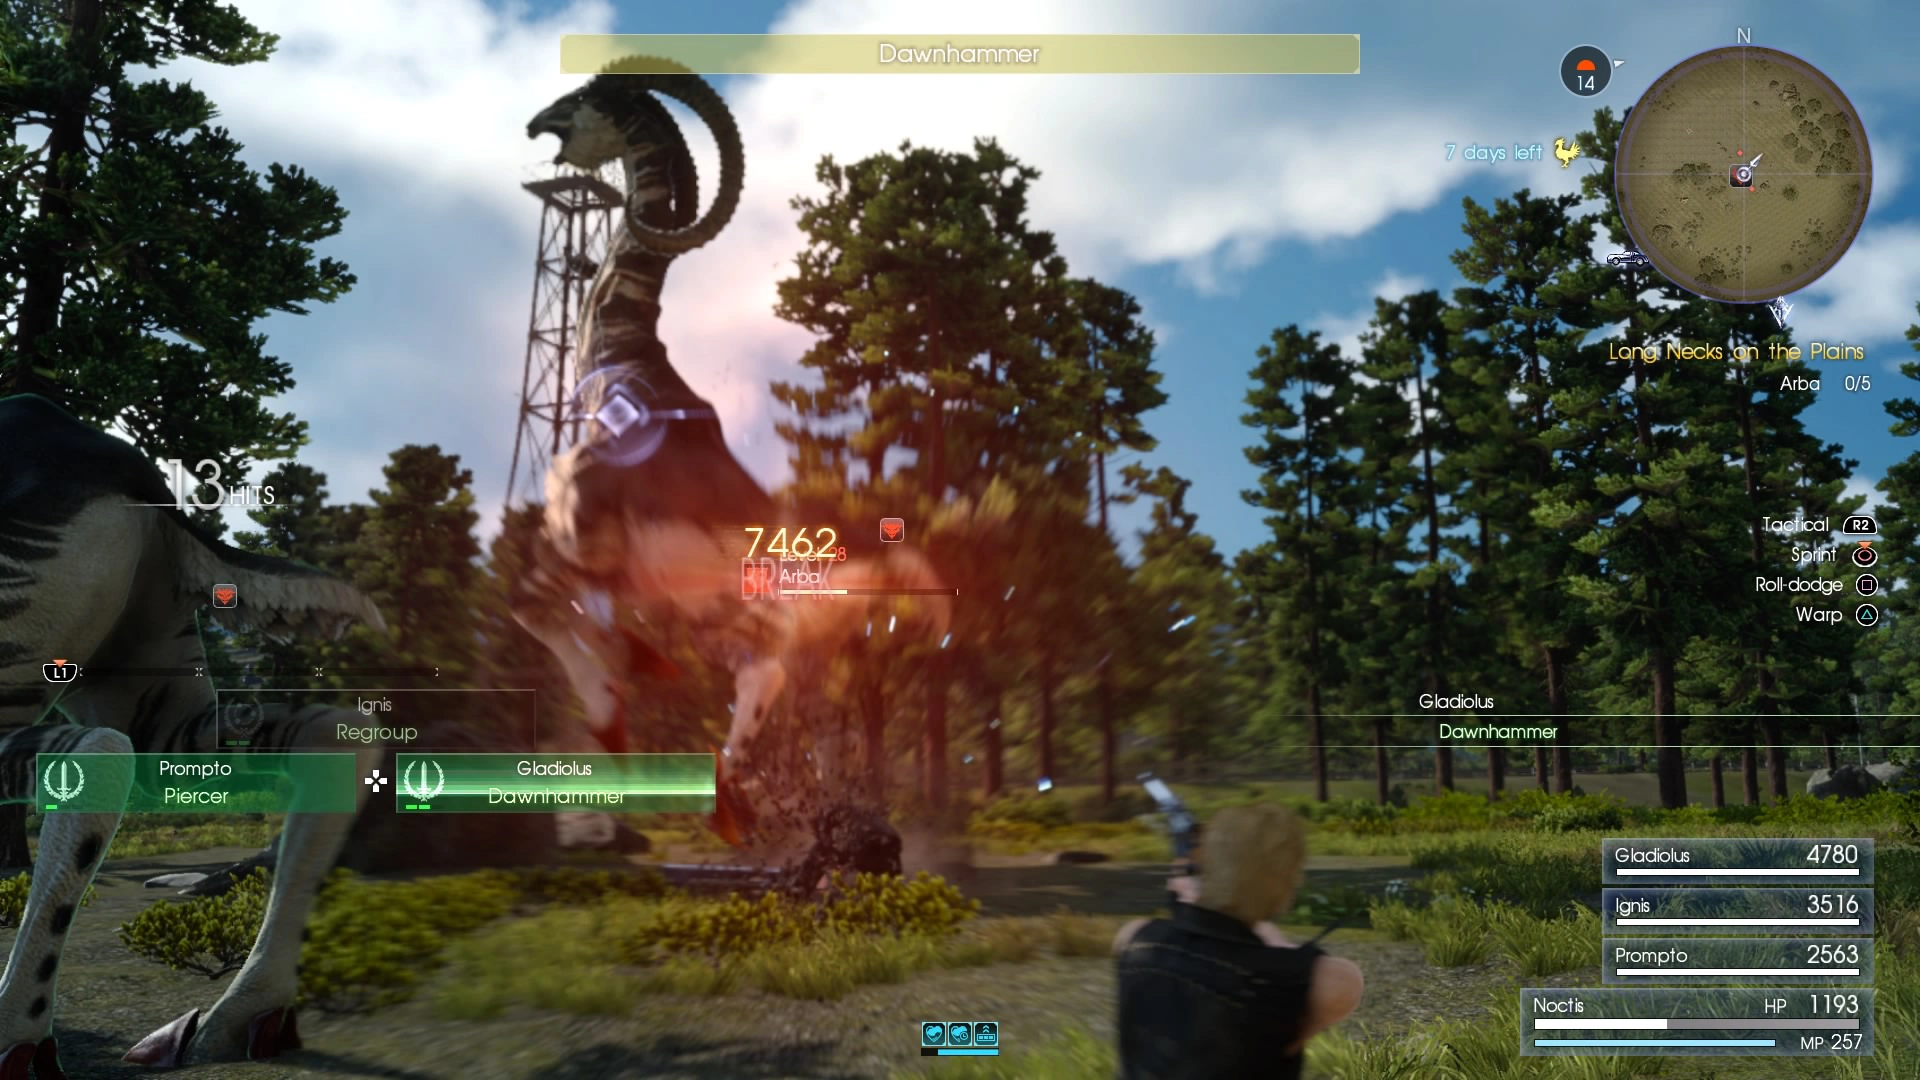
|
2 | Deliver powerful greatsword lunge to a target. Can miss agile enemies. Can be followed up with an attack from Noctis. | Gladiolus |
Regroup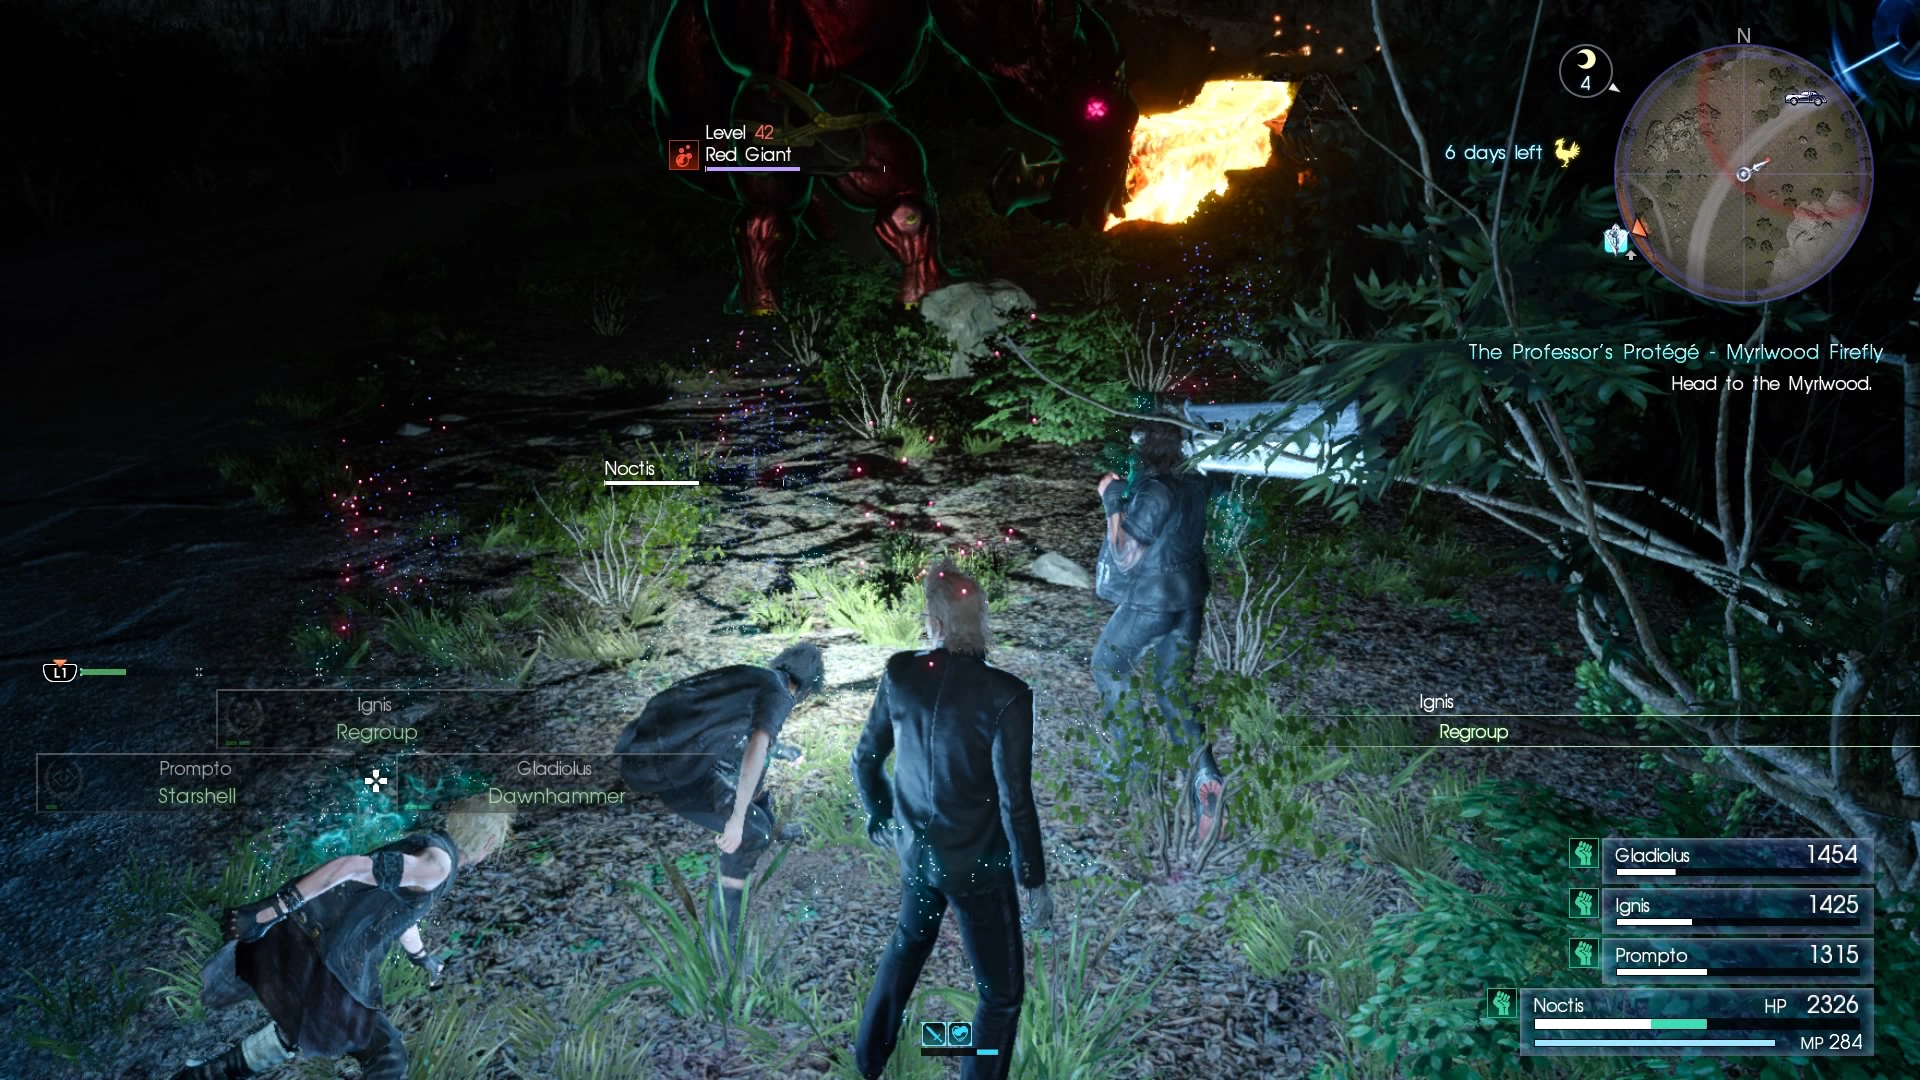
|
2 | Ignis summons the party to him, almost entirely restoring everyone's HP. Does not restore Max HP. Rescues any allies in Danger status. Poisoned or Downed allies won't be healed, though Poisoned allies still recover from Danger with 25% HP. The critical version also yields the Stalwart buff. | Ignis |
Starshell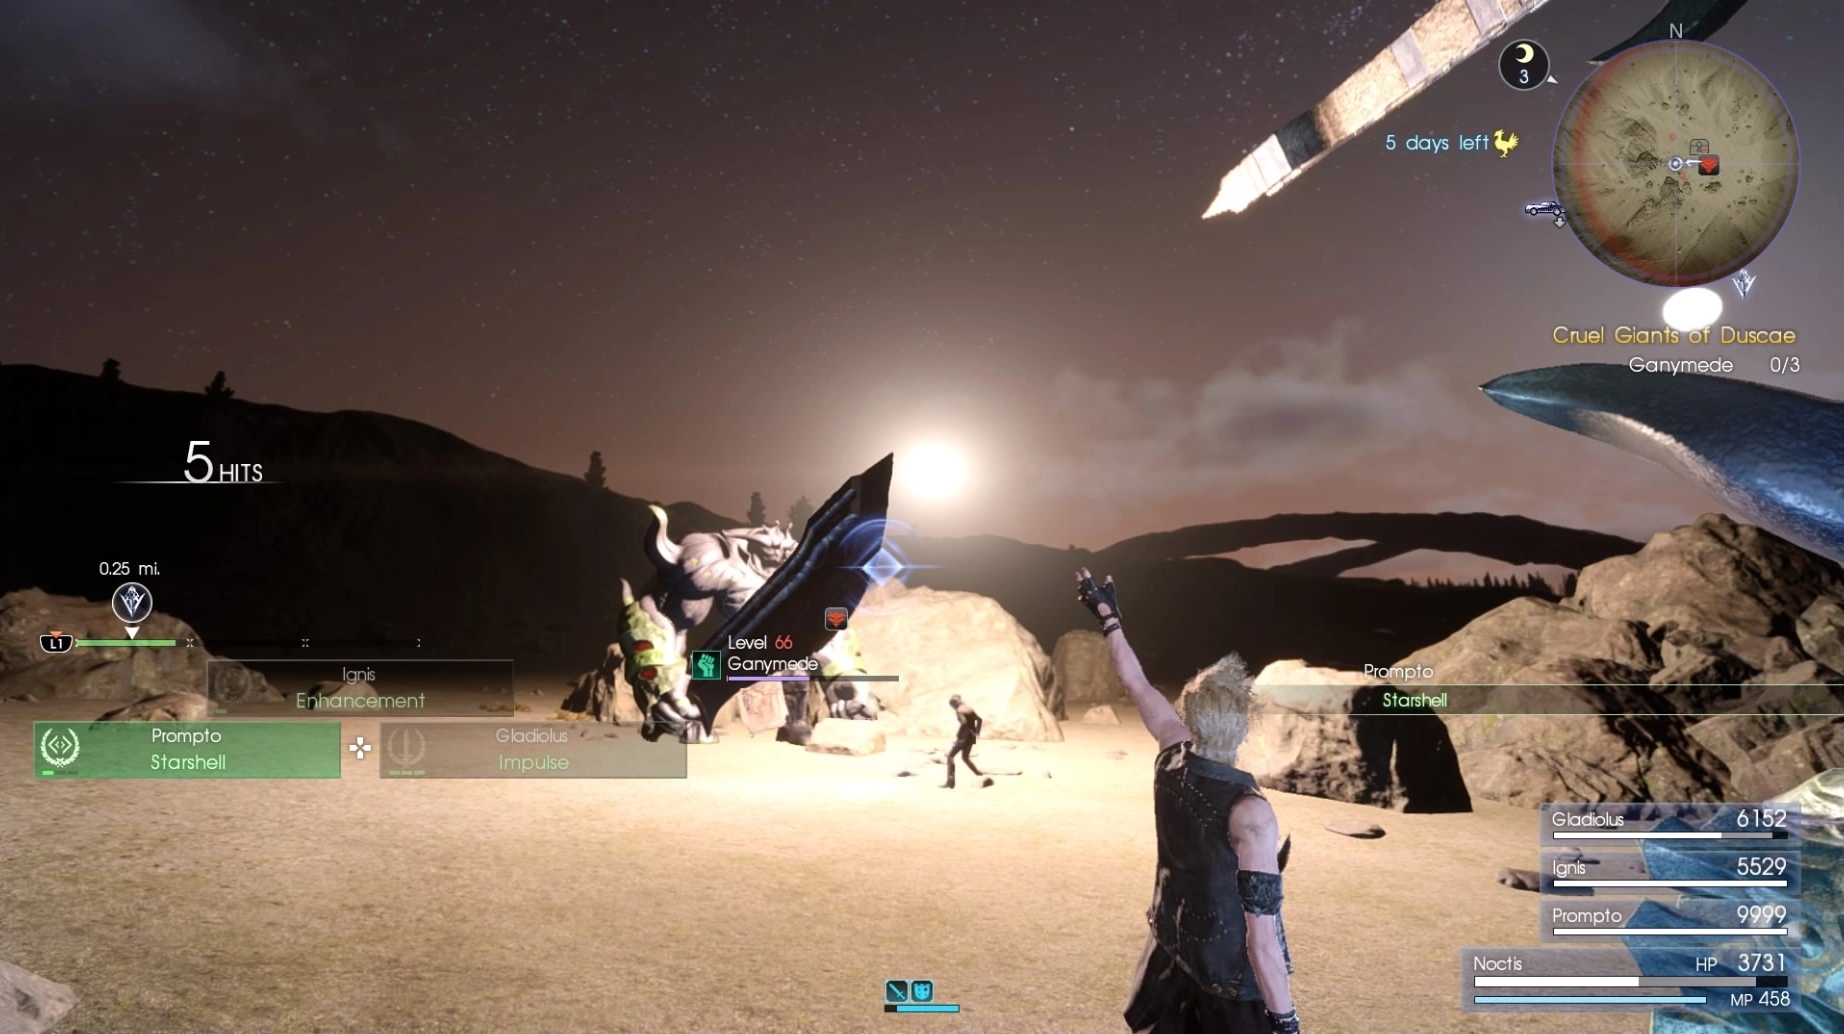
|
1 | Draws enemy attention in a wide radius with a firearm. Can inflict Threatened or Enervated, depending on the enemy. | Prompto |
Snapshot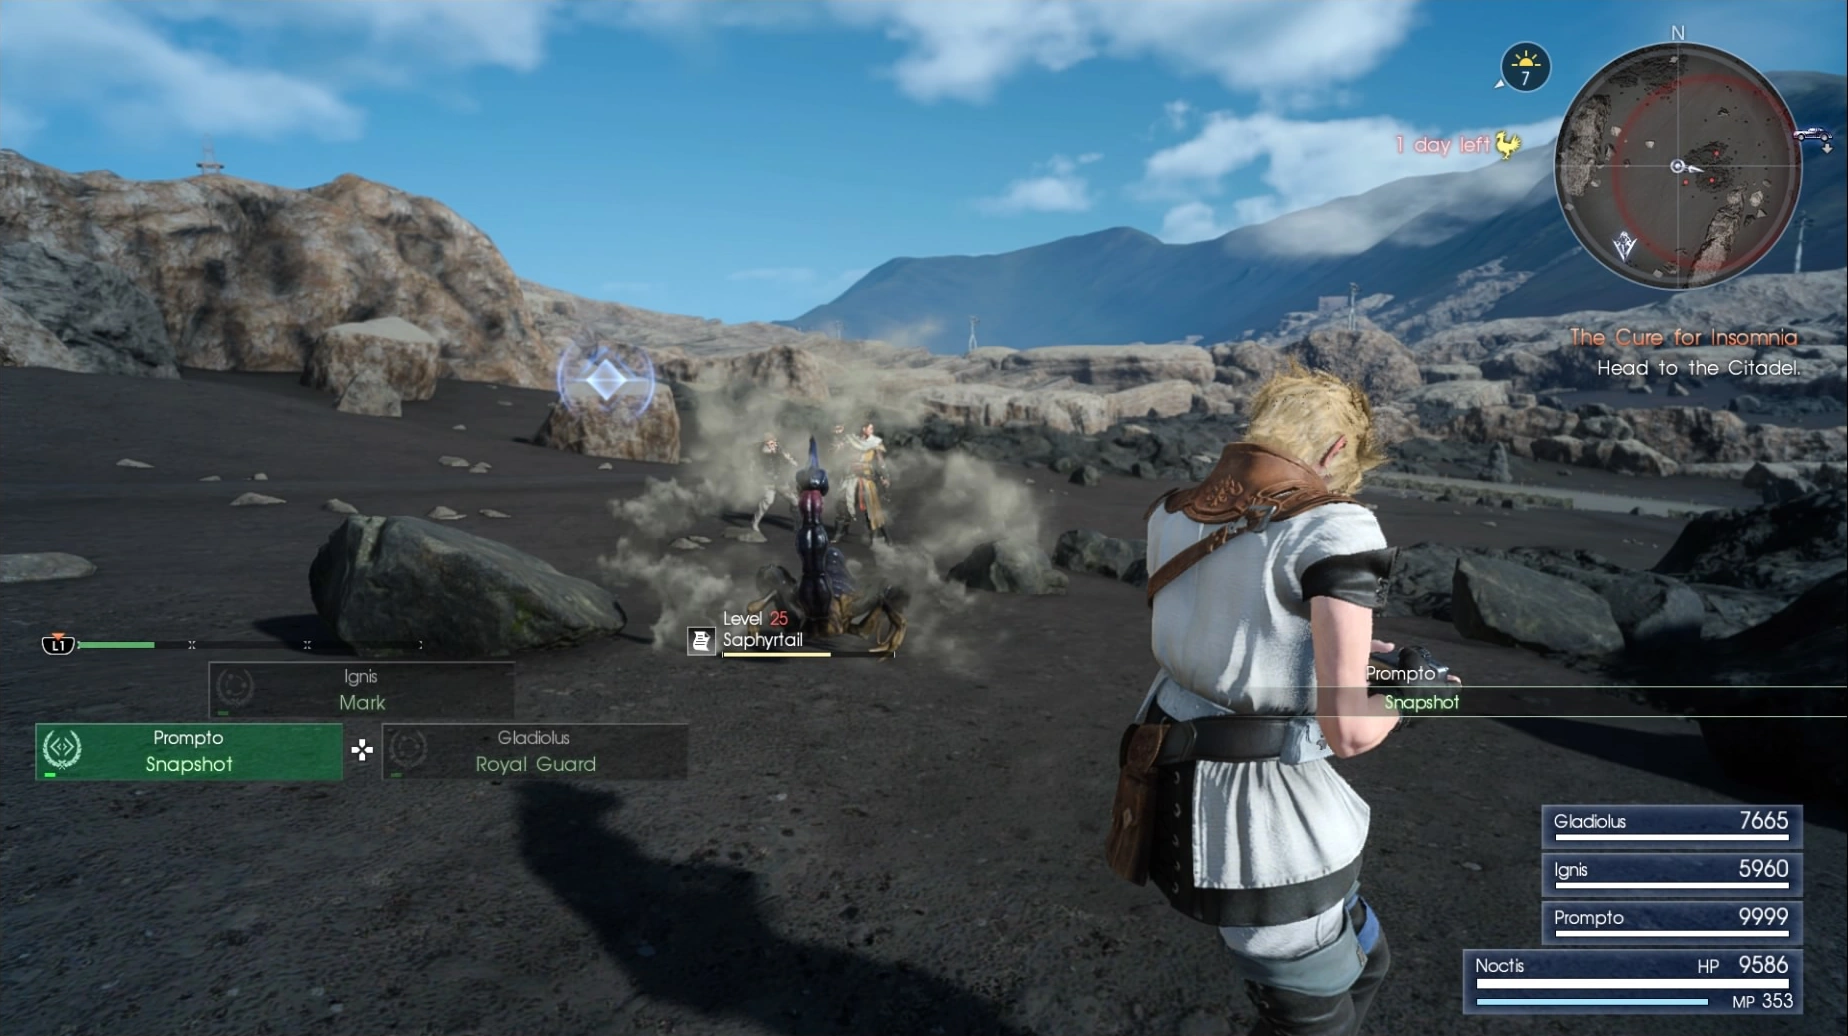
|
1 | Takes a photo mid-battle. Up to 5 photos can be saved at a time. Photos are saved to auto-snapshots. Critical version takes a selfie. | Prompto |
Royal Guard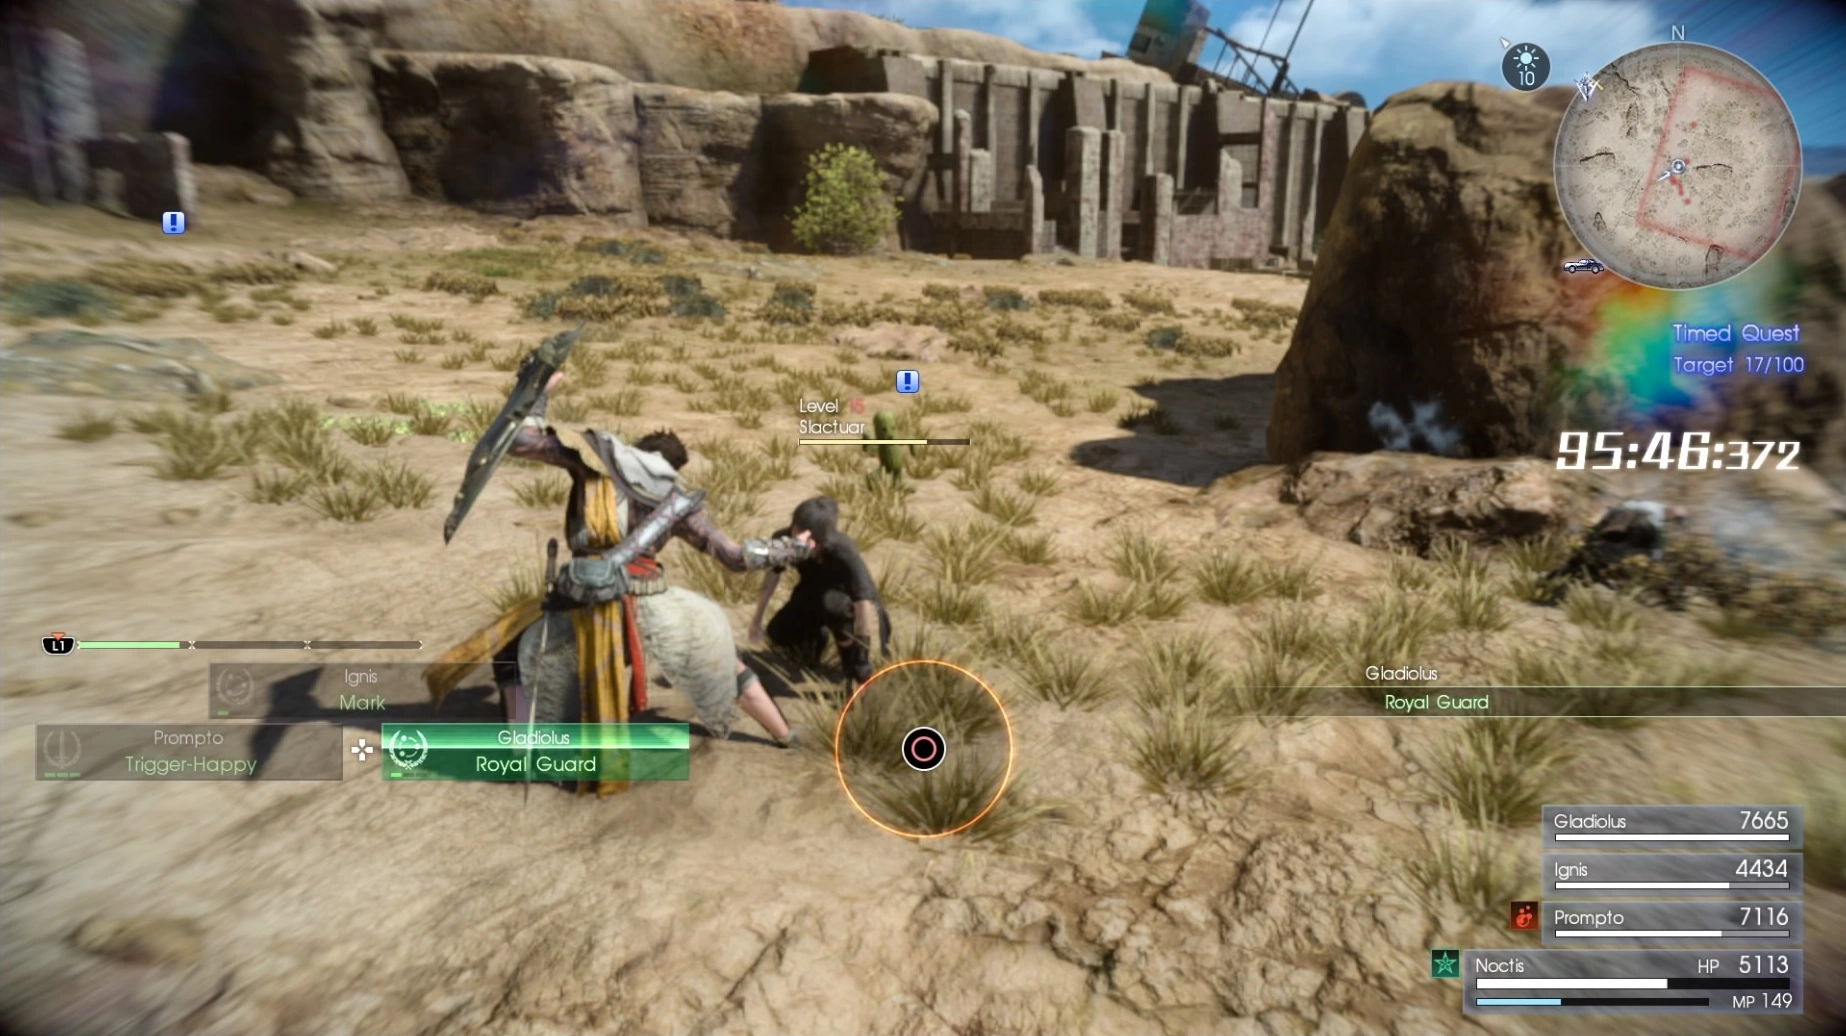
|
1 | Calls Gladiolus to protect Noctis with a shield, preventing damage and providing the Serene status to Noctis. Lasts for a short period of time, or until Noctis initiates the follow-up attack. Can't bring Noctis out of Danger. Gladiolus needs a shield equipped. | Gladiolus |
Enhancement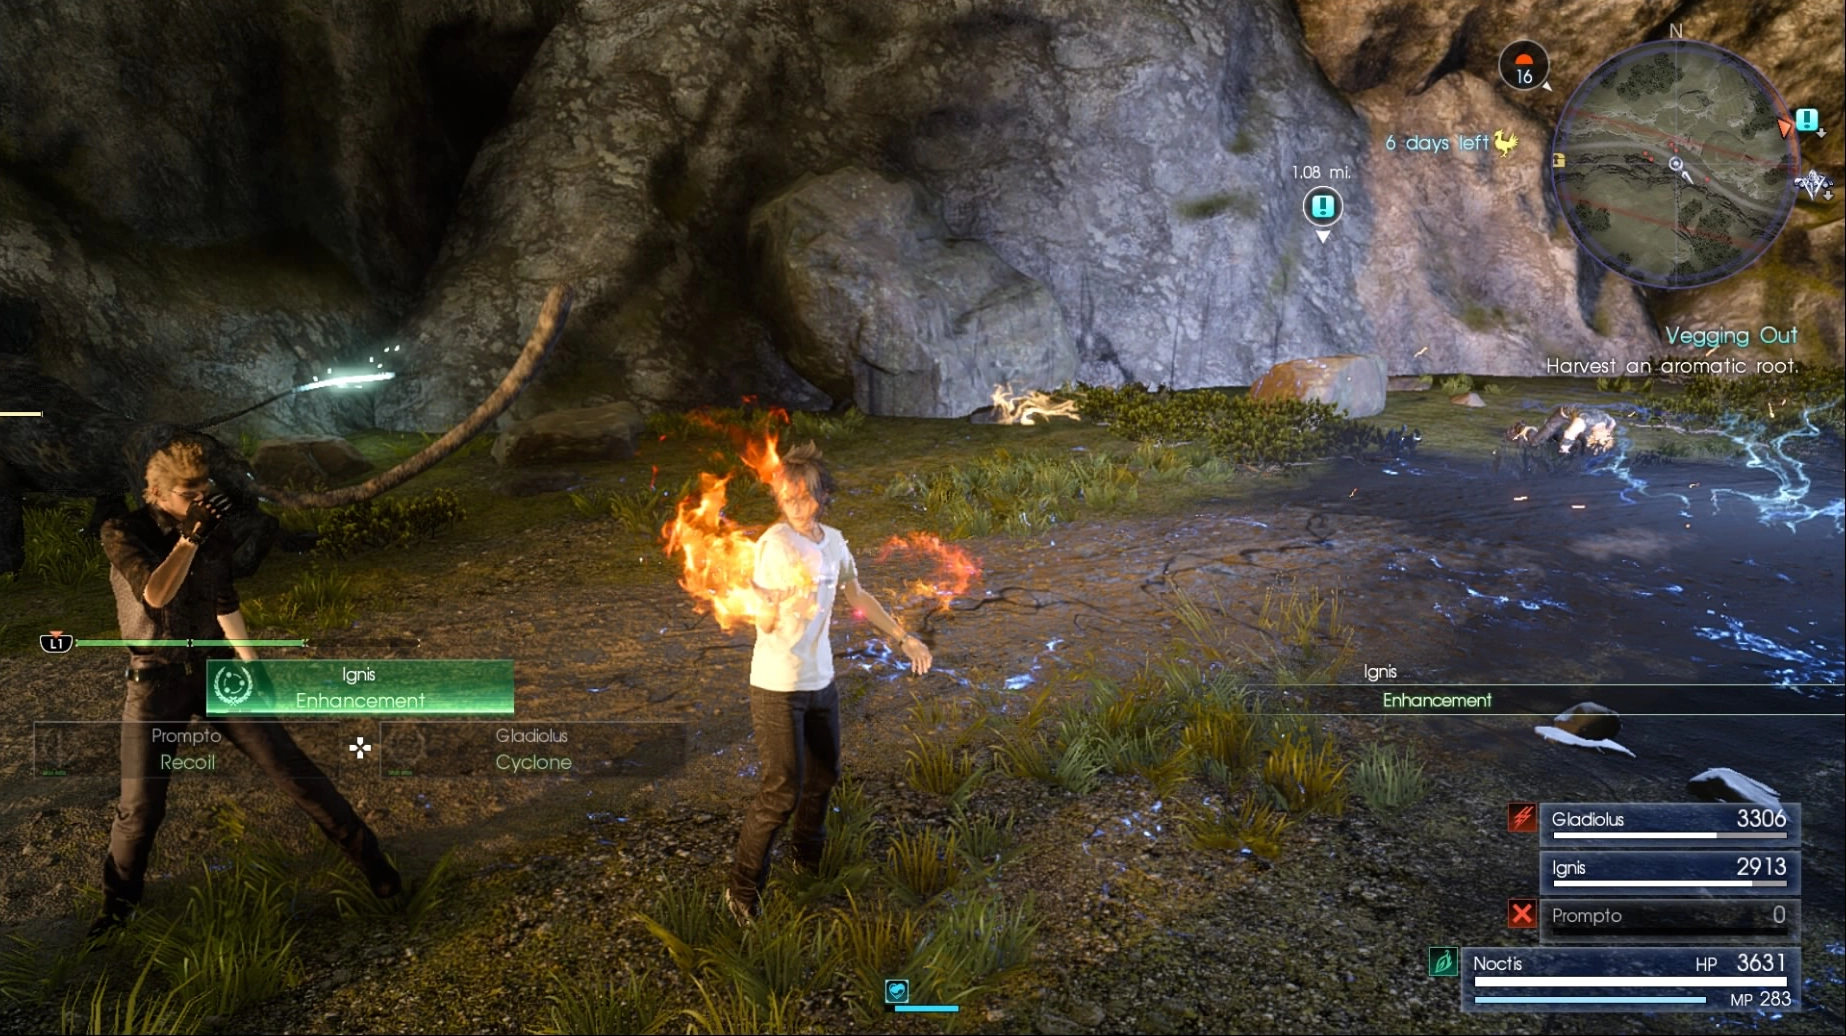
|
1 | Casts Flameboost, Frostboost, or Stormboost on Noctis, depending on the target's weakness. Noctis must not be incapacitated. Effects can be combined and don't immediately wear off after battle. Its critical version extends the duration of the buff. Re-applying the same buff won't reset the duration length. | Ignis |
Gravisphere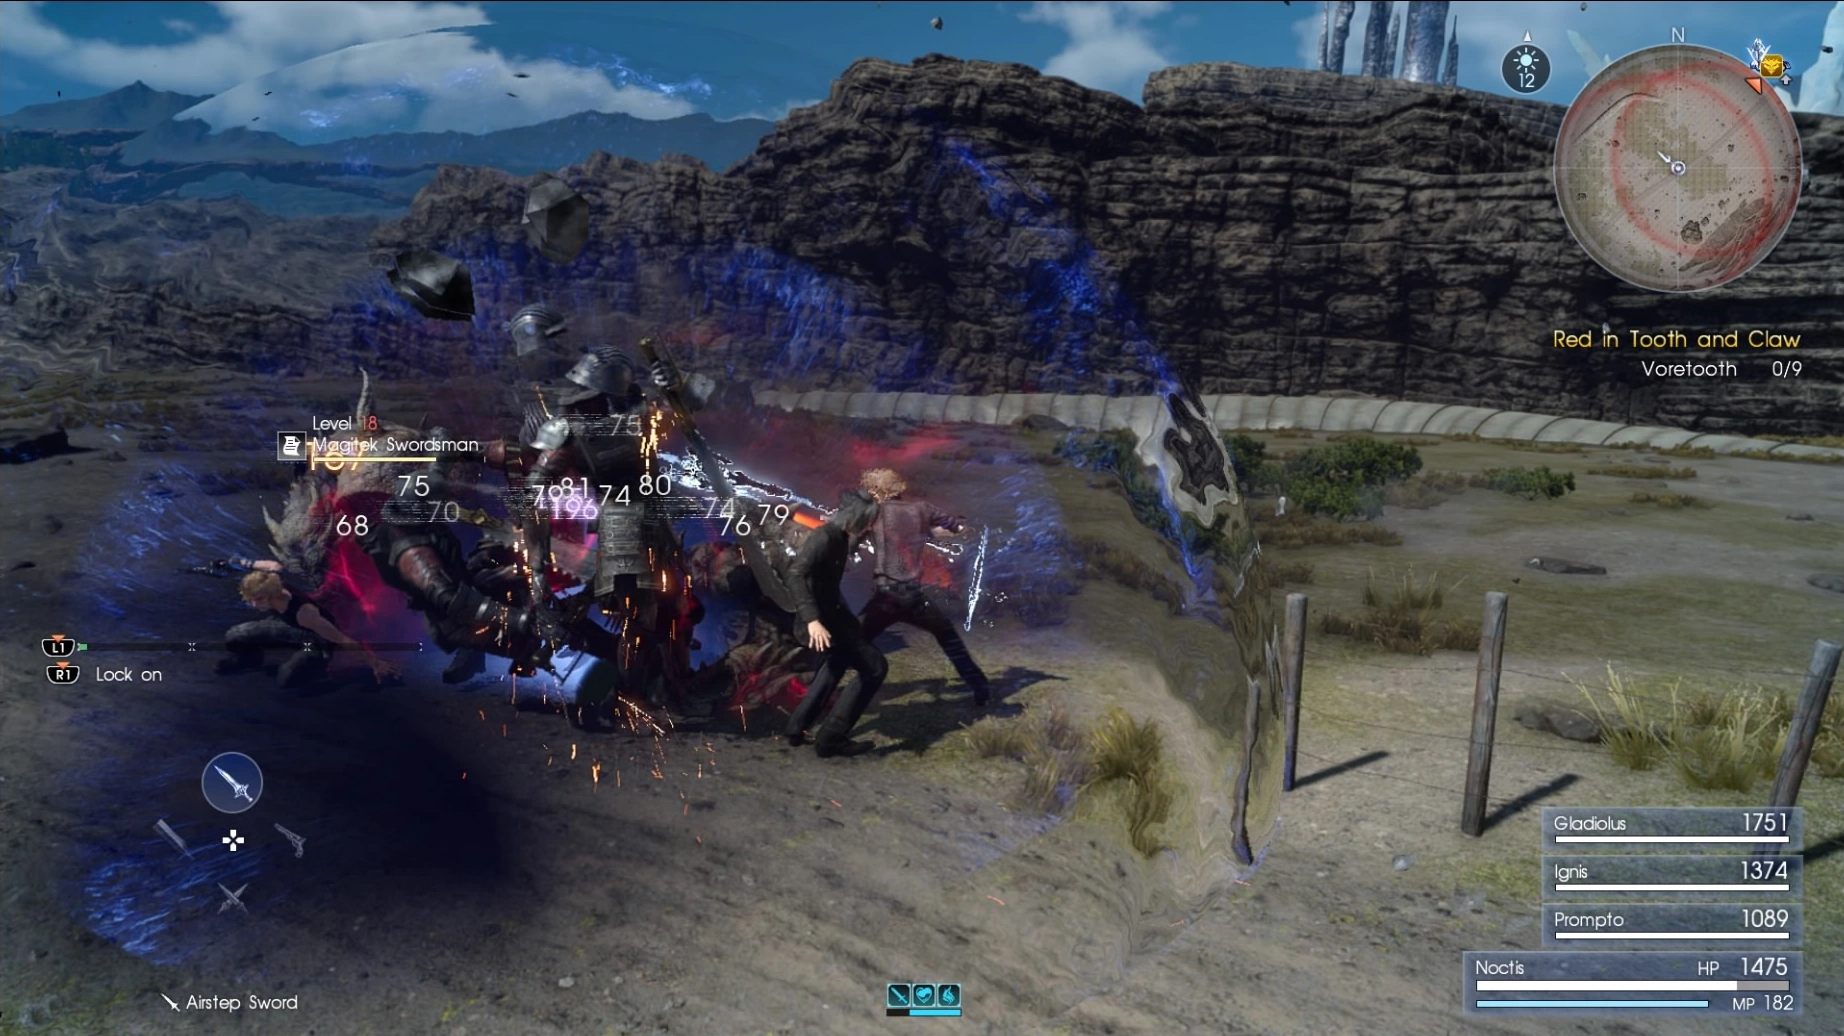
|
2 | Shoots a sphere of energy from that sucks in enemies and deals constant magic damage. Prompto needs a machine equipped. | Prompto |
Cyclone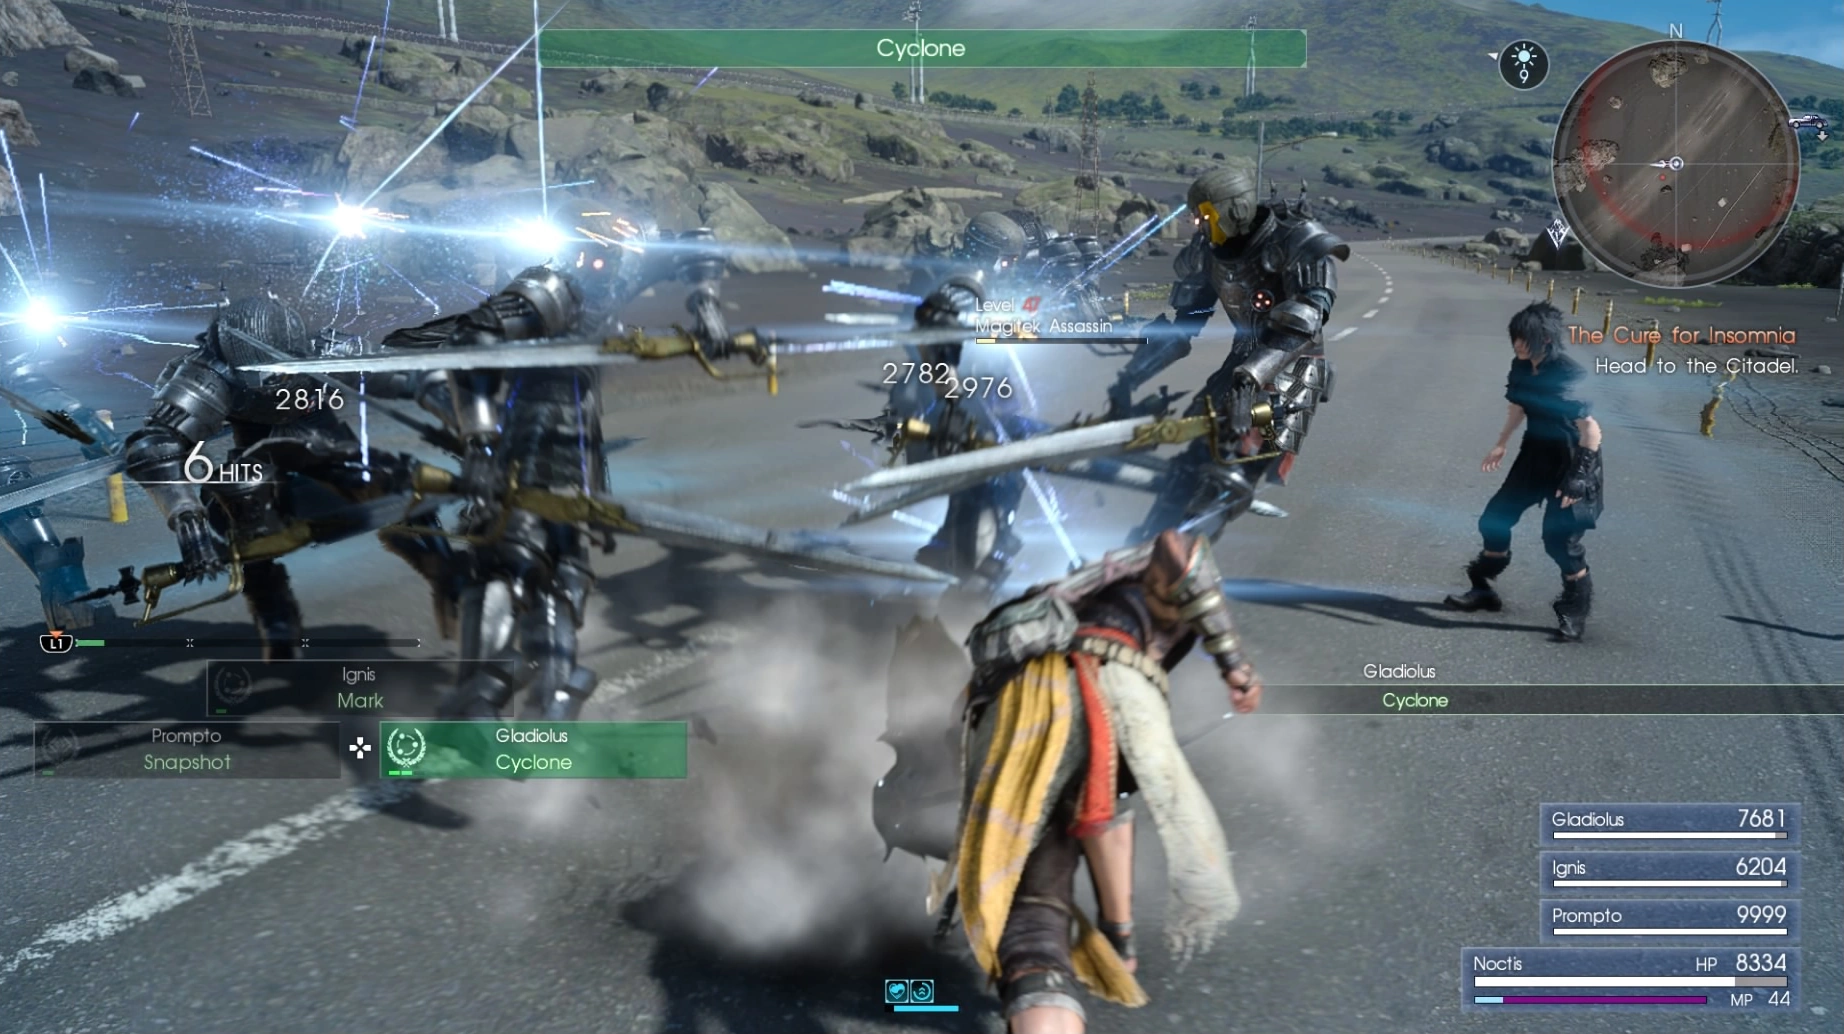
|
2 | Damages nearby enemies with a shield shockwave. Noctis can point-warp to Gladiolus for a follow-up attack consisting of multiple area-of-effect spins. Gladiolus needs a shield equipped. | Gladiolus |
Overwhelm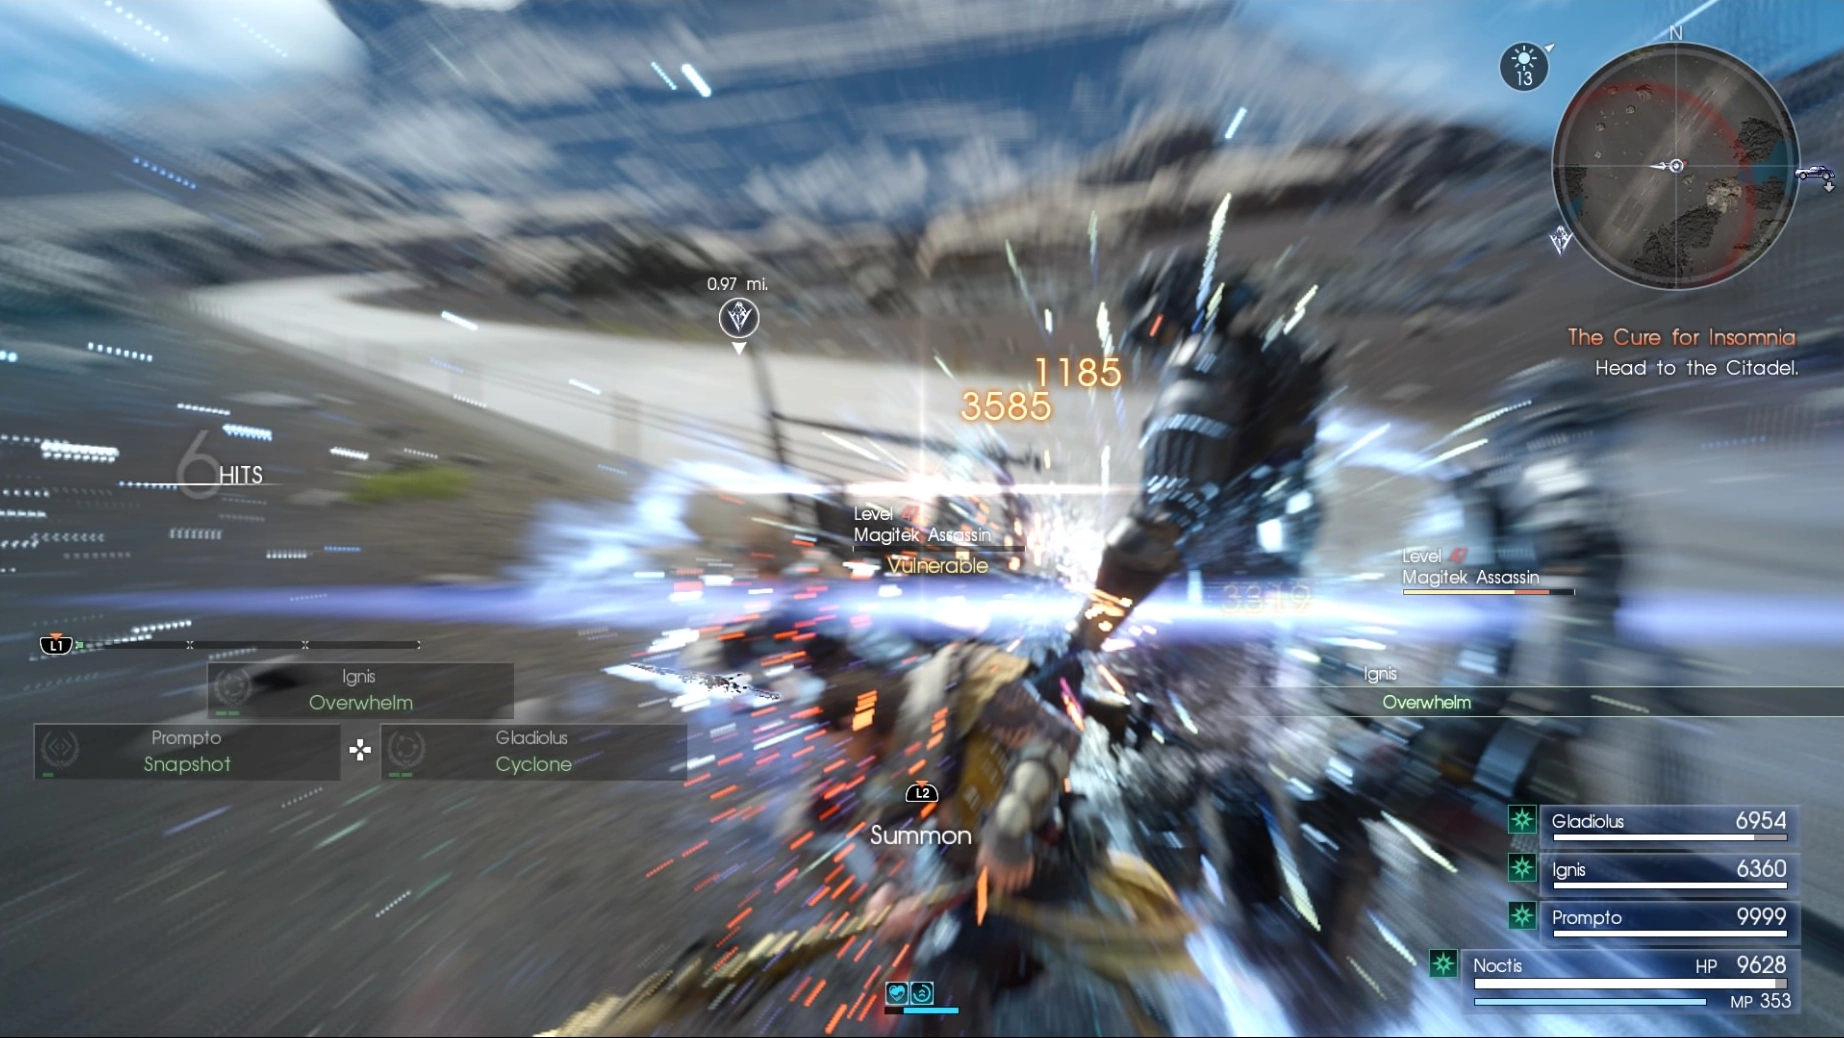
|
2 | Ignis orders the party to focus attacks on one enemy. Noctis retains normal attacks with his equipped weapon (will do nothing with magic or the Ring of the Lucii). Allies also attack with Deathblows if they're unlocked, and will use secondary weapons if equipped. Party is invincible throughout duration. The critical version always deals critical hits. Less effective against highly mobile or hard-to-reach targets. Ends prematurely if the target perishes. | Ignis |
Recoil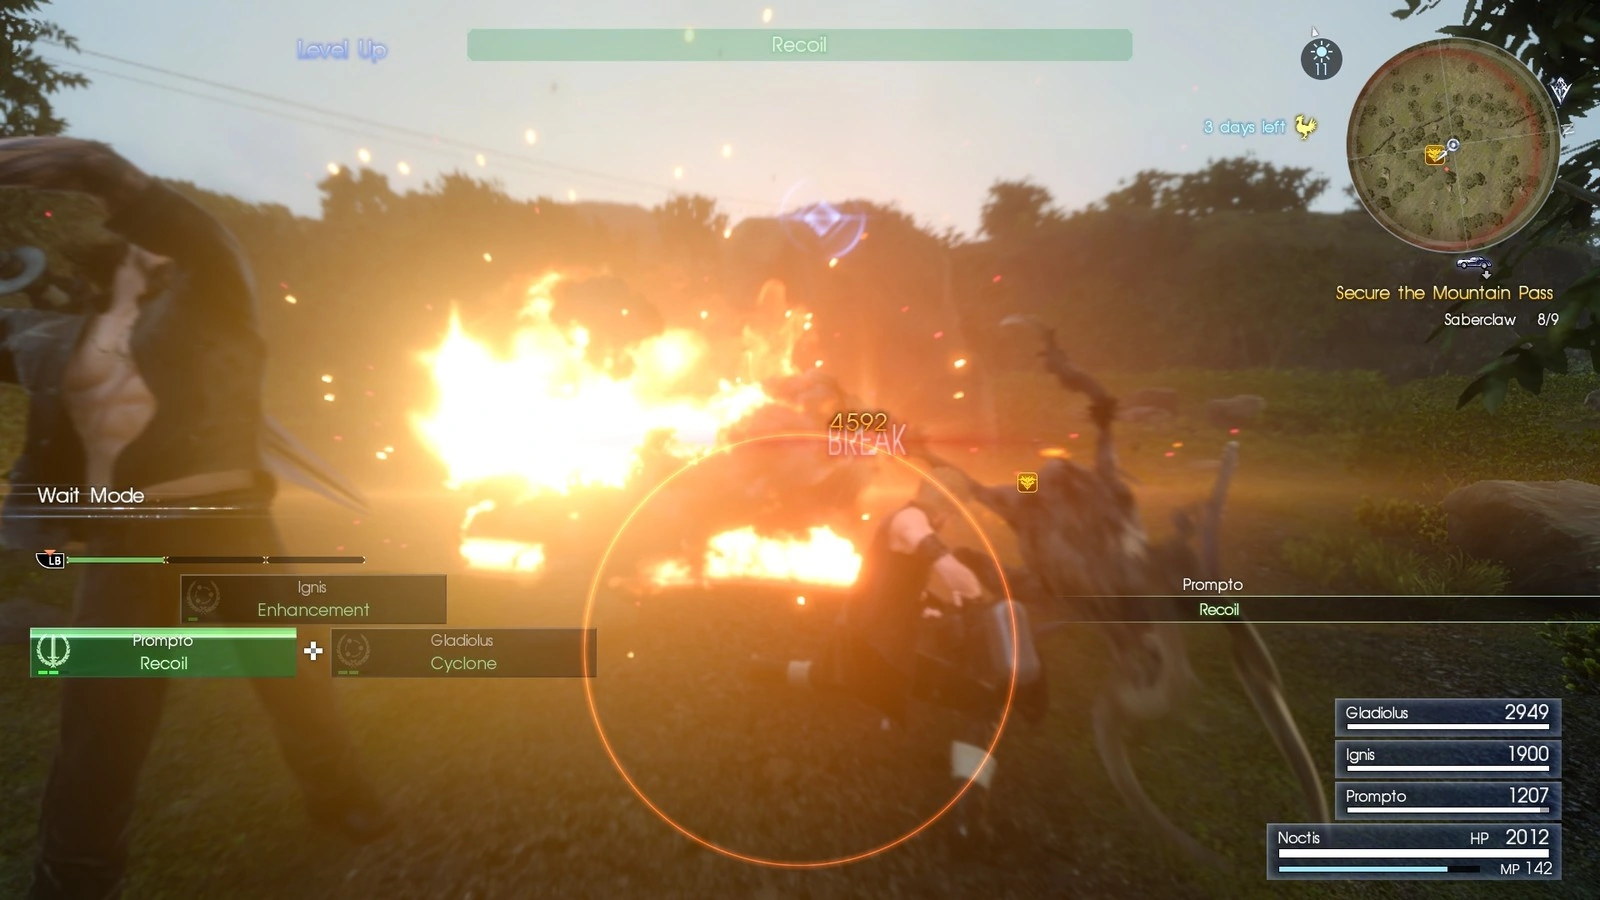
|
2 | Deals heavy, small area-of-effect damage to a single enemy with machinery. Excels at breaking limbs. Can inflict Burnt. Prompto needs a machine equipped. Can be followed up with an attack from Noctis. | Prompto |
Impulse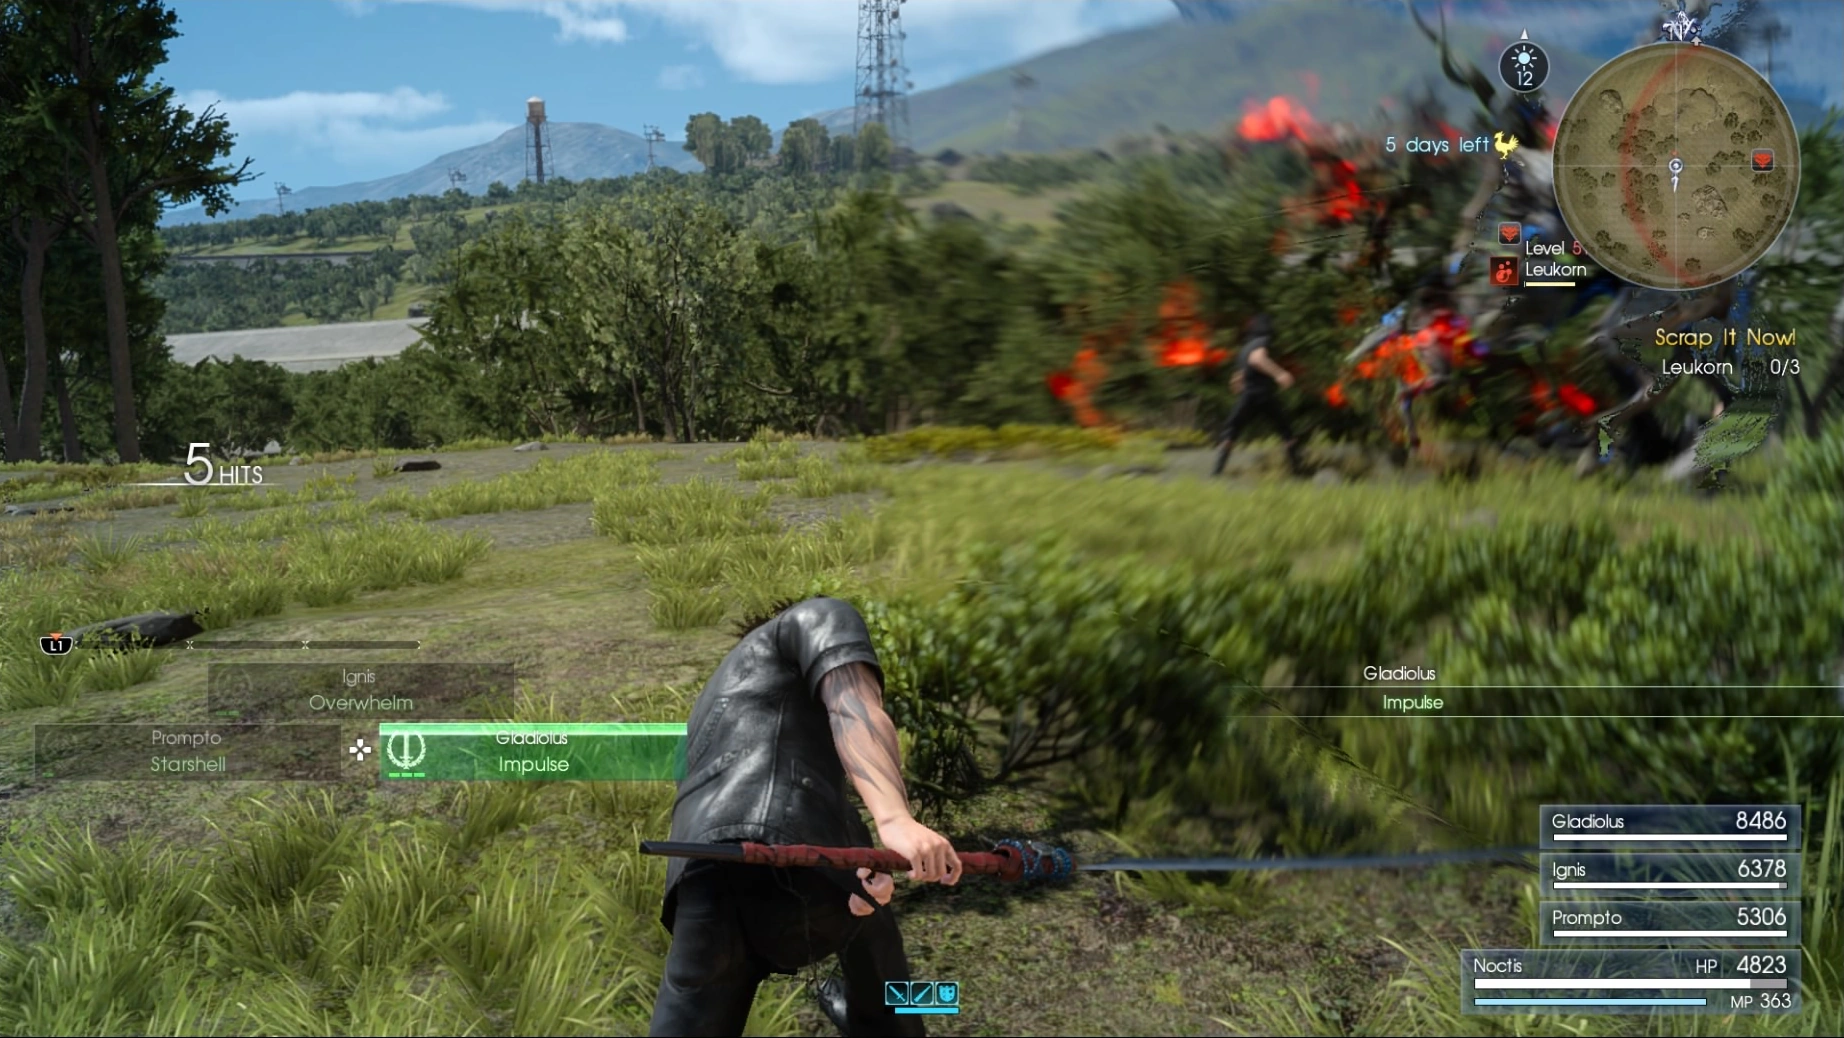
|
3 | Pauses for a couple seconds before unleashing a powerful frontal-sweep attack covering a large radius that hits twice. Excels at breaking limbs. | Gladiolus |
Sagefire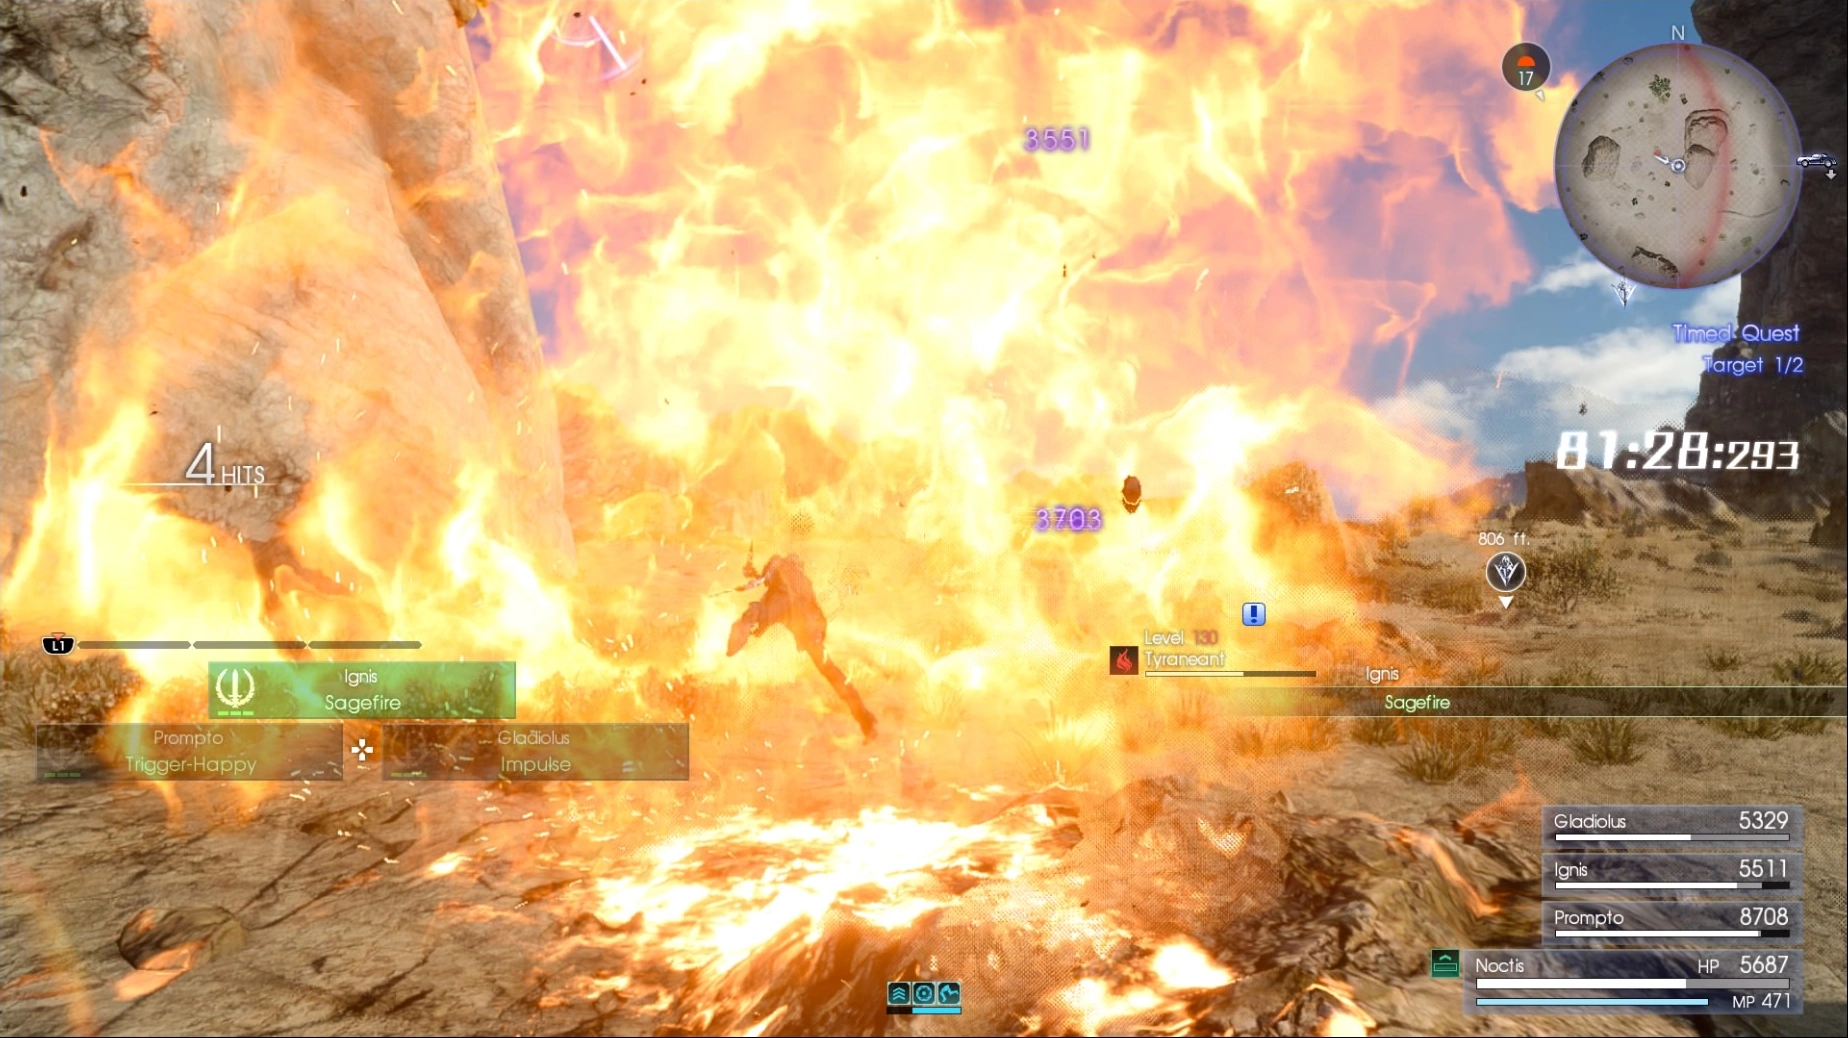
|
3 | Charges forward, dealing three devastating area-of-effect Fire attacks with daggers. Excels at breaking limbs. | Ignis |
Trigger Happy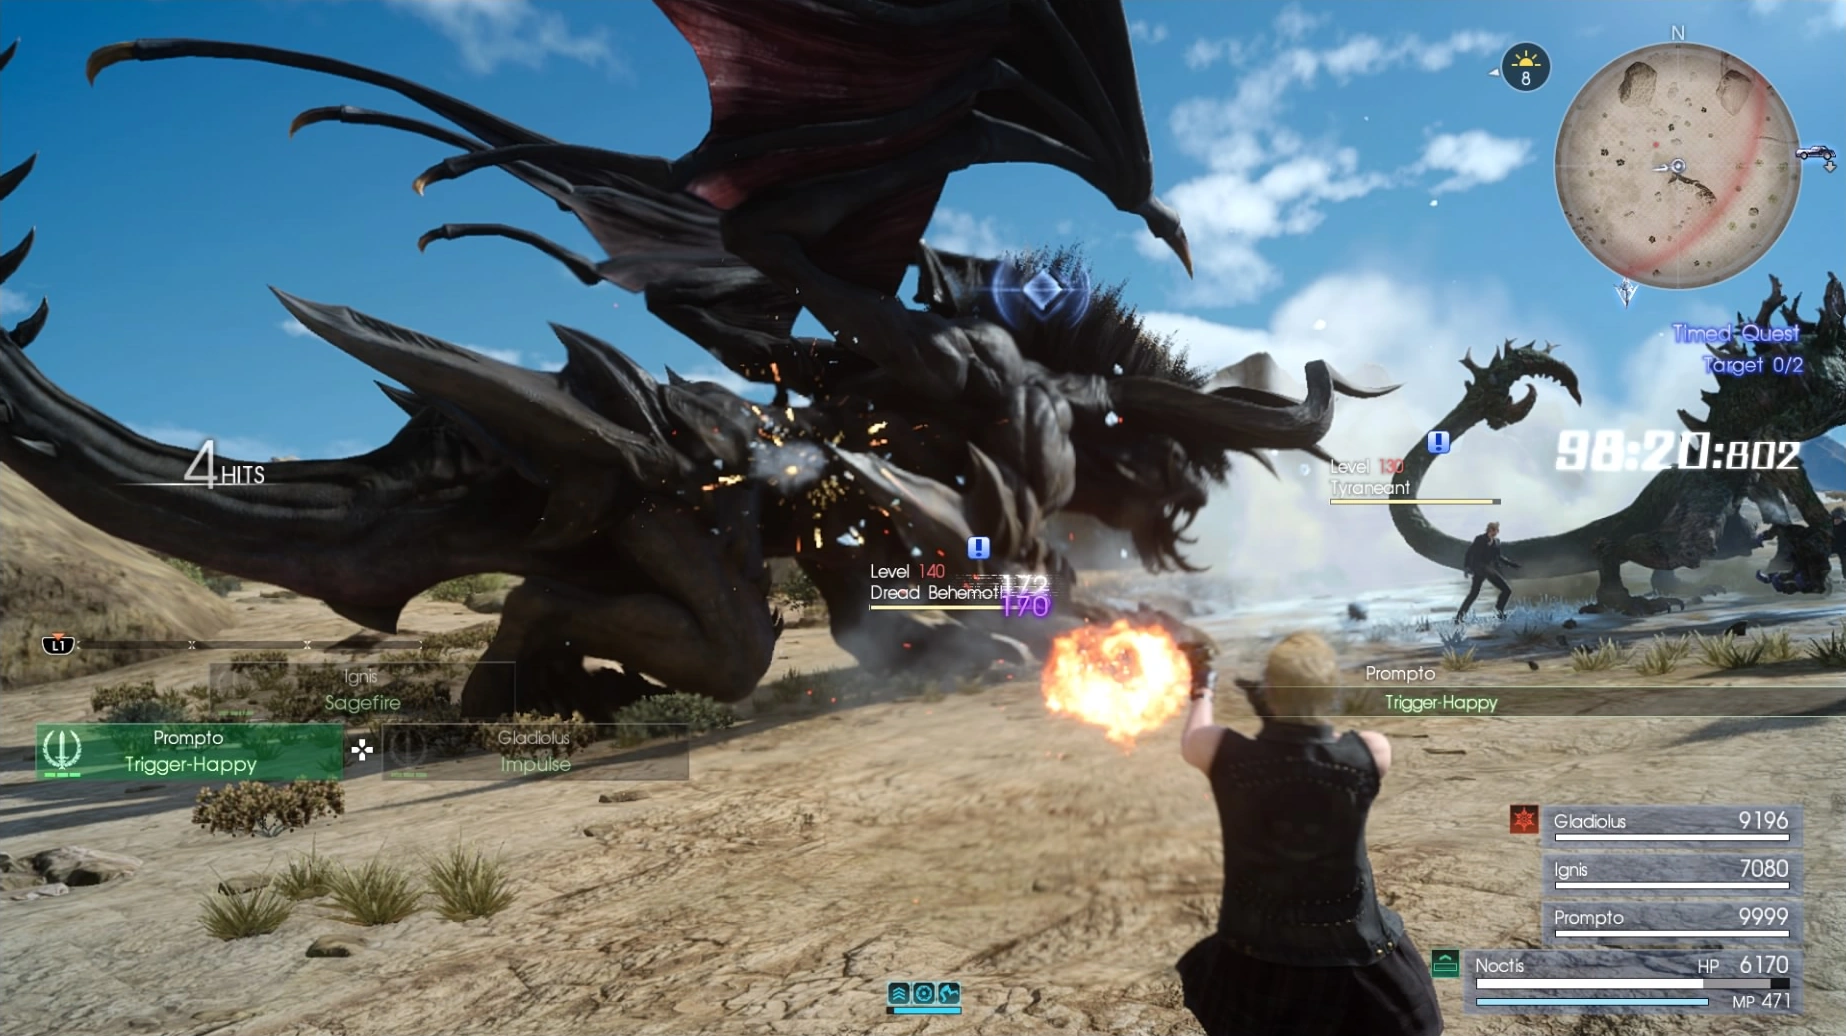
|
3 | Fires two separate bullet volleys on a target before finishing with a powerful single shot. Excels at breaking limbs. Each shot utilizes the passive effect of his equipped gun. The critical version fires twice as many bullets, all critical strikes. | Prompto |
Libra Elementia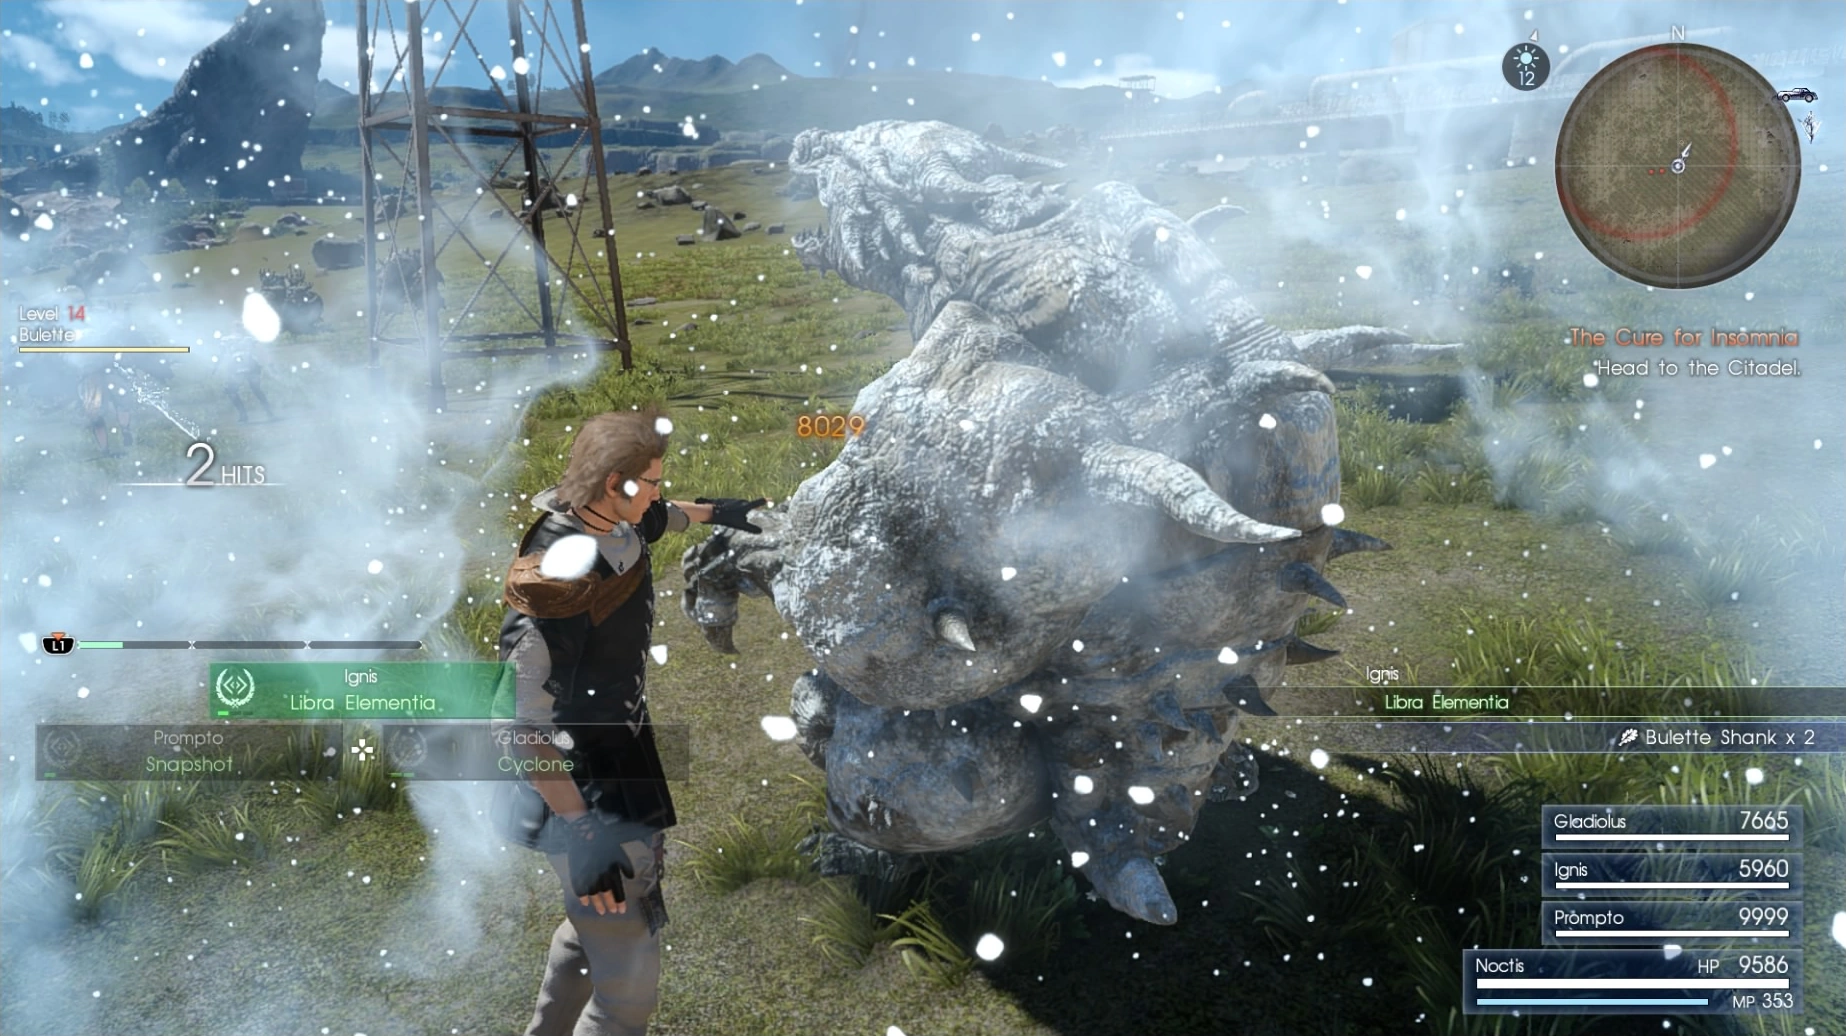
|
1 | Exploits an enemy's elemental weakness with a magic spell. It is the only Technique Ignis can use in Chapters 10-13. Learned via an event in Chapter 10. Can be followed up with an attack from Noctis. | Ignis |
Lion's Roar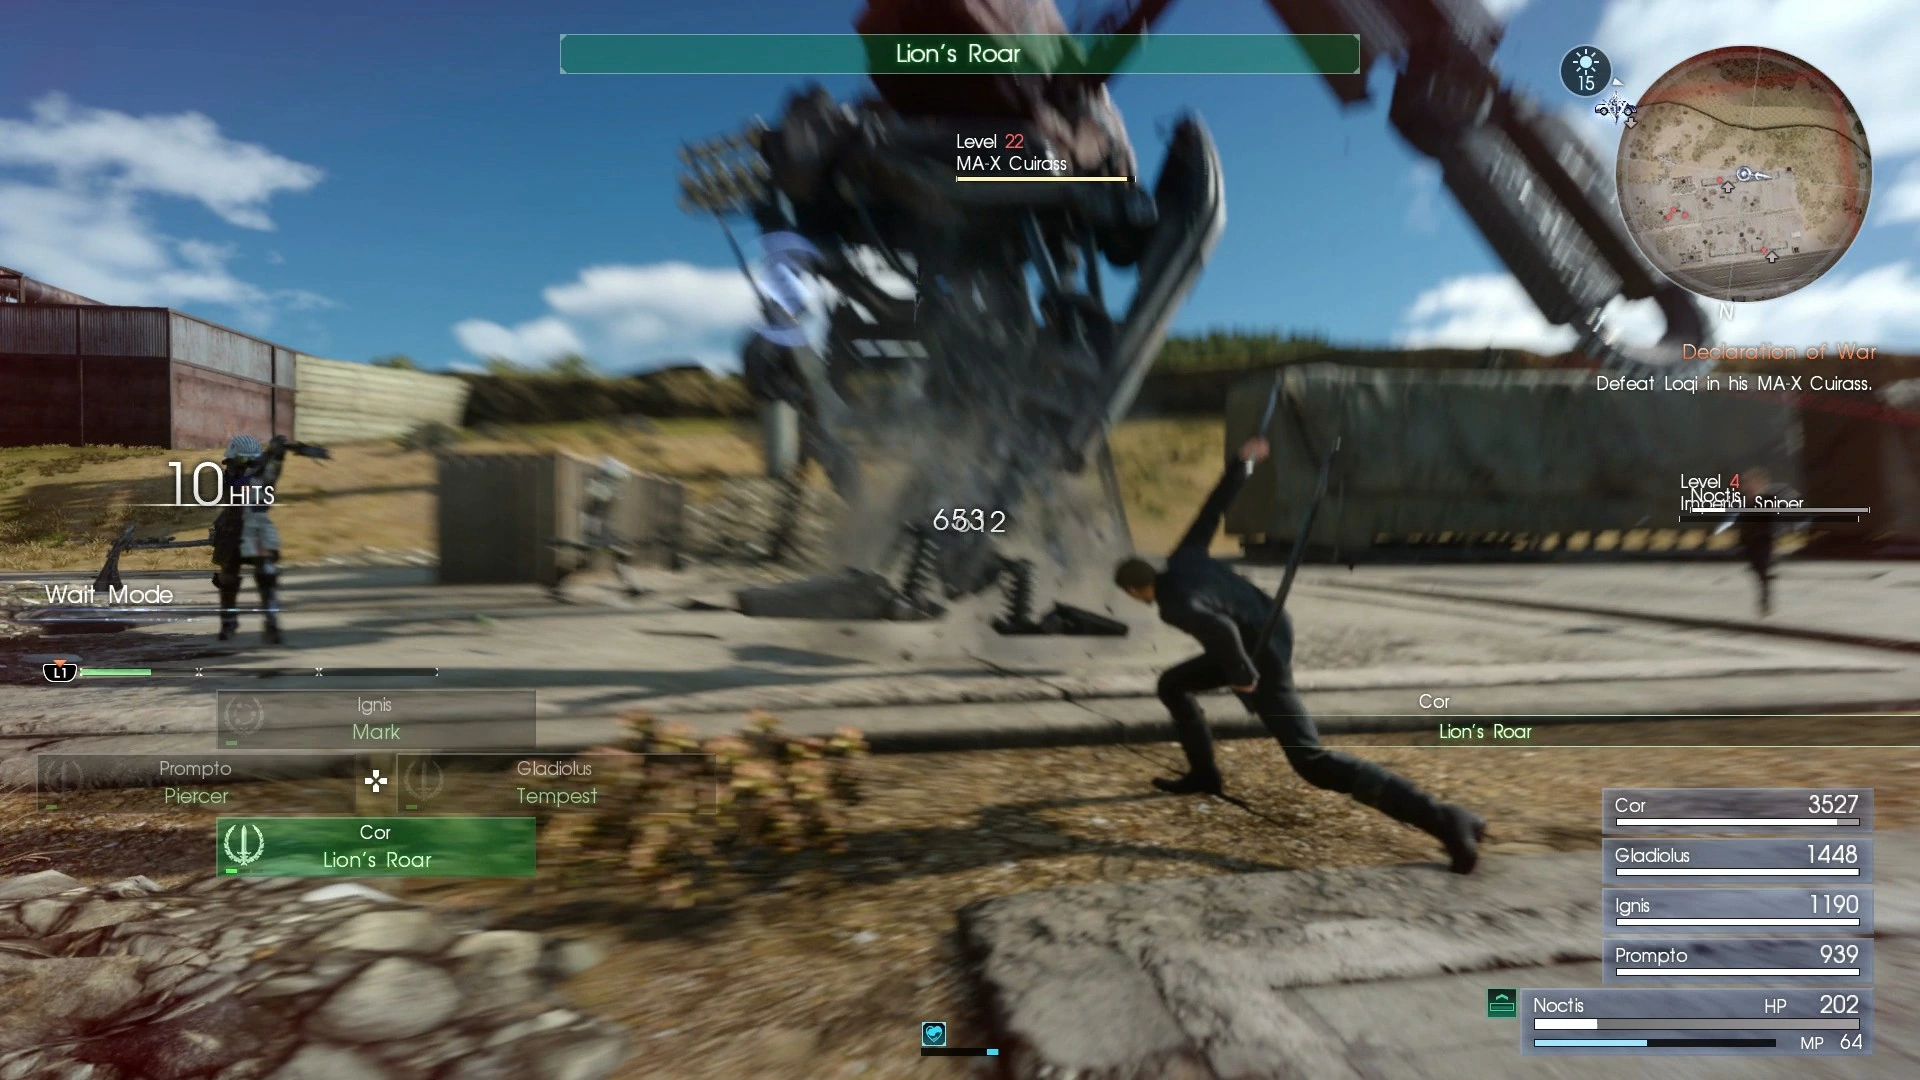
|
1 | Unleashes an upward slash, releasing a shockwave that moves in a single line. | Cor |
Eclipse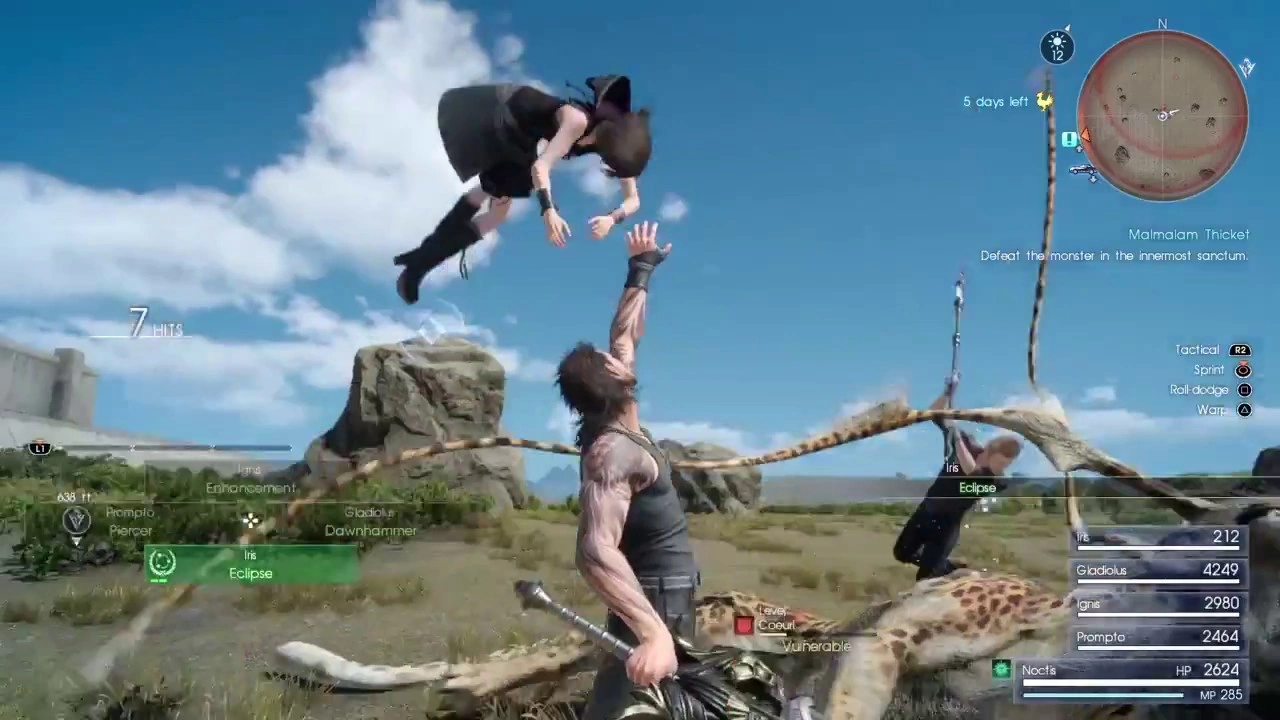
|
2 | Attacks one enemy. Instantly kills Magitek Troopers. Gladiolus can't be incapacitated. | Iris |
Highwind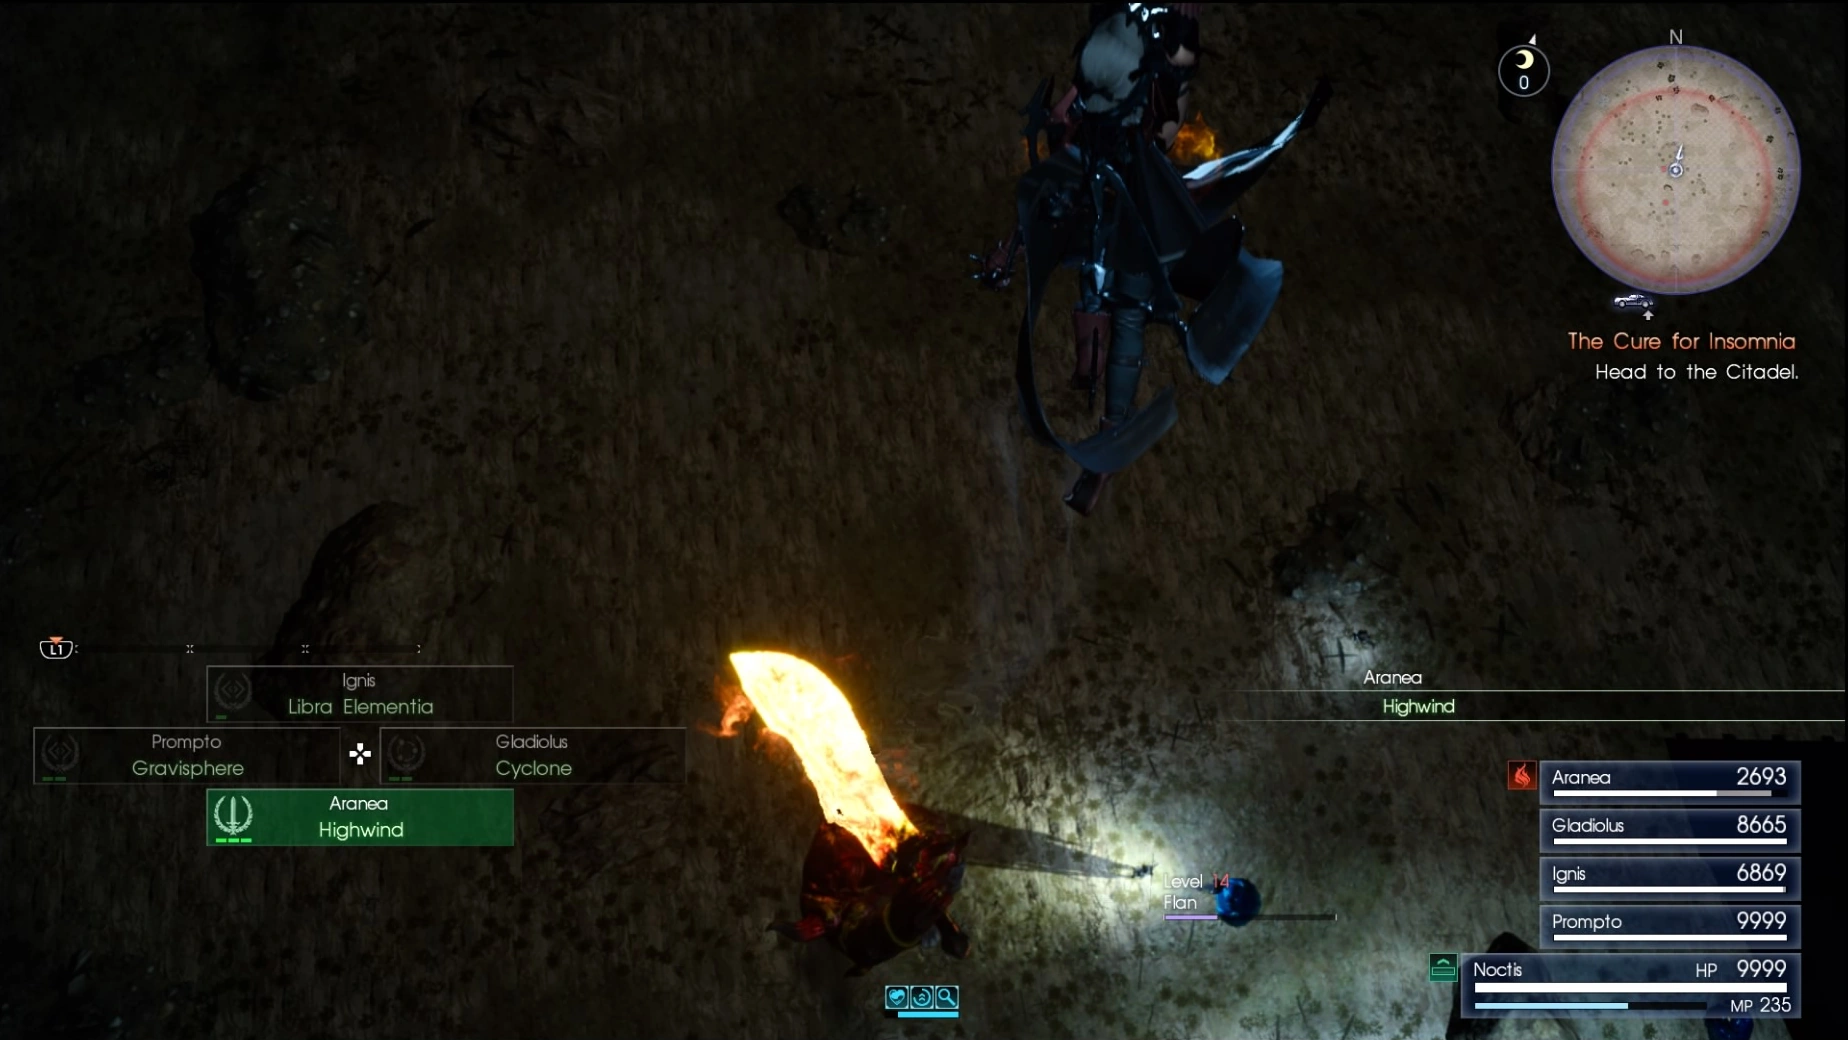
|
3 | Leaps high into the air before hurtling downward with a powerful strike. Can put even large enemies into a vulnerable state. | Aranea |
| Name | Effect |
|---|---|
| Limit Break | Allow character's techniques to break the damage limit. They are prefixed above with who they belong to. All are simply called "Limit Break." |
| Quick Tech | All Tech Bar replenishment increased by 10%. |
| Tech Damage | Adds to the tech bar as Noctis takes damage with the formula |
| Tech Strike | Adds to the tech bar when Noctis lands attacks. |

Armiger Unleashed
Noctis uses Techniques as part of his Armiger Unleashed mode in the Windows and Royal Editions. Armiger Unleashed replaces techniques with Unleashed techniques and the tech bar carries over from before activating the mode. The bar keeps replenishing unless frozen by the Armiger Accelerator accessory. Noctis is invincible during technique animations. Equipping Tech Turbocharger while in Unleashed lets Noctis use techniques more often, but stops the Armiger bar from filling.
| Technique | Cost | Direction | Effect |
|---|---|---|---|
Royal Cleave
|
1 | Cloaks a sword in a magic aura and slashes forward once. Has a huge knockdown multiplier and hits up to three times. Deals Light-elemental damage. | |
Apocalypsis
|
2 | Brings the royal arms in front of Noctis in a cylindrical formation that damages foes and shoots it forward, splitting into multiple homing bolts. Deals ballistic damage. | |
Dynastic Stance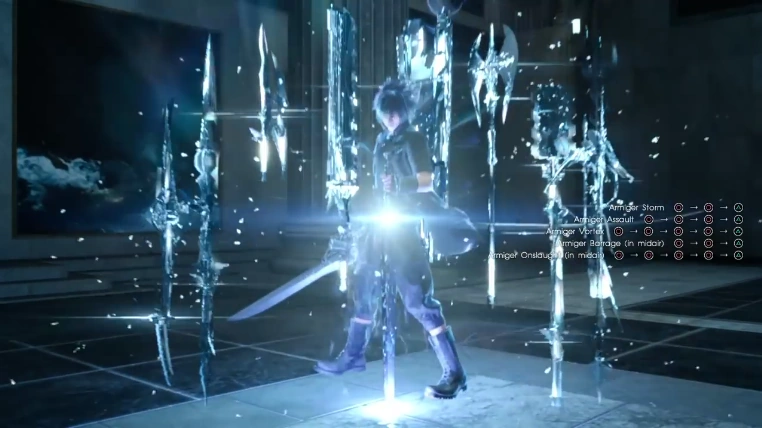
|
2 | Takes a stance and summons phantom swords around Noctis. Swords will rain down as Noctis use normal attacks. | |
Legacy of the Lucii
|
3 | Executes a flashy combo using many royal arms and finishes with an area-of-effect magic attack on the ground that deals Light-elemental damage. Cannot activate against some enemies (i.e. adamantoise) |
Royal Cleave can be used to knock down enemies to set up combo finishers and as part of a regular combo, useful for avoiding damage mid-combo. Apocalypsis is useful to unleash near a target. Dynastic Stance is good against groups of enemies, or when fighting Light-immune foes. Because the blades will often not fire when using finishing moves, it may be better to simply use regular combo attacks while under its effect.
Legacy of the Lucii performs a damaging combo and many of its hits deal area damage. The final swing is very powerful and often hits multiple times.
Other appearances
Final Fantasy XV: Episode Prompto

Dragoon Dive.
Along with Highwind, the player can again invoke Aranea to use Dragoon Dive indoors with the Technique command, costing 2 tech bars. Aranea downing enemies can set them up for Prompto to use his crackshot for critical damage.
Prompto can use Starshell, Selfie Shot, and Trigger Happy to almost the same degree as his regular Techniques, though Selfie Shot costs 2 bars, is always a selfie, and the photos are saved to manual-shots. Prompto gains the ability to use Trigger Happy after beating the episode once, essentially functioning as an always-critical version, firing a quick barrage of critical shots, with a unique strong explosive ending shot that can stagger groups of enemies.
Final Fantasy XV: Episode Ignis
The power of the storm, surges through my blade!
Ravus when Last Rites

Overclock.
Ignis has three Tactical Art techniques. High Jump acts similar to Aranea's Dragoon Dive at the cost of one tech bar. Ignis leaps towards his target (or straight down if there is none), dealing strong area damage which scales off the damage meter and breaks off enemy appendages, also granting AP for kills similar to Noctis's warp-strikes. He can still jump without a spear equipped. Overclock doubles the damage meter for a random element at the cost of two tech bars, able to reach 8.0 and also doubling its growth rate. A higher damage meter may visually intensify the elements. Using Overclock again overwrites the last buff.
Additionally, while he acts as a guest party member, Ravus has a technique known as Last Rites, which costs one tech bar, in which he empowers his artificial arm with electricity and releases a Thunder-elemental AOE attack.
After beating the episode once, Ignis gains Quick Recipeh in the main game when he is in the lead, and after acquiring the necessary items from shops during subsequent playthroughs of the episode. Quick Recipeh allows Ignis to cook a meal mid-battle. Its result is random, yielding either a buff or a debuff with four possible outcomes. Both the buffs and debuffs wear off if switching away from Ignis.
- "Terrible": Ignis hunches over and is afflicted with two debuffs exclusive to him (damage and Total Clarity meters drop to 0, and he can't build them up again until to effect wears off), plus poison. The debuffs ignore immunities, though Poison can still be blocked with the Magitek Exosuits or healed with an item.
- "Bad": Ignis shakes his head and is afflicted with the two exclusive debuffs, neutering his damage and Total Clarity meters.
- "Great": Ignis clenches his fist in front of him, granting a unique buff that fills the Total Clarity gauge automatically.
- "Perfect": Ignis holds out a dish, granting the previous buff and making him immune to damage and stagger.
Final Fantasy XV: Episode Ardyn
Ifrit has three main attacks the player can invoke with the technique command: Firaga (one target, two tech bar segments), Flames of Rage (boost Ifrit's Strength and engulfs him in flames, two tech bar segments), and Meteor Strike (one target, three tech bar segments). He starts with Firaga, and the player can unlock the other techs from the Descension ability tree by collecting AP from felled foes. Upon being summoned via a technique, the battle arena will engulf in flames and glow orange, and he will remain to fight at Ardyn's side for roughly a minute. Ifrit can break through the guardians' barriers.
")
")
")
Close Encounter of the Terra Kind
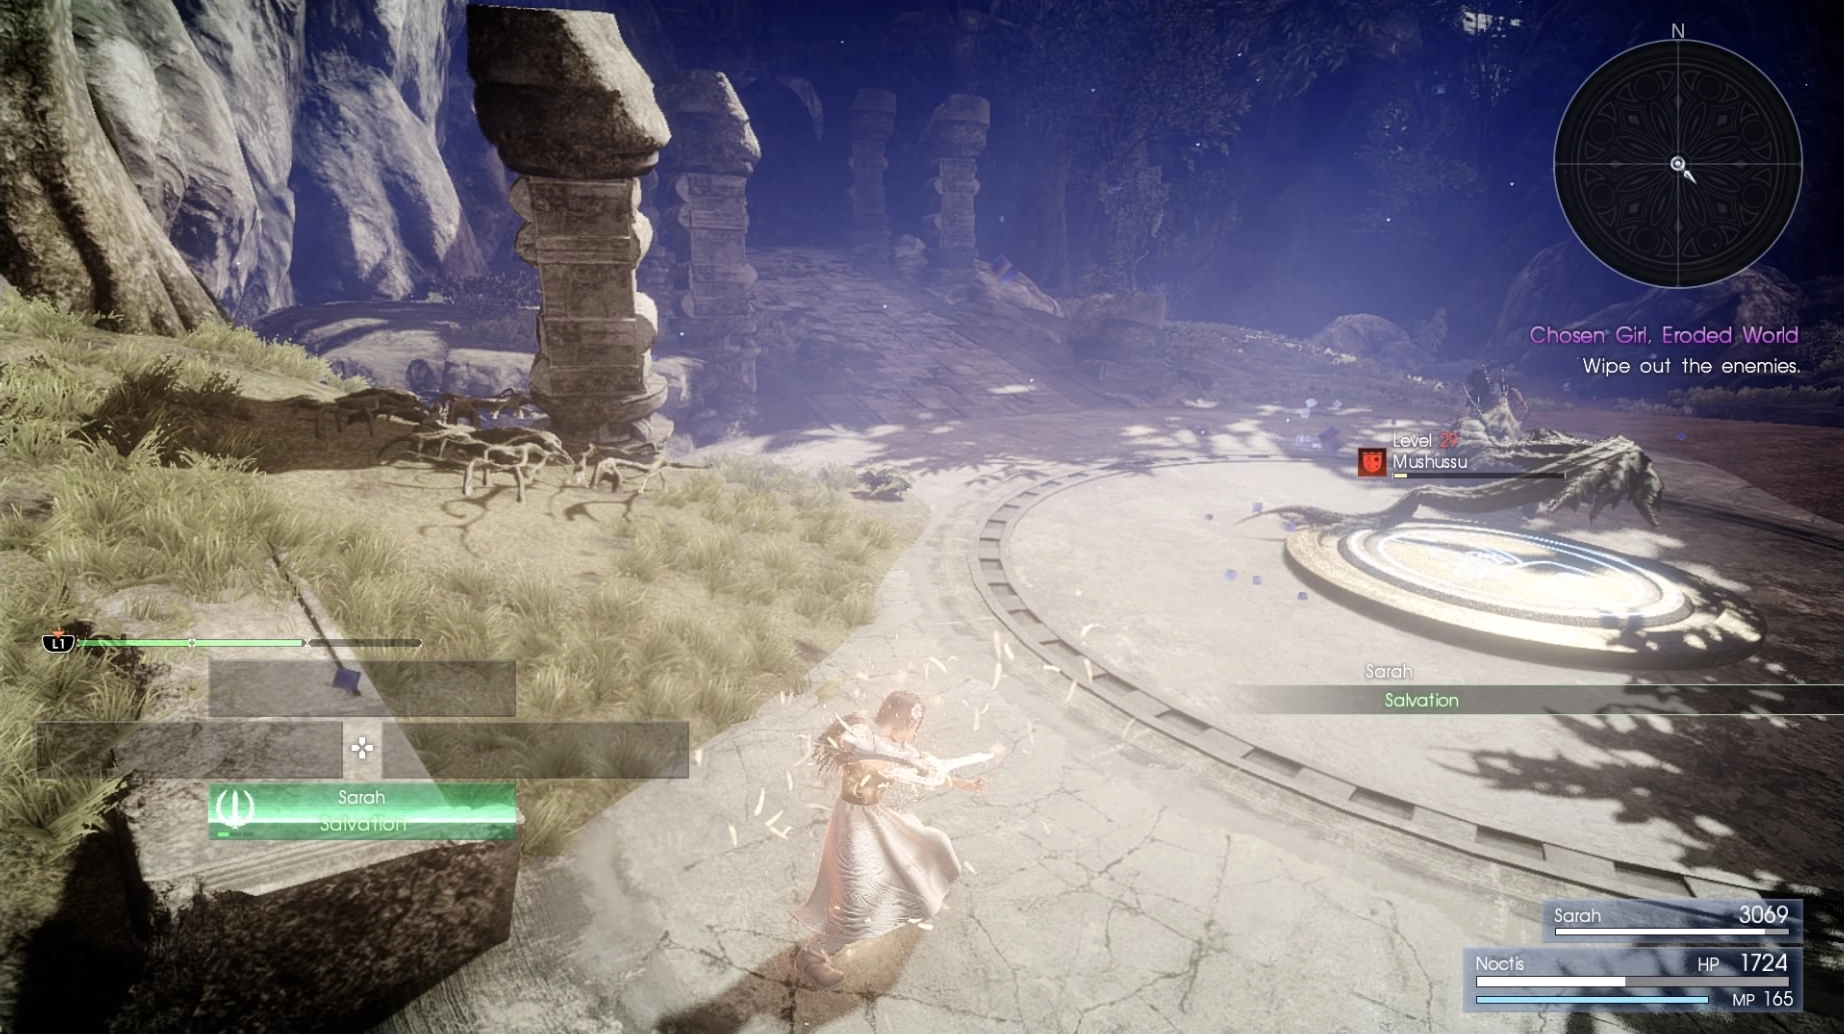
Salvation.
Only one Technique is available: Sarah's Salvation, which is a sword attack against one target with a possible follow up from Noctis. It becomes available in the battle after meeting the Hiso Alien Elder and costs one tech bar to use. Upon initiating, unique artwork of Sarah is shown. When the player invokes the tech in the boss battle, Noctis will accidentally call Sarah either Gladiolus, Ignis or Prompto, before correcting himself.
Dissidia Final Fantasy Opera Omnia
")
")
")
")
")
Theatrhythm Final Fantasy All-Star Carnival
Pictlogica Final Fantasy
")
")
")
")
Final Fantasy Airborne Brigade
- Legend Cards
")
")
")
")
")
")
")
")
")
")
")
Final Fantasy Record Keeper
Some techniques appear as Soul Breaks.
")
")
")
")
")
")
")
")
Final Fantasy Brave Exvius
")
")
")
")
")
")
")
")
")
")
")
")
")
")
")
")
")
")
Mobius Final Fantasy
Gallery
")
")
")
")
")
")
")
")
")
")
")
")
")
")
")
Trivia
- Prompto is the only one to use his Techniques against the player when fought as a training partner at camp: he uses Recoil, Gravisphere and Starshell, although the latter has a different effect (inflicting Confuse). Gladiolus also uses Dawnhammer in the training room (in Parry and Rescue tutorials), Cor uses Lion's Roar when fought in Episode Gladiolus, Aranea frequently uses Highwind during her boss fights, and Ravus uses Last Rites when fought in Episode Ignis.
- The "Prompto" who fights alongside Noctis in Chapter 11 at Eusciello is actually Ardyn in disguise. If the player invokes Techniques during this time, "Prompto" doesn't say the lines the real Prompto says, rather, he uses lines Prompto will use in Chapter 14. Starshell is an exception, but the player is unlikely to use it in this battle. It is not possible to use Snapshot at this time.