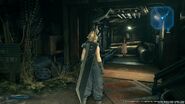
Tour Guide, Take the Shortcut, Beyond the Ladder, and Working Together are the first quests in Chapter 9, "The Town That Never Sleeps", in Final Fantasy VII Remake. They take place in the Sector 6 Slums and the Collapsed Expressway. Cloud Strife and Aerith Gainsborough travel to Sector 6 on their way to escort Cloud back to the Sector 7 Slums.
Walkthrough[]
As the quest begins, use the opportunity to upgrade weapons for Cloud Strife and Aerith Gainsborough. Head down a linear path, at the end of which a cutscene commences. Aerith suggests taking a shortcut through a tunnel; follow her down to lead to a Collapsed Expressway.
In the expressway, a terpsicolt is fought; this enemy can spin in the air, making them resist physical attacks, and are best defeated with ![]() Ice Materia spells or with Aerith's ranged attacks. Head forward and left, taking the ladder up to continue down the expressway. After this, a lesser drake is fought. This enemy is best attacked with spells or with Aerith's ranged abilities until it is staggered, when Cloud can more reliably lay into it. Past it, a moogle medal can be found in a tunnel to the left.
Ice Materia spells or with Aerith's ranged attacks. Head forward and left, taking the ladder up to continue down the expressway. After this, a lesser drake is fought. This enemy is best attacked with spells or with Aerith's ranged abilities until it is staggered, when Cloud can more reliably lay into it. Past it, a moogle medal can be found in a tunnel to the left.
Take the ladder down to a lower area with a robotic arm. Use the control terminal nearby to move the arm and allow Aerith to climb on; move the ![]() to lower the arm for her, press
to lower the arm for her, press ![]() to give her a ride, then move the
to give her a ride, then move the ![]() fully up and the
fully up and the ![]() right to allow her to drop off and lower the ladder for Cloud. After climbing the ladder, a short cutscene commences, and the Sweeper Prototype appears. As with other sweepers, it is a durable enemy weak to
right to allow her to drop off and lower the ladder for Cloud. After climbing the ladder, a short cutscene commences, and the Sweeper Prototype appears. As with other sweepers, it is a durable enemy weak to ![]() Lightning. Its arms can be targeted, and crippling one of them will cause it to go into a rampage; avoid its attacks until this point, then deal enough damage into it to stagger it and destroy it. After this, talk to Aerith for some dialogue. Following this, proceed and take the ladder down, grab two hi-potions from the treasure chest, and then proceed down the narrow gap, then take the ladder up and fight two terpsicolts; the same strategy as before applies.
Lightning. Its arms can be targeted, and crippling one of them will cause it to go into a rampage; avoid its attacks until this point, then deal enough damage into it to stagger it and destroy it. After this, talk to Aerith for some dialogue. Following this, proceed and take the ladder down, grab two hi-potions from the treasure chest, and then proceed down the narrow gap, then take the ladder up and fight two terpsicolts; the same strategy as before applies.
Up ahead is a fork in the road, where a tunnel leads down into a dead end with a mega-potion in a chest, while the ramp up right leads forward. If the tunnel is used, two smoggers appear, and are best defeated by attacking it with Cloud in Punisher Mode or using abilities while Aerith stays at a distance and casts spells to stagger them.
Up the ramp is another console, which can control an arm, this time able to use ![]() to grab a container. Grab the container, and after some dialogue, move the container to the right, adjacent to the wooden ledge, and drop it. Pick up Aerith and drop her onto the container, allowing her to move right and run to pick up the
to grab a container. Grab the container, and after some dialogue, move the container to the right, adjacent to the wooden ledge, and drop it. Pick up Aerith and drop her onto the container, allowing her to move right and run to pick up the ![]() Binding Materia. Offer her a lift again and raise her over the concrete ledge, allowing her to drop the ladder, then cross the gap and meet her by climbing up the ladder she dropped. Follow her and a short cutscene commences. Following this is the next quest, "Beyond the Dead End".
Binding Materia. Offer her a lift again and raise her over the concrete ledge, allowing her to drop the ladder, then cross the gap and meet her by climbing up the ladder she dropped. Follow her and a short cutscene commences. Following this is the next quest, "Beyond the Dead End".
Hard mode tips[]
The enemies here are more durable than before and deal more damage, though it is advisable to conserve MP. Equipping Cloud with the ![]() Provoke Materia can help keep the less durable Aerith alive, while she stays at a distance to cast spells. Aerith should either equip
Provoke Materia can help keep the less durable Aerith alive, while she stays at a distance to cast spells. Aerith should either equip ![]() MP Absorption Materia to keep spellcasting, or
MP Absorption Materia to keep spellcasting, or ![]() HP Absorption Materia for sustainability. Using Soul Drain as Aerith is worthwhile at this stage to both deal damage and heal her MP.
HP Absorption Materia for sustainability. Using Soul Drain as Aerith is worthwhile at this stage to both deal damage and heal her MP.

