Monterossa (talk | contribs) |
Intangir Bot (talk | contribs) m (Renaming categories in accordance with Forum:Category overhaul and categories for redirects) |
||
| (31 intermediate revisions by 10 users not shown) | |||
| Line 1: | Line 1: | ||
| ⚫ | |||
| ⚫ | |||
| + | {{infobox location |
||
| ⚫ | '''Taejin's Tower''' |
||
| + | |name=Taejin's Tower |
||
| + | |release=FFXIII |
||
| + | |japanese=テージンタワー |
||
| + | |romaji=Tējin Tawā |
||
| + | |lit=Tejin Tower |
||
| ⚫ | |||
| + | |type=Dungeon |
||
| + | |region=[[Gran Pulse]] |
||
| + | |affiliation=Pulse [[fal'Cie]] |
||
| + | |areas= |
||
| ⚫ | |||
| ⚫ | |||
| ⚫ | |||
| ⚫ | |||
| ⚫ | |||
| ⚫ | |||
| ⚫ | |||
| ⚫ | |||
| ⚫ | |||
| ⚫ | |||
| + | |residents=[[Menhirrim]]<br>[[Dahaka (Final Fantasy XIII)|Dahaka]] |
||
| + | |items= |
||
| + | *[[Final Fantasy XIII components#Sinister Fang|Sinister Fang]] x20 |
||
| + | *[[Final Fantasy XIII components#Chipped Fang|Chipped Fang]] x12 |
||
| + | *4721 gil |
||
| + | *[[Final Fantasy XIII accessories#Sparkbane Brooch|Sparkbane Brooch]] |
||
| + | *[[Final Fantasy XIII components#Spark Plug|Spark Plug]] x5 |
||
| ⚫ | |||
| + | *[[Final Fantasy XIII accessories#Metal Armband|Metal Armband]] x2 |
||
| ⚫ | |||
| + | *[[Final Fantasy XIII accessories#Gale Ring|Gale Ring]] |
||
| + | *[[Final Fantasy XIII accessories#Rainbow Anklet|Rainbow Anklet]] x2 |
||
| + | *[[Final Fantasy XIII components#Ancient Bone|Ancient Bone]] x9 |
||
| + | *[[Final Fantasy XIII items#Librascope|Librascope]] |
||
| + | *[[Final Fantasy XIII components#Tear of Woe|Tear of Woe]] x4 |
||
| + | *[[Final Fantasy XIII weapons#Unsetting Sun|Unsetting Sun]] |
||
| + | *[[Final Fantasy XIII accessories#Clay Ring|Clay Ring]] |
||
| + | *[[Final Fantasy XIII components#Tear of Remorse|Tear of Remorse]] x8 |
||
| + | *[[Final Fantasy XIII accessories#Frostbane Brooch|Frostbane Brooch]] x2 |
||
| + | *[[Shroud|Ethersol]] |
||
| + | *[[Final Fantasy XIII accessories#Collector's Catalog|Collector's Catalog]] |
||
| + | |enemies= |
||
| + | {{collapsible text|header=Regular encounters|content= |
||
| ⚫ | |||
| ⚫ | |||
| ⚫ | |||
| ⚫ | |||
| ⚫ | |||
| ⚫ | |||
| ⚫ | |||
| ⚫ | |||
| ⚫ | |||
| ⚫ | |||
| ⚫ | |||
| + | *[[Penanggalan]] |
||
| + | *[[Chonchon (Final Fantasy XIII)|Chonchon]] |
||
| + | *[[Amphisbaena (Final Fantasy XIII)|Amphisbaena]] |
||
| ⚫ | |||
| + | {{collapsible text|header=Marks and bosses|content= |
||
| + | *[[Munchkin Maestro (Final Fantasy XIII)|Munchkin Maestro]] (Mark 20) |
||
| ⚫ | |||
| ⚫ | |||
| ⚫ | |||
| + | *[[Mushussu (Final Fantasy XIII)|Mushussu]], [[Yaksha (Final Fantasy XIII)|Yakshini]] x2 (Mark 24) |
||
| ⚫ | |||
| ⚫ | |||
| + | *[[Juggernaut (Final Fantasy XIII)|Juggernaut]] (Mark 29) |
||
| ⚫ | |||
| ⚫ | |||
| ⚫ | |||
| + | |quests= |
||
| + | *Reach the top |
||
| + | *Reach the hidden floor (seventh tier) |
||
| + | }} |
||
| ⚫ | '''Taejin's Tower''' is a location on [[Gran Pulse]] in ''[[Final Fantasy XIII]]''. It is a large tower amid the wilderness overlooking the village of [[Oerba]]. Taejin's Tower is an ancient structure built by the [[fal'Cie]] for purposes unknown before serving as home to the fal'Cie [[Dahaka (Final Fantasy XIII)|Dahaka]]. What once towered the Pulse sky is now broken and crumbling, but most of its mechanisms still function, including the living statues called [[Menhirrim]] imprisoned by Dahaka. |
||
| − | Later, [[Bhakti]]'s bonus tip #10 explains the party can climb to the top of the tower and ride the elevator back down all seven flights, which allows the player to find a hidden |
+ | Later, [[Bhakti]]'s bonus tip #10 explains that the party can climb to the top of the tower and ride the elevator back down all seven flights, which allows the player to find a hidden seventh tier and battle an [[Undying (Final Fantasy XIII)|Undying]] [[Cie'th]]. |
| − | ==Datalog== |
+ | == Datalog == |
| − | {{See Also|Datalog |
+ | {{See Also|Datalog (Final Fantasy XIII)/Locales/Final Fantasy XIII}} |
''This towering spire was built by the fal'Cie in ages past. While the purpose of the structure is unclear, its original height suggests that the mighty beings sought to pierce even the heavens in their insatiable quest for expansion.'' |
''This towering spire was built by the fal'Cie in ages past. While the purpose of the structure is unclear, its original height suggests that the mighty beings sought to pierce even the heavens in their insatiable quest for expansion.'' |
||
''No matter the reason for its construction, the tower now lies in ruin, its great spine snapped, and its crumbling interior serving as a lair for the fal'Cie Dahaka.'' |
''No matter the reason for its construction, the tower now lies in ruin, its great spine snapped, and its crumbling interior serving as a lair for the fal'Cie Dahaka.'' |
||
| − | ==Story== |
+ | == Story == |
| ⚫ | |||
{{spoiler}} |
{{spoiler}} |
||
| − | [[File:Menhirrim.png|thumb|Menhirrims protect the party from |
+ | [[File:Menhirrim.png|thumb|left|Menhirrims protect the party from Dahaka.]] |
The party ventures through the tower on their way to Oerba and must take on a series of [[Missions (Final Fantasy XIII)|missions]] from the resident statues, whose powers are held in check by the monsters inhabiting the tower. Completing the missions allows the statues to spin the tower's segments into alignment, opening the path upward. |
The party ventures through the tower on their way to Oerba and must take on a series of [[Missions (Final Fantasy XIII)|missions]] from the resident statues, whose powers are held in check by the monsters inhabiting the tower. Completing the missions allows the statues to spin the tower's segments into alignment, opening the path upward. |
||
| Line 19: | Line 93: | ||
{{Endspoiler}} |
{{Endspoiler}} |
||
| − | == |
+ | == Treasure == |
| ⚫ | |||
| ⚫ | |||
| ⚫ | |||
| ⚫ | |||
| ⚫ | |||
| ⚫ | |||
| ⚫ | |||
| ⚫ | |||
| ⚫ | |||
| ⚫ | |||
| ⚫ | |||
| − | |||
| − | ==Treasure== |
||
| ⚫ | |||
|-class="a" |
|-class="a" |
||
!width="200px"|Item |
!width="200px"|Item |
||
!width="250px"|Location |
!width="250px"|Location |
||
|- |
|- |
||
| − | !class="b"|[[ |
+ | !class="b"|[[Final Fantasy XIII components#Sinister Fang|Sinister Fang]] x20 |
|The Palisades |
|The Palisades |
||
|- |
|- |
||
| − | !class="b"|[[ |
+ | !class="b"|[[Final Fantasy XIII components#Chipped Fang|Chipped Fang]] x12 |
|Ground Tier |
|Ground Tier |
||
|- |
|- |
||
| − | !class="b"|4721 |
+ | !class="b"|4721 gil |
|Ground Tier |
|Ground Tier |
||
|- |
|- |
||
| − | !class="b"|[[ |
+ | !class="b"|[[Final Fantasy XIII accessories#Sparkbane Brooch|Sparkbane Brooch]] |
|Ground Tier |
|Ground Tier |
||
|- |
|- |
||
| − | !class="b"|[[ |
+ | !class="b"|[[Final Fantasy XIII components#Spark Plug|Spark Plug]] x5 |
|Second Tier |
|Second Tier |
||
|- |
|- |
||
| − | !class="b"|[[ |
+ | !class="b"|[[Final Fantasy XIII weapons#Simurgh|Simurgh]] |
|Third Tier |
|Third Tier |
||
|- |
|- |
||
| − | !class="b"|[[ |
+ | !class="b"|[[Final Fantasy XIII accessories#Metal Armband|Metal Armband]] x2 |
|Third Tier |
|Third Tier |
||
|- |
|- |
||
| − | !class="b"|[[ |
+ | !class="b"|[[Final Fantasy XIII components#Glass Orb|Glass Orb]] x2 |
|Fourth Tier |
|Fourth Tier |
||
|- |
|- |
||
| − | !class="b"|[[ |
+ | !class="b"|[[Final Fantasy XIII accessories#Gale Ring|Gale Ring]] |
|Fourth Tier |
|Fourth Tier |
||
|- |
|- |
||
| − | !class="b"|[[ |
+ | !class="b"|[[Final Fantasy XIII accessories#Rainbow Anklet|Rainbow Anklet]] x2 |
|Fourth Tier |
|Fourth Tier |
||
|- |
|- |
||
| − | !class="b"|[[ |
+ | !class="b"|[[Final Fantasy XIII components#Ancient Bone|Ancient Bone]] x9 |
|Fifth Tier |
|Fifth Tier |
||
|- |
|- |
||
| − | !class="b"|[[ |
+ | !class="b"|[[Final Fantasy XIII items#Librascope|Librascope]] |
|Fifth Tier |
|Fifth Tier |
||
|- |
|- |
||
| − | !class="b"|[[ |
+ | !class="b"|[[Final Fantasy XIII components#Tear of Woe|Tear of Woe]] x4 |
|Sixth Tier |
|Sixth Tier |
||
|- |
|- |
||
| − | !class="b"|[[ |
+ | !class="b"|[[Final Fantasy XIII weapons#Unsetting Sun|Unsetting Sun]] |
|Sixth Tier |
|Sixth Tier |
||
|- |
|- |
||
| − | !class="b"|[[ |
+ | !class="b"|[[Final Fantasy XIII accessories#Clay Ring|Clay Ring]] |
|Sixth Tier |
|Sixth Tier |
||
|- |
|- |
||
| − | !class="b"|[[ |
+ | !class="b"|[[Final Fantasy XIII components#Tear of Remorse|Tear of Remorse]] x8 |
|Sixth Tier |
|Sixth Tier |
||
|- |
|- |
||
| − | !class="b"|[[ |
+ | !class="b"|[[Final Fantasy XIII accessories#Frostbane Brooch|Frostbane Brooch]] x2 |
|The Cloven Spire |
|The Cloven Spire |
||
|- |
|- |
||
| Line 91: | Line 153: | ||
|The Cloven Spire |
|The Cloven Spire |
||
|- |
|- |
||
| − | !class="b"|[[ |
+ | !class="b"|[[Final Fantasy XIII accessories#Collector's Catalog|Collector's Catalog]] |
|Seventh Tier |
|Seventh Tier |
||
|} |
|} |
||
| − | == |
+ | == Enemies == |
| + | {{multicol-begin}} |
||
| − | <tabber> |
||
| − | The Palisades |
+ | ;The Palisades |
| − | *[[Mánagarmr (Final Fantasy XIII)|Mánagarmr]] (two separate encounters) |
+ | * [[Mánagarmr (Final Fantasy XIII)|Mánagarmr]] (two separate encounters) |
| − | *[[Amphisbaena (Final Fantasy XIII)|Amphisbaena]] |
+ | * [[Amphisbaena (Final Fantasy XIII)|Amphisbaena]] |
| − | *[[Amphisbaena (Final Fantasy XIII)|Amphisbaena]], [[Mánagarmr (Final Fantasy XIII)|Mánagarmr]] |
+ | * [[Amphisbaena (Final Fantasy XIII)|Amphisbaena]], [[Mánagarmr (Final Fantasy XIII)|Mánagarmr]] |
| − | *[[Goblin Chieftain (Final Fantasy XIII)|Goblin Chieftain]], [[Goblin (Final Fantasy XIII)|Goblin]] x2, [[Munchkin (Final Fantasy XIII)|Munchkin]], [[Munchkin Maestro (Final Fantasy XIII)|Munchkin Maestro]] (Mark 20) |
+ | * [[Goblin Chieftain (Final Fantasy XIII)|Goblin Chieftain]], [[Goblin (Final Fantasy XIII)|Goblin]] x2, [[Munchkin (Final Fantasy XIII)|Munchkin]], [[Munchkin Maestro (Final Fantasy XIII)|Munchkin Maestro]] (Mark 20) |
| − | *[[Juggernaut (Final Fantasy XIII)|Juggernaut]] (Mark 29) |
+ | * [[Juggernaut (Final Fantasy XIII)|Juggernaut]] (Mark 29) |
| + | {{multicol-separator}} |
||
| − | + | ;The Tyrant's Gate |
|
| ⚫ | |||
| ⚫ | |||
| ⚫ | |||
| + | {{multicol-separator}} |
||
| ⚫ | |||
| ⚫ | |||
| ⚫ | |||
| + | * [[Mánagarmr (Final Fantasy XIII)|Mánagarmr]] x2 |
||
| ⚫ | |||
| + | * [[Mánagarmr (Final Fantasy XIII)|Mánagarmr]] (two separate encounters) |
||
| ⚫ | |||
| + | * [[Mithridates]] (Mark 27) |
||
| ⚫ | |||
| + | {{multicol-separator}} |
||
| ⚫ | |||
| ⚫ | |||
| ⚫ | |||
| − | * |
+ | * [[Pulsework Gladiator (Final Fantasy XIII)|Pulsework Gladiator]] x3 |
| − | *[[ |
+ | * [[Mánagarmr (Final Fantasy XIII)|Mánagarmr]] |
| + | * [[Pulsework Gladiator (Final Fantasy XIII)|Pulsework Gladiator]] x4 |
||
| ⚫ | |||
| + | * [[Mánagarmr (Final Fantasy XIII)|Mánagarmr]], [[Pulsework Gladiator (Final Fantasy XIII)|Pulsework Gladiator]] x2 |
||
| ⚫ | |||
| − | *[[ |
+ | * [[Pulsework Gladiator (Final Fantasy XIII)|Pulsework Gladiator]] x5 |
| + | * [[Gelatitan]] (Mark 21) |
||
| ⚫ | |||
| + | * [[Ambling Bellows]], [[Cryptos]] x2 (Mark 22) |
||
| ⚫ | |||
| − | *[[ |
+ | * [[Gurangatch (Final Fantasy XIII)|Gurangatch]] (Mark 23) |
| + | {{multicol-separator}} |
||
| ⚫ | |||
| ⚫ | |||
| ⚫ | |||
| − | *[[ |
+ | * [[Mánagarmr (Final Fantasy XIII)|Mánagarmr]] x2 |
| + | * [[Pulsework Gladiator (Final Fantasy XIII)|Pulsework Gladiator]] x2 |
||
| ⚫ | |||
| + | {{multicol-separator}} |
||
| ⚫ | |||
| ⚫ | |||
| ⚫ | |||
| − | *[[ |
+ | * [[Varcolaci (Final Fantasy XIII)|Varcolaci]] x2 |
| − | *[[ |
+ | * [[Yaksha (Final Fantasy XIII)|Yaksha]] x2 |
| + | {{multicol-separator}} |
||
| ⚫ | |||
| ⚫ | |||
| ⚫ | |||
| + | * [[Yakshini (Final Fantasy XIII)|Yakshini]] x2 |
||
| ⚫ | |||
| − | *[[ |
+ | * [[Yakshini (Final Fantasy XIII)|Yakshini]], [[Yaksha (Final Fantasy XIII)|Yaksha]] x2 |
| − | *[[ |
+ | * [[Pulsework Gladiator (Final Fantasy XIII)|Pulsework Gladiator]] x5 |
| − | *[[ |
+ | * [[Tyrant (Final Fantasy XIII)|Tyrant]], [[Centaurion Blade (Final Fantasy XIII)|Centaurion Blade]] |
| − | *[[ |
+ | * [[Mushussu (Final Fantasy XIII)|Mushussu]], Yakshini x2 (Mark 24) |
| + | * [[Vetala]] (Mark 25) |
||
| ⚫ | |||
| + | {{multicol-separator}} |
||
| ⚫ | |||
| ⚫ | |||
| ⚫ | |||
| + | * [[Vampire (Final Fantasy XIII)|Vampire]] (three separate encounters) |
||
| ⚫ | |||
| − | * |
+ | * [[Varcolaci (Final Fantasy XIII)|Varcolaci]] |
| + | * [[Chonchon (Final Fantasy XIII)|Chonchon]] x4 |
||
| ⚫ | |||
| − | *[[ |
+ | * [[Varcolaci (Final Fantasy XIII)|Varcolaci]] x2 |
| − | *[[ |
+ | * [[Vampire (Final Fantasy XIII)|Vampire]], [[Chonchon (Final Fantasy XIII)|Chonchon]] x3 |
| − | *[[ |
+ | * [[Vampire (Final Fantasy XIII)|Vampire]] x3 |
| + | * [[Penanggalan]], [[Chonchon (Final Fantasy XIII)|Chonchon]] x4 |
||
| ⚫ | |||
| + | {{multicol-separator}} |
||
| ⚫ | |||
| ⚫ | |||
| − | </tabber> |
||
| + | * [[Yaksha (Final Fantasy XIII)|Yaksha]] x2, [[Yakshini (Final Fantasy XIII)|Yakshini]] x2 |
||
| + | {{multicol-separator}} |
||
| ⚫ | |||
| + | * [[Amphisbaena (Final Fantasy XIII)|Amphisbaena]], [[Mánagarmr (Final Fantasy XIII)|Mánagarmr]] |
||
| + | * [[Amphisbaena (Final Fantasy XIII)|Amphisbaena]] |
||
| + | * [[Pulsework Gladiator (Final Fantasy XIII)|Pulsework Gladiator]] x5 |
||
| + | * [[Gelatitan]] x3 (Mark 60) |
||
| + | * [[Dahaka (boss)]] |
||
| + | {{multicol-end}} |
||
| + | |||
| + | ==Quests== |
||
| + | ===Seventh Tier=== |
||
| + | There is a second elevator on the apex that leads to another tier. It can be activated after the boss at the top of the tower, Dahaka, has been defeated. The player can use this new elevator to get to the seventh tier where they find another statue. Activating that spins the tower allowing the main elevator to reach every tier. |
||
| + | |||
| + | ===Missions=== |
||
| + | {{Main|Missions (Final Fantasy XIII)}} |
||
| − | ==Musical |
+ | == Musical themes == |
| − | {{ |
+ | {{audio|filename=FFXIII - Taejin's Tower.ogg|title= "Taejin's Tower"}} |
The first background theme heard at Taejin's Tower is "The Vestige", the background theme heard at the [[Pulse Vestige]]. It is calm and mysterious, which suits the sight of the tower's palisades. Inside, Taejin's Tower's eponymous theme starts playing, and features a strange tune, reminiscent of electronics, mirroring the tower's mysterious structure and machinery. |
The first background theme heard at Taejin's Tower is "The Vestige", the background theme heard at the [[Pulse Vestige]]. It is calm and mysterious, which suits the sight of the tower's palisades. Inside, Taejin's Tower's eponymous theme starts playing, and features a strange tune, reminiscent of electronics, mirroring the tower's mysterious structure and machinery. |
||
The Taejin's Tower elevator has 'elevator's music'. Each times it moves (specifically reaches a floor), it plays classical music in the same mechanics like a music box. The music sounds more like wind chimes instead of digital sounds. |
The Taejin's Tower elevator has 'elevator's music'. Each times it moves (specifically reaches a floor), it plays classical music in the same mechanics like a music box. The music sounds more like wind chimes instead of digital sounds. |
||
| − | On the "Taejin's Tower" theme, [[Mina]], who performs the vocals for many background themes in the game, performed a traditional Ainu instrument called the mukkuri.<ref>http://www.gamasutra.com/view/news/34135/Interview_Final_Fantasy_XIII_Composer_On_Creating_Performing_The_Series_Classic_Tunes.php</ref> |
+ | On the "Taejin's Tower" theme, [[Mina Sakai]], who performs the vocals for many background themes in the game, performed a traditional Ainu instrument called the mukkuri.<ref>http://www.gamasutra.com/view/news/34135/Interview_Final_Fantasy_XIII_Composer_On_Creating_Performing_The_Series_Classic_Tunes.php</ref> |
{{-}} |
{{-}} |
||
| + | == Other appearances == |
||
| − | ==Map== |
||
| + | ===''[[Final Fantasy Airborne Brigade]]''=== |
||
| − | {{gallery|class=FFXIIIa |
||
| − | + | [[File:FFAB Taejin's Tower (The Cloven Spire) FFXIII Special.png|right]] |
|
| + | {{Locat-stub|Final Fantasy Airborne Brigade}} |
||
| ⚫ | |||
| + | {{-}} |
||
| + | === ''[[Final Fantasy Record Keeper]]'' === |
||
| − | ==Gallery== |
||
| + | {{Locat-stub|Final Fantasy Record Keeper}} |
||
| − | {{Gallery|class=FFXIIIa |
||
| ⚫ | |||
| ⚫ | |||
| ⚫ | |||
| ⚫ | |||
| ⚫ | |||
| ⚫ | |||
| ⚫ | |||
| ⚫ | |||
| ⚫ | |||
| ⚫ | |||
| ⚫ | |||
| ⚫ | |||
| ⚫ | |||
| ⚫ | |||
| − | |File:Taejins tower3.jpg|Lightning in Taejin's Tower (2). |
||
| − | |File:Taejin statue.jpg|Statue at the top. |
||
| − | |File:Taejin's-Tower-Summit-FFXIII.jpg|Summit. |
||
| − | |File:View-from-Taejin's-Tower-FFXIII.jpg|View from the top. |
||
| − | |File:Taejins tower.jpg|Lightning outside Taejin's Tower. |
||
| ⚫ | |||
| − | == |
+ | == Map == |
| + | <gallery> |
||
| ⚫ | *Building a tower up to reach the heavens may have been a fal'Cie plan on locating the Etro's |
||
| ⚫ | |||
| + | </gallery> |
||
| − | == |
+ | == Gallery == |
| + | ;Artwork |
||
| + | <gallery> |
||
| ⚫ | |||
| ⚫ | |||
| ⚫ | |||
| ⚫ | |||
| + | </gallery> |
||
| + | |||
| + | ;Screenshots |
||
| + | <gallery> |
||
| ⚫ | |||
| ⚫ | |||
| ⚫ | |||
| ⚫ | |||
| ⚫ | |||
| ⚫ | |||
| ⚫ | |||
| ⚫ | |||
| ⚫ | |||
| + | Taejin's_Tower_-_The_Cloven_Spire.png|The Cloven Spire. |
||
| + | |XIII menhirrim after dahaka.PNG|Statue at the top. |
||
| + | Taejin's_Tower_Summit.png|Summit. |
||
| + | View_from_Taejin's_Tower.png|View from the top. |
||
| + | </gallery> |
||
| + | |||
| + | == Trivia == |
||
| ⚫ | * Building a tower up to reach the heavens may have been a fal'Cie plan on locating the [[Etro's gate]]. This is supported by the fal'Cie Dahaka making its abode atop the tower, a fal'Cie tasked with searching for the Gate from the skies of Gran Pulse. Thus, the tower may allude to the Biblical story of [[wikipedia:Tower of Babel|Tower of Babel]] where people attempted to build a tower tall enough to reach God, but the tower was struck down by Him. |
||
| + | |||
| + | == References == |
||
{{Reflist}} |
{{Reflist}} |
||
| − | {{FFXIII}} |
+ | {{navbox setting FFXIII}} |
| + | |||
| ⚫ | |||
| + | [[Category:Locations in Final Fantasy XIII]] |
||
[[Category:Towers]] |
[[Category:Towers]] |
||
Revision as of 01:35, 14 January 2019
Template:Sideicon Taejin's Tower is a location on Gran Pulse in Final Fantasy XIII. It is a large tower amid the wilderness overlooking the village of Oerba. Taejin's Tower is an ancient structure built by the fal'Cie for purposes unknown before serving as home to the fal'Cie Dahaka. What once towered the Pulse sky is now broken and crumbling, but most of its mechanisms still function, including the living statues called Menhirrim imprisoned by Dahaka.
Later, Bhakti's bonus tip #10 explains that the party can climb to the top of the tower and ride the elevator back down all seven flights, which allows the player to find a hidden seventh tier and battle an Undying Cie'th.
Datalog
Template:See Also This towering spire was built by the fal'Cie in ages past. While the purpose of the structure is unclear, its original height suggests that the mighty beings sought to pierce even the heavens in their insatiable quest for expansion.
No matter the reason for its construction, the tower now lies in ruin, its great spine snapped, and its crumbling interior serving as a lair for the fal'Cie Dahaka.
Story
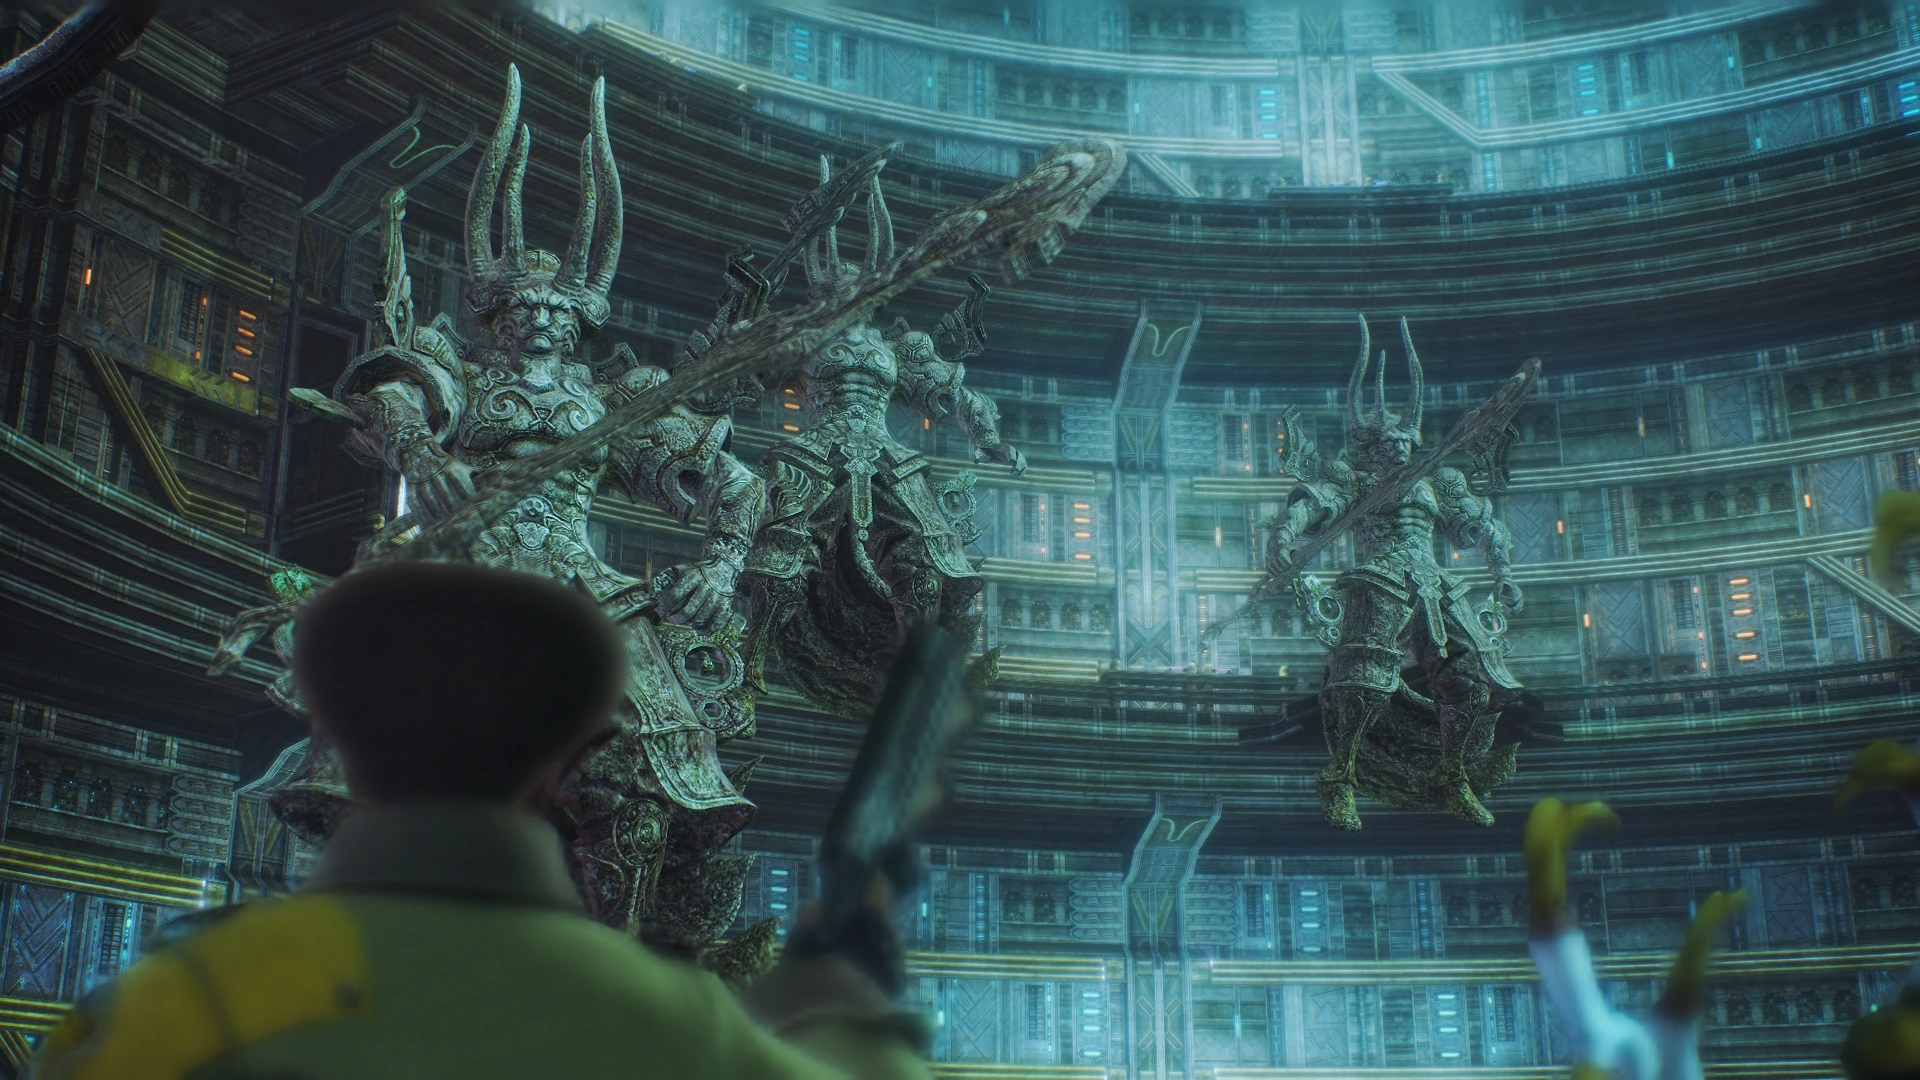
Menhirrims protect the party from Dahaka.
The party ventures through the tower on their way to Oerba and must take on a series of missions from the resident statues, whose powers are held in check by the monsters inhabiting the tower. Completing the missions allows the statues to spin the tower's segments into alignment, opening the path upward.
As they approach the top, the fal'Cie Dahaka approaches the party, but is beaten back by the now-freed statues. At the tower's apex, the wounded fal'Cie attacks directly but is defeated. As the party gazes out from the top of the tower, Fang and Vanille are disappointed to discover their hometown looks dilapidated and barren, instead of the grove of flowers they recall from their memories. Despite this, the party decides to ride a capsule down the slope to Oerba to take a closer look.
Treasure
| Item | Location |
|---|---|
| Sinister Fang x20 | The Palisades |
| Chipped Fang x12 | Ground Tier |
| 4721 gil | Ground Tier |
| Sparkbane Brooch | Ground Tier |
| Spark Plug x5 | Second Tier |
| Simurgh | Third Tier |
| Metal Armband x2 | Third Tier |
| Glass Orb x2 | Fourth Tier |
| Gale Ring | Fourth Tier |
| Rainbow Anklet x2 | Fourth Tier |
| Ancient Bone x9 | Fifth Tier |
| Librascope | Fifth Tier |
| Tear of Woe x4 | Sixth Tier |
| Unsetting Sun | Sixth Tier |
| Clay Ring | Sixth Tier |
| Tear of Remorse x8 | Sixth Tier |
| Frostbane Brooch x2 | The Cloven Spire |
| Ethersol | The Cloven Spire |
| Collector's Catalog | Seventh Tier |
Enemies
- The Palisades
- Mánagarmr (two separate encounters)
- Amphisbaena
- Amphisbaena, Mánagarmr
- Goblin Chieftain, Goblin x2, Munchkin, Munchkin Maestro (Mark 20)
- Juggernaut (Mark 29)
- The Tyrant's Gate
- Mánagarmr x2
- Ground Tier
- Mánagarmr x2
- Mánagarmr (two separate encounters)
- Mithridates (Mark 27)
- Second Tier
- Pulsework Gladiator x3
- Mánagarmr
- Pulsework Gladiator x4
- Mánagarmr, Pulsework Gladiator x2
- Pulsework Gladiator x5
- Gelatitan (Mark 21)
- Ambling Bellows, Cryptos x2 (Mark 22)
- Gurangatch (Mark 23)
- Third Tier
- Mánagarmr x2
- Pulsework Gladiator x2
- Fifth Tier
- Yakshini x2
- Yakshini, Yaksha x2
- Pulsework Gladiator x5
- Tyrant, Centaurion Blade
- Mushussu, Yakshini x2 (Mark 24)
- Vetala (Mark 25)
- Sixth Tier
- The Cloven Spire
- Amphisbaena, Mánagarmr
- Amphisbaena
- Pulsework Gladiator x5
- Gelatitan x3 (Mark 60)
- Dahaka (boss)
Quests
Seventh Tier
There is a second elevator on the apex that leads to another tier. It can be activated after the boss at the top of the tower, Dahaka, has been defeated. The player can use this new elevator to get to the seventh tier where they find another statue. Activating that spins the tower allowing the main elevator to reach every tier.
Missions
Musical themes
The first background theme heard at Taejin's Tower is "The Vestige", the background theme heard at the Pulse Vestige. It is calm and mysterious, which suits the sight of the tower's palisades. Inside, Taejin's Tower's eponymous theme starts playing, and features a strange tune, reminiscent of electronics, mirroring the tower's mysterious structure and machinery.
The Taejin's Tower elevator has 'elevator's music'. Each times it moves (specifically reaches a floor), it plays classical music in the same mechanics like a music box. The music sounds more like wind chimes instead of digital sounds.
On the "Taejin's Tower" theme, Mina Sakai, who performs the vocals for many background themes in the game, performed a traditional Ainu instrument called the mukkuri.[1]
Other appearances
Final Fantasy Airborne Brigade
Final Fantasy Record Keeper
Map
")
Gallery
- Artwork
")
")
")
")
- Screenshots
")
")
")
")
")
")
")
")
")
")
")
")
Trivia
- Building a tower up to reach the heavens may have been a fal'Cie plan on locating the Etro's gate. This is supported by the fal'Cie Dahaka making its abode atop the tower, a fal'Cie tasked with searching for the Gate from the skies of Gran Pulse. Thus, the tower may allude to the Biblical story of Tower of Babel where people attempted to build a tower tall enough to reach God, but the tower was struck down by Him.