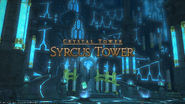
Syrcus Tower is a level 50 alliance raid in Final Fantasy XIV added in patch 2.3, and the second part of crystal tower raid series.
Story[]
Having secured a path through the Labyrinth of the Ancients, the fellowship of NOAH finds itself before the entrance to the Crystal Tower proper. With the aid of their new comrades, Unei and Doga, the companions succeed in opening the gate whose workings had baffled even the brightest minds among them. Upon learning that dark forces have awakened within, the fellowship decides to suspend its investigative effort in favor of sealing off the tower. You must fight your way to the apex and defeat the resurrected Emperor Xande, that Eorzea might be free of his all-consuming ambition.
In-game description
The party's goal is to destroy Xande and his main lieutenants in order to stop his attempts to fulfill his pact with the Cloud of Darkness, a powerful voidsent who desires to erase all existance. This is due to Xande's experience with death, as he has been resurrected by Amon with a glimpse of the oblivion, and therefore developed a nihilistic viewpoint. It was the pact with the Cloud of Darkness that drove him to order the creation of Dalamud to use as a power collection device. The energy was too great for the Syrcus Tower to contain, and this ushers in the Fourth Umbral Era, the Allagan Empire laid to ruin from a catastrophic earthquake.
The party succeeds, but Nero tol Scaeva, Doga and Unei are pulled into the World of Darkness, leaving only Cid Garlond, G'raha Tia and Rammbroes behind. The story is continued in ![]() The World of Darkness where the player must save them.
The World of Darkness where the player must save them.
Objectives[]
- Clear the ladder of Ascension: 0/1
- Defeat Scylla: 0/1
- Clear the Braid: 0/1
- Defeat Glasya Labolas: 0/1
- Clear the Golder Sacristy: 0/1
- Defeat Amon: 0/1
- Defeat Xande: 0/1
Maps[]
Syrcus Tower is a blue, crystal area. Its areas are split between several different floors as the team rises the tower. These floors are the first to third Lower Rings, the first to third Central Rings and finally the Upper Ring.
Progression[]
First Lower Ring[]
The first lower ring does not contain any areas, other than two staircases off to the left and right which will lead up to the first true area in the Second Lower Ring.
The Ladder of Ascension[]
This is a "trash pool", an area featuring only normal enemies. Here, Shinobi, Kunoichi, Dark General, Oceanus and Yellow Dragon enemies are all fought before the parties can progress. There are no key mechanics here, and players should simply focus on taking out whichever enemy they choose. A simple strategy is for tanks to pull all enemies close together to have parties destroy them with area-of-effect attacks. After the area is cleared, stairs will spawn up to the Third Lower Ring.
The Gathering[]
The Gathering is the location of the first boss Scylla. Each of the parties should position themselves in one of the three outer parts of this round area before pulling the boss. Throughout this fight, players may be tethered to red fire orbs, purple lightning orbs and blue ice orbs. Purple lightning orbs must be removed by simply moving towards the outer blue lightning columns, while blue ice orbs will freeze players and other players standing in a puddle they also stand within (as such players are advised not to stand in puddles when tethered) and red orbs will damage players unless they are removed by reaching players frozen by the blue orbs, which will damage that player but unfreeze them earlier. Doing so will also create puddles, which are important for Scylla's Ancient Flare attack; standing in puddles will drastically reduce the damage it deals. The other attack is Daybreak, which must be avoided by having a majority of one party standing on each of the outer three pads. After Daybreak is finished, the player must defeat Scylla and the Oceanus and Dark General additional enemies that spawn. This will cause staircases to spawn to the First Inner Ring.
Scylla may drop Phlegethon's Gauntlets, Scylla's Gloves of Healing, The Guardian's Tassets of Striking, The Guardian's Greaves of Maiming, Scylla's Boots of Casting, The Guardian's Armguards of Striking, Phlegethon's Plate Belt, Scylla's Belt of Healing or Amon's Boots.
The Braid[]
This area is another trash pool, with three Acherons and several Gomery enemies. A Green Dragon will divebomb later later, which will add stacks of Poison that should be removed with status effect healing spells. At this time, several Doga's Clone and Unei's Clone enemies will spawn. After this, the next area is unlocked.
The Ring of the Protector[]
Once players arrive, a pad will allow them to jump to the central area, where Glasya Labolas is fought. This fight has three stages to it. The boss itself will mostly launch several area-of-effect attacks, but its stages operate differently. Initially, after being damaged a lot, several Clockwork Wright enemies will spawn and Glasya will reflect all damage done. The Clockwork Wrights which will amplify Glasya Labolas' damage of a major area-of-effect attack that Glasya will perform after a certain period of time. However, standing within a circle around the Wrights will not only pull the beam amplifying Glasya away from him, they will freeze the player, as such a second player is required to destroy the Wright and free them. The more Wrights defeated, the better, and if the player survives Glasya Labolas' attack, it will move to the next stage. This stage, there will be more area-of-effect damaging attacks but more importantly, after a heavy amount of damage is dealt, Labolas will this time spawn Clockwork Squire enemies. These should be pulled to three equilateral locations near the outside, and away from each other, which they should be defeated at, as they will then pull power from Labolas. If the party survives Labolas' attack, they must run to one of three pads with their party that jump to the outer platforms. Players should jump around these platforms to kill the Spanner-Rock enemies that spawn here, moving in a clockwise direction. Eventually, the area will be unsealed.
Glasya Labolas will drop either The Guardian's Armguards of Maiming, Scylla's Gloves of Casting, Amon's Sash, Phlegethon's Sabatons, Scylla's Boots of Healing, Amon's Sleeves, The Guardian's Tassets of Maiming, Scylla's Belt of Casting, or The Guardian's Greaves of Striking.
The Golden Sacristy[]
The last trash pool initially contains three Acheron enemies, while an untargetable Red Dragon hurls fireballs at random targets. Upon the Acherons' deaths, the Red Dragon marks a random player with a green circle, Divebombing that person and anyone nearby after a short delay. The Red Dragon then lands in the center of the arena, as minor Haokah and Abaia enemies spawn intermittently.
The Final Curtain[]
Amon is the host of the final Curtain, and is ideally tanked in the center of the platform with each party spread out 120 degrees from each other. Amon possesses the AOE attacks Blizzaga Forte, which is a circle around himself, Firaga Forte, which unavoidably damages all raid members, and Thundaga Forte, which selects a non-tank member from each party and creates a series of circular, tracking AOE at their position, much like Ifrit's Eruptions. Adds in sets of three will also spawn at the edges of the arena. Experimental By-products make their way slowly towards Amon and inflict the entire raid with Silence and Pacification should they reach him. Kum Kums are high damage, high HP adds that should be picked up by the offtanks. Kichiknebiks chase Frogged players and deal heavy damage to them upon contact, and can be killed relatively leisurely by other members. In conjunction with many of these adds, purple orbs spawn and tether to players, which can be led into the adds to shrink them, reducing their damage.
Concurrently with the spawning of Kichiknebiks, Amon transfigures a player from each party into a frog, giving them the Flame Breath that allows them to melt players that have been Frozen by him. At about 20% health, Amon begins casting Curtain Call, refreezing a player from each party and forcing others to hide behind them relative to Amon to avoid Curtain Call's instant kill. After this move, Amon should not be able to spawn too many more adds before he is defeated.
The Emperor's Throne[]
Musical themes[]
"Out of the Labyrinth", an arrangement of "The Crystal Tower" from Final Fantasy III, plays throughout Syrcus Tower while not in combat. "Shattered", a more active-sounding arrangement of the same theme, plays whenever the alliance is fighting regular enemies.
"Nemesis" plays while fighting Scylla, Glasya Labolas and Amon; "Tumbling Down", an arrangement of "Battle 2" from Final Fantasy III, plays during the battle with Xande.
Behind the scenes[]
Syrcus Tower is based on the Crystal Tower, the penultimate dungeon in Final Fantasy III.
Most of the enemies fought in the Syrcus Tower originally appeared in the Crystal Tower. These include Shinobi, Dark General, Yellow Dragon, Gomory, Green Dragon, Doga's Clone, Glasya Labolas, Red Dragon, Azer and Qumqum. Xande holds a similar role in both games, serving as the final boss of the Crystal Tower.
The rest of the enemies are taken from other dungeons in Final Fantasy III. Kunoichi, Oceanus, Scylla, Acheron, Haokah, Abaia and Amon are enemies from the Forbidden Land Eureka while Unei's Clone comes from Ancients' Maze.


