Intangir Bot (talk | contribs) m (Bot: Automated text replacement (-{{Expand +{{Expand|FFXII); cosmetic changes) |
Intangir Bot (talk | contribs) m (Bot: Changing template: Locat-stub) |
||
| (18 intermediate revisions by 7 users not shown) | |||
| Line 1: | Line 1: | ||
| − | {{sideicon|FFXII}} |
+ | {{sideicon|prime=FFXII|FFRK}} |
| − | {{Expand|FFXII|Adding a Locations section, with images and brief descriptions of the areas within the location}} |
+ | {{Expand|FFXII|FFXII|Adding a Locations section, with images and brief descriptions of the areas within the location}} |
| + | {{infobox location |
||
| − | {{Location |
||
|name=Stilshrine of Miriam |
|name=Stilshrine of Miriam |
||
|release=FFXII |
|release=FFXII |
||
| Line 36: | Line 36: | ||
*[[#Level grinding|Level grinding]] |
*[[#Level grinding|Level grinding]] |
||
}} |
}} |
||
| − | {{ |
+ | {{Quote|Journey across the Paramina Rift to the Stilshrine of Miriam. There rests the gift he entrusted to the Gran Kiltias of his time. Seek it out. The Sword of Kings... can cut through nethicite.|Anastasis of Kiltias}} |
The '''Stilshrine of Miriam''' is a location in the land of [[Ivalice (Final Fantasy XII)|Ivalice]] in ''[[Final Fantasy XII]]''. It is a temple located in snowy mountains, housing a powerful artifact. |
The '''Stilshrine of Miriam''' is a location in the land of [[Ivalice (Final Fantasy XII)|Ivalice]] in ''[[Final Fantasy XII]]''. It is a temple located in snowy mountains, housing a powerful artifact. |
||
| Line 42: | Line 42: | ||
== [[Sage Knowledge]] == |
== [[Sage Knowledge]] == |
||
| − | {{ |
+ | {{Quote|An ancient shrine deep within the Jagd Ramooda. Like Raithwall's tomb, this, too, was constructed in the time of the Galtean Alliance, originally to honor the ancient god of swords and martial might. It is said that a Gran Kiltias of long ago selected the Stilshrine to house the relics of Dynast-King Raithwall, though why he chose this site, and not a temple of his own sect, is unclear.|[[Sage Knowledge 53-78#SK 78: The Stilshrine of Miriam|Sage Knowledge piece 78]]}} |
== Profile == |
== Profile == |
||
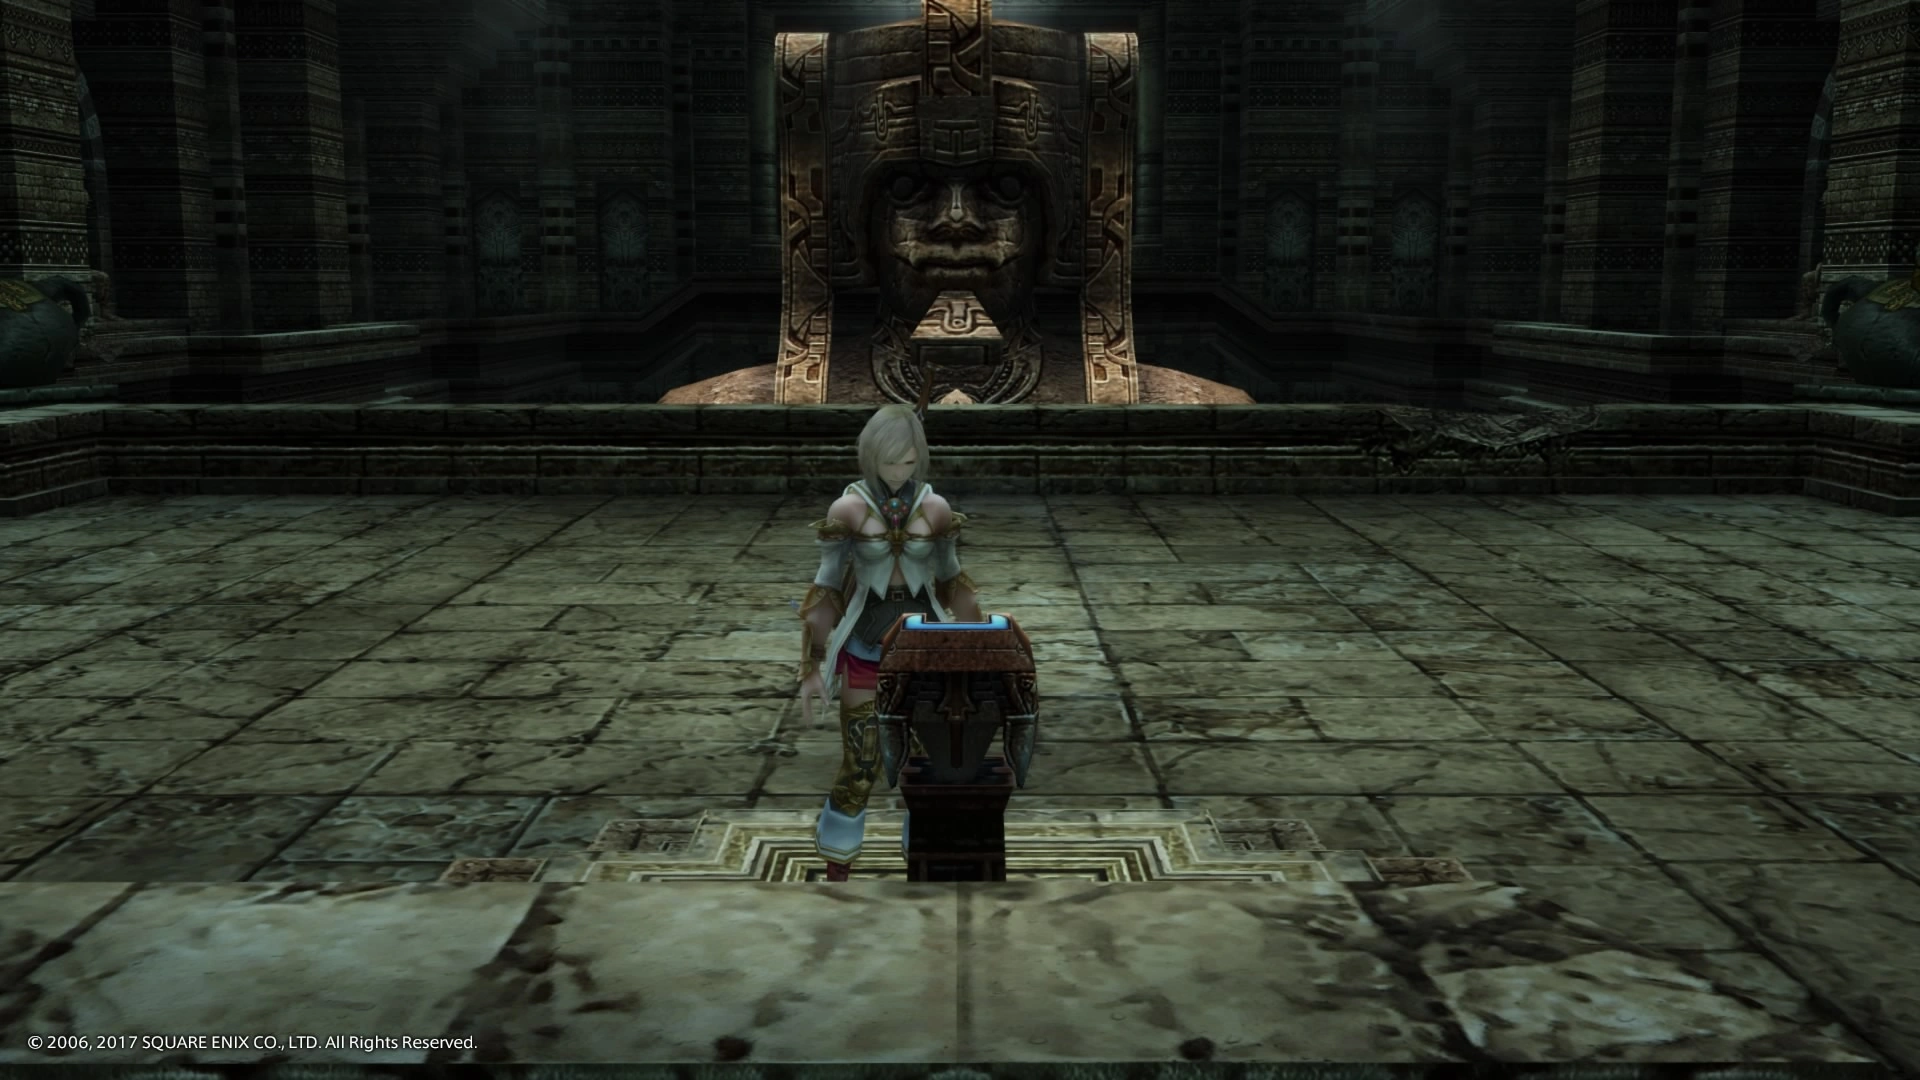
[[File:Stilshrine of miriam.png|thumb|Pedestal of Dawn at the entrance to the Stilshrine.]] |
[[File:Stilshrine of miriam.png|thumb|Pedestal of Dawn at the entrance to the Stilshrine.]] |
||
| − | Not much is known about Stilshrine of Miriam. It is named after an ancient god of swords and martial might (also referred to as a goddess elsewhere in the game). It was built during the time of the [[Galtean Alliance]], by the [[Kiltia|Gran Kiltias]] of that time. The [[Sword of Kings]] rests, sealed deep within. No one knows why the Sword was left with the Gran Kiltias and not kept by King [[Raithwall]] himself. |
+ | Not much is known about Stilshrine of Miriam. It is named after an ancient god of swords and martial might (also referred to as a goddess elsewhere in the game). It was built during the time of the [[Galtean Alliance]], by the [[Kiltia|Gran Kiltias]] of that time. The [[Sword of Kings (weapon)|Sword of Kings]] rests, sealed deep within. No one knows why the Sword was left with the Gran Kiltias and not kept by King [[Raithwall]] himself. |
Stilshrine of Miriam has a design similar to other places built during the Galtean Alliance, like the [[Sochen Cave Palace]]. Unlike other buildings from this era though, it is in much better condition, thanks to the effort of the [[Kiltia]]. The guardians of the Stilshrine even consist of the walls themselves. The technology to do this has since been lost. |
Stilshrine of Miriam has a design similar to other places built during the Galtean Alliance, like the [[Sochen Cave Palace]]. Unlike other buildings from this era though, it is in much better condition, thanks to the effort of the [[Kiltia]]. The guardians of the Stilshrine even consist of the walls themselves. The technology to do this has since been lost. |
||
| Line 56: | Line 56: | ||
The party venture inside the shrine and eventually come across the sword. [[Balthier]] urges Ashe to test the sword on the Dawn Shard to see if it really works. Ashe hesitates and sees the ghostly vision of [[Rasler Heios Nabradia|Lord Rasler]], shaking his head at her. She still picks up the sword and raises it to the stone, but on purpose misses the mark. [[Fran]] says the stone fears the sword, and Ashe says she is positive this sword is the real Sword of Kings. |
The party venture inside the shrine and eventually come across the sword. [[Balthier]] urges Ashe to test the sword on the Dawn Shard to see if it really works. Ashe hesitates and sees the ghostly vision of [[Rasler Heios Nabradia|Lord Rasler]], shaking his head at her. She still picks up the sword and raises it to the stone, but on purpose misses the mark. [[Fran]] says the stone fears the sword, and Ashe says she is positive this sword is the real Sword of Kings. |
||
| − | {{ |
+ | {{clear}} |
{{endspoiler}} |
{{endspoiler}} |
||
| Line 76: | Line 76: | ||
* Vault of the Champion |
* Vault of the Champion |
||
* Throne of Veiled Gods (enter from Ward of Measure with Stone of the Condemner) |
* Throne of Veiled Gods (enter from Ward of Measure with Stone of the Condemner) |
||
| − | {{ |
+ | {{Location section|Final Fantasy XII}} |
== Treasures == |
== Treasures == |
||
| − | {{See |
+ | {{See|Treasure (Final Fantasy XII)}} |
[[File:FF12 - Treasure Chest 2.png|right|150px]] |
[[File:FF12 - Treasure Chest 2.png|right|150px]] |
||
| − | + | With the [[Final Fantasy XII accessories#Diamond Armlet|Diamond Armlet]] equipped the common item treasure is Knot of Rust and the rare treasure is [[Final Fantasy XII items#Elixir|Elixir]]. |
|
| − | Most treasures in the Shrine are found in the Walk of Reason area. The treasure in the northeast of the area can contain [[ |
+ | Most treasures in the Shrine are found in the Walk of Reason area. The treasure in the northeast of the area can contain [[Final Fantasy XII accessories#Steel Poleyns|Steel Poleyns]] and the treasure slightly south from there can have the [[Final Fantasy XII armor#Lamia's Tiara|Lamia's Tiara]]. There is a group of four treasures in the southeast corner and one of them can have the [[Final Fantasy XII armor#Pirate Hat|Pirate Hat]]. Among the treasures found on the other side of the map, in the northwest, the player may find the [[Final Fantasy XII accessories#Firefly|Firefly]] and [[Final Fantasy XII armor#Sorcerer's Hat|Sorcerer's Hat]]. |
| − | The treasure in the east end of the Ward of Velitation is always either Elixir or [[ |
+ | The treasure in the east end of the Ward of Velitation is always either Elixir or [[Final Fantasy XII items#Megalixir|Megalixir]] when Diamond Armlet is not equipped, but with Diamond Armlet the treasure is always Megalixir. The treasure will not respawn. |
| − | The Ward of the Sword-King area has a [[Hidden passage]] on the left of the hallway; if the player skirts the wall in a way the camera attempts to go "inside" the wall, they reveal a new path. At the end of the path they can find a treasure that never respawns that has either [[ |
+ | The Ward of the Sword-King area has a [[Hidden passage]] on the left of the hallway; if the player skirts the wall in a way the camera attempts to go "inside" the wall, they reveal a new path. At the end of the path they can find a treasure that never respawns that has either [[Final Fantasy XII items#Dark Matter|Dark Matter]] or [[Final Fantasy XII armor#Shell Shield|Shell Shield]]. With the Diamond Armlet equipped the treasure is 90% Shell Shield, 10% Dark Matter. When entering the last room after the hidden passage the player should cast [[Float (ability)|Float]] before entering, because the entrance is covered in [[Trap (term)|traps]]. |
=== Walk of Sky === |
=== Walk of Sky === |
||
These chests only appear in the ''Zodiac'' versions. They do not respawn. |
These chests only appear in the ''Zodiac'' versions. They do not respawn. |
||
| − | {|class="full-width FFXII table" style="text-align:center" |
+ | {|class="full-width FFXII article-table" style="text-align:center" |
|-class="a" |
|-class="a" |
||
!style="width:20%"|Chest |
!style="width:20%"|Chest |
||
| Line 105: | Line 105: | ||
|0% |
|0% |
||
|N/A |
|N/A |
||
| − | |colspan="4"|[[ |
+ | |colspan="4"|[[Final Fantasy XII accessories#Tourmaline Ring|Tourmaline Ring]] |
|- |
|- |
||
|class="b"|2 |
|class="b"|2 |
||
| Line 111: | Line 111: | ||
|0% |
|0% |
||
|N/A |
|N/A |
||
| − | |colspan="4"|[[ |
+ | |colspan="4"|[[Final Fantasy XII accessories#Tourmaline Ring|Tourmaline Ring]] |
|- |
|- |
||
|class="b"|3 |
|class="b"|3 |
||
| Line 117: | Line 117: | ||
|0% |
|0% |
||
|N/A |
|N/A |
||
| − | |colspan="4"|[[ |
+ | |colspan="4"|[[Final Fantasy XII accessories#Battle Harness|Battle Harness]] |
|} |
|} |
||
| − | {{ |
+ | {{clear}} |
=== Walk of Mind === |
=== Walk of Mind === |
||
This chest only appears in the ''Zodiac'' versions. It does not respawn. |
This chest only appears in the ''Zodiac'' versions. It does not respawn. |
||
| − | {|class="full-width FFXII table" style="text-align:center" |
+ | {|class="full-width FFXII article-table" style="text-align:center" |
|-class="a" |
|-class="a" |
||
!style="width:20%"|Chest |
!style="width:20%"|Chest |
||
| Line 136: | Line 136: | ||
|0% |
|0% |
||
|N/A |
|N/A |
||
| − | |colspan="4"|[[ |
+ | |colspan="4"|[[Final Fantasy XII armor#Ice Shield|Ice Shield]] |
|} |
|} |
||
| − | {{ |
+ | {{clear}} |
=== Ward of Velitation === |
=== Ward of Velitation === |
||
;Zodiac |
;Zodiac |
||
| − | {|class="full-width FFXII table" style="text-align:center" |
+ | {|class="full-width FFXII article-table" style="text-align:center" |
|-class="a" |
|-class="a" |
||
!style="width:20%"|Chest |
!style="width:20%"|Chest |
||
| Line 183: | Line 183: | ||
* '''''{{A|1}}''''' - Chest does not respawn. |
* '''''{{A|1}}''''' - Chest does not respawn. |
||
;Original |
;Original |
||
| − | {|class="full-width FFXII table" style="text-align:center" |
+ | {|class="full-width FFXII article-table" style="text-align:center" |
|-class="a" |
|-class="a" |
||
!style="width:20%"|Chest |
!style="width:20%"|Chest |
||
| Line 205: | Line 205: | ||
=== Cold Distance === |
=== Cold Distance === |
||
;Zodiac |
;Zodiac |
||
| − | {|class="full-width FFXII table" style="text-align:center" |
+ | {|class="full-width FFXII article-table" style="text-align:center" |
|-class="a" |
|-class="a" |
||
!style="width:20%"|Chest |
!style="width:20%"|Chest |
||
| Line 218: | Line 218: | ||
|0% |
|0% |
||
|N/A |
|N/A |
||
| − | |colspan="4"|[[ |
+ | |colspan="4"|[[Final Fantasy XII armor#Shell Shield|Shell Shield]] |
|} |
|} |
||
* '''''{{A|1}}''''' - Chest does not respawn. |
* '''''{{A|1}}''''' - Chest does not respawn. |
||
;Original |
;Original |
||
| − | {|class="full-width FFXII table" style="text-align:center" |
+ | {|class="full-width FFXII article-table" style="text-align:center" |
|-class="a" |
|-class="a" |
||
!style="width:20%"|Chest |
!style="width:20%"|Chest |
||
| Line 239: | Line 239: | ||
|- |
|- |
||
|Dark Matter |
|Dark Matter |
||
| − | |[[ |
+ | |[[Final Fantasy XII armor#Shell Shield|Shell Shield]] |
| − | |[[ |
+ | |[[Final Fantasy XII armor#Shell Shield|Shell Shield]] |
|Dark Mater |
|Dark Mater |
||
|} |
|} |
||
| Line 247: | Line 247: | ||
This chest only appears in the ''Zodiac'' versions. It does not respawn. |
This chest only appears in the ''Zodiac'' versions. It does not respawn. |
||
| − | {|class="full-width FFXII table" style="text-align:center" |
+ | {|class="full-width FFXII article-table" style="text-align:center" |
|-class="a" |
|-class="a" |
||
!style="width:20%"|Chest |
!style="width:20%"|Chest |
||
| Line 260: | Line 260: | ||
|0% |
|0% |
||
|N/A |
|N/A |
||
| − | |colspan="4"|[[ |
+ | |colspan="4"|[[Final Fantasy XII accessories#Ruby Ring|Ruby Ring]] |
|} |
|} |
||
| − | {{ |
+ | {{clear}} |
=== Walk of Reason === |
=== Walk of Reason === |
||
;Zodiac |
;Zodiac |
||
| − | {|class="full-width FFXII table" style="text-align:center" |
+ | {|class="full-width FFXII article-table" style="text-align:center" |
|-class="a" |
|-class="a" |
||
!style="width:20%"|Chest |
!style="width:20%"|Chest |
||
| Line 408: | Line 408: | ||
* '''''{{A|1}}''''' - Chest does not respawn. |
* '''''{{A|1}}''''' - Chest does not respawn. |
||
;Original |
;Original |
||
| − | {|class="full-width FFXII table" style="text-align:center" |
+ | {|class="full-width FFXII article-table" style="text-align:center" |
|-class="a" |
|-class="a" |
||
!style="width:20%"|Chest |
!style="width:20%"|Chest |
||
| Line 428: | Line 428: | ||
|≤ 50 gil |
|≤ 50 gil |
||
|Knot of Rust |
|Knot of Rust |
||
| − | |[[ |
+ | |[[Final Fantasy XII accessories#Steel Poleyns|Steel Poleyns]] |
|≤ 200 gil |
|≤ 200 gil |
||
|Knot of Rust |
|Knot of Rust |
||
| Line 445: | Line 445: | ||
|≤ 50 gil |
|≤ 50 gil |
||
|Knot of Rust |
|Knot of Rust |
||
| − | |[[ |
+ | |[[Final Fantasy XII armor#Lamia's Tiara|Lamia's Tiara]] |
|≤ 200 gil |
|≤ 200 gil |
||
|Knot of Rust |
|Knot of Rust |
||
| Line 479: | Line 479: | ||
|≤ 50 gil |
|≤ 50 gil |
||
|Knot of Rust |
|Knot of Rust |
||
| − | |[[ |
+ | |[[Final Fantasy XII accessories#Firefly|Firefly]] |
|≤ 200 gil |
|≤ 200 gil |
||
|Knot of Rust |
|Knot of Rust |
||
| Line 496: | Line 496: | ||
|≤ 50 gil |
|≤ 50 gil |
||
|Knot of Rust |
|Knot of Rust |
||
| − | |[[ |
+ | |[[Final Fantasy XII armor#Sorcerer's Hat|Sorcerer's Hat]] |
|≤ 200 gil |
|≤ 200 gil |
||
|Knot of Rust |
|Knot of Rust |
||
| Line 530: | Line 530: | ||
|≤ 50 gil |
|≤ 50 gil |
||
|Knot of Rust |
|Knot of Rust |
||
| − | |[[ |
+ | |[[Final Fantasy XII armor#Pirate Hat|Pirate Hat]] |
|≤ 200 gil |
|≤ 200 gil |
||
|Knot of Rust |
|Knot of Rust |
||
| Line 570: | Line 570: | ||
|} |
|} |
||
| − | === |
+ | === Ward of Steel === |
This chest only appears in the ''Zodiac'' versions. It does not respawn. |
This chest only appears in the ''Zodiac'' versions. It does not respawn. |
||
| − | {|class="full-width FFXII table" style="text-align:center" |
+ | {|class="full-width FFXII article-table" style="text-align:center" |
|-class="a" |
|-class="a" |
||
!style="width:20%"|Chest |
!style="width:20%"|Chest |
||
| Line 586: | Line 586: | ||
|0% |
|0% |
||
|N/A |
|N/A |
||
| − | |colspan="4"|[[ |
+ | |colspan="4"|[[Final Fantasy XII accessories#Sage's Ring|Sage's Ring]] |
|} |
|} |
||
| − | {{ |
+ | {{clear}} |
| + | |||
=== Hall of Worth === |
=== Hall of Worth === |
||
These chests only appear in the ''Zodiac'' versions. They do not respawn. |
These chests only appear in the ''Zodiac'' versions. They do not respawn. |
||
| − | {|class="full-width FFXII table" style="text-align:center" |
+ | {|class="full-width FFXII article-table" style="text-align:center" |
|-class="a" |
|-class="a" |
||
!style="width:20%"|Chest |
!style="width:20%"|Chest |
||
| Line 620: | Line 621: | ||
To find the Rare Game [[Matriarch Bomb]], as well as the enemy [[Oiling]], the player needs to locate the [[hidden passage]] in Ward of the Sword-King. The player should head south to where [[Darkmare]] stands in waiting. The western wall here is where the hidden passage is located. When the player stands in front of the western wall for a few seconds, the wall will vanish and reveal a hidden stairway leading up. The player can try to move the game camera inside the wall to reveal it. The player should cast [[Float (ability)|Float]] on the [[party]], as the last hidden area has a [[Trap (term)|trap]] that immediately applies berserk and confuse and is otherwise impossible to avoid. |
To find the Rare Game [[Matriarch Bomb]], as well as the enemy [[Oiling]], the player needs to locate the [[hidden passage]] in Ward of the Sword-King. The player should head south to where [[Darkmare]] stands in waiting. The western wall here is where the hidden passage is located. When the player stands in front of the western wall for a few seconds, the wall will vanish and reveal a hidden stairway leading up. The player can try to move the game camera inside the wall to reveal it. The player should cast [[Float (ability)|Float]] on the [[party]], as the last hidden area has a [[Trap (term)|trap]] that immediately applies berserk and confuse and is otherwise impossible to avoid. |
||
| − | The Matriarch Bomb has a 20% chance to spawn in the final area, along with a one time only [[Treasure (Final Fantasy XII)|treasure]] that can contain either a [[ |
+ | The Matriarch Bomb has a 20% chance to spawn in the final area, along with a one time only [[Treasure (Final Fantasy XII)|treasure]] that can contain either a [[Final Fantasy XII items#Dark Matter|Dark Matter]] or a [[Final Fantasy XII armor#Shell Shield|Shell Shield]]. |
Once entering the Stilshrine, the player must spend at least thirty minutes within to find [[Negalmuur]]. [[Darkmare]] must also be killed (Ward of the Sword-King) for it to appear. Negalmuur will spawn at the junction within the Ward of the Sword-King. Negalmuur can be used for auto-leveling (see below). |
Once entering the Stilshrine, the player must spend at least thirty minutes within to find [[Negalmuur]]. [[Darkmare]] must also be killed (Ward of the Sword-King) for it to appear. Negalmuur will spawn at the junction within the Ward of the Sword-King. Negalmuur can be used for auto-leveling (see below). |
||
| Line 629: | Line 630: | ||
There are two important things to avoid, both of which have the effect of ending the loop. The first is killing Negalmuur. To this end, gambits should be set up so as to ensure that only the summoned enemies are attacked, for example, using a gambit such as "Foe:HP<3,000", since Negalmuur's [[HP (stat)|HP]] is far in excess of that. The second thing is to prevent the party leader remaining [[Knocked Out|KOed]] for long enough that the game is paused to select a new leader. The appropriate healing gambits should be set up to avoid the party leader's death, and [[Decoy (ability)|Decoy]] used to attract as many attacks as possible to other members. |
There are two important things to avoid, both of which have the effect of ending the loop. The first is killing Negalmuur. To this end, gambits should be set up so as to ensure that only the summoned enemies are attacked, for example, using a gambit such as "Foe:HP<3,000", since Negalmuur's [[HP (stat)|HP]] is far in excess of that. The second thing is to prevent the party leader remaining [[Knocked Out|KOed]] for long enough that the game is paused to select a new leader. The appropriate healing gambits should be set up to avoid the party leader's death, and [[Decoy (ability)|Decoy]] used to attract as many attacks as possible to other members. |
||
| − | One early method for near infinite auto-leveling is to teleport back to [[Rabanastre]] and buy the gambit for Foe: HP <2000 (also the < 3000 gambit, if the party doesn't already have it), plus [[ |
+ | One early method for near infinite auto-leveling is to teleport back to [[Rabanastre]] and buy the gambit for Foe: HP <2000 (also the < 3000 gambit, if the party doesn't already have it), plus [[Final Fantasy XII armor#Bone Mail|Bone Mail]]. It's also good to grab a [[Final Fantasy XII armor#Flame Shield|Flame Shield]] to farm some [[Oiling]]s while waiting for the 30 min Negalmuur spawn time to pass. |
Party leader gambits in order of priority top to bottom: |
Party leader gambits in order of priority top to bottom: |
||
| Line 636: | Line 637: | ||
:(2) Foe: HP < 2000 → Attack (If one doesn't want to [[steal]], one can just use the HP < 3000 gambit); |
:(2) Foe: HP < 2000 → Attack (If one doesn't want to [[steal]], one can just use the HP < 3000 gambit); |
||
:(3) Foe: HP = 100% → Steal; |
:(3) Foe: HP = 100% → Steal; |
||
| − | :(4) Self → [[Charge |
+ | :(4) Self → [[Technicks#Charge|Charge]]. |
| − | Using [[ |
+ | Using [[Final Fantasy XII items#Remedy|Remedies]] to remove [[Doom (ability)|Doom]] status is not so workable as the earliest the Self: Status = Doom gambit is available is [[Balfonheim Port|Balfonheim]]. The Ally: Status = Doom gambit would probably end up using too many Remedies. This is why this method is described as "near" infinite; there is still the small chance the party leader might get doomed. |
Number (2) on the list should have higher priority than (3), as the aim is for turnover: the faster the Ghasts are killed, the faster Negalmuur spawns more, and the fewer Ghasts there are simultaneously present hitting the party. One wants to avoid having Negalmuur + four Ghasts with part-health spawned and to be stuck on raising, healing and buffing because of being under constant attack, also increasing the likelihood of the party leader ending up doomed. |
Number (2) on the list should have higher priority than (3), as the aim is for turnover: the faster the Ghasts are killed, the faster Negalmuur spawns more, and the fewer Ghasts there are simultaneously present hitting the party. One wants to avoid having Negalmuur + four Ghasts with part-health spawned and to be stuck on raising, healing and buffing because of being under constant attack, also increasing the likelihood of the party leader ending up doomed. |
||
| Line 652: | Line 653: | ||
:(5) Self → Charge. |
:(5) Self → Charge. |
||
| − | Both subs should have Decoy as it reduces the likelihood of the party leader becoming a target should one of the subs die and have to be raised. It helps to have the [[License Board|licenses]] for extended [[status effect]] time (to limit Haste, Decoy recasting) and to gain [[MP (stat)|MP]] from dealing or taking damage. Finally, having [[ |
+ | Both subs should have Decoy as it reduces the likelihood of the party leader becoming a target should one of the subs die and have to be raised. It helps to have the [[License Board|licenses]] for extended [[status effect]] time (to limit Haste, Decoy recasting) and to gain [[MP (stat)|MP]] from dealing or taking damage. Finally, having [[Final Fantasy XII accessories#Thief's Cuffs|Thief's Cuffs]] equipped increases the chance of a [[Paramina Crossbow (Final Fantasy XII)|Paramina Crossbow]] steal. |
The above early method is not fool-proof, as the tank will occasionally be doomed. |
The above early method is not fool-proof, as the tank will occasionally be doomed. |
||
| − | Later methods available are to either equip the party leader with a [[ |
+ | Later methods available are to either equip the party leader with a [[Final Fantasy XII accessories#Ribbon|Ribbon]] to prevent Doom status, or otherwise gaining the Self: Status = Doom gambit, a stack of Remedies, and the license that allows Remedies to heal Doom. The latter Remedy method would only last as long as the Remedies do, while the former Ribbon method would mean the party leader would be stealing without having Thief's Cuffs equipped. |
== Enemies == |
== Enemies == |
||
| Line 694: | Line 695: | ||
<div style="overflow:auto; width: 100%; height:300px"> |
<div style="overflow:auto; width: 100%; height:300px"> |
||
[[File:FF12 Map - Stilshrine of Miriam.png]]</div> |
[[File:FF12 Map - Stilshrine of Miriam.png]]</div> |
||
| + | |||
| + | [[:File:FF12 Map - Stilshrine of Miriam.png|Map from the original ''Final Fantasy XII'' that includes all treasure information]] |
||
| + | |||
| + | ==Musical themes== |
||
| + | "The Stilshrine of Miriam" {{J|ミリアム遺跡|Miriamu Iseki}} is the location theme. |
||
== Other appearances == |
== Other appearances == |
||
=== ''[[Final Fantasy Record Keeper]]'' === |
=== ''[[Final Fantasy Record Keeper]]'' === |
||
| + | |||
| − | {{sideicon|FFRK}} |
||
==== Stilshrine of Miriam, Part 1 ==== |
==== Stilshrine of Miriam, Part 1 ==== |
||
[[File:FFRK Stilshrine of Miriam, Part 1 FFXII.png|right|150px]] |
[[File:FFRK Stilshrine of Miriam, Part 1 FFXII.png|right|150px]] |
||
| − | {{ |
+ | {{Location section|Final Fantasy Record Keeper}} |
| − | {{ |
+ | {{clear}} |
==== Stilshrine of Miriam, Part 2 ==== |
==== Stilshrine of Miriam, Part 2 ==== |
||
[[File:FFRK Stilshrine of Miriam, Part 2 FFXII.png|right|150px]] |
[[File:FFRK Stilshrine of Miriam, Part 2 FFXII.png|right|150px]] |
||
| − | {{ |
+ | {{Location section|Final Fantasy Record Keeper}} |
| − | {{ |
+ | {{clear}} |
== Gallery == |
== Gallery == |
||
| Line 725: | Line 731: | ||
Miriam is the name of the sister of both Moses and Aaron as told in the Book of Exodus in Hebrew Bible. She is in fact, a prophetess and the older sibling of them. |
Miriam is the name of the sister of both Moses and Aaron as told in the Book of Exodus in Hebrew Bible. She is in fact, a prophetess and the older sibling of them. |
||
| − | {{FFXII}} |
+ | {{navbox setting FFXII}} |
| − | [[Category:Final Fantasy XII |
+ | [[Category:Locations in Final Fantasy XII]] |
[[Category:Temples]] |
[[Category:Temples]] |
||
[[Category:Ruins]] |
[[Category:Ruins]] |
||
Revision as of 18:46, 13 January 2020
Template:Sideicon

Oh, shut up and help me remodel the Stilshrine of Miriam page!
- Adding a Locations section, with images and brief descriptions of the areas within the location.
This request can be discussed on the associated discussion page. Remove this notice upon completion.
Journey across the Paramina Rift to the Stilshrine of Miriam. There rests the gift he entrusted to the Gran Kiltias of his time. Seek it out. The Sword of Kings... can cut through nethicite.
Anastasis of Kiltias
The Stilshrine of Miriam is a location in the land of Ivalice in Final Fantasy XII. It is a temple located in snowy mountains, housing a powerful artifact.
Stilshrine of Miriam is one of the two areas included in the playable demo released in North America a year before the game.
Sage Knowledge
An ancient shrine deep within the Jagd Ramooda. Like Raithwall's tomb, this, too, was constructed in the time of the Galtean Alliance, originally to honor the ancient god of swords and martial might. It is said that a Gran Kiltias of long ago selected the Stilshrine to house the relics of Dynast-King Raithwall, though why he chose this site, and not a temple of his own sect, is unclear.
Profile

Pedestal of Dawn at the entrance to the Stilshrine.
Not much is known about Stilshrine of Miriam. It is named after an ancient god of swords and martial might (also referred to as a goddess elsewhere in the game). It was built during the time of the Galtean Alliance, by the Gran Kiltias of that time. The Sword of Kings rests, sealed deep within. No one knows why the Sword was left with the Gran Kiltias and not kept by King Raithwall himself.
Stilshrine of Miriam has a design similar to other places built during the Galtean Alliance, like the Sochen Cave Palace. Unlike other buildings from this era though, it is in much better condition, thanks to the effort of the Kiltia. The guardians of the Stilshrine even consist of the walls themselves. The technology to do this has since been lost.
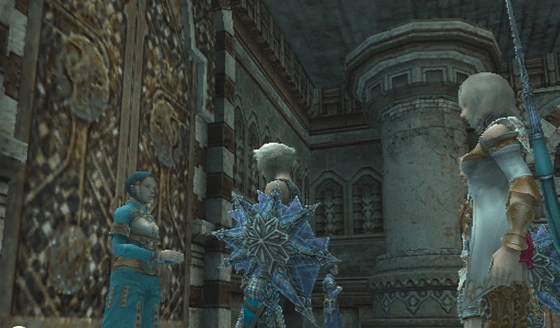
Story
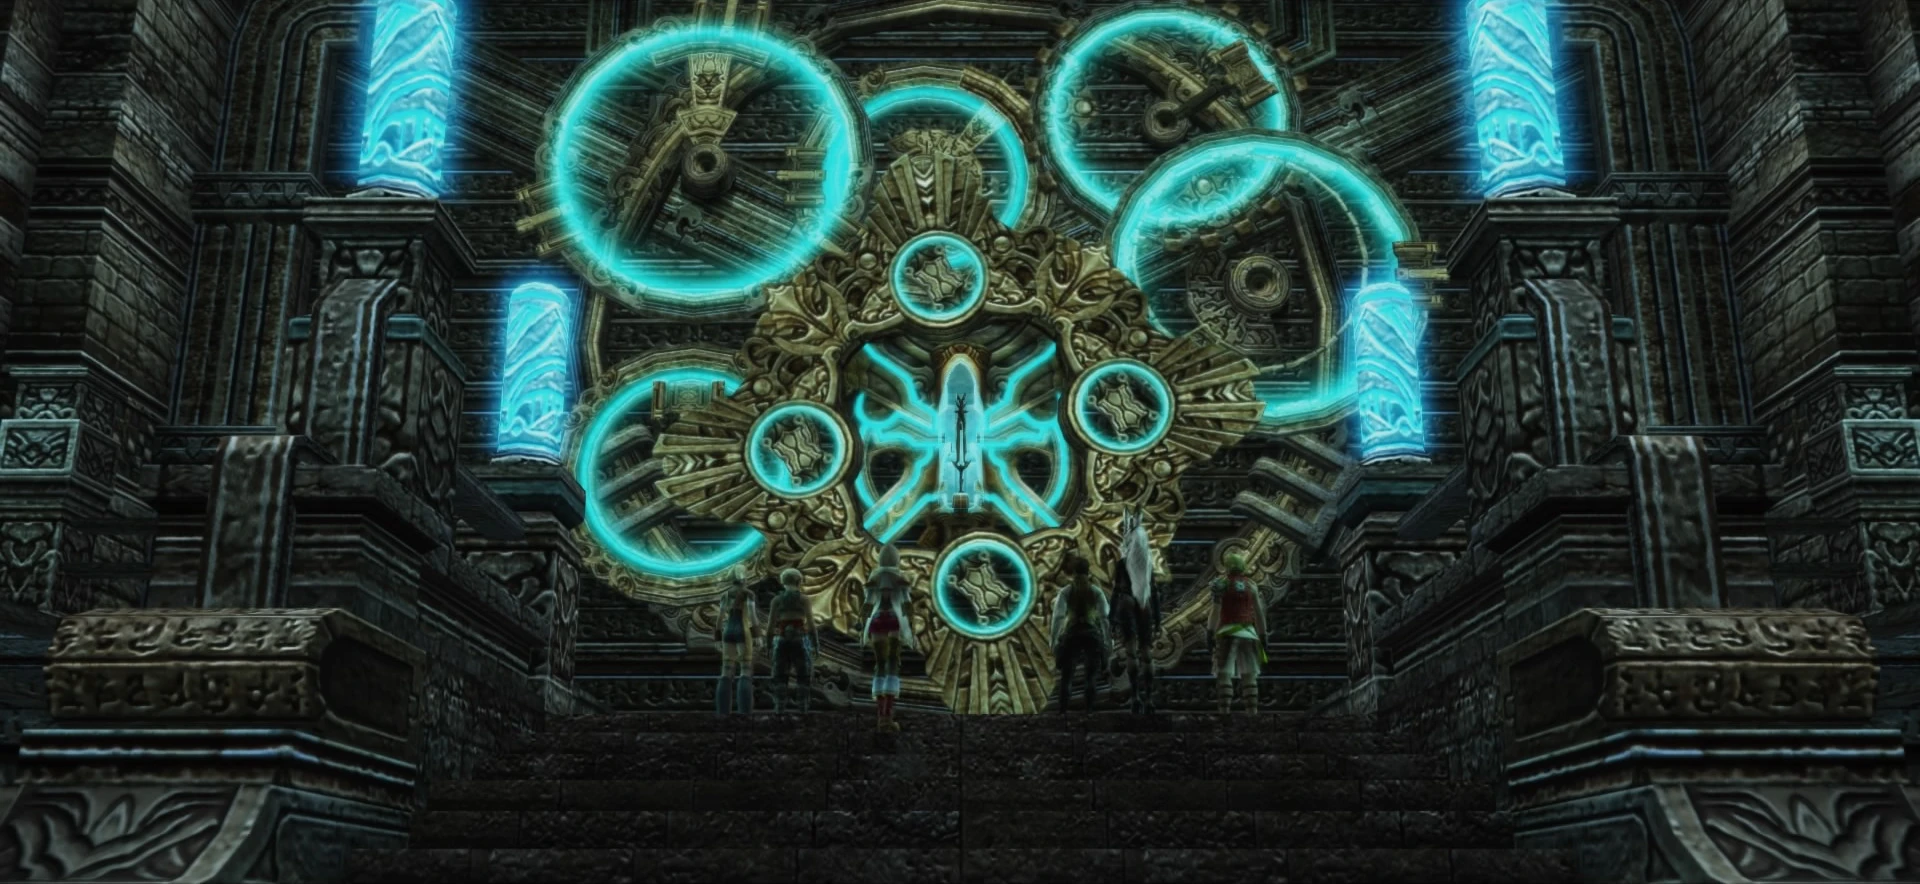
Sword of Kings deep inside Stilshrine of Miriam.
Princess Ashe has decided to fight the Empire, but with no nethicite to use for a weapon after the Dawn Shard lost its power, the outlook looks grim. The Gran Kiltias Anastasis on Mt Bur-Omisace tells Ashe of the Sword of Kings resting deep inside the Stilshrine of Miriam; a sword, that can cut through nethicite, to destroy the Empire's most powerful of weapons.
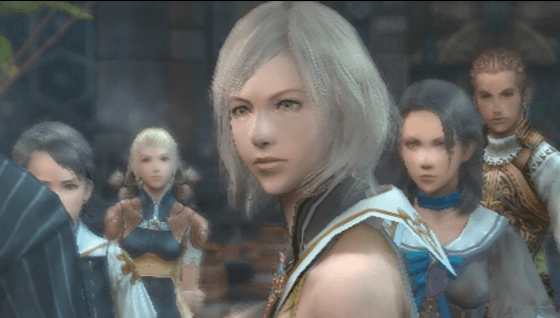
The party venture inside the shrine and eventually come across the sword. Balthier urges Ashe to test the sword on the Dawn Shard to see if it really works. Ashe hesitates and sees the ghostly vision of Lord Rasler, shaking his head at her. She still picks up the sword and raises it to the stone, but on purpose misses the mark. Fran says the stone fears the sword, and Ashe says she is positive this sword is the real Sword of Kings.
Locations
The Stilshrine of Miriam is located in a territory near the Paramina Rift. Flying there is normally impossible, because the area is a jagd.
- Walk of Sky (to the Paramina Rift)
- Walk of Mind
- Ward of Measure
- Cold Distance
- Ward of Steel
- Walk of Prescience
- Walk of Reason
- Ward of Velitation
- Walk of Torn Illusion
- Ward of the Sword-King
- Walk of Revelation
- Hall of Worth
- Vault of the Champion
- Throne of Veiled Gods (enter from Ward of Measure with Stone of the Condemner)
Treasures
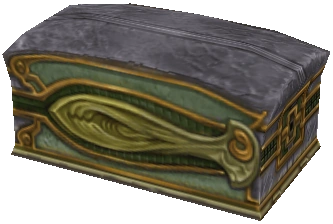
With the Diamond Armlet equipped the common item treasure is Knot of Rust and the rare treasure is Elixir.
Most treasures in the Shrine are found in the Walk of Reason area. The treasure in the northeast of the area can contain Steel Poleyns and the treasure slightly south from there can have the Lamia's Tiara. There is a group of four treasures in the southeast corner and one of them can have the Pirate Hat. Among the treasures found on the other side of the map, in the northwest, the player may find the Firefly and Sorcerer's Hat.
The treasure in the east end of the Ward of Velitation is always either Elixir or Megalixir when Diamond Armlet is not equipped, but with Diamond Armlet the treasure is always Megalixir. The treasure will not respawn.
The Ward of the Sword-King area has a Hidden passage on the left of the hallway; if the player skirts the wall in a way the camera attempts to go "inside" the wall, they reveal a new path. At the end of the path they can find a treasure that never respawns that has either Dark Matter or Shell Shield. With the Diamond Armlet equipped the treasure is 90% Shell Shield, 10% Dark Matter. When entering the last room after the hidden passage the player should cast Float before entering, because the entrance is covered in traps.
Walk of Sky
These chests only appear in the Zodiac versions. They do not respawn.
| Chest | Spawns | Holds Gil% | Gil | Normal Treasure | Diamond Armlet Treasure | ||
|---|---|---|---|---|---|---|---|
| 1 | 100% | 0% | N/A | Tourmaline Ring | |||
| 2 | 100% | 0% | N/A | Tourmaline Ring | |||
| 3 | 100% | 0% | N/A | Battle Harness | |||
Walk of Mind
This chest only appears in the Zodiac versions. It does not respawn.
| Chest | Spawns | Holds Gil% | Gil | Normal Treasure | Diamond Armlet Treasure | ||
|---|---|---|---|---|---|---|---|
| 4 | 100% | 0% | N/A | Ice Shield | |||
Ward of Velitation
- Zodiac
| Chest | Spawns | Holds Gil% | Gil | Normal Treasure | Diamond Armlet Treasure | ||
|---|---|---|---|---|---|---|---|
| 5 | 5% | 5% | ≤ 65000 gil | Potion | Common | Rare | |
| Knot of Rust | Meteorite (B) | ||||||
| 6 | 10% | 95% | ≤ 200 gil | Item 1 | Item 2 | Common | Rare |
| Megalixir | Potion | Knot of Rust | Meteorite (A) | ||||
| 7[1] | 100% | 0% | N/A | Countdown | |||
- 1 - Chest does not respawn.
- Original
| Chest | Spawns | Holds Gil% | Normal Treasure | Diamond Armlet Treasure | |
|---|---|---|---|---|---|
| 1[1] | 100% | 0% | Item 1 | Item 2 | Knot of Rust |
| Elixir | Knot of Rust | ||||
- 1 - Chest does not respawn.
Cold Distance
- Zodiac
| Chest | Spawns | Holds Gil% | Gil | Normal Treasure | Diamond Armlet Treasure | ||
|---|---|---|---|---|---|---|---|
| 8[1] | 100% | 0% | N/A | Shell Shield | |||
- 1 - Chest does not respawn.
- Original
| Chest | Spawns | Holds Gil% | Normal Treasure | Diamond Armlet Treasure | ||
|---|---|---|---|---|---|---|
| 2 | 100% | 0% | Item 1 | Item 2 | Common | Rare |
| Dark Matter | Shell Shield | Shell Shield | Dark Mater | |||
Walk of Prescience
This chest only appears in the Zodiac versions. It does not respawn.
| Chest | Spawns | Holds Gil% | Gil | Normal Treasure | Diamond Armlet Treasure | ||
|---|---|---|---|---|---|---|---|
| 9 | 100% | 0% | N/A | Ruby Ring | |||
Walk of Reason
- Zodiac
| Chest | Spawns | Holds Gil% | Gil | Normal Treasure | Diamond Armlet Treasure | ||
|---|---|---|---|---|---|---|---|
| 10[1] | 100% | 0% | N/A | Ashura | |||
| 11 | 75% | 50% | ≤ 370 gil | Item 1 | Item 2 | Common | Rare |
| Cura Mote | Platinum Sword | Knot of Rust | Meteorite (A) | ||||
| 12 | 75% | 50% | ≤ 370 gil | Item 1 | Item 2 | Common | Rare |
| Hi-Potion | Obelisk | Knot of Rust | Meteorite (A) | ||||
| 13 | 75% | 50% | ≤ 370 gil | Item 1 | Item 2 | Common | Rare |
| Remedy | Hunting Crossbow | Knot of Rust | Meteorite (A) | ||||
| 14 | 75% | 50% | ≤ 370 gil | Item 1 | Item 2 | Common | Rare |
| Phoenix Down | Power Rod | Knot of Rust | Meteorite (C) | ||||
| 15 | 75% | 50% | ≤ 370 gil | Item 1 | Item 2 | Common | Rare |
| Chronos Tear | Kiku-ichimonji | Knot of Rust | Meteorite (A) | ||||
| 16 | 75% | 50% | ≤ 370 gil | Item 1 | Item 2 | Common | Rare |
| Chronos Tear | Golden Staff | Knot of Rust | Meteorite (A) | ||||
| 17 | 75% | 50% | ≤ 370 gil | Item 1 | Item 2 | Common | Rare |
| Cura Mote | Loxley Bow | Knot of Rust | Meteorite (B) | ||||
| 18 | 75% | 50% | ≤ 370 gil | Item 1 | Item 2 | Common | Rare |
| Phoenix Down | Ras Algethi | Knot of Rust | Meteorite (A) | ||||
| 19 | 75% | 50% | ≤ 370 gil | Item 1 | Item 2 | Common | Rare |
| Phoenix Down | Hammerhead | Knot of Rust | Meteorite (A) | ||||
- 1 - Chest does not respawn.
- Original
| Chest | Spawns | Holds Gil% | Normal Treasure | Diamond Armlet Treasure | ||||
|---|---|---|---|---|---|---|---|---|
| 3 | 60% | 45% | Gil | Item 1 | Item 2 | Gil | Common | Rare |
| ≤ 50 gil | Knot of Rust | Steel Poleyns | ≤ 200 gil | Knot of Rust | Elixir | |||
| 4 | 60% | 45% | Gil | Item 1 | Item 2 | Gil | Common | Rare |
| ≤ 50 gil | Knot of Rust | Lamia's Tiara | ≤ 200 gil | Knot of Rust | Elixir | |||
| 5 | 70% | 30% | Gil | Item 1 | Item 2 | Gil | Common | Rare |
| ≤ 50 gil | Knot of Rust | Chronos Tear | ≤ 200 gil | Knot of Rust | Elixir | |||
| 6 | 55% | 45% | Gil | Item 1 | Item 2 | Gil | Common | Rare |
| ≤ 50 gil | Knot of Rust | Firefly | ≤ 200 gil | Knot of Rust | Elixir | |||
| 7 | 60% | 45% | Gil | Item 1 | Item 2 | Gil | Common | Rare |
| ≤ 50 gil | Knot of Rust | Sorcerer's Hat | ≤ 200 gil | Knot of Rust | Elixir | |||
| 8 | 60% | 40% | Gil | Item 1 | Item 2 | Gil | Common | Rare |
| ≤ 50 gil | Knot of Rust | Gold Needle | ≤ 200 gil | Knot of Rust | Elixir | |||
| 9 | 55% | 30% | Gil | Item 1 | Item 2 | Gil | Common | Rare |
| ≤ 50 gil | Knot of Rust | Pirate Hat | ≤ 200 gil | Knot of Rust | Elixir | |||
| 10 | 80% | 40% | Gil | Item 1 | Item 2 | Gil | Common | Rare |
| ≤ 50 gil | Knot of Rust | G-Foe: HP >= 3000 | ≤ 200 gil | Knot of Rust | Elixir | |||
| 11 | 80% | 40% | Gil | Item 1 | Item 2 | Gil | Common | Rare |
| ≤ 50 gil | Knot of Rust | G-Foe: HP < 3000 | ≤ 200 gil | Knot of Rust | Elixir | |||
Ward of Steel
This chest only appears in the Zodiac versions. It does not respawn.
| Chest | Spawns | Holds Gil% | Gil | Normal Treasure | Diamond Armlet Treasure | ||
|---|---|---|---|---|---|---|---|
| 20 | 100% | 0% | N/A | Sage's Ring | |||
Hall of Worth
These chests only appear in the Zodiac versions. They do not respawn.
| Chest | Spawns | Holds Gil% | Gil | Normal Treasure | Diamond Armlet Treasure | ||
|---|---|---|---|---|---|---|---|
| 20 | 100% | 0% | N/A | Elixir | |||
| 21 | 100% | 0% | N/A | Bubble Mote | |||
Quests
Rare Game
To find Myath, the player must have spoken to the "Huntmaster" in Phon Coast and defeated Thalassinon, which will trigger the start of the Rare Game quest. Myath then appears in the Stilshrine of Miriam in the area Ward of Velitation. To get this creature to spawn, the player must kill the three Dragon Aevises in the room, leave and return, and it will be in the center of the room. Like all trophy game, once it is killed, it will never reappear.
To find the Rare Game Matriarch Bomb, as well as the enemy Oiling, the player needs to locate the hidden passage in Ward of the Sword-King. The player should head south to where Darkmare stands in waiting. The western wall here is where the hidden passage is located. When the player stands in front of the western wall for a few seconds, the wall will vanish and reveal a hidden stairway leading up. The player can try to move the game camera inside the wall to reveal it. The player should cast Float on the party, as the last hidden area has a trap that immediately applies berserk and confuse and is otherwise impossible to avoid.
The Matriarch Bomb has a 20% chance to spawn in the final area, along with a one time only treasure that can contain either a Dark Matter or a Shell Shield.
Once entering the Stilshrine, the player must spend at least thirty minutes within to find Negalmuur. Darkmare must also be killed (Ward of the Sword-King) for it to appear. Negalmuur will spawn at the junction within the Ward of the Sword-King. Negalmuur can be used for auto-leveling (see below).
Level grinding
By correctly setting up the party's gambits, it is possible to create an infinite loop, which allows the game to be left playing while the party continues to gain experience. Leaving the game for a long period of time, for example overnight, allows the party to gain several levels with only minor initial effort.
There are two important things to avoid, both of which have the effect of ending the loop. The first is killing Negalmuur. To this end, gambits should be set up so as to ensure that only the summoned enemies are attacked, for example, using a gambit such as "Foe:HP<3,000", since Negalmuur's HP is far in excess of that. The second thing is to prevent the party leader remaining KOed for long enough that the game is paused to select a new leader. The appropriate healing gambits should be set up to avoid the party leader's death, and Decoy used to attract as many attacks as possible to other members.
One early method for near infinite auto-leveling is to teleport back to Rabanastre and buy the gambit for Foe: HP <2000 (also the < 3000 gambit, if the party doesn't already have it), plus Bone Mail. It's also good to grab a Flame Shield to farm some Oilings while waiting for the 30 min Negalmuur spawn time to pass.
Party leader gambits in order of priority top to bottom:
- (1) Party health maintenance gambits (Vox, Raise, Curaga, Haste, ... , Esuna);
- (2a) Foe: HP < 1000 → Attack (Optional - if there is enough available gambit space);
- (2) Foe: HP < 2000 → Attack (If one doesn't want to steal, one can just use the HP < 3000 gambit);
- (3) Foe: HP = 100% → Steal;
- (4) Self → Charge.
Using Remedies to remove Doom status is not so workable as the earliest the Self: Status = Doom gambit is available is Balfonheim. The Ally: Status = Doom gambit would probably end up using too many Remedies. This is why this method is described as "near" infinite; there is still the small chance the party leader might get doomed.
Number (2) on the list should have higher priority than (3), as the aim is for turnover: the faster the Ghasts are killed, the faster Negalmuur spawns more, and the fewer Ghasts there are simultaneously present hitting the party. One wants to avoid having Negalmuur + four Ghasts with part-health spawned and to be stuck on raising, healing and buffing because of being under constant attack, also increasing the likelihood of the party leader ending up doomed.
The party should be equipped with weapons with stable damage instead weapons with high but unstable damage to get the Ghasts' health below 2000 on the first hit from the secondary characters. Alternatively, one could use the Foe: HP < 3000 gambit instead, but then the chances of stealing are reduced.
Secondary character gambits in order of priority top to bottom:
- (1) Self → Decoy;
- (2) Party health maintenance gambits (as per tank, but is a good idea to mix them up a bit so the characters aren't constantly interrupting their action/cast because another character has changed theirs);
- (3a) Foe: HP < 1000 → Attack (as per tank, optional - if there is available gambit space);
- (3) Foe: HP < 2000 → Attack (as per tank, if the player does not care about stealing, one should just use HP < 3000);
- (4) Foe: party leader's target → Attack;
- (5) Self → Charge.
Both subs should have Decoy as it reduces the likelihood of the party leader becoming a target should one of the subs die and have to be raised. It helps to have the licenses for extended status effect time (to limit Haste, Decoy recasting) and to gain MP from dealing or taking damage. Finally, having Thief's Cuffs equipped increases the chance of a Paramina Crossbow steal.
The above early method is not fool-proof, as the tank will occasionally be doomed.
Later methods available are to either equip the party leader with a Ribbon to prevent Doom status, or otherwise gaining the Self: Status = Doom gambit, a stack of Remedies, and the license that allows Remedies to heal Doom. The latter Remedy method would only last as long as the Remedies do, while the former Ribbon method would mean the party leader would be stealing without having Thief's Cuffs equipped.
Enemies

Darkmare roams the hallways of Stilshrine of Miriam.
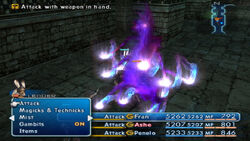
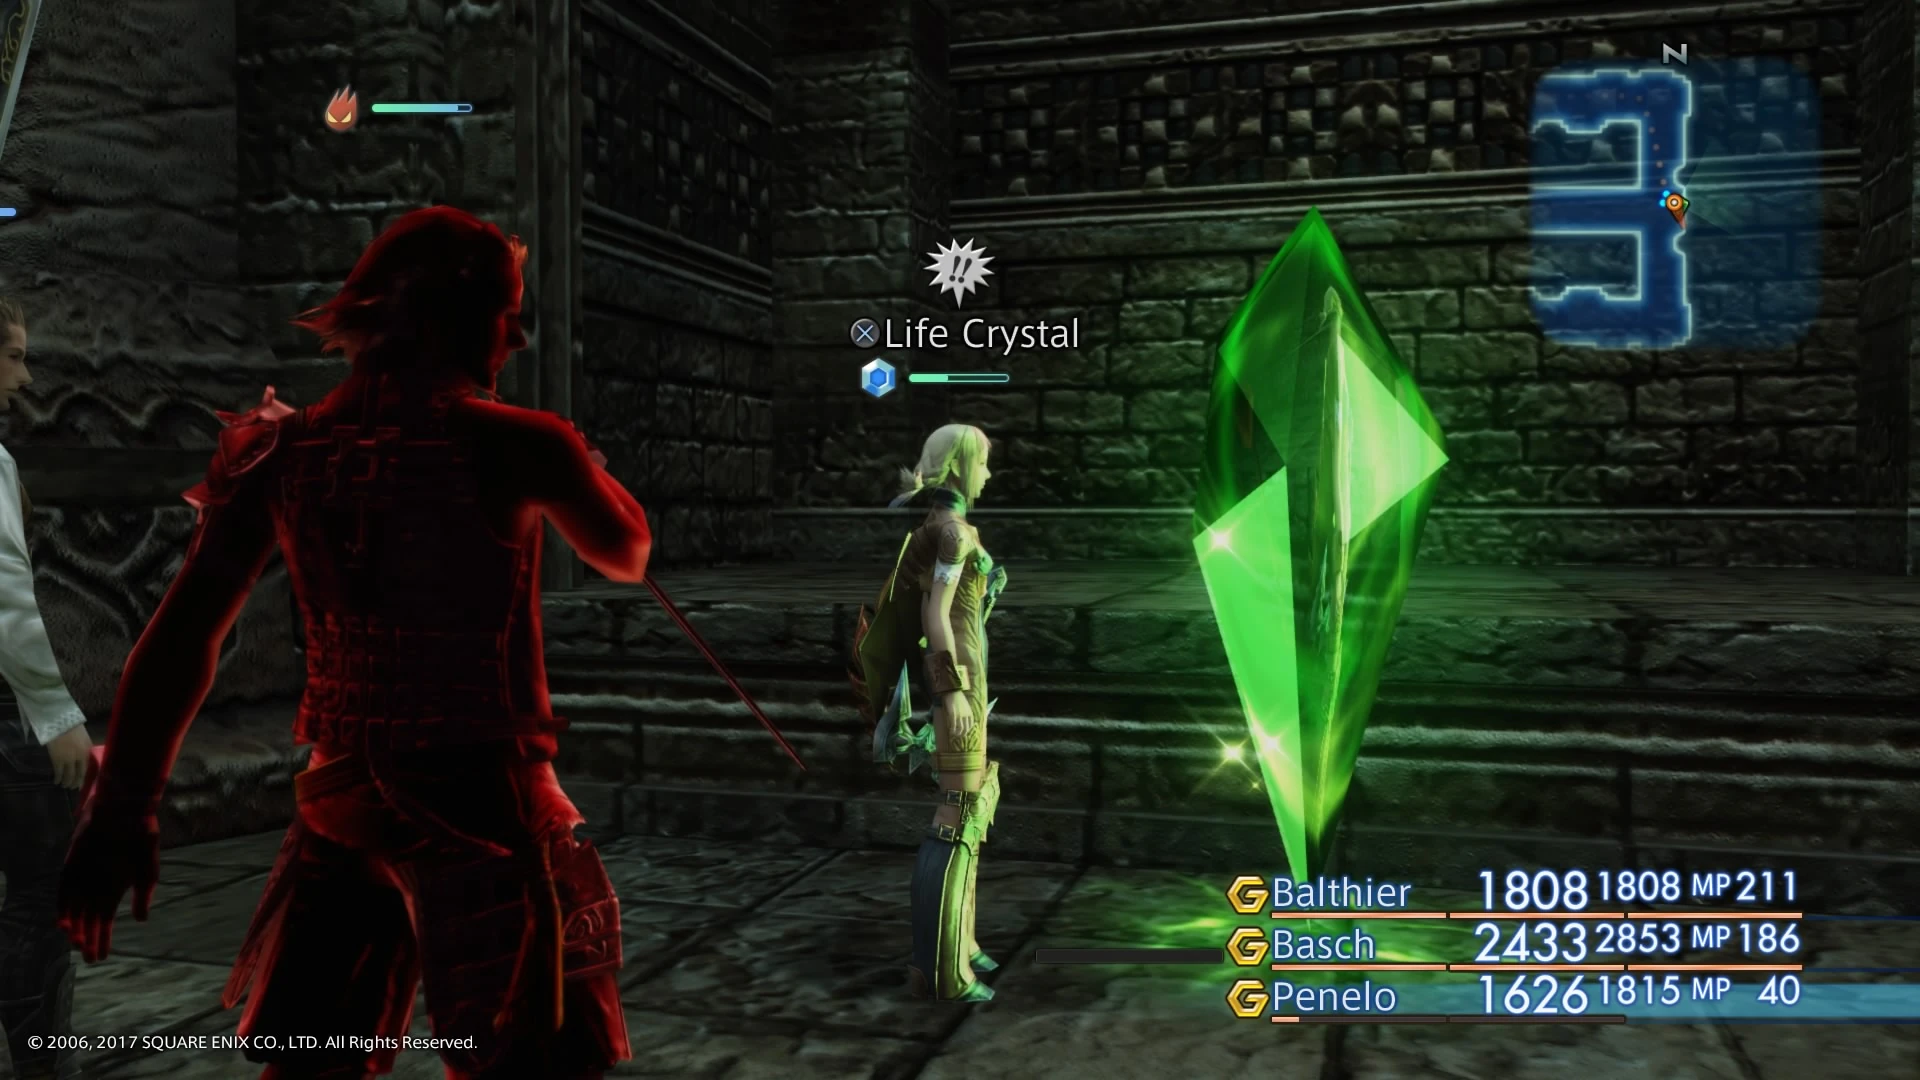
The "Life Crystal" is in fact a Crystalbug.

Matriarch Bomb is found in the secret area of the shrine.
- Blood Gigas
- Balloon
- Crystalbug (green)
- Darkmare
- Dragon Aevis
- Facer
- Redmaw
- Zombie
- Zombie Warrior
- Miriam Guardian
- Miriam Facer
- Ghoul
- Ghast
- Dark Lord
- Nightwalker
- Reaper Mage
- Reaper Claw
- Oiling (Secret area only)
- Ice Azer (during esper battle)
- Vinuskar (Boss)
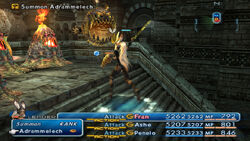
- Mateus (Esper)
- Zeromus (Optional Esper)
- Myath (Rare)
- Matriarch Bomb (Rare)
- Negalmuur (Rare)
Map
The map can be found behind the ancient door leading to the statue in the Ward of Steel after defeating Vinuskar.
- Areas highlighted in red are hidden passages that do not appear on the map.
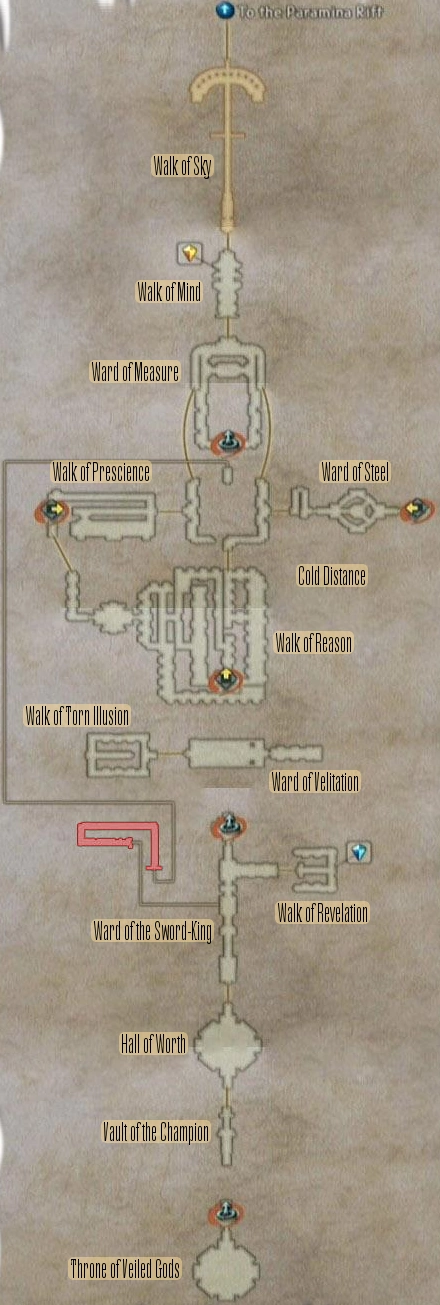
Map from the original Final Fantasy XII that includes all treasure information
Musical themes
"The Stilshrine of Miriam" (ミリアム遺跡, Miriamu Iseki?) is the location theme.
Other appearances
Final Fantasy Record Keeper
Stilshrine of Miriam, Part 1
Stilshrine of Miriam, Part 2
Gallery
")
")
")
")
")
")
")
")
")
")
Etymology
Miriam is the name of the sister of both Moses and Aaron as told in the Book of Exodus in Hebrew Bible. She is in fact, a prophetess and the older sibling of them.