mNo edit summary Tag: sourceedit |
Intangir Bot (talk | contribs) m (Bot: Automated text replacement (-List of Final Fantasy XII Weapons +List of Final Fantasy XII weapons, -Other Appearances +Other appearances, -List of Final Fantasy XII Items +List of Final Fantasy XII items, -Zeromus (Final Fantasy XII Boss) +Z...) Tag: apiedit |
||
| Line 32: | Line 32: | ||
{{See Also|Treasure (Final Fantasy XII)}} |
{{See Also|Treasure (Final Fantasy XII)}} |
||
[[File:FF12 - Treasure Chest 2.png|right|150px]] |
[[File:FF12 - Treasure Chest 2.png|right|150px]] |
||
| − | Unlike in most areas in the game, most treasures in the Stilshrine can contain equipment. With the [[List of Final Fantasy XII |
+ | Unlike in most areas in the game, most treasures in the Stilshrine can contain equipment. With the [[List of Final Fantasy XII accessories#Diamond Armlet|Diamond Armlet]] equipped the common item treasure is Knot of Rust and the rare treasure is [[List of Final Fantasy XII items#Elixir|Elixir]]. |
| − | Most treasures in the Shrine are found in the Walk of Reason area. The treasure in the northeast of the area can contain [[List of Final Fantasy XII |
+ | Most treasures in the Shrine are found in the Walk of Reason area. The treasure in the northeast of the area can contain [[List of Final Fantasy XII accessories#Steel Poleyns|Steel Poleyns]] and the treasure slightly south from there can have the [[List of Final Fantasy XII armor#Lamia's Tiara|Lamia's Tiara]]. There is a group of four treasures in the southeast corner and one of them can have the [[List of Final Fantasy XII armor#Pirate Hat|Pirate Hat]]. Among the treasures found on the other side of the map, in the northwest, the player may find the [[List of Final Fantasy XII accessories#Firefly|Firefly]] and [[List of Final Fantasy XII armor#Sorcerer's Hat|Sorcerer's Hat]]. |
| − | The treasure in the east end of the Ward of Ventilation is always either Elixir or [[List of Final Fantasy XII |
+ | The treasure in the east end of the Ward of Ventilation is always either Elixir or [[List of Final Fantasy XII items#Megalixir|Megalixir]] when Diamond Armlet is not equipped, but with Diamond Armlet the treasure is always Megalixir. The treasure will not respawn. |
| − | The Ward of the Sword-King area has a [[Hidden |
+ | The Ward of the Sword-King area has a [[Hidden passage]] on the left of the hallway; if the player skirts the wall in a way the camera attempts to go "inside" the wall, they reveal a new path. At the end of the path they can find a treasure that never respawns that has either [[List of Final Fantasy XII items#Dark Matter|Dark Matter]] or [[List of Final Fantasy XII armor#Shell Shield|Shell Shield]]. With the Diamond Armlet equipped the treasure is 90% Shell Shield, 10% Dark Matter. When entering the last room after the hidden passage the player should cast [[Float (ability)|Float]] before entering, because the entrance is covered in [[Trap (term)|traps]]. |
====Walk of Sky==== |
====Walk of Sky==== |
||
| Line 56: | Line 56: | ||
|0% |
|0% |
||
|N/A |
|N/A |
||
| − | |colspan="4"|[[List of Final Fantasy XII |
+ | |colspan="4"|[[List of Final Fantasy XII accessories#Tourmaline Ring|Tourmaline Ring]] |
|- |
|- |
||
|class="b"|2 |
|class="b"|2 |
||
| Line 62: | Line 62: | ||
|0% |
|0% |
||
|N/A |
|N/A |
||
| − | |colspan="4"|[[List of Final Fantasy XII |
+ | |colspan="4"|[[List of Final Fantasy XII accessories#Tourmaline Ring|Tourmaline Ring]] |
|- |
|- |
||
|class="b"|3 |
|class="b"|3 |
||
| Line 68: | Line 68: | ||
|0% |
|0% |
||
|N/A |
|N/A |
||
| − | |colspan="4"|[[List of Final Fantasy XII |
+ | |colspan="4"|[[List of Final Fantasy XII accessories#Battle Harness|Battle Harness]] |
|} |
|} |
||
| Line 87: | Line 87: | ||
|0% |
|0% |
||
|N/A |
|N/A |
||
| − | |colspan="4"|[[List of Final Fantasy XII |
+ | |colspan="4"|[[List of Final Fantasy XII armor#Ice Shield|Ice Shield]] |
|} |
|} |
||
| Line 151: | Line 151: | ||
|0% |
|0% |
||
|N/A |
|N/A |
||
| − | |colspan="4"|[[Doom ( |
+ | |colspan="4"|[[Doom (ability)#Final Fantasy XII|Countdown]] |
|} |
|} |
||
*'''''{{A|1}}''''' - Chest does not respawn.</div></div> |
*'''''{{A|1}}''''' - Chest does not respawn.</div></div> |
||
| Line 175: | Line 175: | ||
|- |
|- |
||
|Dark Matter |
|Dark Matter |
||
| − | |[[List of Final Fantasy XII |
+ | |[[List of Final Fantasy XII armor#Shell Shield|Shell Shield]] |
| − | |[[List of Final Fantasy XII |
+ | |[[List of Final Fantasy XII armor#Shell Shield|Shell Shield]] |
|Dark Mater |
|Dark Mater |
||
|}</div> |
|}</div> |
||
| Line 193: | Line 193: | ||
|0% |
|0% |
||
|N/A |
|N/A |
||
| − | |colspan="4"|[[List of Final Fantasy XII |
+ | |colspan="4"|[[List of Final Fantasy XII armor#Shell Shield|Shell Shield]] |
|} |
|} |
||
*'''''{{A|1}}''''' - Chest does not respawn.</div></div> |
*'''''{{A|1}}''''' - Chest does not respawn.</div></div> |
||
| Line 213: | Line 213: | ||
|0% |
|0% |
||
|N/A |
|N/A |
||
| − | |colspan="4"|[[List of Final Fantasy XII |
+ | |colspan="4"|[[List of Final Fantasy XII accessories#Ruby Ring|Ruby Ring]] |
|} |
|} |
||
| Line 239: | Line 239: | ||
|≤ 50 gil |
|≤ 50 gil |
||
|Knot of Rust |
|Knot of Rust |
||
| − | |[[List of Final Fantasy XII |
+ | |[[List of Final Fantasy XII accessories#Steel Poleyns|Steel Poleyns]] |
|≤ 200 gil |
|≤ 200 gil |
||
|Knot of Rust |
|Knot of Rust |
||
| Line 256: | Line 256: | ||
|≤ 50 gil |
|≤ 50 gil |
||
|Knot of Rust |
|Knot of Rust |
||
| − | |[[List of Final Fantasy XII |
+ | |[[List of Final Fantasy XII armor#Lamia's Tiara|Lamia's Tiara]] |
|≤ 200 gil |
|≤ 200 gil |
||
|Knot of Rust |
|Knot of Rust |
||
| Line 290: | Line 290: | ||
|≤ 50 gil |
|≤ 50 gil |
||
|Knot of Rust |
|Knot of Rust |
||
| − | |[[List of Final Fantasy XII |
+ | |[[List of Final Fantasy XII accessories#Firefly|Firefly]] |
|≤ 200 gil |
|≤ 200 gil |
||
|Knot of Rust |
|Knot of Rust |
||
| Line 307: | Line 307: | ||
|≤ 50 gil |
|≤ 50 gil |
||
|Knot of Rust |
|Knot of Rust |
||
| − | |[[List of Final Fantasy XII |
+ | |[[List of Final Fantasy XII armor#Sorcerer's Hat|Sorcerer's Hat]] |
|≤ 200 gil |
|≤ 200 gil |
||
|Knot of Rust |
|Knot of Rust |
||
| Line 341: | Line 341: | ||
|≤ 50 gil |
|≤ 50 gil |
||
|Knot of Rust |
|Knot of Rust |
||
| − | |[[List of Final Fantasy XII |
+ | |[[List of Final Fantasy XII armor#Pirate Hat|Pirate Hat]] |
|≤ 200 gil |
|≤ 200 gil |
||
|Knot of Rust |
|Knot of Rust |
||
| Line 394: | Line 394: | ||
|0% |
|0% |
||
|N/A |
|N/A |
||
| − | |colspan="4"|[[List of Final Fantasy XII |
+ | |colspan="4"|[[List of Final Fantasy XII weapons#Ashura|Ashura]] |
|- |
|- |
||
|class="b" rowspan="2"|11 |
|class="b" rowspan="2"|11 |
||
| Line 406: | Line 406: | ||
|- |
|- |
||
|Cura Mote |
|Cura Mote |
||
| − | |[[List of Final Fantasy XII |
+ | |[[List of Final Fantasy XII weapons#Platinum Sword|Platinum Sword]] |
|Knot of Rust |
|Knot of Rust |
||
|Meteorite (A) |
|Meteorite (A) |
||
| Line 420: | Line 420: | ||
|- |
|- |
||
|Hi-Potion |
|Hi-Potion |
||
| − | |[[List of Final Fantasy XII |
+ | |[[List of Final Fantasy XII weapons#Obelisk|Obelisk]] |
|Knot of Rust |
|Knot of Rust |
||
|Meteorite (A) |
|Meteorite (A) |
||
| Line 434: | Line 434: | ||
|- |
|- |
||
|Remedy |
|Remedy |
||
| − | |[[List of Final Fantasy XII |
+ | |[[List of Final Fantasy XII weapons#Hunting Crossbow|Hunting Crossbow]] |
|Knot of Rust |
|Knot of Rust |
||
|Meteorite (A) |
|Meteorite (A) |
||
| Line 448: | Line 448: | ||
|- |
|- |
||
|Phoenix Down |
|Phoenix Down |
||
| − | |[[List of Final Fantasy XII |
+ | |[[List of Final Fantasy XII weapons#Power Rod|Power Rod]] |
|Knot of Rust |
|Knot of Rust |
||
|Meteorite (C) |
|Meteorite (C) |
||
| Line 462: | Line 462: | ||
|- |
|- |
||
|Chronos Tear |
|Chronos Tear |
||
| − | |[[List of Final Fantasy XII |
+ | |[[List of Final Fantasy XII weapons#Kiku-ichimonji|Kiku-ichimonji]] |
|Knot of Rust |
|Knot of Rust |
||
|Meteorite (A) |
|Meteorite (A) |
||
| Line 476: | Line 476: | ||
|- |
|- |
||
|Chronos Tear |
|Chronos Tear |
||
| − | |[[List of Final Fantasy XII |
+ | |[[List of Final Fantasy XII weapons#Golden Staff|Golden Staff]] |
|Knot of Rust |
|Knot of Rust |
||
|Meteorite (A) |
|Meteorite (A) |
||
| Line 490: | Line 490: | ||
|- |
|- |
||
|Cura Mote |
|Cura Mote |
||
| − | |[[List of Final Fantasy XII |
+ | |[[List of Final Fantasy XII weapons#Loxley Bow|Loxley Bow]] |
|Knot of Rust |
|Knot of Rust |
||
|Meteorite (B) |
|Meteorite (B) |
||
| Line 504: | Line 504: | ||
|- |
|- |
||
|Phoenix Down |
|Phoenix Down |
||
| − | |[[List of Final Fantasy XII |
+ | |[[List of Final Fantasy XII weapons#Ras Algethi|Ras Algethi]] |
|Knot of Rust |
|Knot of Rust |
||
|Meteorite (A) |
|Meteorite (A) |
||
| Line 518: | Line 518: | ||
|- |
|- |
||
|Phoenix Down |
|Phoenix Down |
||
| − | |[[List of Final Fantasy XII |
+ | |[[List of Final Fantasy XII weapons#Hammerhead|Hammerhead]] |
|Knot of Rust |
|Knot of Rust |
||
|Meteorite (A) |
|Meteorite (A) |
||
| Line 540: | Line 540: | ||
|0% |
|0% |
||
|N/A |
|N/A |
||
| − | |colspan="4"|[[List of Final Fantasy XII |
+ | |colspan="4"|[[List of Final Fantasy XII accessories#Sage's Ring|Sage's Ring]] |
|} |
|} |
||
| Line 607: | Line 607: | ||
*[[Ice Azer]] (during esper battle) |
*[[Ice Azer]] (during esper battle) |
||
*[[Vinuskar]] (Boss) |
*[[Vinuskar]] (Boss) |
||
| − | *[[Mateus (Final Fantasy XII |
+ | *[[Mateus (Final Fantasy XII boss)|Mateus]] (Esper) |
| − | *[[Zeromus (Final Fantasy XII |
+ | *[[Zeromus (Final Fantasy XII boss)|Zeromus]] (Optional Esper) |
*[[Myath]] (Rare) |
*[[Myath]] (Rare) |
||
*[[Matriarch Bomb]] (Rare) |
*[[Matriarch Bomb]] (Rare) |
||
| Line 618: | Line 618: | ||
[[File:FF12 Map - Stilshrine of Miriam.png]]</div> |
[[File:FF12 Map - Stilshrine of Miriam.png]]</div> |
||
| − | ==Other |
+ | ==Other appearances== |
===''[[Final Fantasy Record Keeper]]''=== |
===''[[Final Fantasy Record Keeper]]''=== |
||
{{sideicon|FFRK}} |
{{sideicon|FFRK}} |
||
Revision as of 20:35, 27 November 2015
Template:Sideicon

Oh, shut up and help me remodel the Stilshrine of Miriam page!
- Adding a Locations section, with images and brief descriptions of the areas within the location.
This request can be discussed on the associated discussion page. Remove this notice upon completion.

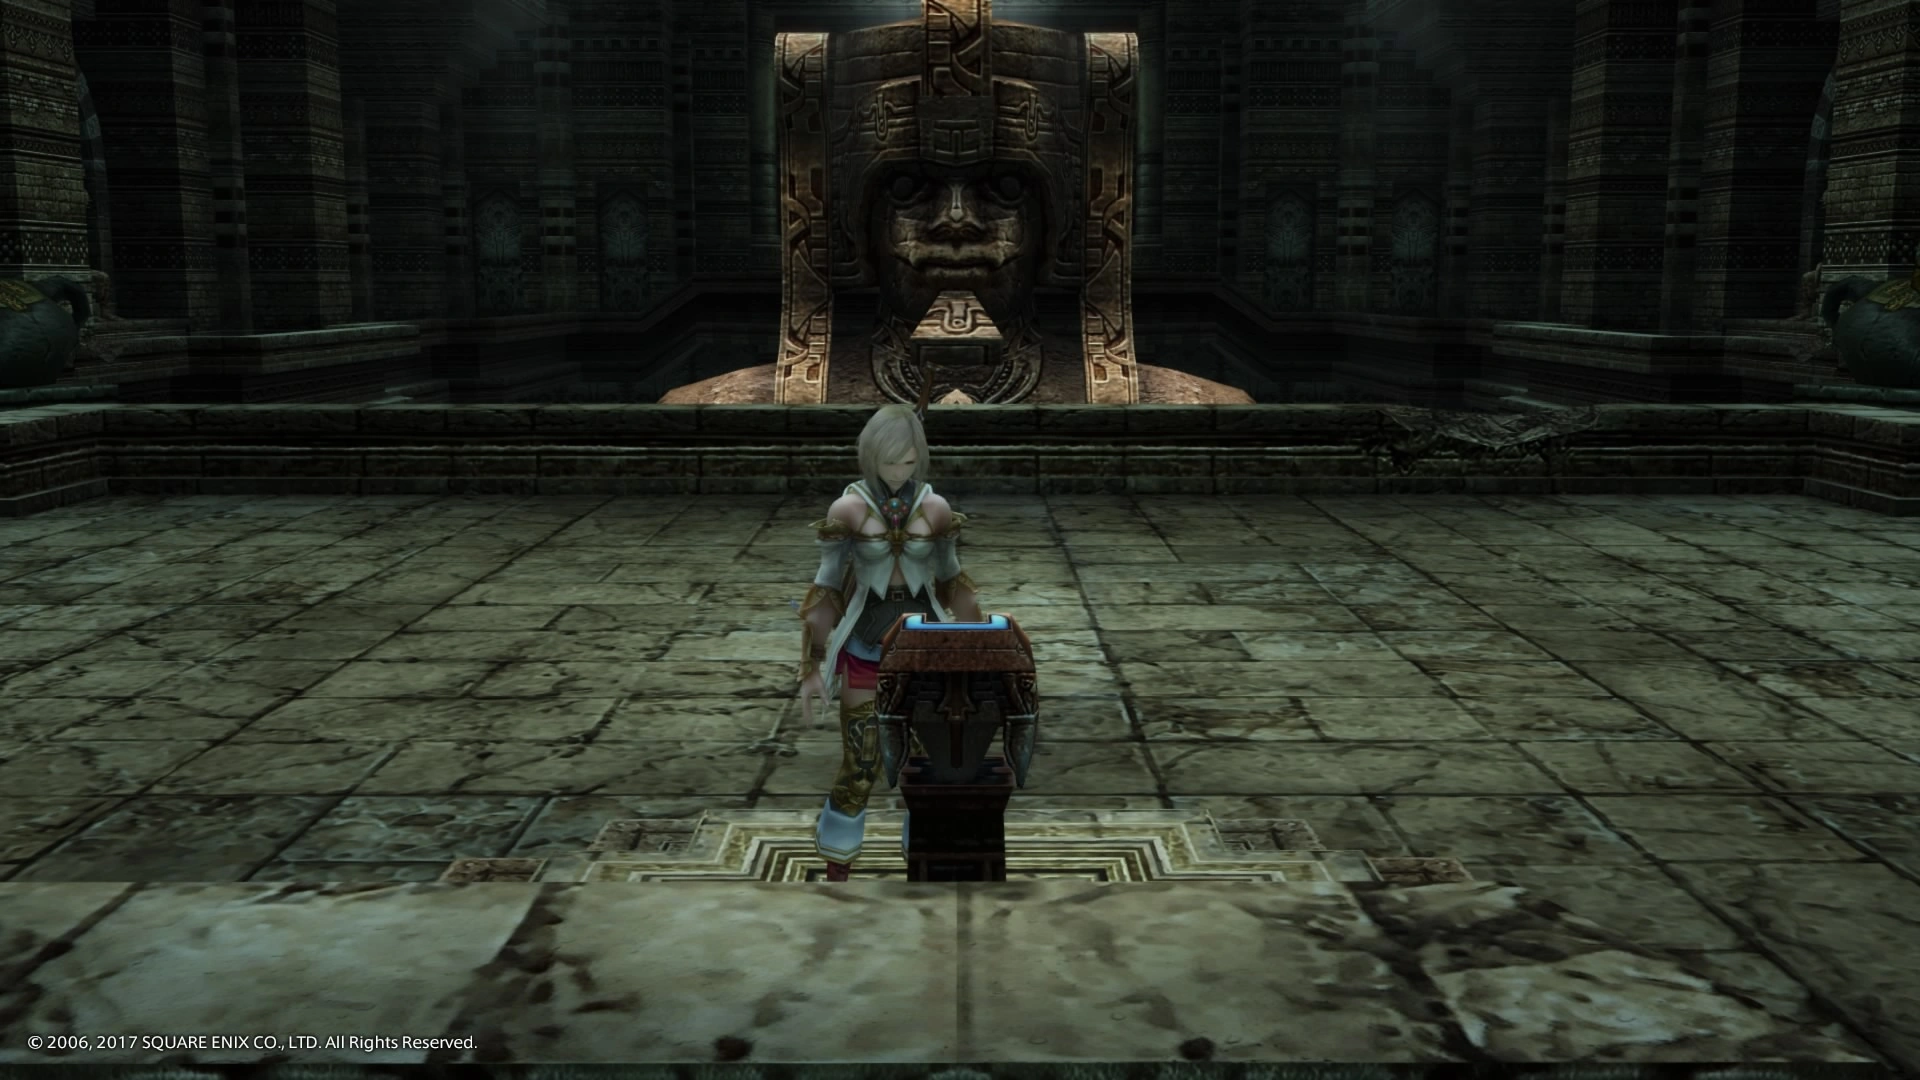
Outside Stilshrine of Miriam.
Journey across the Paramina Rift to the Stilshrine of Miriam. There rests the gift he entrusted to the Gran Kiltias of his time. Seek it out. The Sword of Kings... can cut through nethicite.
Anastasis of Kiltias
The Stilshrine of Miriam (ミリアム遺跡, Miriamu Iseki?, lit. Miriam Ruin) is a location in the land of Ivalice in Final Fantasy XII. It is a temple located in snowy mountains, housing a powerful artifact.
Stilshrine of Miriam is one of the two areas included in the playable demo released in North America a year before the game.
Sage Knowledge
An ancient shrine deep within the Jagd Ramooda. Like Raithwall's tomb, this, too, was constructed in the time of the Galtean Alliance, originally to honor the ancient god of swords and martial might. It is said that a Gran Kiltias of long ago selected the Stilshrine to house the relics of Dynast-King Raithwall, though why he chose this site, and not a temple of his own sect, is unclear.
Location
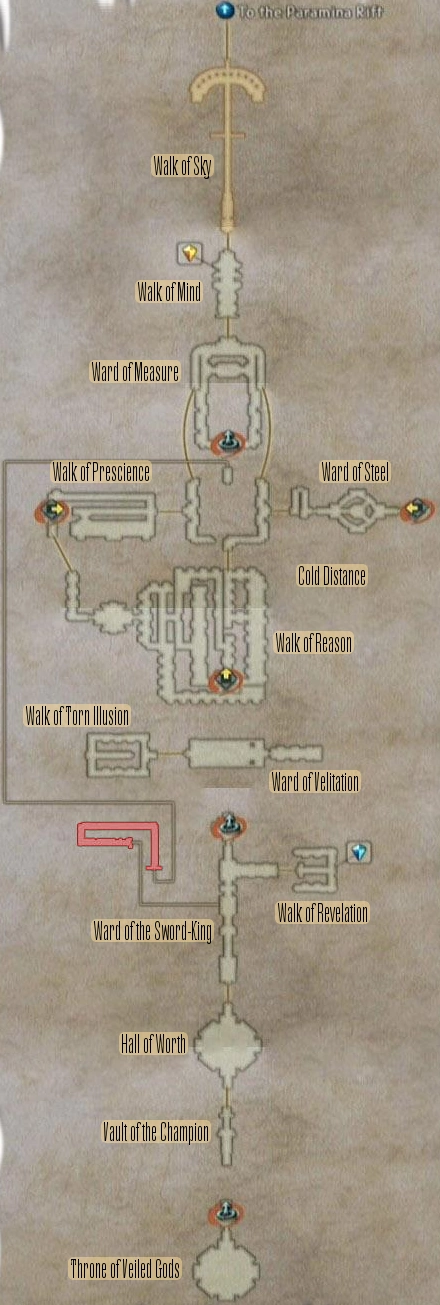
The Stilshrine of Miriam is located in a territory near the Paramina Rift. Flying there is normally impossible, because the area is a jagd.
- Walk of Sky (to the Paramina Rift)
- Walk of Mind
- Ward of Measure
- Cold Distance
- Ward of Steel
- Walk of Prescience
- Walk of Reason
- Ward of Velitation
- Walk of Torn Illusion
- Ward of the Sword-King
- Walk of Revelation
- Hall of Worth
- Vault of the Champion
- Throne of Veiled Gods (enter from Ward of Measure with Stone of the Condemner)
Treasures
Template:See Also
Unlike in most areas in the game, most treasures in the Stilshrine can contain equipment. With the Diamond Armlet equipped the common item treasure is Knot of Rust and the rare treasure is Elixir.
Most treasures in the Shrine are found in the Walk of Reason area. The treasure in the northeast of the area can contain Steel Poleyns and the treasure slightly south from there can have the Lamia's Tiara. There is a group of four treasures in the southeast corner and one of them can have the Pirate Hat. Among the treasures found on the other side of the map, in the northwest, the player may find the Firefly and Sorcerer's Hat.
The treasure in the east end of the Ward of Ventilation is always either Elixir or Megalixir when Diamond Armlet is not equipped, but with Diamond Armlet the treasure is always Megalixir. The treasure will not respawn.
The Ward of the Sword-King area has a Hidden passage on the left of the hallway; if the player skirts the wall in a way the camera attempts to go "inside" the wall, they reveal a new path. At the end of the path they can find a treasure that never respawns that has either Dark Matter or Shell Shield. With the Diamond Armlet equipped the treasure is 90% Shell Shield, 10% Dark Matter. When entering the last room after the hidden passage the player should cast Float before entering, because the entrance is covered in traps.
Walk of Sky
These chests only appear in the International Zodiac Job System version of the game. They do not respawn.
| Chest | Spawns | Holds Gil% | Gil | Normal Treasure | Diamond Armlet Treasure | ||
|---|---|---|---|---|---|---|---|
| 1 | 100% | 0% | N/A | Tourmaline Ring | |||
| 2 | 100% | 0% | N/A | Tourmaline Ring | |||
| 3 | 100% | 0% | N/A | Battle Harness | |||
Walk of Mind
This chest only appears in the International Zodiac Job System version of the game. It does not respawn.
| Chest | Spawns | Holds Gil% | Gil | Normal Treasure | Diamond Armlet Treasure | ||
|---|---|---|---|---|---|---|---|
| 4 | 100% | 0% | N/A | Ice Shield | |||
Ward of Velitation
| Chest | Spawns | Holds Gil% | Normal Treasure | Diamond Armlet Treasure | |
|---|---|---|---|---|---|
| 1[1] | 100% | 0% | Item 1 | Item 2 | Knot of Rust |
| Elixir | Knot of Rust | ||||
- 1 - Chest does not respawn.
Cold Distance
| Chest | Spawns | Holds Gil% | Normal Treasure | Diamond Armlet Treasure | ||
|---|---|---|---|---|---|---|
| 2 | 100% | 0% | Item 1 | Item 2 | Common | Rare |
| Dark Matter | Shell Shield | Shell Shield | Dark Mater | |||
| Chest | Spawns | Holds Gil% | Gil | Normal Treasure | Diamond Armlet Treasure | ||
|---|---|---|---|---|---|---|---|
| 8[1] | 100% | 0% | N/A | Shell Shield | |||
- 1 - Chest does not respawn.
Walk of Prescience
This chest only appears in the International Zodiac Job System version of the game. It does not respawn.
| Chest | Spawns | Holds Gil% | Gil | Normal Treasure | Diamond Armlet Treasure | ||
|---|---|---|---|---|---|---|---|
| 9 | 100% | 0% | N/A | Ruby Ring | |||
Walk of Reason
| Chest | Spawns | Holds Gil% | Normal Treasure | Diamond Armlet Treasure | ||||
|---|---|---|---|---|---|---|---|---|
| 3 | 60% | 45% | Gil | Item 1 | Item 2 | Gil | Common | Rare |
| ≤ 50 gil | Knot of Rust | Steel Poleyns | ≤ 200 gil | Knot of Rust | Elixir | |||
| 4 | 60% | 45% | Gil | Item 1 | Item 2 | Gil | Common | Rare |
| ≤ 50 gil | Knot of Rust | Lamia's Tiara | ≤ 200 gil | Knot of Rust | Elixir | |||
| 5 | 70% | 30% | Gil | Item 1 | Item 2 | Gil | Common | Rare |
| ≤ 50 gil | Knot of Rust | Chronos Tear | ≤ 200 gil | Knot of Rust | Elixir | |||
| 6 | 55% | 45% | Gil | Item 1 | Item 2 | Gil | Common | Rare |
| ≤ 50 gil | Knot of Rust | Firefly | ≤ 200 gil | Knot of Rust | Elixir | |||
| 7 | 60% | 45% | Gil | Item 1 | Item 2 | Gil | Common | Rare |
| ≤ 50 gil | Knot of Rust | Sorcerer's Hat | ≤ 200 gil | Knot of Rust | Elixir | |||
| 8 | 60% | 40% | Gil | Item 1 | Item 2 | Gil | Common | Rare |
| ≤ 50 gil | Knot of Rust | Gold Needle | ≤ 200 gil | Knot of Rust | Elixir | |||
| 9 | 55% | 30% | Gil | Item 1 | Item 2 | Gil | Common | Rare |
| ≤ 50 gil | Knot of Rust | Pirate Hat | ≤ 200 gil | Knot of Rust | Elixir | |||
| 10 | 80% | 40% | Gil | Item 1 | Item 2 | Gil | Common | Rare |
| ≤ 50 gil | Knot of Rust | G-Foe: HP >= 3000 | ≤ 200 gil | Knot of Rust | Elixir | |||
| 11 | 80% | 40% | Gil | Item 1 | Item 2 | Gil | Common | Rare |
| ≤ 50 gil | Knot of Rust | G-Foe: HP < 3000 | ≤ 200 gil | Knot of Rust | Elixir | |||
| Chest | Spawns | Holds Gil% | Gil | Normal Treasure | Diamond Armlet Treasure | ||
|---|---|---|---|---|---|---|---|
| 10[1] | 100% | 0% | N/A | Ashura | |||
| 11 | 75% | 50% | ≤ 370 gil | Item 1 | Item 2 | Common | Rare |
| Cura Mote | Platinum Sword | Knot of Rust | Meteorite (A) | ||||
| 12 | 75% | 50% | ≤ 370 gil | Item 1 | Item 2 | Common | Rare |
| Hi-Potion | Obelisk | Knot of Rust | Meteorite (A) | ||||
| 13 | 75% | 50% | ≤ 370 gil | Item 1 | Item 2 | Common | Rare |
| Remedy | Hunting Crossbow | Knot of Rust | Meteorite (A) | ||||
| 14 | 75% | 50% | ≤ 370 gil | Item 1 | Item 2 | Common | Rare |
| Phoenix Down | Power Rod | Knot of Rust | Meteorite (C) | ||||
| 15 | 75% | 50% | ≤ 370 gil | Item 1 | Item 2 | Common | Rare |
| Chronos Tear | Kiku-ichimonji | Knot of Rust | Meteorite (A) | ||||
| 16 | 75% | 50% | ≤ 370 gil | Item 1 | Item 2 | Common | Rare |
| Chronos Tear | Golden Staff | Knot of Rust | Meteorite (A) | ||||
| 17 | 75% | 50% | ≤ 370 gil | Item 1 | Item 2 | Common | Rare |
| Cura Mote | Loxley Bow | Knot of Rust | Meteorite (B) | ||||
| 18 | 75% | 50% | ≤ 370 gil | Item 1 | Item 2 | Common | Rare |
| Phoenix Down | Ras Algethi | Knot of Rust | Meteorite (A) | ||||
| 19 | 75% | 50% | ≤ 370 gil | Item 1 | Item 2 | Common | Rare |
| Phoenix Down | Hammerhead | Knot of Rust | Meteorite (A) | ||||
- 1 - Chest does not respawn.
Walk of Steel
This chest only appears in the International Zodiac Job System version of the game. It does not respawn.
| Chest | Spawns | Holds Gil% | Gil | Normal Treasure | Diamond Armlet Treasure | ||
|---|---|---|---|---|---|---|---|
| 20 | 100% | 0% | N/A | Sage's Ring | |||
Hall of Worth
These chests only appear in the International Zodiac Job System version of the game. They do not respawn.
| Chest | Spawns | Holds Gil% | Gil | Normal Treasure | Diamond Armlet Treasure | ||
|---|---|---|---|---|---|---|---|
| 20 | 100% | 0% | N/A | Elixir | |||
| 21 | 100% | 0% | N/A | Bubble Mote | |||
Profile

Pedestal of Dawn at the entrance to the Stilshrine.
Not much is known about Stilshrine of Miriam. It is named after an ancient god of swords and martial might (also referred to as a goddess elsewhere in the game). It was built during the time of the Galtean Alliance, by the Gran Kiltias of that time. The Sword of Kings rests, sealed deep within. No one knows why the Sword was left with the Gran Kiltias and not kept by King Raithwall himself.
Stilshrine of Miriam has a design similar to other places built during the Galtean Alliance, like the Sochen Cave Palace. Unlike other buildings from this era though, it is in much better condition, thanks to the effort of the Kiltia. The guardians of the Stilshrine even consist of the walls themselves. The technology to do this has since been lost.
Story
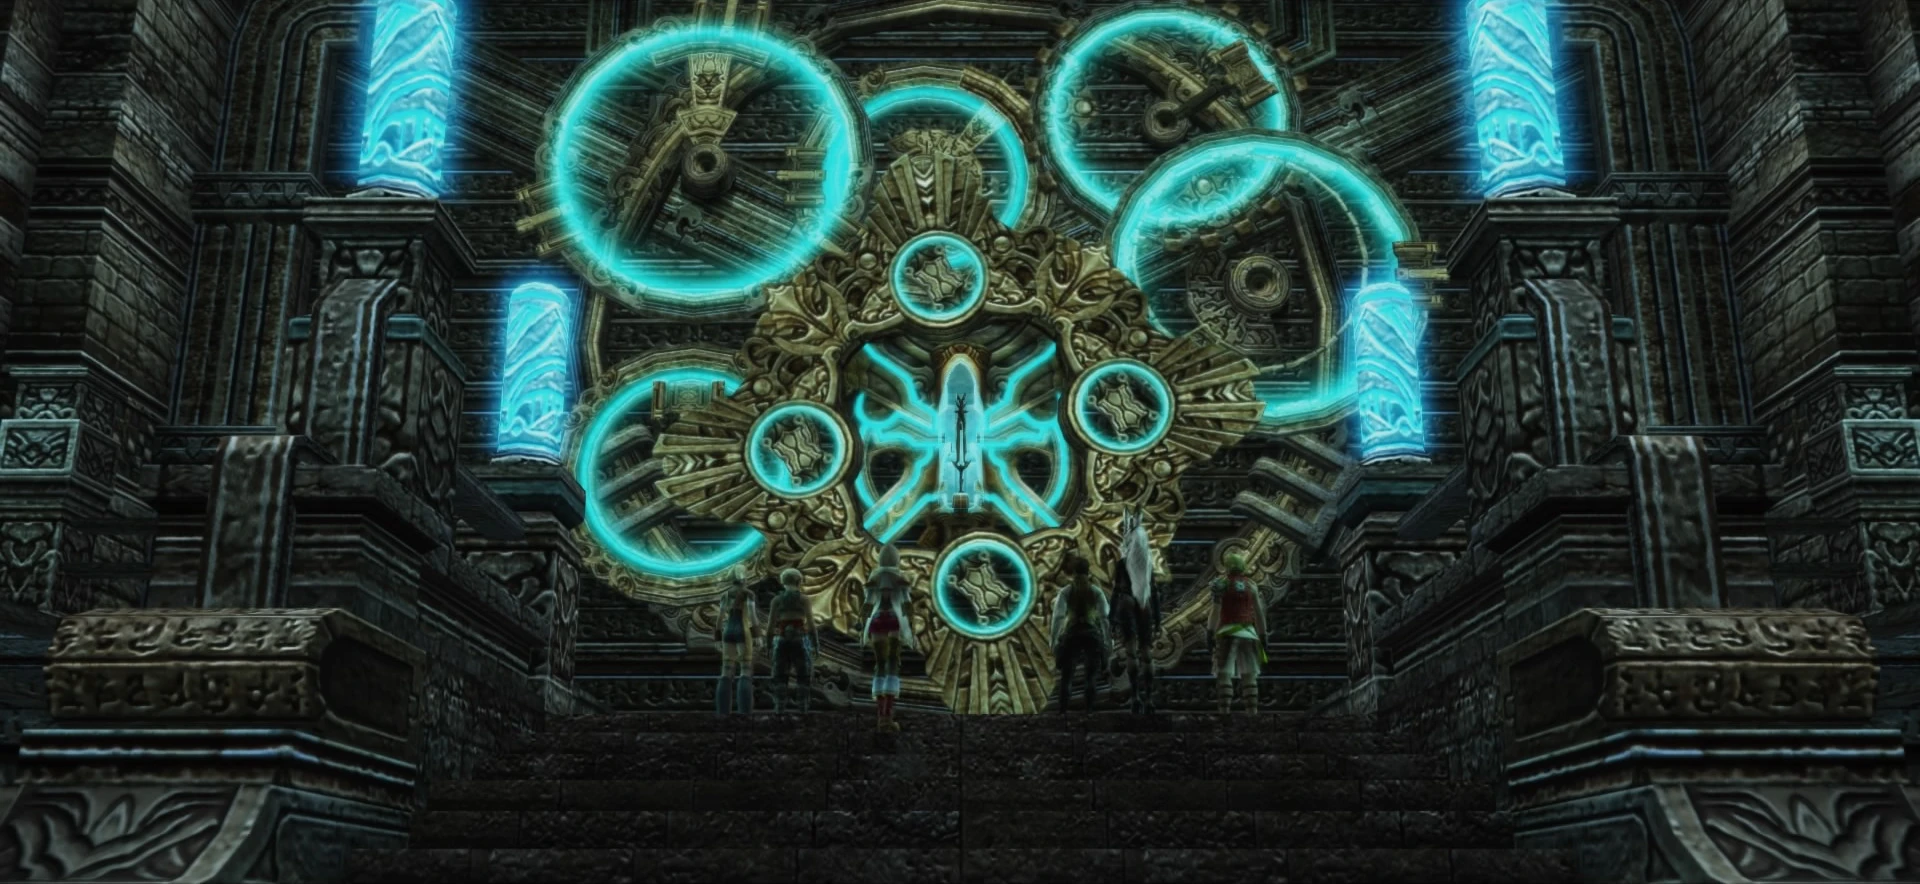
Sword of Kings deep inside Stilshrine of Miriam.
Princess Ashe has decided to fight the Empire, but with no nethicite to use for a weapon after the Dawn Shard lost its power, the outlook looks grim. The Gran Kiltias Anastasis on Mt Bur-Omisace tells Ashe of the Sword of Kings resting deep inside the Stilshrine of Miriam; a sword, that can cut through nethicite, to destroy the Empire's most powerful of weapons.
The party venture inside the shrine and eventually come across the sword. Balthier urges Ashe to test the sword on the Dawn Shard to see if it really works. Ashe hesitates and sees the ghostly vision of Lord Rasler, shaking his head at her. She still picks up the sword and raises it to the stone, but on purpose misses the mark. Fran says the stone fears the sword, and Ashe says she is positive this sword is the real Sword of Kings.
Monsters

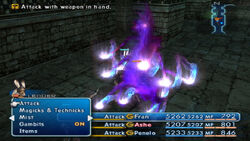
Darkmare roams the hallways of Stilshrine of Miriam.
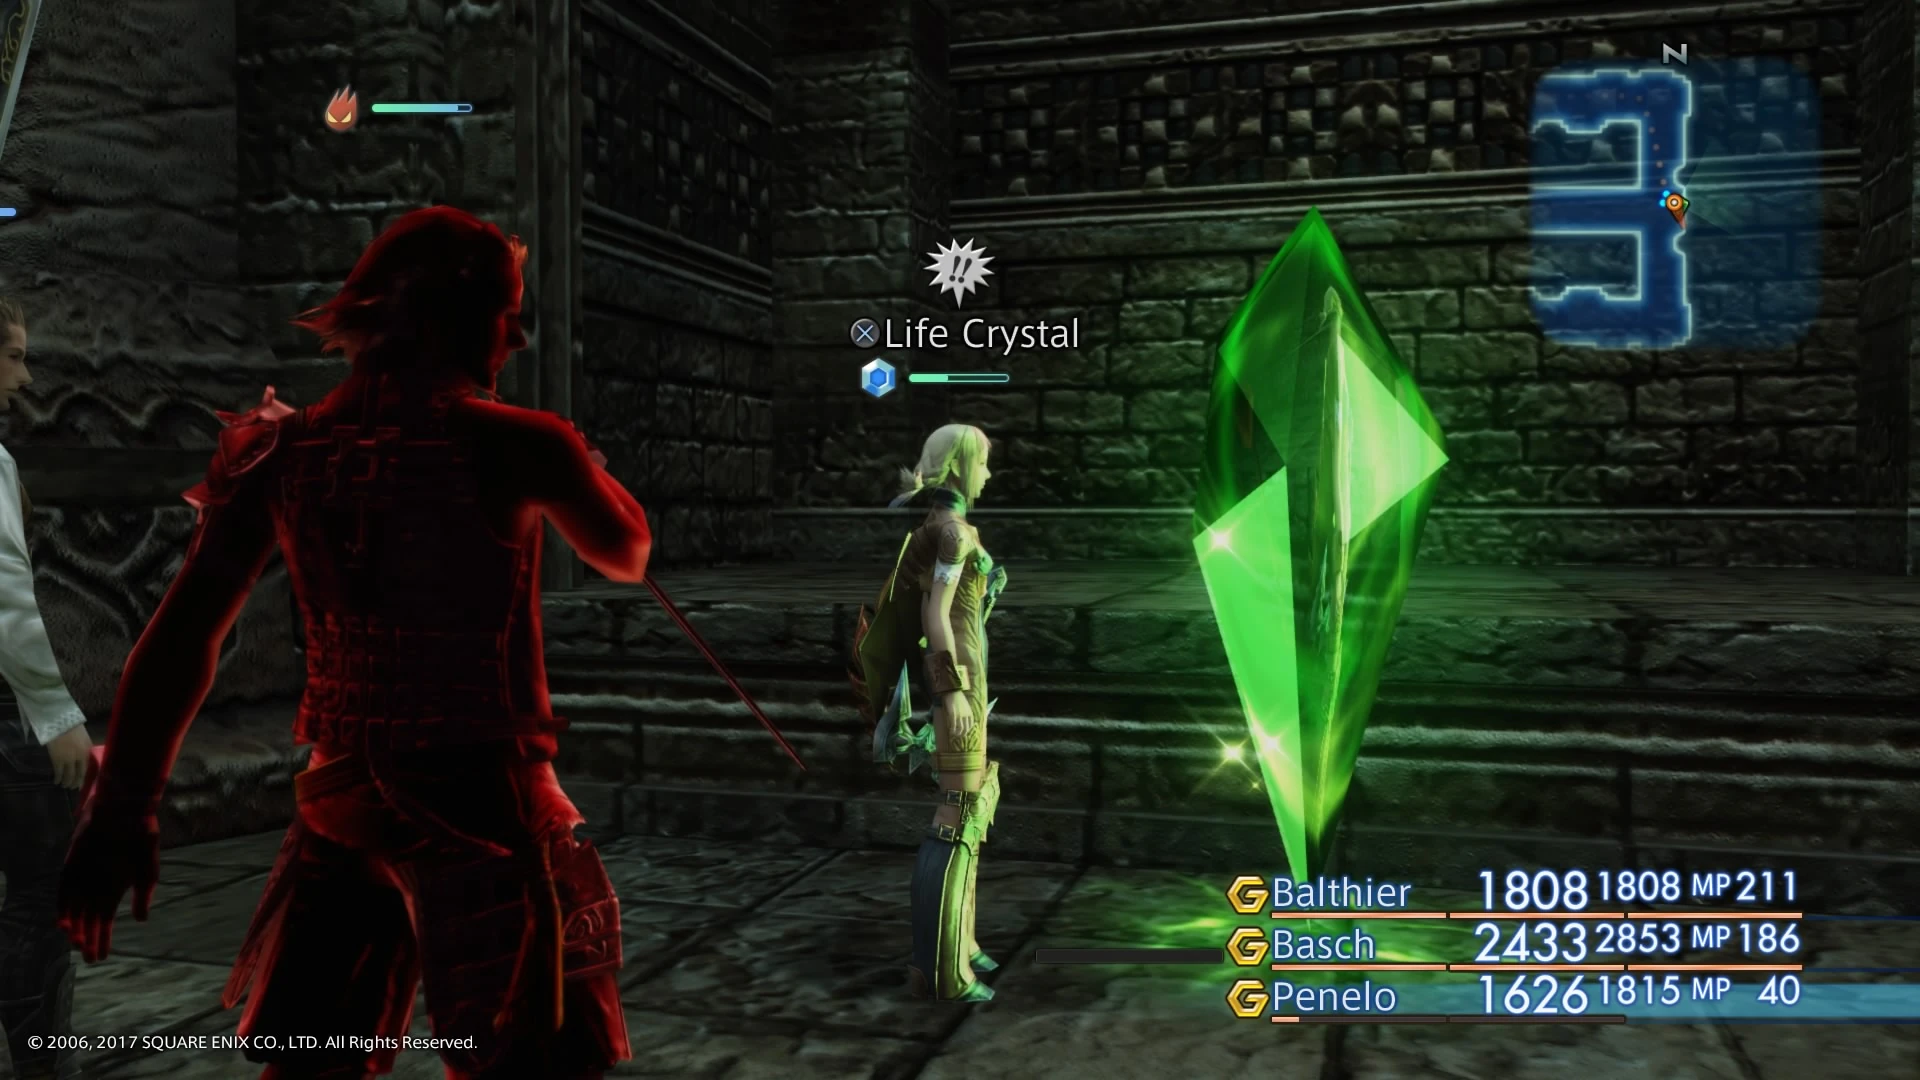
The Life Crystal is in fact a Crystalbug.

Matriarch Bomb is found in the secret area of the shrine.
- Blood Gigas
- Balloon
- Crystalbug
- Darkmare
- Dragon Aevis
- Facer
- Redmaw
- Zombie
- Zombie Warrior
- Miriam Guardian
- Miriam Facer
- Ghoul
- Ghast
- Dark Lord
- Nightwalker
- Reaper Mage
- Reaper Claw
- Oiling (Secret area only)
- Ice Azer (during esper battle)
- Vinuskar (Boss)
- Mateus (Esper)
- Zeromus (Optional Esper)
- Myath (Rare)
- Matriarch Bomb (Rare)
- Negalmuur (Rare)
Map
- Note: areas highlighted in red are hidden passages that do not appear on the map.
Other appearances
Final Fantasy Record Keeper
Template:Sideicon
Gallery
Template:Gallery
Etymology
Miriam is the name of the sister of both Moses and Aaron as told in the Book of Exodus in Hebrew Bible. She is in fact, a prophetess and the older sibling of them.
Template:FFXII