m (→Kimahri: grammar changes) Tag: Visual edit |
m (→Expert grid: clarification edits) Tag: Visual edit |
||
| Line 53: | Line 53: | ||
{{-}} |
{{-}} |
||
| − | ==Expert |
+ | ==Expert Grid== |
[[File:Expert sphere grid.jpg|thumb|The Expert Sphere Grid.]] |
[[File:Expert sphere grid.jpg|thumb|The Expert Sphere Grid.]] |
||
| − | The International, PAL and ''HD Remaster'' versions have the Expert option |
+ | The International, PAL and, ''HD Remaster'' versions have the Expert option available at the beginning of the game. In the Expert Grid, characters start in the middle of a Sphere Grid that is a completely different design than the one included in the original release. The player must decide which path the character will follow. The abilities in both grids are the same (the standard grid is slightly different from the regular grid, with extra branches and nodes to fit the new abilities), but the Expert grid has 68 fewer nodes than the Standard grid, but still contains enough to [[Min-maxing|max out most of the characters' statistics]]. |
==Spheres== |
==Spheres== |
||
{{See Also|Sphere (Final Fantasy X)}} |
{{See Also|Sphere (Final Fantasy X)}} |
||
| − | Activating any node on the grid requires a sphere. Early on, the player only has access to the basic red spheres, but as they progress many more types become available. Though all nodes need a sphere to be activated, |
+ | Activating any node on the grid requires a sphere. Early on, the player only has access to the basic red spheres, but as they progress many more types become available. Though all nodes need a sphere to be activated, spheres can have more uses than solely activating a node. |
The types of sphere are as follows: |
The types of sphere are as follows: |
||
Revision as of 21:34, 5 June 2018
Template:Images Template:Sideicon
File:Final Fantasy 10 Sphere Grid.svg The Sphere Grid (スフィア盤, Sufia Ban?, lit. Sphere Board) is the ability and character development system in Final Fantasy X. It is a roughly circular grid of interconnected nodes arranged in smaller circular clusters containing the abilities and special skills player characters can learn. The name refers to both the grid's design and to the use of spheres to activate the nodes.
In the "Beyond Final Fantasy" feature included with the PAL and International versions, Director Yoshinori Kitase explains that the Sphere Grid offers an interactive means of increasing characters' attributes so players can observe their development firsthand.
Across all official versions, there are three types of Sphere Grids:
- Regular: Offered in the original Japanese and North American versions, this version has 828 nodes with 77 unremovable nodes and 751 manipulable nodes.
- Standard: Offered in the International, PAL and HD Remaster versions, this version has 860 nodes, with 85 unremovable nodes and 775 manipulable nodes.
- Expert: Offered in the International, PAL and HD Remaster versions, this version has 792 nodes with 85 unremovable nodes and 707 manipulable nodes.
Completing a character's Sphere Grid in the Final Fantasy X HD Remaster version unlocks the Sphere Master trophy, while completing all characters' individual Sphere Grids unlocks the Perfect Sphere Master trophy. To unlock either trophy, the player must have every node, including empty nodes, active with either a stat boost or an ability.
AP and Sphere Levels
At the end of each battle every party member that took at least one full turn earns AP. Characters who are switched out during their first turn, KO'd, or petrified at the end of the battle will not gain AP. If the player defeats the enemy using an aeon, then Yuna will be treated as having taken a turn even if she only summoned.
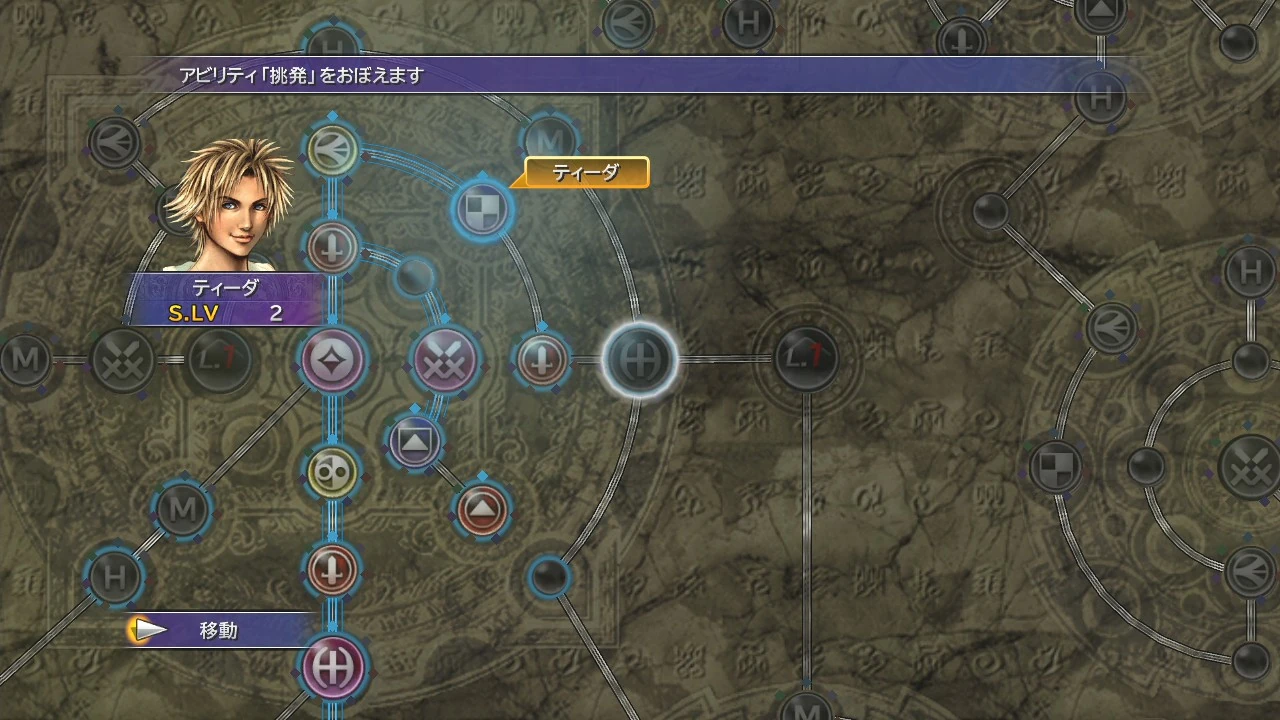
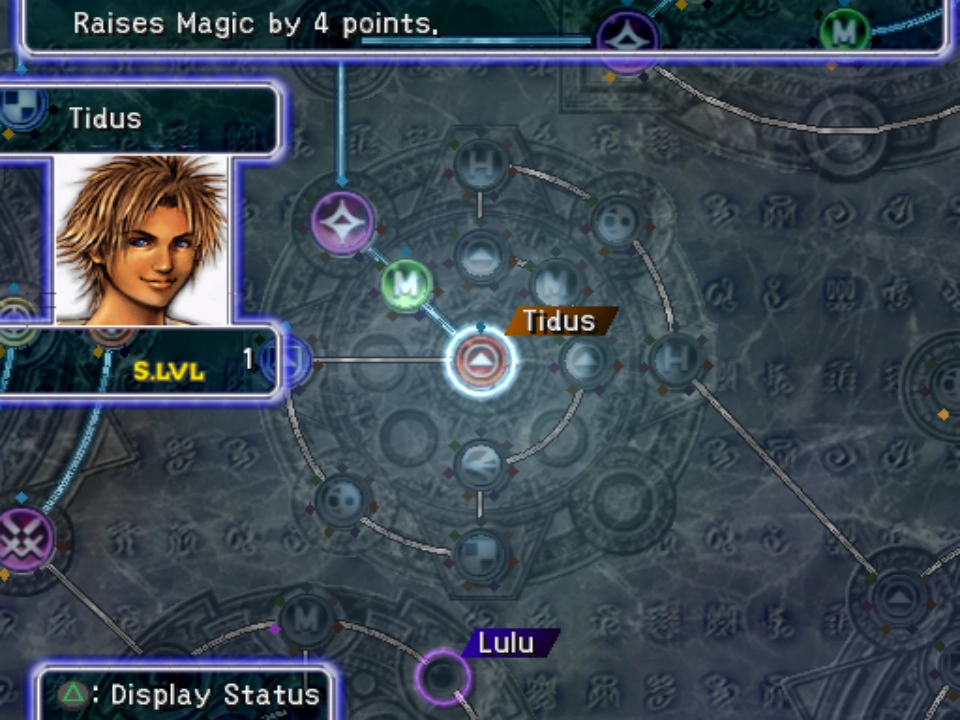
Tidus with two Sphere Levels in Final Fantasy X HD Remaster.
When enough AP is earned, the character gains a Sphere Level ("S.Lv"). The amount of AP needed to generate Sphere Levels increases progressively until the character has acquired 101 S.LV, after which an additional Sphere Level will always require 22,000 AP. When moving about the Sphere Grid, the character may move one node forward for each S.LV they have. The player does not need to activate a node to pass by it. Regardless of activation, when the player passes a node, a colored band connects their current node to the node they left to mark their path on the grid. Moving across previously connected paths allows the character to move four nodes for every S.LV they have.
Each character's starting location on the grid indicates their strengths and weaknesses based on the variety of nodes in their section, though the player can choose to take the character down a different path using Key Spheres. The character-specific sections merge at certain points, allowing a character to take another's path. The character-specific sections are separated by locked nodes, which become empty nodes once opened, allowing free movement. Ultimately, every node on the Sphere Grid may be accessed by every character.
Sections
The Sphere Grid is roughly divided into seven sections, one for each party member. A selected character's path is highlighted in their grid color. Each node is connected by up to seven paths in cardinal and intercardinal directions. Activating a node highlights the corresponding path in the character's grid color. These marks are visible no matter which character is selected.
Tidus
Tidus near the beginning of his section of the grid.
Tidus' grid has a balance of Strength and Accuracy as well as decent Evasion and Agility. He is adept at killing lightly-armored enemies, but flying enemies often have too much Evasion for him to hit, and most of his weapons cannot pierce through armored enemies.
Tidus learns Special abilities and White Magic that affect the turn order of his allies and enemies, such as Haste, Slow, and Delay Buster. He has party support abilities like Cheer and Flee. At the end of his section is Quick Hit. In the International, PAL and HD Remaster versions, it also includes Extract Speed. Tidus' grid section runs into Yuna's. His grid color is aqua.
Yuna
Yuna has low Strength and Defense but has the highest Magic and strong Evasion and Agility. Yuna's grid contains many healing White Magic spells, such as Cure spells, Regen and Esuna, and buffing spells like Reflect and Shell. Being the Summoner, her aeons' stats rise alongside hers. At the end of her section is the spell Holy. Yuna's grid section runs into Rikku's. Her grid color is white.
Rikku

Steal and Use are highlighted even before Rikku has navigated on the grid.
Rikku has the highest Agility and her grid has many HP and Agility nodes. She has average Strength and low-to-average Magic but learns a variety of support abilities, such as Steal, Mug, Spare Change, and Copycat. Her grid contains the White Magic spell Full-Life. At the end of her section is the ability Bribe. In the International, PAL, and HD Remaster versions, it also includes Nab Gil and Quick Pockets. Rikku's grid section runs into Lulu's. Her grid color is green.
Lulu
Lulu, as a classic Black Mage, has low Strength, Accuracy and Agility but high Magic and the highest Magic Defense and Evasion. She has the party's highest Defense, which is uncharacteristic of the traditional Black Mage. Black Magic, such as the Fire, Blizzard, Thunder, and Water series, are in her section, along with other spells like Bio and Demi. Lulu's section also has the support skills Focus, Reflex and Doublecast. At the end of her section is the spell Flare. Lulu's grid section runs into Wakka's. Her grid color is purple.
Wakka
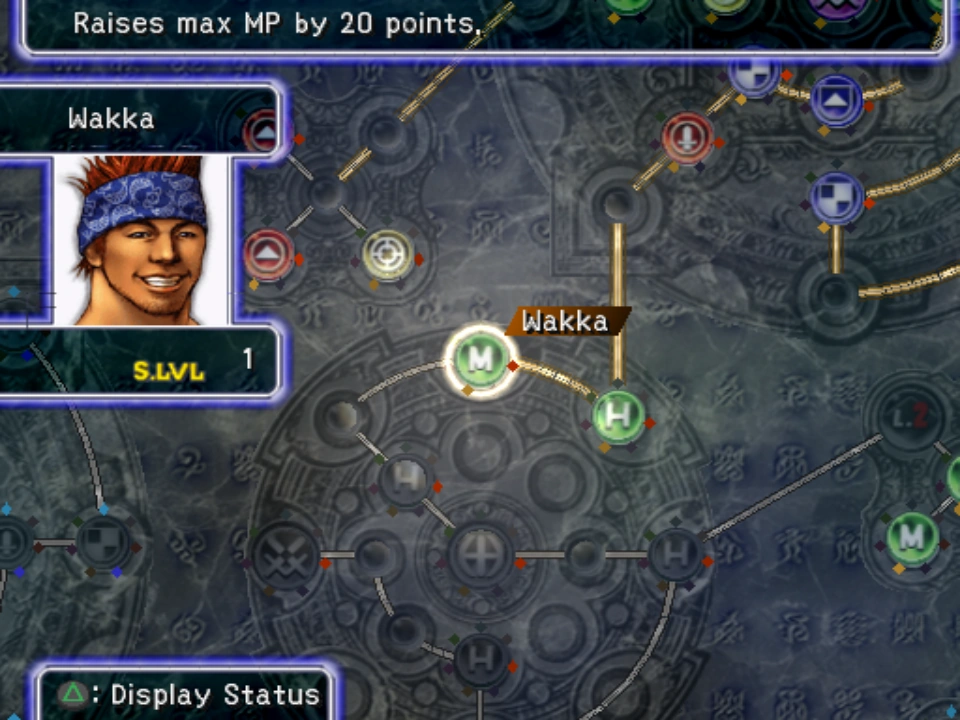

Wakka's Sphere Grid.
Wakka has high HP, Strength, and Accuracy, but average Magic, MP, and Agility, along with low-to-average Evasion and low Magic Defense. Wakka learns many special attacks that let him inflict status ailments on enemies, such as Dark Attack and Silence Attack. Wakka's grid contains two Black Magic spells—Drain and Osmose. At the end of his section is the special attack Triple Foul. In the International, PAL, and HD Remaster versions, it also includes Extract Ability. Wakka's section runs into Auron's. His grid color is yellow.
Auron
Auron's section has many Strength, Defense, and HP nodes, but lacks Evasion, Accuracy, and Agility. His section includes "break" abilities like Power Break and Armor Break, which lower enemy stats, and defensive abilities such as Sentinel and Guard. At the end of his section are the special abilities Threaten and Entrust. In the International, PAL and HD Remaster versions, it also includes Extract Power and Full Break. Auron's section runs into Tidus' grid, thus closing the circle of Tidus-Yuna-Rikku-Lulu-Wakka-Auron. His grid color is red.
Kimahri
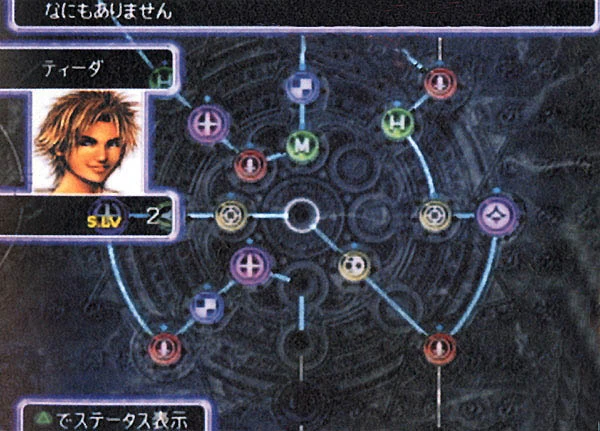
Zoomed-out Sphere Grid in the PS Vita.
Kimahri's section is in the center of the Sphere Grid and contains a variety of nodes. As a Blue Mage, Kimahri's grid connects to the grids of every other character except Auron, allowing the player to customize his stats as they wish once they can access the Key Spheres separating the grids. Kimahri's section contains Lancet, which allows him to learn Ronso Rage abilities from certain enemies, and support abilities like Jinx and Scan. At the center of his section is the Black Magic Ultima. In the International, PAL, and HD Remaster versions, it also includes Extract Mana. Kimahri's grid color is dark blue.
Expert Grid
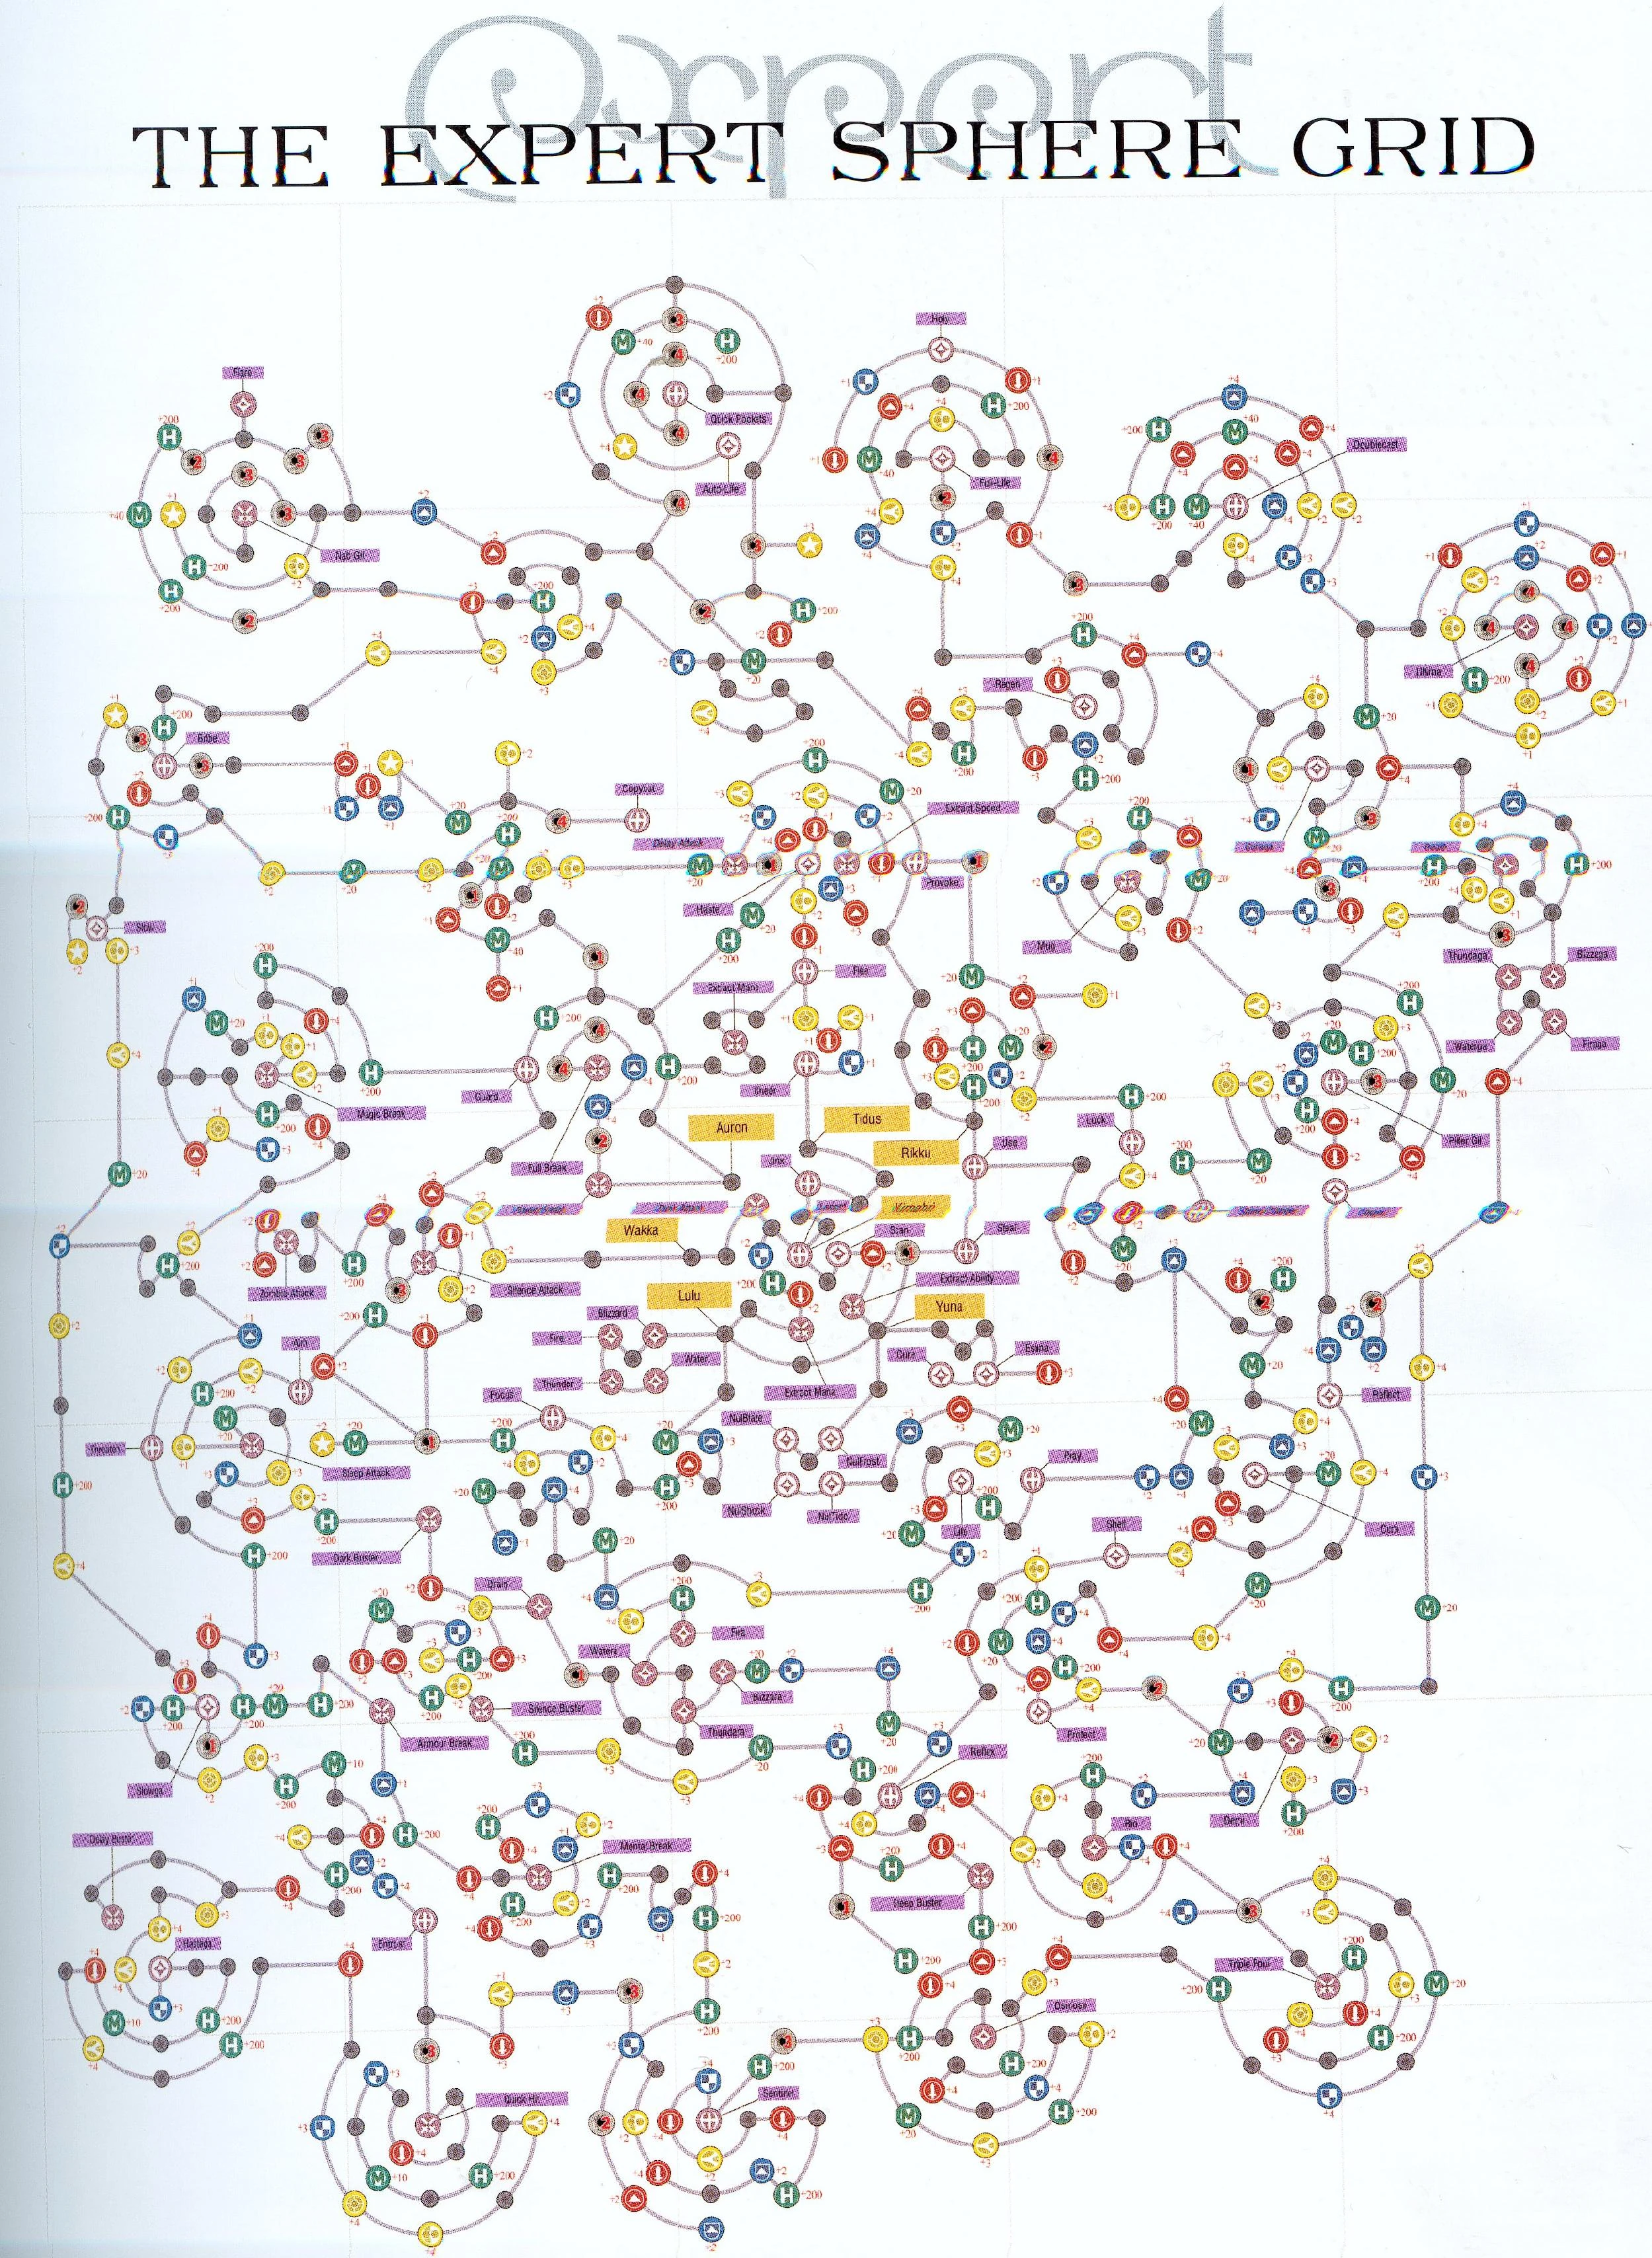
The Expert Sphere Grid.
The International, PAL and, HD Remaster versions have the Expert option available at the beginning of the game. In the Expert Grid, characters start in the middle of a Sphere Grid that is a completely different design than the one included in the original release. The player must decide which path the character will follow. The abilities in both grids are the same (the standard grid is slightly different from the regular grid, with extra branches and nodes to fit the new abilities), but the Expert grid has 68 fewer nodes than the Standard grid, but still contains enough to max out most of the characters' statistics.
Spheres
Template:See Also Activating any node on the grid requires a sphere. Early on, the player only has access to the basic red spheres, but as they progress many more types become available. Though all nodes need a sphere to be activated, spheres can have more uses than solely activating a node.
The types of sphere are as follows:
- Red Spheres are the most common kind, with the exception of the Fortune Spheres. They are used to activate most of the nodes on the grid to increase basic stats like Strength, Agility and HP. The types of red sphere are:
- Power Sphere - Activates Strength, Defense, and HP Nodes.
- Mana Sphere - Activates Magic Power, Magic Resistance, and MP Nodes.
- Speed Sphere - Activates Agility, Accuracy, and Evasion Nodes.
- Ability Sphere - Activates Skill, Special, and Magic Nodes.
- Fortune Sphere - Activates Luck Nodes.
- Key Spheres are dark gray and come in four levels, which can open a locked node of the corresponding level: a Level 4 Key Sphere cannot open any locked node but Level 4. When a locked node is unlocked, it is unlocked for all characters regardless of who unlocked it.
- Lv. 1 Key Sphere
- Lv. 2 Key Sphere
- Lv. 3 Key Sphere
- Lv. 4 Key Sphere
- Purple Spheres are used to fill empty nodes with stat nodes. There are ten types of purple sphere, one for each for the basic stats: HP, MP, Strength, Defense, Magic Power, Magic Defense, Agility, Evasion, Accuracy and Luck. Whenever any empty node is turned into a stat node, the stat increase given by that node is higher than the increase given by a normal node: For example, an HP node made from a purple sphere gives +300 HP, as opposed to normal HP nodes which give +200 HP. MP nodes give +40 MP, and all other stat nodes give +4 in their respective stat.
- HP Sphere
- MP Sphere
- Strength Sphere
- Defense Sphere
- Magic Sphere
- Magic Def Sphere
- Agility Sphere
- Evasion Sphere
- Accuracy Sphere
- Luck Sphere
- Yellow spheres are used to activate ability nodes that have been activated by at least one other character, no matter where that node is in relation to the character's location. The types of yellow sphere are:
- Attribute Sphere - activate any stat node.
- Special Sphere - activates any Special node.
- Skill Sphere - activates any Skill node.
- White Magic Sphere - activates any White Magic node.
- Black Magic Sphere - activates any Black Magic node.
- Master Sphere - activates any node.
- Light blue Spheres can teleport characters around the grid. The types of light blue sphere are:
- Return Sphere - Warp to any node previously activated by the player.
- Friend Sphere - Warp to an ally's spot on the grid.
- Teleport Sphere - Warp to any activated node on the grid.
- Warp Sphere - Warp to any spot on the grid.
- Clear Spheres are aqua and can be bought from the Monster Arena owner after the player has captured five of every fiend. They clear any stat node and negate whatever stat increase it gave. Ability nodes and locked nodes cannot be cleared. Clear Spheres cost 10,000 gil apiece.
Customization

A Customized Sphere Grid.
Template:See Also There is an option to customize one's personal Sphere Grid and max out the characters' stats. If the player only activates the nodes available by default, the characters will not max on all of the stats.
Some nodes will either have +1, +2, +3 and (rarely) +4, as well as +200 HP and +20 MP. By using the Clear Sphere (available at the Monster Arena) the player can clear out the weaker nodes and activate any of the purple spheres of the player's choice (HP, MP, Strength, Defense, Magic Power, Magic Defense, Agility, Evasion, Accuracy and Luck). Once all the weak nodes have been removed and replaced with the +4, +300 HP, and +40 MP, it is possible to max a number of stats. It is not possible to max out all stats.
HP caps at 9,999 and MP at 999 or 99,999 HP and 9,999 MP with the Break HP Limit/Break MP Limit abilities. Other stats hard cap at 255. The higher Luck cap won't change much on the requirements to max all stats, and thus the player can decide between maxing Luck or maxing Accuracy and Evasion.
Special Spheres
The special spheres to help the player customize the Sphere Grid are received from the monsters at the Monster Arena. The following chart explains what they drop and how to acquire them.
| Sphere | Stat Increase | Fiend | Unlock by |
|---|---|---|---|
| HP Sphere | +300 HP | Ironclad | Capture 10 of each of the Iron Giant-type fiends. |
| MP Sphere | +40 MP | Vidatu | Capture 4 of each of the elemental Imp-type fiends. |
| Strength Sphere | +4 Strength | Juggernaut | Capture 5 of each of the Ruminant-type fiends. |
| Defense Sphere | +4 Defense | Tanket | Capture 3 of each of the Helm-type fiends. |
| Magic Sphere | +4 Magic | Jumbo Flan | Capture 3 of each of the Flan-type fiends. |
| Magic Def Sphere | +4 Magic Defense | One-Eye | Capture 4 of each of the Eye-type fiends. |
| Agility Sphere | +4 Agility | Fenrir | Capture 3 of each of the Wolf-type fiends. |
| Evasion Sphere | +4 Evasion | Pteryx | Capture 4 of each of the Bird-type fiends. |
| Accuracy Sphere | +4 Accuracy | Hornet | Capture 4 of each of the Wasp-type fiends. |
| Luck Sphere | +4 Luck | Greater Sphere | Breed at least 2 monsters in Species Conquest. |
The Fortune Spheres that activate Luck nodes are obtained from the Earth Eater Original Species, unlocked by creating two Area Conquest monsters.
Ability list
Skills
Specials
Blk Magic
Wht Magic
Gallery
")
")