m (→Coins) |
No edit summary |
||
| (48 intermediate revisions by 12 users not shown) | |||
| Line 1: | Line 1: | ||
| + | {{sideicon|X2}} |
||
| − | [[File:Sphere break 2.jpg|thumb|right|Game |
+ | [[File:Sphere break 2.jpg|thumb|right|250px|Game opening.]] |
| − | {{ |
+ | {{Quote|The probability you'll win is slim at best.|Shinra in the Sphere Break finals}} |
| − | '''Sphere Break''' is a newly established coin-game in ''[[Final Fantasy X-2]]''. Funded by the entrepreneurial [[Al Bhed]], [[Rin (Final Fantasy X)|Rin]], the game was designed as a source of entertainment during [[ |
+ | '''Sphere Break''' is a newly established coin-game in ''[[Final Fantasy X-2]]''. Funded by the entrepreneurial [[Al Bhed]], [[Rin (Final Fantasy X)|Rin]], the game was designed as a source of entertainment during [[blitzball]]'s off-season. |
| − | The mechanics |
+ | The mechanics are purely mathematical, with the aim to create the most [[wikipedia:Multiplication|multiples]] of the "Core Number" by combining the number values of the 16 coins in play. To win, the player must meet a predetermined quota of coins used while staying within a set number of turns to use them in. |
| − | ==Playing the |
+ | ==Playing the game== |
| − | [[File:Sphere break.jpg|right| |
+ | [[File:Sphere break.jpg|right|250px|thumb|Game board: Core Sphere (light blue) surrounded by Entry Coins (gold) which are in turn surrounded by Border Coins (dark blue).]] |
| − | ===Setting |
+ | ===Setting up and how to play=== |
| − | The game takes place on a 4x4 board with a Core Sphere in the center |
+ | The game takes place on a 4x4 board with a Core Sphere in the center whose number is called the Core Number that ranges from 1 to 9. The four fields around the Core Sphere are reserved for the Entry Coins. The Border Coins are the twelve outer fields. |
| − | Each coin is numbered from 1 to 9 |
+ | Each coin is numbered from 1 to 9. The objective is to combine these numbers to achieve multiples of the Core Number. |
During the game the following details will appear at the top of the screen: |
During the game the following details will appear at the top of the screen: |
||
| Line 16: | Line 17: | ||
*Break Multiples: Lists three multiples of the Core Number that the player must strive for. |
*Break Multiples: Lists three multiples of the Core Number that the player must strive for. |
||
| − | At the start of each round one of the four Entry Coins must be selected first |
+ | At the start of each round one of the four Entry Coins must be selected first. The player is then free to select another coin from either the Entry or Border Coin fields. If the combined sum matches one of the Break Multiples, this is called a Core Break, which ends the round. If not, then the player may continue selecting coins until their combined sum equals one of the Break Multiples displayed. |
===Winning=== |
===Winning=== |
||
| + | [[File:Sphere Breaker xtro.PNG|right|150px|Sphere Breaker" trophy icon.]] |
||
| − | To win the player must have used up a set |
+ | To win the player must have used up a set quota of Border Coins within a set number of rounds. If the player reaches the quota before reaching the maximum number of rounds, the player wins. If they do not reach the quota, or if they run out of time, the player loses. In the case of a defeat, the player will lose their Entry Coins to the opponent. |
| ⚫ | |||
| + | |||
| + | In the ''HD Remaster'' version, winning 10 Sphere Break matches will unlock the "[[Final Fantasy X-2 HD Remaster achievements and trophies|Sphere Breaker]]" trophy/achievement. |
||
| ⚫ | |||
==Types of coin== |
==Types of coin== |
||
| − | There are 64 coins available |
+ | There are 64 coins available, each with a unique illustration etched on its surface portraying a [[Fiend (Final Fantasy X)|fiend]] or character from ''[[Final Fantasy X]]'' or ''Final Fantasy X-2''. Each coin possesses a value (1-9) that is used to determine its role in multiplication pairs while some also possess attributes to aid in meeting the game quota or to obtain items or additional coins from the opponent should the player win. |
===Entry Coins=== |
===Entry Coins=== |
||
[[File:goldcoins.gif|150px|right]] |
[[File:goldcoins.gif|150px|right]] |
||
The four placements surrounding the Core Sphere are for the Entry Coins. Chosen and placed by the player, these coins will be taken by the opponent should the player lose. Colored gold, these coins are used in combination with the Border Coins to form multiples of the Core Sphere number. |
The four placements surrounding the Core Sphere are for the Entry Coins. Chosen and placed by the player, these coins will be taken by the opponent should the player lose. Colored gold, these coins are used in combination with the Border Coins to form multiples of the Core Sphere number. |
||
| − | {{ |
+ | {{clear}} |
===Border Coins=== |
===Border Coins=== |
||
[[File:silvercoins.gif|150px|right]] |
[[File:silvercoins.gif|150px|right]] |
||
| − | The Border Coins are randomly chosen and placed along the outside border of twelve placement points. Colored blue, these coins are used in addition with the Entry Coins to form multiples of the Core Sphere |
+ | The Border Coins are randomly chosen and placed along the outside border of twelve placement points. Colored blue, these coins are used in addition with the Entry Coins to form multiples of the Core Sphere. Unlike the Entry Coins, Border Coins disappear after being used while the remaining Border Coins' values are increased by one (any coins with values exceeding 9 will also be discarded or replaced after this increase). |
==Traits== |
==Traits== |
||
===Echoes=== |
===Echoes=== |
||
| − | Echo traits allow the player to obtain bonus |
+ | Echo traits allow the player to obtain bonus quota points. To initiate an Echo the player must not only select an Entry Coin with the trait, but also maintain a set play pattern. |
| − | *'''Coin Count Echo:''' The same number of coins must be used in successive rounds to achieve a Core Break ( |
+ | *'''Coin Count Echo:''' The same number of coins must be used in successive rounds to achieve a Core Break (e.g. 3 coins were used in Round 1, 3 coins were used in Round 2, etc). |
| − | *'''Multiplier Echo:''' Core Breaks must be achieved using the same multiple value used in the previous round ( |
+ | *'''Multiplier Echo:''' Core Breaks must be achieved using the same multiple value used in the previous round (e.g. if the Core Number was 7 in the previous round and the player achieved a Core Break of 14 (7x2), in the next round the player must achieve a Core Break of the Core Number x2). |
| − | ===Entry Coin |
+ | ===Entry Coin traits=== |
| ⚫ | |||
| − | {|border="1" cellspacing="0" cellpadding="2" width="100%" |
||
| + | |-class="a" |
||
| − | |-bgcolor="#EE82EE" style="color:white" |
||
!width="20%"|Trait |
!width="20%"|Trait |
||
!width="80%"|Description |
!width="80%"|Description |
||
|- |
|- |
||
| − | ! |
+ | !class="b"|Coin Count Echo |
| − | + | |''Coin Count Echo'' becomes possible. |
|
|- |
|- |
||
| − | ! |
+ | !class="b"|Coin Count: 2 |
| − | + | |If this Coin is selected first, the effect of ''+X Coins'' and ''-X Coins'' will be doubled. |
|
|- |
|- |
||
| − | ! |
+ | !class="b"|Coin |
| − | + | |A Border Coin with the ''Coin'' trait appears. |
|
|- |
|- |
||
| − | ! |
+ | !class="b"|Gil x2 |
| − | + | |If this Coin is selected first, the effect of ''+X Gil'' and ''-X Gil'' will be doubled. |
|
|- |
|- |
||
| − | ! |
+ | !class="b"|Item |
| − | + | |A Border Coin with the ''Item'' trait appears. |
|
|- |
|- |
||
| − | ! |
+ | !class="b"|Multiplier Echo |
| − | + | |''Multiplier Echo'' becomes possible. |
|
|- |
|- |
||
| − | ! |
+ | !class="b"|Quota x2 |
| − | + | |If this Coin is selected first, the Quota will be doubled depending on the amount of Border Coins used to make a Core Break. |
|
|- |
|- |
||
| − | ! |
+ | !class="b"|Quota x3 |
| − | + | |If this Coin is selected first, the Quota will be tripled depending on the amount of Border Coins used to make a Core Break. |
|
|- |
|- |
||
| − | ! |
+ | !class="b"|Quota x4 |
| − | + | |If this Coin is selected first, the Quota will be multiplied by four depending on the amount of Border Coins used to make a Core Break. |
|
|- |
|- |
||
| − | ! |
+ | !class="b"|Quota x5 |
| − | + | |If this Coin is selected first, the Quota will be multiplied by five depending on the amount of Border Coins used to make a Core Break. |
|
|- |
|- |
||
| − | ! |
+ | !class="b"|Rare Coin |
| − | + | |A Border Coin with the ''Rare Coin'' trait will appear. |
|
|- |
|- |
||
| − | ! |
+ | !class="b"|Rare Item |
| − | + | |A Border Coin with the ''Rare Item'' trait will appear. |
|
|} |
|} |
||
| − | ===Border Coin |
+ | ===Border Coin traits=== |
| + | {|class="full-width X2 article-table" style="text-align:center" |
||
| − | {|border="1" cellspacing="0" cellpadding="2" width="100%" |
||
| + | |-class="a" |
||
| − | |-bgcolor="#EE82EE" style="color:white" |
||
!width="20%"|Trait |
!width="20%"|Trait |
||
!width="80%"|Description |
!width="80%"|Description |
||
|- |
|- |
||
| − | ! |
+ | !class="b"|Item, Rare Item |
| − | + | |Player obtains one item or one rare item. |
|
|- |
|- |
||
| − | ! |
+ | !class="b"|Coin, Rare Coin |
| − | + | |Player obtains one Coin or one rare Coin. |
|
|- |
|- |
||
| − | ! |
+ | !class="b"|+X Coin |
| − | + | |The number on the Entry Coin selected first is increased by 1-5. |
|
|- |
|- |
||
| − | ! |
+ | !class="b"|-X Coin |
| − | + | |The number on the Entry Coin selected first is decreased by 1-5. |
|
|- |
|- |
||
| − | ! |
+ | !class="b"|+X Gil |
| − | + | |The value in gil of the Entry Coin selected first is increased by 1-5. |
|
|- |
|- |
||
| − | ! |
+ | !class="b"|-X Gil |
| − | + | |The value in gil of the Entry Coin selected first is decreased by 1-5. |
|
|} |
|} |
||
| − | == |
+ | ==Quests== |
===Sphere Break Tournament=== |
===Sphere Break Tournament=== |
||
{{main|Sphere Break Tournament}} |
{{main|Sphere Break Tournament}} |
||
| Line 114: | Line 118: | ||
===Sphere Break Elites=== |
===Sphere Break Elites=== |
||
| − | In the [[International Version]] of ''Final Fantasy X-2'' the player can challenge the strongest Sphere Break players |
+ | In the [[International Version|International]] and ''[[Final Fantasy X/X-2 HD Remaster|HD Remaster]]'' versions of ''Final Fantasy X-2'', the player can challenge the strongest Sphere Break players. By completing the storyline of [[Varan]] first, the player can then challenge the elites in [[Luca (Final Fantasy X)|Luca]], in the [[Besaid Aurochs|Aurochs']] room. They each have a difficulty of seven stars and are hard to beat. |
| − | : |
+ | :Cursed Core Sphere (Varan) |
:Turns: 30 |
:Turns: 30 |
||
:Quota: 500 |
:Quota: 500 |
||
:Time: 30 seconds |
:Time: 30 seconds |
||
| − | For defeating Varan, the player is rewarded with the [[ |
+ | For defeating Varan, the player is rewarded with the [[Final Fantasy X-2 accessories#Enterprise|Enterprise]] accessory. If they leave the room and reenter, or beat him twice in a row without leaving, a new challenger will appear next to Varan. |
| − | : |
+ | :Underground Core Sphere (Tonberry) |
:Turns: 25 |
:Turns: 25 |
||
:Quota: 500 |
:Quota: 500 |
||
:Time: 20 seconds |
:Time: 20 seconds |
||
| − | If the player defeats Tonberry, they are given the [[ |
+ | If the player defeats Tonberry, they are given the [[Final Fantasy X-2 accessories#Invincible|Invincible]] accessory. After leaving the room and reentering, or beating him twice in a row without leaving, the final challenger will be there. |
| − | : |
+ | :Farplane Core Sphere (Haunt) |
:Turns: 30 |
:Turns: 30 |
||
:Quota: 600 |
:Quota: 600 |
||
:Time: 20 seconds |
:Time: 20 seconds |
||
| − | Beating Haunt awards the player with the [[ |
+ | Beating Haunt awards the player with the [[Ragnarok (Final Fantasy X-2)|Ragnarok]] accessory. |
| + | |||
| + | It is best to collect these three accessories in chapter 3, as it is no longer possible in chapter 5 due to the door being locked by the woman with the dog by her side who challenges the player to a sphere break game. The player can still earn the accessories via the Farplane Cup, but it will be hard even with a level 99 party. |
||
==Coins== |
==Coins== |
||
| ⚫ | |||
| ⚫ | |||
| + | {|class="full-width X2 article-table" |
||
| − | !class=" |
+ | !class="a" colspan="8"|List of Coins |
|- |
|- |
||
| − | !class=" |
+ | !class="b" width="5%"|1 |
|width="20%"|[[Helm (Final Fantasy X)#Sphere Break|Helm Coin]] |
|width="20%"|[[Helm (Final Fantasy X)#Sphere Break|Helm Coin]] |
||
| − | !class=" |
+ | !class="b" width="5%"|2 |
|width="20%"|[[Zurvan (Final Fantasy X-2)#Sphere Break|Zurvan Coin]] |
|width="20%"|[[Zurvan (Final Fantasy X-2)#Sphere Break|Zurvan Coin]] |
||
| − | !class=" |
+ | !class="b" width="5%"|3 |
| − | |width="20%"|[[Coyote#Sphere Break|Coyote Coin]] |
+ | |width="20%"|[[Coyote (Final Fantasy X-2)#Sphere Break|Coyote Coin]] |
| − | !class=" |
+ | !class="b" width="5%"|4 |
| − | |width="20%"|[[Flan#Sphere Break|Flan Coin]] |
+ | |width="20%"|[[Flan (enemy family)#Sphere Break|Flan Coin]] |
|- |
|- |
||
| − | !class=" |
+ | !class="b"|5 |
|[[Reptile#Sphere Break|Reptile Coin]] |
|[[Reptile#Sphere Break|Reptile Coin]] |
||
| − | !class=" |
+ | !class="b"|6 |
|[[Bird (Final Fantasy X)#Sphere Break|Bird Coin]] |
|[[Bird (Final Fantasy X)#Sphere Break|Bird Coin]] |
||
| − | !class=" |
+ | !class="b"|7 |
|[[Wasp#Sphere Break|Wasp Coin]] |
|[[Wasp#Sphere Break|Wasp Coin]] |
||
| − | !class=" |
+ | !class="b"|8 |
|[[Ahriman#Sphere Break|Ahriman Coin]] |
|[[Ahriman#Sphere Break|Ahriman Coin]] |
||
|- |
|- |
||
| − | !class=" |
+ | !class="b"|9 |
|[[Purpurea#Sphere Break|Purpurea Coin]] |
|[[Purpurea#Sphere Break|Purpurea Coin]] |
||
| − | !class=" |
+ | !class="b"|10 |
|[[Zu (Final Fantasy X-2)#Sphere Break|Zu Coin]] |
|[[Zu (Final Fantasy X-2)#Sphere Break|Zu Coin]] |
||
| − | !class=" |
+ | !class="b"|11 |
|[[Worm (Final Fantasy X)#Sphere Break|Worm Coin]] |
|[[Worm (Final Fantasy X)#Sphere Break|Worm Coin]] |
||
| − | !class=" |
+ | !class="b"|12 |
| − | |[[Defender (Final Fantasy X)#Sphere Break|Defender Coin]] |
+ | |[[Defender (Final Fantasy X enemy family)#Sphere Break|Defender Coin]] |
|- |
|- |
||
| − | !class=" |
+ | !class="b"|13 |
|[[Phantom (Final Fantasy X-2)#Sphere Break|Phantom Coin]] |
|[[Phantom (Final Fantasy X-2)#Sphere Break|Phantom Coin]] |
||
| − | !class=" |
+ | !class="b"|14 |
|[[Ruminant#Sphere Break|Ruminant Coin]] |
|[[Ruminant#Sphere Break|Ruminant Coin]] |
||
| − | !class=" |
+ | !class="b"|15 |
|[[Drake (Final Fantasy X)#Sphere Break|Drake Coin]] |
|[[Drake (Final Fantasy X)#Sphere Break|Drake Coin]] |
||
| − | !class=" |
+ | !class="b"|16 |
|[[Malboro#Sphere Break|Malboro Coin]] |
|[[Malboro#Sphere Break|Malboro Coin]] |
||
|- |
|- |
||
| − | !class=" |
+ | !class="b"|17 |
| − | |[[Ogre ( |
+ | |[[Ogre (enemy)#Sphere Break|Ogre Coin]] |
| − | !class=" |
+ | !class="b"|18 |
| − | |[[Elemental ( |
+ | |[[Elemental (enemy)#Sphere Break|Elemental Coin]] |
| − | !class=" |
+ | !class="b"|19 |
| − | |[[Blade (Final Fantasy X)#Sphere Break|Blade Coin]] |
+ | |[[Blade (Final Fantasy X enemy family)#Sphere Break|Blade Coin]] |
| − | !class=" |
+ | !class="b"|20 |
|[[Behemoth#Sphere Break|Behemoth Coin]] |
|[[Behemoth#Sphere Break|Behemoth Coin]] |
||
|- |
|- |
||
| − | !class=" |
+ | !class="b"|21 |
|[[Chimera#Sphere Break|Chimera Coin]] |
|[[Chimera#Sphere Break|Chimera Coin]] |
||
| − | !class=" |
+ | !class="b"|22 |
|[[Coeurl#Sphere Break|Coeurl Coin]] |
|[[Coeurl#Sphere Break|Coeurl Coin]] |
||
| − | !class=" |
+ | !class="b"|23 |
|[[Tomb#Sphere Break|Tomb Coin]] |
|[[Tomb#Sphere Break|Tomb Coin]] |
||
| − | !class=" |
+ | !class="b"|24 |
|[[Iron Giant (Final Fantasy X-2)#Sphere Break|Iron Giant Coin]] |
|[[Iron Giant (Final Fantasy X-2)#Sphere Break|Iron Giant Coin]] |
||
|- |
|- |
||
| − | !class=" |
+ | !class="b"|25 |
| − | |[[Kukulcan#Sphere Break|Kukulcan Coin]] |
+ | |[[Kukulcan (Final Fantasy X-2)#Sphere Break|Kukulcan Coin]] |
| − | !class=" |
+ | !class="b"|26 |
|[[Adamantoise (Final Fantasy X-2)#Sphere Break|Adamantoise Coin]] |
|[[Adamantoise (Final Fantasy X-2)#Sphere Break|Adamantoise Coin]] |
||
| − | !class=" |
+ | !class="b"|27 |
|[[Daeva#Sphere Break|Daeva Coin]] |
|[[Daeva#Sphere Break|Daeva Coin]] |
||
| − | !class=" |
+ | !class="b"|28 |
|[[Ochu#Sphere Break|Ochu Coin]] |
|[[Ochu#Sphere Break|Ochu Coin]] |
||
|- |
|- |
||
| − | !class=" |
+ | !class="b"|29 |
| − | |[[Bomb ( |
+ | |[[Bomb (creature)#Sphere Break|Bomb Coin]] |
| − | !class=" |
+ | !class="b"|30 |
|[[Magic Pot#Sphere Break|Magic Urn Coin]] |
|[[Magic Pot#Sphere Break|Magic Urn Coin]] |
||
| − | !class=" |
+ | !class="b"|31 |
|[[Cactuar (Final Fantasy X-2)#Sphere Break|Cactuar Coin]] |
|[[Cactuar (Final Fantasy X-2)#Sphere Break|Cactuar Coin]] |
||
| − | !class=" |
+ | !class="b"|32 |
| − | |[[Stalwart#Sphere Break|Stalwart Coin]] |
+ | |[[Stalwart (Final Fantasy X-2)#Sphere Break|Stalwart Coin]] |
|- |
|- |
||
| − | !class=" |
+ | !class="b"|33 |
|[[Fungus (Final Fantasy X)#Sphere Break|Fungus Coin]] |
|[[Fungus (Final Fantasy X)#Sphere Break|Fungus Coin]] |
||
| − | !class=" |
+ | !class="b"|34 |
|[[Pairika#Sphere Break|Pairika Coin]] |
|[[Pairika#Sphere Break|Pairika Coin]] |
||
| − | !class=" |
+ | !class="b"|35 |
|[[Tonberry#Sphere Break|Tonberry Coin]] |
|[[Tonberry#Sphere Break|Tonberry Coin]] |
||
| − | !class=" |
+ | !class="b"|36 |
| − | |[[Dragon ( |
+ | |[[Dragon (enemy)#Sphere Break|Dragon Coin]] |
|- |
|- |
||
| − | !class=" |
+ | !class="b"|37 |
| − | |[[Creeper#Sphere Break|Creeper Coin]] |
+ | |[[Creeper (Final Fantasy X-2)#Sphere Break|Creeper Coin]] |
| − | !class=" |
+ | !class="b"|38 |
|[[Arachnid (Final Fantasy X-2)#Sphere Break|Arachnid Coin]] |
|[[Arachnid (Final Fantasy X-2)#Sphere Break|Arachnid Coin]] |
||
| − | !class=" |
+ | !class="b"|39 |
|[[Piranha (Final Fantasy X)#Sphere Break|Piranha Coin]] |
|[[Piranha (Final Fantasy X)#Sphere Break|Piranha Coin]] |
||
| − | !class=" |
+ | !class="b"|40 |
|[[Sahagin (Final Fantasy X-2)#Sphere Break|Sahagin Coin]] |
|[[Sahagin (Final Fantasy X-2)#Sphere Break|Sahagin Coin]] |
||
|- |
|- |
||
| − | !class=" |
+ | !class="b"|41 |
|[[Haizhe#Sphere Break|Haizhe Coin]] |
|[[Haizhe#Sphere Break|Haizhe Coin]] |
||
| − | !class=" |
+ | !class="b"|42 |
|[[Dinictus#Sphere Break|Dinictus Coin]] |
|[[Dinictus#Sphere Break|Dinictus Coin]] |
||
| − | !class=" |
+ | !class="b"|43 |
|[[Tentacles (Final Fantasy X-2)#Sphere Break|Tentacles Coin]] |
|[[Tentacles (Final Fantasy X-2)#Sphere Break|Tentacles Coin]] |
||
| − | !class=" |
+ | !class="b"|44 |
|[[Ultima Weapon (Final Fantasy X-2)#Sphere Break|Ultima Weapon Coin]] |
|[[Ultima Weapon (Final Fantasy X-2)#Sphere Break|Ultima Weapon Coin]] |
||
|- |
|- |
||
| − | !class=" |
+ | !class="b"|45 |
|[[Omega Weapon (Final Fantasy X-2)#Sphere Break|Omega Weapon Coin]] |
|[[Omega Weapon (Final Fantasy X-2)#Sphere Break|Omega Weapon Coin]] |
||
| − | !class=" |
+ | !class="b"|46 |
|[[Eater (Final Fantasy X)#Sphere Break|Eater Coin]] |
|[[Eater (Final Fantasy X)#Sphere Break|Eater Coin]] |
||
| − | !class=" |
+ | !class="b"|47 |
|[[Hermit (Final Fantasy X)#Sphere Break|Hermit Coin]] |
|[[Hermit (Final Fantasy X)#Sphere Break|Hermit Coin]] |
||
| − | !class=" |
+ | !class="b"|48 |
|[[Evrae#Sphere Break|Evrae Coin]] |
|[[Evrae#Sphere Break|Evrae Coin]] |
||
|- |
|- |
||
| − | !class=" |
+ | !class="b"|49 |
|[[Gel#Sphere Break|Gel Coin]] |
|[[Gel#Sphere Break|Gel Coin]] |
||
| − | !class=" |
+ | !class="b"|50 |
|[[Azi Dahaka#Sphere Break|Azi Dahaka Coin]] |
|[[Azi Dahaka#Sphere Break|Azi Dahaka Coin]] |
||
| − | !class=" |
+ | !class="b"|51 |
|[[Chocobo (Final Fantasy X)#Sphere Break|Chocobo Coin]] |
|[[Chocobo (Final Fantasy X)#Sphere Break|Chocobo Coin]] |
||
| − | !class=" |
+ | !class="b"|52 |
|[[Jumbo Cactuar (Final Fantasy X-2)#Sphere Break|Jumbo Cactuar Coin]] |
|[[Jumbo Cactuar (Final Fantasy X-2)#Sphere Break|Jumbo Cactuar Coin]] |
||
|- |
|- |
||
| − | !class=" |
+ | !class="b"|53 |
|[[Precepts Guard#Sphere Break|Precepts Guard Coin]] |
|[[Precepts Guard#Sphere Break|Precepts Guard Coin]] |
||
| − | !class=" |
+ | !class="b"|54 |
|[[Georapella#Sphere Break|Georapella Coin]] |
|[[Georapella#Sphere Break|Georapella Coin]] |
||
| − | !class=" |
+ | !class="b"|55 |
|[[Angra Mainyu (Final Fantasy X-2)#Sphere Break|Angra Mainyu Coin]] |
|[[Angra Mainyu (Final Fantasy X-2)#Sphere Break|Angra Mainyu Coin]] |
||
| − | !class=" |
+ | !class="b"|56 |
|[[Seymour Guado#Sphere Break|Seymour Coin]] |
|[[Seymour Guado#Sphere Break|Seymour Coin]] |
||
|- |
|- |
||
| − | !class=" |
+ | !class="b"|57 |
| − | |[[Yuna#Sphere Break|Yuna Coin]] |
+ | |[[Yuna/Gameplay#Sphere Break|Yuna Coin]] |
| − | !class=" |
+ | !class="b"|58 |
| − | |[[Rikku#Sphere Break|Rikku Coin]] |
+ | |[[Rikku/Gameplay#Sphere Break|Rikku Coin]] |
| − | !class=" |
+ | !class="b"|59 |
| − | |[[Paine#Sphere Break|Paine Coin]] |
+ | |[[Paine/Gameplay#Sphere Break|Paine Coin]] |
| − | !class=" |
+ | !class="b"|60 |
| − | |[[Auron#Sphere Break|Auron Coin]] |
+ | |[[Auron/Gameplay#Sphere Break|Auron Coin]] |
|- |
|- |
||
| − | !class=" |
+ | !class="b"|61 |
| − | |[[Lulu#Sphere Break|Lulu Coin]] |
+ | |[[Lulu/Gameplay#Sphere Break|Lulu Coin]] |
| − | !class=" |
+ | !class="b"|62 |
| − | |[[Wakka#Sphere Break|Wakka Coin]] |
+ | |[[Wakka/Gameplay#Sphere Break|Wakka Coin]] |
| − | !class=" |
+ | !class="b"|63 |
| − | |[[Kimahri Ronso#Sphere Break|Kimahri Coin]] |
+ | |[[Kimahri Ronso/Gameplay#Sphere Break|Kimahri Coin]] |
| − | !class=" |
+ | !class="b"|64 |
| − | |[[Tidus#Sphere Break|Tidus Coin]] |
+ | |[[Tidus/Gameplay#Sphere Break|Tidus Coin]] |
|} |
|} |
||
| − | ==Musical |
+ | ==Musical themes== |
The game rounds are accompanied by the track "Sphere Hunter" from the game's soundtrack. |
The game rounds are accompanied by the track "Sphere Hunter" from the game's soundtrack. |
||
==Gallery== |
==Gallery== |
||
| + | <gallery> |
||
| − | {{Gallery |
||
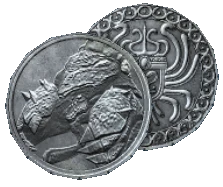
| − | + | Ffx2-coin-back.gif|Coin rear design (silver). |
|
| − | + | Ffx2-coin-backg.gif|Coin rear design (gold). |
|
| − | + | 102b-coins.jpg|Rear design concepts. |
|
| + | </gallery> |
||
| − | }} |
||
| − | |||
| − | ==Trivia== |
||
| − | *Coins #1 to #51 can be found in the archeology dig sites in [[Bikanel#The Desert|Bikanel Desert]], meaning that they were probably once used by an ancient civilization. |
||
| ⚫ | |||
| + | {{navbox setting X2}} |
||
| − | {{FFX-2}} |
||
| + | {{navbox minigames}} |
||
| − | {{Sidequests}} |
||
| − | [[Category:Final Fantasy X-2]] |
+ | [[Category:Minigames in Final Fantasy X-2]] |
| − | [[Category:Minigames]] |
||
Revision as of 12:06, 4 June 2020
Template:Sideicon

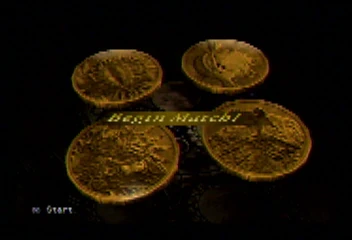
Game opening.
The probability you'll win is slim at best.
Shinra in the Sphere Break finals
Sphere Break is a newly established coin-game in Final Fantasy X-2. Funded by the entrepreneurial Al Bhed, Rin, the game was designed as a source of entertainment during blitzball's off-season.
The mechanics are purely mathematical, with the aim to create the most multiples of the "Core Number" by combining the number values of the 16 coins in play. To win, the player must meet a predetermined quota of coins used while staying within a set number of turns to use them in.
Playing the game

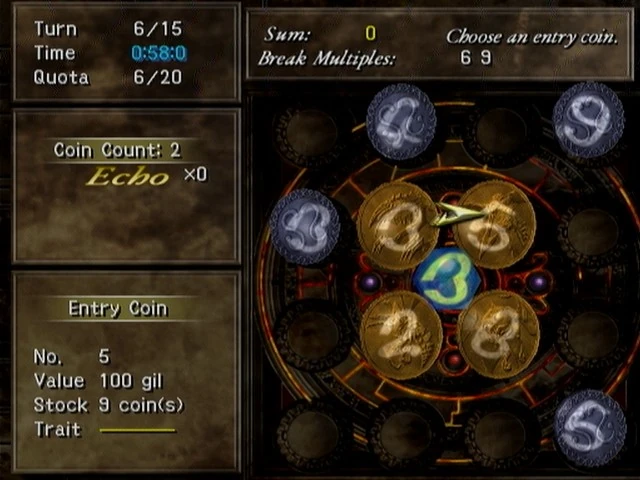
Game board: Core Sphere (light blue) surrounded by Entry Coins (gold) which are in turn surrounded by Border Coins (dark blue).
Setting up and how to play
The game takes place on a 4x4 board with a Core Sphere in the center whose number is called the Core Number that ranges from 1 to 9. The four fields around the Core Sphere are reserved for the Entry Coins. The Border Coins are the twelve outer fields.
Each coin is numbered from 1 to 9. The objective is to combine these numbers to achieve multiples of the Core Number.
During the game the following details will appear at the top of the screen:
- Sum: Shows the current combined sum of the coins selected.
- Break Multiples: Lists three multiples of the Core Number that the player must strive for.
At the start of each round one of the four Entry Coins must be selected first. The player is then free to select another coin from either the Entry or Border Coin fields. If the combined sum matches one of the Break Multiples, this is called a Core Break, which ends the round. If not, then the player may continue selecting coins until their combined sum equals one of the Break Multiples displayed.
Winning
To win the player must have used up a set quota of Border Coins within a set number of rounds. If the player reaches the quota before reaching the maximum number of rounds, the player wins. If they do not reach the quota, or if they run out of time, the player loses. In the case of a defeat, the player will lose their Entry Coins to the opponent.
In the HD Remaster version, winning 10 Sphere Break matches will unlock the "Sphere Breaker" trophy/achievement.
Types of coin
There are 64 coins available, each with a unique illustration etched on its surface portraying a fiend or character from Final Fantasy X or Final Fantasy X-2. Each coin possesses a value (1-9) that is used to determine its role in multiplication pairs while some also possess attributes to aid in meeting the game quota or to obtain items or additional coins from the opponent should the player win.
Entry Coins
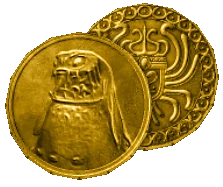
The four placements surrounding the Core Sphere are for the Entry Coins. Chosen and placed by the player, these coins will be taken by the opponent should the player lose. Colored gold, these coins are used in combination with the Border Coins to form multiples of the Core Sphere number.
Border Coins
The Border Coins are randomly chosen and placed along the outside border of twelve placement points. Colored blue, these coins are used in addition with the Entry Coins to form multiples of the Core Sphere. Unlike the Entry Coins, Border Coins disappear after being used while the remaining Border Coins' values are increased by one (any coins with values exceeding 9 will also be discarded or replaced after this increase).
Traits
Echoes
Echo traits allow the player to obtain bonus quota points. To initiate an Echo the player must not only select an Entry Coin with the trait, but also maintain a set play pattern.
- Coin Count Echo: The same number of coins must be used in successive rounds to achieve a Core Break (e.g. 3 coins were used in Round 1, 3 coins were used in Round 2, etc).
- Multiplier Echo: Core Breaks must be achieved using the same multiple value used in the previous round (e.g. if the Core Number was 7 in the previous round and the player achieved a Core Break of 14 (7x2), in the next round the player must achieve a Core Break of the Core Number x2).
Entry Coin traits
| Trait | Description |
|---|---|
| Coin Count Echo | Coin Count Echo becomes possible. |
| Coin Count: 2 | If this Coin is selected first, the effect of +X Coins and -X Coins will be doubled. |
| Coin | A Border Coin with the Coin trait appears. |
| Gil x2 | If this Coin is selected first, the effect of +X Gil and -X Gil will be doubled. |
| Item | A Border Coin with the Item trait appears. |
| Multiplier Echo | Multiplier Echo becomes possible. |
| Quota x2 | If this Coin is selected first, the Quota will be doubled depending on the amount of Border Coins used to make a Core Break. |
| Quota x3 | If this Coin is selected first, the Quota will be tripled depending on the amount of Border Coins used to make a Core Break. |
| Quota x4 | If this Coin is selected first, the Quota will be multiplied by four depending on the amount of Border Coins used to make a Core Break. |
| Quota x5 | If this Coin is selected first, the Quota will be multiplied by five depending on the amount of Border Coins used to make a Core Break. |
| Rare Coin | A Border Coin with the Rare Coin trait will appear. |
| Rare Item | A Border Coin with the Rare Item trait will appear. |
Border Coin traits
| Trait | Description |
|---|---|
| Item, Rare Item | Player obtains one item or one rare item. |
| Coin, Rare Coin | Player obtains one Coin or one rare Coin. |
| +X Coin | The number on the Entry Coin selected first is increased by 1-5. |
| -X Coin | The number on the Entry Coin selected first is decreased by 1-5. |
| +X Gil | The value in gil of the Entry Coin selected first is increased by 1-5. |
| -X Gil | The value in gil of the Entry Coin selected first is decreased by 1-5. |
Quests
Sphere Break Tournament
The Sphere Break Tournament is a tournament where the contestants challenge each other in a series of matches while following a set of special rules designed specifically for the tournament.
Sphere Break Elites
In the International and HD Remaster versions of Final Fantasy X-2, the player can challenge the strongest Sphere Break players. By completing the storyline of Varan first, the player can then challenge the elites in Luca, in the Aurochs' room. They each have a difficulty of seven stars and are hard to beat.
- Cursed Core Sphere (Varan)
- Turns: 30
- Quota: 500
- Time: 30 seconds
For defeating Varan, the player is rewarded with the Enterprise accessory. If they leave the room and reenter, or beat him twice in a row without leaving, a new challenger will appear next to Varan.
- Underground Core Sphere (Tonberry)
- Turns: 25
- Quota: 500
- Time: 20 seconds
If the player defeats Tonberry, they are given the Invincible accessory. After leaving the room and reentering, or beating him twice in a row without leaving, the final challenger will be there.
- Farplane Core Sphere (Haunt)
- Turns: 30
- Quota: 600
- Time: 20 seconds
Beating Haunt awards the player with the Ragnarok accessory.
It is best to collect these three accessories in chapter 3, as it is no longer possible in chapter 5 due to the door being locked by the woman with the dog by her side who challenges the player to a sphere break game. The player can still earn the accessories via the Farplane Cup, but it will be hard even with a level 99 party.
Coins
Coins #52 to #64 are rare and can only be obtained from other players either as a gift or from using the Rare Coin trait during a game round.
Musical themes
The game rounds are accompanied by the track "Sphere Hunter" from the game's soundtrack.
Gallery
")
")
")