m (→Any difficulty) |
|||
| Line 203: | Line 203: | ||
|image = Ultimate Weapon from FFVII Remake.png |
|image = Ultimate Weapon from FFVII Remake.png |
||
}} |
}} |
||
| − | This challenge is only unlocked by completing all Corneo Colosseum challenges, all Shinra |
+ | This challenge is only unlocked by completing all Corneo Colosseum challenges, all Shinra Combat Simulator challenges, and all of Chadley's VR missions against summons, all in Hard Mode. |
{{clear}} |
{{clear}} |
||
Revision as of 00:33, 31 May 2020
Template:Sideicon

Oh, shut up and help me remodel the Shinra Combat Simulator page!
The Shinra Combat Simulator is a battle arena in Final Fantasy VII Remake. It is a simulated arena in which participants fight a number of battles in a virtual reality setting.
The player first uses the Shinra Combat Simulator in "A Helping Hand" during Chapter 16, "The Belly of the Beast". There, the simulator is located on the 63rd floor. It can later be used at the end of "A Way Out" in Chapter 17, "Deliverance from Chaos", by using taking the path right to reach it instead of taking a path ahead to the tunnel to proceed with the story.
A portable version of the combat simulator is used by Chadley for summon matches during Battle Intel quests.
Challenges
Items cannot be used in any challenge. With the exception of "Three-Person Team vs. Mayor Is Best", all challenges last five rounds. Upon repeating challenges, a "Grab Bag" prize is awarded instead of the original prize.
Any difficulty
These challenges can be faced in Chapter 16, and later Chapter 17 with Chapter Select. Aerith vs. SOLDIER Trainees can only be done in Chapter 17 with Chapter Select.
| Challenge | Description | Rank | Gil | Enemy level | Reward |
|---|---|---|---|---|---|
| Three-Person Team vs. Mayor Is Best | A three-person team battle in which you pick your team. Show who's really the best by taking on powerful foes handpicked by a top Shinra executive who is also Mayor Domino's secret ally. | 3 | 0 | 31 | |
| Cloud vs. SOLDIER Trainees | A series of solo battles for Cloud. Take on standard training exercises for SOLDIER operators. | 4 | 400 | 35 | Cog Bangle |
| Barret vs. SOLDIER Trainees | A series of solo battles for Barret. Take on standard training exercises for SOLDIER operators. | 4 | 400 | 35 | Supreme Bracer |
| Tifa vs. SOLDIER Trainees | A series of solo battles for Tifa. Take on standard training exercises for SOLDIER operators. | 4 | 400 | 35 | Rune Armlet |
| Aerith vs. SOLDIER Trainees | A series of solo battles for Aerith. Take on standard training exercises for SOLDIER operators. | 4 | 400 | 35 | Geometric Bracelet |
| Two-Person Team vs. High Flyers | A series of two-person team battles in which you pick your team. Fight practice bouts against airborne helitroopers and grenadier long-range specialists. | 4 | 400 | 35 | |
| Three-Person Team vs. Team Ragbag | A series of three-person team battles in which you pick your team. Fight in war-game battles designed by Shinra to simulate a Wutai invasion. | 4 | 400 | 35 |
Three-Person Team vs. Mayor Is Best
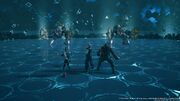
This challenge is required for the quest "A Helping Hand". It is straightforward and comprises only one round against two Cutters. Using ![]() Lightning Materia is best, either paired with
Lightning Materia is best, either paired with ![]() Elemental Materia or used for casting spells. Destroying the left and right arm and cripplnig them is an effective way to pressure and stagger them, leaving them open to more powerful attacks. Focus one first before destroying the next.
Elemental Materia or used for casting spells. Destroying the left and right arm and cripplnig them is an effective way to pressure and stagger them, leaving them open to more powerful attacks. Focus one first before destroying the next.
vs. SOLDIER Trainees
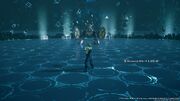
The vs. SOLDIER Trainees challenges are solo challenges that reward high level armor pieces. Rounds are all against single durable enemies, meaning most battles are endurance challenges. With the exception of the final round, all enemies are weak to ![]() Fire, meaning the
Fire, meaning the ![]() Fire Materia is best to exploit it. Defensive materia such as
Fire Materia is best to exploit it. Defensive materia such as ![]() Steadfast Block Materia and
Steadfast Block Materia and ![]() Barrier Materia are also especially helpful for each battle, while
Barrier Materia are also especially helpful for each battle, while ![]() Deadly Dodge Materia can be especially useful with how often characters will be dodge rolling.
Deadly Dodge Materia can be especially useful with how often characters will be dodge rolling. ![]() Healing Materia should be equipped, and casting Regen at the start of each fight can be effective, as can casting Haste from
Healing Materia should be equipped, and casting Regen at the start of each fight can be effective, as can casting Haste from ![]() Time Materia.
Time Materia.
The different characters will require slightly different tactics. Cloud can remain in Punisher Mode and counterattack many of the enemies. He can benefit greatly from elemental materia, and should use Infinity's End as soon as an enemy is staggered. Barret can use Steelskin at the start of every battle and fire his attacks from range, taking advantage of Overcharge often. Tifa can use abilities such as Starshower and Focused Strike to build enemies' stagger gauges while remaining invulnerable, and should take advantage of Deadly Dodge often to hit enemies as soon as they are vulnerable, as well as her ability to increase stagger bonus damage with her Unbridled Strength techniques. Aerith can remain at a distance from enemies while firing attacks to build up her ATB. She should use Arcane Ward while hurling powerful spells, as well as using Ray of Judgment, to deal heavy damage.
For the first round, a Sahagin Prince is fought. Dodging its Salientian Curse is crucial to avoid ![]() Toad, and can be done by rolling away from the smoke appearing on the ground before its attacks land. Its Jump attack can be dodged by rolling just before it lands. Aside from this, use abilities and attacks while maintaining a fair distance from it to stagger it, and then lay into it. The second round is fought against a Phantom, which is capable of phasing in and out of battle and returning to deal physical damage. Dodge its attacks as it phases back in, focusing on building its stagger gauge. When it uses its Essence Drain attack, maintain distance and use the opportunity to fire ranged abilities and spells at it.
Toad, and can be done by rolling away from the smoke appearing on the ground before its attacks land. Its Jump attack can be dodged by rolling just before it lands. Aside from this, use abilities and attacks while maintaining a fair distance from it to stagger it, and then lay into it. The second round is fought against a Phantom, which is capable of phasing in and out of battle and returning to deal physical damage. Dodge its attacks as it phases back in, focusing on building its stagger gauge. When it uses its Essence Drain attack, maintain distance and use the opportunity to fire ranged abilities and spells at it.
The third round is fought against a Grungy Bandit. This enemy has powerful attacks and can bind a character, but all of its attacks are telegraphed by running forward. As it runs forward, dodge out of the way, as this will pressure it and leave it vulnerable, then lay into it and stagger it. The fourth round against the 3-C SOLDIER Operator requires similar tactics; guard against or dodge from its attacks, and then lay into it when it is vulnerable to destroy it.
The final round is fought against a Cutter, which requires different strategy. Crippling its left and right arm is best to leave it vulnerable to being staggered, then laying into it with spells and abilities is ideal. Its Buzzsaw Blitz attack should be avoided by dodging just before the attack lands.
Two-Person Team vs. High Flyers
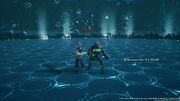
Depending on the chapter, the two-person team can be any combination of two characters, though it is best to have one melee character and one ranged character. The enemies have a variety of weaknesses, though spells from lightning materia may be ideal as lightning spells are guaranteed to hit. Healing spells are also ideal.
The first round is fought against bugaboos, which can be finished off quickly using attacks that deal area-of-effect damage, such as Cloud's Blade Burst or Tifa's Divekick, as well as Deadly Dodge. For the second round, two Slug-Rays and two byobapolises are fought. The Slug-Rays are less durable, but their Luminous Blast makes them a bigger threat as it can stun characters. Destroy the Slug-Rays first with abilities and spells, and then focus on the byobapolises next with the same tactics.
For the third round, two terpsicolts and four Monodrives are fought. Monodrives can be dispatched more quickly with abilities, allowing the terpsicolts to be fought next. Against them, use attacks and abilities until they begin spinning, at which point, use spells to finish them off. The fourth round as against two elite helitroopers, against which spells are best to destroy them quickly, and aerial attacks are also helpful.
The final round is fought against a Rust Drake. This enemy absorbs spells when it is engulfed in darkness, and uses gravity-based attacks to deal significant HP damage. Aerial and ranged attacks are best to push it into stagger, at which point it is vulnerable to spells and abilities to finish it off.
Three-Person Team vs. Team Ragbag
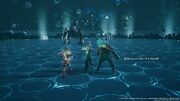
This challenge can be completed with any combination of characters. Any team combination is viable, though a team composition should be balanced. It is important that a team have be capable of casting powerful magic spells with at least one character, using powerful physical abilities on demand, and healing or buffing the party. Many of the enemies are weak to ![]() Ice, while others are weak to
Ice, while others are weak to ![]() Lightning, meaning that equipping both ice and lightning materia is helpful.
Lightning, meaning that equipping both ice and lightning materia is helpful.
Characters in a chosen team should play to their strengths. Cloud is suited well to dealing raw physical and magic damage for bursting down enemies, and if used, can fill either gap in a team composition, keeping in mind his mobility is fairly limited. Tifa has very high mobility and is well-positioned to build an enemy's stagger gauge with her combos, and if used should focus on building stagger bonus damage to set up powerful spells from herself or her teammates. Barret is best suited to protect the party with Lifesaver, and either use physical abilities from range with a gun equipped, or deal more considerable damage up close with a melee weapon, keeping in mind his mobility will hinder him on some rounds. Aerith can make effective use of Arcane Ward to allow the party to burst down enemies while in stagger, though her durability is low and she will need other characters to draw fire away from her.
The first round is fought against an Abzu shoat, which can be defeated quickly with physical abilities. The second round is more challenging, and is fought against two varghidpolises and one trypapolis. Avoiding the Screech attack is important, as this attack stuns a party member. Beyond this, finishing off the smaller varghidpolises first makes sense, allowing the trypapolis to then be defeated as the last one standing. This enemy is durable, but can be burst down with ice spells.
The third round is fought against a hellhound and two bloodhounds. As before, the smaller bloodhounds should be defeated first with physical abilities; these are very mobile enemies, meaning that either Tifa should be used for her own mobility, or Barret's ranged abilities can instead be relied on. With the hellhound standing, ice spells should be used to pressure it and build its stagger gauge, at which point it can be burst down with spells and abilities.
The fourth round is fought against two ringmaws and a Smogger. The ringmaws should be taken down with physical abilities, and the Smogger can be defeated with lightning spells. The Smogger's silencing attack is crucial to avoid in order to achieve this, and though its Haywire Haze unleashes strong attacks on all party members, these attacks are all telegraphed and can be avoided. During Haywire Haze, switch to a character not presently attacked to take advantage of its pressured state and stagger it, then use lightning spells to destroy it.
The final round is fought against a Sweeper Prototype and a Blast-Ray, and lightning spells are ideal against both. The Blast-Ray can be focused down with physical attacks until it is staggered, though it will then push both party members away, and should be finished off with a spell or with ranged abilities. The Sweeper Prototype can likewise be destroyed with spells, by engaging it with one melee character, then using spells from another to destroy it.
Hard mode only
The final challenge can only be faced after completing Battle Intel, and beating all Corneo Colosseum and Shinra Combat Simulator challenges.
| Challenge | Description | Rank | Gil | Enemy level | Reward |
|---|---|---|---|---|---|
| Cloud vs. 3-C SOLDIER Candidates | A series of solo battles for Cloud. Take on training exercises designed for operators vying for promotion to SOLDIER: Third Class. | 5 | 500 | 50 | The Art of Swordplay Vol. XIII |
| Barret vs. 3-C SOLDIER Candidates | A series of solo battles for Barret. Take on training exercises designed for operators vying for promotion to SOLDIER: Third Class. | 5 | 500 | 50 | Sharpshooter's Companion Vol. XIII |
| Tifa vs. 3-C SOLDIER Candidates | A series of solo battles for Tifa. Take on training exercises designed for operators vying for promotion to SOLDIER: Third Class. | 5 | 500 | 50 | Way of the Fist Vol. XIII |
| Aerith vs. 3-C SOLDIER Candidates | A series of solo battles for Aerith. Take on training exercises designed for operators vying for promotion to SOLDIER: Third Class. | 5 | 500 | 50 | Telluric Scriptures Vol. XI |
| Two-Person Team vs. Dynamic Duos | A series of two-person team battles in which you pick your team. Take on training exercises designed for 3-C SOLDIER operators. | 5 | 500 | 50 | |
| Three-Person Team vs. Monsters of Legend | A series of three-person team battles in which you pick your team. Take on monsters of legend that have been recreated by analyzing ancient texts. | 6 | 600 | 50 | |
| Three-Person Team vs. Top Secrets | 7 | 700 | 50 | Götterdämmerung |
Three-Person Team vs. Monsters of Legend
| {{{type}}}: That's the Smell | |
|---|---|
| Defeat a malboro in "Three-Person Team vs. Monsters of Legend". | 
|
Three-Person Team vs. Top Secrets
| {{{type}}}: Ultimate Weapon | |
|---|---|
| Defeat the Pride and Joy Prototype in "Three-Person Team vs. Top Secrets". | 
|
This challenge is only unlocked by completing all Corneo Colosseum challenges, all Shinra Combat Simulator challenges, and all of Chadley's VR missions against summons, all in Hard Mode.
Grab Bag
After completing a challenge, repeating it will offer a "Grab Bag" as a reward. This gives a random set of rewards dependent on the challenge.
| Rank | 50% | 30% | 15% | 5% |
|---|---|---|---|---|
| Rank 3 | 1000 gil | Hi-Potion x3 Orb of Gravity x1 Phoenix Down x1 |
Mega-Potion x1 Remedy x1 Celeris x1 |
Mega-Potion x2 Molotov Cocktail x1 Ether x1 |
| Rank 4 | 2000 gil | Hi-Potion x2 Orb of Gravity x1 Celeris x1 |
Mega-Potion x3 Remedy x1 Ether x1 |
Mega-Potion x4 Big Bomber x1 Turbo Ether x1 |
| Rank 5 Rank 6 Rank 7 |
2500 gil | Mega-Potion x3 Remedy x1 Ether x1 |
Mega-Potion x4 Big Bomber x1 Turbo Ether x1 |
Elixir x1 |


