(infobox add) |
Intangir Bot (talk | contribs) m (Bot: Automated text replacement (-Jessie (Final Fantasy VII) +Jessie Rasberry)) |
||
| (24 intermediate revisions by 5 users not shown) | |||
| Line 1: | Line 1: | ||
| − | {{sideicon|FFVII}} |
+ | {{sideicon|prime=FFVII|FFBE}} |
{{infobox location |
{{infobox location |
||
|name=Sector 4 |
|name=Sector 4 |
||
|release=FFVII |
|release=FFVII |
||
| − | |japanese= |
+ | |japanese=四番街 |
| − | |romaji= |
+ | |romaji=Yonban-gai |
| − | |lit= |
+ | |lit=District 4 |
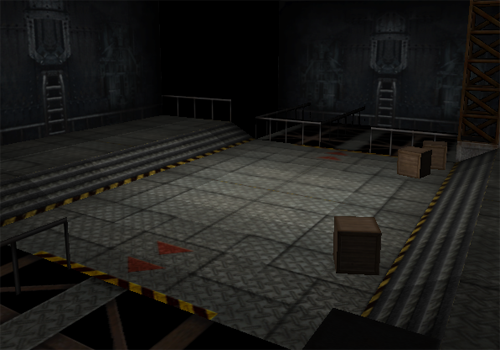
|image=Midgar underground.png |
|image=Midgar underground.png |
||
|type=City sector |
|type=City sector |
||
|region=[[Midgar]] |
|region=[[Midgar]] |
||
|affiliation=[[Shinra Electric Power Company]] |
|affiliation=[[Shinra Electric Power Company]] |
||
| − | |areas=*[[#Winding |
+ | |areas=*[[#Winding tunnels|Winding tunnels]] |
*[[#Lower Sector 4 Plate|Lower Sector 4 Plate]] |
*[[#Lower Sector 4 Plate|Lower Sector 4 Plate]] |
||
|residents= |
|residents= |
||
| − | |items=*[[ |
+ | |items=*[[Ether (Final Fantasy VII)|Ether]] |
| − | *[[ |
+ | *[[Potion (Final Fantasy VII)|Potion]] |
| ⚫ | |||
|enemies= |
|enemies= |
||
*[[Chuse Tank]] |
*[[Chuse Tank]] |
||
| Line 20: | Line 21: | ||
*[[Rocket Launcher (Final Fantasy VII)|Rocket Launcher]] |
*[[Rocket Launcher (Final Fantasy VII)|Rocket Launcher]] |
||
*[[Special Combatant]] |
*[[Special Combatant]] |
||
| − | |quests=*[[ |
+ | |quests=*[[To the No. 5 Reactor]] |
}} |
}} |
||
'''Sector 4''' is a location on the [[Gaia (Final Fantasy VII)|Planet]] in the ''[[Compilation of Final Fantasy VII]]''. It is one of the eight sectors in [[Midgar]], and is visited briefly by the party during the events of ''[[Final Fantasy VII]]''. The locations visited in Sector 4 are [[Unrevisitable locations|unrevisitable]] and cannot be re-explored once the story has progressed beyond them. |
'''Sector 4''' is a location on the [[Gaia (Final Fantasy VII)|Planet]] in the ''[[Compilation of Final Fantasy VII]]''. It is one of the eight sectors in [[Midgar]], and is visited briefly by the party during the events of ''[[Final Fantasy VII]]''. The locations visited in Sector 4 are [[Unrevisitable locations|unrevisitable]] and cannot be re-explored once the story has progressed beyond them. |
||
| Line 26: | Line 27: | ||
==Story== |
==Story== |
||
{{spoiler}} |
{{spoiler}} |
||
| − | [[File:Midgar underground2.png|thumb|left|Underground Sector 4.]] |
+ | [[File:Midgar underground2.png|thumb|left|Underground Sector 4 ([[#Exit|exit room]]).]] |
| − | After the success of the [[Sector 1 Reactor]] bombing mission, [[AVALANCHE]] plan another mission on the [[Sector 5 Reactor]]. In the early hours of the morning after the first mission, they board a train for the Sector 4 Station. The train uses an ID scan system, making the fake IDs made by [[Jessie |
+ | After the success of the [[Sector 1 Reactor]] bombing mission, [[Avalanche (group)|AVALANCHE]] plan another mission on the [[Sector 5 Reactor]]. In the early hours of the morning after the first mission, they board a train for the Sector 4 Station. The train uses an ID scan system, making the fake IDs made by [[Jessie Rasberry|Jessie]] ineffective, and therefore the party plan to jump off the moving train into the train tunnel. |
| − | Unauthorized personnel are discovered on board prior to when the check was meant to happen due to modifications to the ID cards made by Jessie, meaning the party has to move down the train to the end cart before the lockdown. While [[Cloud Strife|Cloud]]'s party jumps off the train, [[Biggs |
+ | Unauthorized personnel are discovered on board prior to when the check was meant to happen due to modifications to the ID cards made by Jessie, meaning the party has to move down the train to the end cart before the lockdown. While [[Cloud Strife|Cloud]]'s party jumps off the train, [[Biggs (Final Fantasy VII)|Biggs]], [[Wedge (Final Fantasy VII)|Wedge]], and Jessie stay on board in disguises. |
After moving down the railway, Cloud's party come to [[Shinra Electric Power Company|Shinra's]] security sensors and have to look for another way. The party crawl through a duct into the Lower Sector 4 Plate. As Cloud's party move through the plate, they find the rest of AVALANCHE have made it there safely. The others withdraw back to [[Sector 7]] as Cloud and his party enter the Sector 5 Reactor. |
After moving down the railway, Cloud's party come to [[Shinra Electric Power Company|Shinra's]] security sensors and have to look for another way. The party crawl through a duct into the Lower Sector 4 Plate. As Cloud's party move through the plate, they find the rest of AVALANCHE have made it there safely. The others withdraw back to [[Sector 7]] as Cloud and his party enter the Sector 5 Reactor. |
||
{{Endspoiler}} |
{{Endspoiler}} |
||
| − | == |
+ | ==Geography== |
| − | ===Winding |
+ | ===Winding tunnels=== |
| + | The winding tunnels comprise a series of railroad tunnels visited by AVALANCHE after getting off the [[Train (Final Fantasy VII)|train]] to the Sector 5 Reactor. The tunnels comprise multiple dimly-lit identical-looking {{A|Tunnels|tunnels}}{{A|Tunnel 1|}}{{A|Tunnel 2|}}{{A|Tunnel 3|}}{{A|Tunnel 4|}}{{A|Tunnel 5|}}{{A|Tunnel 6|}} (totaling six screens when traversed by the player) with rail tracks on either side. The southern-most tunnel (Tunnel 1), leads to the [[#Danger area|danger area]], which is patrolled by Shinra guards, while the northern-most tunnel (Tunnel 6) leads to the [[#security sensors|security sensors]], which are impassable by foot. |
||
| ⚫ | |||
| − | ;{{A|Tunnels}}{{A|Tunnel 1|}}{{A|Tunnel 2|}}{{A|Tunnel 3|}}{{A|Tunnel 4|}}{{A|Tunnel 5|}}{{A|Tunnel 6|}} |
||
| − | Multiple areas that look the same, there are six screens in total. the screen the player jumps off at depends on the point the player jumps off the [[Train (Final Fantasy VII)|train to Sector 4]]. Timing out in Car #1 has the player jump off at Tunnel 2, in Car #2 at Tunnel 3, in Car #3 at Tunnel 4, in Car #4 at Tunnel 5, and making it to the end leaves the player at Tunnel 6. |
||
| + | At the southern end of the tunnel is the {{A|Danger area|danger area}}. An open door is located here, guarded by Shinra security guards, alongside the rail tunnel. At the northern end are the {{A|Security sensors|security sensors}}, which block the rail travel forward towards Sector 5. Adjacent to the sensors is the [[#First duct|first duct]], which leads to the [[#Lower Sector 4 Plate|Lower Sector 4 Plate]]. |
||
| − | The southern most tunnel, Tunnel 1, leads to the [[#Danger Area|danger area]]. The northern most tunnel, Tunnel 6, leads to the [[#Security Sensors|security sensors]]. |
||
| ⚫ | |||
| − | ;{{A|Security Sensors}} |
||
| ⚫ | |||
| − | North end of the tunnels, blocked by Shinra's security sensors. Exit through [[#First Duct|first duct]] to enter the Lower Sector 4 Plate. |
||
| ⚫ | |||
| − | |||
| ⚫ | |||
| ⚫ | |||
| ⚫ | |||
| − | ;{{A|Danger Area}} |
||
| − | South end of the tunnels. Shinra security guards are here. Choosing to stay will lead to an encounter against three [[Special Combatant]]s, choosing to leave will move the player onto the next screen. This can be repeated indefinitely. |
||
===Lower Sector 4 Plate=== |
===Lower Sector 4 Plate=== |
||
| + | The Lower Sector 4 Plate is a series of winding ducts, ladders, and tiered platforms supported by steel beams, located underneath Midgar's Sector 4 Plate. This area is traversed by AVALANCHE in order to reach the nearby Sector 5 Reactor. The area is dimly lit and made mostly of construction material. |
||
| − | ;{{A|First Duct}} |
||
| − | Moving through the duct takes the player to the [[#Ladder|ladder]] room. There is an [[List of Final Fantasy VII items#Ether|Ether]] on the floor. |
||
| + | Lower Sector 4 Plate is reached through the {{A|First duct|first duct}}, entered through the [[#Security sensors|security sensors]] in the [[#Winding tunnels|winding tunnels]]. This leads to the {{A|Ladder|ladder room}}, consisting only of a platform to another ladder which itself leads down into the [[#Big room|big room]] of the Lower Sector 4 Plate. |
||
| ⚫ | |||
| − | ;{{A|Ladder}} |
||
| − | Moving down the ladder takes the player to the [[#Big Room|big room]]. |
||
| + | The {{A|Big room|big room}}, entered through a ladder on the right, is built of tiered platforms and contains a few ladders to other rooms. It is entered through a ladder on the right. The ladder in the middle of this room leads to the {{A|Crawl duct|crawl duct}}, a narrow duct which itself leads to the [[#Small room|small room]]. The ladder on the far left-hand side of the big room leads directly to the small room. |
||
| − | ;{{A|Big Room}} |
||
| − | Originally entered by going down the ladder from the [[#Ladder|ladder]] room. Ladder in the middle of the room leads to the [[#Crawl duct|crawl duct]] which leads to [[#Small room|small room]]. The ladder on the right also leads to small room, and Wedge is standing by it. Wedge tells the player that the reactor is up the ladder he is standing by. |
||
| + | The {{A|Small room|small room}} is a narrower metal room with rusted walls, entered through the [[#Crawl duct|crawl duct]] at the back or through a ladder on the right from the [[#Big room|big room]]. A ladder on the left-hand side of this room leads to the [[#Exit|exit]]. |
||
| ⚫ | |||
| − | ;{{A|Small Room}} |
||
| − | Connected to the [[#Big Room|big room]] via a [[#Crawl Duct|crawl duct]] at the top of the screen. Also connected to the big room via a ladder in the bottom-right. Also connected to the [[#Exit|exit]] by going down a ladder on the left. A [[List of Final Fantasy VII items#Potion|Potion]] is across from Jessie in the top-right of the screen. Jessie tells the player that the ID scan problem was her fault as she modified Cloud's ID. |
||
| + | The {{A|Exit|exit}} room is a set of wooden and metal bridges connecting platforms. A duct leads to the Sector 5 Reactor, and a [[save point]] is located on the right-hand side. |
||
| − | ;{{A|Crawl Duct}} |
||
| − | Connects the [[#Big Room|big room]] and the [[#Small Room|small room]]. |
||
| + | <gallery> |
||
| − | ;{{A|Exit}} |
||
| ⚫ | |||
| − | Connected to the [[#Small Room|small room]] via a ladder. There is a ladder to climb up through a vent and into the Sector 5 Reactor. Further passed the ladder is a [[List of Final Fantasy VII items#Tent|Tent]] item and a [[save point]]. Biggs is by the ladder. Biggs tells the player that him and his party will withdraw to the hideout. |
||
| ⚫ | |||
| ⚫ | |||
| ⚫ | |||
| + | </gallery> |
||
| − | == |
+ | ==Gameplay== |
| + | ===Encounters=== |
||
| − | ===Path to Sector 5 Reactor=== |
||
| + | {{multiple image |
||
| − | Sector 4 is only visited once after getting off the train to sector 4. The only goal here is to pass through the sector and reach the next reactor. |
||
| + | |align = right |
||
| + | |direction = vertical |
||
| + | |image1 = Battlebg-ffvii-tunnel-s4.png |
||
| − | ==Enemies== |
||
| + | |image2 = Battlebg-ffvii-s4corridor.png |
||
| − | ===Sector 4 Train Tunnel (All screens)=== |
||
| − | + | |image3 = Battlebg-ffvii-s4gantries.png |
|
| + | |||
| + | |footer = Battle backgrounds for tunnels (top), Lower Sector 4 Plate ducts (middle), and the Lower Sector 4 Plate rooms (bottom). |
||
| + | }} |
||
| + | {|class="article-table FFVII" |
||
| + | |-class="a" |
||
| + | !Encounters |
||
| + | !Areas |
||
| + | |- |
||
| + | | |
||
*[[Grashtrike (Final Fantasy VII)|Grashtrike]] x3 |
*[[Grashtrike (Final Fantasy VII)|Grashtrike]] x3 |
||
*[[Grashtrike (Final Fantasy VII)|Grashtrike]] x4 |
*[[Grashtrike (Final Fantasy VII)|Grashtrike]] x4 |
||
*[[Grashtrike (Final Fantasy VII)|Grashtrike]] x4 (Back attack) |
*[[Grashtrike (Final Fantasy VII)|Grashtrike]] x4 (Back attack) |
||
*[[Rocket Launcher (Final Fantasy VII)|Rocket Launcher]] x4 |
*[[Rocket Launcher (Final Fantasy VII)|Rocket Launcher]] x4 |
||
| + | |Winding tunnels |
||
| ⚫ | |||
| + | |- |
||
| − | |||
| + | | |
||
| ⚫ | |||
| ⚫ | |||
| − | [[File:Battlebg-ffvii-s4corridor.png|right|thumb|150px|Battle background.]] |
||
| + | |Winding tunnel - Danger area |
||
| + | |- |
||
| + | | |
||
*[[Chuse Tank]] x2, [[Grashtrike (Final Fantasy VII)|Grashtrike]] x2 |
*[[Chuse Tank]] x2, [[Grashtrike (Final Fantasy VII)|Grashtrike]] x2 |
||
*[[Chuse Tank]] x3 |
*[[Chuse Tank]] x3 |
||
*[[Chuse Tank]] x3, [[Grashtrike (Final Fantasy VII)|Grashtrike]] x2 |
*[[Chuse Tank]] x3, [[Grashtrike (Final Fantasy VII)|Grashtrike]] x2 |
||
*[[Grashtrike (Final Fantasy VII)|Grashtrike]] x4 (Ambush) |
*[[Grashtrike (Final Fantasy VII)|Grashtrike]] x4 (Ambush) |
||
| ⚫ | |||
| − | |||
| + | |- |
||
| ⚫ | |||
| + | | |
||
| − | [[File:Battlebg-ffvii-s4gantries.png|right|thumb|150px|Battle background.]] |
||
*[[Blugu]] x2, [[Rocket Launcher (Final Fantasy VII)|Rocket Launcher]] |
*[[Blugu]] x2, [[Rocket Launcher (Final Fantasy VII)|Rocket Launcher]] |
||
*[[Blugu]] x2, [[Rocket Launcher (Final Fantasy VII)|Rocket Launcher]] x2 |
*[[Blugu]] x2, [[Rocket Launcher (Final Fantasy VII)|Rocket Launcher]] x2 |
||
*[[Blugu]] x3, [[Chuse Tank]] (Back attack) |
*[[Blugu]] x3, [[Chuse Tank]] (Back attack) |
||
*[[Rocket Launcher (Final Fantasy VII)|Rocket Launcher]] x3 |
*[[Rocket Launcher (Final Fantasy VII)|Rocket Launcher]] x3 |
||
| ⚫ | |||
| + | |} |
||
| + | In the [[#Winding tunnels|winding tunnels]], the most commonly fought enemies are [[Grashtrike (Final Fantasy VII)|Grashtrikes]], in groups of three to four. These enemies deal little damage of their own, and can be defeated in one or two hits. They can be fought to obtain [[Spider Web (Final Fantasy VII)|Spider Webs]], however. [[Rocket Launcher (Final Fantasy VII)|Rocket Launcher]]s can also be fought here, and their main attack will do a decent amount of damage to the character with the lowest HP. These enemies attack infrequently, and so they should be focused down to prevent them from firing. |
||
| + | The [[Special Combatant]]s, fought in the [[#Danger area|danger area]], deal more damage and have higher HP than either Grashtrikes or Rocket Launchers. As they are completely optional to fight, this means these enemies are best off avoided. |
||
| ⚫ | |||
| ⚫ | |||
| − | {{sideicon|FFBE}} |
||
| ⚫ | |||
| ⚫ | |||
| ⚫ | |||
| ⚫ | |||
| + | In the Lower Sector 4 Plate, the player may also encounter [[Chuse Tank]]s and [[Blugu]]s in addition to Grashtrikes and Rocket Launchers. Chuse Tanks have fairly low HP but can deal considerable damage, meaning they should be focused first as they can normally be defeated in one hit. Blugus have much higher HP, but their damage is minimal. They should be prioritized last, and though weak to [[Lightning (Final Fantasy VII element)|Lightning]] and thus vulnerable to [[Bolt (Final Fantasy VII)|Bolt]], it is better to save MP for healing. |
||
| ⚫ | |||
| ⚫ | |||
| ⚫ | |||
| ⚫ | |||
| ⚫ | |||
| ⚫ | |||
| ⚫ | |||
| − | == |
+ | ===Items=== |
| + | {|class="article-table FFVII" |
||
| ⚫ | |||
| + | |-class="a" |
||
| + | !Items |
||
| + | !Areas |
||
| + | |- |
||
| + | |[[Ether (Final Fantasy VII)|Ether]] |
||
| + | |Lower Sector 4 Plate - First duct |
||
| + | |- |
||
| + | |[[Potion (Final Fantasy VII)|Potion]] |
||
| + | |Lower Sector 4 Plate - Small room |
||
| + | |- |
||
| + | |[[Tent (Final Fantasy VII)|Tent]] |
||
| + | |Lower Sector 4 Plate - Exit |
||
| + | |} |
||
| + | An [[Ether (Final Fantasy VII)|Ether]] is found on the floor of the [[#First duct|first duct]]. In the [[#Small room|small room]], a [[Potion (Final Fantasy VII)|Potion]] can be obtained, just to the left of Jessie. Finally, a [[Tent (Final Fantasy VII)|Tent]] is located in the [[#Exit|exit room]], adjacent to the save point. |
||
| + | |||
| + | ===Interactions=== |
||
| + | In the [[#Big room|big room]] on the far left-hand side, the player can talk to Wedge, who will tell Cloud that the reactor is found ahead past the ladder he is standing by. In the [[#Small room|small room]], Jessie apologizes to Cloud, and tells him that the ID scan error was her fault as she adjusting Cloud's ID card. Biggs can be talked to in the [[#Exit|exit]], and will tell them that he, Wedge, and Jessie will pull out and return to the hideout. After talking to him, he will then leave. |
||
| + | |||
| + | ===Quests=== |
||
| + | *[[To the No. 5 Reactor]] |
||
| + | Sector 4 is visited during "To the No. 5 Reactor", after Cloud, Barret, and Tifa get off the train from Sector 7 to Sector 5, and the group land in the [[#Winding tunnel|winding tunnel]]. They must then make their way to the No. 5 Reactor. |
||
| + | |||
| + | ==Behind the scenes== |
||
| ⚫ | In the [[PlayStation]] translation of ''Final Fantasy VII'', the lines Jessie says are slightly different from what she says in the [[Microsoft Windows|PC]] and later versions. In the former, she states she made Cloud's ID card "special", while the latter translations clarify that she modified his card. |
||
{|class="full-width" |
{|class="full-width" |
||
|-style="font-style:italic" |
|-style="font-style:italic" |
||
| Line 123: | Line 147: | ||
| —Jessie in the PC version |
| —Jessie in the PC version |
||
|} |
|} |
||
| + | |||
| − | + | In the scene showing Cloud and Zack right outside Midgar in ''Final Fantasy VII'', the Midgar upper plate for Sector 4 is absent. While ''[[Crisis Core -Final Fantasy VII-]]'' states the Sector 4 plate is last on the schedule for completion, ''Final Fantasy VII'' shows it fully complete and in place, while [[Sector 6]] is the sole sector still under construction as of the game's opening. |
|
| + | |||
| ⚫ | |||
| ⚫ | |||
| + | |||
| ⚫ | |||
| ⚫ | |||
| ⚫ | |||
| ⚫ | |||
| + | |||
| ⚫ | |||
| + | <gallery> |
||
| ⚫ | |||
| + | </gallery> |
||
{{navbox setting FFVII}} |
{{navbox setting FFVII}} |
||
| + | |||
| ⚫ | |||
| + | [[ru:Сектор 4]] |
||
| + | [[Category:Locations in Final Fantasy VII]] |
||
Revision as of 23:26, 4 April 2020
Template:Sideicon Sector 4 is a location on the Planet in the Compilation of Final Fantasy VII. It is one of the eight sectors in Midgar, and is visited briefly by the party during the events of Final Fantasy VII. The locations visited in Sector 4 are unrevisitable and cannot be re-explored once the story has progressed beyond them.
Story
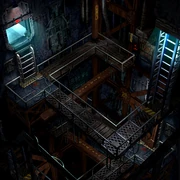
Underground Sector 4 (exit room).
After the success of the Sector 1 Reactor bombing mission, AVALANCHE plan another mission on the Sector 5 Reactor. In the early hours of the morning after the first mission, they board a train for the Sector 4 Station. The train uses an ID scan system, making the fake IDs made by Jessie ineffective, and therefore the party plan to jump off the moving train into the train tunnel.
Unauthorized personnel are discovered on board prior to when the check was meant to happen due to modifications to the ID cards made by Jessie, meaning the party has to move down the train to the end cart before the lockdown. While Cloud's party jumps off the train, Biggs, Wedge, and Jessie stay on board in disguises.
After moving down the railway, Cloud's party come to Shinra's security sensors and have to look for another way. The party crawl through a duct into the Lower Sector 4 Plate. As Cloud's party move through the plate, they find the rest of AVALANCHE have made it there safely. The others withdraw back to Sector 7 as Cloud and his party enter the Sector 5 Reactor.
Geography
Winding tunnels
The winding tunnels comprise a series of railroad tunnels visited by AVALANCHE after getting off the train to the Sector 5 Reactor. The tunnels comprise multiple dimly-lit identical-looking tunnels (totaling six screens when traversed by the player) with rail tracks on either side. The southern-most tunnel (Tunnel 1), leads to the danger area, which is patrolled by Shinra guards, while the northern-most tunnel (Tunnel 6) leads to the security sensors, which are impassable by foot.
At the southern end of the tunnel is the danger area. An open door is located here, guarded by Shinra security guards, alongside the rail tunnel. At the northern end are the security sensors, which block the rail travel forward towards Sector 5. Adjacent to the sensors is the first duct, which leads to the Lower Sector 4 Plate.
")
")
")
Lower Sector 4 Plate
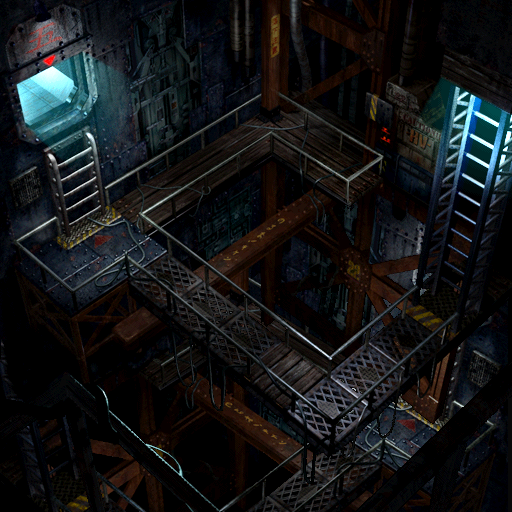
The Lower Sector 4 Plate is a series of winding ducts, ladders, and tiered platforms supported by steel beams, located underneath Midgar's Sector 4 Plate. This area is traversed by AVALANCHE in order to reach the nearby Sector 5 Reactor. The area is dimly lit and made mostly of construction material.
Lower Sector 4 Plate is reached through the first duct, entered through the security sensors in the winding tunnels. This leads to the ladder room, consisting only of a platform to another ladder which itself leads down into the big room of the Lower Sector 4 Plate.
The big room, entered through a ladder on the right, is built of tiered platforms and contains a few ladders to other rooms. It is entered through a ladder on the right. The ladder in the middle of this room leads to the crawl duct, a narrow duct which itself leads to the small room. The ladder on the far left-hand side of the big room leads directly to the small room.
The small room is a narrower metal room with rusted walls, entered through the crawl duct at the back or through a ladder on the right from the big room. A ladder on the left-hand side of this room leads to the exit.
The exit room is a set of wooden and metal bridges connecting platforms. A duct leads to the Sector 5 Reactor, and a save point is located on the right-hand side.
")
")
")
")
Gameplay
Encounters
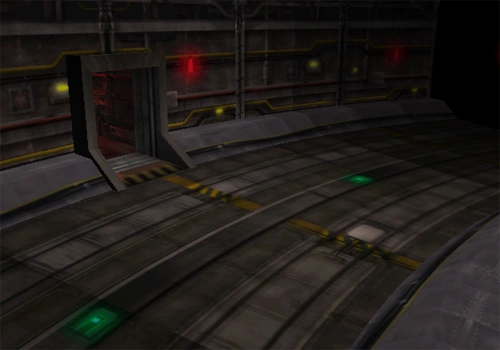
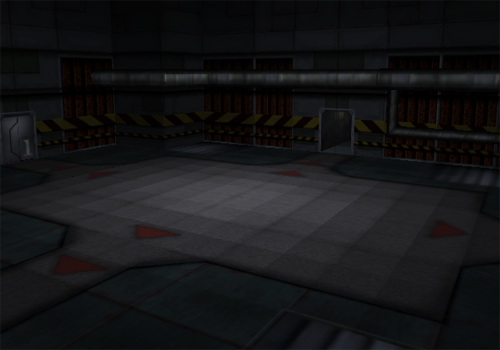
Battle backgrounds for tunnels (top), Lower Sector 4 Plate ducts (middle), and the Lower Sector 4 Plate rooms (bottom).
| Encounters | Areas |
|---|---|
|
Winding tunnels |
| Winding tunnel - Danger area | |
|
Lower Sector 4 Plate - First duct and small room |
|
Lower Sector 4 Plate - Ladder, big room, exit |
In the winding tunnels, the most commonly fought enemies are Grashtrikes, in groups of three to four. These enemies deal little damage of their own, and can be defeated in one or two hits. They can be fought to obtain Spider Webs, however. Rocket Launchers can also be fought here, and their main attack will do a decent amount of damage to the character with the lowest HP. These enemies attack infrequently, and so they should be focused down to prevent them from firing.
The Special Combatants, fought in the danger area, deal more damage and have higher HP than either Grashtrikes or Rocket Launchers. As they are completely optional to fight, this means these enemies are best off avoided.
In the Lower Sector 4 Plate, the player may also encounter Chuse Tanks and Blugus in addition to Grashtrikes and Rocket Launchers. Chuse Tanks have fairly low HP but can deal considerable damage, meaning they should be focused first as they can normally be defeated in one hit. Blugus have much higher HP, but their damage is minimal. They should be prioritized last, and though weak to Lightning and thus vulnerable to Bolt, it is better to save MP for healing.
Items
| Items | Areas |
|---|---|
| Ether | Lower Sector 4 Plate - First duct |
| Potion | Lower Sector 4 Plate - Small room |
| Tent | Lower Sector 4 Plate - Exit |
An Ether is found on the floor of the first duct. In the small room, a Potion can be obtained, just to the left of Jessie. Finally, a Tent is located in the exit room, adjacent to the save point.
Interactions
In the big room on the far left-hand side, the player can talk to Wedge, who will tell Cloud that the reactor is found ahead past the ladder he is standing by. In the small room, Jessie apologizes to Cloud, and tells him that the ID scan error was her fault as she adjusting Cloud's ID card. Biggs can be talked to in the exit, and will tell them that he, Wedge, and Jessie will pull out and return to the hideout. After talking to him, he will then leave.
Quests
Sector 4 is visited during "To the No. 5 Reactor", after Cloud, Barret, and Tifa get off the train from Sector 7 to Sector 5, and the group land in the winding tunnel. They must then make their way to the No. 5 Reactor.
Behind the scenes
In the PlayStation translation of Final Fantasy VII, the lines Jessie says are slightly different from what she says in the PC and later versions. In the former, she states she made Cloud's ID card "special", while the latter translations clarify that she modified his card.
| "The ID scan problem on the train was all my fault." "I made your ID card special... So that's why it happened..." "I put my heart into making it." But I failed." |
"The ID scan problem on the train was all my fault." "I modified your ID card... And that's what did it..." "I did my best... But I failed." |
| —Jessie in the PlayStation version | —Jessie in the PC version |
In the scene showing Cloud and Zack right outside Midgar in Final Fantasy VII, the Midgar upper plate for Sector 4 is absent. While Crisis Core -Final Fantasy VII- states the Sector 4 plate is last on the schedule for completion, Final Fantasy VII shows it fully complete and in place, while Sector 6 is the sole sector still under construction as of the game's opening.
Other appearances
Final Fantasy Brave Exvius
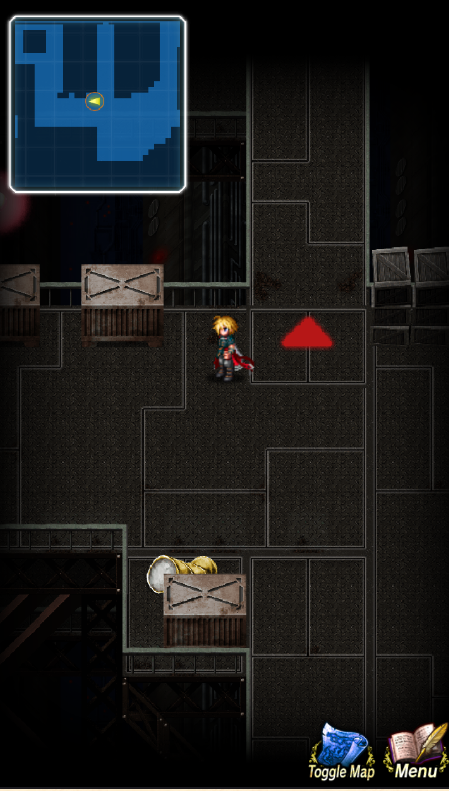
Sector 4 appeared during the exploration event "Destroy the Reactor". It leads directly to Sector 5 Reactor.
Gallery
")