mNo edit summary Tag: sourceedit |
Intangir Bot (talk | contribs) m (Bot: Changing template: Q) |
||
| (8 intermediate revisions by 3 users not shown) | |||
| Line 1: | Line 1: | ||
| − | {{sideicon|FFXII}} |
+ | {{sideicon|prime=FFXII}} |
| + | {{infobox enemy |
||
| ⚫ | |||
| release = FFXII |
| release = FFXII |
||
|type = Mark |
|type = Mark |
||
| Line 6: | Line 6: | ||
| japanese = ロビー |
| japanese = ロビー |
||
| romaji = Robī |
| romaji = Robī |
||
| − | | image = |
+ | | image = Roblon.jpg |
|location = [[Nabreus Deadlands]] (Overlooking Eternity) |
|location = [[Nabreus Deadlands]] (Overlooking Eternity) |
||
| + | |aiscript=yes |
||
}} |
}} |
||
| − | + | '''Roblon''' is a Rank VI [[Hunt (Final Fantasy XII)#Marks|Mark]] from ''[[Final Fantasy XII]]''. The hunt becomes available after felling [[Judge Bergan (boss)|Judge Bergan]] at [[Mt Bur-Omisace]]. Roblon can be found in the Overlooking Eternity area of the [[Nabreus Deadlands]] (accessed by a [[hidden passage]]) and is part of the [[Jovy]] side quest in [[Nalbina Fortress|Nalbina]]. |
|
== Clan Primer == |
== Clan Primer == |
||
| Line 20: | Line 21: | ||
* ''Roblon defeated! Report to Morgen in Nalbina's West Ward.'' |
* ''Roblon defeated! Report to Morgen in Nalbina's West Ward.'' |
||
* ''Hunt reported to Morgen. It transpires that the golem was the creation of Morgen's son.'' |
* ''Hunt reported to Morgen. It transpires that the golem was the creation of Morgen's son.'' |
||
| − | {{ |
+ | {{clear|left}} |
=== Bestiary entry === |
=== Bestiary entry === |
||
| − | {{ |
+ | {{Quote|Being a magickal Construct of Iron, faithful to its Master always, heeding neither Call nor Command of any Other. This method of Control is called 'Morgenstyling' after the famous Golemologist Morgen. This particular Golem is the Creation of the great man's Son, who was lost in Battle soon thereafter. Now his Roblon rampages, masterless, wild, and newly Marked.}} |
==Stats== |
==Stats== |
||
| + | {{infobox enemy stats FFXII |
||
| − | {{FFXII Enemy Stats |
||
| name = Roblon |
| name = Roblon |
||
| prev = Thextera (Final Fantasy XII) |
| prev = Thextera (Final Fantasy XII) |
||
| bestiary = 215 |
| bestiary = 215 |
||
| next = Flowering Cactoid |
| next = Flowering Cactoid |
||
| − | | |
+ | | class = Rank VI Mark |
| − | | |
+ | | genus = Augmented Automaton |
| level = 43 |
| level = 43 |
||
| evade = 0 |
| evade = 0 |
||
| Line 49: | Line 50: | ||
| level = 43 |
| level = 43 |
||
| evade = 0 |
| evade = 0 |
||
| − | | fire = |
+ | | fire = Absorb |
| ice = Halves |
| ice = Halves |
||
| lightning = Halves |
| lightning = Halves |
||
| Line 81: | Line 82: | ||
| bravery = 50 |
| bravery = 50 |
||
| shell = 50 |
| shell = 50 |
||
| − | | technicks = [[ |
+ | | technicks = [[Final Fantasy XII enemy abilities#Lunge|Lunge]], [[Final Fantasy XII enemy abilities#Smite of Rage|Smite of Rage]], [[Final Fantasy XII enemy abilities#Tri-Attack|Tri-Attack]], [[Final Fantasy XII enemy abilities#Focus|Focus]] |
| − | | magicks = [[ |
+ | | magicks = [[Final Fantasy XII enemy abilities#Fira|Fira]], [[Final Fantasy XII enemy abilities#Blizzara|Blizzara]], [[Final Fantasy XII enemy abilities#Thundara|Thundara]], [[Final Fantasy XII enemy abilities#Fear|Fear]] |
| − | | innate augments = [[ |
+ | | innate augments = [[Final Fantasy XII enemy abilities#Safety|Safety]], [[Final Fantasy XII enemy abilities#No Knockback|No Knockback]], [[Final Fantasy XII enemy abilities#Ignore Evade|Ignore Evade]], [[Final Fantasy XII enemy abilities#Low-HP ATK+|Low-HP ATK+]], [[Final Fantasy XII enemy abilities#Low-HP Def+|Low-HP Def+]] |
| − | | conditional augments = |
+ | | conditional augments = When HP <20%: [[Final Fantasy XII enemy abilities#Attack CT0|Attack CT0]] |
| + | |charge time = 25 |
||
}} |
}} |
||
| + | ==AI script==<!--info is from Split Infinity's guide: https://gamefaqs.gamespot.com/ps2/459841-final-fantasy-xii/faqs/42270--> |
||
| − | == Finding Roblon == |
||
| ⚫ | |||
| ⚫ | |||
| + | |magickname1 = [[Final Fantasy XII enemy abilities#Fira|Fira]] |
||
| + | |magickcond1 = HP >50%; use on closest opponent (50%)<br/> 50% < HP < 20% when opponent is close (5%)<br/>HP <50% when opponent is far (50%) |
||
| + | |magickname2 = [[Final Fantasy XII enemy abilities#Blizzara|Blizzara]] |
||
| + | |magickcond2 = HP >50%; use on closest opponent (50%)<br/> 50% < HP < 20% when opponent is close (5%)<br/>HP <50% when opponent is far (50%) |
||
| + | |magickname3 = [[Final Fantasy XII enemy abilities#Thundara|Thundara]] |
||
| + | |magickcond3 = HP >50%; use on closest opponent (50%)<br/> 50% < HP < 20% when opponent is close (5%)<br/>HP <50% when opponent is far (50%) |
||
| + | |magickname4 = [[Final Fantasy XII enemy abilities#Fear|Fear]] |
||
| + | |magickcond4 = HP >50%; use on closest opponent (50%)<br/> 50% < HP < 20% when opponent is close (5%)<br/>HP <50% when opponent is far (50%) |
||
| + | |technickname1 = [[Final Fantasy XII enemy abilities#Smite of Rage|Smite of Rage]] |
||
| + | |technickcond1 = 50% < HP < 20%; use on closest opponent (5%) |
||
| + | |technickname2 = [[Final Fantasy XII enemy abilities#Focus|Focus]] |
||
| + | |technickcond2 = HP > 50% & MP < 20% (100%)<br/>HP < 50% & MP < 20% when opponent is far (100%) |
||
| + | |technickname3 = [[Final Fantasy XII enemy abilities#Lunge|Lunge]] |
||
| + | |technickcond3 = 50% < HP < 20%; use on closest opponent (5%) |
||
| + | |technickname4 = [[Final Fantasy XII enemy abilities#Tri-Attack|Tri-Attack]] |
||
| + | |technickcond4 = 50% < HP < 20%; use on closest opponent (5%) |
||
| + | |augmentname1 = [[Final Fantasy XII enemy abilities#Attack CT0|Attack CT0]] |
||
| + | |augmentcond1 = When HP<50% |
||
| + | }} |
||
| + | |||
| + | == How to find == |
||
| ⚫ | |||
== Battle == |
== Battle == |
||
| − | The player should be prepared for a long fight with a low-[[level]] party. Roblon casts [[Fira (ability)|Fira]], [[Blizzara (ability)|Blizzara]], and [[Thundara (ability)|Thundara]] and uses Fear that reduces one party member's [[MP (stat)|MP]] to zero. [[Dead Bones]] keep on [[Spawning enemies|spawning]] as soon as the party enters the area. They constantly cast [[Magick (ability type)|magicks]] |
+ | The player should be prepared for a long fight with a low-[[level]] party. Roblon casts [[Fira (ability)|Fira]], [[Blizzara (ability)|Blizzara]], and [[Thundara (ability)|Thundara]] and uses Fear that reduces one party member's [[MP (stat)|MP]] to zero. [[Dead Bones]] keep on [[Spawning enemies|spawning]] as soon as the party enters the area. They constantly cast -ra tier [[Magick (ability type)|magicks]] and use [[Reflect (ability)|Reflect]] on themselves. |
=== Strategy === |
=== Strategy === |
||
| − | It may be a good idea to bring plenty of [[ |
+ | It may be a good idea to bring plenty of [[Final Fantasy XII items#Phoenix Down|Phoenix Downs]] and other items to restore MP or cure [[status effect|status conditions]]. [[Quickening (ability)|Quickenings]] should be used cautiously for a low level party, as Quickenings may not be strong enough to completely defeat Roblon, leaving no MP left for healing. In the ''Zodiac'' versions, however, this concern is nullified, as Quickenings are no longer cast from MP. |
| − | The player can destroy all of the Dead Bones before engaging Roblon. There are several spawn points in the area, but each will only spawn about three times. By luring the Dead Bones down the hill, the party can mop them up before engaging Roblon. Using the [[ |
+ | The player can destroy all of the Dead Bones before engaging Roblon. There are several spawn points in the area, but each will only spawn about three times. By luring the Dead Bones down the hill, the party can mop them up before engaging Roblon. Using the [[Final Fantasy XII accessories#Opal Ring|Opal Ring]] accessory, a character can penetrate a Dead Bone's Reflect status to damage them with curative spells. |
| − | While the temptation is there to use [[Reddas]] as a fourth member, the fight's unique nature means he can actually do more harm than good; his [[gambits]] are structured to attack foes targeting him or are the nearest visible, not to attack the party leader's target. With the Dead Bones' spawn points scattered around the field, it is easy for Reddas to get distracted and be drawn away. If he gets in trouble, he can draw one of the party members away from the main fight to aid him, and if the distance is great enough, they will be out of range of curative spells like Curaja, and the party will end up expending twice the amount of MP as normally. This is no longer the case in the ''Zodiac'' versions as |
+ | While the temptation is there to use [[Reddas]] as a fourth member, the fight's unique nature means that in the original version he can actually do more harm than good; his pre-set [[gambits]] are structured to attack foes targeting him or are the nearest visible, not to attack the party leader's target. With the Dead Bones' spawn points scattered around the field, it is easy for Reddas to get distracted and be drawn away. If he gets in trouble, he can draw one of the party members away from the main fight to aid him, and if the distance is great enough, they will be out of range of curative spells like Curaja, and the party will end up expending twice the amount of MP as normally. This is no longer the case in the ''Zodiac'' versions as [[guest]]s can be controlled and their gambits can be changed. |
It may be worth setting up individual curative gambits for each party member with an [[Arise]] gambit in place to deal with party members being [[Knocked Out|KO'd]]; this will revive Reddas (or any other KO'd members) in the thick of the battle where he is needed. |
It may be worth setting up individual curative gambits for each party member with an [[Arise]] gambit in place to deal with party members being [[Knocked Out|KO'd]]; this will revive Reddas (or any other KO'd members) in the thick of the battle where he is needed. |
||
| Line 104: | Line 128: | ||
== Rewards == |
== Rewards == |
||
* 3,100 gil |
* 3,100 gil |
||
| − | * [[ |
+ | * [[Final Fantasy XII armor#Giant's Helmet|Giant's Helmet]] |
* [[Loot (Final Fantasy XII)#Mythril|Mythril]] |
* [[Loot (Final Fantasy XII)#Mythril|Mythril]] |
||
| Line 121: | Line 145: | ||
[[de:Robi]] |
[[de:Robi]] |
||
[[it:Lobby]] |
[[it:Lobby]] |
||
| − | [[Category:Final Fantasy XII |
+ | [[Category:Marks in Final Fantasy XII]] |
Revision as of 22:05, 9 January 2020
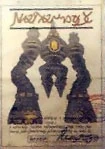
Template:Sideicon Roblon is a Rank VI Mark from Final Fantasy XII. The hunt becomes available after felling Judge Bergan at Mt Bur-Omisace. Roblon can be found in the Overlooking Eternity area of the Nabreus Deadlands (accessed by a hidden passage) and is part of the Jovy side quest in Nalbina.
Clan Primer
Hunt 18: Adding Insult to Injury
Mark Bill.
- Petitioner: Morgen
- Petitioner's Location: Nalbina Fortress
- Saw bill posted for the hunting of the Roblon (Rank VI). The petitioner is Morgen in the West Ward of Nalbina.
- Hunt accepted. Morgen is distressed by a certain golem wandering the ruins of his homeland, Nabudis. The Roblon is to be found in the Nabreus Deadlands, hidden beyond a place of high grasses and thick fog.
- Roblon defeated! Report to Morgen in Nalbina's West Ward.
- Hunt reported to Morgen. It transpires that the golem was the creation of Morgen's son.
Bestiary entry
Being a magickal Construct of Iron, faithful to its Master always, heeding neither Call nor Command of any Other. This method of Control is called 'Morgenstyling' after the famous Golemologist Morgen. This particular Golem is the Creation of the great man's Son, who was lost in Battle soon thereafter. Now his Roblon rampages, masterless, wild, and newly Marked.
Stats
AI script
| Abilities | ||
|---|---|---|
| Type | Name | Condition |
| Fira | HP >50%; use on closest opponent (50%) 50% < HP < 20% when opponent is close (5%) HP <50% when opponent is far (50%) | |
| Blizzara | HP >50%; use on closest opponent (50%) 50% < HP < 20% when opponent is close (5%) HP <50% when opponent is far (50%) | |
| Thundara | HP >50%; use on closest opponent (50%) 50% < HP < 20% when opponent is close (5%) HP <50% when opponent is far (50%) | |
| Fear | HP >50%; use on closest opponent (50%) 50% < HP < 20% when opponent is close (5%) HP <50% when opponent is far (50%) | |
| Smite of Rage | 50% < HP < 20%; use on closest opponent (5%) | |
| Focus | HP > 50% & MP < 20% (100%) HP < 50% & MP < 20% when opponent is far (100%) | |
| Lunge | 50% < HP < 20%; use on closest opponent (5%) | |
| Tri-Attack | 50% < HP < 20%; use on closest opponent (5%) | |
| Attack CT0 | When HP<50% | |
| Properties | ||
| Type | Property | |
| Targeting | ||
| Linking | ||
| Attacks | ||
| Pursuit | ||
How to find
Roblon is in an area reached via a hidden path in the northwest part of The Slumbermead. The path is hidden in the tall grass. Roblon then appears at the shrine at the top of the area.
Battle
The player should be prepared for a long fight with a low-level party. Roblon casts Fira, Blizzara, and Thundara and uses Fear that reduces one party member's MP to zero. Dead Bones keep on spawning as soon as the party enters the area. They constantly cast -ra tier magicks and use Reflect on themselves.
Strategy
It may be a good idea to bring plenty of Phoenix Downs and other items to restore MP or cure status conditions. Quickenings should be used cautiously for a low level party, as Quickenings may not be strong enough to completely defeat Roblon, leaving no MP left for healing. In the Zodiac versions, however, this concern is nullified, as Quickenings are no longer cast from MP.
The player can destroy all of the Dead Bones before engaging Roblon. There are several spawn points in the area, but each will only spawn about three times. By luring the Dead Bones down the hill, the party can mop them up before engaging Roblon. Using the Opal Ring accessory, a character can penetrate a Dead Bone's Reflect status to damage them with curative spells.
While the temptation is there to use Reddas as a fourth member, the fight's unique nature means that in the original version he can actually do more harm than good; his pre-set gambits are structured to attack foes targeting him or are the nearest visible, not to attack the party leader's target. With the Dead Bones' spawn points scattered around the field, it is easy for Reddas to get distracted and be drawn away. If he gets in trouble, he can draw one of the party members away from the main fight to aid him, and if the distance is great enough, they will be out of range of curative spells like Curaja, and the party will end up expending twice the amount of MP as normally. This is no longer the case in the Zodiac versions as guests can be controlled and their gambits can be changed.
It may be worth setting up individual curative gambits for each party member with an Arise gambit in place to deal with party members being KO'd; this will revive Reddas (or any other KO'd members) in the thick of the battle where he is needed.
Rewards
- 3,100 gil
- Giant's Helmet
- Mythril
Related enemies
- Treant
- Clay Golem
- Golem
- Mythril Golem
- Babil
- Goliath (Mark)
- Juggernaut (Rare)
- Molen (Rare)
- Tower (Rare)