Ozma is a superboss in Final Fantasy IX. An unusual-looking monster, Ozma is a giant sphere patterned with bright, swirling colors, one hemisphere being made of light energy and the other hemisphere of dark energy. It is found in Chocobo's Air Garden, requiring the player to complete a substantial part of the Chocobo Hot and Cold sidequest, and it is also tied into the friendly monsters sidequest.
Stats[]
Preparation[]
Friendly monsters sidequest[]
Completing the friendly monsters sidequest before tackling Ozma offers some advantages: Ozma will no longer be "out of reach" (despite nothing changing in the battle visually), and it therefore becomes possible to hit it with physical attacks. Long Reach does not help reach it. Ozma will absorb Shadow-elemental attacks (and thus be healed by Doomsday) unless the sidequest is completed, which weakens Ozma to Shadow.
Finding Ozma[]
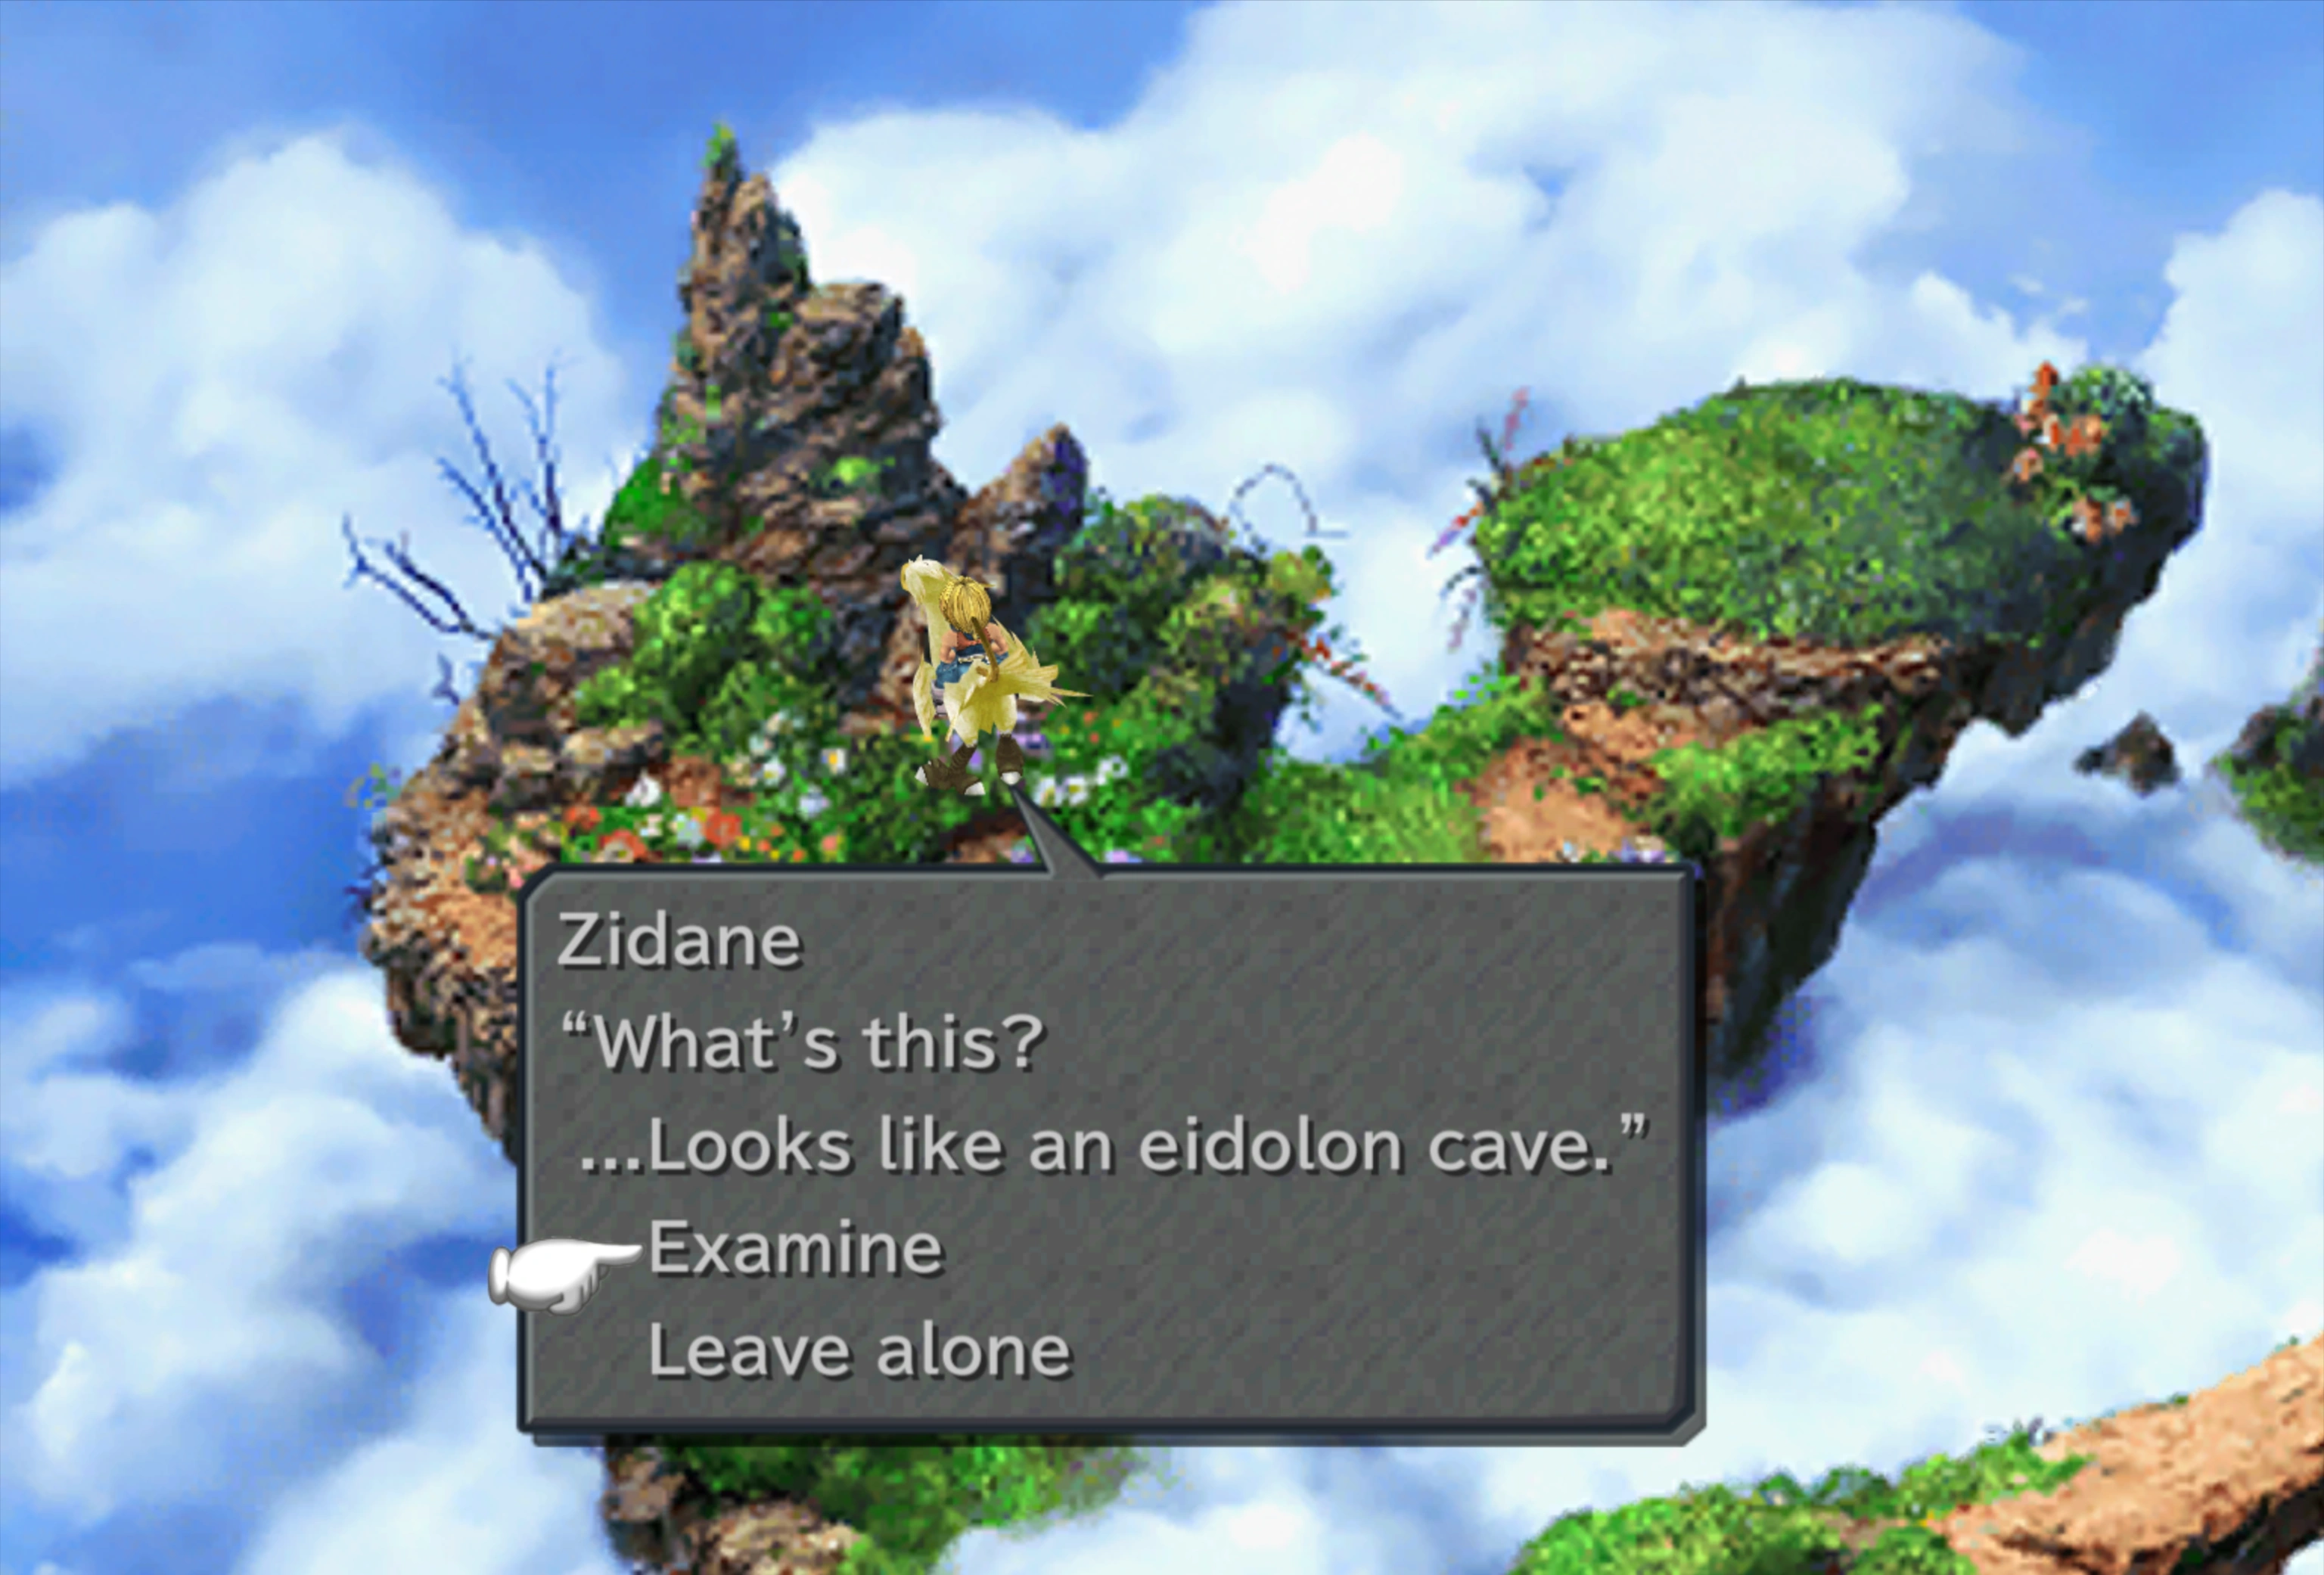
Ozma hides in the Chocobo's Air Garden. The player must play the Chocobo Hot and Cold minigame and find enough Chocographs to have Choco learn the Sky ability to fly there by using a Dead Pepper on the Air Garden's shadow on certain fixed locations on the world map.
Once in the Air Garden, the player can examine an eidolon cave on the rear island, and is given the option to fight Ozma. Mene will try to stop the player, saying that he feels a "strange presence" that is "not of this world". Should the player continue, Mene will remark it is dangerous, and will prompt the player to access the menu and switch party members.
Battle[]

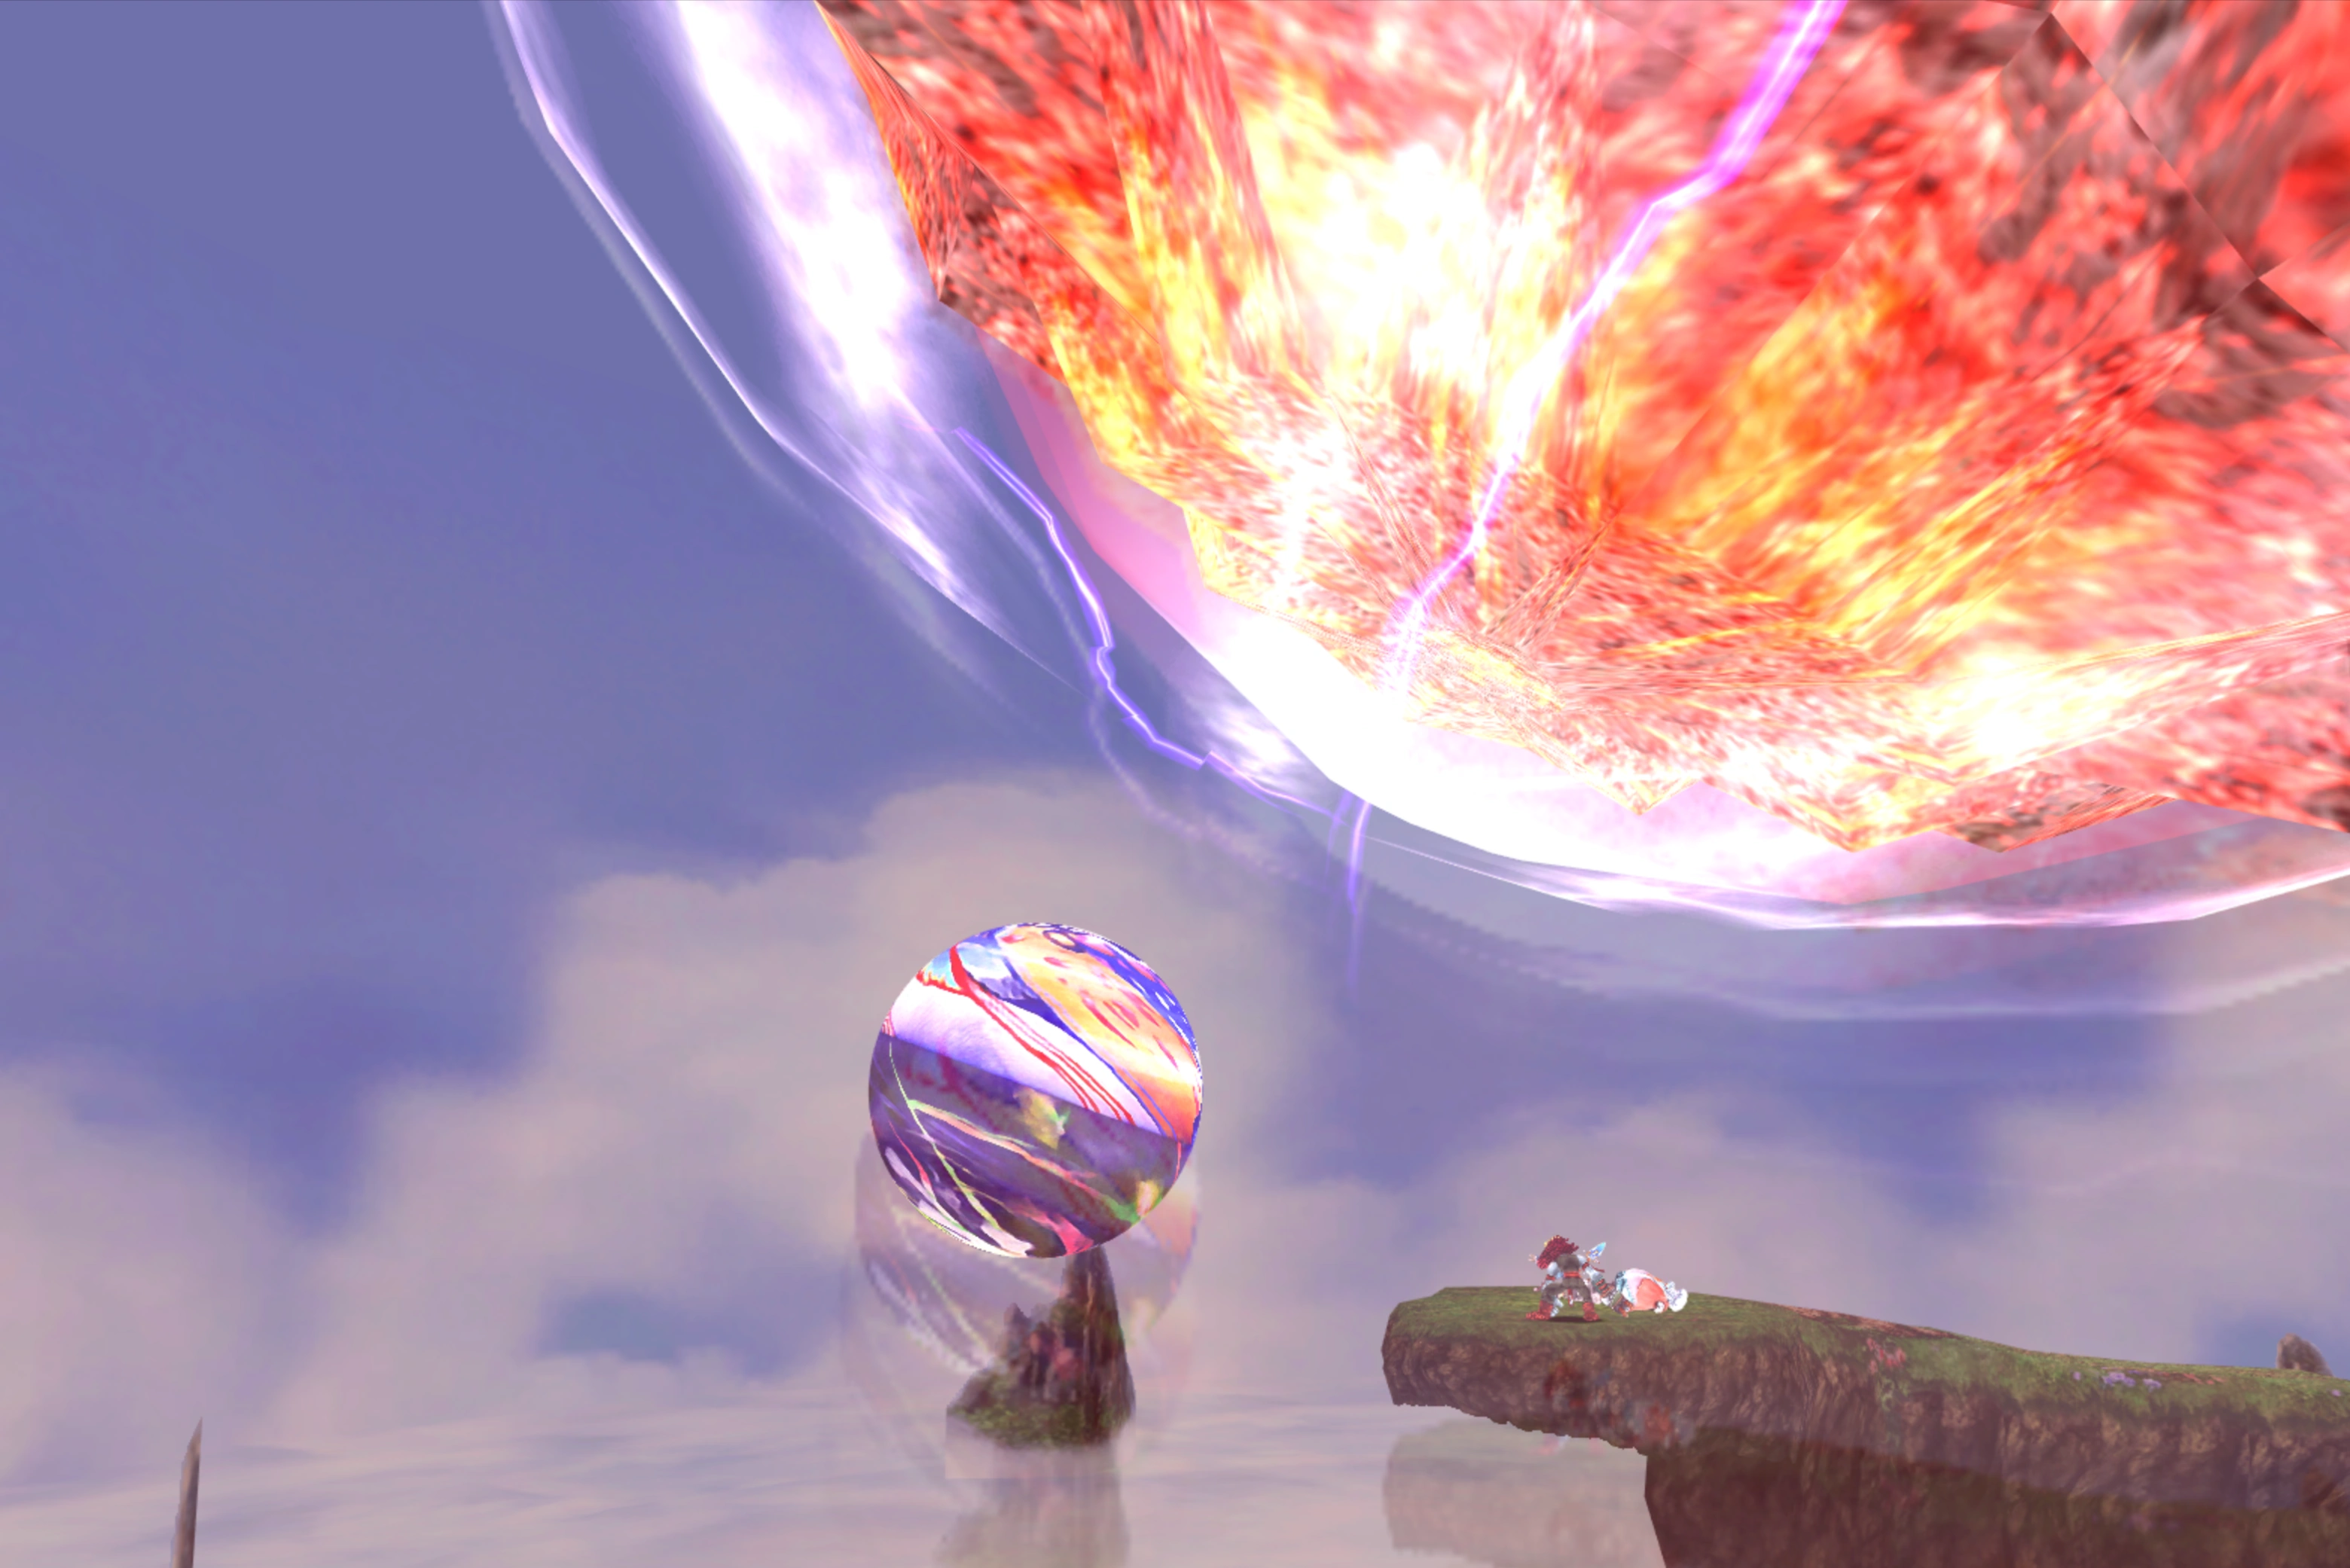
Ozma using Doomsday.
Ozma can quickly destroy the party with a variety of heavy attacks, including Curse, Doomsday, Holy, LV5 Death, and Meteor. It will frequently restore itself to full health.
Ozma will not waste a turn using an elemental attack that will be absorbed by all party members (nullifying the element still makes Ozma use it), or use status attacks if all targets are immune to it. Thus being immune to Ozma's other attacks increases the likelihood it will use Meteor.
Ozma has a unique battle script; when its ATB bar is filling up—i.e. when it is not in the middle of casting an ability—any command the party targets at Ozma will fill its ATB bar up, and Ozma will execute its turn before the player's commands.
- LV5 Death: Defeats all party members whose levels are a multiple of 5. Ozma will only use Lv5 Death if the party has a member susceptible to it; if no party member is of a suitable level, Ozma will not waste its turn.
- Death: Defeats one party member if it hits.
- LV4 Holy: Deals Holy damage to all party members whose levels are a multiple of 4. Ozma will only use Lv4 Holy if the party has a member susceptible to it.
- Holy: Deals Holy damage to one target. Ozma will not use the ability if the target absorbs it.
- Flare: Deals non-elemental damage to one target.
- Flare Star: Deals damage based on the characters' level. Can miss.
- Doomsday: Deals Shadow damage to all targets, including Ozma.
- Meteor: Deals random damage to the entire party with the possibility of dealing 9999 to all of them.
- Curse: Deals non-elemental damage to all party members and inflicts Confuse, Poison, Slow, Mini, and Darkness.
- Mini: Inflicts Mini status on all targets.
- Esuna: Used if Ozma is afflicted with a status ailment.
- MP Absorb: Used if Ozma is low on MP. Drains MP from the party.
- Berserk: Used to counter attacks.
- Curaga: Used as a counterattack; there is a higher chance of countering with Curaga when Ozma's health is low.
Ozma chooses its actions depending on whether its turn count is an odd or an even number. In the former case, it will use either Flare Star, Meteor, Doomsday, Flare, Holy, Death, or Absorb MP. If its turn count is an even number, it will employ either Curse, Mini, Level 4 Holy, LV5 Death, Curaga, or Esuna. Most of these attacks are used only if certain conditions are met. For instance, Ozma will cast Holy only if at least one character does not absorb the Holy element and is not affected by the Reflect status.
Apart from its main attack script, Ozma uses counter attacks. It casts Berserk when its HP is reduced to a value less than 40,000 / less than 30,000, but also to counter. It can also counter by using Curaga. The probability with which Ozma will counter with using Curaga on itself is inversely related to its HP and ranges from approximately 13% to 50%. When Freya is the only non-KO'd party member, during her Jump animation, Ozma will use either Doomsday or Curaga. If Ozma's HP exceeds 27,767, it will use Doomsday, otherwise it will use Curaga.
If drained of all of its MP, Ozma is meant to use MP Absorb on party members, but due to a bug it can behave strangely, like casting Esuna on party members or Curse on only one target instead of the whole party. This is because Ozma can cast some of its regular spells on the target that should have their MP absorbed.
When defeated, Ozma will leave behind a complete Pumice, which Dagger can use to learn her final eidolon, Ark. The Strategy Guide trophy item, meanwhile, offers but a small clue about collecting Tetra Master cards, and when ![]() is pressed to bring up the help tip, it congratulates the player for beating the most difficult enemy in the game. The player will also receive Ozma's Tetra Master card for the victory, and if the player's card quota is full, Mene will leave the card on the ground so that the player can pick it up later. Defeating Ozma in the latest versions of Final Fantasy IX yields the To Ozma and Back achievement/trophy.
is pressed to bring up the help tip, it congratulates the player for beating the most difficult enemy in the game. The player will also receive Ozma's Tetra Master card for the victory, and if the player's card quota is full, Mene will leave the card on the ground so that the player can pick it up later. Defeating Ozma in the latest versions of Final Fantasy IX yields the To Ozma and Back achievement/trophy.
Strategy[]
It is preferable for the party to have reached level 60 or above. It is useful to have one character whose level is a multiple of 5 to entice Ozma to use LV5 Death, an attack much less devastating than many of its other moves. It is also a good idea to have one character with a level multiple of 4, as Ozma's LV4 Holy is a comparatively weak attack. Since there are no means to guard against the Berserk status, one will have to resort to the Auto-Reflect ability to definitely prevent that status ailment.


Ozma casting Curaga.
The player can exploit Ozma's Doomsday by nullifying or absorbing its damage using various equipment, such as Pumice Piece, Ninja Gear, Demon's Mail, and Egoist's Armlet. This is especially useful after having completed the friendly monsters sidequest, in which case Ozma will heal the party and damage itself when using Doomsday (even more so if Vivi and/or Amarant has Return Magic equipped).
A Chimera Armlet can immunize the wearer to Holy; Ozma will not target a character with Holy if they absorb the element, but will use it if they are merely immune to it. This is a useful way to make Ozma waste a turn.
When considering the party members' abilities, it is useful to equip status-protection skills, such as Antibody to block Poison, and Clear Headed to block Confuse, while characters who are predominantly physical attackers will also benefit from Bright Eyes to block Darkness. Ozma's AI is smart, however, and will not attempt to inflict status ailments to which the whole party is immune, which increases the chance of it using Meteor.
The party should be equipped with Auto-Regen, whereas the usefulness of Auto-Life is debatable; it takes many Magic Stones and only works once, and there are party members who can bestow the status. Having physical attackers equip Auto-Reflect works as a deterrent against Ozma's counter attack, Berserk, and physical attackers can also equip Bird Killer and MP Attack to deal extra damage.
The player can bring three party members of their choice to accompany Zidane.
- Quina can cast Auto-Life and Mighty Guard, as well as use Angel's Snack to relieve the entire party of status ailments. They can also deal significant damage with Frog Drop if the player has caught a large number of frogs in the marshes. Because the damage from Frog Drop is fixed, Quina can do good damage even in Mini status. Quina's LV3 Def-less works to lower Ozma's physical and magical defenses.
- Amarant has Aura to bestow Auto-Life, and when he is in Trance, he can bestow it on the entire party at once. He has the useful Return Magic ability, and is also a strong physical attacker. Additionally, he can throw Wing Edges for high physical damage.
- Steiner is a strong physical attacker and can deal enormous damage with Shock and Darkside. His Charge! ability can be useful if the party is comprised of the physical attackers — Zidane, Steiner, Freya, and Amarant — allowing for multiple attacks per turn.
- Freya can use Jump to temporarily exit the battlefield and thus evade Ozma's attacks; the command is even better in Trance. She can deal heavy damage with Dragon's Crest if the player has killed a large number of dragon-type enemies. Because damage from Dragon's Crest is fixed, Freya can do good damage even in Mini status. If Freya uses Jump in Trance while the other three party members are KO'd, Ozma will only use Curaga or Doomsday. If Ozma is vulnerable to the Shadow element, it may either sharply damage itself or outright commit suicide via Doomsday.
- Vivi can cast Doomsday, which, with the right preparation, will damage Ozma and heal the party. In Trance, he can cast it twice per turn. Like Amarant, he also has Return Magic.
- Eiko can heal the party and be a potent damage-dealer with Holy and Madeen. Using Carbuncle, she can bestow Reflect or Haste on the whole party at once, or duplicate Mighty Guard depending on her add-on. She can also use Might to buff the party's physical attackers. A unique benefit of using Eiko is the possibility of a spontaneous revival by Phoenix if the party is annihilated. The probability depends on the player's stock of Phoenix Pinions, but even with 99 Phoenix Pinions, Phoenix only has a 38.7% chance of appearing.
- Dagger can heal and buff the party, and can function as a damage-dealer by summoning her eidolons. When in Trance, her last eidolon is summoned automatically as a counterattack. If the party has Auto-Regen, they can easily regain their health during the eidolons' summoning animations. If she equips Boost, her eidolons use the full summoning animation every time.

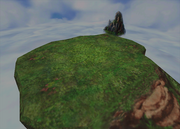
Battle background.
Understanding Ozma's ATB mechanics gives the player a huge advantage. The only way to get more than one turn in a row against Ozma is to enter all of the commands during a time when Ozma is casting an ability, and before the damage and/or healing numbers appear. Even adhering to this method, Ozma still has a chance to counter attacks with Curaga or Berserk.
The strategy depends on whom the player decides to bring along, and what skills they have learned. Ozma doesn't have an attack pattern and a great deal depends on luck.
If the player brings Amarant or Quina, they can keep casting Auto-Life on party members as necessary, given the potential for Ozma to wipe the party out with attacks such as Meteor. Offensively, many party members have attacks that can do a guaranteed 9999 damage: Thievery (Zidane), Frog Drop (Quina), Dragon Crest (Freya), and Shock/Darkside (Steiner). As three of these abilities take time to power up, one can make the best use of physical attackers by equipping them with Bird Killer and MP Attack instead to reach up to 9999 damage per normal attack; however, they become useless if afflicted with Mini. As Ozma's HP is relatively low for a superboss, a successful round of powerful attacks can shave away a considerable portion of its 55,535 total HP in a single round.

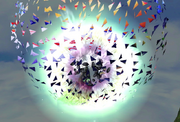
Ozma defeated.
Because Ozma has a series of devastating attacks, such as Meteor and Curse, it is always to the player's advantage if Ozma can be influenced into not using its more debilitating attacks, wasting its turns by using milder alternatives. Throwing a Tent at Ozma has a 50% chance of inflicting Darkness, and Ozma will then waste a turn by using Esuna. Having characters be immune to Holy makes Ozma cast it regardless, and having party members at susceptible levels for LV5 Death and LV4 Holy causes Ozma to cast those abilities, thus only targeting certain members of the party.
Amarant and Vivi can use their Return Magic ability to counter Ozma's Doomsday without using up a turn. If Amarant is in the party, he can also use the Curse ability to add an elemental weakness to Ozma; however, Ozma will never become weak against Earth or Shadow, even though the status bar may state the ability has worked with one of those elements. Giving Ozma an additional weakness allows Vivi, Dagger, and Eiko to use elemental attacks and eidolons to their full potential.
If the player has a Dark Matter, throwing it at Ozma deals 9999 damage.
AI script[]
Using general variable FriendlyMonster_Complete
Using general variable Ozma_Defeated

Function Ozma_Init
   set phase1attacklist = [ Doomsday ; Flare ; Meteor ; Holy ; Flare Star ; Death ]
   set phase1attackmplist = [ 16 ; 47 ; 40 ; 36 ; 0 ; 26 ]
   set phase2attacklist = [ Curse ; LV4 Holy ; LV5 Death ; Curaga ; Esuna ; Mini ]
   set phase2attackmplist = [ 0 ; 22 ; 20 ; 20 ; 22 ; 8 ]


Function Ozma_Loop
   if ( !InitFlag )
      set InitFlag = 1
      set SV_FunctionEnemy[ENABLE_SHADOW_FLAG] = 0
      set SV_FunctionEnemy[CURRENT_ATB] = SV_FunctionEnemy[MAX_ATB] - 1
      if ( ( SV_PlayerTeam & 1 ) && ( 1[LEVEL] % 4 == 0 ) )
         set lv4characters  | = 1
      if ( ( SV_PlayerTeam & 2 ) && ( 2[LEVEL] % 4 == 0 ) )
         set lv4characters  | = 2
      if ( ( SV_PlayerTeam & 4 ) && ( 4[LEVEL] % 4 == 0 ) )
         set lv4characters  | = 4
      if ( ( SV_PlayerTeam & 8 ) && ( 8[LEVEL] % 4 == 0 ) )
         set lv4characters  | = 8
      if ( ( SV_PlayerTeam & 1 ) && ( 1[LEVEL] % 5 == 0 ) )
         set lv5characters  | = 1
      if ( ( SV_PlayerTeam & 2 ) && ( 2[LEVEL] % 5 == 0 ) )
         set lv5characters  | = 2
      if ( ( SV_PlayerTeam & 4 ) && ( 4[LEVEL] % 5 == 0 ) )
         set lv5characters  | = 4
      if ( ( SV_PlayerTeam & 8 ) && ( 8[LEVEL] % 5 == 0 ) )
         set lv5characters  | = 8
      if ( FriendlyMonster_Complete )
         set SV_FunctionEnemy[ABSORB_ELEMENTS] &= ~SHADOW
         set SV_FunctionEnemy[WEAK_ELEMENTS]  | = SHADOW
         BattleDialog( "The spiritual power raised the attack range." )
         Wait( 60 )
   if ( ReplenishATBStep == 0 )
      if ( GetAttacker == SV_FunctionEnemy )
         set ReplenishATBStep = 1
   elseif ( ReplenishATBStep == 1 )
      if ( GetAttacker == SV_FunctionEnemy )
         set ReplenishATBStep = 1
      else
         set ReplenishATBStep = 2
         set SV_FunctionEnemy[CURRENT_ATB] = SV_FunctionEnemy[MAX_ATB] - 1
   elseif ( ReplenishATBStep == 2 )
      if ( GetAttacker == SV_FunctionEnemy )
         set ReplenishATBStep = 1
   if ( SV_FunctionEnemy[HP] <= 10000 )
      while ( IsAttacking != 0 )
         Wait( 1 )
      RunBattleCode( Disable ATB )
      while ( GetBattleState != BATTLE_STATE_PAUSE )
         Wait( 1 )
      set SV_Target = SV_FunctionEnemy
      RunBattleCode( Run Camera, 9 )
      AttackSpecial( Death )
      set SV_FunctionEnemy[STAND_ANIMATION] = 1
      while ( IsAttacking != 0 )
         Wait( 1 )
      set SV_FunctionEnemy[DEFEATED_ON] = 1
      set Ozma_Defeated = TRUE
      RunBattleCode( End Battle, Victory )
      return
   Wait( 1 )
   loop


Function Ozma_ATB
   set phaseswitch =  ~phaseswitch & 1
   if ( phaseswitch )
      set phase1selectedattack = RandomAttack( phase1attacklist )
      if ( phase1selectedattack == Doomsday )
         set SV_Target = ( SV_PlayerTeam  |  SV_EnemyTeam )
      elseif ( phase1selectedattack == Flare )
         set SV_Target = RandomInTeam( WithoutMatching( SV_PlayerTeam[CURRENT_STATUS], PETRIFY | DEATH | KO | REFLECT) & WithoutMatching( SV_PlayerTeam[AUTO_STATUS], REFLECT) )
      elseif ( phase1selectedattack == Meteor )
         set SV_Target = SV_PlayerTeam
      elseif ( phase1selectedattack == Holy )
         set SV_Target = RandomInTeam( WithoutMatching( SV_PlayerTeam[CURRENT_STATUS], PETRIFY | DEATH | KO | REFLECT) & WithoutMatching( SV_PlayerTeam[AUTO_STATUS], REFLECT) & WithoutMatching( SV_PlayerTeam[ABSORB_ELEMENT], HOLY) )
      elseif ( phase1selectedattack == Flare Star )
         set SV_Target = SV_PlayerTeam
      elseif ( phase1selectedattack == Death )
         set SV_Target = RandomInTeam( WithoutMatching( SV_PlayerTeam[CURRENT_STATUS], PETRIFY | DEATH | KO | REFLECT | EASYKILLPROOF) & WithoutMatching( SV_PlayerTeam[AUTO_STATUS], REFLECT) )
      if ( SV_FunctionEnemy[MP] > 0 )
         if ( WithoutMatching( SV_PlayerTeam[CURRENT_STATUS], PETRIFY | VENOM | DEATH | STOP) & 1 )
            set absorbmptarget = 1
         if ( WithoutMatching( SV_PlayerTeam[CURRENT_STATUS], PETRIFY | VENOM | DEATH | STOP) & 2 )
            set absorbmptarget = 2
         if ( WithoutMatching( SV_PlayerTeam[CURRENT_STATUS], PETRIFY | VENOM | DEATH | STOP) & 4 )
            set absorbmptarget = 4
         if ( WithoutMatching( SV_PlayerTeam[CURRENT_STATUS], PETRIFY | VENOM | DEATH | STOP) & 8 )
            set absorbmptarget = 8
         if ( #absorbmptarget )
            if ( WithoutMatching( SV_PlayerTeam[CURRENT_STATUS], PETRIFY | VENOM | DEATH | STOP) & 1 )
               if ( 1[MP] > absorbmptarget[MP] )
                  set absorbmptarget = 1
            if ( WithoutMatching( SV_PlayerTeam[CURRENT_STATUS], PETRIFY | VENOM | DEATH | STOP) & 2 )
               if ( 2[MP] > absorbmptarget[MP] )
                  set absorbmptarget = 2
            if ( WithoutMatching( SV_PlayerTeam[CURRENT_STATUS], PETRIFY | VENOM | DEATH | STOP) & 4 )
               if ( 4[MP] > absorbmptarget[MP] )
                  set absorbmptarget = 4
            if ( WithoutMatching( SV_PlayerTeam[CURRENT_STATUS], PETRIFY | VENOM | DEATH | STOP) & 8 )
               if ( 8[MP] > absorbmptarget[MP] )
                  set absorbmptarget = 8
         if ( !absorbmptarget[MP])
            set absorbmptarget = 0
         if ( #absorbmptarget )
            if ( ( absorbmptarget[MP] > SV_FunctionEnemy[MP] ) && #WithoutMatching( absorbmptarget[CURRENT_STATUS], PETRIFY | DEATH | KO) )
               set SV_Target = absorbmptarget
               set phase1selectedattack = Absorb MP
      Attack( phase1selectedattack )
   else
      if ( #WithoutMatching( lv4characters[CURRENT_STATUS], PETRIFY | DEATH | KO) )
         set lv4holytarget = SV_PlayerTeam
      else
         set lv4holytarget = 0
      if ( #WithoutMatching( LV5Characters[CURRENT_STATUS], PETRIFY | DEATH | KO) )
         set lv5deathtarget = SV_PlayerTeam
      else
         set lv5deathtarget = 0
      if ( ( SV_FunctionEnemy[HP] - 10000 ) < ( (SV_FunctionEnemy[MAX_HP]) - 10000 ) / 2 )
         set curagatarget = SV_FunctionEnemy
      else
         set curagatarget = 0
      if ( #WithoutMatching( SV_PlayerTeam[CURRENT_STATUS], PETRIFY | DEATH | KO | MINI) > 3 )
         set minitarget = SV_PlayerTeam
      else
         set minitarget = 0
      set phase2selectedattack = RandomAttack( phase2attacklist )
      if ( phase2selectedattack == Curse )
         set SV_Target = SV_PlayerTeam
      elseif ( phase2selectedattack == LV4 Holy )
         set SV_Target = lv4holytarget
      elseif ( phase2selectedattack == LV5 Death )
         set SV_Target = lv5deathtarget
      elseif ( phase2selectedattack == Curaga )
         set SV_Target = curagatarget
      elseif ( phase2selectedattack == Esuna )
         set SV_Target = RandomInTeam( Matching( SV_EnemyTeam[CURRENT_STATUS], PETRIFY | BLIND | CONFUSE | TRANCE | POISON | SLEEP | HEAT | FREEZE | MINI ) )
      elseif ( phase2selectedattack == Mini )
         set SV_Target = minitarget
      if ( SV_FunctionEnemy[MP] > 0 )
         if ( WithoutMatching( SV_PlayerTeam[CURRENT_STATUS], PETRIFY | VENOM | DEATH | STOP) & 1 )
            set absorbmptarget = 1
         if ( WithoutMatching( SV_PlayerTeam[CURRENT_STATUS], PETRIFY | VENOM | DEATH | STOP) & 2 )
            set absorbmptarget = 2
         if ( WithoutMatching( SV_PlayerTeam[CURRENT_STATUS], PETRIFY | VENOM | DEATH | STOP) & 4 )
            set absorbmptarget = 4
         if ( WithoutMatching( SV_PlayerTeam[CURRENT_STATUS], PETRIFY | VENOM | DEATH | STOP) & 8 )
            set absorbmptarget = 8
         if ( #absorbmptarget )
            if ( WithoutMatching( SV_PlayerTeam[CURRENT_STATUS], PETRIFY | VENOM | DEATH | STOP) & 1 )
               if ( 1[MP] > absorbmptarget[MP] )
                  set absorbmptarget = 1
            if ( WithoutMatching( SV_PlayerTeam[CURRENT_STATUS], PETRIFY | VENOM | DEATH | STOP) & 2 )
               if ( 2[MP] > absorbmptarget[MP] )
                  set absorbmptarget = 2
            if ( WithoutMatching( SV_PlayerTeam[CURRENT_STATUS], PETRIFY | VENOM | DEATH | STOP) & 4 )
               if ( 4[MP] > absorbmptarget[MP] )
                  set absorbmptarget = 4
            if ( WithoutMatching( SV_PlayerTeam[CURRENT_STATUS], PETRIFY | VENOM | DEATH | STOP) & 8 )
               if ( 8[MP] > absorbmptarget[MP] )
                  set absorbmptarget = 8
         if ( !absorbmptarget[MP])
            set absorbmptarget = 0
         if ( #absorbmptarget )
            if ( ( absorbmptarget[MP] > SV_FunctionEnemy[MP] ) && #WithoutMatching( absorbmptarget[CURRENT_STATUS], PETRIFY | DEATH | KO) )
               set SV_Target = absorbmptarget
               set phase1selectedattack = Absorb MP
      Attack( phase2selectedattack )


Function Ozma_Counter
   if ( ( GetAttackCommandId == Skill ) && ( GetAttackId == What's That!? ) )
      return
   if ( SV_FunctionEnemy[HP] < 50000L )
      if ( !berserkflag1 && ( GetAttackCommandId != Attack ) && ( GetAttackCommandId != Item ) )
         set SV_Target = GetAttacker
         if ( WithoutMatching( SV_PlayerTeam[CURRENT_STATUS], PETRIFY | VENOM | DEATH | STOP ) & SV_Target )
            set berserkflag1 = TRUE
            Attack( Berserk )
   if ( SV_FunctionEnemy[HP] < 40000L )
      if ( !berserkflag2 && ( GetAttackCommandId != Attack ) && ( GetAttackCommandId != Item ) )
         set SV_Target = GetAttacker
         if ( WithoutMatching( SV_PlayerTeam[CURRENT_STATUS], PETRIFY | VENOM | DEATH | STOP ) & SV_Target )
            set berserkflag2 = TRUE
            Attack( Berserk )
   set curagachances = SV_FunctionEnemy[HP] / 10000
   if ( GetRandom % ( curagachances + 1 ) )
      return
   set SV_Target = SV_FunctionEnemy
   Attack( Curaga )
Tetra Master[]
| Tetra Master |
|---|
 #055 Location: Memoria, "Beast Master Gilbert" Treno Card Stadium |
Behind the scenes[]
Ozma appears as a sphere with many colors circling it that is segmented into two halves that rotate; the top half is bright and turns clockwise, while the bottom half is darker and turns counter-clockwise. The bottom half spins faster than Ozma uses an offensive ability, and the top half spins faster when it uses a supportive ability, and Ozma turns vertically to orient the half casting the spell towards the party. The exception is the Black Magic Doomsday, where both halves spin and Ozma spins vertically, showing that both halves of it are channeling the spell.
It is unclear exactly what Ozma is, but it is implied to be some manner of eidolon. It is found inside an "eidolon cave" in Chocobo's Air Garden, Mene says Ozma is a presence "not of this world", and when defeated it drops a Pumice, which can teach Dagger the Ark summon. These imply that Ozma is connected to Terra, a parallel world whose citizens created Ark. One of Final Fantasy IX's main themes is the concept of memories, and the eidolons factor heavily into this with the game raising the question of if eidolons are constructs created by humans from memories and legends given form by the Crystal, which receives the memories of all living beings. It is plausible Ozma is, or was, an eidolon from Terra, but because of the degradation of Terra's Crystal and its loss of power, it lost its form and now appears only as a swirling mass of color. Outside Final Fantasy IX, Theatrhythm Final Fantasy describes Ozma as a "metaphysical being" that "exists without form and is unknowable, untouchable, and unattainable".
If the party defeats Ozma before encountering Hades in Memoria, Hades will comment on the feat. If the party defeats Ozma before appeasing the Friendly Yan, the Yan says: "Reach the round guy... ...Huh!? You already beat him?"
Ozma's Meteor is not the same as the regular Meteor ability usable by Vivi; it will never miss and costs 40MP, while Vivi's Meteor can miss and costs 42MP.
Gallery[]
")
")
Etymology[]
Ozma is a fictional character in the Land of Oz, created by L. Frank Baum. Project Ozma, an early SETI attempt at finding extraterrestrial life, was named after Princess Ozma, and is likely the inspiration behind the UFO-like Ozma.