m (link) |
mNo edit summary |
||
| (22 intermediate revisions by 8 users not shown) | |||
| Line 1: | Line 1: | ||
| − | {{sideicon|prime=FFVI|DFFNT|TFFCC|FFAB|FFRK}} |
+ | {{sideicon|prime=FFVI|DFFNT|TFFCC|FFAB|FFRK|FFBE}} |
{{infobox location |
{{infobox location |
||
|name=Narshe |
|name=Narshe |
||
| Line 11: | Line 11: | ||
*[[#Adventuring School|Adventuring School]] |
*[[#Adventuring School|Adventuring School]] |
||
*[[Narshe Cliffs]] |
*[[Narshe Cliffs]] |
||
| − | *[[Narshe Mines]] |
+ | *[[Narshe Mines (North Passage)]] |
| + | *[[Narshe Mines (South Passage)]] |
||
|affiliation=Independent |
|affiliation=Independent |
||
|residents=[[Elder of Narshe]], [[Arvis]], [[Mog (Final Fantasy VI)|Mog]], [[ten Moogles]], [[Umaro]] |
|residents=[[Elder of Narshe]], [[Arvis]], [[Mog (Final Fantasy VI)|Mog]], [[ten Moogles]], [[Umaro]] |
||
| Line 47: | Line 48: | ||
*[[Crawler (Final Fantasy VI)|Crawler]] |
*[[Crawler (Final Fantasy VI)|Crawler]] |
||
*[[Garm (Final Fantasy VI)|Garm]] |
*[[Garm (Final Fantasy VI)|Garm]] |
||
| ⚫ | |||
*[[Leap Frog (Final Fantasy VI)|Leap Frog]] |
*[[Leap Frog (Final Fantasy VI)|Leap Frog]] |
||
*[[Lukhavi (Final Fantasy VI)|Lukhavi]] |
*[[Lukhavi (Final Fantasy VI)|Lukhavi]] |
||
| Line 57: | Line 59: | ||
*[[#Optional bosses|Defeating Ice Dragon, Valigarmanda and Yeti]] |
*[[#Optional bosses|Defeating Ice Dragon, Valigarmanda and Yeti]] |
||
}} |
}} |
||
| − | {{ |
+ | {{Quote|Narshe is a neutral city. We want no war here, but that @#$% Empire won't listen!|Narshe resident}} |
| − | '''Narshe''', also known as '''Narche''', and titled "Colliery City Narshe" {{j|炭坑都市ナルシェ|Tankō Toshi Narushe}} in the Japanese version, is a city in ''[[Final Fantasy VI]]''. It is a coal mining [[town]] at the northern edge of the world, governed by the [[Elder of Narshe]]. The town is one of the game's most important locations—it is where the player party makes their base of operations before they have an [[Airship (term)|airship]], and several storyline events, including the beginning, take place here. Situated in the mountains and affected by snowy conditions, Narshe |
+ | '''Narshe''', also known as '''Narche''', and titled "Colliery City Narshe" {{j|炭坑都市ナルシェ|Tankō Toshi Narushe}} in the Japanese version, is a city in ''[[Final Fantasy VI]]''. It is a coal mining [[town]] at the northern edge of the world, governed by the [[Elder of Narshe]]. The town is one of the game's most important locations—it is where the player party makes their base of operations before they have an [[Airship (term)|airship]], and several storyline events, including the beginning, take place here. Situated in the mountains and affected by snowy conditions, Narshe resists invasion attempts by the [[Gestahlian Empire]]. |
| + | |||
| + | {{toclimit|3}} |
||
== Story == |
== Story == |
||
| Line 65: | Line 69: | ||
According to a [[Final Fantasy VI timeline|timeline]] in the ''[[Final Fantasy VI Settei Shiryō-hen|Settei Shiryō-hen]]'' [[List of guide books|guide book]], Narshe formed an independent political system 150 years ago. Around 20 years ago it refused to sell coal to the invading Gestahlian Empire with armed resistance, but a pact of mutual peace is agreed upon. The canonity of this timeline is questionable, however. |
According to a [[Final Fantasy VI timeline|timeline]] in the ''[[Final Fantasy VI Settei Shiryō-hen|Settei Shiryō-hen]]'' [[List of guide books|guide book]], Narshe formed an independent political system 150 years ago. Around 20 years ago it refused to sell coal to the invading Gestahlian Empire with armed resistance, but a pact of mutual peace is agreed upon. The canonity of this timeline is questionable, however. |
||
| − | In the [[World of Balance]] Narshe is a neutral city that |
+ | In the [[World of Balance]] Narshe is a neutral city that has kept out of the war between the Gestahlian Empire and the [[Returners]], though one prominent citizen, [[Arvis]], is secretly allied with the Returners. When the town discovers [[Valigarmanda|a frozen esper]] in a newly dug mineshaft, they attract the Empire's attention; they send [[Terra Branford]], [[Biggs and Wedge (Final Fantasy VI)|Biggs]] and [[Biggs and Wedge (Final Fantasy VI)|Wedge]], to [[Raid on Narshe|raid the town]] and seize the Esper. While the three easily defeat Narshe's guards, the [[Esper (Final Fantasy VI)|esper]] reacts to Terra's presence with a surge of magic, killing Biggs and Wedge and freeing Terra from imperial control when the [[Slave Crown]] she was wearing is disabled. |
| + | |||
| + | Terra is rescued from the mines by Arvis, but the guards of Narshe still wish to arrest her as an imperial soldier. Arvis sends Terra to flee through [[Narshe Mines (North Passage)|the mines]], and then contacts [[Locke Cole]], a "[[Thief (job)|Treasure Hunter]]" and contact with the Returners, to aid in her escape. Locke is able to save Terra from the guards with the help of [[Mog (Final Fantasy VI)|Mog]] and [[Ten Moogles|ten other moogles]], and after a [[Battle to Protect Terra|brief clash]] with Narshe guards, the two flee Narshe. Shocked and angered by the violation of their neutrality, the Narsheans close their gates to the Returners, and anyone attempting to enter the town is chased away by armed guards. |
||
[[File:FFVI GBA Narshe Returners Alliance 2.png|left|The Elder decided to fight against the Empire.]] |
[[File:FFVI GBA Narshe Returners Alliance 2.png|left|The Elder decided to fight against the Empire.]] |
||
| − | + | Later, Terra returns to Narshe in the company of [[Edgar Roni Figaro|Edgar]], king of [[Figaro Castle|Figaro]], and [[Banon]], leader of the Returners. With Arvis they attempt to convince the town to side with the Returners, but the [[Elder of Narshe]] is hesitant for fear of making Narshe a target. Locke arrives with the former Imperial general [[Celes Chere]], and inform the group that an Imperial force led by [[Kefka Palazzo]] is already on its way to Narshe to seize the esper by force. The Elder agrees to accept defensive aid from the Returners and the [[Battle for the Frozen Esper]] ends with the Returners driving off Kefka and the Imperials. In the aftermath, Terra confronts the frozen esper and transforms into an esper herself, flying away. |
|
| + | While Narshe has not formally aligned itself with the Returners, Banon and his forces remain there to aid in its defense against any further Imperial aggression, while a group of them searches for Terra. After Terra is recovered, Narshe joins the Returners and the group plots an attack on the Imperial capital [[Vector]] with the aid of Narshe and Figaro forces. Lacking the manpower for such an endeavor, the Returners ask Terra to go to the gate to the [[Esper World]] and enlist their aid. Instead, the espers that emerge from the gateway [[Battle of Vector|decimate Vector]], and the town is occupied by a coalition of Narshe and Figaro soldiers. |
||
| − | In the aftermath, Terra confronts the frozen esper and transforms into an esper herself, flying away. Banon and a handful of Returners remain in the town while another group departs to search for Terra. Terra is recovered and the people of Narshe agree to join the Returners, giving them the strength to plot a direct [[Battle of Vector|attack on the imperial capital Vector]]. Vector slips into the hands of the allied forces after co-belligerent espers decimate the city, forcing the Empire to sign a temporary peace treaty with the Returners. The allies subsequently withdraw from Vector. |
||
| ⚫ | |||
| + | After the [[Cataclysm (Final Fantasy VI)|cataclysm]] Narshe is overrun by [[Monster (term)|monsters]]. It is never directly stated how this happened, though it is possible that Kefka attacked the town with his [[Light of Judgment]]. Most of the citizens have fled or been killed, with a few exceptions: Mog has returned to the [[Moogle (race)|moogle]] home within the mines, the adventurer's school is still operational, the weapons shop owner is still in his shop and gives the party the [[Ragnarok (Final Fantasy VI esper)|Ragnarok]], and another resident sick in bed in another home will hand over the [[Cursed Shield]]. Most doors in the town are locked and can only be opened by Locke; the only buildings not locked are the Armor shop, Arvis' house, the Elder's house, and the adventurer's school. |
||
| + | If the party returns to the snowfields above the town, they can thaw the frozen Esper to obtain its [[Magicite (Final Fantasy VI)|magicite]], ad defeating it opens a secret passage to the [[Yeti's Cave]] behind the [[Narshe Cliffs|cliffs of Narshe]]. [[Umaro]] can be recruited into the party here, provided Mog is with them. |
||
| ⚫ | |||
| + | |||
| − | After the [[end of the world]] Narshe is overrun by [[Monster (term)|monsters]], and most of the townsfolk have fled or been killed. It is never directly stated how this happened; one possibility is that Kefka, having suffered his first defeat in Narshe, made the town one of the first targets of his [[Light of Judgment]]. Many doors are locked and require Locke in the party to open them. The owner of the weapon shop refuses to leave Narshe and has locked himself in, and will give the party [[Ragnarok (Final Fantasy VI esper)|Ragnarok]] if talked to. Another old man who has stayed behind will hand over the [[Cursed Shield]] if the party finds him in his basement. Mog has returned to the [[Moogle (race)|moogle]] home within the mines. The frozen esper can still be found where it was left after the battle, and the party can obtain its [[Magicite (Final Fantasy VI)|magicite]] by awakening it and defeat it in battle. A secret passage to the [[Yeti's Cave]] behind the [[Narshe Cliffs|cliffs of Narshe]] opens and [[Umaro]] can be recruited into the party, provided Mog is with them. Whether Narshe is repopulated after the final defeat of Kefka is unknown. |
||
| + | Narshe is not shown during the end of the game and if it is repopulated after the defeat of Kefka is unknown. |
||
| − | {{ |
+ | {{clear}} |
{{Endspoiler}} |
{{Endspoiler}} |
||
| − | == |
+ | ==Layout== |
| + | Narshe is built into the foot of a far northern mountain; the environment is chilly and cold, but Narshe is warmed by geothermal heaters; boilers and pipes can be seen throughout the town, as well as vents in the ground that may also serve to distribute heat. On the outskirts of town more houses are built on the cliffs and connected by staircases. |
||
| + | |||
| + | To the north the town of Narshe gives way to a large cliff face, where a mine shaft winds through the mountain and across the cliffs up to the snowfields overlooking the town. A secondary cave system. the [[Yeti's Cave]], is contain in the mountains, but the only apparent entrance is a hole in the cliff that is unreachable. |
||
| + | |||
=== Town === |
=== Town === |
||
| − | The |
+ | The houses in the center of town hold various shops; an inn, a weapon shop, armor shop, item shop, and relic shop. On the western edge of the town on a cliff is the Elder's house, and another house sits on a ledge overlooking the relic shop. On the eastern edge of town is Arvis' houses and a storehouse full of treasures belonging to a citizen of the town. A bridge from Arvis' house connects to [[Narshe Mines (South Passage)|an abandoned mineshaft]] that exits to the southern edge of town. |
=== Adventuring School === |
=== Adventuring School === |
||
| + | {{main|Beginner's Hall}} |
||
| − | The [[Beginner's Hall]] can be first accessed on the way out from the Narshe Mines. This place has three rooms and a healing pot the player can use to heal before proceeding on to the world map. The first room teaches players the basics, and the other rooms teach the player advanced techniques. |
||
| + | The Adventuring School lies just outside the entrance of town, and hosts classes that teach the player various gameplay concepts. The classrooms are Field Science, Battle Tactics, and Advanced Battle Tactics. Field Science gives general gameplay information, Battle Tactics focuses on the basics of combat, and Advanced Battle Tactics discuss specific aspects of character abilities and spell effects. |
||
=== Mines === |
=== Mines === |
||
| + | There are two mineshafts in Narshe. [[Narshe Mines (South Passage)|The southern mine]] leads from the outskirts of town to deep within the town limits, and connects to Arvis' house via a bridge. The entrance to the mine is concealed in a rockface, and opens with a secret switch. The mines also contain a security checkpoint used to test applicants to the city guard. |
||
| − | {{main|Narshe Mines}} |
||
| + | |||
| − | The mines form an expansive system of caves leading through and above the cliffs overlooking the town. There are three distinct sets of caves: one leads from just inside the town's entrance to Arvis's house, and includes the moogles' home. |
||
| + | [[Narshe Mines (North Passage)|The northern mine]] is only accessible by going through the town itself, and leads to the cliffs above the town. Compared to the southern mine, it is much shorter with a more linear path. A rear area near the entrance to the mines is the initial location of the frozen esper. |
||
=== Cliffs === |
=== Cliffs === |
||
{{main|Narshe Cliffs}} |
{{main|Narshe Cliffs}} |
||
| + | The cliffs above the town are a large, snowy field with winding paths through the rockface. At the northern end of the cliffs is a bluff overlooking a valley. It is here the citizens of Narshe move the frozen esper after the imperial raid, and it is on the cliffs that the [[Battle for the Frozen Esper]] takes place when the Returners defend the town from a second, larger imperial attack. |
||
| − | The second set of caves can be found north of the town and leads onto the cliffs where the frozen esper is located. A rear passage is where the esper is first found. The third set of caves, known as the [[Yeti's Cave]], is accessible after unthawing Valigarmanda in the World of Ruin, and leads to Umaro's home. A drop-off within the cave drops the party back on the path leading up to the cliffs. In the World of Balance, Umaro can sometimes be seen poking his head out from this hole in the cliffs. |
||
| + | In the World of Ruin, the player can have the party leap off the bluff to enter the [[Yeti's Cave]] where [[Umaro]] lives. |
||
| ⚫ | |||
| ⚫ | |||
| ⚫ | |||
| ⚫ | During the third visit to the town the player can find [[Lone Wolf the Pickpocket#Final Fantasy VI|Lone Wolf]] in the house on the hill on the east side of town. The player must pursue him |
||
| + | == Gameplay == |
||
| ⚫ | |||
| ⚫ | |||
| ⚫ | |||
| ⚫ | |||
| − | |||
| ⚫ | |||
| ⚫ | |||
| ⚫ | In the World of Ruin, a man in the basement of |
||
| − | |||
| ⚫ | A fast way to dispel the curse is to fly to [[Solitary Island]] and fight the [[Peeper (Final Fantasy VI)|Peepers]]; since they have innate [[Sap (status)|Sap]] and only one HP, it will die on its first turn. The players must be careful when fighting in the desert, as a [[Black Dragon (Final Fantasy VI)|Black Dragon]] may occasionally show up. |
||
| − | |||
| ⚫ | |||
| ⚫ | |||
| ⚫ | |||
| − | |||
| − | The player cannot return to have the magicite turned into the sword if they take the magicite. In the GBA and later releases, where the player can continue their save data after the [[List of final bosses|final battle]], it may be preferable to take the magicite, as a Ragnarok sword can be [[Steal#Final Fantasy VI|stolen]] from [[Lady]], while the magicite cannot be obtained in other ways. Even if the player takes the sword, the Ultima spell can still be learned from the [[Final Fantasy VI armor#Paladin Shield|Paladin Shield]]. |
||
| − | |||
| ⚫ | |||
| ⚫ | In the |
||
| − | |||
| ⚫ | |||
| ⚫ | |||
| − | |||
| ⚫ | |||
| ⚫ | |||
| ⚫ | |||
| ⚫ | |||
| ⚫ | |||
| ⚫ | |||
| ⚫ | |||
| ⚫ | |||
| ⚫ | |||
| − | * [[Relic (Final Fantasy VI)#Sprint Shoes|Sprint Shoes]] (Unobtainable, located one tile to the right near back door of Arvis's house. Wob only.) |
||
| ⚫ | |||
| ⚫ | |||
| ⚫ | |||
| ⚫ | |||
| ⚫ | |||
| ⚫ | |||
| ⚫ | |||
| ⚫ | |||
| ⚫ | |||
| ⚫ | |||
| − | |||
| ⚫ | |||
| ⚫ | |||
{{multicol-begin}} |
{{multicol-begin}} |
||
| − | + | ====World of Balance==== |
|
| + | {{multicol-begin}} |
||
| − | * Plains |
||
| + | ; Overworld - Plains |
||
| ⚫ | |||
| − | + | * [[Leaf Bunny (Final Fantasy VI)|Leaf Bunny]] |
|
| ⚫ | |||
| − | * Forest |
||
| + | ; Overworld - Forest |
||
| ⚫ | |||
| − | + | * Leaf Bunny x2, Darkwind |
|
| + | * Leaf Bunny x2, Darkwind x2 |
||
| − | * Opening Sequence |
||
| ⚫ | |||
| ⚫ | |||
| ⚫ | |||
| ⚫ | |||
| ⚫ | |||
| ⚫ | |||
| − | ** [[Silver Lobo (Final Fantasy VI)|Silver Lobo]] (Monster-In-A-Box) |
||
{{multicol-separator}} |
{{multicol-separator}} |
||
| + | ; Imperial raid |
||
| ⚫ | |||
| ⚫ | |||
| − | * Barrens |
||
| ⚫ | |||
| ⚫ | |||
| − | + | * [[Guard (Final Fantasy VI)|Guard]] x2 |
|
| ⚫ | |||
| ⚫ | |||
| ⚫ | |||
| ⚫ | |||
| ⚫ | |||
| ⚫ | |||
| − | + | * [[Silver Lobo (Final Fantasy VI)|Silver Lobo]] (Monster-In-A-Box) |
|
| ⚫ | |||
{{multicol-end}} |
{{multicol-end}} |
||
| + | {{multicol-separator}} |
||
| ⚫ | |||
| + | ; Overworld - Plains |
||
| ⚫ | |||
| + | * [[Basilisk (Final Fantasy VI)|Basilisk]] x2, [[Leap Frog (Final Fantasy VI)|Leap Frog]] |
||
| ⚫ | |||
| ⚫ | |||
| ⚫ | |||
| ⚫ | |||
| ⚫ | |||
| ⚫ | |||
| + | {{multicol-end}} |
||
| + | |||
| ⚫ | |||
| + | The shops of Narshe change their inventory after completing the [[Magitek Research Facility (Final Fantasy VI)|Magitek Research Facility]] and acquiring the ''[[Blackjack (Final Fantasy VI)|Blackjack]]''. |
||
| − | == Shops == |
||
{{multicol-begin}} |
{{multicol-begin}} |
||
| − | + | ;[[Final Fantasy VI items|Items]] |
|
{|class="FFVI article-table" style="text-align:center" |
{|class="FFVI article-table" style="text-align:center" |
||
|- |
|- |
||
| Line 233: | Line 210: | ||
|} |
|} |
||
{{multicol-separator}} |
{{multicol-separator}} |
||
| − | + | ;[[Final Fantasy VI weapons|Weapons]] |
|
{|class="FFVI article-table" style="text-align:center" |
{|class="FFVI article-table" style="text-align:center" |
||
|- |
|- |
||
| Line 286: | Line 263: | ||
|} |
|} |
||
{{multicol-separator}} |
{{multicol-separator}} |
||
| − | + | ;[[Final Fantasy VI armor|Armor]] |
|
{|class="FFVI article-table" style="text-align:center" |
{|class="FFVI article-table" style="text-align:center" |
||
|- |
|- |
||
| Line 342: | Line 319: | ||
|} |
|} |
||
{{multicol-separator}} |
{{multicol-separator}} |
||
| − | + | ;[[Relic (Final Fantasy VI)|Relics]] |
|
{|class="FFVI article-table" style="text-align:center" |
{|class="FFVI article-table" style="text-align:center" |
||
|- |
|- |
||
| Line 390: | Line 367: | ||
{{multicol-end}} |
{{multicol-end}} |
||
| + | === Treasures === |
||
| − | ==Creation and development== |
||
| + | {{context-link|desc=For treasures in the caves, see|Narshe Mines (South Passage)|Yeti's Cave}}[[File:FFVI Unobtainable Sprint Shoes.png|thumb|right|The unobtainable Sprint Shoes.]] |
||
| ⚫ | |||
| + | In addition to these treasures, a pair of [[Relic (Final Fantasy VI)#Sprint Shoes|Sprint Shoes]] exists in the back of Arvis' house. However, the shows were misplaced one tile too far to the right, beyond the space the party is able to walk on, making them unobtainable. |
||
| ⚫ | |||
| ⚫ | |||
| + | * [[Final Fantasy VI items#Elixir|Elixir]] x2 (Clock in Arvis' house, clock in Elder's house) |
||
| ⚫ | |||
| ⚫ | |||
| ⚫ | |||
| ⚫ | |||
| ⚫ | |||
| ⚫ | |||
| ⚫ | |||
| ⚫ | |||
| ⚫ | |||
| ⚫ | |||
| ⚫ | |||
| ⚫ | |||
| ⚫ | |||
| ⚫ | |||
| ⚫ | |||
| ⚫ | |||
| ⚫ | |||
| ⚫ | |||
| ⚫ | |||
| + | |||
| ⚫ | |||
| + | ==== Raid on Narshe ==== |
||
| + | {{main|Raid on Narshe}} |
||
| + | The game opens with an attack on Narshe. The player commands a party of Terra, Biggs, and Wedge, riding Magitek Armor. When they first attempt to go north past the inn, two [[Guard (Final Fantasy VI)|Guards]] will attack them. Attempting to take the path east by the inn will cause a guard to sic a [[Silver Lobo (Final Fantasy VI)|Silver Lobo]] on the trio, but this path cannot be traversed in Magitek Armor. Going further north, the tile directly below the cross shaped form by the grates in the ground will trigger two more battles with Guards and Silver Lobos, but this tile can be walked around to avoid fighting. Further north the player will be attacked by more Guards and Silver Lobos in a pincer attack. |
||
| + | |||
| + | At the entrance to [[Narshe Mines (North Passage)|the mines]], two guards will attack with two [[Megalodoth (Final Fantasy VI)|Megalodoths]]. Once they are defeated, the player can continue north into the mines. |
||
| + | |||
| + | ==== Sneaking into Narshe ==== |
||
| + | The second part of Terra's scenario in the Three Scenarios demands the party enter Narshe to speak to Arvis. Attempting to enter town through the front entrance causes the guards to recognize Terra from the imperial raid, and, doubting [[Edgar Roni Figaro|Edgar's]] claim he is the King of [[Figaro Castle]], kick the party out. To get into town, the player must walk far to the west and inspect the rock wall, prompting Terra to reveal to Edgar and [[Banon]] the secret passage Locke used to sneak her out of town; they can now use it to sneak back in. |
||
| + | |||
| + | ==== Battle for the Frozen Esper ==== |
||
| + | {{main|Battle for the Frozen Esper}} |
||
| + | Upon completing the Three Scenarios, the three parties automatically gather at Narshe and fight off an imperial attack on the [[Narshe Cliffs]]. |
||
| + | |||
| ⚫ | |||
| ⚫ | |||
| ⚫ | During the third visit to the town the player can find [[Lone Wolf the Pickpocket#Final Fantasy VI|Lone Wolf]] in the house on the hill on the east side of town. The player must pursue him through the northern mines and onto the cliffs, where he holds Mog hostage. If the player holds still for a few moments after approaching once, Mog will struggle and knock himself and Lone Wolf to opposite sides of the cliff. The player can rescue Mog and recruit him to the party, or can approach Lone Wolf to take the [[Relic (Final Fantasy VI)#Gold Hairpin|Gold Hairpin]] he had stolen earlier. If they take the latter option Mog falls and cannot be recruited. |
||
| + | |||
| ⚫ | In the World of Ruin, Mog can be found in the moogle cave in the depths of the Narshe's mines and finding him will prompt him to join the party. Mog will join the party even if not recruited in the World of Balance, and he will still be available to join if the player let him fall during the confrontation with Lone Wolf. |
||
| ⚫ | |||
| + | |||
| ⚫ | |||
| ⚫ | |||
| ⚫ | In the World of Ruin, a man in the basement of the house above the relic shop will give the player the [[Cursed Shield]] that inflicts a slew of negative status ailments, stat penalties and elemental weaknesses on the equipped character. If a player fights 256 battles with it the curse will be lifted and it becomes the [[Hero's Shield|Paladin's Shield]], the best shield in the game. |
||
| + | |||
| ⚫ | A fast way to dispel the curse is to fly to [[Solitary Island]] and fight the [[Peeper (Final Fantasy VI)|Peepers]]; since they have innate [[Sap (status)|Sap]] and only one HP, it will die on its first turn. The players must be careful when fighting in the desert, as a [[Black Dragon (Final Fantasy VI)|Black Dragon]] may occasionally show up. |
||
| + | |||
| + | ==== Ragnarok ==== |
||
| ⚫ | |||
| + | In the World of Ruin, the owner of the weapon shop can be found in his back room. He shows the party a glowing stone, the [[magicite (Final Fantasy VI)|magicite]] [[Ragnarok (Final Fantasy VI esper)|Ragnarok]], and offers to melt it down to forge it into [[Final Fantasy VI weapons#Ragnarok|a powerful sword]]. The player's option is a one-time opportunity and they cannot return the magicite later to forge the sword if they take the magicite. |
||
| + | |||
| ⚫ | Which item to take is largely a matter of personal preference - the magicite is the only magicite to teach [[Ultima (Final Fantasy VI)|Ultima]], the most powerful spell, and the only way to use [[Ragnarok (Final Fantasy VI esper)#Esper|Metamorphosis]] to [[poach|turn enemies into items]]. The sword meanwhile is one of the most powerful weapons in the game and can be bet at [[Dragon's Neck Coliseum]] to win an even more powerful weapon, the [[Final Fantasy VI weapons#Lightbringer|Lightbringer]]. |
||
| + | |||
| + | During the [[Statue of the Gods|final battle]], the player can [[Steal#Final Fantasy VI|steal]] a Ragnarok sword from [[Lady]]. While this is of minimal use in the Super NES and Playstation versions, in the GBA and later versions the player has the option to save after the final battle. This not only allows the player to keep the Ragnarok, but farm it by fighting the final battle over and over. With this, keeping the Ragnarok as a magicite may be the more appealing option to taking the sword. |
||
| + | |||
| ⚫ | |||
| ⚫ | In the World of Ruin, the [[Ice Dragon (Final Fantasy VI)|Ice Dragon]], one of the [[eight legendary dragons]], prowls the snowfields above town. Beyond it at the bluff, the player can find the frozen esper [[Valigarmanda (boss)|Valigarmanda]] and battle it, thawing it to obtain it as a magicite. Defeating Valigarmanda opens a passage to the [[Yeti's Cave]] where Umaro lives. Defeating Umaro with Mog in the party will have Umaro join. |
||
| + | |||
| ⚫ | |||
| ⚫ | |||
| + | |||
| + | ===Maps=== |
||
| + | {{multicol-begin}} |
||
| + | ;Town |
||
| + | <div style="width: 400px; height: 600px; overflow-x: scroll; overflow-y: hidden; border: 1px solid black;"> |
||
| + | [[File:Narshe Town.png|408px]] |
||
| + | </div> |
||
| + | {{multicol-separator}} |
||
| + | ;Interiors |
||
| + | <div style="width: 400px; height: 600px; overflow-x: scroll; overflow-y: hidden; border: 1px solid black;"> |
||
| + | [[File:Narshe Town Interiors.png|488px]] |
||
| + | </div> |
||
| + | {{multicol-end}} |
||
== Musical themes == |
== Musical themes == |
||
{{audio|filename=FFVI - The Mines of Narshe.ogg|title= "The Mines of Narshe" from ''Final Fantasy VI''}} |
{{audio|filename=FFVI - The Mines of Narshe.ogg|title= "The Mines of Narshe" from ''Final Fantasy VI''}} |
||
"The Mines of Narshe" is the track used as the background theme for Narshe, but is replaced by the theme "Dark World" in the World of Ruin. |
"The Mines of Narshe" is the track used as the background theme for Narshe, but is replaced by the theme "Dark World" in the World of Ruin. |
||
| − | {{ |
+ | {{clear}} |
== Other appearances == |
== Other appearances == |
||
| Line 407: | Line 453: | ||
[[File:Narshe (Final Fantasy VI) dissidia arcade.jpg|right|thumb|The town of Narshe in the background]] |
[[File:Narshe (Final Fantasy VI) dissidia arcade.jpg|right|thumb|The town of Narshe in the background]] |
||
The town of Narshe appears in the background of the [[Narshe Cliffs|Narshe Outskirts]] stage. |
The town of Narshe appears in the background of the [[Narshe Cliffs|Narshe Outskirts]] stage. |
||
| − | {{ |
+ | {{clear}} |
=== ''[[Theatrhythm Final Fantasy]]'' === |
=== ''[[Theatrhythm Final Fantasy]]'' === |
||
| Line 418: | Line 464: | ||
=== ''[[Final Fantasy Airborne Brigade]]'' === |
=== ''[[Final Fantasy Airborne Brigade]]'' === |
||
| − | |||
The Snowfield Mining Town in the [[Kolts Region]] is based on the city of Narshe. As part of the January special events of "Typhon Attacks" and "Deathgaze's Onslaught", four locations from the game were added, including the Snow Fields (which use the same background as the Snow Fields of Narshe). |
The Snowfield Mining Town in the [[Kolts Region]] is based on the city of Narshe. As part of the January special events of "Typhon Attacks" and "Deathgaze's Onslaught", four locations from the game were added, including the Snow Fields (which use the same background as the Snow Fields of Narshe). |
||
| Line 429: | Line 474: | ||
=== ''[[Final Fantasy Record Keeper]]'' === |
=== ''[[Final Fantasy Record Keeper]]'' === |
||
| − | |||
Narshe is the setting for two regular dungeons and is also featured in the [[Challenge Event]]s [[A Fateful Coin Toss - Ascension and Freedom|A Fateful Coin Toss]] and [[Back to the Skies]]. In [[Assassin in Black]] Narshe is the name of a "+++" difficulty battle. |
Narshe is the setting for two regular dungeons and is also featured in the [[Challenge Event]]s [[A Fateful Coin Toss - Ascension and Freedom|A Fateful Coin Toss]] and [[Back to the Skies]]. In [[Assassin in Black]] Narshe is the name of a "+++" difficulty battle. |
||
==== Narshe, Part 1 ==== |
==== Narshe, Part 1 ==== |
||
[[File:FFRK Narshe, Part 1 FFVI.png|right|150px]] |
[[File:FFRK Narshe, Part 1 FFVI.png|right|150px]] |
||
| − | {{ |
+ | {{Location section|Final Fantasy Record Keeper}} |
==== Narshe, Part 2 ==== |
==== Narshe, Part 2 ==== |
||
[[File:FFRK Narshe, Part 2 FFVI.png|right|150px]] |
[[File:FFRK Narshe, Part 2 FFVI.png|right|150px]] |
||
| − | {{ |
+ | {{Location section|Final Fantasy Record Keeper}} |
| + | ===''[[Final Fantasy Brave Exvius]]''=== |
||
| ⚫ | |||
| ⚫ | |||
| + | FFBE Narshe.png|Battle background. |
||
| + | FFBE Narshe 2.png|Exploration event. |
||
| ⚫ | |||
| + | {{Location section|Final Fantasy Brave Exvius}} |
||
| + | {{clear}} |
||
| + | |||
| + | ===Other media=== |
||
| ⚫ | There are several references to Narshe in ''[[Dissidia 012 Final Fantasy]]'': [[Terra Branford/Dissidia (PSP)|Terra's]] second alternate outfit is called "Narshean Princess", and in [[Light to All/Chapter 3|her storyline]], which begins in a snowfield, she remarks the snow makes her feel nostalgic. There is also a trade material named "Narshe Ore". |
||
| + | |||
| + | ==Behind the scenes== |
||
| ⚫ | |||
| + | |||
| + | <gallery> |
||
| ⚫ | |||
| ⚫ | |||
| + | </gallery> |
||
| + | |||
| ⚫ | |||
<gallery> |
<gallery> |
||
Narsheart.JPG|Artwork of Narshe as depicted in a ''Final Fantasy VI'' [[List of guide books|creation materials guide]]. |
Narsheart.JPG|Artwork of Narshe as depicted in a ''Final Fantasy VI'' [[List of guide books|creation materials guide]]. |
||
Terra heading for Narshe.jpg|Artwork by [[Yoshitaka Amano]] of Terra riding Magitek Armor in Narshe. |
Terra heading for Narshe.jpg|Artwork by [[Yoshitaka Amano]] of Terra riding Magitek Armor in Narshe. |
||
| − | FFVI Unobtainable Sprint Shoes.png|Unobtainable Sprint Shoes (SNES). |
||
Narshe-world-map-FFVI-iOS.png|Entrance to Narshe (iOS/Android/PC). |
Narshe-world-map-FFVI-iOS.png|Entrance to Narshe (iOS/Android/PC). |
||
FFVI PC Narshe Upper.png|The upper trails (iOS/Android/PC). |
FFVI PC Narshe Upper.png|The upper trails (iOS/Android/PC). |
||
| Line 451: | Line 513: | ||
Battleback town a.png|Battle background (iOS/Android/PC). |
Battleback town a.png|Battle background (iOS/Android/PC). |
||
FFVI Narshe WoB.png|Narshe in the World of Balance (GBA). |
FFVI Narshe WoB.png|Narshe in the World of Balance (GBA). |
||
| − | + | FFVI Narshe WoB Weapon Shop.png|Narshe's Weapon Shop (GBA). |
|
| − | + | FFVI Narshe WoB Relic Shop.png|Narshe's Relic Shop (GBA). |
|
| − | + | FFVI Narshe WoB Inn.png|Narshe's Inn (GBA). |
|
| − | + | FFVI Narshe WoB Armor Shop.png|Narshe's Armor Shop (GBA). |
|
| − | + | FFVI Narshe WoB Item Shop.png|Narshe's Item Shop (GBA). |
|
FFVIA Narshe BG.PNG|Battle background (GBA). |
FFVIA Narshe BG.PNG|Battle background (GBA). |
||
FFVI Narshe secret passagw.png|Narshe's secret passage to the mines (GBA). |
FFVI Narshe secret passagw.png|Narshe's secret passage to the mines (GBA). |
||
| Line 464: | Line 526: | ||
Narshe town.PNG|The town of Narshe (SNES). |
Narshe town.PNG|The town of Narshe (SNES). |
||
FFVI Narshe Field Background.png|Field background (SNES). |
FFVI Narshe Field Background.png|Field background (SNES). |
||
| − | FFVI Narshe Guard. |
+ | FFVI Narshe Guard.png|Narshe guard. |
FFVI Narshe Guard 2.png|Ymir Narshe guard. |
FFVI Narshe Guard 2.png|Ymir Narshe guard. |
||
FFRK Narshe, Part 1 JP FFVI.png|The Japanese dungeon image for ''Narshe, Part 1'' in ''Final Fantasy Record Keeper''. |
FFRK Narshe, Part 1 JP FFVI.png|The Japanese dungeon image for ''Narshe, Part 1'' in ''Final Fantasy Record Keeper''. |
||
FFRK Narshe, Part 2 JP FFVI.png|The Japanese dungeon image for ''Narshe, Part 2'' in ''Final Fantasy Record Keeper''. |
FFRK Narshe, Part 2 JP FFVI.png|The Japanese dungeon image for ''Narshe, Part 2'' in ''Final Fantasy Record Keeper''. |
||
</gallery> |
</gallery> |
||
| − | |||
| − | == Trivia == |
||
| ⚫ | |||
{{FA|July 1, 2009}} |
{{FA|July 1, 2009}} |
||
{{navbox setting FFVI}} |
{{navbox setting FFVI}} |
||
| ⚫ | |||
| ⚫ | |||
[[de:Narshe]] |
[[de:Narshe]] |
||
[[fi:Narshe]] |
[[fi:Narshe]] |
||
[[ru:Нарше]] |
[[ru:Нарше]] |
||
| ⚫ | |||
| ⚫ | |||
Revision as of 02:42, 18 June 2020
Template:Sideicon
Narshe is a neutral city. We want no war here, but that @#$% Empire won't listen!
Narshe resident
Narshe, also known as Narche, and titled "Colliery City Narshe" (炭坑都市ナルシェ, Tankō Toshi Narushe?) in the Japanese version, is a city in Final Fantasy VI. It is a coal mining town at the northern edge of the world, governed by the Elder of Narshe. The town is one of the game's most important locations—it is where the player party makes their base of operations before they have an airship, and several storyline events, including the beginning, take place here. Situated in the mountains and affected by snowy conditions, Narshe resists invasion attempts by the Gestahlian Empire.
Story
Arvis commenting on Narshe's policy of neutrality.
According to a timeline in the Settei Shiryō-hen guide book, Narshe formed an independent political system 150 years ago. Around 20 years ago it refused to sell coal to the invading Gestahlian Empire with armed resistance, but a pact of mutual peace is agreed upon. The canonity of this timeline is questionable, however.
In the World of Balance Narshe is a neutral city that has kept out of the war between the Gestahlian Empire and the Returners, though one prominent citizen, Arvis, is secretly allied with the Returners. When the town discovers a frozen esper in a newly dug mineshaft, they attract the Empire's attention; they send Terra Branford, Biggs and Wedge, to raid the town and seize the Esper. While the three easily defeat Narshe's guards, the esper reacts to Terra's presence with a surge of magic, killing Biggs and Wedge and freeing Terra from imperial control when the Slave Crown she was wearing is disabled.
Terra is rescued from the mines by Arvis, but the guards of Narshe still wish to arrest her as an imperial soldier. Arvis sends Terra to flee through the mines, and then contacts Locke Cole, a "Treasure Hunter" and contact with the Returners, to aid in her escape. Locke is able to save Terra from the guards with the help of Mog and ten other moogles, and after a brief clash with Narshe guards, the two flee Narshe. Shocked and angered by the violation of their neutrality, the Narsheans close their gates to the Returners, and anyone attempting to enter the town is chased away by armed guards.
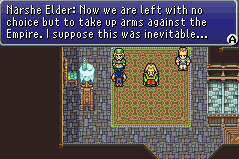
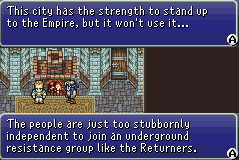
Later, Terra returns to Narshe in the company of Edgar, king of Figaro, and Banon, leader of the Returners. With Arvis they attempt to convince the town to side with the Returners, but the Elder of Narshe is hesitant for fear of making Narshe a target. Locke arrives with the former Imperial general Celes Chere, and inform the group that an Imperial force led by Kefka Palazzo is already on its way to Narshe to seize the esper by force. The Elder agrees to accept defensive aid from the Returners and the Battle for the Frozen Esper ends with the Returners driving off Kefka and the Imperials. In the aftermath, Terra confronts the frozen esper and transforms into an esper herself, flying away.
While Narshe has not formally aligned itself with the Returners, Banon and his forces remain there to aid in its defense against any further Imperial aggression, while a group of them searches for Terra. After Terra is recovered, Narshe joins the Returners and the group plots an attack on the Imperial capital Vector with the aid of Narshe and Figaro forces. Lacking the manpower for such an endeavor, the Returners ask Terra to go to the gate to the Esper World and enlist their aid. Instead, the espers that emerge from the gateway decimate Vector, and the town is occupied by a coalition of Narshe and Figaro soldiers.
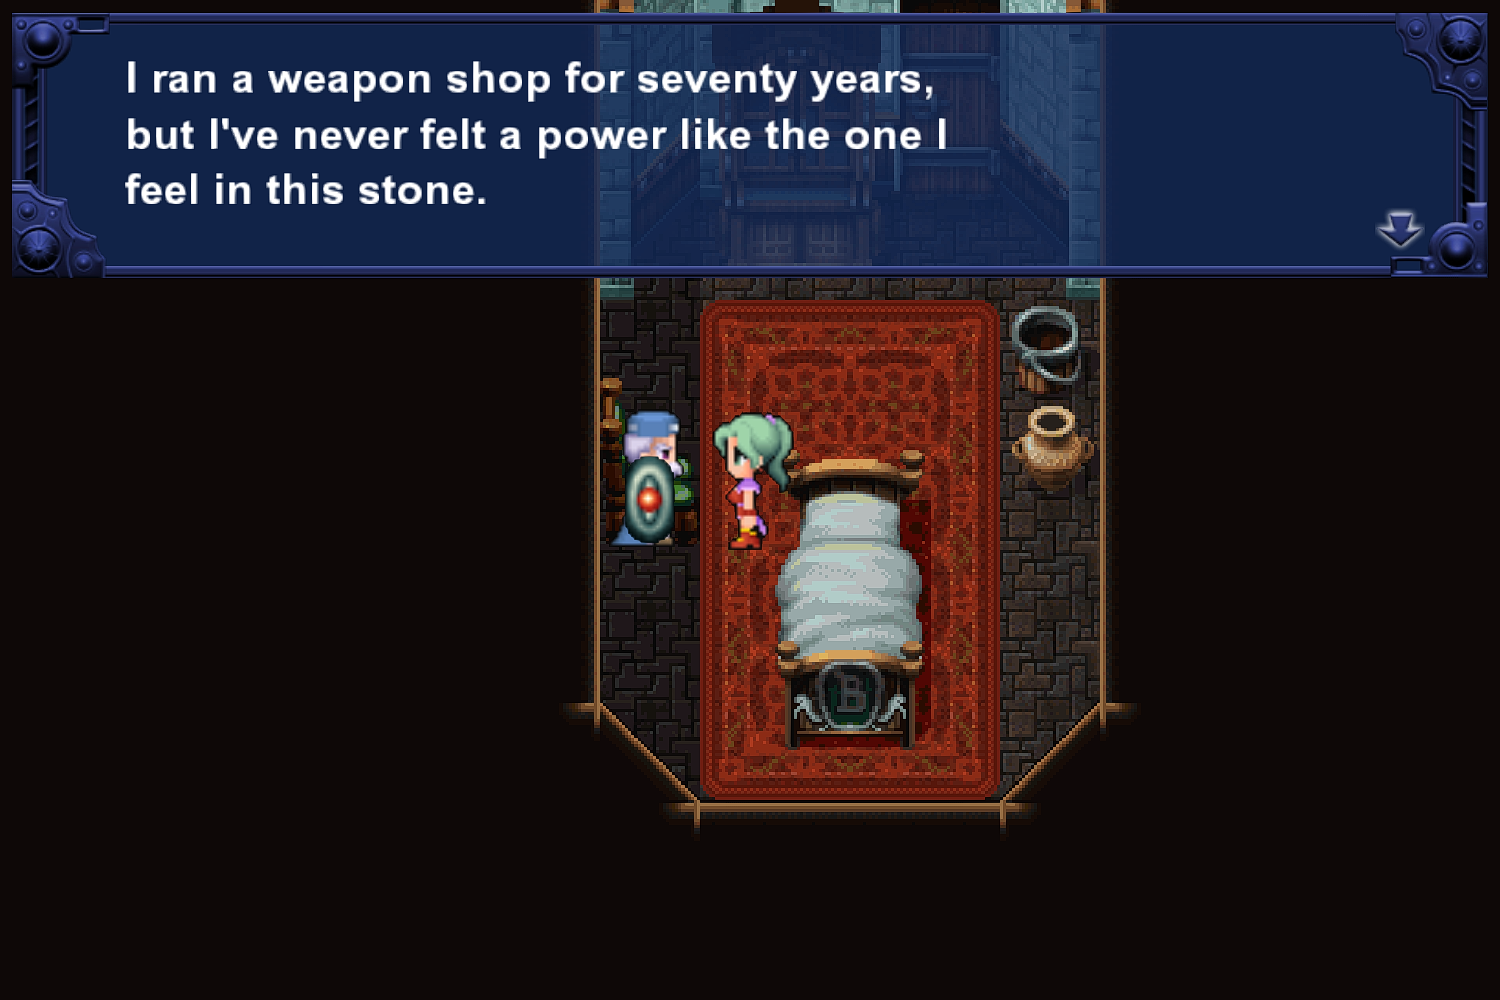
The weapon shop owner giving the Ragnarok magicite to the party.
After the cataclysm Narshe is overrun by monsters. It is never directly stated how this happened, though it is possible that Kefka attacked the town with his Light of Judgment. Most of the citizens have fled or been killed, with a few exceptions: Mog has returned to the moogle home within the mines, the adventurer's school is still operational, the weapons shop owner is still in his shop and gives the party the Ragnarok, and another resident sick in bed in another home will hand over the Cursed Shield. Most doors in the town are locked and can only be opened by Locke; the only buildings not locked are the Armor shop, Arvis' house, the Elder's house, and the adventurer's school.
If the party returns to the snowfields above the town, they can thaw the frozen Esper to obtain its magicite, ad defeating it opens a secret passage to the Yeti's Cave behind the cliffs of Narshe. Umaro can be recruited into the party here, provided Mog is with them.
Narshe is not shown during the end of the game and if it is repopulated after the defeat of Kefka is unknown.
Layout
Narshe is built into the foot of a far northern mountain; the environment is chilly and cold, but Narshe is warmed by geothermal heaters; boilers and pipes can be seen throughout the town, as well as vents in the ground that may also serve to distribute heat. On the outskirts of town more houses are built on the cliffs and connected by staircases.
To the north the town of Narshe gives way to a large cliff face, where a mine shaft winds through the mountain and across the cliffs up to the snowfields overlooking the town. A secondary cave system. the Yeti's Cave, is contain in the mountains, but the only apparent entrance is a hole in the cliff that is unreachable.
Town
The houses in the center of town hold various shops; an inn, a weapon shop, armor shop, item shop, and relic shop. On the western edge of the town on a cliff is the Elder's house, and another house sits on a ledge overlooking the relic shop. On the eastern edge of town is Arvis' houses and a storehouse full of treasures belonging to a citizen of the town. A bridge from Arvis' house connects to an abandoned mineshaft that exits to the southern edge of town.
Adventuring School
The Adventuring School lies just outside the entrance of town, and hosts classes that teach the player various gameplay concepts. The classrooms are Field Science, Battle Tactics, and Advanced Battle Tactics. Field Science gives general gameplay information, Battle Tactics focuses on the basics of combat, and Advanced Battle Tactics discuss specific aspects of character abilities and spell effects.
Mines
There are two mineshafts in Narshe. The southern mine leads from the outskirts of town to deep within the town limits, and connects to Arvis' house via a bridge. The entrance to the mine is concealed in a rockface, and opens with a secret switch. The mines also contain a security checkpoint used to test applicants to the city guard.
The northern mine is only accessible by going through the town itself, and leads to the cliffs above the town. Compared to the southern mine, it is much shorter with a more linear path. A rear area near the entrance to the mines is the initial location of the frozen esper.
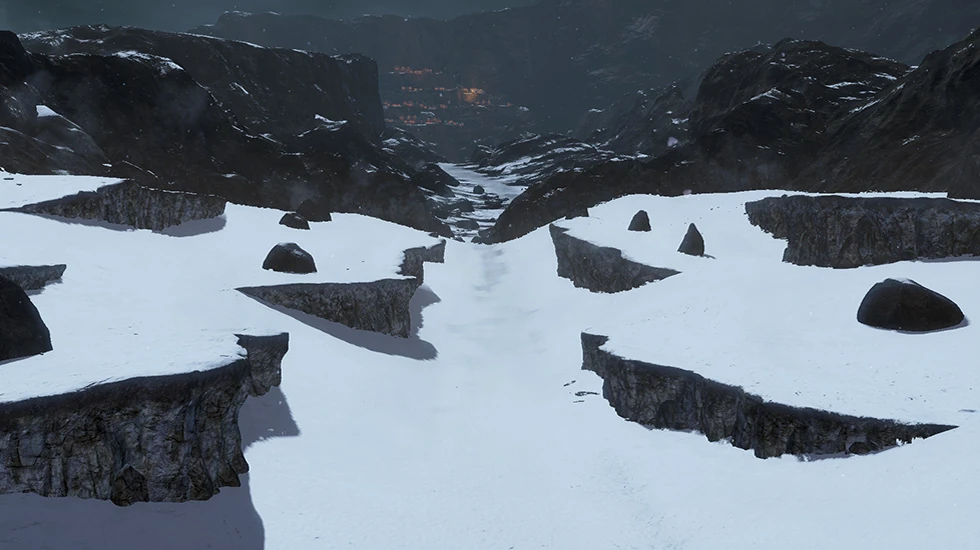
Cliffs
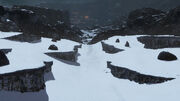
The cliffs above the town are a large, snowy field with winding paths through the rockface. At the northern end of the cliffs is a bluff overlooking a valley. It is here the citizens of Narshe move the frozen esper after the imperial raid, and it is on the cliffs that the Battle for the Frozen Esper takes place when the Returners defend the town from a second, larger imperial attack.
In the World of Ruin, the player can have the party leap off the bluff to enter the Yeti's Cave where Umaro lives.
Gameplay
Encounters
World of Balance
- Overworld - Plains
- Leaf Bunny
- Leaf Bunny x2, Darkwind
- Overworld - Forest
- Leaf Bunny x2, Darkwind
- Leaf Bunny x2, Darkwind x2
- Imperial raid
- Silver Lobo
- Silver Lobo x2
- Guard x2
- Silver Lobo , Guard x2
- Guard x2, Megalodoth x2
- Adventuring School
- Silver Lobo (Monster-In-A-Box)
World of Ruin
- Overworld - Plains
- Crawler x3
- Basilisk x2, Leap Frog
- Leap Frog x4
- Greater Mantis x2
- In Town
- Garm x3
- Garm x2, Lukhavi
- Test Rider
Shops
The shops of Narshe change their inventory after completing the Magitek Research Facility and acquiring the Blackjack.
| Before acquiring the Blackjack | |
|---|---|
| Item | Price |
| Potion | 50 gil |
| Hi-Potion | 300 gil |
| Ether | 1,500 gil |
| Phoenix Down | 500 gil |
| Gold Needle | 200 gil |
| Sleeping Bag | 500 gil |
| Tent | 1,200 gil |
| Smoke Bomb | 300 gil |
| After acquiring the Blackjack | |
| Item | Price |
| Hi-Potion | 300 gil |
| Ether | 1,500 gil |
| Phoenix Down | 500 gil |
| Green Cherry | 150 gil |
| Tent | 1,200 gil |
| Flame Scroll | 500 gil |
| Water Scroll | 500 gil |
| Lightning Scroll | 500 gil |
| Before acquiring the Blackjack | |
|---|---|
| Weapon | Price |
| Air Knife | 950 gil |
| Great Sword | 800 gil |
| Mythril Spear | 800 gil |
| Kotetsu | 800 gil |
| Mythril Claw | 800 gil |
| Chain Flail | 2,000 gil |
| Moonring Blade | 2,500 gil |
| After acquiring the Blackjack | |
| Weapon | Price |
| Sakura | 3,200 gil |
| Trident | 1,700 gil |
| Poison Rod | 1,500 gil |
| Morning Star | 5,000 gil |
| Boomerang | 4,500 gil |
| Hawkeye | 6,000 gil |
| Before acquiring the Blackjack | |
|---|---|
| Armor | Price |
| Mythril Shield | 1,200 gil |
| Magus Hat | 600 gil |
| Bandana | 900 gil |
| Iron Helmet | 1,000 gil |
| Silk Robe | 600 gil |
| Iron Armor | 700 gil |
| After acquiring the Blackjack | |
| Armor | Price |
| Golden Shield | 2,500 gil |
| Mythril Helm | 2,000 gil |
| Priest's Miter | 3,000 gil |
| Green Beret | 3,000 gil |
| Tiara | 3,000 gil |
| Golden Helmet | 4,000 gil |
| Mythril Mail | 3,500 gil |
| Power Sash | 5,000 gil |
| Before acquiring the Blackjack | |
|---|---|
| Relic | Price |
| Barrier Ring | 500 gil |
| Mythril Glove | 700 gil |
| Jeweled Ring | 1,000 gil |
| Knight's Code | 1,000 gil |
| Sprint Shoes | 1,500 gil |
| Fairy Ring | 1,500 gil |
| After acquiring the Blackjack | |
| Relic | Price |
| Sniper Eye | 3,000 gil |
| Black Belt | 5,000 gil |
| Earrings | 5,000 gil |
| Reflect Ring | 6,000 gil |
| Hermes Sandals | 7,000 gil |
Treasures
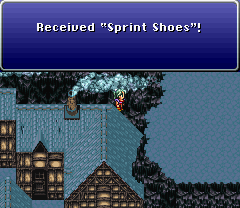

The unobtainable Sprint Shoes.
In addition to these treasures, a pair of Sprint Shoes exists in the back of Arvis' house. However, the shows were misplaced one tile too far to the right, beyond the space the party is able to walk on, making them unobtainable.
- Town
- Elixir x2 (Clock in Arvis' house, clock in Elder's house)
- 5,000 gil
- Thief's Knife
- Hyper Wrist
- Thief's Bracer
- Reflect Ring
- Earring
- Sleeping Bag x2 (Added to inventory after Frozen Esper cutscene.)
- Adventuring School
- World of Ruin
- The sword Ragnarok or the magicite Ragnarok
- Cursed Shield
- The magicite Valigarmanda
Quests
Raid on Narshe
The game opens with an attack on Narshe. The player commands a party of Terra, Biggs, and Wedge, riding Magitek Armor. When they first attempt to go north past the inn, two Guards will attack them. Attempting to take the path east by the inn will cause a guard to sic a Silver Lobo on the trio, but this path cannot be traversed in Magitek Armor. Going further north, the tile directly below the cross shaped form by the grates in the ground will trigger two more battles with Guards and Silver Lobos, but this tile can be walked around to avoid fighting. Further north the player will be attacked by more Guards and Silver Lobos in a pincer attack.
At the entrance to the mines, two guards will attack with two Megalodoths. Once they are defeated, the player can continue north into the mines.
Sneaking into Narshe
The second part of Terra's scenario in the Three Scenarios demands the party enter Narshe to speak to Arvis. Attempting to enter town through the front entrance causes the guards to recognize Terra from the imperial raid, and, doubting Edgar's claim he is the King of Figaro Castle, kick the party out. To get into town, the player must walk far to the west and inspect the rock wall, prompting Terra to reveal to Edgar and Banon the secret passage Locke used to sneak her out of town; they can now use it to sneak back in.
Battle for the Frozen Esper
Upon completing the Three Scenarios, the three parties automatically gather at Narshe and fight off an imperial attack on the Narshe Cliffs.
Recruiting Mog
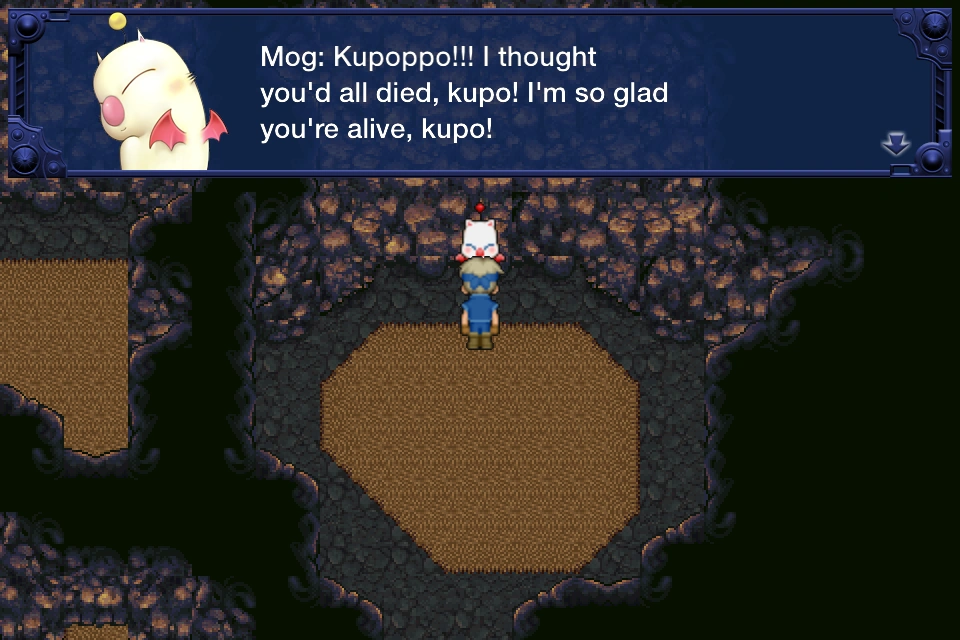
Mog joins in World of Ruin.
During the third visit to the town the player can find Lone Wolf in the house on the hill on the east side of town. The player must pursue him through the northern mines and onto the cliffs, where he holds Mog hostage. If the player holds still for a few moments after approaching once, Mog will struggle and knock himself and Lone Wolf to opposite sides of the cliff. The player can rescue Mog and recruit him to the party, or can approach Lone Wolf to take the Gold Hairpin he had stolen earlier. If they take the latter option Mog falls and cannot be recruited.
In the World of Ruin, Mog can be found in the moogle cave in the depths of the Narshe's mines and finding him will prompt him to join the party. Mog will join the party even if not recruited in the World of Balance, and he will still be available to join if the player let him fall during the confrontation with Lone Wolf.
The Cursed Shield


Obtaining the Cursed Shield.
In the World of Ruin, a man in the basement of the house above the relic shop will give the player the Cursed Shield that inflicts a slew of negative status ailments, stat penalties and elemental weaknesses on the equipped character. If a player fights 256 battles with it the curse will be lifted and it becomes the Paladin's Shield, the best shield in the game.
A fast way to dispel the curse is to fly to Solitary Island and fight the Peepers; since they have innate Sap and only one HP, it will die on its first turn. The players must be careful when fighting in the desert, as a Black Dragon may occasionally show up.
Ragnarok
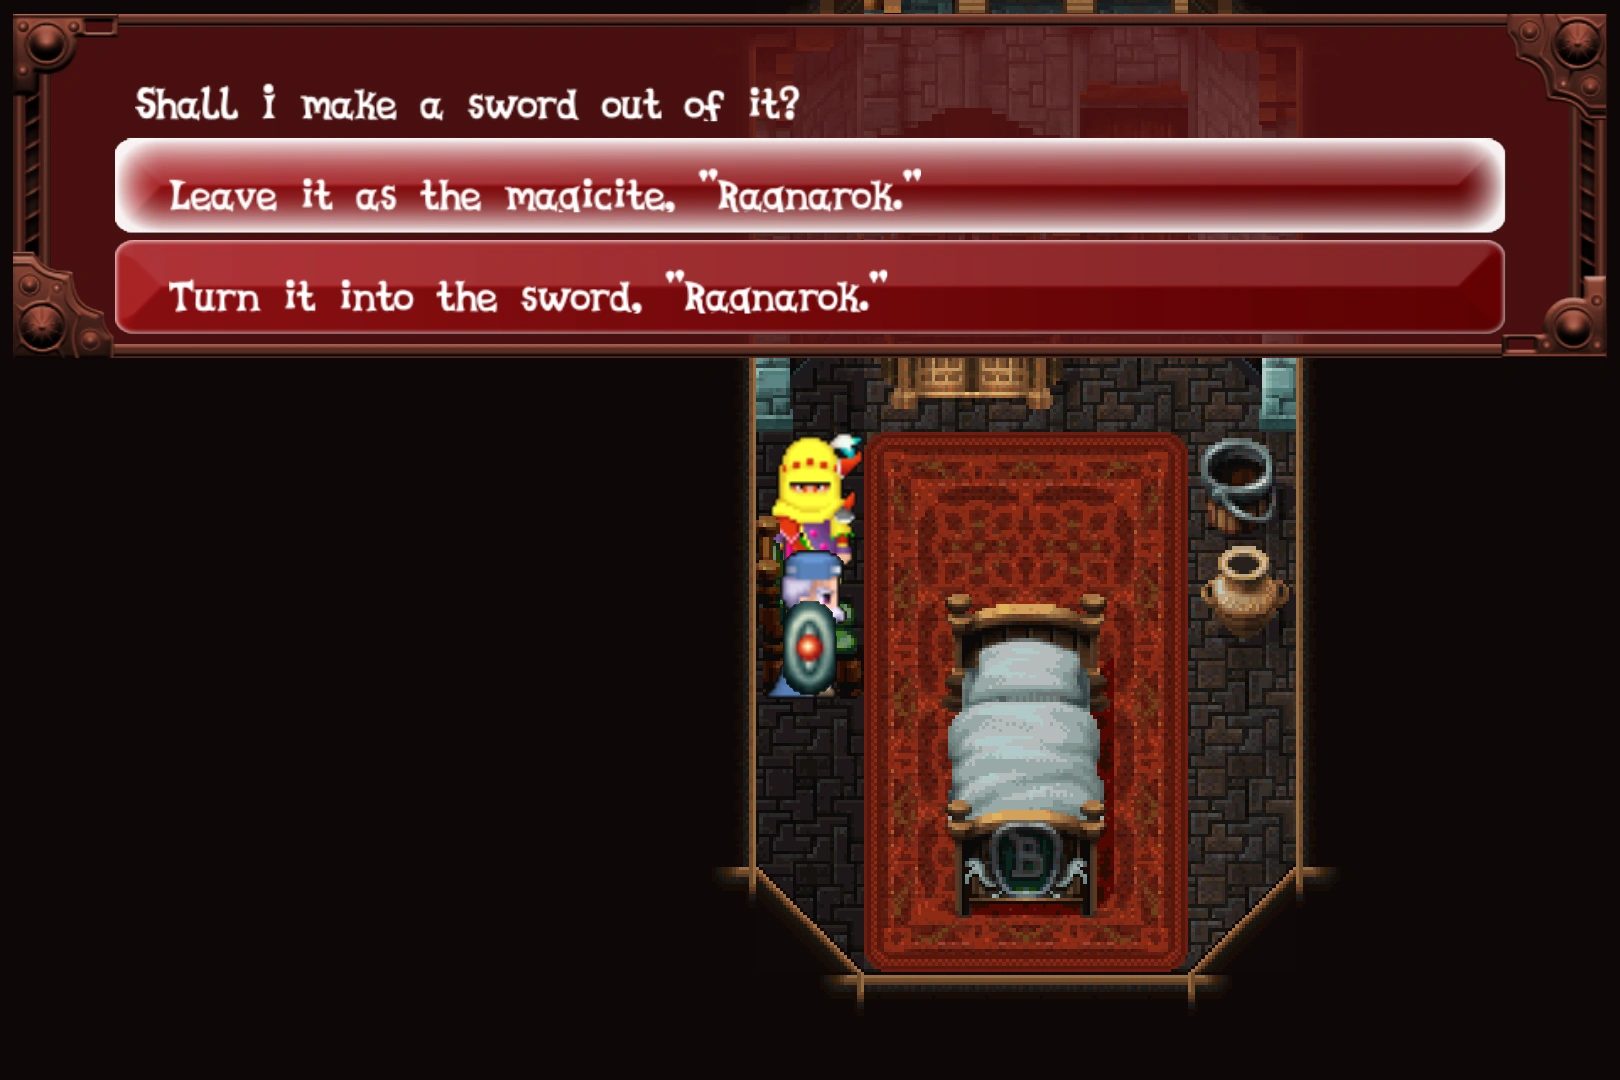
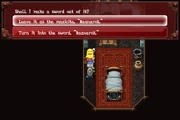
Obtaining the Ragnarok magicite.
In the World of Ruin, the owner of the weapon shop can be found in his back room. He shows the party a glowing stone, the magicite Ragnarok, and offers to melt it down to forge it into a powerful sword. The player's option is a one-time opportunity and they cannot return the magicite later to forge the sword if they take the magicite.
Which item to take is largely a matter of personal preference - the magicite is the only magicite to teach Ultima, the most powerful spell, and the only way to use Metamorphosis to turn enemies into items. The sword meanwhile is one of the most powerful weapons in the game and can be bet at Dragon's Neck Coliseum to win an even more powerful weapon, the Lightbringer.
During the final battle, the player can steal a Ragnarok sword from Lady. While this is of minimal use in the Super NES and Playstation versions, in the GBA and later versions the player has the option to save after the final battle. This not only allows the player to keep the Ragnarok, but farm it by fighting the final battle over and over. With this, keeping the Ragnarok as a magicite may be the more appealing option to taking the sword.
Optional bosses
In the World of Ruin, the Ice Dragon, one of the eight legendary dragons, prowls the snowfields above town. Beyond it at the bluff, the player can find the frozen esper Valigarmanda and battle it, thawing it to obtain it as a magicite. Defeating Valigarmanda opens a passage to the Yeti's Cave where Umaro lives. Defeating Umaro with Mog in the party will have Umaro join.
Mog's Dance
The snowfields above the town are the only location where Mog can learn the Snowman Rondo Dance. Because no random encounters occur here in the World of Balance, Mog cannot learn the Dance until the World of Ruin.
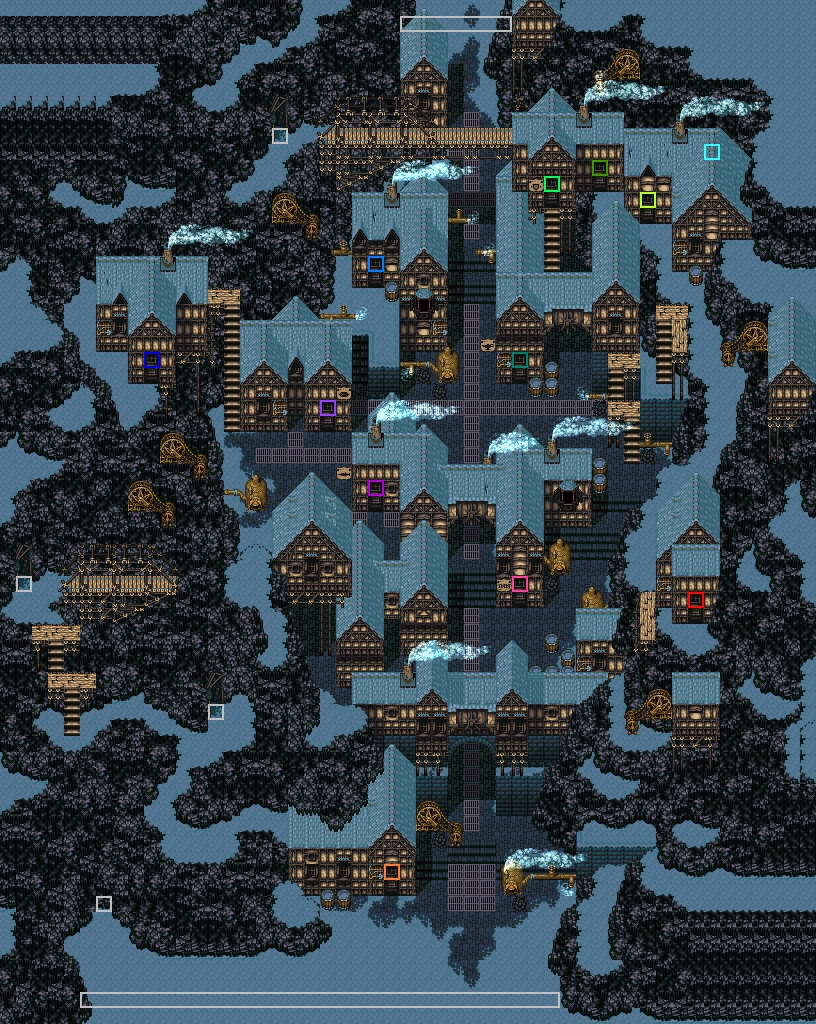
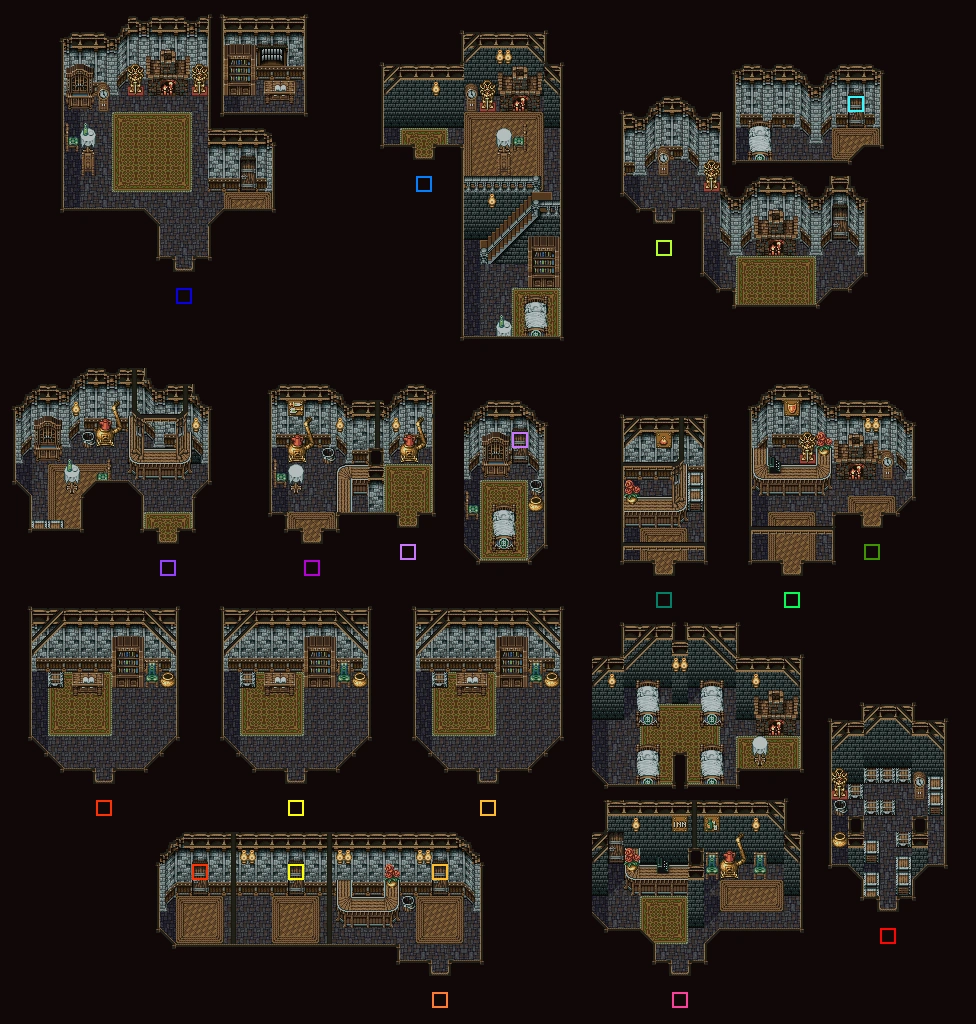
Maps
- Town
- Interiors
Musical themes
"The Mines of Narshe" is the track used as the background theme for Narshe, but is replaced by the theme "Dark World" in the World of Ruin.
Other appearances
Dissidia Final Fantasy NT
_dissidia_arcade.jpg)
The town of Narshe in the background
The town of Narshe appears in the background of the Narshe Outskirts stage.
Theatrhythm Final Fantasy
Narshe and the surrounding snowcapped mountains appear in the background of the Field Music Sequence for "Terra's Theme" and "Searching for Friends", existing in the World of Balance for "Terra's Theme" and the World of Ruin for "Searching for Friends".
")
")
Final Fantasy Airborne Brigade
The Snowfield Mining Town in the Kolts Region is based on the city of Narshe. As part of the January special events of "Typhon Attacks" and "Deathgaze's Onslaught", four locations from the game were added, including the Snow Fields (which use the same background as the Snow Fields of Narshe).
")
![Narshe Cliffs [DFF] (Special).](/wiki/File:FFAB_Narshe_Cliffs_DFF_Special.png "FFAB Narshe Cliffs DFF Special.png (17 KB)")
Final Fantasy Record Keeper
Narshe is the setting for two regular dungeons and is also featured in the Challenge Events A Fateful Coin Toss and Back to the Skies. In Assassin in Black Narshe is the name of a "+++" difficulty battle.
Narshe, Part 1

Narshe, Part 2

Final Fantasy Brave Exvius
Other media
There are several references to Narshe in Dissidia 012 Final Fantasy: Terra's second alternate outfit is called "Narshean Princess", and in her storyline, which begins in a snowfield, she remarks the snow makes her feel nostalgic. There is also a trade material named "Narshe Ore".
Behind the scenes
Narshe was going to have a chocobo stable, situated right next to the Beginner's House. It didn't make the cut for the final version of the game. The inn also appears to have a pub sign right above it.
")
")
Gallery
")
")
")
")
")
")
")
")
")
")
")
")
")
")
")
")
")
")
")
")
")
")
")