mNo edit summary Tag: sourceedit |
Intangir Bot (talk | contribs) m (Renaming categories in accordance with Forum:Category overhaul and categories for redirects) |
||
| (9 intermediate revisions by 3 users not shown) | |||
| Line 1: | Line 1: | ||
| − | {{sideicon|FFT}} |
+ | {{sideicon|prime=FFT|FFRK|FFBE}} |
| ⚫ | |||
The '''Monastery Vaults''' {{j|地下書庫|Chika Shoko}}, also known as '''Underground Book Storage''', is part of the [[Orbonne Monastery]] in ''[[Final Fantasy Tactics]]''. |
The '''Monastery Vaults''' {{j|地下書庫|Chika Shoko}}, also known as '''Underground Book Storage''', is part of the [[Orbonne Monastery]] in ''[[Final Fantasy Tactics]]''. |
||
| − | The monastery is said to have an underground library filled with many great literary works, such has historical writings and scriptures |
+ | The monastery is said to have an underground library filled with many great literary works, such has historical writings and scriptures including works in foreign languages. The literary works are strewn in piles of disarray on the floors, and ancient scrolls and lithographs are piled among the printed works. Priests are restricted in going to the third underground floor. In the deepest area of the vault the floor covers a tunnel entrance, and a magickal rune is inscribed on the floor. |
| − | Five battles are fought in the Monastery Vaults between [[Ramza Beoulve]] and the forces of the [[Church of Glabados]]. The first three of the five battles are fought in Chapter Three, the remaining two are fought as part of the final sequence of battles leading up to the [[Ultima (Tactics)|final boss]]; it is also the [[ |
+ | Five [[Battle (term)|battles]] are fought in the Monastery Vaults between [[Ramza Beoulve]] and the forces of the [[Church of Glabados]]. The first three of the five battles are fought in Chapter Three, the remaining two are fought as part of the final sequence of battles leading up to the [[Ultima (Tactics)|final boss]]; it is also the [[point of no return]]. |
| − | ==Story== |
+ | == Story == |
{{spoiler}} |
{{spoiler}} |
||
| − | ===The |
+ | === The battle for the Virgo Stone === |
| − | Following the declaration of Ramza as a heretic by the church, Ramza attempts to recover the [[Virgo]] [[ |
+ | Following the declaration of Ramza as a heretic by the church, Ramza attempts to recover the [[Virgo]] [[auracite]] from the monastery, where [[Alma Beoulve|Alma]] believes it to be located. A [[Knights Templar]] named [[Isilud Tengille]] arrives first, also seeking the stone. |
| − | When the monastery's librarian, [[Simon Penn-Lachish|Simon]], refuses to help Isilud he is mortally wounded. Isilud proceeds into the Monastery Vaults to search for the stone and Ramza and Alma arrive to find Simon dying. Ramza leaves |
+ | When the monastery's librarian, [[Simon Penn-Lachish|Simon]], refuses to help Isilud he is mortally wounded. Isilud proceeds into the Monastery Vaults to search for the stone and Ramza and Alma arrive to find Simon dying. Ramza leaves the auracites he had collected with Alma, and rushes downstairs to confront Isilud. |
| − | Isilud finds the Virgo Stone, but is confronted by Ramza. After being defeated |
+ | Isilud finds the Virgo Stone, but is confronted by Ramza. After being defeated Isilud teleports back up to the exit, where [[Wiegraf Folles]], another Templar, has captured Alma. As Ramza runs back up the stairs, Wiegraf has Isilud take Alma away, while he fights Ramza. Ramza prevails, but is unable to prevent Isilud from making off with his sister. As Wiegraf lay dying, the [[Aries (zodiac)|Aries Stone]], which Wiegraf had been given by the other Knights Templar, reacts. |
| − | A voice offers Wiegraf great power, which he accepts, becoming one with the [[Lucavi]] demon [[Belias (Tactics)|Belias]]. Ramza draws his sword, prepared to fight, but Belias is not looking to fight |
+ | A voice offers Wiegraf great power, which he accepts, becoming one with the [[Lucavi]] demon [[Belias (Tactics)|Belias]]. Ramza draws his sword, prepared to fight, but Belias is not looking to fight him and teleports away. After Wiegraf's escape, Simon gives Ramza the [[Scriptures of Germonique]] before dying. |
| − | ==Link to Mullonde== |
+ | == Link to Mullonde == |
| − | As the Lucavi plot unfolds, it comes to the attention of [[Folmarv Tengille]] |
+ | As the Lucavi plot unfolds, it comes to the attention of [[Folmarv Tengille]]—the leader of the Knights Templar and the host for Lucavi demon [[Hashmal (Tactics)|Hashmal]]—that Orbonne Monastery is the site of the portal to [[Necrohol of Mullonde]]. He takes the captured Alma there to cross over into Mullonde and resurrect his master [[Ultima (Tactics)|Ultima]]. |
| − | Folmarv is joined by two others in the service of the Lucavi: [[Loffrey Wodring|Loffrey]] and [[Cletienne Duroi|Cletienne]]. The trio |
+ | Folmarv is joined by two others in the service of the Lucavi: [[Loffrey Wodring|Loffrey]] and [[Cletienne Duroi|Cletienne]]. The trio descends to the lowest floor of the Underground Book Storage where they find the portal. Loffrey reads an incantation to allow Folmarv and Cletienne pass through, but Ramza arrives moments later. Ramza defeats Loffrey, but as Loffrey lay dying, he recites the incantation, and draws both himself and Ramza into the portal. |
| − | On the other side, Loffrey seals the portal before succumbing. Ramza defeats Cletienne and fights his way to the [[Airship Graveyard]] where Folmarv is attempting the ritual to resurrect Ultima by using Alma as a host body. Folmarv transforms into Hashmal, |
+ | On the other side, Loffrey seals the portal before succumbing. Ramza defeats Cletienne and fights his way to the [[Airship Graveyard]] where Folmarv is attempting the ritual to resurrect Ultima by using Alma as a host body. Folmarv transforms into Hashmal, and although Ramza prevails, the demon completes to resurrection by offering himself as a sacrifice. Ramza triumphs over Ultima, and the ensuing explosion destroys the Airship Graveyard. |
{{endspoiler}} |
{{endspoiler}} |
||
| − | ==Battle |
+ | == Battle information == |
| − | ===Monastery Vaults - Second Level=== |
+ | === Monastery Vaults - Second Level === |
{{FFT BI |
{{FFT BI |
||
|image = [[File:Orbonne-battlefield2.jpg|350px]] |
|image = [[File:Orbonne-battlefield2.jpg|350px]] |
||
| Line 43: | Line 44: | ||
|item = None |
|item = None |
||
|info = First in a series of three battles, save a separate file. |
|info = First in a series of three battles, save a separate file. |
||
| − | |trophies=[[ |
+ | |trophies=[[Final Fantasy Tactics weapons#Battle Folio|Battle Folio]] |
|weather=[[Weather (Tactics)|Indoors]] |
|weather=[[Weather (Tactics)|Indoors]] |
||
|terrain = Book, Brick, Furnishings, Stairs |
|terrain = Book, Brick, Furnishings, Stairs |
||
| Line 51: | Line 52: | ||
{{-}} |
{{-}} |
||
| − | ===Monastery Vaults - Third Level=== |
+ | === Monastery Vaults - Third Level === |
{{FFT BI |
{{FFT BI |
||
|image = [[File:Orbonne-battlefield3.jpg|350px]] |
|image = [[File:Orbonne-battlefield3.jpg|350px]] |
||
| Line 68: | Line 69: | ||
|item = None |
|item = None |
||
|info = The battle will end once Isilud's [[HP (stat)|HP]] has been reduced to below 20%. |
|info = The battle will end once Isilud's [[HP (stat)|HP]] has been reduced to below 20%. |
||
| − | |trophies= [[ |
+ | |trophies= [[Final Fantasy Tactics accessories#Guardian Bracelet|Guardian Bracelet]] |
|weather= [[Weather (Tactics)|Indoors]] |
|weather= [[Weather (Tactics)|Indoors]] |
||
|terrain = Flagstone, Book, Stairs |
|terrain = Flagstone, Book, Stairs |
||
| Line 76: | Line 77: | ||
{{-}} |
{{-}} |
||
| − | ===Monastery Vaults - First Level=== |
+ | === Monastery Vaults - First Level === |
{{FFT BI |
{{FFT BI |
||
|image = [[File:Orbonne-battlefield4.jpg|350px]] |
|image = [[File:Orbonne-battlefield4.jpg|350px]] |
||
| Line 90: | Line 91: | ||
|enemy lvl = Average: 24 |
|enemy lvl = Average: 24 |
||
|recommend = 26 - 28 |
|recommend = 26 - 28 |
||
| − | |item = [[ |
+ | |item = [[Final Fantasy Tactics armor#Crystal Helm|Crystal Helm]] |
|info = None |
|info = None |
||
|trophies= 2500 gil |
|trophies= 2500 gil |
||
| Line 100: | Line 101: | ||
{{-}} |
{{-}} |
||
| − | ===Monastery Vaults - Fourth Level=== |
+ | === Monastery Vaults - Fourth Level === |
{{FFT BI |
{{FFT BI |
||
|image = [[File:Orbonne-battlefield5.jpg|350px]] |
|image = [[File:Orbonne-battlefield5.jpg|350px]] |
||
| Line 123: | Line 124: | ||
{{-}} |
{{-}} |
||
| − | ===Monastery Vaults - Fifth Level=== |
+ | === Monastery Vaults - Fifth Level === |
{{FFT BI |
{{FFT BI |
||
|image = [[File:Orbonne-battlefield6.jpg|350px]] |
|image = [[File:Orbonne-battlefield6.jpg|350px]] |
||
| Line 145: | Line 146: | ||
Deep within the fifth level of the Orbonne Monastery, Ramza is challenged by the Knight Templar Loffrey Wodring. Although Loffrey is defeated, he manages to activate the seal and transport the entire party to the Necrohol of Mullonde. |
Deep within the fifth level of the Orbonne Monastery, Ramza is challenged by the Knight Templar Loffrey Wodring. Although Loffrey is defeated, he manages to activate the seal and transport the entire party to the Necrohol of Mullonde. |
||
| − | ==[[Treasure Hunter (ability)|Treasures]]== |
+ | == [[Treasure Hunter (ability)|Treasures]] == |
:''Note: It is possible to miss out on treasures here, as these are a one-time battle.'' |
:''Note: It is possible to miss out on treasures here, as these are a one-time battle.'' |
||
| − | ===Monastery Vaults - Second Level=== |
+ | === Monastery Vaults - Second Level === |
| − | *[[Potion (item)|Potion]]/[[Murasame]] (0,9 on a panel of height 12) |
+ | * [[Potion (item)|Potion]]/[[Murasame]] (0,9 on a panel of height 12) |
| − | *[[Hi-Potion]]/[[ |
+ | * [[Hi-Potion]]/[[Final Fantasy Tactics weapons#Poison Bow|Poison Bow]] (4,3 on a panel of height 6) |
| − | *[[Ether]]/[[ |
+ | * [[Ether]]/[[Final Fantasy Tactics weapons#Mythril Bow|Mythril Bow]] (5,0 on a panel of height 0) |
| − | *[[Remedy (item)|Remedy]]/[[ |
+ | * [[Remedy (item)|Remedy]]/[[Final Fantasy Tactics weapons#Musk Pole|Musk Pole]] (9,4 on a panel of height 12) |
| − | ===Monastery Vaults - Third Level=== |
+ | === Monastery Vaults - Third Level === |
| − | *[[Phoenix Down]]/[[ |
+ | * [[Phoenix Down]]/[[Final Fantasy Tactics weapons#Croakadile Bag|Croakadile Bag]] (0,0 on a panel of height 8) |
| − | *Potion/[[ |
+ | * Potion/[[Final Fantasy Tactics armor#Flame Shield|Flame Shield]] (1,9 on a panel of height 7) |
| − | *Hi-Potion/[[Twist Headband]] (3,11 on a panel of height 8) |
+ | * Hi-Potion/[[Twist Headband]] (3,11 on a panel of height 8) |
| − | *[[Holy Water]]/[[ |
+ | * [[Holy Water]]/[[Final Fantasy Tactics armor#Ice Shield|Ice Shield]] (4,5 on a panel of height 7) |
| − | ===Monastery Vaults - First Level=== |
+ | === Monastery Vaults - First Level === |
| − | *Holy Water/[[ |
+ | * Holy Water/[[Final Fantasy Tactics accessories#Nu Khai Armband|Nu Khai Armband]] (0,12 on a panel of height 0) |
| − | *Phoenix Down/[[Reflect Ring]] (2,6 on a panel of height 0) |
+ | * Phoenix Down/[[Reflect Ring]] (2,6 on a panel of height 0) |
| − | *Remedy/[[ |
+ | * Remedy/[[Final Fantasy Tactics accessories#Magepower Glove|Magepower Glove]] (6,12 on a panel of height 8) |
| − | *Ether/[[Winged Boots]] (7,1 on a panel of height 1) |
+ | * Ether/[[Winged Boots]] (7,1 on a panel of height 1) |
| − | ===Monastery Vaults - Fourth Level=== |
+ | === Monastery Vaults - Fourth Level === |
| − | *[[Elixir (item)|Elixir]] (2,4 on a panel of height 2~) |
+ | * [[Elixir (item)|Elixir]] (2,4 on a panel of height 2~) |
| − | *Elixir (7,0 on a panel of height 7) |
+ | * Elixir (7,0 on a panel of height 7) |
| − | *Elixir (7,13 on a panel of height 8) |
+ | * Elixir (7,13 on a panel of height 8) |
| − | *Elixir (7,15 on a panel of height 1) |
+ | * Elixir (7,15 on a panel of height 1) |
| − | ===Monastery Vaults - Fifth Level=== |
+ | === Monastery Vaults - Fifth Level === |
| − | *Elixir (0,0 on a panel of height 2) |
+ | * Elixir (0,0 on a panel of height 2) |
| − | *Elixir (5,8 on a panel of height 0) |
+ | * Elixir (5,8 on a panel of height 0) |
| − | *Elixir (6,8 on a panel of height 0) |
+ | * Elixir (6,8 on a panel of height 0) |
| − | *Elixir (11,0 on a panel of height 7) |
+ | * Elixir (11,0 on a panel of height 7) |
| + | |||
| ⚫ | |||
| ⚫ | |||
| ⚫ | |||
| ⚫ | |||
| − | {{sideicon|FFRK}} |
||
{{Locat-stub|Final Fantasy Record Keeper}} |
{{Locat-stub|Final Fantasy Record Keeper}} |
||
{{-}} |
{{-}} |
||
| + | === ''[[Final Fantasy Brave Exvius]]'' === |
||
| − | ==Gallery== |
||
| + | |||
| − | {{Gallery|class=FFTa |
||
| + | {{Locat-stub|Final Fantasy Brave Exvius}} |
||
| ⚫ | |||
| + | |||
| − | }} |
||
| + | {{navbox setting FFT}} |
||
| ⚫ | |||
| − | {{FFT}} |
||
| ⚫ | |||
Revision as of 01:43, 14 January 2019
Template:Sideicon
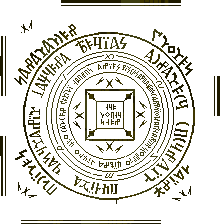
Magic circle from the Fifth Level.
The Monastery Vaults (地下書庫, Chika Shoko?), also known as Underground Book Storage, is part of the Orbonne Monastery in Final Fantasy Tactics.
The monastery is said to have an underground library filled with many great literary works, such has historical writings and scriptures including works in foreign languages. The literary works are strewn in piles of disarray on the floors, and ancient scrolls and lithographs are piled among the printed works. Priests are restricted in going to the third underground floor. In the deepest area of the vault the floor covers a tunnel entrance, and a magickal rune is inscribed on the floor.
Five battles are fought in the Monastery Vaults between Ramza Beoulve and the forces of the Church of Glabados. The first three of the five battles are fought in Chapter Three, the remaining two are fought as part of the final sequence of battles leading up to the final boss; it is also the point of no return.
Story
The battle for the Virgo Stone
Following the declaration of Ramza as a heretic by the church, Ramza attempts to recover the Virgo auracite from the monastery, where Alma believes it to be located. A Knights Templar named Isilud Tengille arrives first, also seeking the stone.
When the monastery's librarian, Simon, refuses to help Isilud he is mortally wounded. Isilud proceeds into the Monastery Vaults to search for the stone and Ramza and Alma arrive to find Simon dying. Ramza leaves the auracites he had collected with Alma, and rushes downstairs to confront Isilud.
Isilud finds the Virgo Stone, but is confronted by Ramza. After being defeated Isilud teleports back up to the exit, where Wiegraf Folles, another Templar, has captured Alma. As Ramza runs back up the stairs, Wiegraf has Isilud take Alma away, while he fights Ramza. Ramza prevails, but is unable to prevent Isilud from making off with his sister. As Wiegraf lay dying, the Aries Stone, which Wiegraf had been given by the other Knights Templar, reacts.
A voice offers Wiegraf great power, which he accepts, becoming one with the Lucavi demon Belias. Ramza draws his sword, prepared to fight, but Belias is not looking to fight him and teleports away. After Wiegraf's escape, Simon gives Ramza the Scriptures of Germonique before dying.
Link to Mullonde
As the Lucavi plot unfolds, it comes to the attention of Folmarv Tengille—the leader of the Knights Templar and the host for Lucavi demon Hashmal—that Orbonne Monastery is the site of the portal to Necrohol of Mullonde. He takes the captured Alma there to cross over into Mullonde and resurrect his master Ultima.
Folmarv is joined by two others in the service of the Lucavi: Loffrey and Cletienne. The trio descends to the lowest floor of the Underground Book Storage where they find the portal. Loffrey reads an incantation to allow Folmarv and Cletienne pass through, but Ramza arrives moments later. Ramza defeats Loffrey, but as Loffrey lay dying, he recites the incantation, and draws both himself and Ramza into the portal.
On the other side, Loffrey seals the portal before succumbing. Ramza defeats Cletienne and fights his way to the Airship Graveyard where Folmarv is attempting the ritual to resurrect Ultima by using Alma as a host body. Folmarv transforms into Hashmal, and although Ramza prevails, the demon completes to resurrection by offering himself as a sacrifice. Ramza triumphs over Ultima, and the ensuing explosion destroys the Airship Graveyard.
Battle information
Monastery Vaults - Second Level
Template:FFT BI
Ramza and his party encounter a group of soldiers commanded by Isilud to protect the passage, ultimately defeating them to continue their pursuit of Isilud.
Monastery Vaults - Third Level
Template:FFT BI
After Ramza reaches the third floor of the monastery, he confronts Isilud, but is unsuccessful in stopping Isilud from teleporting away.
Monastery Vaults - First Level
Template:FFT BI
With Isilud having teleported away, taking Alma with him, Ramza is forced to take on an old enemy, Wiegraf Folles, critically wounding him before he teleports away.
Monastery Vaults - Fourth Level
Template:FFT BI
Following a lead from the High Confessor Marcel, Ramza ventures once more to Orbonne Monastery, in search of his sister. Within the walls, the party encounters a group of soldiers left behind to halt or at least hinder their progress.
Monastery Vaults - Fifth Level
Template:FFT BI Deep within the fifth level of the Orbonne Monastery, Ramza is challenged by the Knight Templar Loffrey Wodring. Although Loffrey is defeated, he manages to activate the seal and transport the entire party to the Necrohol of Mullonde.
Treasures
- Note: It is possible to miss out on treasures here, as these are a one-time battle.
Monastery Vaults - Second Level
- Potion/Murasame (0,9 on a panel of height 12)
- Hi-Potion/Poison Bow (4,3 on a panel of height 6)
- Ether/Mythril Bow (5,0 on a panel of height 0)
- Remedy/Musk Pole (9,4 on a panel of height 12)
Monastery Vaults - Third Level
- Phoenix Down/Croakadile Bag (0,0 on a panel of height 8)
- Potion/Flame Shield (1,9 on a panel of height 7)
- Hi-Potion/Twist Headband (3,11 on a panel of height 8)
- Holy Water/Ice Shield (4,5 on a panel of height 7)
Monastery Vaults - First Level
- Holy Water/Nu Khai Armband (0,12 on a panel of height 0)
- Phoenix Down/Reflect Ring (2,6 on a panel of height 0)
- Remedy/Magepower Glove (6,12 on a panel of height 8)
- Ether/Winged Boots (7,1 on a panel of height 1)
Monastery Vaults - Fourth Level
- Elixir (2,4 on a panel of height 2~)
- Elixir (7,0 on a panel of height 7)
- Elixir (7,13 on a panel of height 8)
- Elixir (7,15 on a panel of height 1)
Monastery Vaults - Fifth Level
- Elixir (0,0 on a panel of height 2)
- Elixir (5,8 on a panel of height 0)
- Elixir (6,8 on a panel of height 0)
- Elixir (11,0 on a panel of height 7)
Other appearances
Final Fantasy Record Keeper