Intangir Bot (talk | contribs) m (updates {{Gallery}} to <gallery>; cosmetic changes) Tag: apiedit |
No edit summary |
||
| (47 intermediate revisions by 9 users not shown) | |||
| Line 1: | Line 1: | ||
| + | {{sideicon|prime=FFX|X2|TFF|TFFCC|PFF|FFAB|FFRK}} |
||
| − | {{Expand|Adding images and brief descriptions to the Locations section}} |
+ | {{Expand|FFAB|PFF|X2|FFX|Adding images and brief descriptions to the Locations section}} |
| − | {{FFX Location |
||
| + | {{infobox location |
||
|name=Mi'ihen Highroad |
|name=Mi'ihen Highroad |
||
| + | |release=FFX |
||
|japanese=ミヘン街道 |
|japanese=ミヘン街道 |
||
|romaji=Mihen-kaidō |
|romaji=Mihen-kaidō |
||
| Line 9: | Line 11: | ||
</gallery> |
</gallery> |
||
|type=Path |
|type=Path |
||
| − | |region=[[Spira]], |
+ | |region=[[Spira]], neighbors [[Luca (Final Fantasy X)|Luca]] and [[Mushroom Rock Road]] |
|ffx items=*Many available through treasures and interaction, [[#Items|see full list]] |
|ffx items=*Many available through treasures and interaction, [[#Items|see full list]] |
||
*Many found in [[#Shops|shops]] |
*Many found in [[#Shops|shops]] |
||
| Line 20: | Line 22: | ||
*[[Vouivre (Final Fantasy X)|Vouivre]] |
*[[Vouivre (Final Fantasy X)|Vouivre]] |
||
*[[White Element]] |
*[[White Element]] |
||
| − | *[[Thunder Flan]] |
+ | *[[Thunder Flan (Final Fantasy X)|Thunder Flan]] |
*[[Chocobo Eater (Final Fantasy X)|Chocobo Eater]] (boss) |
*[[Chocobo Eater (Final Fantasy X)|Chocobo Eater]] (boss) |
||
*[[Ifrit (Final Fantasy X boss)|Ifrit]] (optional boss) |
*[[Ifrit (Final Fantasy X boss)|Ifrit]] (optional boss) |
||
| − | |ffx quests=* |
+ | |ffx quests=*Traveling for the Pilgrimage |
|x2 items=*Many available treasures and interaction [[#Items|see full list]] |
|x2 items=*Many available treasures and interaction [[#Items|see full list]] |
||
*Many found in [[#Shops|shops]] |
*Many found in [[#Shops|shops]] |
||
| Line 35: | Line 37: | ||
***[[#Machina Mayhem|Machina Mayhem!]] |
***[[#Machina Mayhem|Machina Mayhem!]] |
||
}} |
}} |
||
| − | {{ |
+ | {{Quote|This is a statue of Lord Mi'ihen. Eight centuries ago, he founded a legion known today as the Crusaders. In just a few short years after their founding, their ranks grew throughout Spira. The maesters of Yevon feared an uprising and accused them of rebellion. So Lord Mi'ihen walked along this very road to go face their charges and refute them. He succeeded in winning the maesters' trust, and his legion became an arm of the Yevon clergy.|Maechen}} |
| − | '''Mi'ihen Highroad''' is a road between the city of [[Luca (Final Fantasy X)|Luca]] and [[Mushroom Rock Road]] |
+ | '''Mi'ihen Highroad''' is a road between the city of [[Luca (Final Fantasy X)|Luca]] and [[Mushroom Rock Road]] in ''[[Final Fantasy X]]'' and ''[[Final Fantasy X-2]]''. Mi'ihen Highroad is a dirt road through wide open plains. Ruins lie along the sides while the path winds through canyons, sea and mountain cliffs before leading to Mushroom Rock. |
| − | ==Story== |
+ | == Story == |
{{spoiler}} |
{{spoiler}} |
||
| − | ===Early |
+ | === Early history === |
| − | The road was named for [[Lord Mi'ihen]], the founder of the [[Crusaders]], then called the Crimson Blades, who walked |
+ | The road was named for [[Lord Mi'ihen]], the founder of the [[Crusaders]], then called the Crimson Blades, who walked the old path on his way to [[Bevelle]] to answer the challenge that his group was a threat to [[Yevon]]. It is called a highroad because of both its altitude in relation to Luca, and because Mi'ihen walked the "highroad" when he decided to face the [[maester]]s of Yevon instead of antagonizing them. |
| − | Five hundred years ago the highroad was destroyed by [[Sin]], and a new |
+ | Five hundred years ago the highroad was destroyed by [[Sin]], and a new road was constructed to its place. The old highroad became known as the "old road". |
| − | Some time before the events of ''Final Fantasy X'', in the place of the [[Rin's Travel Agency| |
+ | Some time before the events of ''Final Fantasy X'', in the place of the [[Rin's Travel Agency|travel agency]], there was a manor where an elderly couple lived caring for their flower. At some point they were killed by a female servant for [[gil]].<ref>The ending of one of [[Purpurea]]'s fiend tales in ''Final Fantasy X-2''.</ref> |
| − | ===''[[Final Fantasy X]]''=== |
+ | === ''[[Final Fantasy X]]'' === |
| − | {{sideicon|FFX}} |
||
[[File:Yuna and tidus miihen highroad.jpg|thumb|Yuna and Tidus share a moment on Mi'ihen Highroad.]] |
[[File:Yuna and tidus miihen highroad.jpg|thumb|Yuna and Tidus share a moment on Mi'ihen Highroad.]] |
||
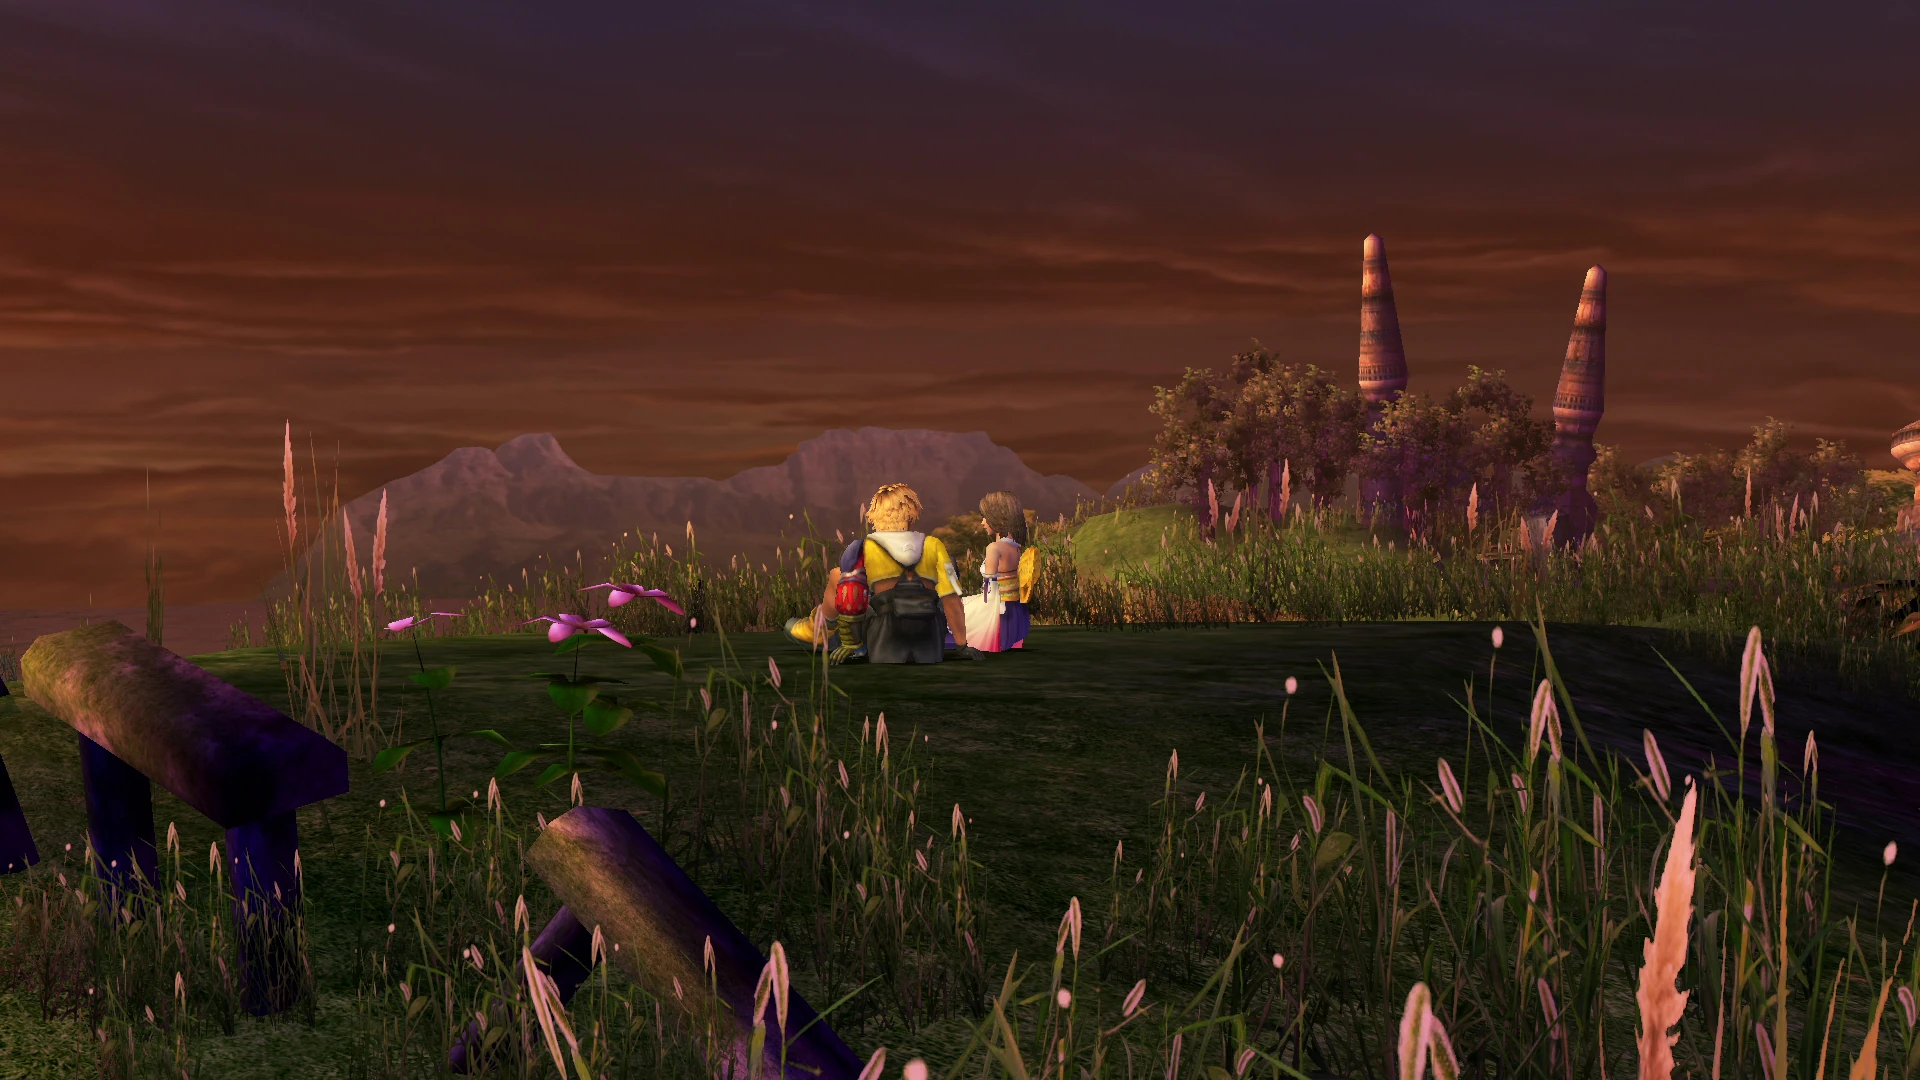
| − | + | The highroad is home to many [[Fiend (Final Fantasy X)|fiends]]. People who need to cross the highroad generally travel by [[Chocobo (Final Fantasy X)|chocobo]], as it is safer than dealing with the fiends. Even the chocobos are not entirely immune to the fiend activity, as the [[Chocobo Eater]] roams the area. [[Yuna]] and her [[Guardian (Final Fantasy X)|guardians]] defeat this monster on their way through. While staying at Rin's Travel Agency, Yuna makes a [[movie sphere|sphere recording]] to leave to her guardians to view after she has gone through with the [[Final Aeon|Final Summoning]], but [[Tidus]] interrupts her, and the two sit outside in the sunset and talk for a bit. |
|
| + | Reaching the northern end of the highroad, the guards forbid the party from passing until [[Seymour Guado]] tells thm to permit Yuna's party to pass. |
||
| ⚫ | |||
| − | {{sideicon|X2}} |
||
| − | With [[Sin]] vanquished, the highroad becomes home to [[Iron Giant (Final Fantasy X-2)|Iron Giants]] from the [[Thunder Plains]] and large, carnivorous birds. Travel by chocobo has been strayed from, with hovercrafts taking their place. The road is now covered in [[Al Bhed]] [[Machina (Final Fantasy X)|machina]], used as a defense mechanism against the fiend population. |
||
| ⚫ | |||
| − | At some point, a fiend individual, [[Purpurea]], created from the spirit of a flower decides to punish the now elderly woman who killed its master and his wife, but seeing the woman's grief and sadness over the act she did years ago, the Purpurea decides not to punish her and depart to the Farplane to join its master. |
||
| + | After the defeat of [[Sin]], people have stopped riding chocobos in favor of [[Hover (Final Fantasy X)|hovers]]. The [[Gullwings]] can help [[Calli]] catch a chocobo, and if they're successful, they have to rescue her from a Chocobo Eater. If the party arrives just in time, they defeat the fiend and Calli is able to ride a chocobo. They can invite both Calli and her chocobo to the ''[[Celsius]]''. |
||
| ⚫ | |||
| + | |||
| + | In Chapter 3, the [[Al Bhed]] [[Machina (Final Fantasy X)|machina]] suddenly go haywire, and the Gullwings and the Al Bhed need to destroy them. In Chapter 4, [[Rin (Final Fantasy X)|Rin]] asks Yuna's help in [[Mi'ihen Highroad Mystery|his investigation in finding the culprit]]. If the party helps, the culprits are either the Chocobo Eater, [[Rikku]], Calli, [[Prophet (Final Fantasy X-2)|Prophet]], or Rin himself. |
||
{{Endspoiler}} |
{{Endspoiler}} |
||
| − | ==Locations== |
+ | == Locations == |
| − | [[File:Mi' |
+ | [[File:Mi'ihen Ruins.jpg|thumb|Mi'ihen Ruins.]] |
| − | ===Highroad North End=== |
+ | === Highroad North End === |
| − | ===Highroad South End=== |
+ | === Highroad South End === |
| − | ===Oldroad=== |
+ | === Oldroad === |
| − | ===Rin's Travel Agency=== |
+ | === Rin's Travel Agency === |
| ⚫ | |||
| ⚫ | |||
| − | ===Mi'ihen Ruins=== |
+ | === Mi'ihen Ruins === |
| − | Mi'ihen Ruins is a secret area in ''Final Fantasy X''. It can be found by inputting the coordinates X: 33 - 36 / Y: 55 - 60 while on the |
+ | Mi'ihen Ruins is a secret area in ''Final Fantasy X''. It can be found by inputting the coordinates X: 33 - 36 / Y: 55 - 60 while on the [[Fahrenheit|airship]]. |
| − | ===Fiend Colony=== |
+ | === Fiend Colony === |
{{main|Fiend Colony}} |
{{main|Fiend Colony}} |
||
| − | The Fiend Colony |
+ | The Fiend Colony is an [[Bonus dungeon|optional dungeon]] in ''Final Fantasy X-2''. The player must dispatch a level four or five [[Chocobo raising (Final Fantasy X-2)|chocobo]] to the highroad from [[Clasko]]'s [[Calm Lands Ruins|Chocobo Ranch]] during Chapter 5 to access it. Once it returns, Clasko will report a new dungeon has been found and the player can enter the colony. The entrance appears as a green portal. |
| ⚫ | |||
| ⚫ | |||
| − | ==Quests== |
+ | == Quests == |
| − | ===''[[Final Fantasy X-2]]''=== |
+ | === ''[[Final Fantasy X-2]]'' === |
| − | ====Mi'ihen Highroad Mystery==== |
+ | ==== Mi'ihen Highroad Mystery ==== |
{{main|Mi'ihen Highroad Mystery}} |
{{main|Mi'ihen Highroad Mystery}} |
||
| + | The Mi'ihen Highroad Mystery takes place during Chapter 4. Rin asks Yuna, Rikku and [[Paine]] help him investigate two separate incidents that occurred on the Mi'ihen Highroad; a hover crashing on the Oldroad and the sentry machina going haywire. The culprit is either the Chocobo Eater, Rikku, Calli, Prophet, or Rin himself. |
||
| + | |||
| + | If the Chocobo Eater, Rikku, or Calli are blamed, the player will be awarded an [[Episode Complete]] for the area, and they will be able to ride chocobos on the highroad. If Prophet is blamed, the player will be awarded an [[Episode Concluded]] for the area, and they won't be able to ride chocobos on the highroad. If Rin is blamed, the player will be awarded an Episode Concluded for the area, but they will be able to ride chocobos on the highroad free of charge. |
||
| − | ====Chocobo |
+ | ==== Chocobo treasures ==== |
| − | + | [[Chocobo raising (Final Fantasy X-2)|Sending a chocobo]] to Mi'ihen Highroad to look for treasures finds the following items (depending on the chocobo's level): |
|
| − | {|class="half-width X2 table" |
+ | {|class="half-width X2 article-table" |
|-class="a" |
|-class="a" |
||
!Level |
!Level |
||
| Line 92: | Line 96: | ||
|- |
|- |
||
!class="b"|1 |
!class="b"|1 |
||
| − | |[[ |
+ | |[[Final Fantasy X-2 items#Soft|Soft]], [[Final Fantasy X-2 items#Soft|Soft]] x2, [[Final Fantasy X-2 items#Soft|Soft]] x4 |
|- |
|- |
||
!class="b"|2 |
!class="b"|2 |
||
| − | |[[ |
+ | |[[Final Fantasy X-2 items#Remedy|Remedy]], [[Final Fantasy X-2 items#Eye Drops|Eye Drops]], [[Final Fantasy X-2 items#Silence Grenade|Silence Grenade]], [[Final Fantasy X-2 accessories#Silver Bracer|Silver Bracer]] |
|- |
|- |
||
!class="b"|3 |
!class="b"|3 |
||
| − | |[[ |
+ | |[[Final Fantasy X-2 items#Remedy|Remedy]] x2, [[Final Fantasy X-2 items#Eye Drops|Eye Drops]] x2, [[Final Fantasy X-2 items#Silence Grenade|Silence Grenade]] x2, [[Final Fantasy X-2 accessories#Gold Bracer|Gold Bracer]] |
|- |
|- |
||
!class="b"|4 |
!class="b"|4 |
||
| − | |[[ |
+ | |[[Final Fantasy X-2 items#Remedy|Remedy]] x3, [[Final Fantasy X-2 items#Eye Drops|Eye Drops]] x3, [[Final Fantasy X-2 items#Silence Grenade|Silence Grenade]] x3, [[Final Fantasy X-2 accessories#Rune Bracer|Rune Bracer]] |
|- |
|- |
||
!class="b"|5 |
!class="b"|5 |
||
| − | |[[ |
+ | |[[Final Fantasy X-2 items#Remedy|Remedy]] x4, [[Final Fantasy X-2 items#Eye Drops|Eye Drops]] x4, [[Final Fantasy X-2 accessories#White Cape|White Cape]], [[Final Fantasy X-2 accessories#Mute Shock|Mute Shock]] |
|} |
|} |
||
Sending a level 5 chocobo to Mi'ihen Highroad may uncover a new dungeon. |
Sending a level 5 chocobo to Mi'ihen Highroad may uncover a new dungeon. |
||
| ⚫ | |||
| ⚫ | |||
| + | Cuckoo for Chocobos! is a [[Missions (Final Fantasy X-2)|mission]] in Chapter 2. |
||
| − | ====Chapter Two==== |
||
| ⚫ | |||
:'''''Note''': This is not a compulsory mission, thus is not required to complete the game.'' |
:'''''Note''': This is not a compulsory mission, thus is not required to complete the game.'' |
||
''Your Mission: Catch the Chocobo for Calli! Follow Captain Rikku's instructions and bring that winged whirlwind to justice! It's the kwest of a lifetime!'' |
''Your Mission: Catch the Chocobo for Calli! Follow Captain Rikku's instructions and bring that winged whirlwind to justice! It's the kwest of a lifetime!'' |
||
| − | *'''Objective''': Capture the Chocobo? |
+ | * '''Objective''': Capture the Chocobo? |
| − | *'''Unlock''': Becomes available when the party returns to the ''Celsius'' after they hand over the 'Awesome Sphere'. |
+ | * '''Unlock''': Becomes available when the party returns to the ''Celsius'' after they hand over the 'Awesome Sphere'. |
| − | *'''Reward''': [[Garment Grid#Selene Guard|Selene Guard]] [[Garment Grid]]. |
+ | * '''Reward''': [[Garment Grid#Selene Guard|Selene Guard]] [[Garment Grid]]. |
| − | ==== |
+ | ==== Machina Mayhem! ==== |
| − | + | Machina Mayhem is a mission in Chapter 3. |
|
:'''''Note''': This is not a compulsory mission, thus is not required to complete the game.'' |
:'''''Note''': This is not a compulsory mission, thus is not required to complete the game.'' |
||
''The machina deployed along the Mi'ihen Highroad have started attacking innocent people. Take out the misbehaving machina and restore peace to the Highroad!'' |
''The machina deployed along the Mi'ihen Highroad have started attacking innocent people. Take out the misbehaving machina and restore peace to the Highroad!'' |
||
| − | *'''Objective''': Incapacitate 13 tandems of machina. |
+ | * '''Objective''': Incapacitate 13 tandems of machina. |
| − | *'''Unlock''': Becomes available at the beginning of Chapter Three. |
+ | * '''Unlock''': Becomes available at the beginning of Chapter Three. |
| − | *'''Reward''': [[Garment Grid#Undying Storm|Undying Storm]] Garment Grid, 10,000 [[gil]]. |
+ | * '''Reward''': [[Garment Grid#Undying Storm|Undying Storm]] Garment Grid, 10,000 [[gil]]. |
| + | ====Episode Complete==== |
||
| ⚫ | |||
| + | {{Quote|The chocobos are back on the Highroad and running free!|Mi'ihen Highroad highlighted in the locations list on board the ''[[Celsius]]''.}} |
||
| ⚫ | |||
| + | There are three possible scenarios here that will result in an Episode Complete, all of which involve correctly solving the mystery about why the Highroad's machina are going haywire. The rare [[Ragnarok (Final Fantasy X-2)|Ragnarok]] accessory can be obtained by pinning Rikku as the culprit. |
||
| ⚫ | |||
| + | |||
| − | <div class="multicolumn"> |
||
| + | To get Episode Complete the player must fulfill the following requirements: |
||
| − | <div> |
||
| + | *Chapter 3 - The player must initiate the "Machina Mayhem!" mission, but it is not required to finish it. |
||
| + | *Chapter 4 – The player must complete the mission "Detective Rin", finding Calli, Rikku or the Chocobo Eater guilty. |
||
| + | *Chapter 5 – The player must visit the Highroad to discover the results of Rin's investigation. |
||
| + | |||
| + | While it is not necessary to complete the Mi'ihen Highroad mission in Chapter 2 in order to find the Chocobo Eater guilty, skipping this mission will mean Rikku and Calli cannot be found guilty. If either Prophet or Rin are found guilty, the player will only receive Episode Concluded. |
||
| + | |||
| + | ====Episode Concluded==== |
||
| + | {{Quote|That's right! Like, it was me! And I would've gotten away with it too, if it hadn't been for you meddling kids!|Prophet}} |
||
| + | There are three possible scenarios that will result in an Episode Concluded, all of which involve incorrectly solving the mystery about why the Highroad's machina are going haywire. The player will receive the key item [[Gippal's Sphere]], which [[Permanently missable content|cannot otherwise be obtained]], if they name Rin as the culprit. |
||
| + | |||
| ⚫ | |||
| ⚫ | |||
| ⚫ | |||
| + | {{multicol-begin}} |
||
;Before airship |
;Before airship |
||
| + | {{multicol-begin}} |
||
| − | <div class="multicolumn"> |
||
| − | {|class="table FFX" style="text-align:center" |
+ | {|class="article-table FFX" style="text-align:center" |
|-class="a" |
|-class="a" |
||
!style="width:100px"|Item |
!style="width:100px"|Item |
||
!style="width:50px"|Cost |
!style="width:50px"|Cost |
||
|- |
|- |
||
| − | !class="b"|[[ |
+ | !class="b"|[[Final Fantasy X items#Potion|Potion]] |
|50 gil |
|50 gil |
||
|- |
|- |
||
| − | !class="b"|[[ |
+ | !class="b"|[[Final Fantasy X items#Phoenix Down|Phoenix Down]] |
|100 gil |
|100 gil |
||
|- |
|- |
||
| − | !class="b"|[[ |
+ | !class="b"|[[Final Fantasy X items#Antidote|Antidote]] |
|50 gil |
|50 gil |
||
|- |
|- |
||
| − | !class="b"|[[ |
+ | !class="b"|[[Final Fantasy X items#Eye Drops|Eye Drops]] |
|50 gil |
|50 gil |
||
|- |
|- |
||
| − | !class="b"|[[ |
+ | !class="b"|[[Final Fantasy X items#Echo Screen|Echo Screen]] |
|50 gil |
|50 gil |
||
|- |
|- |
||
| − | !class="b"|[[ |
+ | !class="b"|[[Final Fantasy X items#Grenade|Grenade]] |
|300 gil |
|300 gil |
||
|- |
|- |
||
| − | !class="b"|[[ |
+ | !class="b"|[[Final Fantasy X items#Map|Map]] |
|50 gil |
|50 gil |
||
|} |
|} |
||
| + | {{multicol-separator}} |
||
| − | {|class="table FFX" style="text-align:center" |
+ | {|class="article-table FFX" style="text-align:center" |
|-class="a" |
|-class="a" |
||
!style="width:100px"|Equipment |
!style="width:100px"|Equipment |
||
| Line 165: | Line 183: | ||
!style="width:50px"|Cost |
!style="width:50px"|Cost |
||
|- |
|- |
||
| − | !class="b"|[[ |
+ | !class="b"|[[Final Fantasy X weapons#Warrior's Sword|Warrior's Sword]] |
|Tidus |
|Tidus |
||
|150 gil |
|150 gil |
||
|- |
|- |
||
| − | !class="b"|[[ |
+ | !class="b"|[[Final Fantasy X weapons#Enchanted Rod|Enchanted Rod]] |
|Yuna |
|Yuna |
||
|150 gil |
|150 gil |
||
|- |
|- |
||
| − | !class="b" align="center"|[[ |
+ | !class="b" align="center"|[[Final Fantasy X weapons#Power Ball|Power Ball]] |
|Wakka |
|Wakka |
||
|150 gil |
|150 gil |
||
|- |
|- |
||
| − | !class="b"|[[ |
+ | !class="b"|[[Final Fantasy X weapons#Magical Mog|Magical Mog]] |
|Lulu |
|Lulu |
||
|150 gil |
|150 gil |
||
|- |
|- |
||
| − | !class="b"|[[ |
+ | !class="b"|[[Final Fantasy X weapons#Halberd|Halberd]] |
|Kimahri |
|Kimahri |
||
|225 gil |
|225 gil |
||
|- |
|- |
||
| − | !class="b"|[[ |
+ | !class="b"|[[Final Fantasy X weapons#Shimmering Blade|Shimmering Blade]] |
|Auron |
|Auron |
||
|225 gil |
|225 gil |
||
|- |
|- |
||
| − | !class="b"|[[ |
+ | !class="b"|[[Final Fantasy X armor#Pearl Shield|Pearl Shield]] |
|Tidus |
|Tidus |
||
|250 gil |
|250 gil |
||
|- |
|- |
||
| − | !class="b"|[[ |
+ | !class="b"|[[Final Fantasy X armor#Pearl Ring|Pearl Ring]] |
|Yuna |
|Yuna |
||
|250 gil |
|250 gil |
||
|- |
|- |
||
| − | !class="b"|[[ |
+ | !class="b"|[[Final Fantasy X armor#Pearl Armguard|Pearl Armguard]] |
|Wakka |
|Wakka |
||
|250 gil |
|250 gil |
||
|- |
|- |
||
| − | !class="b"|[[ |
+ | !class="b"|[[Final Fantasy X armor#Pearl Bangle|Pearl Bangle]] |
|Lulu |
|Lulu |
||
|250 gil |
|250 gil |
||
|- |
|- |
||
| − | !class="b"|[[ |
+ | !class="b"|[[Final Fantasy X armor#Pearl Armlet|Pearl Armlet]] |
|Kimahri |
|Kimahri |
||
|250 gil |
|250 gil |
||
|- |
|- |
||
| − | !class="b"|[[ |
+ | !class="b"|[[Final Fantasy X armor#Pearl Bracer|Pearl Bracer]] |
|Auron |
|Auron |
||
|250 gil |
|250 gil |
||
|} |
|} |
||
| + | {{multicol-end}} |
||
| − | </div> |
||
| + | {{multicol-separator}} |
||
| − | <div> |
||
;After airship |
;After airship |
||
| + | {{multicol-begin}} |
||
| − | <div class="multicolumn"> |
||
| − | {|class="table FFX" style="text-align:center" |
+ | {|class="article-table FFX" style="text-align:center" |
|-class="a" |
|-class="a" |
||
!style="width:100px"|Item |
!style="width:100px"|Item |
||
!style="width:50px"|Cost |
!style="width:50px"|Cost |
||
|- |
|- |
||
| − | !class="b"|[[ |
+ | !class="b"|[[Final Fantasy X items#Potion|Potion]] |
|50 gil |
|50 gil |
||
|- |
|- |
||
| − | !class="b"|[[ |
+ | !class="b"|[[Final Fantasy X items#Hi-Potion|Hi-Potion]] |
|500 gil |
|500 gil |
||
|- |
|- |
||
| − | !class="b"|[[ |
+ | !class="b"|[[Final Fantasy X items#Phoenix Down|Phoenix Down]] |
|100 gil |
|100 gil |
||
|- |
|- |
||
| − | !class="b"|[[ |
+ | !class="b"|[[Final Fantasy X items#Antidote|Antidote]] |
|50 gil |
|50 gil |
||
|- |
|- |
||
| − | !class="b"|[[ |
+ | !class="b"|[[Final Fantasy X items#Eye Drops|Eye Drops]] |
|50 gil |
|50 gil |
||
|- |
|- |
||
| − | !class="b"|[[ |
+ | !class="b"|[[Final Fantasy X items#Echo Screen|Echo Screen]] |
|50 gil |
|50 gil |
||
|- |
|- |
||
| − | !class="b"|[[ |
+ | !class="b"|[[Final Fantasy X items#Soft|Soft]] |
|50 gil |
|50 gil |
||
|- |
|- |
||
| − | !class="b"|[[ |
+ | !class="b"|[[Final Fantasy X items#Power Distiller|Power Distiller]] |
|100 gil |
|100 gil |
||
|- |
|- |
||
| − | !class="b"|[[ |
+ | !class="b"|[[Final Fantasy X items#Mana Distiller|Mana Distiller]] |
|100 gil |
|100 gil |
||
|- |
|- |
||
| − | !class="b"|[[ |
+ | !class="b"|[[Final Fantasy X items#Speed Distiller|Speed Distiller]] |
|100 gil |
|100 gil |
||
|- |
|- |
||
| − | !class="b"|[[ |
+ | !class="b"|[[Final Fantasy X items#Ability Distiller|Ability Distiller]] |
|100 gil |
|100 gil |
||
|- |
|- |
||
| − | !class="b"|[[ |
+ | !class="b"|[[Final Fantasy X items#Grenade|Grenade]] |
|300 gil |
|300 gil |
||
|- |
|- |
||
| − | !class="b"|[[ |
+ | !class="b"|[[Final Fantasy X items#Map|Map]] |
|50 gil |
|50 gil |
||
|} |
|} |
||
| + | {{multicol-separator}} |
||
| − | {|class="table FFX" style="text-align:center" |
+ | {|class="article-table FFX" style="text-align:center" |
|-class="a" |
|-class="a" |
||
!style="width:100px"|Equipment |
!style="width:100px"|Equipment |
||
| Line 267: | Line 286: | ||
!style="width:50px"|Cost |
!style="width:50px"|Cost |
||
|- |
|- |
||
| − | !class="b"|[[ |
+ | !class="b"|[[Final Fantasy X weapons#Nightbringer|Nightbringer]] |
|Tidus |
|Tidus |
||
|18,225 gil |
|18,225 gil |
||
|- |
|- |
||
| − | !class="b"|[[ |
+ | !class="b"|[[Final Fantasy X weapons#Darkness Staff|Darkness Staff]] |
|Yuna |
|Yuna |
||
|18,225 gil |
|18,225 gil |
||
|- |
|- |
||
| − | !class="b"|[[ |
+ | !class="b"|[[Final Fantasy X weapons#Blackout|Blackout]] |
|Wakka |
|Wakka |
||
|18,225 gil |
|18,225 gil |
||
|- |
|- |
||
| − | !class="b"|[[ |
+ | !class="b"|[[Final Fantasy X weapons#Dark Cait Sith|Dark Cait Sith]] |
|Lulu |
|Lulu |
||
|18,225 gil |
|18,225 gil |
||
|- |
|- |
||
| − | !class="b"|[[ |
+ | !class="b"|[[Final Fantasy X weapons#Darkbringer|Darkbringer]] |
|Kimahri |
|Kimahri |
||
|18,225 gil |
|18,225 gil |
||
|- |
|- |
||
| − | !class="b"|[[ |
+ | !class="b"|[[Final Fantasy X weapons#Dark Blade|Dark Blade]] |
|Auron |
|Auron |
||
|18,225 gil |
|18,225 gil |
||
|- |
|- |
||
| − | !class="b"|[[ |
+ | !class="b"|[[Final Fantasy X weapons#Jammer|Jammer]] |
|Rikku |
|Rikku |
||
|18,225 gil |
|18,225 gil |
||
|- |
|- |
||
| − | !class="b"|[[ |
+ | !class="b"|[[Final Fantasy X armor#Glorious Shield|Glorious Shield]] |
|Tidus |
|Tidus |
||
|4,725 gil |
|4,725 gil |
||
|- |
|- |
||
| − | !class="b"|[[ |
+ | !class="b"|[[Final Fantasy X armor#Glorious Ring|Glorious Ring]] |
|Yuna |
|Yuna |
||
|4,725 gil |
|4,725 gil |
||
|- |
|- |
||
| − | !class="b"|[[ |
+ | !class="b"|[[Final Fantasy X armor#Glorious Armguard|Glorious Armguard]] |
|Wakka |
|Wakka |
||
|4,725 gil |
|4,725 gil |
||
|- |
|- |
||
| − | !class="b"|[[ |
+ | !class="b"|[[Final Fantasy X armor#Glorious Bangle|Glorious Bangle]] |
|Lulu |
|Lulu |
||
|4,725 gil |
|4,725 gil |
||
|- |
|- |
||
| − | !class="b"|[[ |
+ | !class="b"|[[Final Fantasy X armor#Glorious Armlet|Glorious Armlet]] |
|Kimahri |
|Kimahri |
||
|4,725 gil |
|4,725 gil |
||
|- |
|- |
||
| − | !class="b"|[[ |
+ | !class="b"|[[Final Fantasy X armor#Glorious Bracer|Glorious Bracer]] |
|Auron |
|Auron |
||
|4,725 gil |
|4,725 gil |
||
|- |
|- |
||
| − | !class="b"|[[ |
+ | !class="b"|[[Final Fantasy X armor#Glorious Targe|Glorious Targe]] |
|Rikku |
|Rikku |
||
|4,725 gil |
|4,725 gil |
||
|} |
|} |
||
| + | {{multicol-end}} |
||
| − | </div> |
||
| + | {{multicol-end}} |
||
| − | </div> |
||
| − | </div> |
||
| − | </div> |
||
| − | ====O'aka - Oldroad==== |
+ | ==== O'aka - Oldroad ==== |
| − | {|class="table FFX" style="text-align:center" |
+ | {|class="article-table FFX" style="text-align:center" |
|-class="a" |
|-class="a" |
||
!style="width:100px"|Item |
!style="width:100px"|Item |
||
!style="width:50px"|Cost |
!style="width:50px"|Cost |
||
|- |
|- |
||
| − | !class="b"|[[ |
+ | !class="b"|[[Final Fantasy X items#Potion|Potion]] |
|50 gil |
|50 gil |
||
|- |
|- |
||
| − | !class="b"|[[ |
+ | !class="b"|[[Final Fantasy X items#Phoenix Down|Phoenix Down]] |
|100 gil |
|100 gil |
||
|- |
|- |
||
| − | !class="b"|[[ |
+ | !class="b"|[[Final Fantasy X items#Antidote|Antidote]] |
|50 gil |
|50 gil |
||
|- |
|- |
||
| − | !class="b"|[[ |
+ | !class="b"|[[Final Fantasy X items#Eye Drops|Eye Drops]] |
|50 gil |
|50 gil |
||
|- |
|- |
||
| − | !class="b"|[[ |
+ | !class="b"|[[Final Fantasy X items#Echo Screen|Echo Screen]] |
|50 gil |
|50 gil |
||
|} |
|} |
||
| − | ===''Final Fantasy X-2''=== |
+ | === ''Final Fantasy X-2'' === |
| − | {|class="table X2" style="text-align:center" |
+ | {|class="article-table X2" style="text-align:center" |
|-class="a" |
|-class="a" |
||
!style="width:100px"|Item |
!style="width:100px"|Item |
||
| Line 357: | Line 374: | ||
!style="width:50px"|Chapter |
!style="width:50px"|Chapter |
||
|- |
|- |
||
| − | !class="b"|[[ |
+ | !class="b"|[[Final Fantasy X-2 items#Potion|Potion]] |
|50 |
|50 |
||
|All |
|All |
||
|- |
|- |
||
| − | !class="b"|[[ |
+ | !class="b"|[[Final Fantasy X-2 items#Hi-Potion|Hi-Potion]] |
|500 |
|500 |
||
|Ch 3+ |
|Ch 3+ |
||
|- |
|- |
||
| − | !class="b"|[[ |
+ | !class="b"|[[Final Fantasy X-2 items#Phoenix Down|Phoenix Down]] |
|100 |
|100 |
||
|All |
|All |
||
|- |
|- |
||
| − | !class="b"|[[ |
+ | !class="b"|[[Final Fantasy X-2 items#Antidote|Antidote]] |
|50 |
|50 |
||
|All |
|All |
||
|- |
|- |
||
| − | !class="b"|[[ |
+ | !class="b"|[[Final Fantasy X-2 items#Eye Drops|Eye Drops]] |
|50 |
|50 |
||
|All |
|All |
||
|- |
|- |
||
| − | !class="b"|[[ |
+ | !class="b"|[[Final Fantasy X-2 items#Echo Screen|Echo Screen]] |
|50 |
|50 |
||
|All |
|All |
||
|- |
|- |
||
| − | !class="b"|[[ |
+ | !class="b"|[[Final Fantasy X-2 items#Soft|Soft]] |
|50 |
|50 |
||
|All |
|All |
||
|- |
|- |
||
| − | !class="b"|[[ |
+ | !class="b"|[[Final Fantasy X-2 items#Holy Water|Holy Water]] |
|300 |
|300 |
||
|All |
|All |
||
|- |
|- |
||
| − | !class="b"|[[ |
+ | !class="b"|[[Final Fantasy X-2 accessories#Iron Bangle|Iron Bangle]] |
|500 |
|500 |
||
|Ch 1-2 |
|Ch 1-2 |
||
|- |
|- |
||
| − | !class="b"|[[ |
+ | !class="b"|[[Final Fantasy X-2 accessories#Silver Bracer|Silver Bracer]] |
|500 |
|500 |
||
|Ch 1-2 |
|Ch 1-2 |
||
|- |
|- |
||
| − | !class="b"|[[ |
+ | !class="b"|[[Final Fantasy X-2 accessories#Gauntlets|Gauntlets]] |
|2,500 |
|2,500 |
||
|Ch 1-2 |
|Ch 1-2 |
||
|- |
|- |
||
| − | !class="b"|[[ |
+ | !class="b"|[[Final Fantasy X-2 accessories#Tiara|Tiara]] |
|2,500 |
|2,500 |
||
|Ch 1-2 |
|Ch 1-2 |
||
|- |
|- |
||
| − | !class="b"|[[ |
+ | !class="b"|[[Final Fantasy X-2 accessories#Titanium Bangle|Titanium Bangle]] |
|3,000 |
|3,000 |
||
|Ch 3+ |
|Ch 3+ |
||
|- |
|- |
||
| − | !class="b"|[[ |
+ | !class="b"|[[Final Fantasy X-2 accessories#Gold Bracer|Gold Bracer]] |
|4,000 |
|4,000 |
||
|Ch 3+ |
|Ch 3+ |
||
|- |
|- |
||
| − | !class="b"|[[ |
+ | !class="b"|[[Final Fantasy X-2 accessories#Muscle Belt|Muscle Belt]] |
|4,000 |
|4,000 |
||
|Ch 3+ |
|Ch 3+ |
||
|- |
|- |
||
| − | !class="b"|[[ |
+ | !class="b"|[[Final Fantasy X-2 accessories#Circlet|Circlet]] |
|4,000 |
|4,000 |
||
|Ch 3+ |
|Ch 3+ |
||
|} |
|} |
||
| − | ==Items== |
+ | == Items == |
| − | ===''Final Fantasy X''=== |
+ | === ''Final Fantasy X'' === |
| − | *[[ |
+ | * [[Final Fantasy X items#Hi-Potion|Hi-Potion]] (from man in yellow shirt) |
| − | *[[ |
+ | * [[Final Fantasy X weapons#Hunter's Spear|Hunter's Spear]] (from man in blue shirt) |
| − | *[[ |
+ | * [[Final Fantasy X items#Antidote|Antidote]] x2 (from girl in red skirt) |
| − | *[[ |
+ | * [[Final Fantasy X weapons#Ice Brand|Ice Brand]] (behind the ancient ruins) |
| − | *[[ |
+ | * [[Final Fantasy X armor#Echo Ring|Echo Ring]] (defeat [[Belgemine]]'s aeon) |
| − | *[[ |
+ | * [[Final Fantasy X armor#Seeker's Ring|Seeker's Ring]] (lose to Belgemine's aeon) |
| − | *[[ |
+ | * [[Final Fantasy X items#Remedy|Remedy]] (in chest behind the Crusader on chocobo) |
| − | *[[ |
+ | * [[Final Fantasy X armor#Red Ring|Red Ring]] (from Crusader running around) |
| − | *[[ |
+ | * [[Final Fantasy X items#Soft|Soft]] x3 (from young boy, only if player does not kick the blitzball) |
| − | *[[ |
+ | * [[Final Fantasy X items#Lv. 1 Key Sphere|Lv. 1 Key Sphere]] (from male Crusader in purple) |
| − | *[[ |
+ | * [[Final Fantasy X items#Antidote|Antidote]] x4 (from woman in yellow) |
| − | *2000 gil |
+ | * 2000 gil |
| − | *600 gil (from Crusader in yellow) |
+ | * 600 gil (from Crusader in yellow) |
| − | *[[ |
+ | * [[Final Fantasy X items#Ether|Ether]] (from Crusader quiescent) |
| − | *[[ |
+ | * [[Final Fantasy X items#Hi-Potion|Hi-Potion]] (from woman in purple) |
| − | *[[ |
+ | * [[Final Fantasy X items#Eye Drops|Eye Drops]] x3 |
| − | *[[ |
+ | * [[Final Fantasy X items#Lv. 1 Key Sphere|Lv. 1 Key Sphere]] (from man in green automatically in Travel Agency) |
| − | *[[Al Bhed Primer|Al Bhed Primer vol. VIII]] (from Rin automatically) |
+ | * [[Al Bhed Primer|Al Bhed Primer vol. VIII]] (from Rin automatically) |
| − | *[[ |
+ | * [[Final Fantasy X items#Mega-Potion|Mega-Potion]] x2 (from Rin automatically) |
| − | *[[ |
+ | * [[Final Fantasy X weapons#Heat Lance|Heat Lance]] (requires a chocobo) |
| − | *[[Al Bhed Primer|Al Bhed Primer vol. IX]] |
+ | * [[Al Bhed Primer|Al Bhed Primer vol. IX]] |
| − | *[[ |
+ | * [[Final Fantasy X items#Hi-Potion|Hi-Potion]] x2 |
| − | *[[ |
+ | * [[Final Fantasy X weapons#Thunder Blade|Thunder Blade]] (requires a chocobo) |
| − | *[[ |
+ | * [[Final Fantasy X weapons#Scout|Scout]] (requires a chocobo) |
| − | *[[ |
+ | * [[Final Fantasy X items#Fortune Sphere|Fortune Sphere]] (requires a chocobo) |
| − | *[[ |
+ | * [[Final Fantasy X items#Mars Crest|Mars Crest]] (at the end of Oldroad, South) |
| − | *[[ |
+ | * [[Final Fantasy X weapons#Scout|Scout]] (donate 100 gil. Repeatable) |
| − | *[[ |
+ | * [[Final Fantasy X weapons#Ice Lance|Ice Lance]] (donate 1000 gil. Repeatable) |
| − | *[[ |
+ | * [[Final Fantasy X armor#Moon Ring|Moon Ring]] (donate 10000 gil. Repeatable) |
| − | *[[movie sphere|Jecht's Sphere]] (Oldroad in South area, after defeating [[Spherimorph]]) |
+ | * [[movie sphere|Jecht's Sphere]] (Oldroad in South area, after defeating [[Spherimorph]]) |
| − | *[[ |
+ | * [[Final Fantasy X weapons#Sonar|Sonar]] (Mi'ihen Ruins hidden area) |
| − | ===''Final Fantasy X-2''=== |
+ | === ''Final Fantasy X-2'' === |
| + | {{multicol-begin}} |
||
| − | <div class="multicolumn"><div> |
||
;Chapter 1 |
;Chapter 1 |
||
| − | *[[ |
+ | * [[Final Fantasy X-2 items#Phoenix Down|Phoenix Down]] x2 |
| − | *500 gil |
+ | * 500 gil |
| − | *[[ |
+ | * [[Final Fantasy X-2 accessories#Circlet|Circlet]] |
| − | *[[ |
+ | * [[Final Fantasy X-2 items#Antidote|Antidote]] x2 |
| − | *[[ |
+ | * [[Final Fantasy X-2 items#Holy Water|Holy Water]] x2 |
| − | *[[ |
+ | * [[Final Fantasy X-2 items#Potion|Potion]] x2 |
| − | *[[ |
+ | * [[Final Fantasy X-2 accessories#Iron Bangle|Iron Bangle]] |
| − | *[[ |
+ | * [[Final Fantasy X-2 items#Eye Drops|Eye Drops]] x2 |
| − | *[[ |
+ | * [[Final Fantasy X-2 items#Potion|Potion]] |
| − | *[[ |
+ | * [[Final Fantasy X-2 items#Phoenix Down|Phoenix Down]] x2 |
| − | *[[ |
+ | * [[Final Fantasy X-2 items#Budget Grenade|Budget Grenade]] x2 |
| − | *[[ |
+ | * [[Final Fantasy X-2 items#Mana Spring|Mana Spring]] |
| − | *[[ |
+ | * [[Final Fantasy X-2 items#Echo Screen|Echo Screen]] x2 |
| − | *[[ |
+ | * [[Final Fantasy X-2 items#Soft|Soft]] x2 |
| + | {{multicol-separator}} |
||
| − | </div><div> |
||
;Chapter 2 |
;Chapter 2 |
||
| − | *[[ |
+ | * [[Final Fantasy X-2 accessories#Muscle Belt|Muscle Belt]] |
| − | *1000 gil |
+ | * 1000 gil |
| − | *[[ |
+ | * [[Final Fantasy X-2 items#Phoenix Down|Phoenix Down]] x3 |
| − | *[[ |
+ | * [[Final Fantasy X-2 items#Antidote|Antidote]] x3 |
| − | *[[ |
+ | * [[Final Fantasy X-2 items#Potion|Potion]] x3 |
| − | *[[ |
+ | * [[Final Fantasy X-2 accessories#Silver Bracer|Silver Bracer]] |
| − | *[[ |
+ | * [[Final Fantasy X-2 items#Holy Water|Holy Water]] x3 |
| − | *[[ |
+ | * [[Final Fantasy X-2 items#Eye Drops|Eye Drops]] x3 |
| − | *[[ |
+ | * [[Final Fantasy X-2 items#Phoenix Down|Phoenix Down]] x3 |
| − | *[[ |
+ | * [[Final Fantasy X-2 items#Grenade|Grenade]] x2 |
| − | *[[ |
+ | * [[Final Fantasy X-2 items#Ether|Ether]] |
| − | *[[ |
+ | * [[Final Fantasy X-2 items#Potion|Potion]] x2 |
| − | *[[ |
+ | * [[Final Fantasy X-2 items#Echo Screen|Echo Screen]] x3 |
| − | *[[ |
+ | * [[Final Fantasy X-2 items#Soft|Soft]] x3 |
| + | {{multicol-separator}} |
||
| − | </div><div> |
||
;Chapter 3 |
;Chapter 3 |
||
| − | *[[ |
+ | * [[Final Fantasy X-2 items#Phoenix Down|Phoenix Down]] x4 |
| − | *2000 gil |
+ | * 2000 gil |
| − | *[[ |
+ | * [[Final Fantasy X-2 accessories#Hypno Crown|Hypno Crown]] |
| − | *[[ |
+ | * [[Final Fantasy X-2 items#Hi-Potion|Hi-Potion]] x2 |
| − | *[[ |
+ | * [[Final Fantasy X-2 items#Holy Water|Holy Water]] x4 |
| − | *[[ |
+ | * [[Final Fantasy X-2 items#Hi-Potion|Hi-Potion]] x4 |
| − | *[[ |
+ | * [[Final Fantasy X-2 items#Potion|Potion]] x2 |
| − | *[[ |
+ | * [[Final Fantasy X-2 items#Eye Drops|Eye Drops]] x3 |
| − | *[[ |
+ | * [[Final Fantasy X-2 items#Soft|Soft]] x4 |
| − | *[[ |
+ | * [[Final Fantasy X-2 items#Phoenix Down|Phoenix Down]] x4 |
| − | *[[ |
+ | * [[Final Fantasy X-2 items#S-Bomb|S-Bomb]] x2 |
| − | *[[ |
+ | * [[Final Fantasy X-2 items#Ether|Ether]] x2 |
| − | *[[ |
+ | * [[Final Fantasy X-2 items#Echo Screen|Echo Screen]] x4 |
| − | *[[ |
+ | * [[Final Fantasy X-2 items#Hi-Potion|Hi-Potion]] x2 |
| + | {{multicol-separator}} |
||
| − | </div><div> |
||
;Chapter 5 |
;Chapter 5 |
||
| − | *[[ |
+ | * [[Final Fantasy X-2 items#Phoenix Down|Phoenix Down]] x5 |
| + | * [[Final Fantasy X-2 accessories#Black Belt|Black Belt]] (behind the ruin) |
||
| − | *3000 gil |
+ | * 3000 gil |
| ⚫ | |||
| − | *[[ |
+ | * [[Final Fantasy X-2 items#Remedy|Remedy]] x2 |
| − | *[[ |
+ | * [[Final Fantasy X-2 items#Hi-Potion|Hi-Potion]] x3 |
| − | *[[ |
+ | * [[Final Fantasy X-2 accessories#Titanium Bangle|Titanium Bangle]] |
| − | *[[ |
+ | * [[Final Fantasy X-2 items#Holy Water|Holy Water]] x6 |
| − | *[[ |
+ | * [[Final Fantasy X-2 items#Remedy|Remedy]] x2 |
| − | *[[ |
+ | * [[Final Fantasy X-2 items#M-Bomb|M-Bomb]] x2 |
| − | *[[ |
+ | * [[Final Fantasy X-2 items#Soft|Soft]] x5 |
| − | *[[ |
+ | * [[Final Fantasy X-2 items#Hi-Potion|Hi-Potion]] x3 |
| − | *[[ |
+ | * [[Final Fantasy X-2 items#Echo Screen|Echo Screen]] x5 |
| − | * |
+ | * [[Final Fantasy X-2 items#Phoenix Down|Phoenix Down]] x5 (on cliff, must get chocobos on Highroad) |
| + | * Victor Primoris (on cliff, must get chocobos on Highroad) |
||
| − | *Everyman's Repair Manual (examine every machina, one is holding it) |
+ | * Everyman's Repair Manual (examine every machina, one is holding it) |
| − | </div></div> |
||
| + | {{multicol-end}} |
||
| − | ==Enemies== |
+ | == Enemies == |
| − | ===''Final Fantasy X''=== |
+ | === ''Final Fantasy X'' === |
| − | + | ;South End |
|
| − | * |
+ | * [[Raldo (Final Fantasy X)|Raldo]] (tutorial) |
| ⚫ | |||
| − | **General area (aside from ledges) |
||
| − | * |
+ | * [[Floating Eye (Final Fantasy X)|Floating Eye]], [[Mi'ihen Fang]], [[Raldo (Final Fantasy X)|Raldo]] |
| − | * |
+ | * [[Mi'ihen Fang]], [[White Element]], [[Raldo (Final Fantasy X)|Raldo]] |
| − | * |
+ | * [[Raldo (Final Fantasy X)|Raldo]], [[White Element]], [[Floating Eye (Final Fantasy X)|Floating Eye]] |
| − | * |
+ | * [[Bomb (Final Fantasy X)|Bomb]] |
| − | * |
+ | * [[Dual Horn (Final Fantasy X)|Dual Horn]] |
| − | * |
+ | * [[Ifrit (Final Fantasy X boss)|Ifrit]] (Optional Boss) |
| ⚫ | |||
| ⚫ | |||
| − | * |
+ | * [[Mi'ihen Fang]] x2 (Ledges) |
| − | * |
+ | * [[Dual Horn (Final Fantasy X)|Dual Horn]], [[Mi'ihen Fang]] (Ledges) |
| ⚫ | |||
| ⚫ | |||
| ⚫ | |||
| − | **General area (aside from ledges) |
||
| ⚫ | |||
| ⚫ | |||
| ⚫ | |||
| ⚫ | |||
| ⚫ | |||
| ⚫ | |||
| ⚫ | |||
| ⚫ | |||
| − | **Ledge(s) |
||
| ⚫ | |||
| ⚫ | |||
| ⚫ | |||
| ⚫ | |||
| ⚫ | |||
| ⚫ | |||
| ⚫ | |||
| ⚫ | |||
| ⚫ | |||
| ⚫ | |||
| − | **[[Bomb (Final Fantasy X)|Bomb]] x3 |
||
| ⚫ | |||
| ⚫ | |||
| − | **[[Chocobo Eater (Final Fantasy X)|Chocobo Eater]] (Boss) |
||
| ⚫ | |||
| ⚫ | |||
| ⚫ | |||
| ⚫ | |||
| ⚫ | |||
| ⚫ | |||
| − | **[[Vouivre (Final Fantasy X)|Vouivre]], [[Dual Horn (Final Fantasy X)|Dual Horn]] x2 |
||
| − | **[[Vouivre (Final Fantasy X)|Vouivre]], [[Thunder Flan]] |
||
| − | **[[Vouivre (Final Fantasy X)|Vouivre]], [[Ipiria]], [[Thunder Flan]] |
||
| ⚫ | |||
| − | ===''Final Fantasy X-2''=== |
||
| ⚫ | |||
| − | <div class="multicolumn"><div> |
||
| ⚫ | |||
| ⚫ | |||
| ⚫ | |||
| ⚫ | |||
| ⚫ | |||
| ⚫ | |||
| ⚫ | |||
| ⚫ | |||
| ⚫ | |||
| + | |||
| ⚫ | |||
| + | * [[Mi'ihen Fang]], [[White Element]], [[Floating Eye (Final Fantasy X)|Floating Eye]] |
||
| ⚫ | |||
| ⚫ | |||
| ⚫ | |||
| ⚫ | |||
| ⚫ | |||
| ⚫ | |||
| ⚫ | |||
| + | |||
| ⚫ | |||
| ⚫ | |||
| + | |||
| ⚫ | |||
| ⚫ | |||
| ⚫ | |||
| ⚫ | |||
| ⚫ | |||
| ⚫ | |||
| ⚫ | |||
| ⚫ | |||
| ⚫ | |||
| + | |||
| ⚫ | |||
| + | {{multicol-begin}} |
||
;Chapter 1 |
;Chapter 1 |
||
| − | *[[Iron Giant (Final Fantasy X-2)|Iron Giant]] |
+ | * [[Iron Giant (Final Fantasy X-2)|Iron Giant]] |
| − | *[[Wild Wolf (Final Fantasy X-2)|Wild Wolf]], [[Flan Palido]] |
+ | * [[Wild Wolf (Final Fantasy X-2)|Wild Wolf]], [[Flan Palido]] |
| − | *[[Purpurea]], [[Wild Wolf (Final Fantasy X-2)|Wild Wolf]] x2 |
+ | * [[Purpurea]], [[Wild Wolf (Final Fantasy X-2)|Wild Wolf]] x2 |
| − | *[[Wild Wolf (Final Fantasy X-2)|Wild Wolf]], [[Divebeak (Final Fantasy X-2)|Divebeak]] x2 |
+ | * [[Wild Wolf (Final Fantasy X-2)|Wild Wolf]], [[Divebeak (Final Fantasy X-2)|Divebeak]] x2 |
| − | *[[Shantak]] |
+ | * [[Shantak]] |
| − | *[[Wild Wolf (Final Fantasy X-2)|Wild Wolf]] x3 |
+ | * [[Wild Wolf (Final Fantasy X-2)|Wild Wolf]] x3 |
| − | *[[Flan Palido]], [[Divebeak (Final Fantasy X-2)|Divebeak]] |
+ | * [[Flan Palido]], [[Divebeak (Final Fantasy X-2)|Divebeak]] |
| − | *[[Flan Palido]] x2 |
+ | * [[Flan Palido]] x2 |
| − | *[[Purpurea]] x2 |
+ | * [[Purpurea]] x2 |
| − | *[[Wild Wolf (Final Fantasy X-2)|Wild Wolf]] x2, [[Bully Cap (Final Fantasy X-2)|Bully Cap]] |
+ | * [[Wild Wolf (Final Fantasy X-2)|Wild Wolf]] x2, [[Bully Cap (Final Fantasy X-2)|Bully Cap]] |
| − | *[[Wild Wolf (Final Fantasy X-2)|Wild Wolf]], [[Quadricorn]] |
+ | * [[Wild Wolf (Final Fantasy X-2)|Wild Wolf]], [[Quadricorn]] |
| − | *[[Flan Palido]], [[Fly Eye (Final Fantasy X-2)|Fly Eye]] |
+ | * [[Flan Palido]], [[Fly Eye (Final Fantasy X-2)|Fly Eye]] |
| − | *[[Fly Eye (Final Fantasy X-2)|Fly Eye]], [[Quadricorn]] |
+ | * [[Fly Eye (Final Fantasy X-2)|Fly Eye]], [[Quadricorn]] |
| − | *[[Flan Palido]], [[Bully Cap (Final Fantasy X-2)|Bully Cap]] |
+ | * [[Flan Palido]], [[Bully Cap (Final Fantasy X-2)|Bully Cap]] |
| − | *[[Fly Eye (Final Fantasy X-2)|Fly Eye]], [[Wild Wolf (Final Fantasy X-2)|Wild Wolf]] x2 |
+ | * [[Fly Eye (Final Fantasy X-2)|Fly Eye]], [[Wild Wolf (Final Fantasy X-2)|Wild Wolf]] x2{{multicol-separator}} |
;Chapter 2 |
;Chapter 2 |
||
| − | *[[Wild Wolf (Final Fantasy X-2)|Wild Wolf]] x4 |
+ | * [[Wild Wolf (Final Fantasy X-2)|Wild Wolf]] x4 |
| − | *[[Wild Wolf (Final Fantasy X-2)|Wild Wolf]] x2, [[Flan Palido]] |
+ | * [[Wild Wolf (Final Fantasy X-2)|Wild Wolf]] x2, [[Flan Palido]] |
| − | *[[Wild Wolf (Final Fantasy X-2)|Wild Wolf]], [[Flan Palido]], [[Purpurea]] |
+ | * [[Wild Wolf (Final Fantasy X-2)|Wild Wolf]], [[Flan Palido]], [[Purpurea]] |
| − | *[[Iron Giant (Final Fantasy X-2)|Iron Giant]] |
+ | * [[Iron Giant (Final Fantasy X-2)|Iron Giant]] |
| − | *[[Shantak]] |
+ | * [[Shantak]] |
| − | *[[Wild Wolf (Final Fantasy X-2)|Wild Wolf]], [[Divebeak (Final Fantasy X-2)|Divebeak]], [[Purpurea]] |
+ | * [[Wild Wolf (Final Fantasy X-2)|Wild Wolf]], [[Divebeak (Final Fantasy X-2)|Divebeak]], [[Purpurea]] |
| − | *[[Flan Palido]], [[Purpurea]] |
+ | * [[Flan Palido]], [[Purpurea]] |
| − | *[[Flan Palido]] x2 |
+ | * [[Flan Palido]] x2 |
| − | *[[Purpurea]] x2 |
+ | * [[Purpurea]] x2 |
| − | *[[Flan Palido]] x2, [[Wild Wolf (Final Fantasy X-2)|Wild Wolf]] |
+ | * [[Flan Palido]] x2, [[Wild Wolf (Final Fantasy X-2)|Wild Wolf]] |
| − | *[[Flan Palido]], [[Wild Wolf (Final Fantasy X-2)|Wild Wolf]], [[Peregrine]] |
+ | * [[Flan Palido]], [[Wild Wolf (Final Fantasy X-2)|Wild Wolf]], [[Peregrine]] |
| − | *[[Wild Wolf (Final Fantasy X-2)|Wild Wolf]], [[Quadricorn]], [[Bully Cap (Final Fantasy X-2)|Bully Cap]] |
+ | * [[Wild Wolf (Final Fantasy X-2)|Wild Wolf]], [[Quadricorn]], [[Bully Cap (Final Fantasy X-2)|Bully Cap]] |
| − | *[[Flan Palido]], [[Fly Eye (Final Fantasy X-2)|Fly Eye]] |
+ | * [[Flan Palido]], [[Fly Eye (Final Fantasy X-2)|Fly Eye]] |
| − | *[[Fly Eye (Final Fantasy X-2)|Fly Eye]] x2 |
+ | * [[Fly Eye (Final Fantasy X-2)|Fly Eye]] x2 |
| − | *[[Flan Palido]], [[Wild Wolf (Final Fantasy X-2)|Wild Wolf]], [[Bully Cap (Final Fantasy X-2)|Bully Cap]] |
+ | * [[Flan Palido]], [[Wild Wolf (Final Fantasy X-2)|Wild Wolf]], [[Bully Cap (Final Fantasy X-2)|Bully Cap]] |
| − | *[[Fly Eye (Final Fantasy X-2)|Fly Eye]], [[Quadricorn]] |
+ | * [[Fly Eye (Final Fantasy X-2)|Fly Eye]], [[Quadricorn]] |
| − | *[[Wild Wolf (Final Fantasy X-2)|Wild Wolf]] x2, [[Bully Cap (Final Fantasy X-2)|Bully Cap]] x2 |
+ | * [[Wild Wolf (Final Fantasy X-2)|Wild Wolf]] x2, [[Bully Cap (Final Fantasy X-2)|Bully Cap]] x2 |
| − | *[[Flan Palido]], [[Bully Cap (Final Fantasy X-2)|Bully Cap]] |
+ | * [[Flan Palido]], [[Bully Cap (Final Fantasy X-2)|Bully Cap]] |
| − | *[[Chocobo Eater (Final Fantasy X-2)|Chocobo Eater]] (Boss) |
+ | * [[Chocobo Eater (Final Fantasy X-2)|Chocobo Eater]] (Boss) |
| + | {{multicol-separator}} |
||
| − | </div><div> |
||
;Chapter 3 |
;Chapter 3 |
||
| − | *[[Scout Machina]] x2 (mission) |
+ | * [[Scout Machina]] x2 (mission) |
| − | *[[Machina Ranger]] x3 (mission) |
+ | * [[Machina Ranger]] x3 (mission) |
| − | *[[Machina Ranger]], [[Scout Machina]] (mission) |
+ | * [[Machina Ranger]], [[Scout Machina]] (mission) |
| − | *[[Barbuta (Final Fantasy X-2)|Barbuta]], [[Cephalotus]] |
+ | * [[Barbuta (Final Fantasy X-2)|Barbuta]], [[Cephalotus]] |
| − | *[[Machina Ranger]], [[Scout Machina]], [[Watcher-A]] |
+ | * [[Machina Ranger]], [[Scout Machina]], [[Watcher-A]] |
| − | *[[Barbuta (Final Fantasy X-2)|Barbuta]] x2 |
+ | * [[Barbuta (Final Fantasy X-2)|Barbuta]] x2 |
| − | *[[Scout Machina]], [[Machina Ranger]] |
+ | * [[Scout Machina]], [[Machina Ranger]] |
| − | *[[Barbuta (Final Fantasy X-2)|Barbuta]], [[Cephalotus]], [[Watcher-R]] |
+ | * [[Barbuta (Final Fantasy X-2)|Barbuta]], [[Cephalotus]], [[Watcher-R]] |
| − | *[[Zu (Final Fantasy X-2)|Zu]] |
+ | * [[Zu (Final Fantasy X-2)|Zu]] |
| − | *[[Barbuta (Final Fantasy X-2)|Barbuta]] x2, [[Peregrine]] |
+ | * [[Barbuta (Final Fantasy X-2)|Barbuta]] x2, [[Peregrine]] |
| − | *[[Machina Ranger]] x2 |
+ | * [[Machina Ranger]] x2 |
| − | *[[Machina Ranger]] x2, [[Watcher-S]] |
+ | * [[Machina Ranger]] x2, [[Watcher-S]] |
| − | *[[Barbuta (Final Fantasy X-2)|Barbuta]] x2, [[Peregrine]], [[Watcher-S]] |
+ | * [[Barbuta (Final Fantasy X-2)|Barbuta]] x2, [[Peregrine]], [[Watcher-S]] |
| − | *[[Barbuta (Final Fantasy X-2)|Barbuta]] x2, [[Watcher-A]] |
+ | * [[Barbuta (Final Fantasy X-2)|Barbuta]] x2, [[Watcher-A]] |
| − | *[[Scout Machina]], [[Machina Ranger]], [[Watcher-R]] |
+ | * [[Scout Machina]], [[Machina Ranger]], [[Watcher-R]] |
| − | *[[Machina Ranger]] x2, [[Scout Machina]] |
+ | * [[Machina Ranger]] x2, [[Scout Machina]] |
| − | *[[Peregrine]], [[Cephalotus]], [[Watcher-S]] |
+ | * [[Peregrine]], [[Cephalotus]], [[Watcher-S]] |
| − | *[[Peregrine]], [[Cephalotus]] |
+ | * [[Peregrine]], [[Cephalotus]] |
| − | *[[Peregrine]], [[Flan Rojo]], [[Watcher-R]] |
+ | * [[Peregrine]], [[Flan Rojo]], [[Watcher-R]] |
| − | *[[Scout Machina]] x2 |
+ | * [[Scout Machina]] x2 |
| − | *[[Peregrine]], [[Flan Rojo]] |
+ | * [[Peregrine]], [[Flan Rojo]] |
| − | *[[Machina Ranger]], [[Scout Machina]] x2 |
+ | * [[Machina Ranger]], [[Scout Machina]] x2 |
| − | *[[Flan Rojo]] x2 |
+ | * [[Flan Rojo]] x2 |
| − | *[[Flan Rojo]] x2, [[Watcher-S]] |
+ | * [[Flan Rojo]] x2, [[Watcher-S]] |
| − | *[[Flan Rojo]], [[Cephalotus]] |
+ | * [[Flan Rojo]], [[Cephalotus]] |
| − | *[[Barbuta (Final Fantasy X-2)|Barbuta]], [[Flan Rojo]] |
+ | * [[Barbuta (Final Fantasy X-2)|Barbuta]], [[Flan Rojo]] |
| − | *[[Flan Rojo]], [[Cephalotus]], [[Watcher-A]] |
+ | * [[Flan Rojo]], [[Cephalotus]], [[Watcher-A]] |
| − | *[[Barbuta (Final Fantasy X-2)|Barbuta]], [[Flan Rojo]], [[Watcher-R]] |
+ | * [[Barbuta (Final Fantasy X-2)|Barbuta]], [[Flan Rojo]], [[Watcher-R]] |
| − | *[[Peregrine]], [[Mycotoxin]] |
+ | * [[Peregrine]], [[Mycotoxin]] |
| − | *[[Peregrine]], [[Mycotoxin]], [[Watcher-R]] |
+ | * [[Peregrine]], [[Mycotoxin]], [[Watcher-R]] |
| − | *[[Flan Rojo]], [[Mycotoxin]] |
+ | * [[Flan Rojo]], [[Mycotoxin]] |
| − | *[[Mycotoxin]], [[Cephalotus]], [[Watcher-S]] |
+ | * [[Mycotoxin]], [[Cephalotus]], [[Watcher-S]] |
| − | *[[Flan Rojo]], [[Mycotoxin]], [[Watcher-A]] |
+ | * [[Flan Rojo]], [[Mycotoxin]], [[Watcher-A]] |
| − | *[[Queen Coeurl]], [[Peregrine]] |
+ | * [[Queen Coeurl]], [[Peregrine]] |
| − | *[[Flan Rojo]], [[Queen Coeurl]] |
+ | * [[Flan Rojo]], [[Queen Coeurl]] |
| − | *[[Flan Rojo]], [[Queen Coeurl]], [[Watcher-A]] |
+ | * [[Flan Rojo]], [[Queen Coeurl]], [[Watcher-A]] |
| − | *[[Queen Coeurl]], [[Cephalotus]] |
+ | * [[Queen Coeurl]], [[Cephalotus]] |
| − | *[[Scout Machina]] x2, [[Watcher-S]] |
+ | * [[Scout Machina]] x2, [[Watcher-S]] |
| − | *[[Queen Coeurl]], [[Peregrine]], [[Watcher-S]] |
+ | * [[Queen Coeurl]], [[Peregrine]], [[Watcher-S]] |
| + | {{multicol-separator}} |
||
| − | </div><div> |
||
;Chapter 5 |
;Chapter 5 |
||
| − | *[[Barbuta (Final Fantasy X-2)|Barbuta]] x2 |
+ | * [[Barbuta (Final Fantasy X-2)|Barbuta]] x2 |
| − | *[[Barbuta (Final Fantasy X-2)|Barbuta]] x2, [[Peregrine]] |
+ | * [[Barbuta (Final Fantasy X-2)|Barbuta]] x2, [[Peregrine]] |
| − | *[[Barbuta (Final Fantasy X-2)|Barbuta]] x2, [[Watcher-R]] |
+ | * [[Barbuta (Final Fantasy X-2)|Barbuta]] x2, [[Watcher-R]] |
| − | *[[Zu (Final Fantasy X-2)|Zu]] |
+ | * [[Zu (Final Fantasy X-2)|Zu]] |
| − | *[[Aka Manah]] |
+ | * [[Aka Manah]] |
| − | *[[Aka Manah]], [[Watcher-A]] |
+ | * [[Aka Manah]], [[Watcher-A]] |
| − | *[[Cephalotus]], [[Lich (Final Fantasy X-2)|Lich]], [[Barbuta (Final Fantasy X-2)|Barbuta]] |
+ | * [[Cephalotus]], [[Lich (Final Fantasy X-2)|Lich]], [[Barbuta (Final Fantasy X-2)|Barbuta]] |
| − | *[[Lich (Final Fantasy X-2)|Lich]], [[Barbuta (Final Fantasy X-2)|Barbuta]] |
+ | * [[Lich (Final Fantasy X-2)|Lich]], [[Barbuta (Final Fantasy X-2)|Barbuta]] |
| − | *[[Cephalotus]], [[Lich (Final Fantasy X-2)|Lich]], [[Barbuta (Final Fantasy X-2)|Barbuta]], [[Watcher-S]] |
+ | * [[Cephalotus]], [[Lich (Final Fantasy X-2)|Lich]], [[Barbuta (Final Fantasy X-2)|Barbuta]], [[Watcher-S]] |
| − | *[[Barbuta (Final Fantasy X-2)|Barbuta]] x2, [[Peregrine]], [[Watcher-A]] |
+ | * [[Barbuta (Final Fantasy X-2)|Barbuta]] x2, [[Peregrine]], [[Watcher-A]] |
| − | *[[Flan Rojo]], [[Peregrine]], [[Watcher-A]] |
+ | * [[Flan Rojo]], [[Peregrine]], [[Watcher-A]] |
| − | *[[Flan Rojo]], [[Peregrine]] |
+ | * [[Flan Rojo]], [[Peregrine]] |
| − | *[[Peregrine]] x2 |
+ | * [[Peregrine]] x2 |
| − | *[[Lich (Final Fantasy X-2)|Lich]] x2 |
+ | * [[Lich (Final Fantasy X-2)|Lich]] x2 |
| − | *[[Peregrine]] x2, [[Watcher-R]] |
+ | * [[Peregrine]] x2, [[Watcher-R]] |
| − | *[[Lich (Final Fantasy X-2)|Lich]], [[Barbuta (Final Fantasy X-2)|Barbuta]], [[Watcher-R]] |
+ | * [[Lich (Final Fantasy X-2)|Lich]], [[Barbuta (Final Fantasy X-2)|Barbuta]], [[Watcher-R]] |
| − | *[[Flan Rojo]], [[Cephalotus]] |
+ | * [[Flan Rojo]], [[Cephalotus]] |
| − | *[[Flan Rojo]], [[Barbuta (Final Fantasy X-2)|Barbuta]], [[Watcher-S]] |
+ | * [[Flan Rojo]], [[Barbuta (Final Fantasy X-2)|Barbuta]], [[Watcher-S]] |
| − | *[[Flan Rojo]], [[Barbuta (Final Fantasy X-2)|Barbuta]] |
+ | * [[Flan Rojo]], [[Barbuta (Final Fantasy X-2)|Barbuta]] |
| − | *[[Flan Rojo]], [[Cephalotus]], [[Watcher-R]] |
+ | * [[Flan Rojo]], [[Cephalotus]], [[Watcher-R]] |
| − | *[[Mycotoxin]], [[Flan Rojo]] |
+ | * [[Mycotoxin]], [[Flan Rojo]] |
| − | *[[Mycotoxin]] x2, [[Peregrine]] |
+ | * [[Mycotoxin]] x2, [[Peregrine]] |
| − | *[[Mycotoxin]], [[Cephalotus]] |
+ | * [[Mycotoxin]], [[Cephalotus]] |
| − | *[[Mycotoxin]], [[Cephalotus]], [[Watcher-A]] |
+ | * [[Mycotoxin]], [[Cephalotus]], [[Watcher-A]] |
| − | *[[Lich (Final Fantasy X-2)|Lich]] x2, [[Watcher-S]] |
+ | * [[Lich (Final Fantasy X-2)|Lich]] x2, [[Watcher-S]] |
| − | *[[Mycotoxin]], [[Flan Rojo]], [[Watcher-R]] |
+ | * [[Mycotoxin]], [[Flan Rojo]], [[Watcher-R]] |
| − | *[[Queen Coeurl]], [[Flan Rojo]] |
+ | * [[Queen Coeurl]], [[Flan Rojo]] |
| − | *[[Queen Coeurl]], [[Cephalotus]], [[Watcher-S]] |
+ | * [[Queen Coeurl]], [[Cephalotus]], [[Watcher-S]] |
| − | *[[Queen Coeurl]], [[Flan Rojo]], [[Watcher-R]] |
+ | * [[Queen Coeurl]], [[Flan Rojo]], [[Watcher-R]] |
| − | *[[Queen Coeurl]] x2 |
+ | * [[Queen Coeurl]] x2 |
| − | *[[Mycotoxin]] x2, [[Peregrine]], [[Watcher-S]] |
+ | * [[Mycotoxin]] x2, [[Peregrine]], [[Watcher-S]] |
| − | *[[Cephalotus]], [[Peregrine]] |
+ | * [[Cephalotus]], [[Peregrine]] |
| − | *[[Queen Coeurl]], [[Cephalotus]] |
+ | * [[Queen Coeurl]], [[Cephalotus]] |
| − | *[[Aka Manah]], [[Watcher-R]] |
+ | * [[Aka Manah]], [[Watcher-R]] |
| + | {{multicol-end}} |
||
| − | </div></div> |
||
| − | ==Musical themes== |
+ | == Musical themes == |
| − | {{ |
+ | {{audio|filename=FFX_Mi'ihen_Highway.ogg|title="Mi'ihen Highroad" from ''Final Fantasy X'' (PS2)}} |
| − | In ''Final Fantasy X'', "Mi'ihen Highroad" is the location theme on the Highroad. It was composed by [[Nobuo Uematsu]]. |
+ | In ''Final Fantasy X'', "Mi'ihen Highroad" is the location theme on the Highroad. It was composed by [[Nobuo Uematsu]]. This theme is included on ''[[Theatrhythm Final Fantasy Compilation Album]]'' and in the ''[[Final Fantasy XV]]'' [[Music player (Final Fantasy XV)|music player]]. |
| + | |||
| + | "Chocobo Jam" plays when riding a chocobo on the Highroad. "They May Pass" plays at the end of the Highroad, when Seymour appears and gives the party permission to pass the roadblock. |
||
For ''[[Final Fantasy X/X-2 HD Remaster|Final Fantasy X HD Remaster]]'', "Mi'ihen Highroad" was remastered by [[Masashi Hamauzu]].<!-- talk about changes --> |
For ''[[Final Fantasy X/X-2 HD Remaster|Final Fantasy X HD Remaster]]'', "Mi'ihen Highroad" was remastered by [[Masashi Hamauzu]].<!-- talk about changes --> |
||
In ''Final Fantasy X-2'', "Mi'ihen Highroad" is an entirely new composition that acts as the Highroad's theme.<!-- composer(s) --> The theme "Chocobo" plays while riding a chocobo on the Highroad and during the Chapter 2 mission, "Cuckoo for Chocobos!". |
In ''Final Fantasy X-2'', "Mi'ihen Highroad" is an entirely new composition that acts as the Highroad's theme.<!-- composer(s) --> The theme "Chocobo" plays while riding a chocobo on the Highroad and during the Chapter 2 mission, "Cuckoo for Chocobos!". |
||
| − | {{ |
+ | {{clear}} |
| − | ==Other appearances== |
+ | == Other appearances == |
| − | ===''[[Theatrhythm Final Fantasy]]''=== |
+ | === ''[[Theatrhythm Final Fantasy]]'' === |
| ⚫ | |||
| − | {{sideicon|TFF}} |
||
| ⚫ | |||
| ⚫ | |||
| ⚫ | |||
| − | ===''[[Theatrhythm Final Fantasy Curtain Call]]''=== |
+ | === ''[[Theatrhythm Final Fantasy Curtain Call]]'' === |
| − | {{sideicon|TFFCC}} |
||
[[File:Mi'hen Highroad.png|right|thumb|200px|Mi'ihen Highroad.]] |
[[File:Mi'hen Highroad.png|right|thumb|200px|Mi'ihen Highroad.]] |
||
| − | The Mi'ihen Highroad |
+ | The Mi'ihen Highroad appears in the background for the FMS of its eponymous theme. |
| − | {{ |
+ | {{clear}} |
| − | ===Pictlogica Final Fantasy=== |
+ | === Pictlogica Final Fantasy === |
| − | {{sideicon|PFF}} |
||
[[File:PFF Mi'ihen Highroad.png|right|thumb|200px|The Mi'ihen Highroad.]] |
[[File:PFF Mi'ihen Highroad.png|right|thumb|200px|The Mi'ihen Highroad.]] |
||
| − | {{ |
+ | {{Location section|Pictlogica Final Fantasy}} |
| − | {{ |
+ | {{clear}} |
| − | ===''[[Final Fantasy Airborne Brigade]]''=== |
+ | === ''[[Final Fantasy Airborne Brigade]]'' === |
| + | <gallery> |
||
| − | {{sideicon|FFAB}} |
||
| − | + | FFAB Mi'ihen Highroad FFX Special.png|Mi'ihen Highroad (Special) |
|
| + | FFAB Mi'ihen Highroad (Outside Rin's Travel Agency) FFX Special.png|Mi'ihen Highroad (Outside Rin's Travel Agency) (Special). |
||
| ⚫ | |||
| + | </gallery> |
||
| ⚫ | |||
| − | ===''[[Final Fantasy Record Keeper]]''=== |
+ | === ''[[Final Fantasy Record Keeper]]'' === |
| − | {{sideicon|FFRK}} |
||
[[File:FFRK Mi'ihen Highroad FFX.png|right|150px]] |
[[File:FFRK Mi'ihen Highroad FFX.png|right|150px]] |
||
| − | Auron joins the party and together they make for Djose Temple. They travel along the Mi'ihen Highroad, but encounter an unexpected problem at its northern end... |
+ | [[Auron/Record Keeper|Auron]] joins the party and together they make for [[Djose Temple]]. They travel along the Mi'ihen Highroad, but encounter an unexpected problem at its northern end... |
| − | {{ |
+ | {{clear}} |
| − | ==Gallery== |
+ | == Gallery == |
;''Final Fantasy X'' |
;''Final Fantasy X'' |
||
| − | <gallery |
+ | <gallery> |
Mi'ihen-highroad-entrance-artwork.png|Mi'ihen Highroad entrance concept. |
Mi'ihen-highroad-entrance-artwork.png|Mi'ihen Highroad entrance concept. |
||
Mi'ihen-Highroad-Details.png|South end details. |
Mi'ihen-Highroad-Details.png|South end details. |
||
| Line 750: | Line 767: | ||
Tidus rides a chocobo.jpg|Tidus riding a chocobo on the Highroad. |
Tidus rides a chocobo.jpg|Tidus riding a chocobo on the Highroad. |
||
Miihen highroad north end.jpg|North end of Mi'ihen Highroad. |
Miihen highroad north end.jpg|North end of Mi'ihen Highroad. |
||
| − | FFRK Mi'ihen Highroad JP FFX.png| |
+ | FFRK Mi'ihen Highroad JP FFX.png|Japanese dungeon image for ''Mi'ihen Highroad'' in ''[[Final Fantasy Record Keeper]]''. |
</gallery> |
</gallery> |
||
;''Final Fantasy X-2'' |
;''Final Fantasy X-2'' |
||
| Line 765: | Line 782: | ||
</gallery> |
</gallery> |
||
| − | {{FFX}} |
+ | {{navbox setting FFX}} |
| − | {{X2}} |
+ | {{navbox setting X2}} |
| ⚫ | |||
| ⚫ | |||
[[de:Mi'hen]] |
[[de:Mi'hen]] |
||
[[es:Camino de Miihen]] |
[[es:Camino de Miihen]] |
||
[[fr:Route de Mi'ihen]] |
[[fr:Route de Mi'ihen]] |
||
| ⚫ | |||
| ⚫ | |||
Revision as of 14:09, 25 April 2020
Template:Sideicon

Oh, shut up and help me remodel the Mi'ihen Highroad page!
- Adding images and brief descriptions to the Locations section.
This request can be discussed on the associated discussion page. Remove this notice upon completion.
This is a statue of Lord Mi'ihen. Eight centuries ago, he founded a legion known today as the Crusaders. In just a few short years after their founding, their ranks grew throughout Spira. The maesters of Yevon feared an uprising and accused them of rebellion. So Lord Mi'ihen walked along this very road to go face their charges and refute them. He succeeded in winning the maesters' trust, and his legion became an arm of the Yevon clergy.
Maechen
Mi'ihen Highroad is a road between the city of Luca and Mushroom Rock Road in Final Fantasy X and Final Fantasy X-2. Mi'ihen Highroad is a dirt road through wide open plains. Ruins lie along the sides while the path winds through canyons, sea and mountain cliffs before leading to Mushroom Rock.
Story
Early history
The road was named for Lord Mi'ihen, the founder of the Crusaders, then called the Crimson Blades, who walked the old path on his way to Bevelle to answer the challenge that his group was a threat to Yevon. It is called a highroad because of both its altitude in relation to Luca, and because Mi'ihen walked the "highroad" when he decided to face the maesters of Yevon instead of antagonizing them.
Five hundred years ago the highroad was destroyed by Sin, and a new road was constructed to its place. The old highroad became known as the "old road".
Some time before the events of Final Fantasy X, in the place of the travel agency, there was a manor where an elderly couple lived caring for their flower. At some point they were killed by a female servant for gil.[1]
Final Fantasy X

Yuna and Tidus share a moment on Mi'ihen Highroad.
The highroad is home to many fiends. People who need to cross the highroad generally travel by chocobo, as it is safer than dealing with the fiends. Even the chocobos are not entirely immune to the fiend activity, as the Chocobo Eater roams the area. Yuna and her guardians defeat this monster on their way through. While staying at Rin's Travel Agency, Yuna makes a sphere recording to leave to her guardians to view after she has gone through with the Final Summoning, but Tidus interrupts her, and the two sit outside in the sunset and talk for a bit.
Reaching the northern end of the highroad, the guards forbid the party from passing until Seymour Guado tells thm to permit Yuna's party to pass.
Final Fantasy X-2
After the defeat of Sin, people have stopped riding chocobos in favor of hovers. The Gullwings can help Calli catch a chocobo, and if they're successful, they have to rescue her from a Chocobo Eater. If the party arrives just in time, they defeat the fiend and Calli is able to ride a chocobo. They can invite both Calli and her chocobo to the Celsius.
In Chapter 3, the Al Bhed machina suddenly go haywire, and the Gullwings and the Al Bhed need to destroy them. In Chapter 4, Rin asks Yuna's help in his investigation in finding the culprit. If the party helps, the culprits are either the Chocobo Eater, Rikku, Calli, Prophet, or Rin himself.
Locations

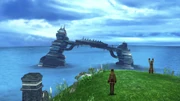
Mi'ihen Ruins.
Highroad North End
Highroad South End
Oldroad
Rin's Travel Agency
Mi'ihen Ruins
Mi'ihen Ruins is a secret area in Final Fantasy X. It can be found by inputting the coordinates X: 33 - 36 / Y: 55 - 60 while on the airship.
Fiend Colony
The Fiend Colony is an optional dungeon in Final Fantasy X-2. The player must dispatch a level four or five chocobo to the highroad from Clasko's Chocobo Ranch during Chapter 5 to access it. Once it returns, Clasko will report a new dungeon has been found and the player can enter the colony. The entrance appears as a green portal.
Quests
Final Fantasy X-2
Mi'ihen Highroad Mystery
The Mi'ihen Highroad Mystery takes place during Chapter 4. Rin asks Yuna, Rikku and Paine help him investigate two separate incidents that occurred on the Mi'ihen Highroad; a hover crashing on the Oldroad and the sentry machina going haywire. The culprit is either the Chocobo Eater, Rikku, Calli, Prophet, or Rin himself.
If the Chocobo Eater, Rikku, or Calli are blamed, the player will be awarded an Episode Complete for the area, and they will be able to ride chocobos on the highroad. If Prophet is blamed, the player will be awarded an Episode Concluded for the area, and they won't be able to ride chocobos on the highroad. If Rin is blamed, the player will be awarded an Episode Concluded for the area, but they will be able to ride chocobos on the highroad free of charge.
Chocobo treasures
Sending a chocobo to Mi'ihen Highroad to look for treasures finds the following items (depending on the chocobo's level):
| Level | Treasure |
|---|---|
| 1 | Soft, Soft x2, Soft x4 |
| 2 | Remedy, Eye Drops, Silence Grenade, Silver Bracer |
| 3 | Remedy x2, Eye Drops x2, Silence Grenade x2, Gold Bracer |
| 4 | Remedy x3, Eye Drops x3, Silence Grenade x3, Rune Bracer |
| 5 | Remedy x4, Eye Drops x4, White Cape, Mute Shock |
Sending a level 5 chocobo to Mi'ihen Highroad may uncover a new dungeon.
Cuckoo for Chocobos!
Cuckoo for Chocobos! is a mission in Chapter 2.
- Note: This is not a compulsory mission, thus is not required to complete the game.
Your Mission: Catch the Chocobo for Calli! Follow Captain Rikku's instructions and bring that winged whirlwind to justice! It's the kwest of a lifetime!
- Objective: Capture the Chocobo?
- Unlock: Becomes available when the party returns to the Celsius after they hand over the 'Awesome Sphere'.
- Reward: Selene Guard Garment Grid.
Machina Mayhem!
Machina Mayhem is a mission in Chapter 3.
- Note: This is not a compulsory mission, thus is not required to complete the game.
The machina deployed along the Mi'ihen Highroad have started attacking innocent people. Take out the misbehaving machina and restore peace to the Highroad!
- Objective: Incapacitate 13 tandems of machina.
- Unlock: Becomes available at the beginning of Chapter Three.
- Reward: Undying Storm Garment Grid, 10,000 gil.
Episode Complete
The chocobos are back on the Highroad and running free!
Mi'ihen Highroad highlighted in the locations list on board the Celsius.
There are three possible scenarios here that will result in an Episode Complete, all of which involve correctly solving the mystery about why the Highroad's machina are going haywire. The rare Ragnarok accessory can be obtained by pinning Rikku as the culprit.
To get Episode Complete the player must fulfill the following requirements:
- Chapter 3 - The player must initiate the "Machina Mayhem!" mission, but it is not required to finish it.
- Chapter 4 – The player must complete the mission "Detective Rin", finding Calli, Rikku or the Chocobo Eater guilty.
- Chapter 5 – The player must visit the Highroad to discover the results of Rin's investigation.
While it is not necessary to complete the Mi'ihen Highroad mission in Chapter 2 in order to find the Chocobo Eater guilty, skipping this mission will mean Rikku and Calli cannot be found guilty. If either Prophet or Rin are found guilty, the player will only receive Episode Concluded.
Episode Concluded
That's right! Like, it was me! And I would've gotten away with it too, if it hadn't been for you meddling kids!
Prophet
There are three possible scenarios that will result in an Episode Concluded, all of which involve incorrectly solving the mystery about why the Highroad's machina are going haywire. The player will receive the key item Gippal's Sphere, which cannot otherwise be obtained, if they name Rin as the culprit.
Shops
Final Fantasy X
Rin's Travel Agency
- Before airship
| Item | Cost |
|---|---|
| Potion | 50 gil |
| Phoenix Down | 100 gil |
| Antidote | 50 gil |
| Eye Drops | 50 gil |
| Echo Screen | 50 gil |
| Grenade | 300 gil |
| Map | 50 gil |
| Equipment | User | Cost |
|---|---|---|
| Warrior's Sword | Tidus | 150 gil |
| Enchanted Rod | Yuna | 150 gil |
| Power Ball | Wakka | 150 gil |
| Magical Mog | Lulu | 150 gil |
| Halberd | Kimahri | 225 gil |
| Shimmering Blade | Auron | 225 gil |
| Pearl Shield | Tidus | 250 gil |
| Pearl Ring | Yuna | 250 gil |
| Pearl Armguard | Wakka | 250 gil |
| Pearl Bangle | Lulu | 250 gil |
| Pearl Armlet | Kimahri | 250 gil |
| Pearl Bracer | Auron | 250 gil |
- After airship
| Item | Cost |
|---|---|
| Potion | 50 gil |
| Hi-Potion | 500 gil |
| Phoenix Down | 100 gil |
| Antidote | 50 gil |
| Eye Drops | 50 gil |
| Echo Screen | 50 gil |
| Soft | 50 gil |
| Power Distiller | 100 gil |
| Mana Distiller | 100 gil |
| Speed Distiller | 100 gil |
| Ability Distiller | 100 gil |
| Grenade | 300 gil |
| Map | 50 gil |
| Equipment | User | Cost |
|---|---|---|
| Nightbringer | Tidus | 18,225 gil |
| Darkness Staff | Yuna | 18,225 gil |
| Blackout | Wakka | 18,225 gil |
| Dark Cait Sith | Lulu | 18,225 gil |
| Darkbringer | Kimahri | 18,225 gil |
| Dark Blade | Auron | 18,225 gil |
| Jammer | Rikku | 18,225 gil |
| Glorious Shield | Tidus | 4,725 gil |
| Glorious Ring | Yuna | 4,725 gil |
| Glorious Armguard | Wakka | 4,725 gil |
| Glorious Bangle | Lulu | 4,725 gil |
| Glorious Armlet | Kimahri | 4,725 gil |
| Glorious Bracer | Auron | 4,725 gil |
| Glorious Targe | Rikku | 4,725 gil |
O'aka - Oldroad
| Item | Cost |
|---|---|
| Potion | 50 gil |
| Phoenix Down | 100 gil |
| Antidote | 50 gil |
| Eye Drops | 50 gil |
| Echo Screen | 50 gil |
Final Fantasy X-2
| Item | Cost | Chapter |
|---|---|---|
| Potion | 50 | All |
| Hi-Potion | 500 | Ch 3+ |
| Phoenix Down | 100 | All |
| Antidote | 50 | All |
| Eye Drops | 50 | All |
| Echo Screen | 50 | All |
| Soft | 50 | All |
| Holy Water | 300 | All |
| Iron Bangle | 500 | Ch 1-2 |
| Silver Bracer | 500 | Ch 1-2 |
| Gauntlets | 2,500 | Ch 1-2 |
| Tiara | 2,500 | Ch 1-2 |
| Titanium Bangle | 3,000 | Ch 3+ |
| Gold Bracer | 4,000 | Ch 3+ |
| Muscle Belt | 4,000 | Ch 3+ |
| Circlet | 4,000 | Ch 3+ |
Items
Final Fantasy X
- Hi-Potion (from man in yellow shirt)
- Hunter's Spear (from man in blue shirt)
- Antidote x2 (from girl in red skirt)
- Ice Brand (behind the ancient ruins)
- Echo Ring (defeat Belgemine's aeon)
- Seeker's Ring (lose to Belgemine's aeon)
- Remedy (in chest behind the Crusader on chocobo)
- Red Ring (from Crusader running around)
- Soft x3 (from young boy, only if player does not kick the blitzball)
- Lv. 1 Key Sphere (from male Crusader in purple)
- Antidote x4 (from woman in yellow)
- 2000 gil
- 600 gil (from Crusader in yellow)
- Ether (from Crusader quiescent)
- Hi-Potion (from woman in purple)
- Eye Drops x3
- Lv. 1 Key Sphere (from man in green automatically in Travel Agency)
- Al Bhed Primer vol. VIII (from Rin automatically)
- Mega-Potion x2 (from Rin automatically)
- Heat Lance (requires a chocobo)
- Al Bhed Primer vol. IX
- Hi-Potion x2
- Thunder Blade (requires a chocobo)
- Scout (requires a chocobo)
- Fortune Sphere (requires a chocobo)
- Mars Crest (at the end of Oldroad, South)
- Scout (donate 100 gil. Repeatable)
- Ice Lance (donate 1000 gil. Repeatable)
- Moon Ring (donate 10000 gil. Repeatable)
- Jecht's Sphere (Oldroad in South area, after defeating Spherimorph)
- Sonar (Mi'ihen Ruins hidden area)
Final Fantasy X-2
- Chapter 1
- Phoenix Down x2
- 500 gil
- Circlet
- Antidote x2
- Holy Water x2
- Potion x2
- Iron Bangle
- Eye Drops x2
- Potion
- Phoenix Down x2
- Budget Grenade x2
- Mana Spring
- Echo Screen x2
- Soft x2
- Chapter 2
- Muscle Belt
- 1000 gil
- Phoenix Down x3
- Antidote x3
- Potion x3
- Silver Bracer
- Holy Water x3
- Eye Drops x3
- Phoenix Down x3
- Grenade x2
- Ether
- Potion x2
- Echo Screen x3
- Soft x3
- Chapter 3
- Phoenix Down x4
- 2000 gil
- Hypno Crown
- Hi-Potion x2
- Holy Water x4
- Hi-Potion x4
- Potion x2
- Eye Drops x3
- Soft x4
- Phoenix Down x4
- S-Bomb x2
- Ether x2
- Echo Screen x4
- Hi-Potion x2
- Chapter 5
- Phoenix Down x5
- Black Belt (behind the ruin)
- 3000 gil
- Remedy x2
- Hi-Potion x3
- Titanium Bangle
- Holy Water x6
- Remedy x2
- M-Bomb x2
- Soft x5
- Hi-Potion x3
- Echo Screen x5
- Phoenix Down x5 (on cliff, must get chocobos on Highroad)
- Victor Primoris (on cliff, must get chocobos on Highroad)
- Everyman's Repair Manual (examine every machina, one is holding it)
Enemies
Final Fantasy X
- South End
- Raldo (tutorial)
- Mi'ihen Fang, White Element, Floating Eye
- Floating Eye, Mi'ihen Fang, Raldo
- Mi'ihen Fang, White Element, Raldo
- Raldo, White Element, Floating Eye
- Bomb
- Dual Horn
- Ifrit (Optional Boss)
- Mi'ihen Fang (Ledges)
- Mi'ihen Fang x2 (Ledges)
- Dual Horn, Mi'ihen Fang (Ledges)
- South and Central
- White Element, Mi'ihen Fang, Floating Eye
- Mi'ihen Fang, Raldo, Floating Eye
- Mi'ihen Fang, White Element, Raldo
- Raldo, White Element, Floating Eye
- Dual Horn, Mi'ihen Fang
- Floating Eye x2, Bomb
- Bomb x3
- Bomb x2, Dual Horn
- Mi'ihen Fang x2 (Ledges)
- Mi'ihen Fang x3 (Ledges)
- Newroad - South and North
- Mi'ihen Fang, White Element, Floating Eye
- Mi'ihen Fang, Raldo, Floating Eye
- Mi'ihen Fang, White Element, Raldo
- Raldo, White Element, Floating Eye
- Dual Horn, Raldo
- Bomb, Floating Eye x2
- Bomb x3
- Bomb x2, Dual Horn
- Travel Agency
- Chocobo Eater (Boss)
- Oldroad
- Bomb x2, Dual Horn
- Ipiria, Vouivre, Floating Eye
- Vouivre, Floating Eye, Thunder Flan
- Thunder Flan, Bomb x2
- Dual Horn, Thunder Flan
- Vouivre, Dual Horn x2
- Vouivre, Thunder Flan
- Vouivre, Ipiria, Thunder Flan
Final Fantasy X-2
- Chapter 1
- Chapter 2
- Wild Wolf x4
- Wild Wolf x2, Flan Palido
- Wild Wolf, Flan Palido, Purpurea
- Iron Giant
- Shantak
- Wild Wolf, Divebeak, Purpurea
- Flan Palido, Purpurea
- Flan Palido x2
- Purpurea x2
- Flan Palido x2, Wild Wolf
- Flan Palido, Wild Wolf, Peregrine
- Wild Wolf, Quadricorn, Bully Cap
- Flan Palido, Fly Eye
- Fly Eye x2
- Flan Palido, Wild Wolf, Bully Cap
- Fly Eye, Quadricorn
- Wild Wolf x2, Bully Cap x2
- Flan Palido, Bully Cap
- Chocobo Eater (Boss)
- Chapter 3
- Scout Machina x2 (mission)
- Machina Ranger x3 (mission)
- Machina Ranger, Scout Machina (mission)
- Barbuta, Cephalotus
- Machina Ranger, Scout Machina, Watcher-A
- Barbuta x2
- Scout Machina, Machina Ranger
- Barbuta, Cephalotus, Watcher-R
- Zu
- Barbuta x2, Peregrine
- Machina Ranger x2
- Machina Ranger x2, Watcher-S
- Barbuta x2, Peregrine, Watcher-S
- Barbuta x2, Watcher-A
- Scout Machina, Machina Ranger, Watcher-R
- Machina Ranger x2, Scout Machina
- Peregrine, Cephalotus, Watcher-S
- Peregrine, Cephalotus
- Peregrine, Flan Rojo, Watcher-R
- Scout Machina x2
- Peregrine, Flan Rojo
- Machina Ranger, Scout Machina x2
- Flan Rojo x2
- Flan Rojo x2, Watcher-S
- Flan Rojo, Cephalotus
- Barbuta, Flan Rojo
- Flan Rojo, Cephalotus, Watcher-A
- Barbuta, Flan Rojo, Watcher-R
- Peregrine, Mycotoxin
- Peregrine, Mycotoxin, Watcher-R
- Flan Rojo, Mycotoxin
- Mycotoxin, Cephalotus, Watcher-S
- Flan Rojo, Mycotoxin, Watcher-A
- Queen Coeurl, Peregrine
- Flan Rojo, Queen Coeurl
- Flan Rojo, Queen Coeurl, Watcher-A
- Queen Coeurl, Cephalotus
- Scout Machina x2, Watcher-S
- Queen Coeurl, Peregrine, Watcher-S
- Chapter 5
- Barbuta x2
- Barbuta x2, Peregrine
- Barbuta x2, Watcher-R
- Zu
- Aka Manah
- Aka Manah, Watcher-A
- Cephalotus, Lich, Barbuta
- Lich, Barbuta
- Cephalotus, Lich, Barbuta, Watcher-S
- Barbuta x2, Peregrine, Watcher-A
- Flan Rojo, Peregrine, Watcher-A
- Flan Rojo, Peregrine
- Peregrine x2
- Lich x2
- Peregrine x2, Watcher-R
- Lich, Barbuta, Watcher-R
- Flan Rojo, Cephalotus
- Flan Rojo, Barbuta, Watcher-S
- Flan Rojo, Barbuta
- Flan Rojo, Cephalotus, Watcher-R
- Mycotoxin, Flan Rojo
- Mycotoxin x2, Peregrine
- Mycotoxin, Cephalotus
- Mycotoxin, Cephalotus, Watcher-A
- Lich x2, Watcher-S
- Mycotoxin, Flan Rojo, Watcher-R
- Queen Coeurl, Flan Rojo
- Queen Coeurl, Cephalotus, Watcher-S
- Queen Coeurl, Flan Rojo, Watcher-R
- Queen Coeurl x2
- Mycotoxin x2, Peregrine, Watcher-S
- Cephalotus, Peregrine
- Queen Coeurl, Cephalotus
- Aka Manah, Watcher-R
Musical themes
In Final Fantasy X, "Mi'ihen Highroad" is the location theme on the Highroad. It was composed by Nobuo Uematsu. This theme is included on Theatrhythm Final Fantasy Compilation Album and in the Final Fantasy XV music player.
"Chocobo Jam" plays when riding a chocobo on the Highroad. "They May Pass" plays at the end of the Highroad, when Seymour appears and gives the party permission to pass the roadblock.
For Final Fantasy X HD Remaster, "Mi'ihen Highroad" was remastered by Masashi Hamauzu.
In Final Fantasy X-2, "Mi'ihen Highroad" is an entirely new composition that acts as the Highroad's theme. The theme "Chocobo" plays while riding a chocobo on the Highroad and during the Chapter 2 mission, "Cuckoo for Chocobos!".
Other appearances
Theatrhythm Final Fantasy
The Mi'ihen Highroad appears in the background for the FMS for "Mi'ihen Highroad". Rin's Travel Agency can be seen in the background during the stage.
Theatrhythm Final Fantasy Curtain Call
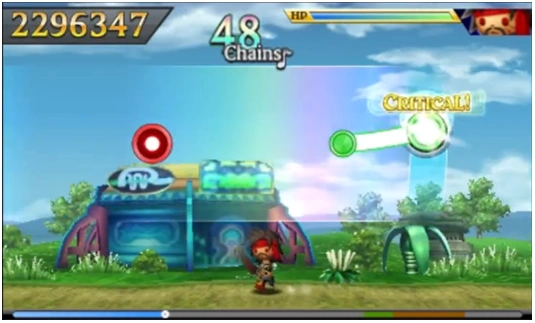
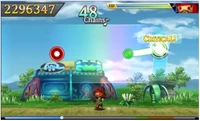
Mi'ihen Highroad.
The Mi'ihen Highroad appears in the background for the FMS of its eponymous theme.
Pictlogica Final Fantasy


The Mi'ihen Highroad.
Final Fantasy Airborne Brigade
")
_FFX_Special.png "FFAB Mi'ihen Highroad (Outside Rin's Travel Agency) FFX Special.png (19 KB)")
Final Fantasy Record Keeper
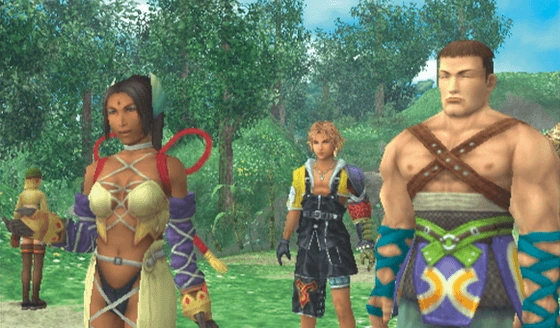
Auron joins the party and together they make for Djose Temple. They travel along the Mi'ihen Highroad, but encounter an unexpected problem at its northern end...
Gallery
- Final Fantasy X
")
")
")
")
")
")
")
")
")
")
")
")
")
")
")
")
")
")
")
- Final Fantasy X-2
")
")
")
")
")
")
")
")
")
")