Intangir Bot (talk | contribs) mNo edit summary |
|||
| (30 intermediate revisions by 6 users not shown) | |||
| Line 1: | Line 1: | ||
{{sideicon|prime=FFVII|FFVIIR|FFAB|FFRK|FFBE}} |
{{sideicon|prime=FFVII|FFVIIR|FFAB|FFRK|FFBE}} |
||
{{infobox location |
{{infobox location |
||
| − | |name= |
+ | |name=Mako Reactor 1 |
|release=FFVII |
|release=FFVII |
||
|japanese=壱番魔晄炉 |
|japanese=壱番魔晄炉 |
||
|romaji=Ichiban Makō-ro |
|romaji=Ichiban Makō-ro |
||
| + | |image=<gallery> |
||
| ⚫ | |||
| + | Mako Reactor 1 area in FFVII Remake.png|Remake |
||
| ⚫ | |||
| + | </gallery> |
||
|type=[[Mako Reactor]] |
|type=[[Mako Reactor]] |
||
|region=[[Sector 1]], [[Midgar]] |
|region=[[Sector 1]], [[Midgar]] |
||
| Line 13: | Line 16: | ||
*[[#North Edge Station|North Edge Station]] |
*[[#North Edge Station|North Edge Station]] |
||
*[[#Reactor Grounds|Reactor Grounds]] |
*[[#Reactor Grounds|Reactor Grounds]] |
||
| − | *[[# |
+ | *[[#Reactor walkway|Reactor walkway]] |
*[[#Interior|Entrance/Interior]] |
*[[#Interior|Entrance/Interior]] |
||
*[[#Elevator|Elevator]] |
*[[#Elevator|Elevator]] |
||
*[[#Utility Access|Utility Access]] |
*[[#Utility Access|Utility Access]] |
||
**[[#Main staircase|Main staircase]] |
**[[#Main staircase|Main staircase]] |
||
| − | + | *[[#Mako storage|Mako storage]] |
|
| − | **[[# |
+ | **[[#Scaffolding|Scaffolding]] |
**[[#Core|Core]] |
**[[#Core|Core]] |
||
|residents=None |
|residents=None |
||
| − | |items= |
+ | |ffvii items= |
*[[Final Fantasy VII items#Potion|Potion]] x3 |
*[[Final Fantasy VII items#Potion|Potion]] x3 |
||
*[[Phoenix Down (Final Fantasy VII)|Phoenix Down]] |
*[[Phoenix Down (Final Fantasy VII)|Phoenix Down]] |
||
*[[Restore (Final Fantasy VII)|Restore]] Materia |
*[[Restore (Final Fantasy VII)|Restore]] Materia |
||
*[[Assault Gun (Final Fantasy VII)|Assault Gun]] (dropped by Guard Scorpion) |
*[[Assault Gun (Final Fantasy VII)|Assault Gun]] (dropped by Guard Scorpion) |
||
| − | |enemies= |
+ | |ffvii enemies= |
*[[1st Ray]] |
*[[1st Ray]] |
||
*[[Grunt (Final Fantasy VII)|Grunt]] |
*[[Grunt (Final Fantasy VII)|Grunt]] |
||
| Line 35: | Line 38: | ||
*[[Sweeper (Final Fantasy VII)|Sweeper]] |
*[[Sweeper (Final Fantasy VII)|Sweeper]] |
||
*[[Guard Scorpion (Final Fantasy VII)|Guard Scorpion]] (boss) |
*[[Guard Scorpion (Final Fantasy VII)|Guard Scorpion]] (boss) |
||
| − | |quests= |
+ | |ffvii quests= |
| − | *[[ |
+ | *[[No. 1 Reactor Bombing]] |
| + | |ffviir items= |
||
| − | *[[#Destroying the Reactor|Destroying the Reactor]] |
||
| + | *[[Final Fantasy VII Remake items#Potion|Potion]] x8 (possible additional drops from Shinra boxes) |
||
| − | *[[#Escaping Sector 1 Reactor|Escaping Sector 1 Reactor]] |
||
| + | *[[Final Fantasy VII Remake items#Ether|Ether]] x3 |
||
| + | *[[Final Fantasy VII Remake items#Phoenix Down|Phoenix Down]] x2 |
||
| + | *[[Final Fantasy VII Remake items#Grenade|Grenade]] x2 |
||
| + | *[[Final Fantasy VII Remake items#Moogle Medal|Moogle Medal]] x1 (has a chance of dropping from Shinra box) |
||
| + | |ffviir enemies= |
||
| + | *[[Guard Dog]] |
||
| + | *[[Monodrive]] |
||
| + | *[[Security Officer]] |
||
| + | *[[Sentry Ray]] |
||
| + | *[[Shock Trooper (VII Remake)|Shock Trooper]] |
||
| + | *[[Sweeper (VII Remake)|Sweeper]] |
||
| + | *[[Scorpion Sentinel]] (boss) |
||
| + | |ffviir quests= |
||
| + | *[[Enter the Reactor Grounds]] |
||
| + | *[[Infiltrate the Reactor]] |
||
| + | **[[Follow Barret]] |
||
| + | **[[Breach Security]] |
||
| + | *[[Reach Mako Storage]] |
||
| + | **[[Follow Jessie]] |
||
| + | **[[Set the Charge]] |
||
| + | *[[Escape from the Reactor]] |
||
| + | **[[Rendezvous with Barret]] |
||
| + | **[[Sprint to Safety]] |
||
}} |
}} |
||
| − | + | '''Mako Reactor 1''' is one of the eight [[Mako Reactor]]s built by the [[Shinra Electric Power Company]] to power the city of Midgar, appropriately found in [[Sector 1]], in ''[[Final Fantasy VII]]''. Its layout is the same as the [[Sector 5 Reactor]]. Mako Reactor 1 is the northernmost reactor in Midgar, and is even referred to as the "'''Northern Reactor'''". |
|
==Story== |
==Story== |
||
{{spoiler}} |
{{spoiler}} |
||
| − | [[File:VII_Remake_Cloud_and_Barret.png|right|thumb|Barret and Cloud in the |
+ | [[File:VII_Remake_Cloud_and_Barret.png|right|thumb|Barret and Cloud in the core area of Mako Reactor 1]] |
| − | The eco-terrorist group [[ |
+ | The eco-terrorist group [[Avalanche (group)|Avalanche]], in an attempt to save the [[Gaia (Final Fantasy VII)|Planet]] from the corrupting ways of Shinra, attacks the reactor. The effort is led by [[Barret Wallace]] who is accompanied by [[Biggs (Final Fantasy VII)|Biggs]], [[Wedge (Final Fantasy VII)|Wedge]], [[Jessie (Final Fantasy VII)|Jessie]], and the recently hired mercenary [[Cloud Strife]]. The team captures a [[Train (Final Fantasy VII)|train]] and uses it to break into the reactor grounds, which are defended by Shinra guards. |
| − | The team fights its way down into the main generator, and prepares to put the charges in. Cloud has a brief flashback to the [[Nibelheim Incident|incident]] in [[Nibelheim]] and suffers a psychic disturbance. Before the charges can be pulled, the robot [[Guard Scorpion (Final Fantasy VII)|Guard Scorpion]] attacks, and is defeated by Cloud and Barret before they and the rest to |
+ | The team fights its way down into the main generator, and prepares to put the charges in. Cloud has a brief flashback to the [[Nibelheim Incident|incident]] in [[Nibelheim]] and suffers a psychic disturbance. Before the charges can be pulled, the robot [[Guard Scorpion (Final Fantasy VII)|Guard Scorpion]] attacks, and is defeated by Cloud and Barret before they and the rest to Avalanche make their way back out before the reactor explodes. |
| − | [[File:FVIIR Mako 1 explosion.png|thumb|left|The destruction of |
+ | [[File:FVIIR Mako 1 explosion.png|thumb|left|The destruction of Mako Reactor 1]] |
| − | The explosion causes massive destruction with unknown numbers of civilian casualties. Cloud and |
+ | The explosion causes massive destruction with unknown numbers of civilian casualties. Cloud and Avalanche scatter to regroup at the train heading for the [[Sector 7]] slums. The reactor remains closed, and when Shinra places the [[Sister Ray]] cannon within Midgar, seven reactors charge up its blast, Mako Reactor 1 still out of commission. |
{{clear}} |
{{clear}} |
||
{{endspoiler}} |
{{endspoiler}} |
||
| Line 56: | Line 82: | ||
==Geography== |
==Geography== |
||
===Overview=== |
===Overview=== |
||
| − | [[File:Sector1-ffvii-layout.png|200px|thumb|right|Map of the outside area of the |
+ | [[File:Sector1-ffvii-layout.png|200px|thumb|right|Map of the outside area of the Mako Reactor 1]] |
| − | Mako Reactor 1 is an unrevisitable location visited at the start of ''Final Fantasy VII'' during a mission to destroy the reactor. The area just outside the reactor that is visited includes the platform, a train station reached by a set of stairs, a walled-off area just north of the station, and a walkway connecting Sector 1 and Sector 8 entered in the walled-off area. The |
+ | Mako Reactor 1 is an unrevisitable location visited at the start of ''Final Fantasy VII'' and ''Final Fantasy VII Remake'' during a mission to destroy the reactor (the chapter "[[The Destruction of Mako Reactor 1]]" in ''Final Fantasy VII Remake''). The area just outside the reactor that is visited includes the platform, a train station reached by a set of stairs, a walled-off area just north of the station, and a walkway connecting Sector 1 and Sector 8 entered in the walled-off area. The utility access is reached through a walkway connecting Sector 1 and [[Sector 8]]. |
| + | |||
| + | The entrance to the reactor is a set of rooms filled with machinery leading to an [[#Elevator|elevator]], which travels down to a series of vast rooms and piping. Ladders can be traversed to eventually lead down to the [[#Core|core of the reactor]]. The interior of Mako Reactor 1 in the original ''Final Fantasy VII'' has a brown-ish tint, in contrast to the [[Sector 5 Reactor]] with a similar layout. |
||
{{clear}} |
{{clear}} |
||
===Platform=== |
===Platform=== |
||
| − | [[File: |
+ | [[File:Mako Reactor 1 platform FFVII Remake.png|thumb]] |
The Platform is the first area in the game and visited as soon as the opening movie finishes. The area comprises a stone platform alongside the railway track, with metal gates on the lefthand side, and the sign "1-0b" painted on the wall. At the fair end of the platform on the left is the exit onto the [[#North Edge Station|North Edge Station]]. |
The Platform is the first area in the game and visited as soon as the opening movie finishes. The area comprises a stone platform alongside the railway track, with metal gates on the lefthand side, and the sign "1-0b" painted on the wall. At the fair end of the platform on the left is the exit onto the [[#North Edge Station|North Edge Station]]. |
||
{{clear}} |
{{clear}} |
||
===North Edge Station=== |
===North Edge Station=== |
||
| ⚫ | |||
| ⚫ | |||
| ⚫ | |||
| ⚫ | |||
| ⚫ | |||
| + | |||
| + | |image1 = North Edge Station first floor FFVII Remake.png |
||
| + | |image2 = North Edge Station second floor FFVII Remake.png |
||
| ⚫ | |||
| + | |||
| ⚫ | |||
| ⚫ | |||
| + | At the end of the platform is the entrance to the North Edge Station. Inside, train schedules are listed and vending machines and poster ads are seen in corners and walls, respectively. These posters include ads for an apple juice named "Banora White", a purse named with the tag "Elegance", a "Hair Tonic" for scalp care promising "astonishingly radiant & spiky hair", a camera named "7" with Shinra-X sensor technology, a music gallery named "Air", [[LOVELESS]], the third book in a series titled ''The Adventures of Stamp'', and posters both for the Shinra Electric Power Company and Shinra Construction. |
||
| + | |||
| + | Additionally, vending machines for mineral water of the brand "Clear Icicle" and for an energy drink named "Redlord" with a logo shaped like a [[Bomb (creature)|bomb]] are found along the walls. Trains to Sector 5 are also seen across displays, as well as a map of the trainline routes, and ticket stations are seen past the barrier at the entry. Near the back are stairs to an upper level, which is still under construction, as evident with the presence of construction materials and lack of proper lighting. |
||
| + | {{clear}} |
||
| + | |||
| + | ===Upper station area=== |
||
| + | [[File:Mako Reactor 1 upper station area FFVII Remake.png|thumb]] |
||
| ⚫ | After going through the station's upstairs area, Cloud exits on to the upper station area. Here, Cloud heads north to join with the members of Avalanche. The station is a wide, stone building with a gale roof and four turbines on each corner. It is situated atop a stone wall overlooking the railway, and adjacent to the wall surrounding the Sector 1 plate. In the surrounding area is a path north towards a stone wall in front of the restricted [[#Reactor Grounds|Reactor Gounds]], where the mission continues. |
||
{{clear}} |
{{clear}} |
||
===Reactor Grounds=== |
===Reactor Grounds=== |
||
[[File:Sector 1 Reactor2.jpg|thumb]] |
[[File:Sector 1 Reactor2.jpg|thumb]] |
||
| − | The Reactor Grounds, |
+ | The Reactor Grounds, misleadingly labeled "Sector 1" in the original game, is a walled-off area reached from station. It comprises a few small metal structures across a stone floor alongside the wall surrounding the compound. Within the area are metal pipes, metal framing around the structures, and dim lights. |
| + | |||
| + | Above some metal framing is a screen, showing the words "INTRUDER", "WARNING", and four Kanji characters. In the center of the area is a narrow building resembling a bunker at its front with a large clock tower at its top. A winding series of areas follow, and construction equipment can be seen scattered everywhere. |
||
| + | |||
| + | In the original game, the path to this door is found to the right of the central building, after passing it is a path left straight to the door. |
||
| − | The |
+ | The Reactor Grounds area leads to a short yet tall hallway leads to a switch, which opens up into the [[#Reactor walkway|walkway outside the reactor]], with another door to the walkway at the very back of the area, leading to Sector 8. |
{{clear}} |
{{clear}} |
||
| − | === |
+ | ===Reactor walkway=== |
| + | [[File:Mako Reactor 1 structure in FFVII Remake.png|thumb|The walkway with different entrances, each leading to Sector 8, the reactor, and Sector 1 (left to right)]] |
||
| ⚫ | |||
| − | The walkway outside the reactor, known as "No.1 Reactor" in the menu of the original game, is used to access |
+ | The walkway outside the reactor, known as "No.1 Reactor" in the menu of the original game, is used to access Mako Reactor 1, and to escape. It comprises a metal walkway connecting Sector 1 and [[Sector 8]], and a path in the middle leading directly to the Mako Reactor 1. The walkway is suspended above a vast abyss over the lower area of the city. |
{{clear}} |
{{clear}} |
||
| Line 90: | Line 138: | ||
===Utility Access=== |
===Utility Access=== |
||
| − | ====Main staircase==== |
||
[[File:Sector 1 Reactor.png|thumb|Main staircase.]] |
[[File:Sector 1 Reactor.png|thumb|Main staircase.]] |
||
| − | The |
+ | The utility access contains a large staircase. It is a large, expansive room, with a red tint on the stairways, dark brick walls, and metallic pipes, accessed from the [[#Elevator|elevator]]. |
| − | The elevator opens atop a large structure within the room, with a staircase used to descend this structure to the floor of the room, where a door leads to the [[# |
+ | The elevator opens atop a large structure within the room, with a staircase used to descend this structure to the floor of the room, where a door leads to the hall into the [[#Mako storage|mako storage]]. The structure also contains a small, round tower atop it that can be climbed using ladders, though it contains nothing of interest. |
| − | In contrast to the [[Sector 5 Reactor#Main staircase|main staircase of the Sector 5 Reactor]], |
+ | In contrast to the [[Sector 5 Reactor#Main staircase|main staircase of the Sector 5 Reactor]], Mako Reactor 1 has no pipe leading down from the door in the back-end of the room, which is instead unreachable. |
{{clear}} |
{{clear}} |
||
| − | === |
+ | ===Mako storage=== |
| + | Pipes, ranging from large to humongous, and fans, which regulate temperature, fill the walls of the large storage area. Large circular vents, located on the level of the penultimately highest platform, direct the smoke emitted by mako upwards, which can be seen outside as a huge cluster of smoke emanating from the top of the reactor building. |
||
| ⚫ | |||
| ⚫ | |||
| ⚫ | |||
| + | ====Scaffolding==== |
||
| ⚫ | |||
| + | This area, while part of "Mako Reactor 1 - Utility Access" in the game, is located in the large area above mako storage. |
||
| ⚫ | |||
| ⚫ | |||
| ⚫ | In the original game, the {{A|Upper piping|upper piping}} is a damaged area full of rusting metallic pipes. It is reached through a door at the bottom of the [[#Main staircase|main staircase]] room, which opens to a damaged stone wall. At the end of this stone wall, a ladder across a huge pipe leads down to a set of beams suspended above the core's main room. To the right of the beams is a set of steps leading down to a pipe below them. At the end of this pipe is a tall ladder leading down to the [[#Lower piping|lower piping]]. |
||
| ⚫ | |||
| ⚫ | |||
| ⚫ | |||
The {{A|Lower piping|lower piping}} comprises large pipes suspended above the walkway leading to the [[#Core|core]]. It is reached using a ladder down from the [[#Upper piping|upper piping]], and themselves lead to another ladder down to the walkway by the core. |
The {{A|Lower piping|lower piping}} comprises large pipes suspended above the walkway leading to the [[#Core|core]]. It is reached using a ladder down from the [[#Upper piping|upper piping]], and themselves lead to another ladder down to the walkway by the core. |
||
| + | {{clear}} |
||
| + | |||
| + | In the remake, scaffolding line the walls of the large core area. while thick sheets are laid on the some parts of the railing. Hung on the lower part of the railings are small rectangular electric lamps emitting white light. Long wires messily run on the surface of most areas of the platforms and are held down by red duct tape. The scaffolding platforms are held by thin yet strong wires from the ceiling and is also connected to the wall structure to prevent them from swaying. |
||
| + | |||
| + | The scaffolding consists of dark gray and black hues, with certain colors indicating extreme caution, as mako is pumped directly below the platforms. Yellow and black stripes border the railings on the platform surface, accompanied by lines of red light, as the presence railings doesn't guarantee safety. A yellow line is also present at the edge of each stair. |
||
| + | |||
| + | The highest platform is located in the south of the large core area is accessible through the lowest level of the main staircase area, from the sweeper units area. To the west of the highest platform is a ladder leading downward to a long platform. Just before the end of the long platform are stairs to the immediate east leading to a platform not connected to the wall and has two ladders both leading downwards: |
||
| + | *The ladder immediately visible from the stairs leads downwards to a long straight platform that bisects the reactor leading to a platform connected to the eastern wall. South of that platform are stairs leading downwards to a platform attached to the southeast and south walls. Just before the end of that platform are stairs leading down to the [[#Core|core]], the lowest platform of mako storage. |
||
| + | *The other ladder is accessible by turning right from the stairs and reaching the platform's south end. When going down the ladder, reaching the platform below, and facing south, wood scaffolding is present and leads to a small platform by the southern wall. A ladder upwards is present, which also leads to another small platform with a ladder leading upwards. This ladder leads to wood scaffolding near the highest platform. The two footings aren't connected but are near enough for one to jump off from the wood scaffolding onto the metal platform. |
||
{{clear}} |
{{clear}} |
||
====Core==== |
====Core==== |
||
[[File:Sector 1 Reactor3.png|150px|thumb|Core.]] |
[[File:Sector 1 Reactor3.png|150px|thumb|Core.]] |
||
| − | The core is where Cloud and Barret fight the [[Guard Scorpion (Final Fantasy VII)|Guard Scorpion]] and set the bomb. The core itself is surrounded by metallic pipes and heavy machinery, with a single narrow walkway leading towards it. |
+ | The core is where Cloud and Barret fight the [[Guard Scorpion (Final Fantasy VII)|Guard Scorpion]] (''Final Fantasy VII'')/[[Scorpion Sentinel]] (''Final Fantasy VII Remake'') and set the bomb. The core itself is surrounded by metallic pipes and heavy machinery, with a single narrow walkway leading towards it. In the original game, the walkway contains a [[save point]] and an inaccessible door. On the end of the walkway is the core itself, which is a large, tubular structure built into a wall, with "1998" written at the top, and a set of pipes leading to a valve at the bottom. |
{{clear}} |
{{clear}} |
||
| Line 195: | Line 246: | ||
Random encounters at the platform are available until the player leaves the screen and returns, in the player's first visit. |
Random encounters at the platform are available until the player leaves the screen and returns, in the player's first visit. |
||
| − | Inside, various enemies are fought as [[random encounter]]s, though most are dispatched with only one or two hits by [[Cloud |
+ | Inside, various enemies are fought as [[random encounter]]s, though most are dispatched with only one or two hits by [[Cloud (Final Fantasy VII party member)|Cloud]] or [[Barret (Final Fantasy VII party member)|Barret]], and deal little damage. The [[Sweeper (Final Fantasy VII)|Sweeper]], fought around the lower piping, is the most durable among them, which takes several hits to be defeated first. When encountered alongside other enemies, the smaller enemies should be defeated first to remove the damage they deal; otherwise, they are best dispatched by casting [[Bolt (Final Fantasy VII)|Bolt]] from Cloud. |
The Guard Scorpion is fought as a boss in the core. This boss should be attacked by Cloud's [[Bolt (Final Fantasy VII)|Bolts]] while Barret uses normal attacks. When the Guard Scorpion raises its tail, it will counterattack until the tail is lowered. The player should either use Potions to heal in this time or simply avoid attacking until its tail is lowered, and then continue to damage it until it is destroyed. |
The Guard Scorpion is fought as a boss in the core. This boss should be attacked by Cloud's [[Bolt (Final Fantasy VII)|Bolts]] while Barret uses normal attacks. When the Guard Scorpion raises its tail, it will counterattack until the tail is lowered. The player should either use Potions to heal in this time or simply avoid attacking until its tail is lowered, and then continue to damage it until it is destroyed. |
||
| Line 221: | Line 272: | ||
Inside the reactor, a [[Potion (Final Fantasy VII)|Potion]] is found in a [[treasure chest (object)|treasure chest]] in the room on the southeast of the entrance, and another is found lying on the ground at the bottom end of the upper piping. By the reactor core, a [[Restore (Final Fantasy VII)|Restore Materia]] can be picked up before reaching the core, and after defeating Guard Scorpion, the [[Assault Gun (Final Fantasy VII)|Assault Gun]] is obtained. |
Inside the reactor, a [[Potion (Final Fantasy VII)|Potion]] is found in a [[treasure chest (object)|treasure chest]] in the room on the southeast of the entrance, and another is found lying on the ground at the bottom end of the upper piping. By the reactor core, a [[Restore (Final Fantasy VII)|Restore Materia]] can be picked up before reaching the core, and after defeating Guard Scorpion, the [[Assault Gun (Final Fantasy VII)|Assault Gun]] is obtained. |
||
| − | ==== |
+ | ====Quests==== |
| + | *[[No. 1 Reactor Bombing]] |
||
| − | The mission begins at the [[#Platform|Platform]], commencing immediately after the opening movie finishes. |
||
| + | All quests in the No. 1 Reactor occur in the chapter "No. 1 Reactor Bombing", the first chapter of the game. As the location cannot be revisited, there are no optional quests. |
||
| − | When entering the Platform, the cast exit off the train to Sector 1 and knock down two troops. Heading north in this scene ensues the first battle of the game as two soldiers run towards the player. After this battle, the player can take an exit on the left to enter the Sector 1 Station area. Two [[Potion (Final Fantasy VII)|Potion]] items can be picked up here from the guards. |
||
| − | |||
| − | The player then enters from the [[#Sector 1 Station|Sector 1 Station]] from the bottom-left of the screen. Here, other members of AVALANCHE will be standing around before running towards the exit. After a conversation, the player gets to name the Ex-SOLDIER, which defaults to "Cloud". Another member of AVALANCHE will then run on screen, the second playable character who can then be named, default "[[Barret Wallace|Barret]]". After the North Gate is open, a small scene occurs and the character automatically runs into the [[#Sector 1|Sector 1]] area. |
||
| − | |||
| − | In this area, the player must run right, up, and then to the left of the screen where they will find the exit to a walkway [[#Outside Reactor|outside the No. 1 Reactor]]. The door on the far left exits out into [[Sector 8]], and the door at the top of the screen leads into the [[#No. 1 Reactor|No. 1 Reactor]]. The area is two straight pathways in a T-formation. Next to the door to Sector 8 is "N-8th" is written on the wall next to this door. |
||
| − | |||
| − | When the player first enters the outside walkway, [[Biggs and Wedge (Final Fantasy VII)|Wedge]] waits at the door to Sector 8 to secure the escape passage. The mission then proceeds [[Sector 1 Reactor#Destroying the Reactor|inside the Sector 1 Reactor]]. |
||
| − | |||
| − | ====Destroying the Reactor==== |
||
| − | After [[Sector 1#Infiltrating Sector 1 Reactor|infiltrating the Reactor]], Cloud and Barret begin at the entrance. Here, the player must interact with Biggs to decipher the code of the first door, and then with Jessie to open the second door and the elevator. After this, the elevator must be activated to the main staircase. Dialogue with Barret will initiate until the elevator reaches its destination. |
||
| − | |||
| − | Following this, the player must descend down through the [[#Main staircase|main staircase]] to reach the piping. Along the way, the player will encounter a variety of enemies in [[random encounter]]s, though these enemies are straightforward and can be defeated in one or two hits. After reaching the piping, the player must interact with the ladder to descend down further. A Potion can be picked up in the [[#Upper piping|upper piping]] before descending down to the [[#Lower piping|lower piping]]. The Sweeper can be fought as an encounter here; this enemy is more durable and can take multiple hits, meaning that it is best to defeat its accompanying enemies before focusing against it. |
||
| − | |||
| − | Eventually, the player will reach a walkway towards the core. Along the walkway, a Restore Materia can be picked up before reaching the core. Here, a short scene commences, and the Guard Scorpion must be fought. Once defeated, a timer initiates. The player must run back and ascend up the Reactor to the exit before the ten minutes expire, at which point the Reactor will explode. Though the player can still fight random encounters, it may be wise to run away if time is low. Along the way, Jessie will be found caught in the pipes; she needs to be rescued along the way or the player will be unable to escape. Upon escaping the Reactor, the next quest commences in Sector 8. |
||
| − | |||
| − | ====Escaping Sector 1 Reactor==== |
||
| − | The player returns to the walkway just outside the reactor after planting the bomb inside. Upon reaching [[#Outside Reactor|the area outside the reactor]], the player meets up with Wedge, and a cutscene plays. The characters run from the reactor out to Sector 8. |
||
===''[[Final Fantasy VII Remake]]''=== |
===''[[Final Fantasy VII Remake]]''=== |
||
| Line 261: | Line 296: | ||
|style="text-align:left;"| |
|style="text-align:left;"| |
||
*[[Monodrive]] |
*[[Monodrive]] |
||
| + | *[[Security Officer]] (after defeating [[Scorpion Sentinel]]) |
||
*[[Sentry Ray]] |
*[[Sentry Ray]] |
||
| − | *[[Shock Trooper]] (after defeating |
+ | *[[Shock Trooper (VII Remake)|Shock Trooper]] (after defeating Scorpion Sentinel) |
*[[Sweeper (VII Remake)|Sweeper]] |
*[[Sweeper (VII Remake)|Sweeper]] |
||
|- |
|- |
||
| Line 270: | Line 306: | ||
|} |
|} |
||
| − | ==== |
+ | ====Chests==== |
{|class="article-table FFVIIR full-width" style="text-align:center;" |
{|class="article-table FFVIIR full-width" style="text-align:center;" |
||
|-class="a" |
|-class="a" |
||
| Line 308: | Line 344: | ||
!class="b"|[[Final Fantasy VII Remake items#Ether|Ether]] x1 |
!class="b"|[[Final Fantasy VII Remake items#Ether|Ether]] x1 |
||
|style="text-align:left;"|One ladder above the lowest platform, to the west |
|style="text-align:left;"|One ladder above the lowest platform, to the west |
||
| + | |- |
||
| + | !class="b"|[[Final Fantasy VII Remake items#Potion|Potion]] x2 |
||
| + | |style="text-align:left;"|After separating from Barret to help Jessie remove a piece of debris, climbing down the ladder, and walking on the wood scaffolding, the chest is located in front of the first ladder leading upwards. |
||
|} |
|} |
||
| + | |||
| + | ====Quests==== |
||
| + | *[[Enter the Reactor Grounds]] |
||
| + | *[[Infiltrate the Reactor]] |
||
| + | *[[Follow Barret]] |
||
| + | *[[Breach Security]] |
||
| + | *[[Reach Mako Storage]] |
||
| + | *[[Follow Jessie]] |
||
| + | *[[Set the Charge]] |
||
| + | *[[Escape from the Reactor]] |
||
| + | *[[Rendezvous with Barret]] |
||
| + | *[[Sprint to Safety]] |
||
| + | All quests in Mako Reactor 1 occur in the first chapter of the game, "[[The Destruction of Mako Reactor 1]]". [[Cloud (Final Fantasy VII party member)|Cloud Strife]] is controlled for the majority of these quests, but [[Barret (Final Fantasy VII party member)|Barret Wallace]] joins from the quest "Breach Security" and onwards. The objective of the quests in the chapter are to plant the bomb in and destroy Mako Reactor 1, and all quests are fairly linear with combat encounters along the way. At the end of "Set the Charge", a boss battle takes place against [[Scorpion Sentinel]]. |
||
==Musical themes== |
==Musical themes== |
||
| Line 320: | Line 372: | ||
During the mission Cloud has a moment where he breaks down and hears a voice that says, "This isn't just a reactor". In a scene that was scrapped from the final version of the game, Cloud would have had a conversation with [[Sephiroth]] where the latter would have explained what Mako Reactors really are. The "This isn't just a reactor" memory is a remnant of this deleted scene. |
During the mission Cloud has a moment where he breaks down and hears a voice that says, "This isn't just a reactor". In a scene that was scrapped from the final version of the game, Cloud would have had a conversation with [[Sephiroth]] where the latter would have explained what Mako Reactors really are. The "This isn't just a reactor" memory is a remnant of this deleted scene. |
||
| − | The PC port had a bug that occurred intermittently to crash |
+ | The PC port had a bug that occurred intermittently to crash the game at the start of the game as the train pulls into the station and an AVALANCHE member kicks a soldier. QA reported this bug as the port was being finalized, and all the programmers were scrambling to reprogram and debug it.<ref>{{Refwebsite| page url = https://www.pcgamer.com/why-the-hell-do-they-have-mouths-a-final-fantasy-7-pc-retrospective/| page name = Why the hell do they have mouths: a Final Fantasy 7 PC retrospective| site url = https://www.pcgamer.com| site name = PC Gamer| access time = 17:02, September 21, 2018 (UTC)}}</ref> |
==Other appearances== |
==Other appearances== |
||
| Line 326: | Line 378: | ||
[[File:Boss-demovii.png|thumb|Part fighting in the "Aeris" demo.]] |
[[File:Boss-demovii.png|thumb|Part fighting in the "Aeris" demo.]] |
||
{{main|Final Fantasy VII demo}} |
{{main|Final Fantasy VII demo}} |
||
| − | The |
+ | The Mako Reactor 1 bombing mission is the setting for the two [[PlayStation]] demos of ''Final Fantasy VII''. Two versions of the demo exist, often differentiated by the third playable character: [[Aerith Gainsborough|Aeris]] or [[Tifa Lockhart|Tifa]]. The Aeris demo is of earlier build and still has many changes from the final version. The Tifa demo is closer to the playable segment in the full game. In the final game of course, neither girl is playable, and only Cloud and Barret are in the player's party. Both demos end when AVALANCHE escapes the exploding reactor. |
{{clear}} |
{{clear}} |
||
| Line 371: | Line 423: | ||
<gallery> |
<gallery> |
||
FFVII PG Bombing Mission.png|Early Sector 1 train station in ''[[Final Fantasy VII: Perfect Guide]]''. |
FFVII PG Bombing Mission.png|Early Sector 1 train station in ''[[Final Fantasy VII: Perfect Guide]]''. |
||
| + | Train station.png|Platform/Train station |
||
| ⚫ | |||
| ⚫ | |||
| ⚫ | |||
| ⚫ | |||
| ⚫ | |||
| ⚫ | |||
| ⚫ | |||
| ⚫ | |||
| ⚫ | |||
| ⚫ | |||
| ⚫ | |||
| ⚫ | |||
| ⚫ | |||
| ⚫ | |||
</gallery> |
</gallery> |
||
| Line 381: | Line 438: | ||
{{Reflist}} |
{{Reflist}} |
||
{{navbox setting FFVII}} |
{{navbox setting FFVII}} |
||
| + | {{navbox FFVIIR}} |
||
{{navbox realms FFRK}} |
{{navbox realms FFRK}} |
||
Revision as of 00:47, 30 March 2020
Template:Sideicon Mako Reactor 1 is one of the eight Mako Reactors built by the Shinra Electric Power Company to power the city of Midgar, appropriately found in Sector 1, in Final Fantasy VII. Its layout is the same as the Sector 5 Reactor. Mako Reactor 1 is the northernmost reactor in Midgar, and is even referred to as the "Northern Reactor".
Story
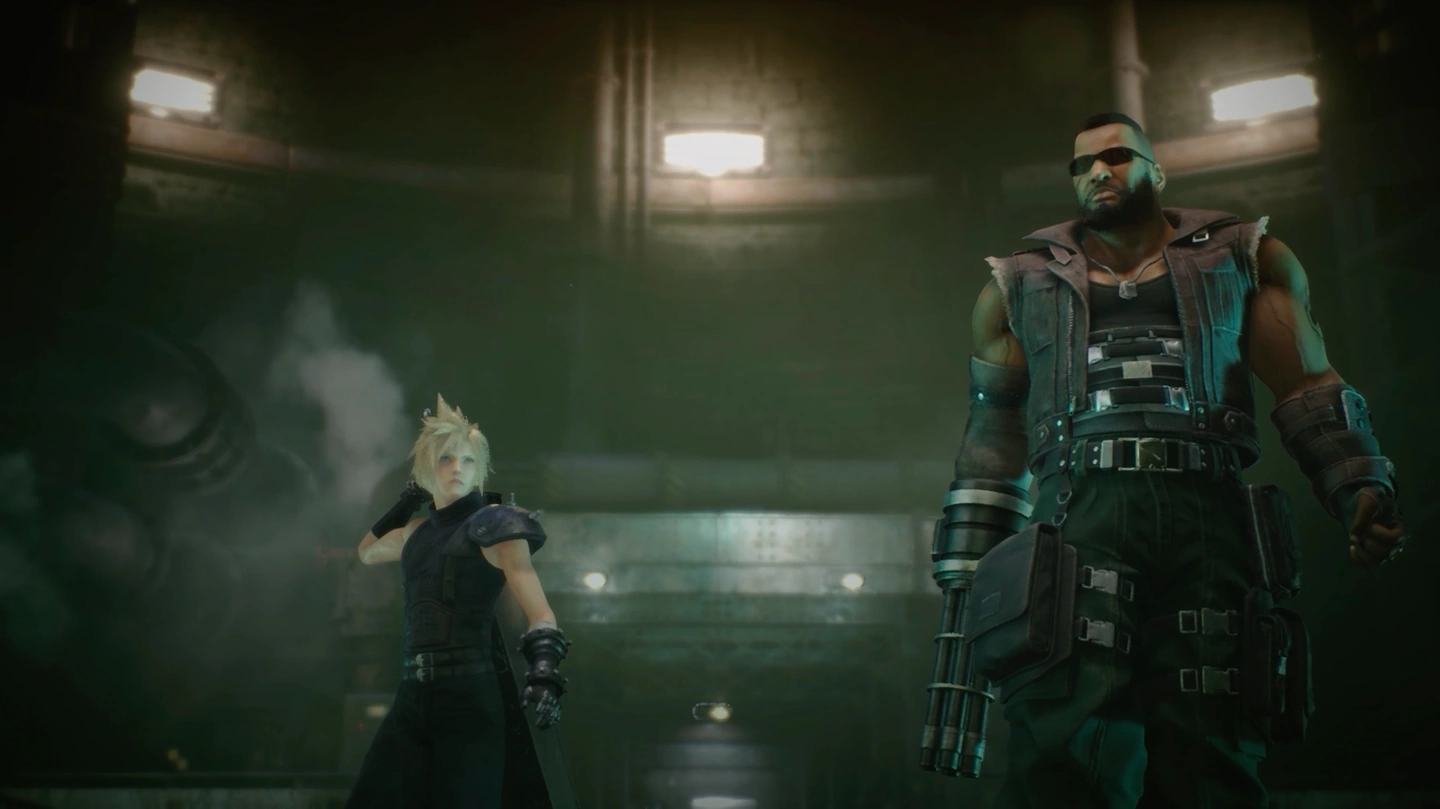
Barret and Cloud in the core area of Mako Reactor 1
The eco-terrorist group Avalanche, in an attempt to save the Planet from the corrupting ways of Shinra, attacks the reactor. The effort is led by Barret Wallace who is accompanied by Biggs, Wedge, Jessie, and the recently hired mercenary Cloud Strife. The team captures a train and uses it to break into the reactor grounds, which are defended by Shinra guards.
The team fights its way down into the main generator, and prepares to put the charges in. Cloud has a brief flashback to the incident in Nibelheim and suffers a psychic disturbance. Before the charges can be pulled, the robot Guard Scorpion attacks, and is defeated by Cloud and Barret before they and the rest to Avalanche make their way back out before the reactor explodes.

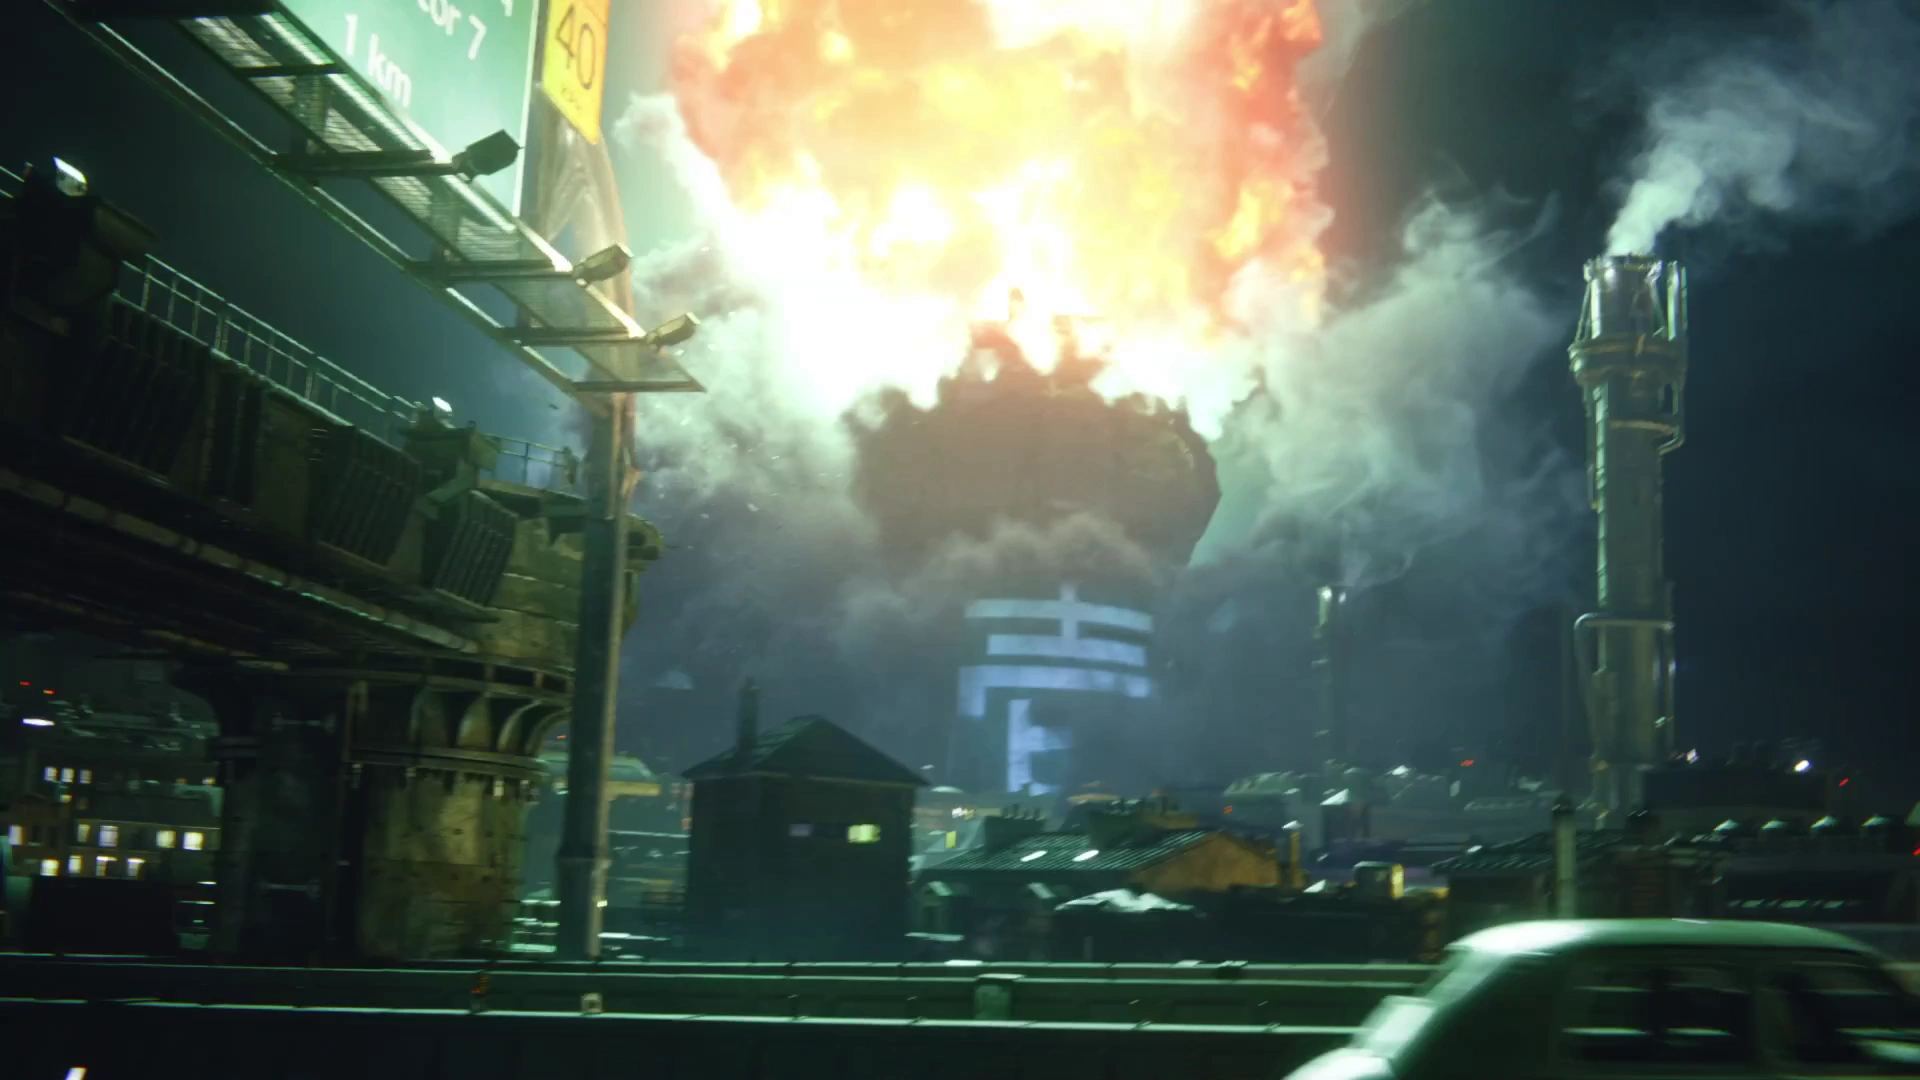
The destruction of Mako Reactor 1
The explosion causes massive destruction with unknown numbers of civilian casualties. Cloud and Avalanche scatter to regroup at the train heading for the Sector 7 slums. The reactor remains closed, and when Shinra places the Sister Ray cannon within Midgar, seven reactors charge up its blast, Mako Reactor 1 still out of commission.
Geography
Overview
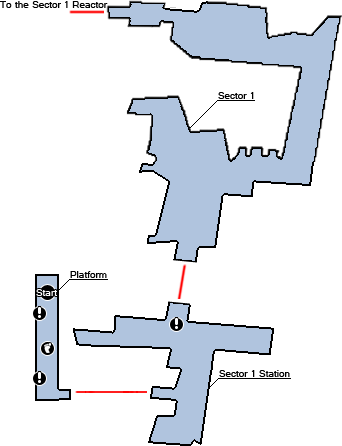
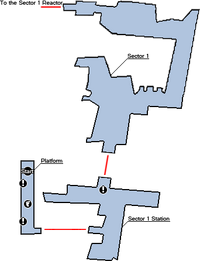
Map of the outside area of the Mako Reactor 1
Mako Reactor 1 is an unrevisitable location visited at the start of Final Fantasy VII and Final Fantasy VII Remake during a mission to destroy the reactor (the chapter "The Destruction of Mako Reactor 1" in Final Fantasy VII Remake). The area just outside the reactor that is visited includes the platform, a train station reached by a set of stairs, a walled-off area just north of the station, and a walkway connecting Sector 1 and Sector 8 entered in the walled-off area. The utility access is reached through a walkway connecting Sector 1 and Sector 8.
The entrance to the reactor is a set of rooms filled with machinery leading to an elevator, which travels down to a series of vast rooms and piping. Ladders can be traversed to eventually lead down to the core of the reactor. The interior of Mako Reactor 1 in the original Final Fantasy VII has a brown-ish tint, in contrast to the Sector 5 Reactor with a similar layout.
Platform
The Platform is the first area in the game and visited as soon as the opening movie finishes. The area comprises a stone platform alongside the railway track, with metal gates on the lefthand side, and the sign "1-0b" painted on the wall. At the fair end of the platform on the left is the exit onto the North Edge Station.
North Edge Station
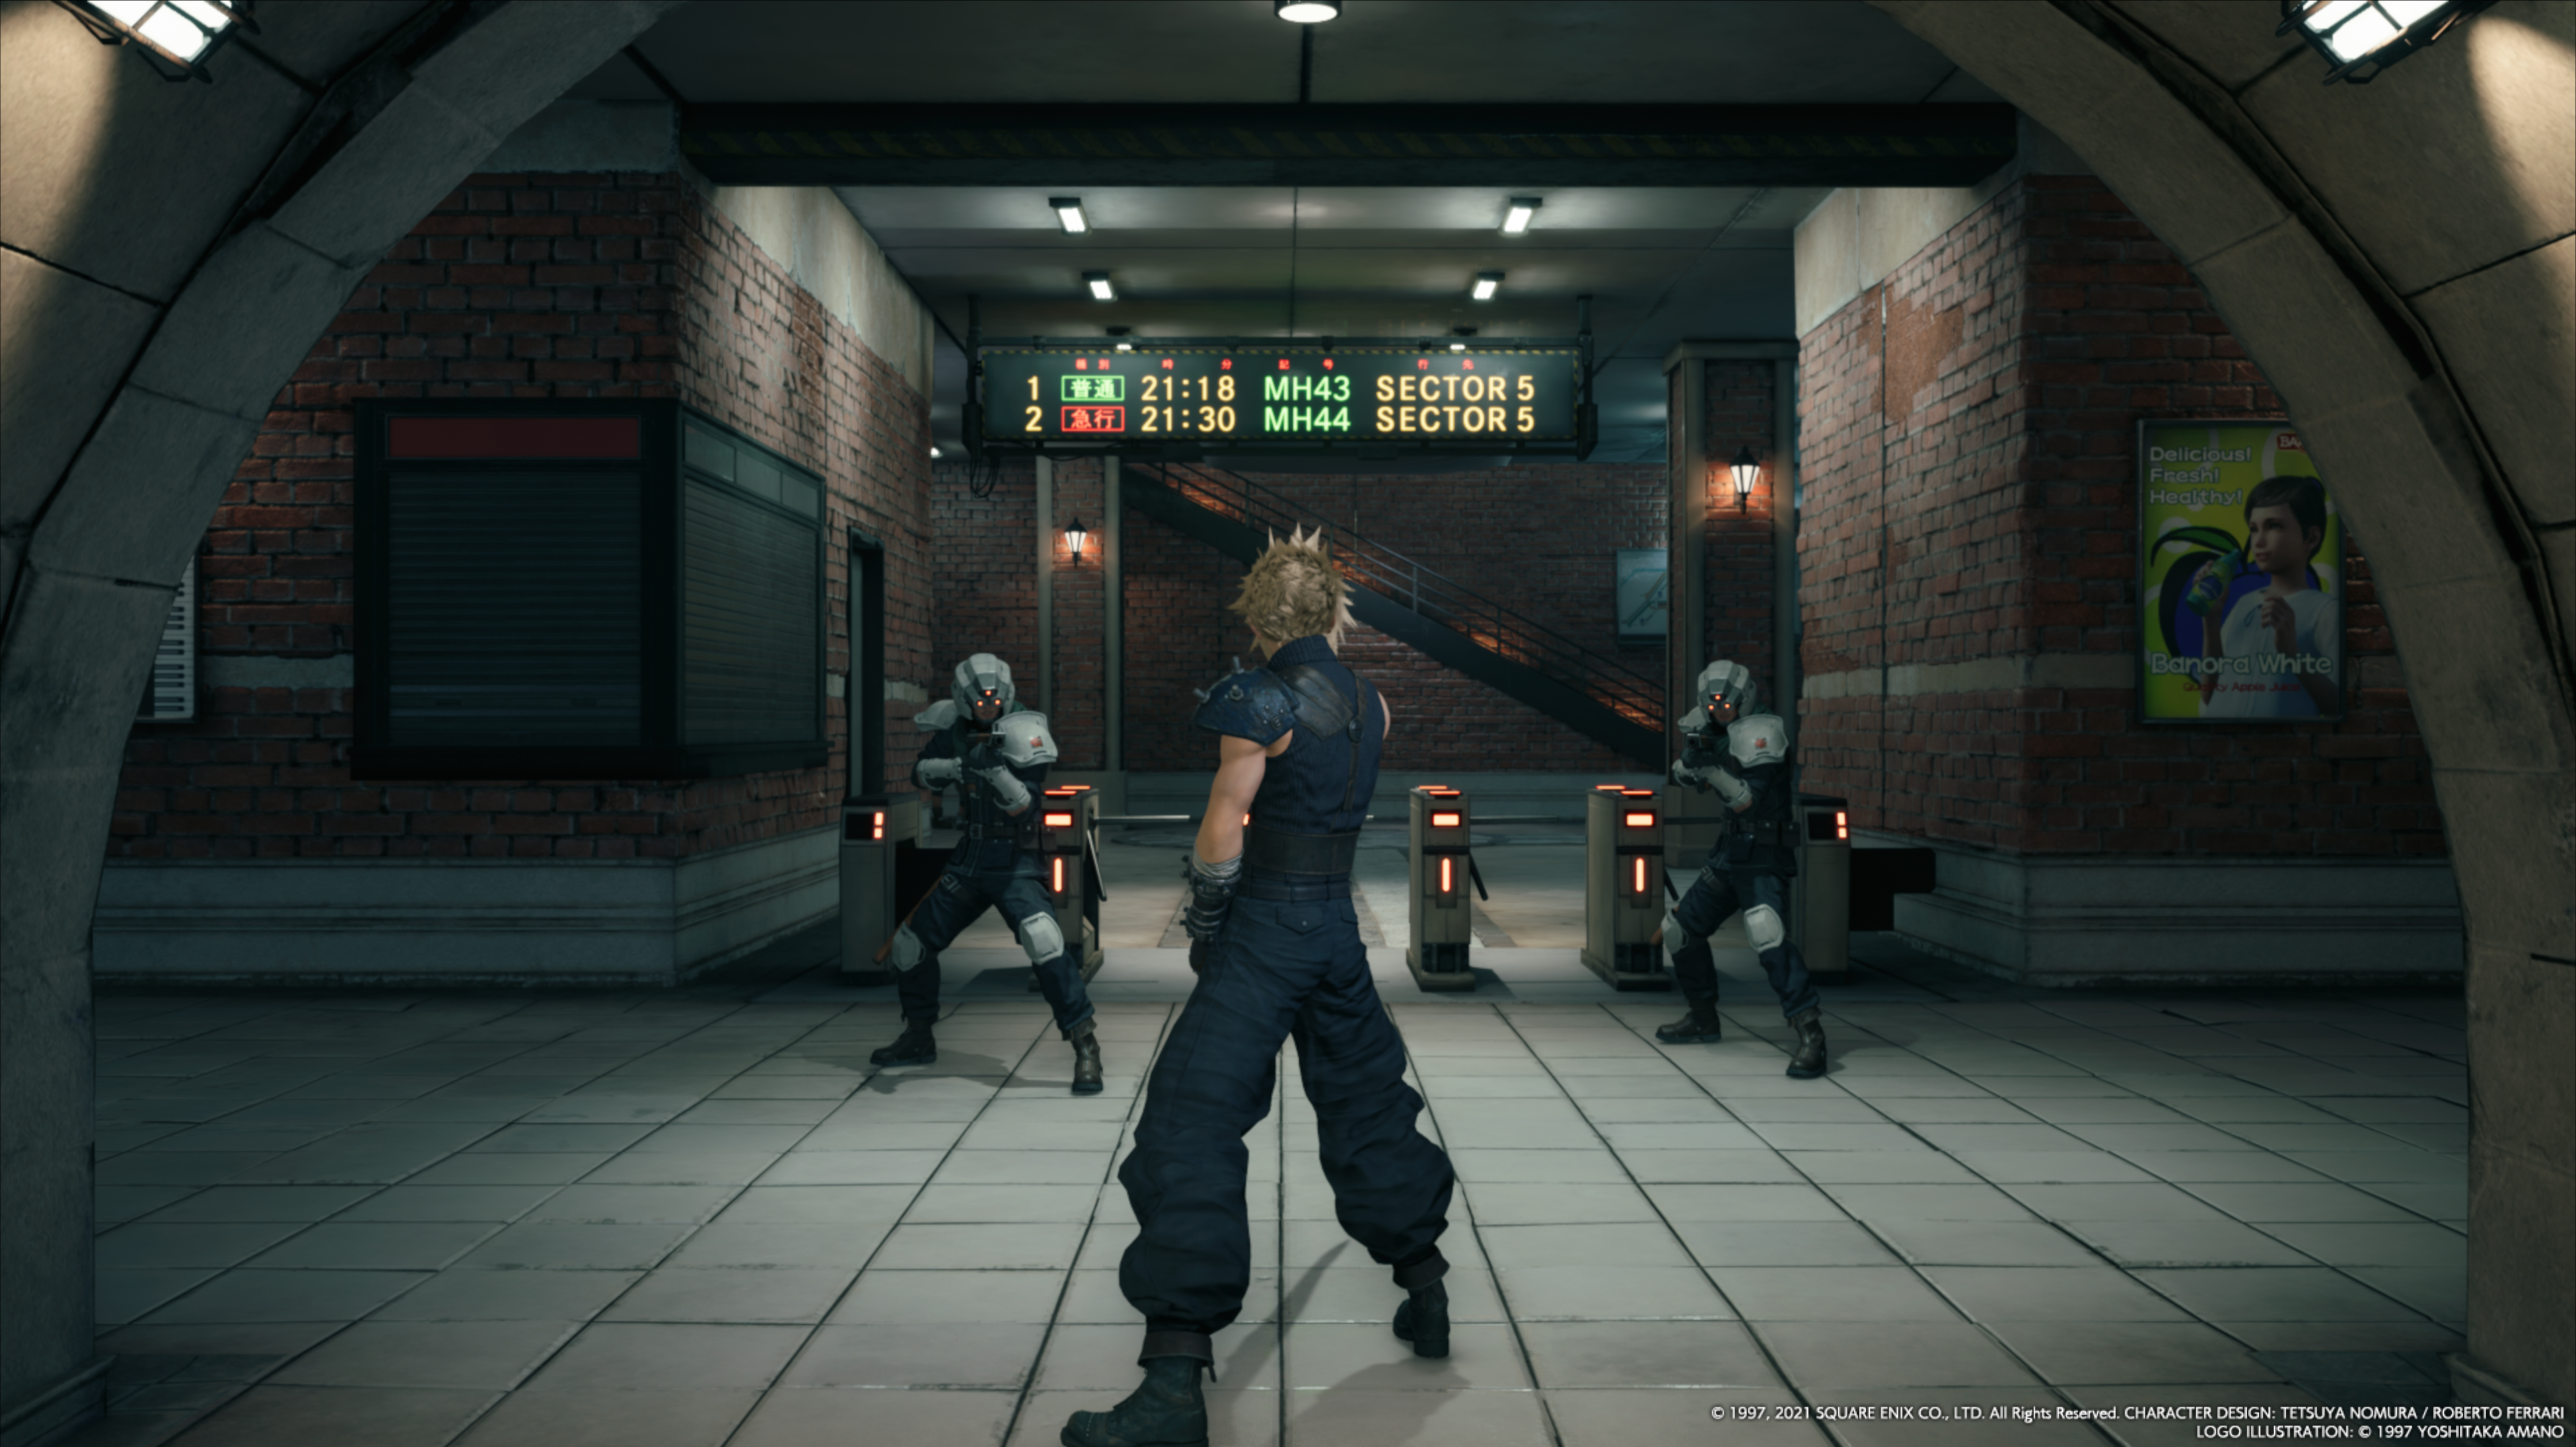
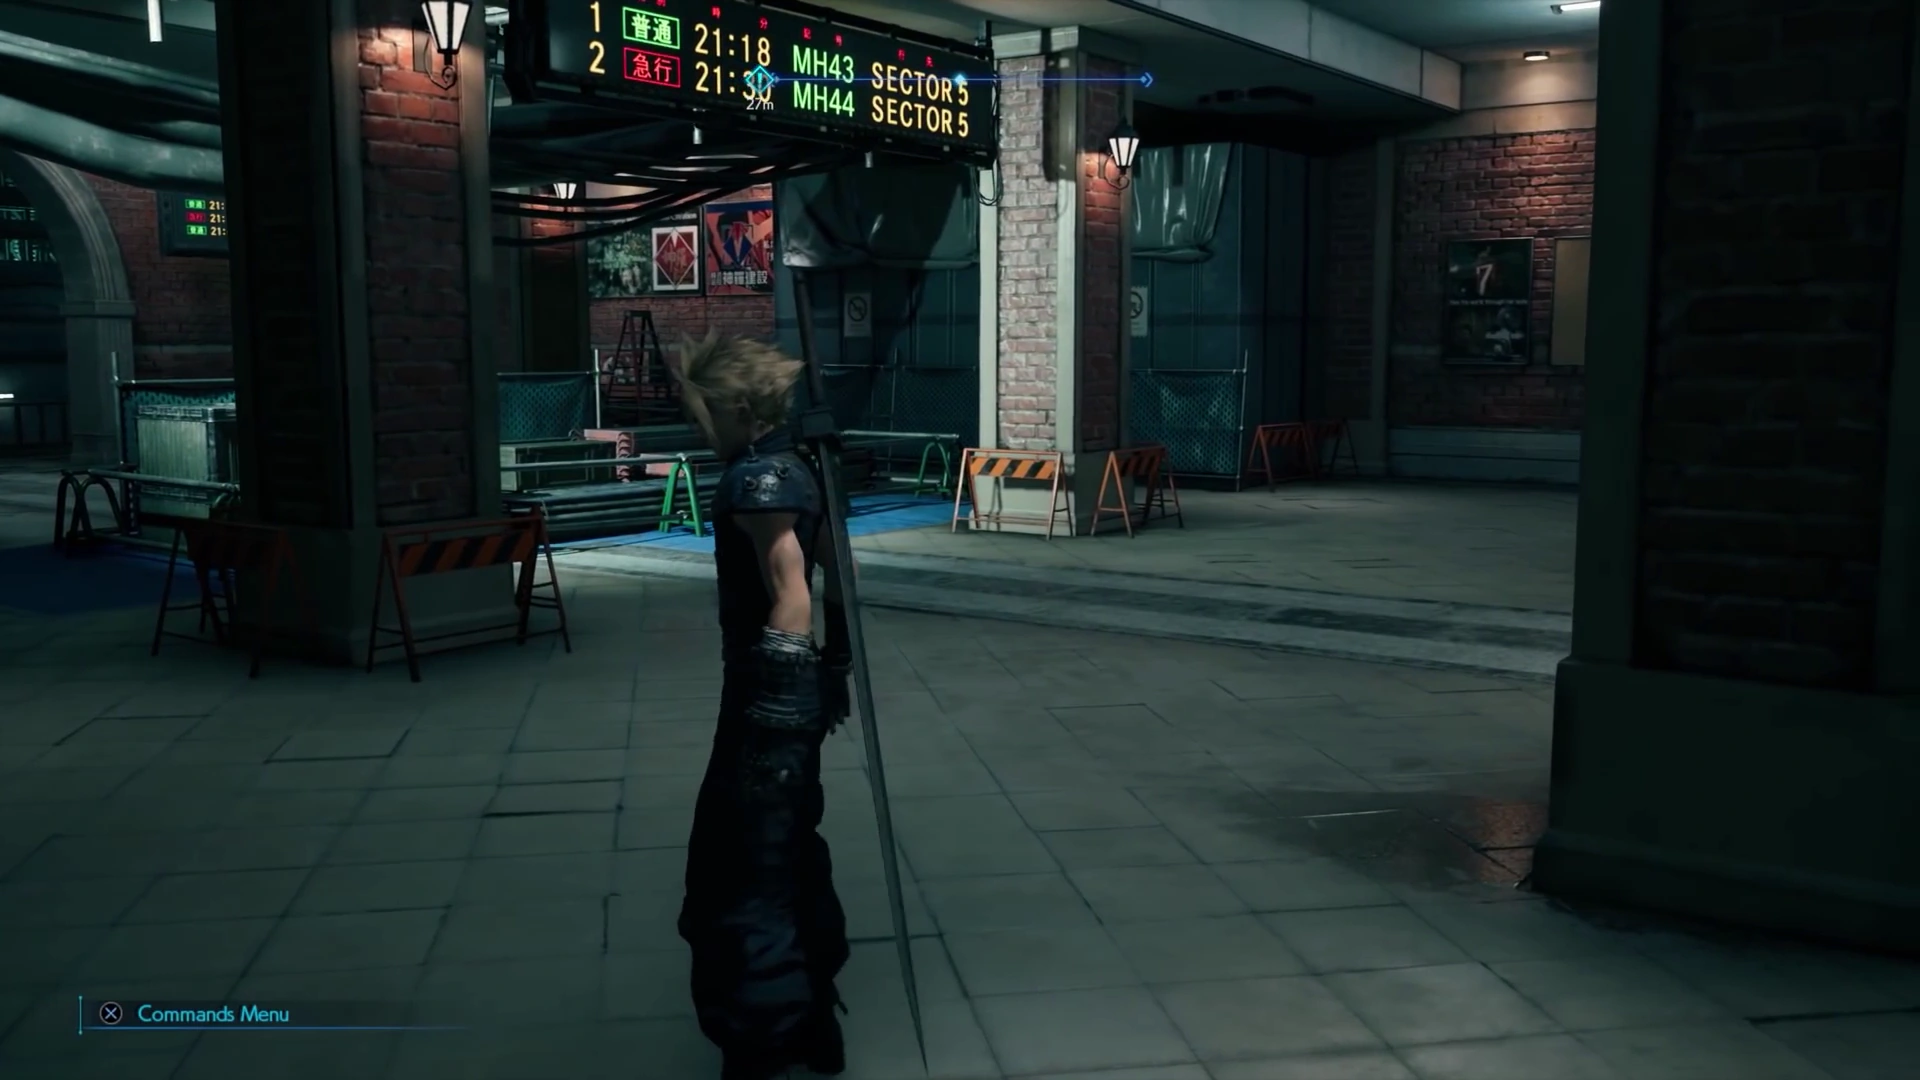
First floor (top) and second floor (bottom)
At the end of the platform is the entrance to the North Edge Station. Inside, train schedules are listed and vending machines and poster ads are seen in corners and walls, respectively. These posters include ads for an apple juice named "Banora White", a purse named with the tag "Elegance", a "Hair Tonic" for scalp care promising "astonishingly radiant & spiky hair", a camera named "7" with Shinra-X sensor technology, a music gallery named "Air", LOVELESS, the third book in a series titled The Adventures of Stamp, and posters both for the Shinra Electric Power Company and Shinra Construction.
Additionally, vending machines for mineral water of the brand "Clear Icicle" and for an energy drink named "Redlord" with a logo shaped like a bomb are found along the walls. Trains to Sector 5 are also seen across displays, as well as a map of the trainline routes, and ticket stations are seen past the barrier at the entry. Near the back are stairs to an upper level, which is still under construction, as evident with the presence of construction materials and lack of proper lighting.
Upper station area
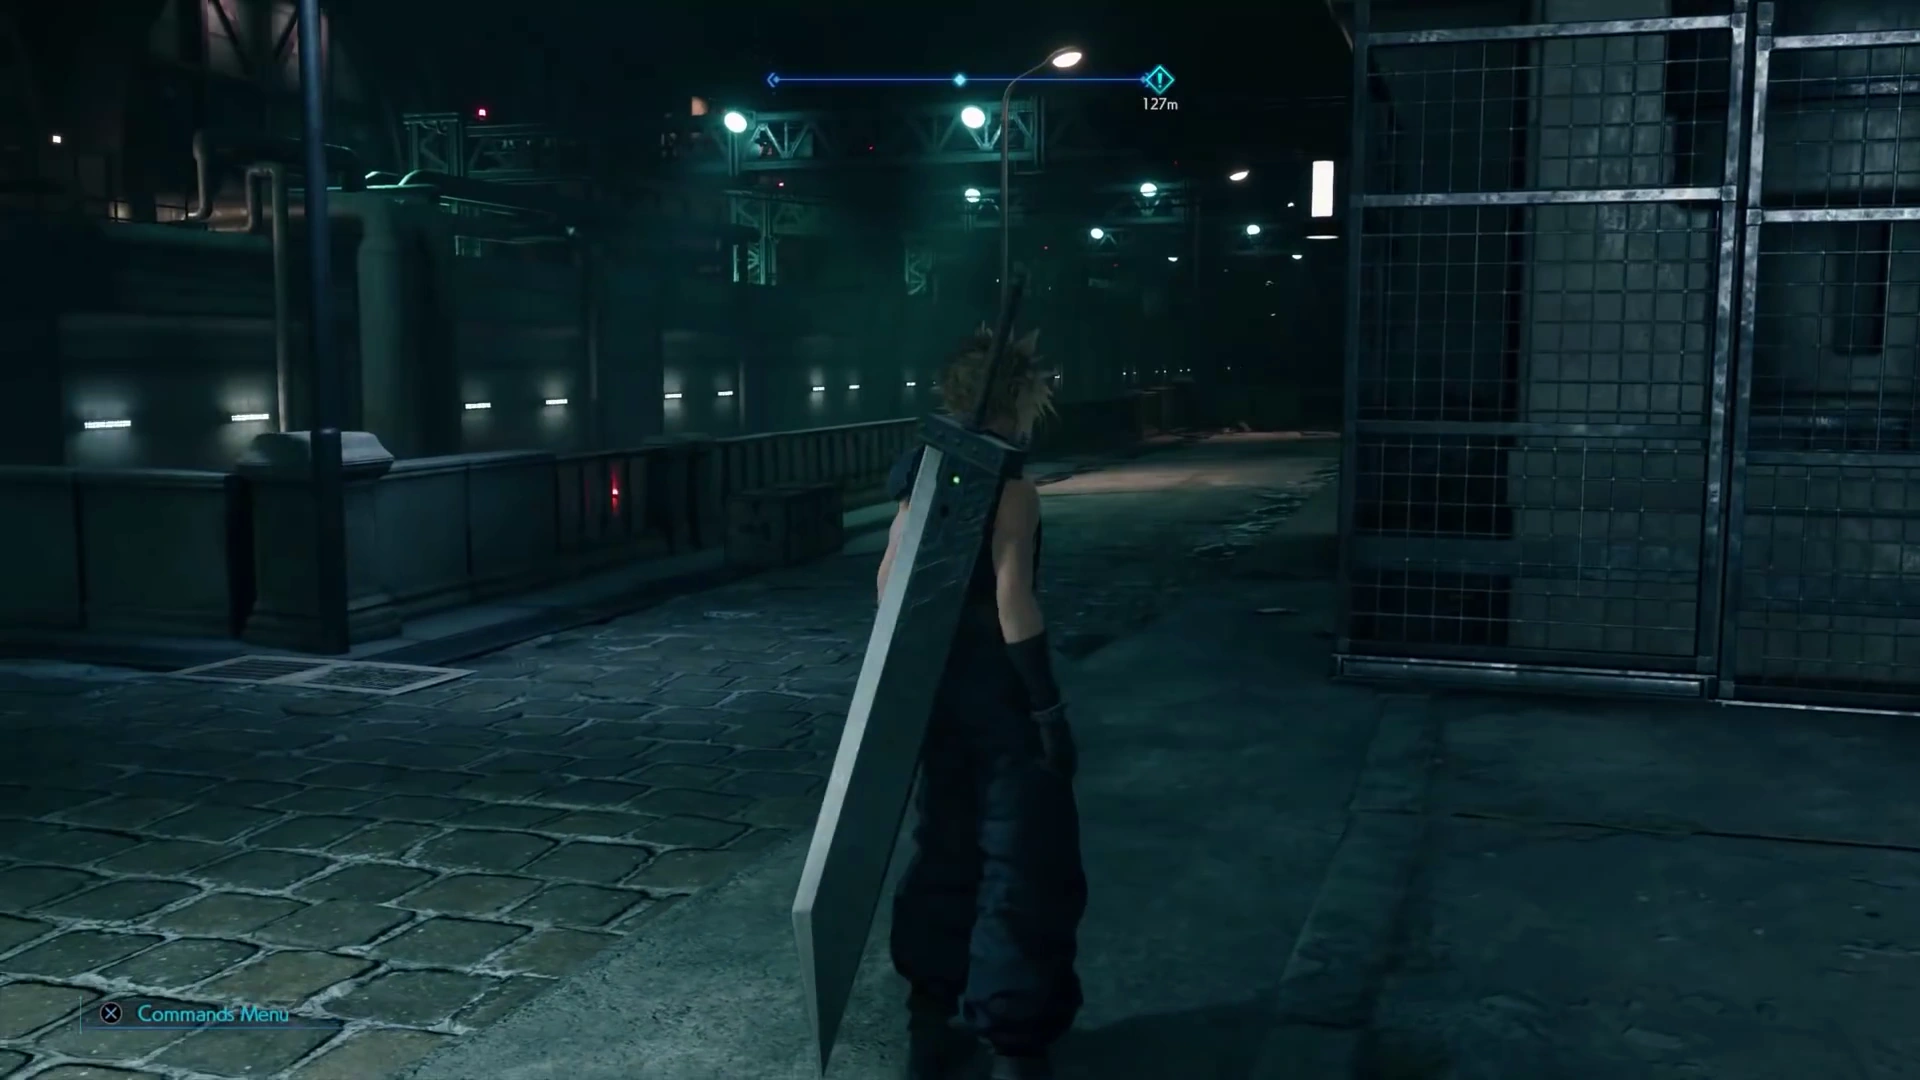

After going through the station's upstairs area, Cloud exits on to the upper station area. Here, Cloud heads north to join with the members of Avalanche. The station is a wide, stone building with a gale roof and four turbines on each corner. It is situated atop a stone wall overlooking the railway, and adjacent to the wall surrounding the Sector 1 plate. In the surrounding area is a path north towards a stone wall in front of the restricted Reactor Gounds, where the mission continues.
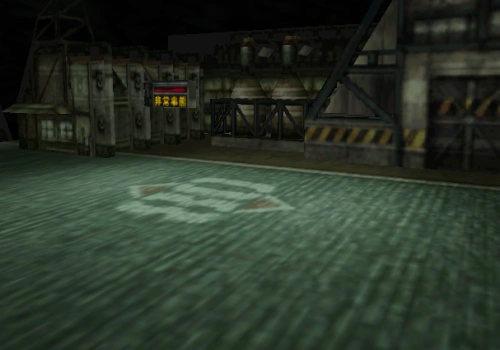
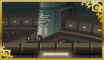
Reactor Grounds

The Reactor Grounds, misleadingly labeled "Sector 1" in the original game, is a walled-off area reached from station. It comprises a few small metal structures across a stone floor alongside the wall surrounding the compound. Within the area are metal pipes, metal framing around the structures, and dim lights.
Above some metal framing is a screen, showing the words "INTRUDER", "WARNING", and four Kanji characters. In the center of the area is a narrow building resembling a bunker at its front with a large clock tower at its top. A winding series of areas follow, and construction equipment can be seen scattered everywhere.
In the original game, the path to this door is found to the right of the central building, after passing it is a path left straight to the door.
The Reactor Grounds area leads to a short yet tall hallway leads to a switch, which opens up into the walkway outside the reactor, with another door to the walkway at the very back of the area, leading to Sector 8.
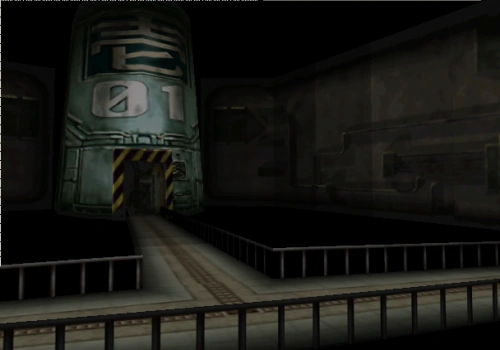
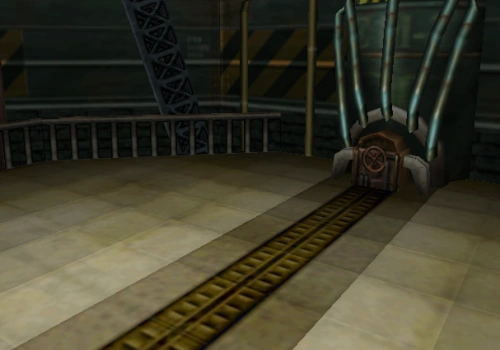
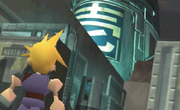
Reactor walkway
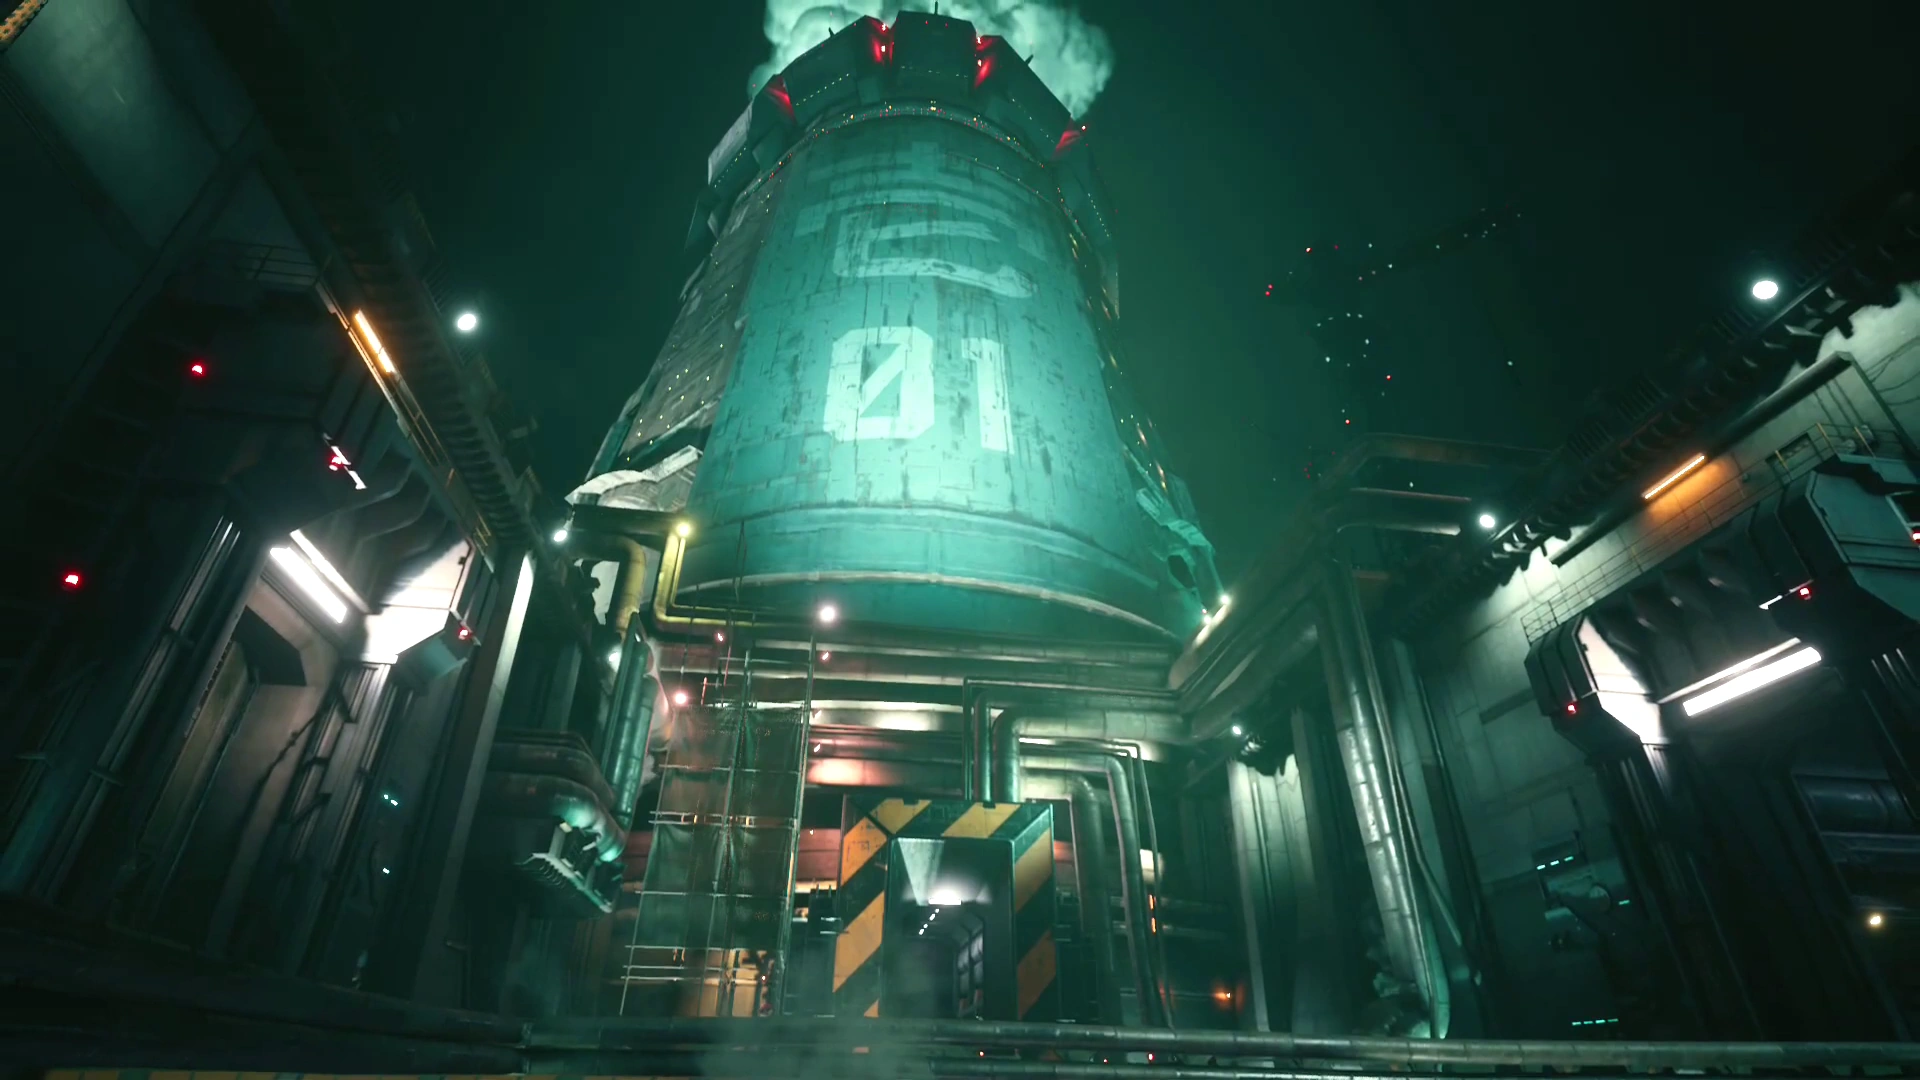

The walkway with different entrances, each leading to Sector 8, the reactor, and Sector 1 (left to right)
The walkway outside the reactor, known as "No.1 Reactor" in the menu of the original game, is used to access Mako Reactor 1, and to escape. It comprises a metal walkway connecting Sector 1 and Sector 8, and a path in the middle leading directly to the Mako Reactor 1. The walkway is suspended above a vast abyss over the lower area of the city.
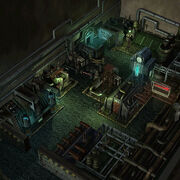
Interior

Entrance.
The interior is a metallic, brown-ish area full of large pipes, rusting doors, and machinery. It is a set of joined rooms with terminals, and the doors between the room are locked until their codes are deciphered. At the northeast-most location, an elevator leads down to the lower areas of the reactor.
The elevator connects the entrance with the main staircase. It is a dimly-lit enclosed space with a purple tint, and has a valve and flashing lights on the wall at the back, while the elevator door is located on the left.
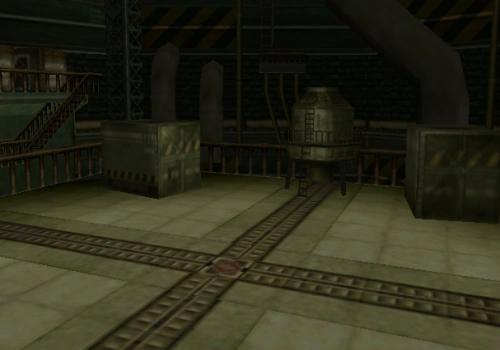
Utility Access

Main staircase.
The utility access contains a large staircase. It is a large, expansive room, with a red tint on the stairways, dark brick walls, and metallic pipes, accessed from the elevator.
The elevator opens atop a large structure within the room, with a staircase used to descend this structure to the floor of the room, where a door leads to the hall into the mako storage. The structure also contains a small, round tower atop it that can be climbed using ladders, though it contains nothing of interest.
In contrast to the main staircase of the Sector 5 Reactor, Mako Reactor 1 has no pipe leading down from the door in the back-end of the room, which is instead unreachable.
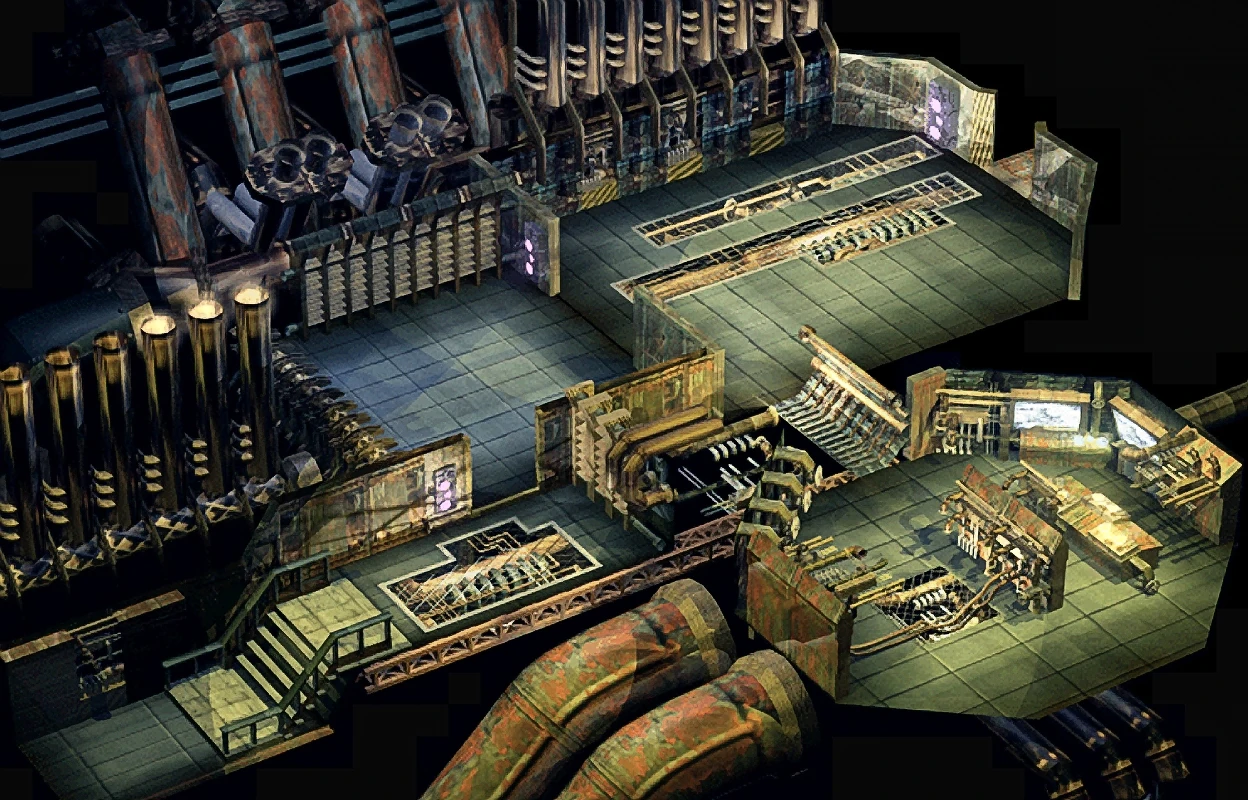
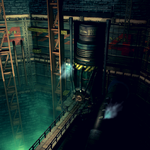
Mako storage
Pipes, ranging from large to humongous, and fans, which regulate temperature, fill the walls of the large storage area. Large circular vents, located on the level of the penultimately highest platform, direct the smoke emitted by mako upwards, which can be seen outside as a huge cluster of smoke emanating from the top of the reactor building.
Scaffolding
This area, while part of "Mako Reactor 1 - Utility Access" in the game, is located in the large area above mako storage.
In the original game, the upper piping is a damaged area full of rusting metallic pipes. It is reached through a door at the bottom of the main staircase room, which opens to a damaged stone wall. At the end of this stone wall, a ladder across a huge pipe leads down to a set of beams suspended above the core's main room. To the right of the beams is a set of steps leading down to a pipe below them. At the end of this pipe is a tall ladder leading down to the lower piping.
The lower piping comprises large pipes suspended above the walkway leading to the core. It is reached using a ladder down from the upper piping, and themselves lead to another ladder down to the walkway by the core.
In the remake, scaffolding line the walls of the large core area. while thick sheets are laid on the some parts of the railing. Hung on the lower part of the railings are small rectangular electric lamps emitting white light. Long wires messily run on the surface of most areas of the platforms and are held down by red duct tape. The scaffolding platforms are held by thin yet strong wires from the ceiling and is also connected to the wall structure to prevent them from swaying.
The scaffolding consists of dark gray and black hues, with certain colors indicating extreme caution, as mako is pumped directly below the platforms. Yellow and black stripes border the railings on the platform surface, accompanied by lines of red light, as the presence railings doesn't guarantee safety. A yellow line is also present at the edge of each stair.
The highest platform is located in the south of the large core area is accessible through the lowest level of the main staircase area, from the sweeper units area. To the west of the highest platform is a ladder leading downward to a long platform. Just before the end of the long platform are stairs to the immediate east leading to a platform not connected to the wall and has two ladders both leading downwards:
- The ladder immediately visible from the stairs leads downwards to a long straight platform that bisects the reactor leading to a platform connected to the eastern wall. South of that platform are stairs leading downwards to a platform attached to the southeast and south walls. Just before the end of that platform are stairs leading down to the core, the lowest platform of mako storage.
- The other ladder is accessible by turning right from the stairs and reaching the platform's south end. When going down the ladder, reaching the platform below, and facing south, wood scaffolding is present and leads to a small platform by the southern wall. A ladder upwards is present, which also leads to another small platform with a ladder leading upwards. This ladder leads to wood scaffolding near the highest platform. The two footings aren't connected but are near enough for one to jump off from the wood scaffolding onto the metal platform.
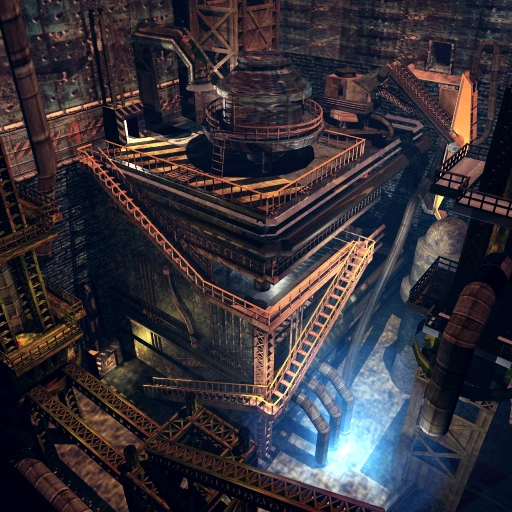
Core

Core.
The core is where Cloud and Barret fight the Guard Scorpion (Final Fantasy VII)/Scorpion Sentinel (Final Fantasy VII Remake) and set the bomb. The core itself is surrounded by metallic pipes and heavy machinery, with a single narrow walkway leading towards it. In the original game, the walkway contains a save point and an inaccessible door. On the end of the walkway is the core itself, which is a large, tubular structure built into a wall, with "1998" written at the top, and a set of pipes leading to a valve at the bottom.
Gameplay
Final Fantasy VII
Encounters
Battle backgrounds for areas outside (top) and for the walkway just outside the Reactor (bottom).
Battle backgrounds for areas inside (top) and for the core (bottom).
| Encounters | Areas |
|---|---|
|
Platform, Sector 1 Station, Sector 1 |
|
Platform |
|
Outside Reactor (after Guard Scorpion is defeated) |
|
Main staircase |
|
Upper piping |
| Lower piping | |
|
Core |
Random encounters at the platform are available until the player leaves the screen and returns, in the player's first visit.
Inside, various enemies are fought as random encounters, though most are dispatched with only one or two hits by Cloud or Barret, and deal little damage. The Sweeper, fought around the lower piping, is the most durable among them, which takes several hits to be defeated first. When encountered alongside other enemies, the smaller enemies should be defeated first to remove the damage they deal; otherwise, they are best dispatched by casting Bolt from Cloud.
The Guard Scorpion is fought as a boss in the core. This boss should be attacked by Cloud's Bolts while Barret uses normal attacks. When the Guard Scorpion raises its tail, it will counterattack until the tail is lowered. The player should either use Potions to heal in this time or simply avoid attacking until its tail is lowered, and then continue to damage it until it is destroyed.
Items
| Items | Areas |
|---|---|
| Potion x2 | Platform (from either guard, or two from one of the guards) |
| Potion x1 | Entrance, upper piping |
| Restore Materia | Core |
| Assault Gun | Core (dropped by Guard Scorpion) |
At the platform, the guards are left behind unconscious after being knocked out by AVALANCHE. Two Potion items can be picked up from them. Though both guards can have the items, their items are shared meaning the player can pick up both Potion items from one guard. This is known as the Quantum Potion bug.
Inside the reactor, a Potion is found in a treasure chest in the room on the southeast of the entrance, and another is found lying on the ground at the bottom end of the upper piping. By the reactor core, a Restore Materia can be picked up before reaching the core, and after defeating Guard Scorpion, the Assault Gun is obtained.
Quests
All quests in the No. 1 Reactor occur in the chapter "No. 1 Reactor Bombing", the first chapter of the game. As the location cannot be revisited, there are no optional quests.
Final Fantasy VII Remake

I'm afraid the jury's still out on that one.
Enemies
| Area | Enemies |
|---|---|
| Mako Reactor 1 | |
| Mako Reactor 1 - Interior | |
| Mako Reactor 1 - Utility Access |
|
| Mako Reactor 1 - Core |
|
Chests
| Items | Location |
|---|---|
| Mako Reactor 1 | |
| Potion x2 | Above the station, just after climbing the staircase |
| Grenade x2 | Above the station, behind the stair railing, beside some vending machines |
| Ether x1 | Inside the Reactor Grounds, its first portion, in a narrow space to the north |
| Potion x2 | Wide area with a forklift and crates, just before the switch |
| Mako Reactor 1 - Interior | |
| Phoenix Down x1 | In front of the elevator leading to Utility Access |
| Mako Reactor 1 - Utility Access | |
| Potion x2 | After passing through all the lasers, before the stairs |
| Ether x1 | After Jessie's introduces the sweeper, turn around and head for the left of the staircase |
| Phoenix Down x1 | Above the core area, after climbing down the first ladder, head to the end of the platform |
| Ether x1 | One ladder above the lowest platform, to the west |
| Potion x2 | After separating from Barret to help Jessie remove a piece of debris, climbing down the ladder, and walking on the wood scaffolding, the chest is located in front of the first ladder leading upwards. |
Quests
- Enter the Reactor Grounds
- Infiltrate the Reactor
- Follow Barret
- Breach Security
- Reach Mako Storage
- Follow Jessie
- Set the Charge
- Escape from the Reactor
- Rendezvous with Barret
- Sprint to Safety
All quests in Mako Reactor 1 occur in the first chapter of the game, "The Destruction of Mako Reactor 1". Cloud Strife is controlled for the majority of these quests, but Barret Wallace joins from the quest "Breach Security" and onwards. The objective of the quests in the chapter are to plant the bomb in and destroy Mako Reactor 1, and all quests are fairly linear with combat encounters along the way. At the end of "Set the Charge", a boss battle takes place against Scorpion Sentinel.
Musical themes
On the reactor grounds "Opening - Bombing Mission" (オープニング~爆破ミッション, Ōpuningu ~ Bakuha Misshon?) plays. The theme has been remixed several times, and also appears in Crisis Core -Final Fantasy VII-.
"Mako Reactor" plays inside the reactor itself until the Guard Scorpion battle begins, where the background theme changes back to "Bombing Mission".
Behind the scenes
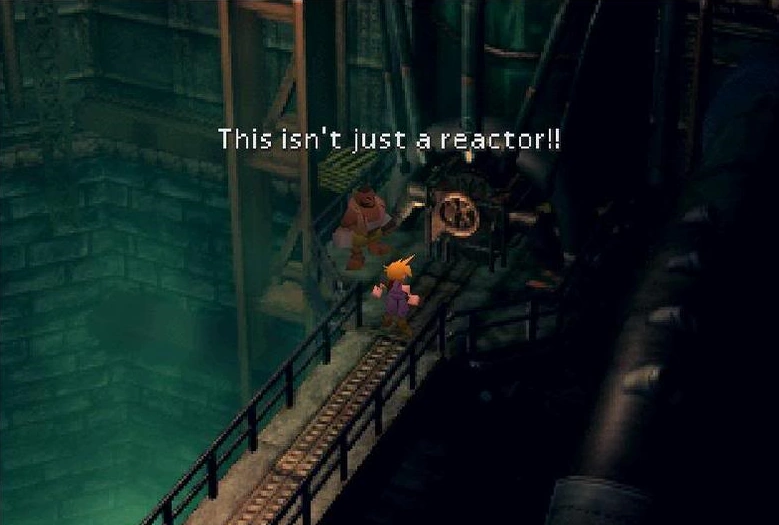

Cloud's ominous message.
During the mission Cloud has a moment where he breaks down and hears a voice that says, "This isn't just a reactor". In a scene that was scrapped from the final version of the game, Cloud would have had a conversation with Sephiroth where the latter would have explained what Mako Reactors really are. The "This isn't just a reactor" memory is a remnant of this deleted scene.
The PC port had a bug that occurred intermittently to crash the game at the start of the game as the train pulls into the station and an AVALANCHE member kicks a soldier. QA reported this bug as the port was being finalized, and all the programmers were scrambling to reprogram and debug it.[1]
Other appearances
Final Fantasy VII demo
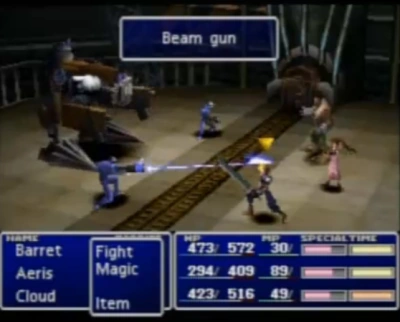
Part fighting in the "Aeris" demo.
The Mako Reactor 1 bombing mission is the setting for the two PlayStation demos of Final Fantasy VII. Two versions of the demo exist, often differentiated by the third playable character: Aeris or Tifa. The Aeris demo is of earlier build and still has many changes from the final version. The Tifa demo is closer to the playable segment in the full game. In the final game of course, neither girl is playable, and only Cloud and Barret are in the player's party. Both demos end when AVALANCHE escapes the exploding reactor.
Final Fantasy Airborne Brigade
Final Fantasy Record Keeper

Painting image.
A former member of SOLDIER has come to destroy one of the Mako Reactors--machines that harness the planet's Lifestream to generate power.
Description
Mako Reactor No. 1 is the first dungeon available whose completion unlocks Mako Reactor No. 5 in the Final Fantasy VII realm.
Final Fantasy Brave Exvius
Gallery
")
")
")
")
")
")
")
")
")
")