Intangir Bot (talk | contribs) m (Bot: Automated text replacement (-Ogre (Final Fantasy IV) +Ogre (Final Fantasy IV 2D))) |
mNo edit summary Tag: Source edit |
||
| (15 intermediate revisions by 5 users not shown) | |||
| Line 1: | Line 1: | ||
{{sideicon|prime=FFIV|IVTAY|FFRK}} |
{{sideicon|prime=FFIV|IVTAY|FFRK}} |
||
| − | {{infobox location |
+ | {{infobox location |
|name=Lodestone Cavern |
|name=Lodestone Cavern |
||
| + | |release=FFIV |
||
|japanese=磁力の洞窟 |
|japanese=磁力の洞窟 |
||
|romaji=Jiryoku no Dōkutsu |
|romaji=Jiryoku no Dōkutsu |
||
| Line 12: | Line 13: | ||
|region=Northeast of [[Troia]], [[Earth (Final Fantasy IV)|Overworld]] |
|region=Northeast of [[Troia]], [[Earth (Final Fantasy IV)|Overworld]] |
||
|resident=[[Dark Elf (Final Fantasy IV)|Dark Elf]] |
|resident=[[Dark Elf (Final Fantasy IV)|Dark Elf]] |
||
| − | |ffiv items= |
+ | |ffiv items={{collapsible text|header=2D|content= |
* 500 accumulated gil |
* 500 accumulated gil |
||
| − | * [[ |
+ | * [[Final Fantasy IV items#Potion|Potion]] x2 |
| − | * [[ |
+ | * [[Final Fantasy IV items#Mega-Potion|Mega-Potion]] |
| − | * [[ |
+ | * [[Final Fantasy IV items#Ether|Ether]] x2 |
| − | * [[ |
+ | * [[Final Fantasy IV items#Hi-Ether|Hi-Ether]] |
| − | * [[ |
+ | * [[Final Fantasy IV items#Remedy|Remedy]] |
| − | * [[ |
+ | * [[Final Fantasy IV items#Phoenix Down|Phoenix Down]] |
| − | * [[ |
+ | * [[Final Fantasy IV weapons#Fairy Claw|Fairy Claw]] |
| + | }} |
||
| + | {{collapsible text|header=3D|content= |
||
| + | *Hi-Potion |
||
| + | *Unicorn Horn |
||
| + | *2000 gil |
||
| + | *Ether x2 |
||
| + | *Bronze Hourglass |
||
| + | *Hi-Potion |
||
| + | *Spider Silk |
||
| + | *[[Final Fantasy IV 3D weapons#Faerie Claws|Faerie Claws]] |
||
| + | *Emergency Exit |
||
| + | *Whirlwind Augment |
||
| + | *Map completion: Ether, Vampire Fang x3, Silent Bell x3, Dry Ether |
||
| + | }} |
||
|ffiv enemies= |
|ffiv enemies= |
||
*[[Cait Sith (Final Fantasy IV 2D)|Cait Sith]] |
*[[Cait Sith (Final Fantasy IV 2D)|Cait Sith]] |
||
| Line 28: | Line 43: | ||
*[[Needlehog (Final Fantasy IV 2D)|Needlehog]] |
*[[Needlehog (Final Fantasy IV 2D)|Needlehog]] |
||
*[[Ogre (Final Fantasy IV 2D)|Ogre]] |
*[[Ogre (Final Fantasy IV 2D)|Ogre]] |
||
| − | *[[Succubus (Final Fantasy IV)|Succubus]] |
+ | *[[Succubus (Final Fantasy IV 2D)|Succubus]] |
*[[Dark Elf (Final Fantasy IV)|Dark Elf]] (boss) |
*[[Dark Elf (Final Fantasy IV)|Dark Elf]] (boss) |
||
*[[Dark Dragon (Final Fantasy IV)|Dark Dragon]] (boss) |
*[[Dark Dragon (Final Fantasy IV)|Dark Dragon]] (boss) |
||
| Line 40: | Line 55: | ||
*Retrieve [[Palom]] and Leonora |
*Retrieve [[Palom]] and Leonora |
||
}} |
}} |
||
| − | {{ |
+ | {{Quote|A magnetized cavern... Wonder how that could be put to use...|[[Cid Pollendina|Cid]]}} |
| − | The '''Lodestone Cavern''', also known as the '''Magnetic Cave''', |
+ | The '''Lodestone Cavern''', also known as the '''Magnetic Cave''', '''Magnetic Cavern''', or '''Cave Magnes''', is a cave in ''[[Final Fantasy IV]]'', located on a small, densely forested island to the northeast of [[Troia]]. The cave is home to the [[Dark Elf (Final Fantasy IV)|Dark Elf]], who stole the [[Earth Crystal (term)#Final Fantasy IV|Earth Crystal]] from [[Troia]]. The cave is home to a strong magnetic field that renders anyone wearing metallic equipment unable to move. |
| + | |||
| ⚫ | |||
== Story == |
== Story == |
||
{{spoiler}} |
{{spoiler}} |
||
=== ''[[Final Fantasy IV]]'' === |
=== ''[[Final Fantasy IV]]'' === |
||
| − | |||
[[Cecil Harvey]], [[Tellah]], [[Yang Fang Leiden|Yang]], and [[Cid Pollendina]] arrive to the Lodestone Cavern in order to retrieve the stolen Earth Crystal. At the bottom floor, they confront the Dark Elf, but are defeated by it. Using the [[Whisperweed]], [[Edward Chris von Muir|Edward]] plays a tune that is transmitted to the heroes' corresponding Whisperweed which dispels the magnetic field, allowing Cecil and his friends to defeat the Dark Elf and recover the Earth Crystal. |
[[Cecil Harvey]], [[Tellah]], [[Yang Fang Leiden|Yang]], and [[Cid Pollendina]] arrive to the Lodestone Cavern in order to retrieve the stolen Earth Crystal. At the bottom floor, they confront the Dark Elf, but are defeated by it. Using the [[Whisperweed]], [[Edward Chris von Muir|Edward]] plays a tune that is transmitted to the heroes' corresponding Whisperweed which dispels the magnetic field, allowing Cecil and his friends to defeat the Dark Elf and recover the Earth Crystal. |
||
=== ''[[Final Fantasy IV: The After Years]]'' === |
=== ''[[Final Fantasy IV: The After Years]]'' === |
||
| − | |||
[[Palom]] and [[Leonora]] head into the cavern to evade [[Baron (Final Fantasy IV)|Baron's]] soldiers while fleeing with the [[Earth Crystal (term)#Final Fantasy IV|Earth Crystal]], hoping that the metallic field will slow them down. On a lower floor Leonora reveals a hidden alternate path through the cave obscured by the magic of the Epopts. |
[[Palom]] and [[Leonora]] head into the cavern to evade [[Baron (Final Fantasy IV)|Baron's]] soldiers while fleeing with the [[Earth Crystal (term)#Final Fantasy IV|Earth Crystal]], hoping that the metallic field will slow them down. On a lower floor Leonora reveals a hidden alternate path through the cave obscured by the magic of the Epopts. |
||
| Line 56: | Line 71: | ||
In the final tale, [[Edge Geraldine|Edge]], [[Rydia]], [[Luca (Final Fantasy IV)|Luca]], and [[Golbez]] find the two in the cavern frozen over with magical ice. Shiva attacks them and is eventually returned to her senses. With her defeat Palom and Leonora are revived. |
In the final tale, [[Edge Geraldine|Edge]], [[Rydia]], [[Luca (Final Fantasy IV)|Luca]], and [[Golbez]] find the two in the cavern frozen over with magical ice. Shiva attacks them and is eventually returned to her senses. With her defeat Palom and Leonora are revived. |
||
| − | {{ |
+ | {{clear}} |
{{endspoiler}} |
{{endspoiler}} |
||
| Line 63: | Line 78: | ||
;Crystal Chamber |
;Crystal Chamber |
||
It is the chamber where the Dark Elf keeps and guards the Earth Crystal he stole from the Troians. Cecil and the party confront him to take the crystal back, but without Edward breaking the magnetic barrier, they would've been unsuccessful. After slaying the Dark Elf, Cecil obtains the Earth Crystal and exchanges it for Rosa's life. |
It is the chamber where the Dark Elf keeps and guards the Earth Crystal he stole from the Troians. Cecil and the party confront him to take the crystal back, but without Edward breaking the magnetic barrier, they would've been unsuccessful. After slaying the Dark Elf, Cecil obtains the Earth Crystal and exchanges it for Rosa's life. |
||
| − | {{ |
+ | {{clear}} |
== Items == |
== Items == |
||
=== ''Final Fantasy IV'' === |
=== ''Final Fantasy IV'' === |
||
| + | ;2D versions |
||
* 500 accumulated gil |
* 500 accumulated gil |
||
| − | * [[ |
+ | * [[Final Fantasy IV items#Potion|Potion]] x2 |
| − | * [[ |
+ | * [[Final Fantasy IV items#Mega-Potion|Mega-Potion]] |
| − | * [[ |
+ | * [[Final Fantasy IV items#Ether|Ether]] x2 |
| − | * [[ |
+ | * [[Final Fantasy IV items#Hi-Ether|Hi-Ether]] |
| − | * [[ |
+ | * [[Final Fantasy IV items#Remedy|Remedy]] |
| − | * [[ |
+ | * [[Final Fantasy IV items#Phoenix Down|Phoenix Down]] |
| − | * [[ |
+ | * [[Final Fantasy IV weapons#Fairy Claw|Fairy Claw]] |
| + | |||
| + | ;3D versions |
||
| + | *Hi-Potion |
||
| + | *Unicorn Horn |
||
| + | *2000 gil |
||
| + | *Ether x2 |
||
| + | *Bronze Hourglass |
||
| + | *Hi-Potion |
||
| + | *Spider Silk |
||
| + | *[[Final Fantasy IV 3D weapons#Faerie Claws|Faerie Claws]] |
||
| + | *Emergency Exit |
||
| + | *Whirlwind Augment |
||
| + | *Map completion: Ether, Vampire Fang x3, Silent Bell x3, Dry Ether |
||
=== ''Final Fantasy IV: The After Years'' === |
=== ''Final Fantasy IV: The After Years'' === |
||
| Line 111: | Line 140: | ||
== Shops == |
== Shops == |
||
[[File:FF4 Cave Magnes.png|200px|thumb|The cave's second floor.]] |
[[File:FF4 Cave Magnes.png|200px|thumb|The cave's second floor.]] |
||
| − | + | This shop is only present in Palom's Tale in ''The After Years''. |
|
{|class="IVTAY article-table" style="text-align:center" |
{|class="IVTAY article-table" style="text-align:center" |
||
| Line 119: | Line 148: | ||
!width="40%"|Price |
!width="40%"|Price |
||
|- |
|- |
||
| − | !class="b"|[[ |
+ | !class="b"|[[Final Fantasy IV: The After Years items#Potion|Potion]] |
|30 gil |
|30 gil |
||
|- |
|- |
||
| − | !class="b"|[[ |
+ | !class="b"|[[Final Fantasy IV: The After Years items#Hi-Potion|Hi-Potion]] |
|150 gil |
|150 gil |
||
|- |
|- |
||
| − | !class="b"|[[ |
+ | !class="b"|[[Final Fantasy IV: The After Years items#Phoenix Down|Phoenix Down]] |
|100 gil |
|100 gil |
||
|- |
|- |
||
| − | !class="b"|[[ |
+ | !class="b"|[[Final Fantasy IV: The After Years items#Diet Ration|Diet Ration]] |
|100 gil |
|100 gil |
||
|- |
|- |
||
| − | !class="b"|[[ |
+ | !class="b"|[[Final Fantasy IV: The After Years items#Echo Herbs|Echo Herbs]] |
|50 gil |
|50 gil |
||
|- |
|- |
||
| − | !class="b"|[[ |
+ | !class="b"|[[Final Fantasy IV: The After Years items#Tent|Tent]] |
|100 gil |
|100 gil |
||
|- |
|- |
||
| − | !class="b"|[[ |
+ | !class="b"|[[Final Fantasy IV: The After Years armor#Sage's Miter|Sage's Miter]] |
|2,000 gil |
|2,000 gil |
||
|- |
|- |
||
| − | !class="b"|[[ |
+ | !class="b"|[[Final Fantasy IV: The After Years armor#Sage's Surplice|Sage's Surplice]] |
|1,200 gil |
|1,200 gil |
||
|- |
|- |
||
| − | !class="b"|[[ |
+ | !class="b"|[[Final Fantasy IV: The After Years armor#Ruby Ring|Ruby Ring]] |
|1,000 gil |
|1,000 gil |
||
|- |
|- |
||
| − | !class="b"|[[ |
+ | !class="b"|[[Final Fantasy IV: The After Years armor#Rune Armlet|Rune Armlet]] |
|2,000 gil |
|2,000 gil |
||
|} |
|} |
||
| Line 152: | Line 181: | ||
== Enemies == |
== Enemies == |
||
=== ''Final Fantasy IV'' === |
=== ''Final Fantasy IV'' === |
||
| + | ;2D versions |
||
* [[Cait Sith (Final Fantasy IV 2D)|Cait Sith]], [[Needlehog (Final Fantasy IV 2D)|Needlehog]] x3 |
* [[Cait Sith (Final Fantasy IV 2D)|Cait Sith]], [[Needlehog (Final Fantasy IV 2D)|Needlehog]] x3 |
||
* [[Ogre (Final Fantasy IV 2D)|Ogre]] x3 |
* [[Ogre (Final Fantasy IV 2D)|Ogre]] x3 |
||
* [[Cave Bat (Final Fantasy IV 2D)|Cave Bat]] x3 |
* [[Cave Bat (Final Fantasy IV 2D)|Cave Bat]] x3 |
||
* [[Ogre (Final Fantasy IV 2D)|Ogre]] x2, [[Cait Sith (Final Fantasy IV 2D)|Cait Sith]] x2 |
* [[Ogre (Final Fantasy IV 2D)|Ogre]] x2, [[Cait Sith (Final Fantasy IV 2D)|Cait Sith]] x2 |
||
| − | * [[Succubus (Final Fantasy IV)|Succubus]], [[Cave Bat (Final Fantasy IV 2D)|Cave Bat]] x3 |
+ | * [[Succubus (Final Fantasy IV 2D)|Succubus]], [[Cave Bat (Final Fantasy IV 2D)|Cave Bat]] x3 |
| − | * [[Succubus (Final Fantasy IV)|Succubus]], [[Cave Bat (Final Fantasy IV 2D)|Cave Bat]] x6 |
+ | * [[Succubus (Final Fantasy IV 2D)|Succubus]], [[Cave Bat (Final Fantasy IV 2D)|Cave Bat]] x6 |
| − | * [[Mindflayer (Final Fantasy IV 2D)| |
+ | * [[Mindflayer (Final Fantasy IV 2D)|Mindflayer]] x2 |
* [[Cave Naga (Final Fantasy IV 2D)|Cave Naga]], [[Ettin Snake (Final Fantasy IV 2D)|Ettin Snake]] x2 |
* [[Cave Naga (Final Fantasy IV 2D)|Cave Naga]], [[Ettin Snake (Final Fantasy IV 2D)|Ettin Snake]] x2 |
||
| − | * [[Dark Elf (Final Fantasy IV)|Dark Elf]] (boss) |
+ | * [[Dark Elf (Final Fantasy IV 2D)|Dark Elf]] (boss) |
| − | * [[Dark Dragon (Final Fantasy IV)|Dark Dragon]] (boss) |
+ | * [[Dark Dragon (Final Fantasy IV 2D)|Dark Dragon]] (boss) |
| + | |||
| + | ;3D versions |
||
| ⚫ | |||
| + | *[[Cait Sith (Final Fantasy IV 3D)|Cait Sith]] x2 |
||
| + | *[[Cait Sith (Final Fantasy IV 3D)|Cait Sith]] x2, [[Ogre (Final Fantasy IV 3D)|Ogre]] x1 |
||
| + | *[[Cait Sith (Final Fantasy IV 3D)|Cait Sith]] x1, [[Needlehog (Final Fantasy IV 3D)|Needlehog]] x2 |
||
| + | *[[Mindflayer (Final Fantasy IV 3D)|Mindflayer]] x2 |
||
| + | *[[Mindflayer (Final Fantasy IV 3D)|Mindflayer]] x1, [[Cait Sith (Final Fantasy IV 3D)|Cait Sith]] x1, [[Ogre (Final Fantasy IV 3D)|Ogre]] x1 |
||
| + | *[[Cave Bat (Final Fantasy IV 3D)|Cave Bat]] x3 |
||
| + | *[[Succubus (Final Fantasy IV 3D)|Succubus]] x1, [[Ogre (Final Fantasy IV 3D)|Ogre]] x1 |
||
| + | *[[Cait Sith (Final Fantasy IV 3D)|Cait Sith]] x2, [[Needlehog (Final Fantasy IV 3D)|Needlehog]] x1 |
||
| + | *[[Succubus (Final Fantasy IV 3D)|Succubus]] x1, [[Cave Bat (Final Fantasy IV 3D)|Cave Bat]] x2 |
||
| + | *[[Ettin Snake (Final Fantasy IV 3D)|Ettin Snake]] x2, [[Cave Naga (Final Fantasy IV 3D)|Cave Naga]] x1 |
||
| + | * [[Dark Elf (Final Fantasy IV 3D)|Dark Elf]] (boss) |
||
| + | * [[Dark Dragon (Final Fantasy IV 3D)|Dark Dragon]] (boss) |
||
=== ''Final Fantasy IV: The After Years'' === |
=== ''Final Fantasy IV: The After Years'' === |
||
| Line 172: | Line 217: | ||
* [[Ettin Snake (The After Years)|Ettin Snake]], [[Needlehog (The After Years)|Needlehog]] x2 |
* [[Ettin Snake (The After Years)|Ettin Snake]], [[Needlehog (The After Years)|Needlehog]] x2 |
||
* [[Cait Sith (The After Years)|Cait Sith]] x2 |
* [[Cait Sith (The After Years)|Cait Sith]] x2 |
||
| − | * [[Mindflayer (The After Years)|Mindflayer]] x2 |
+ | * [[Mindflayer (The After Years enemy)|Mindflayer]] x2 |
{{multicol-separator}} |
{{multicol-separator}} |
||
;B2 |
;B2 |
||
| Line 178: | Line 223: | ||
* [[Ettin Snake (The After Years)|Ettin Snake]], [[Will Priest]], [[Lamage (The After Years)|Lamage]] |
* [[Ettin Snake (The After Years)|Ettin Snake]], [[Will Priest]], [[Lamage (The After Years)|Lamage]] |
||
* [[Succubus (The After Years)|Succubus]], [[Cave Bat (The After Years)|Cave Bat]] x3 |
* [[Succubus (The After Years)|Succubus]], [[Cave Bat (The After Years)|Cave Bat]] x3 |
||
| − | * [[Mindflayer (The After Years)|Mindflayer]] x2 |
+ | * [[Mindflayer (The After Years enemy)|Mindflayer]] x2 |
* [[Cave Naga (The After Years)|Cave Naga]], [[Lamage (The After Years)|Lamage]] |
* [[Cave Naga (The After Years)|Cave Naga]], [[Lamage (The After Years)|Lamage]] |
||
* [[Lamage (The After Years)|Lamage]], [[Ettin Snake (The After Years)|Ettin Snake]] x2 |
* [[Lamage (The After Years)|Lamage]], [[Ettin Snake (The After Years)|Ettin Snake]] x2 |
||
| Line 185: | Line 230: | ||
{{multicol-separator}} |
{{multicol-separator}} |
||
;B2 (Small Room) |
;B2 (Small Room) |
||
| − | * [[Mindflayer (The After Years)|Mindflayer]] x2 |
+ | * [[Mindflayer (The After Years enemy)|Mindflayer]] x2 |
| − | * [[Mindflayer (The After Years)|Mindflayer]], [[Cait Sith (The After Years)|Cait Sith]], [[Cave Naga (The After Years)|Cave Naga]] |
+ | * [[Mindflayer (The After Years enemy)|Mindflayer]], [[Cait Sith (The After Years)|Cait Sith]], [[Cave Naga (The After Years)|Cave Naga]] |
* [[Ettin Snake (The After Years)|Ettin Snake]], [[Will Priest]], [[Lamage (The After Years)|Lamage]] |
* [[Ettin Snake (The After Years)|Ettin Snake]], [[Will Priest]], [[Lamage (The After Years)|Lamage]] |
||
* [[Lamage (The After Years)|Lamage]], [[Ettin Snake (The After Years)|Ettin Snake]] x2 |
* [[Lamage (The After Years)|Lamage]], [[Ettin Snake (The After Years)|Ettin Snake]] x2 |
||
| Line 195: | Line 240: | ||
{{multicol-separator}} |
{{multicol-separator}} |
||
;B3 |
;B3 |
||
| − | * [[Mindflayer (The After Years)|Mindflayer]], [[Cait Sith (The After Years)|Cait Sith]], [[Cave Naga (The After Years)|Cave Naga]] |
+ | * [[Mindflayer (The After Years enemy)|Mindflayer]], [[Cait Sith (The After Years)|Cait Sith]], [[Cave Naga (The After Years)|Cave Naga]] |
* [[Succubus (The After Years)|Succubus]], [[Cave Bat (The After Years)|Cave Bat]] x3 |
* [[Succubus (The After Years)|Succubus]], [[Cave Bat (The After Years)|Cave Bat]] x3 |
||
* [[Cait Sith (The After Years)|Cait Sith]] x2 |
* [[Cait Sith (The After Years)|Cait Sith]] x2 |
||
| − | * [[Mindflayer (The After Years)|Mindflayer]] x2 |
+ | * [[Mindflayer (The After Years enemy)|Mindflayer]] x2 |
* [[Cait Sith (The After Years)|Cait Sith]], [[Cave Naga (The After Years)|Cave Naga]] |
* [[Cait Sith (The After Years)|Cait Sith]], [[Cave Naga (The After Years)|Cave Naga]] |
||
* [[Needlehog (The After Years)|Needlehog]] x2, [[Ricardo Mage]], [[Lamage (The After Years)|Lamage]] |
* [[Needlehog (The After Years)|Needlehog]] x2, [[Ricardo Mage]], [[Lamage (The After Years)|Lamage]] |
||
| Line 219: | Line 264: | ||
* [[Cait Sith (The After Years)|Cait Sith]], [[Needlehog (The After Years)|Needlehog]] x3 |
* [[Cait Sith (The After Years)|Cait Sith]], [[Needlehog (The After Years)|Needlehog]] x3 |
||
* [[Needlehog (The After Years)|Needlehog]] x2, [[Ricardo Mage]], [[Lamage (The After Years)|Lamage]] |
* [[Needlehog (The After Years)|Needlehog]] x2, [[Ricardo Mage]], [[Lamage (The After Years)|Lamage]] |
||
| − | * [[Mindflayer (The After Years)|Mindflayer]], [[Cait Sith (The After Years)|Cait Sith]], [[Cave Naga (The After Years)|Cave Naga]] |
+ | * [[Mindflayer (The After Years enemy)|Mindflayer]], [[Cait Sith (The After Years)|Cait Sith]], [[Cave Naga (The After Years)|Cave Naga]] |
* [[Will Priest]], [[Ettin Snake (The After Years)|Ettin Snake]], [[Hydra (The After Years)|Hydra]] |
* [[Will Priest]], [[Ettin Snake (The After Years)|Ettin Snake]], [[Hydra (The After Years)|Hydra]] |
||
* [[Flood Worm (The After Years)|Flood Worm]], [[Cait Sith (The After Years)|Cait Sith]], [[Lamage (The After Years)|Lamage]] |
* [[Flood Worm (The After Years)|Flood Worm]], [[Cait Sith (The After Years)|Cait Sith]], [[Lamage (The After Years)|Lamage]] |
||
| Line 225: | Line 270: | ||
;B4 |
;B4 |
||
* [[Cave Naga (The After Years)|Cave Naga]] x2, [[Ettin Snake (The After Years)|Ettin Snake]] x2 |
* [[Cave Naga (The After Years)|Cave Naga]] x2, [[Ettin Snake (The After Years)|Ettin Snake]] x2 |
||
| − | * [[Will Priest]], [[Mindflayer (The After Years)|Mindflayer]], [[Cave Naga (The After Years)|Cave Naga]] |
+ | * [[Will Priest]], [[Mindflayer (The After Years enemy)|Mindflayer]], [[Cave Naga (The After Years)|Cave Naga]] |
* [[Succubus (The After Years)|Succubus]], [[Cave Bat (The After Years)|Cave Bat]] x3 |
* [[Succubus (The After Years)|Succubus]], [[Cave Bat (The After Years)|Cave Bat]] x3 |
||
* [[Lamage (The After Years)|Lamage]] x2, [[Ricardo Mage]] |
* [[Lamage (The After Years)|Lamage]] x2, [[Ricardo Mage]] |
||
* [[Will Priest]], [[Ettin Snake (The After Years)|Ettin Snake]], [[Hydra (The After Years)|Hydra]] |
* [[Will Priest]], [[Ettin Snake (The After Years)|Ettin Snake]], [[Hydra (The After Years)|Hydra]] |
||
* [[Flood Worm (The After Years)|Flood Worm]], [[Cait Sith (The After Years)|Cait Sith]], [[Lamage (The After Years)|Lamage]] |
* [[Flood Worm (The After Years)|Flood Worm]], [[Cait Sith (The After Years)|Cait Sith]], [[Lamage (The After Years)|Lamage]] |
||
| − | * [[Mindflayer (The After Years)|Mindflayer]] x1, [[Cait Sith (The After Years)|Cait Sith]], [[Cave Naga (The After Years)|Cave Naga]] |
+ | * [[Mindflayer (The After Years enemy)|Mindflayer]] x1, [[Cait Sith (The After Years)|Cait Sith]], [[Cave Naga (The After Years)|Cave Naga]] |
{{multicol-separator}} |
{{multicol-separator}} |
||
;B5 |
;B5 |
||
* [[Cave Naga (The After Years)|Cave Naga]] x2, [[Ettin Snake (The After Years)|Ettin Snake]] x2 |
* [[Cave Naga (The After Years)|Cave Naga]] x2, [[Ettin Snake (The After Years)|Ettin Snake]] x2 |
||
* [[Needlehog (The After Years)|Needlehog]] x2, [[Ricardo Mage]], [[Lamage (The After Years)|Lamage]] |
* [[Needlehog (The After Years)|Needlehog]] x2, [[Ricardo Mage]], [[Lamage (The After Years)|Lamage]] |
||
| − | * [[Will Priest]], [[Mindflayer (The After Years)|Mindflayer]], [[Cave Naga (The After Years)|Cave Naga]] |
+ | * [[Will Priest]], [[Mindflayer (The After Years enemy)|Mindflayer]], [[Cave Naga (The After Years)|Cave Naga]] |
* [[Will Priest]], [[Ettin Snake (The After Years)|Ettin Snake]], [[Hydra (The After Years)|Hydra]] |
* [[Will Priest]], [[Ettin Snake (The After Years)|Ettin Snake]], [[Hydra (The After Years)|Hydra]] |
||
* [[Cait Sith (The After Years)|Cait Sith]] x2, [[Needlehog (The After Years)|Needlehog]] x2 |
* [[Cait Sith (The After Years)|Cait Sith]] x2, [[Needlehog (The After Years)|Needlehog]] x2 |
||
* [[Cait Sith (The After Years)|Cait Sith]] x2, [[Ricardo Mage]], [[Cave Naga (The After Years)|Cave Naga]] |
* [[Cait Sith (The After Years)|Cait Sith]] x2, [[Ricardo Mage]], [[Cave Naga (The After Years)|Cave Naga]] |
||
* [[Flood Worm (The After Years)|Flood Worm]], [[Cait Sith (The After Years)|Cait Sith]], [[Lamage (The After Years)|Lamage]] |
* [[Flood Worm (The After Years)|Flood Worm]], [[Cait Sith (The After Years)|Cait Sith]], [[Lamage (The After Years)|Lamage]] |
||
| − | * [[Mindflayer (The After Years)|Mindflayer]], [[Cait Sith (The After Years)|Cait Sith]], [[Cave Naga (The After Years)|Cave Naga]] |
+ | * [[Mindflayer (The After Years enemy)|Mindflayer]], [[Cait Sith (The After Years)|Cait Sith]], [[Cave Naga (The After Years)|Cave Naga]] |
{{multicol-separator}} |
{{multicol-separator}} |
||
;Crystal Room |
;Crystal Room |
||
| Line 274: | Line 319: | ||
== Musical themes == |
== Musical themes == |
||
| + | {{Audio|title="Dungeon"|filename=FFIV DS Dungeon Theme.ogg}} |
||
The background theme that plays inside the Lodestone Cavern is the ''Final Fantasy IV'' "Dungeon" theme. |
The background theme that plays inside the Lodestone Cavern is the ''Final Fantasy IV'' "Dungeon" theme. |
||
| + | {{clear}} |
||
| − | |||
== Other appearances == |
== Other appearances == |
||
=== ''[[Final Fantasy Record Keeper]]'' === |
=== ''[[Final Fantasy Record Keeper]]'' === |
||
| − | |||
[[File:FFRK Lodestone Cavern FFIV.png|right|thumb|Painting image.]] |
[[File:FFRK Lodestone Cavern FFIV.png|right|thumb|Painting image.]] |
||
Golbez has demanded the Earth Crystal in exchange for Rosa's safe return, so now Cecil and his allies must pursue the Dark Elf who stole the Crystal from Troia. |
Golbez has demanded the Earth Crystal in exchange for Rosa's safe return, so now Cecil and his allies must pursue the Dark Elf who stole the Crystal from Troia. |
||
| Line 305: | Line 350: | ||
;Enemies |
;Enemies |
||
| − | * [[Bloodbones (Final Fantasy IV 2D)|Bloodbones]]{{foot|May appear in any normal battles |
+ | * [[Bloodbones (Final Fantasy IV 2D)|Bloodbones]]{{foot|May appear in any normal battles}} |
| − | * [[Cockatrice (Final Fantasy IV |
+ | * [[Cockatrice (Final Fantasy IV 2D)|Cockatrice]]{{foot|May appear in any normal battles}} |
| − | * [[Leshy (Final Fantasy IV 2D)|Leshy]]{{foot|May appear in any normal battles |
+ | * [[Leshy (Final Fantasy IV 2D)|Leshy]]{{foot|May appear in any normal battles}} |
| − | * [[Mindflayer (Final Fantasy IV 2D)|Mindflayer]]{{foot|May appear in any normal battles |
+ | * [[Mindflayer (Final Fantasy IV 2D)|Mindflayer]]{{foot|May appear in any normal battles}} |
;Boss |
;Boss |
||
| − | * [[Dark Elf (Final Fantasy IV |
+ | * [[Dark Elf (Final Fantasy IV 2D)|Dark Elf]]{{foot|Lodestone Cavern - Crystal Chamber}} |
| − | * [[Dark Dragon (Final Fantasy IV)|Dark Dragon]]{{foot| |
+ | * [[Dark Dragon (Final Fantasy IV 2D)|Dark Dragon]]{{foot|Once Dark Elf loses a certain amount of HP}} |
;Boss Target Score |
;Boss Target Score |
||
| Line 370: | Line 415: | ||
|} |
|} |
||
{{multicol-end}} |
{{multicol-end}} |
||
| − | {{ |
+ | {{clear}} |
== Gallery == |
== Gallery == |
||
| Line 388: | Line 433: | ||
FFIVDS Lodestone Cavern.png|Battle (DS). |
FFIVDS Lodestone Cavern.png|Battle (DS). |
||
TAY Wii Lodestone Cavern.jpg|''[[Final Fantasy IV: The After Years]]'' (Wii). |
TAY Wii Lodestone Cavern.jpg|''[[Final Fantasy IV: The After Years]]'' (Wii). |
||
| − | FFRK Lodestone Cavern JP FFIV.png|The |
+ | FFRK Lodestone Cavern JP FFIV.png|The Japanese dungeon image for ''Lodestone Cavern'' in ''[[Final Fantasy Record Keeper]]''. |
</gallery> |
</gallery> |
||
== Etymology == |
== Etymology == |
||
| + | {{Etym|lodestone}} |
||
| − | A [[wikipedia:lodestone|lodestone]] is a naturally-occurring magnetized mineral. |
||
| − | |||
| − | == Trivia == |
||
| ⚫ | |||
{{navbox setting FFIV}} |
{{navbox setting FFIV}} |
||
{{navbox setting IVTAY}} |
{{navbox setting IVTAY}} |
||
| ⚫ | |||
| ⚫ | |||
| ⚫ | |||
[[de:Magnethöhle]] |
[[de:Magnethöhle]] |
||
| + | [[Category:Locations in Final Fantasy IV]] |
||
| ⚫ | |||
| ⚫ | |||
Revision as of 19:46, 18 October 2020
Template:Sideicon
A magnetized cavern... Wonder how that could be put to use...
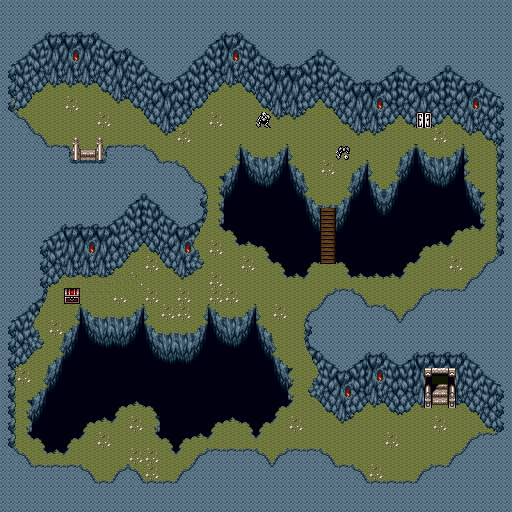
The Lodestone Cavern, also known as the Magnetic Cave, Magnetic Cavern, or Cave Magnes, is a cave in Final Fantasy IV, located on a small, densely forested island to the northeast of Troia. The cave is home to the Dark Elf, who stole the Earth Crystal from Troia. The cave is home to a strong magnetic field that renders anyone wearing metallic equipment unable to move.
In the original Japanese release, the cave is darker. In the Easy Type and English releases, the cave was brightened up.
Story
Final Fantasy IV
Cecil Harvey, Tellah, Yang, and Cid Pollendina arrive to the Lodestone Cavern in order to retrieve the stolen Earth Crystal. At the bottom floor, they confront the Dark Elf, but are defeated by it. Using the Whisperweed, Edward plays a tune that is transmitted to the heroes' corresponding Whisperweed which dispels the magnetic field, allowing Cecil and his friends to defeat the Dark Elf and recover the Earth Crystal.
Final Fantasy IV: The After Years
Palom and Leonora head into the cavern to evade Baron's soldiers while fleeing with the Earth Crystal, hoping that the metallic field will slow them down. On a lower floor Leonora reveals a hidden alternate path through the cave obscured by the magic of the Epopts.
The soldiers pursuing them strip themselves of their weapons and armor and chase the two mages into the Crystal Chamber. There, the Dark Elf is accidentally revived by Leonora placing the Earth Crystal in the resting area. They are powerless against its dragon form, until the Mysterious Girl summons Shiva to destroy it. Palom petrifies himself while holding the Crystal, but Leonora revives him to keep the girl from shattering his stone form. The Mysterious Girl uses Shiva to defeat them and leaves with the Crystal.
In the final tale, Edge, Rydia, Luca, and Golbez find the two in the cavern frozen over with magical ice. Shiva attacks them and is eventually returned to her senses. With her defeat Palom and Leonora are revived.
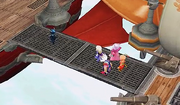
Locations

The Earth Crystal.
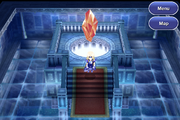
- Crystal Chamber
It is the chamber where the Dark Elf keeps and guards the Earth Crystal he stole from the Troians. Cecil and the party confront him to take the crystal back, but without Edward breaking the magnetic barrier, they would've been unsuccessful. After slaying the Dark Elf, Cecil obtains the Earth Crystal and exchanges it for Rosa's life.
Items
Final Fantasy IV
- 2D versions
- 500 accumulated gil
- Potion x2
- Mega-Potion
- Ether x2
- Hi-Ether
- Remedy
- Phoenix Down
- Fairy Claw
- 3D versions
- Hi-Potion
- Unicorn Horn
- 2000 gil
- Ether x2
- Bronze Hourglass
- Hi-Potion
- Spider Silk
- Faerie Claws
- Emergency Exit
- Whirlwind Augment
- Map completion: Ether, Vampire Fang x3, Silent Bell x3, Dry Ether
Final Fantasy IV: The After Years
- Palom's Tale
- Hi-Potion x2
- Echo Herbs
- Ether x2
- Circlet
- Cottage
- Polymorph Rod
- Spider Silk
- Bronze Hourglass
- Mage's Robe
- Soma Drop
- Hermes Sandals
- Dry Ether
- The Crystals
- Recovery Rod
- Unicorn Horn
- Coeurl Whisker
- Cottage x2
- Hermes Sandals
- Dry Ether
- Diamond Helm
- Silver Hourglass
- Light Curtain
- White Fang
- Remedy
- Elixir
- Small Tail
- Diamond Armlet
Shops
The cave's second floor.
This shop is only present in Palom's Tale in The After Years.
| Item | Price |
|---|---|
| Potion | 30 gil |
| Hi-Potion | 150 gil |
| Phoenix Down | 100 gil |
| Diet Ration | 100 gil |
| Echo Herbs | 50 gil |
| Tent | 100 gil |
| Sage's Miter | 2,000 gil |
| Sage's Surplice | 1,200 gil |
| Ruby Ring | 1,000 gil |
| Rune Armlet | 2,000 gil |
Enemies
Final Fantasy IV
- 2D versions
- Cait Sith, Needlehog x3
- Ogre x3
- Cave Bat x3
- Ogre x2, Cait Sith x2
- Succubus, Cave Bat x3
- Succubus, Cave Bat x6
- Mindflayer x2
- Cave Naga, Ettin Snake x2
- Dark Elf (boss)
- Dark Dragon (boss)
- 3D versions
- Ogre x3
- Cait Sith x2
- Cait Sith x2, Ogre x1
- Cait Sith x1, Needlehog x2
- Mindflayer x2
- Mindflayer x1, Cait Sith x1, Ogre x1
- Cave Bat x3
- Succubus x1, Ogre x1
- Cait Sith x2, Needlehog x1
- Succubus x1, Cave Bat x2
- Ettin Snake x2, Cave Naga x1
- Dark Elf (boss)
- Dark Dragon (boss)
Final Fantasy IV: The After Years
Palom's Tale
- B1
- Cave Naga, Lamage
- Lamage, Ettin Snake x2
- Cave Bat x3
- Ettin Snake, Needlehog x2
- Cait Sith x2
- Mindflayer x2
- B2
- Ettin Snake, Needlehog x2
- Ettin Snake, Will Priest, Lamage
- Succubus, Cave Bat x3
- Mindflayer x2
- Cave Naga, Lamage
- Lamage, Ettin Snake x2
- Cait Sith, Cave Naga
- Cait Sith x2
- B2 (Small Room)
- Mindflayer x2
- Mindflayer, Cait Sith, Cave Naga
- Ettin Snake, Will Priest, Lamage
- Lamage, Ettin Snake x2
- Cave Naga, Ettin Snake x2
- Cait Sith x2
- Flood Worm, Cait Sith, Lamage
- Succubus, Cave Bat x3
- B3
- Mindflayer, Cait Sith, Cave Naga
- Succubus, Cave Bat x3
- Cait Sith x2
- Mindflayer x2
- Cait Sith, Cave Naga
- Needlehog x2, Ricardo Mage, Lamage
- Flood Worm, Cait Sith, Lamage
- Lamage x2, Ricardo Mage
- B3 (Small Room)
- Ettin Snake, Will Priest, Lamage
- Succubus, Cave Bat x3
- Flood Worm, Cait Sith, Lamage
- Needlehog x2, Ricardo Mage, Lamage
- Cave Naga x2, Ettin Snake x2
- Cait Sith, Needlehog x3
- Flood Worm, Cait Sith x2
- Will Priest, Ettin Snake, Hydra
- B3 (Passage)
- Cave Naga x2, Ettin Snake x2
- Succubus, Cave Bat x3
- Cait Sith, Needlehog x3
- Needlehog x2, Ricardo Mage, Lamage
- Mindflayer, Cait Sith, Cave Naga
- Will Priest, Ettin Snake, Hydra
- Flood Worm, Cait Sith, Lamage
- B4
- Cave Naga x2, Ettin Snake x2
- Will Priest, Mindflayer, Cave Naga
- Succubus, Cave Bat x3
- Lamage x2, Ricardo Mage
- Will Priest, Ettin Snake, Hydra
- Flood Worm, Cait Sith, Lamage
- Mindflayer x1, Cait Sith, Cave Naga
- B5
- Cave Naga x2, Ettin Snake x2
- Needlehog x2, Ricardo Mage, Lamage
- Will Priest, Mindflayer, Cave Naga
- Will Priest, Ettin Snake, Hydra
- Cait Sith x2, Needlehog x2
- Cait Sith x2, Ricardo Mage, Cave Naga
- Flood Worm, Cait Sith, Lamage
- Mindflayer, Cait Sith, Cave Naga
- Crystal Room
- Dark Elf / Dark Dragon (Boss)
- Mysterious Girl, Shiva (Event)
The Crystals
- B1 - B3
- Naga x2, Nagaraja
- Stone Golem
- Vampire Bat, Nagaraja
- Black Lizard x3
- Vampire Bat x3
- Chimera, Nagaraja x2
- White Mousse x4
- Black Lizard, White Mousse x3
- B4 - B5
- Stone Golem x2
- Naga, Nagaraja, White Mousse x2
- Vampire Bat x4
- Stone Golem, Nagaraja
- Vampiress, Vampire Bat x3
- Chimera, Nagaraja x2
- Chimera, Nagaraja, Vampire Bat
- Chimera, Stone Golem
- Crystal Room
- Shiva (Boss)
Musical themes
The background theme that plays inside the Lodestone Cavern is the Final Fantasy IV "Dungeon" theme.
Other appearances
Final Fantasy Record Keeper
Painting image.
Golbez has demanded the Earth Crystal in exchange for Rosa's safe return, so now Cecil and his allies must pursue the Dark Elf who stole the Crystal from Troia.
- Difficulty
- 23 (Classic)
- 43 (Elite)
- Layout
- Lodestone Cavern - 1st Level
- Stamina: 7 (Classic), 14 (Elite)
- Rounds: 3
- Lodestone Cavern - 2nd Level
- Stamina: 7 (Classic), 14 (Elite)
- Rounds: 3
- Lodestone Cavern - 3rd Level
- Stamina: 7 (Classic), 14 (Elite)
- Rounds: 3
- Lodestone Cavern - 4th Level
- Stamina: 7 (Classic), 14 (Elite)
- Rounds: 3
- Lodestone Cavern - Crystal Chamber
- Boss Battle
- Stamina: 8 (Classic), 15 (Elite)
- Rounds: 1
- Enemies
- Bloodbones*May appear in any normal battles
- Cockatrice*May appear in any normal battles
- Leshy*May appear in any normal battles
- Mindflayer*May appear in any normal battles
- Boss
- Dark Elf*Lodestone Cavern - Crystal Chamber
- Dark Dragon*Once Dark Elf loses a certain amount of HP
- Boss Target Score
- Exploit the Dark Elf's weakness to fire attacks.
- Classic Rewards
| Completion Type | Item | Quantity |
|---|---|---|
| First Time Completion | Mythril | 1 |
| Stamina Shard | 1 | |
| Completion Reward | Gil | 2,000 |
| Mastery Reward | Lesser Ice Orb | 5 |
| Stamina Shard | 2 |
- Elite Rewards
| Completion Type | Item | Quantity |
|---|---|---|
| First Time Completion | Mythril | 1 |
| Stamina Shard | 1 | |
| Completion Reward | Gil | 12,000 |
| Mastery Reward | Greater Black Orb | 3 |
| Stamina Shard | 1 |
Gallery
")
")
")
")
")
")
")
")
")
")
")
")
")
")
")
Etymology
A lodestone is a naturally-occurring magnetized mineral.