Template:Sideicon
When an enemy has pushed your anger to the limits, you can unleash unimaginable power.
Limit, or Special in the 1996 Aeris Demo release, is a command ability in Final Fantasy VII used to perform Limit Breaks, also known as Limits, Limit Techniques, or Special Abilities in the 1996 demo release.
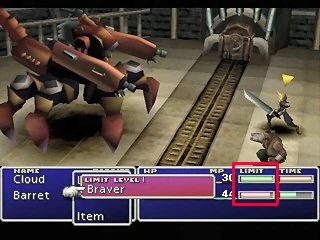
Limit Breaks are skillsets unique to each party member. They have similarities to the Desperation Attacks introduced in Final Fantasy VI, but the added Limit gauge mechanic allows more player control. Each character has a Limit gauge (a Special gauge in the 1996 Demo release), which fills as the character angers as they are attacked by opponents. When the gauge is filled, it will flash, the pink battle message "LIMIT BREAK" appears, the term preceded by the character's name, and their Attack command is replaced with the "Limit" command, which flashes in iridescent colors. If the gauge is filled after selecting a command, not on the command menu, the time gauge will fill up far quicker than usual. It will fill up at normal speed on future turns if the player does not use a Limit Break. When a player activates a Limit Break, it supersedes turn order even if enemies are about to attack or other characters had already been given commands.
When using a Limit Break, the camera angle focuses in on the character, a flame-colored light emits from the ground while a sound is played before the technique is used.
In the PC version re-release, using the characters' first Limit Breaks, and obtaining their final Limit Breaks, unlocks achievements. In the PlayStation 4 version obtaining the characters' final Limit Breaks earns trophies. Except for Vincent and Cait Sith, all characters have seven Limit Breaks (two per level), hinting an allusion to the number 7.
Mechanics
When the gauge is full, you can use a "Limit Technique".
Cloud
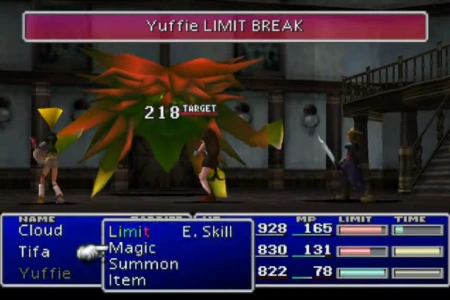
Yuffie receiving her Limit Break command
Party members have four Limit Levels, each containing one or two Limit Breaks. Only one level can be active at a time, and therefore a character has one or two Limit Breaks available when the gauge is filled. The first Limit Break is available automatically, while the others require the player to use Limit Breaks a certain number of times, or to kill a certain amount of enemies, to be unlocked. The final Limit Break for most characters is taught via a unique item.
There are two methods of using a Limit Break: to fill up the gauge, selecting the "Limit" command; or to have previously used the Limit command, not used another attack since then (including counters), and using the Mime command. Characters can only mime their own Limit Breaks. This can be exploited particularly in the Battle Square where only one player can battle at a time, and after the series of battles ends, the stats are reset to before the series was initiated. Miming Tifa's and Cait Sith's Limit Breaks mimes the result, and thus the player won't need to spin the slots reels again.
When trying to mime another character's Limit Break, the sound plays and the flame-colored light is emitted, but the command will fail.
Since a Limit Break takes turn priority, one must ensure any other actions the player wants their characters to perform occur before selecting the Limit Break.
Tutorials
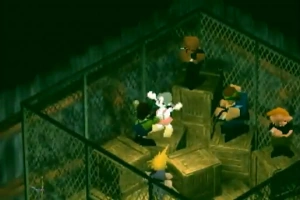

The Girl using a Limit Break in the Beginner's Hall.
Don't mess with me. I used to be in SOLDIER. I'll tell you how much I know... an' for free too.
Cloud
Cloud gives a number of tutorials on Limit Breaks for the benefit of the player. For the short time towards the start of the game, the player can visit the Beginner's Hall before leaving for the train.
The first tutorial is given to the guy outside the cage. Cloud explains the Limit gauge is based on how angry the user is and the basics about Limit levels. He will briefly talk about the system if the player selects the option about the status window, but explains the functions of the Limit window if the player asks about the Limit status in particular.
| How to check your status? |
|---|
| This is called a Limit gauge. It shows your anger level. When the gauge is full, you can use a "Limit Technique". I'll tell you about "Limit Techniques" later. |
| About Limit status? |
| Here are a few hints on limit techniques. When an enemy has pushed your anger to the limits, you can unleash unimaginable power. You know what I mean, right? The trick is how to use it. Access the menu and select [Limit]. Now select a member. Now decide what you limit will be. Lower limits have less power, but you can use them more often. If you set your limit higher, you can inflict great damage, but you'll have to wait longer. After using this technique for awhile, you'll improve your technique. Your development will change depending on how you fight. I can't tell you how it will change. That's something you'll have to find out by yourself. I've heard a rumor about secret items that inspire ultimate techniques. I don't know whether those items really exist. That's it! Try everything out and use what's best for you! |
A second tutorial can be given to the men standing on the boxes focusing on the functions of the Limit system in battle when asking about the gauges.
| About the gauges |
|---|
| "The [limit gauge] increases every time you sustain damage. When it is full, you can use the [limit technique]." "This gauge is not cleared after each battle, but gradually builds over time." "It takes a while for it to build up, so you have to think about which times are the best to use it." "You probably don't know about it, but there are conditions of [status], [fury], and [sadness]." "When you have [fury], your limit gauge builds up sooner, but your attacking accuracy is lower." "Keep in mind that [sadness] makes your limit gauge build up slower, but the damage you receive is also lessened." |
Cloud can also give a visual tutorial to the kids standing on the boxes. The boy will attack the girl until a light flashes, she glows white, and inflicts a combo attack and knocks her opponent over.
Limit Levels

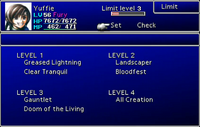
Yuffie's full set of Limit Breaks
Your development will change depending on how you fight. I can't tell you how it will change. That's something you'll have to find out by yourself.
Cloud
In the menu, each character has four Limit Levels. Each level contains two Limit Breaks apart from Level 4 where there is only one. Vincent has only one for each level, and Cait Sith has only two Limit Breaks in total, one for Level 1 and one for Level 2.
Level 4 Limit Breaks act like summon scenes where the camera changes regardless of config settings, and the player cannot choose the targets for commands by other characters.
To obtain the second Limit Break of a level, the character must have used the level's first Limit Break a specific number of times. To obtain the first Limit of a level, the character must have killed a specific number of enemies. It is possible to obtain the first Limit Break of a Limit Level before having obtained the second Limit Break of the previous Limit Levels by killing the prerequisite number of enemies without using enough Limit Breaks to meet the Limit Break requirement. The character's next Limit Level can still be set, but each character's Level 4 Limit Break can only be taught through an item once all of their other Limit Breaks have been learned. If one is missed, the player must reset their Limit Level and continue in getting the specified amount of uses of the first Limit Break of that level to learn the second one before being able to add the manual.
Vincent has one Limit ability per level, so it is possible to learn all his Limit Breaks without having to use any.
Tifa has access to all her Limit abilities at once since she doesn't have sub-commands beneath her Limit command, but slot reels that decide whether each ability misses, hits, or deals critical damage.
| Character | Level 1 | Level 2 | Level 3 | Level 4 | |
|---|---|---|---|---|---|
| Cloud | 1 | Start | 120 kills | 320 kills | Omnislash item |
| 2 | 8 Limit Breaks | 7 Limit Breaks | 6 Limit Breaks | ||
| Barret | 1 | Start | 80 kills | 160 kills | Catastrophe item |
| 2 | 9 Limit Breaks | 8 Limit Breaks | 6 Limit Breaks | ||
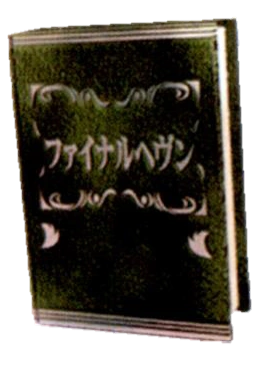
| Tifa | 1 | Start | 96 kills | 192 kills | Final Heaven item |
| 2 | 9 Limit Breaks | 7 Limit Breaks | 6 Limit Breaks | ||
| Aeris | 1 | Start | 80 kills | 160 kills | Great Gospel item |
| 2 | 8 Limit Breaks | 6 Limit Breaks | 5 Limit Breaks | ||
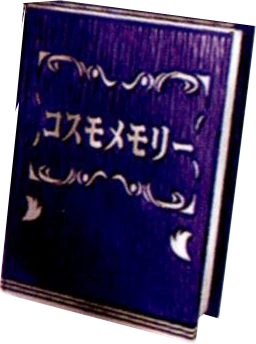
| Red XIII | 1 | Start | 72 kills | 144 kills | Cosmo Memory item |
| 2 | 8 Limit Breaks | 7 Limit Breaks | 6 Limit Breaks | ||
| Yuffie | 1 | Start | 64 kills | 128 kills | All Creation item |
| 2 | 8 Limit Breaks | 7 Limit Breaks | 6 Limit Breaks | ||
| Cait Sith | 1 | Start | 40 kills | — | — |
| 2 | — | — | — | ||
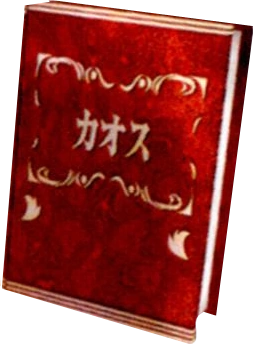
| Vincent | 1 | Start | 40 kills | 96 kills | Chaos item |
| 2 | — | — | — | ||
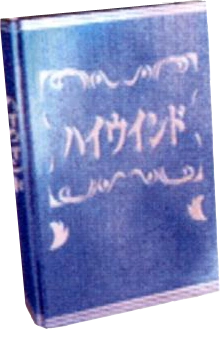
| Cid | 1 | Start | 60 kills | 136 kills | Highwind item |
| 2 | 7 Limit Breaks | 6 Limit Breaks | 5 Limit Breaks | ||
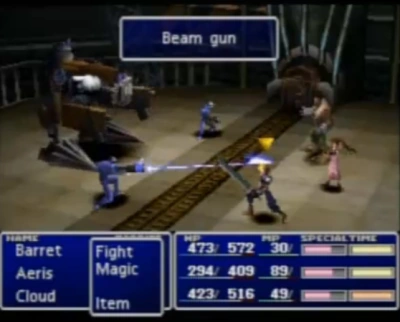
The earliest convenient stage for a player to grind for Limit Breaks is in Midgar's Sector 4 Train Tunnel, where, if the player backtracks far enough, they will get into a series of battles that only stop when the player chooses to. After healing, or switching Materia with party members who still have MP, the player can reenter another series of battles. This is the best place for quick kills, and with Level 1 Limit Breaks, the player's gauges should fill quickly.
The Matra Magic Enemy Skill attacks all enemies with typeless magic for 8 MP; players may use this to get quick kills against enemy groups in the Grasslands Area, in the Mythril Mine, or in the forests of the Junon Area (where groups of 5 Capparwire, which have low health but continue to do decent damage via Grand Spark until around level 35, are very common). And since the Levrikon enemies' Flaming Peck attack gives the Fury status (unless the character already has the Sadness status), the Limit gauge can be filled faster.
With an average of 4.4 relatively weak enemies per encounter, the large forest in the Nibel Area past Mt. Nibel is is a good place for grinding Limit Breaks. It is the only area featuring an enemy formation containing six enemies (Battery Cap x6) whose four laser attack builds Limits quickly, and contains the enemy Valron, who can be manipulated and whose Gravity-based Dive Kick attack quickly fills a character's Limit gauge.
Once Trine has been acquired, the player can equip Enemy Skills to gain quick kills while keeping MP cost to a minimum. Once the party has acquired the submarine, the Unknowns in the sunken Gelnika can be battled to rapidly fill up Limit gauges.
After obtaining the Tiny Bronco, it is possible to have all nine characters in the party, and players may use the Mideel Area enemy groups and the Fury status, granted by Hypers, to get kills and fill Limit gauges. A sufficiently-leveled Restore Materia containing the Regen, or at high enough levels, the Fury Ring to keep the party in Berserk, can make gaining kills quick and easy.
Aeris has the Limit Break Fury Brand that fills the other two allies' Limit gauges. This is a quicker way to get other characters to use their Limit Breaks to learn new ones, and is a net gain of one Limit Break when her team mates' Limit Levels are set to 2. It is even better if they are set to 3, as her Level 2 gauge fills faster. If Aeris's full Limit gauge is withheld, the player can wait for the other two characters to use their Limit commands before Aeris uses hers so there is no wasted build-up.
The Cover Materia can be used to divert Limit-building damage to one party member. Damage is halved when characters are in the back row; characters can be moved from the front to the back row during combat with the ![]() button command Change. The Manipulate Materia can be used to apply known and measured amounts of damage to characters from hard-hitting enemies with little risk. This is effective for spells that hit all characters at once. Before Manipulate is obtained, Sleep can be used to give characters time to heal up. Filling Limit meters combines well with stealing.
button command Change. The Manipulate Materia can be used to apply known and measured amounts of damage to characters from hard-hitting enemies with little risk. This is effective for spells that hit all characters at once. Before Manipulate is obtained, Sleep can be used to give characters time to heal up. Filling Limit meters combines well with stealing.
Half of the characters can get their Limit Breaks before progressing past Forgotten City, while the rest find them later. Aeris requires a prerequisite item to get her ability manual item, Mythril, which can be obtained before the other characters receive their manual items. The earliest available manual is Red XIII's Cosmo Memory; Aeris's Great Gospel and Cloud's Omnislash are available at the same time, and next is Yuffie's All Creation. Cid has the latest opportunity to obtain his final Limit Break, as his item is inside the Gelnika, requiring the use of the submarine.
Limit gauge
Cloud selecting a Limit Break
You've got to hang in there. Your limit gauge is just starting to build.
Cloud
Four variables affect the increase of the Limit gauge: the attack damage, the character's maximum HP, the character's Limit Level, and whether they are affected by Fury or Sadness.
Taking more damage fills the gauge faster, with higher maximum HP requiring more damage to fill the gauge than lower maximum HP. A manipulated enemy still increases the character's gauge, but characters attacking each other or themselves do not (including from Confuse). Restoring HP does not reduce the gauge.
Each character has four Limit Levels, except Cait Sith who has two. Higher Limit Levels require more damage to fill the gauge. While this difference is small for Cait Sith between levels 1 and 2, it takes over twice as much for Cloud.
The Fury status doubles the rate at which the Limit gauge increases, and the Sadness status halves it. Fury and Sadness negate each other. Players can use the Hyper item, normally intended to cure Sadness, to exploit the Fury status to gain Limit Breaks quicker.
Though it displays no number, the Limit gauge is treated as an integer between 0 (empty) and 255 (full). To calculate the increase from an attack, the system multiplies the damage by 300, divides the result by the character's maximum HP, rounds down to the nearest integer, multiplies the result by 256, then multiplies by 2 if the character is in Fury or 0.5 if the character is in Sadness, and finally divided by a Limit constant that depends on the individual character and which Limit Level he or she using, and rounded down again.
Alternatively:

Each character has an individual limit constant for each of their Limit Levels, shown in the following table:[1]
| Character | Limit Level | |||
|---|---|---|---|---|
| 1 | 2 | 3 | 4 | |
| Cloud | 140 | 324 | 435 | 506 |
| Barret | 129 | 240 | 374 | 450 |
| Tifa | 120 | 334 | 509 | 566 |
| Aeris | 200 | 284 | 322 | 436 |
| Red XIII | 195 | 300 | 389 | 486 |
| Yuffie | 200 | 300 | 400 | 480 |
| Cait Sith | 160 | 180 | — | — |
| Vincent | 202 | 244 | 319 | 426 |
| Cid | 200 | 280 | 380 | 480 |
Cait Sith doesn't have any Limit Breaks at Level 3 or Level 4, and therefore they cannot be selected for him. Tifa has the lowest constant on Level 1 at 120, and on Level 4, she has the highest of 566.
One can calculate the proportion of a character's max HP that needs to be lost as follows:

For example, Tifa's level 1 limit while under no status effect yields

meaning she needs to lose about 39.8 percent of her maximum HP to fill her Limit gauge.
Every character has to lose more than their maximum HP to fill the gauge on their third and fourth Limit Levels, which means the player will have to gain HP between their Limit gauge being reset and refilling it, as the gauge will deplete to zero if the character has the Death status. This also applies for Cloud and Tifa on their second Limit, while Red XIII and Yuffie lie just beneath having to lose 99.6% of their HP. At this level Cait Sith only has to lose 59.8%. If the player has the Fury status, under no Limit Level would they have to lose more than their maximum HP.
Three events deplete the Limit gauge: using a Limit Break, dying, and switching Limit Levels (preventing players from easily building the gauge in a lower level and retaining it for a higher level).
The only time the Limit gauge fills in another way is for the final scripted battle against Sephiroth, where Cloud's Limit gauge starts full with his Limit Level automatically set to Level 4 (Omnislash), regardless of whether he previously learned the Limit or not.
Manuals

Yuffie after learning All Creation.
I've heard a rumor about secret items that inspire ultimate techniques. I don't know whether those items really exist.
Cloud
Limit Break manuals are menu items given to characters to learn Limit Breaks. Each character other than Cait Sith has a Limit Break manual, which teaches their Level 4 Limit Break. These items give no indication in-game whom they belong to, nor what their use is for, although the way they are obtained can be a strong indication. If the player attempts to use a wrong manual on a character, they will comment on it not being the right one.
Players can only be taught their Level 4 Limit Break when all their other Limit Breaks have been learned. This means if the second Limit Break of a Limit Level is not learned, the player will have to go back and learn it.
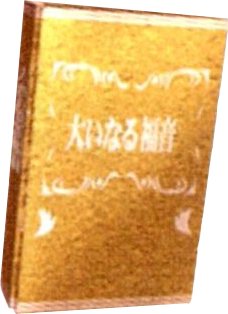
Great Gospel (Aeris)
This should be okay.
Aeris
The player can begin the search for Aeris's manual as soon after acquiring the buggy. Driving it into the Costa del Sol buildings allows passage aboard the cargo ship to Junon. In the north of the Junon Area there is a cave past some shallows. A sleeping man in the cave will give the player the Mythril item if the total number of battles the player has fought ends in two matching odd numbers or zeros; e.g. 11, 133, 255, 1077, 699, 200.
After the events in Rocket Town, the Mythril can be taken to the man in the cabin between the Gold Saucer and Gongaga Village. Opening the correct one of two compartments (the smaller one located on the upper floor of the house) nets the Great Gospel item. Until the player receives the Tiny Bronco, the blacksmith's house will be empty, and Cloud is returned to the field screen after entering.
Cosmo Memory (Red XIII)
Right, I've got it!
Red XIII
Red XIII can learn his final Limit the earliest; the Cosmo Memory manual is obtained from defeating the optional boss Lost Number in the Shinra Mansion safe.
Omnislash (Cloud)
OK! Got it!
Cloud
The Omnislash manual is available at the same time as Aeris's manual. After getting the Tiny Bronco, it can be won at the Battle Square in Gold Saucer. The manual costs 51,200 BP at this point, and 32,000 BP after acquiring the Highwind.
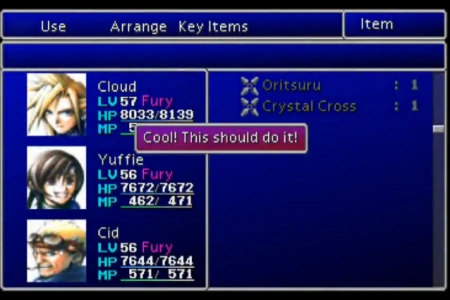
All Creation (Yuffie)
Cool! This should do it!
Yuffie
Yuffie's All Creation can be obtained after defeating Godo, the final boss of the optional Pagoda sidequest in Wutai Village.
Catastrophe (Barret)
Heh! No sweat!
Barret
The Catastrophe manual can be obtained after the Huge Materia quest in Corel by talking to a woman in the ruined building near the inn in North Corel.
Chaos (Vincent)
I'm becoming less human...
Vincent
The player must enter the waterfall cave near Nibelheim with Vincent and Cloud in the party and witness the scene, then leave the cave and fight ten random encounters and return to find the Chaos manual. To get to the cave, the player can either use the submarine, or get there faster via either the green, black, or gold Chocobo obtained through breeding.
Final Heaven (Tifa)
Hmm, so that's it.
Tifa
Tifa's Final Heaven manual is discovered after Cloud returns to the party after the events at Mideel. The player must enter Tifa's House in Nibelheim with Tifa in the party, and play the piano.
The player must insert the following buttons:
| PlayStation | |
|---|---|
| PC | [CANCEL], [SWITCH], [MENU], [PAGEUP] and [MENU], [PAGEUP] and [SWITCH], [CANCEL], [SWITCH], [MENU], [PAGEUP] and [CANCEL], [OK], [CANCEL], [SWITCH], [CANCEL] |
| Switch |
A letter from Zangan is discovered, containing the Final Heaven manual.
If the player plays the piano on disc 1 they will only get a gil. If they play it with Tifa as the party leader, and if in the Kalm/Nibelheim flashback when Cloud first played the piano the player selected "I remember" and then pressed one of ![]() ,
, ![]() ,
, ![]() , or
, or ![]() , an Elemental Materia is uncovered.
, an Elemental Materia is uncovered.
Highwind (Cid)
Hey I like this! Lemme use it!
Cid
Cid's Highwind manual is found inside the optional dungeon Gelnika, discoverable with the submarine. The chest containing the manual is on the left of the hall after entering, past the room where the optional bosses Turks:Reno and Turks:Rude are fought.
Limit Breaks
OK! Now your limit gauge is full, go ahead and use it! Fight with your limit technique.
Cloud
Unused Limit Break concepts.
Each Limit Break does a different thing. Most inflict damage to one or all enemies based on the same stats as an ordinary attack, albeit multiplied. Others use different variables to calculate the damage, and a number of them also inflict statuses to either enemy or party.
Every character has seven Limit Break commands except Vincent and Cait Sith, and every character has seven Limit Break abilities except Vincent and Cait Sith who have more. Vincent's four Limit Breaks each can use two abilities, giving him eight different abilities. Cait Sith's first Limit Break is one ability, and his second one has eight results. Cait Sith can summon one of sixteen summons, and use one of seven abilities in Toy Box, technically giving him a total of 29 abilities. So while Cait Sith and Vincent both have the fewest Limit commands, they have the most Limit Breaks. Also, since Tifa doesn't select a Limit to use, it could be said that she doesn't have any sub-commands, just the main Limit command.
Young Cloud and Sephiroth do not have Limit Breaks. Through use of the GameShark, Sephiroth's and Young Cloud's Limit Break will display Vincent's and Cait Sith's respectively, however, it is not possible to use them. Every time the player enters a battle with one of these characters in their party, their Limit gauge will be empty.
Limit breaks are subjected to the damage cap of 9,999 damage per hit. Thus, if the character's damage is high enough, using a Limit Break that deals more hits may do more damage, even if it is a lower level limit. For example Yuffie's level 4 Limit Break, All Creation, only hits once on all enemies for 8x damage, but her Doom of the Living does 15 hits on random enemies at 5/8 damage each, which works out to a total damage multiplier of 9.375. Doom of the Living will deal more damage against a single target, and can potentially deal 15 x 9,999 damage if her damage is high enough.
Limit Breaks are unaffected by the character's weapon properties, such as ultimate weapons' unique damage formulae, even the Limit Breaks the character performs with their weapon, like Cloud's.
Cloud
- See the Limit Break sequences here.
Cloud's Limit Breaks are the strongest, but are learned slower, as Cloud typically needs to kill twice as many enemies as his comrades to learn his stronger techniques. His ultimate Limit Break, Omnislash, is among the most powerful moves in the game. Against single enemies, this can be even stronger than Knights of Round as it hits two more times.
| Level | Name | Obtained / Effect | Image |
|---|---|---|---|
| 1 | Braver | Default | 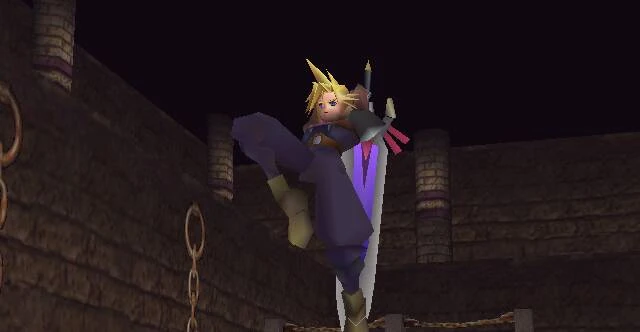
|
| Single physical attack with a downward slash dealing 3 times normal damage. | |||
| Cross-slash | Use Braver 8 times | 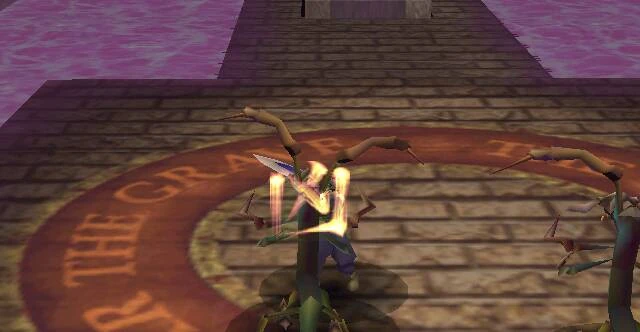
| |
| Single physical attack with three slices dealing 31⁄4 times normal damage and inflicting paralysis. | |||
| 2 | Blade Beam | Kill 120 enemies | 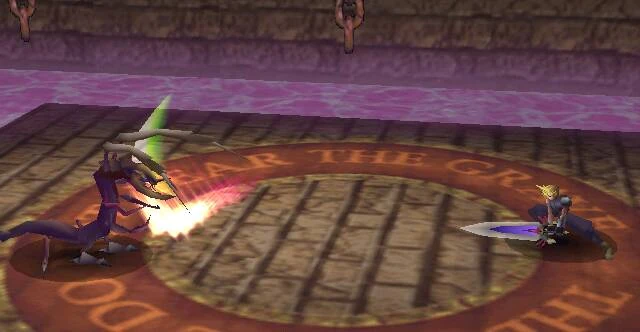
|
| Strikes and unleashes a wave of energy at a single enemy dealing 31⁄2 times normal damage, and hits other enemies for approximately normal damage with shockwaves. If there is only one target Blade Beam is, surprisingly, considered a magical attack, even if its damage and accuracy are still calculated from physical stats. | |||
| Climhazzard | Use Blade Beam 7 times | 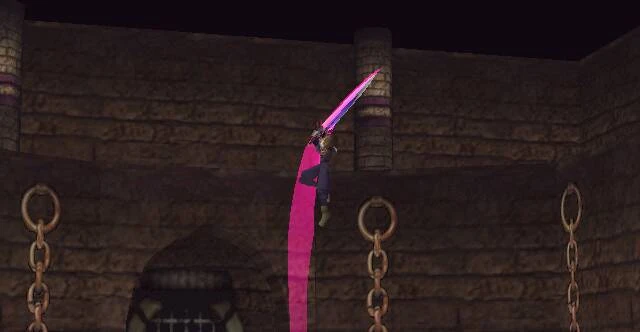
| |
| Strikes enemy, then jumps upwards running the sword along the enemy dealing 43⁄8 times normal damage. | |||
| 3 | Meteorain | Kill 200 enemies after obtaining Blade Beam | 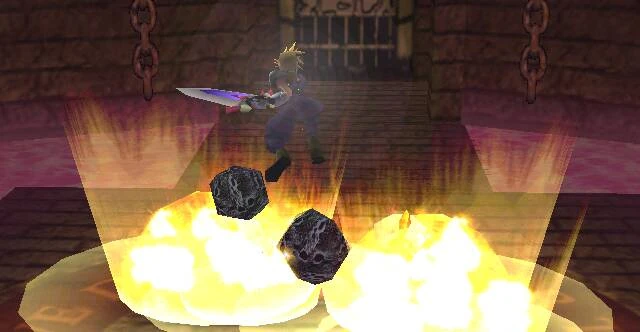
|
| Six meteors fall and hit random targets for 15⁄8 times normal damage each. | |||
| Finishing Touch | Use Meteorain 6 times. | 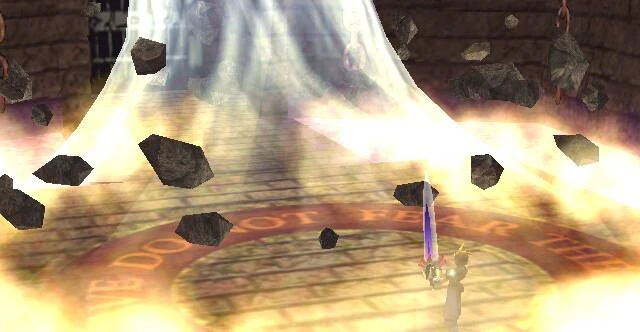
| |
| Hits all enemies with a tornado causing death, or dealing 31⁄8 times normal damage for any enemy immune to death. | |||
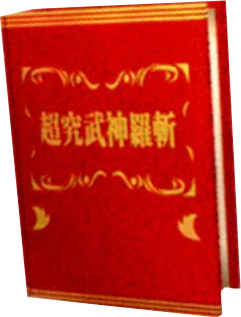
| 4 | Omnislash | Use the Omnislash manual after obtaining Cloud's other six Limit Break commands. | 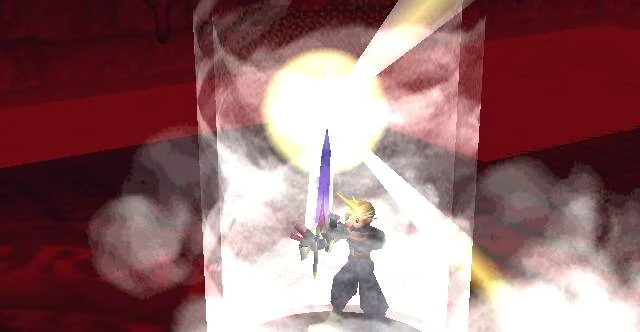
|
| Hits random enemies 15 times under the effect of automatic critical hits for 3⁄4 times normal damage each hit. |
Barret
- See the Limit Break sequences here.
Barret's Limit Breaks mostly consist of physical blows. Mindblow is one of a limited number of attacks available to the player that drains enemy MP. If the player is keen in their leveling, Barret can learn his level 2 technique, Hammer Blow, early, making it useful for dispatching enemies instantly.
| Level | Name | Obtained / Effect | Image |
|---|---|---|---|
| 1 | Big Shot | Default | 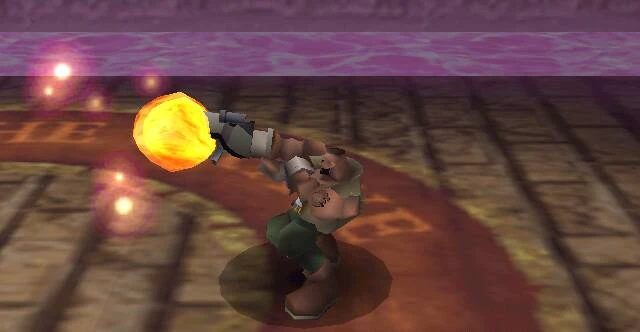
|
| Fires a huge fireball at a single enemy for 31⁄4 times normal damage. | |||
| Mindblow | Use Big Shot 9 times | 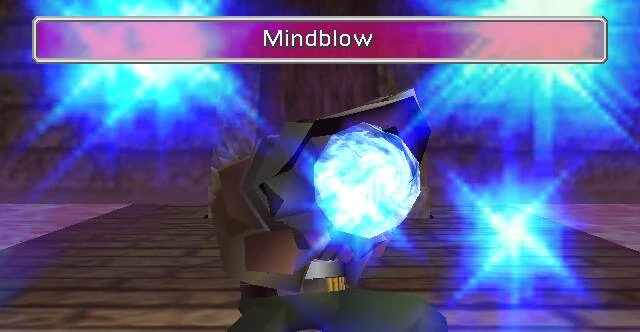
| |
| Fires a blue ball of energy at a single enemy, depleting MP from the target. This is a gravity-elemental attack. | |||
| 2 | Grenade Bomb | Kill 80 enemies | 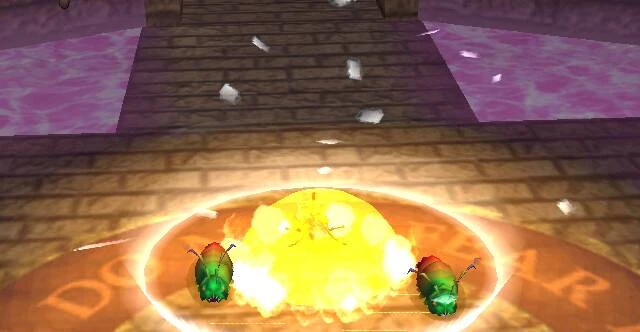
|
| Launches a grenade at the enemy, dealing 33⁄8 times normal damage if there is only a single target, but can hit multiple targets for less. | |||
| Hammer Blow | Use Grenade Bomb 8 times. | 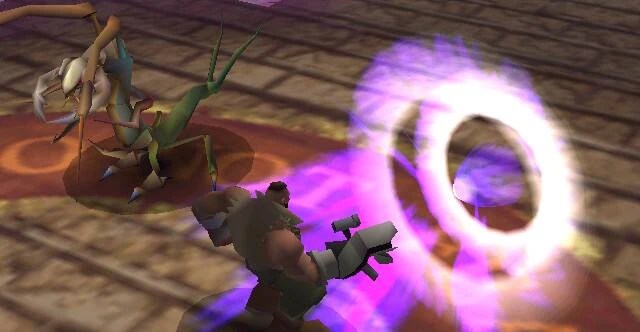
| |
| Runs up and strikes a single enemy, causing death. Does not work on enemies immune to instant death. | |||
| 3 | Satellite Beam | Kill 80 enemies after obtaining Grenade Bomb | 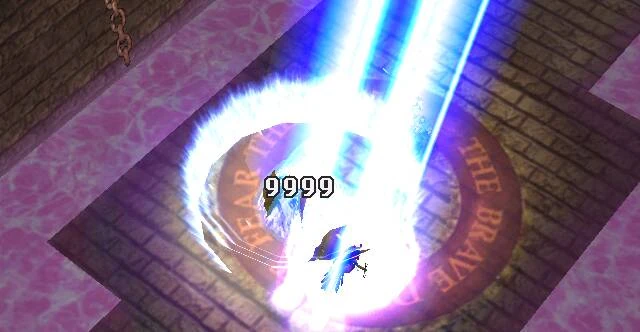
|
| Fires a beam weapon from the sky to hit all enemies for an automatic critical hit of 23⁄16 times normal damage. | |||
| Angermax (Ungarmax) |
Use Satellite Beam 6 times | 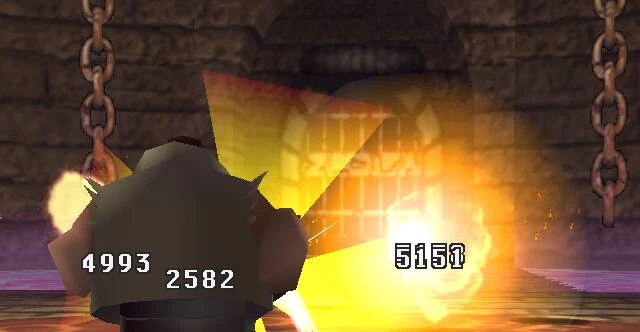
| |
| Fires 18 shots at random enemies for half damage. | |||
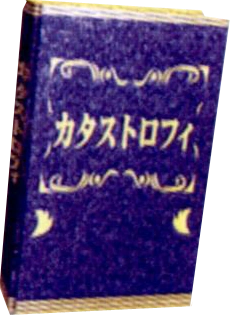
| 4 | Catastrophe | Use the Catastrophe manual after obtaining Barret's other six Limit Break commands. | 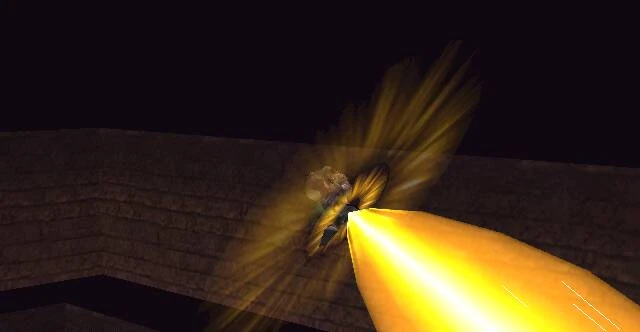
|
| Hits ten times at random enemies for 11⁄4 times normal damage. |
Tifa
- See the Limit Break sequences here.
Instead of selecting a move from a list, Tifa's Limit Breaks consecutively hit the opponent with each move adding on to the previous. Each deals physical damage to a random opponent.
The Limits are selected through a process. Each time the reel hits "Miss", the attack will not be performed. Stopping the reel on "Hit" allows the attack to connect, but it will never be a critical hit, while stopping on "Yeah!" will guarantee a critical hit, approximately doubling the damage. Later skills have "Yeah!" harder to hit and surrounded by "Miss".
| Level | Name | Obtained / Effect | Image |
|---|---|---|---|
| 1 | Beat Rush | Default | 
|
| Runs up and punches the enemy a few times, dealing 11⁄4 times normal damage to a single target. | |||
| Somersault | Use Beat Rush 9 times. | 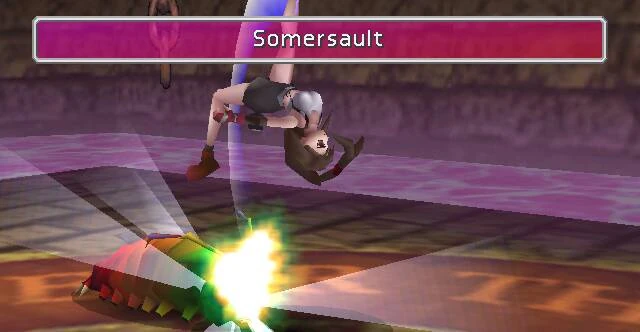
| |
| Somersaults in the air while kicking the enemy, dealing 13⁄8 times normal damage to a single target. | |||
| 2 | Waterkick | Kill 96 enemies | 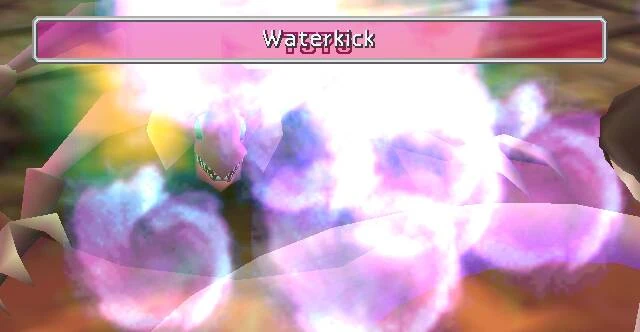
|
| A circling sweep kick accompanied by a blast of water, dealing 11⁄2 times normal damage. | |||
| Meteodrive | Use Waterkick 7 times. | 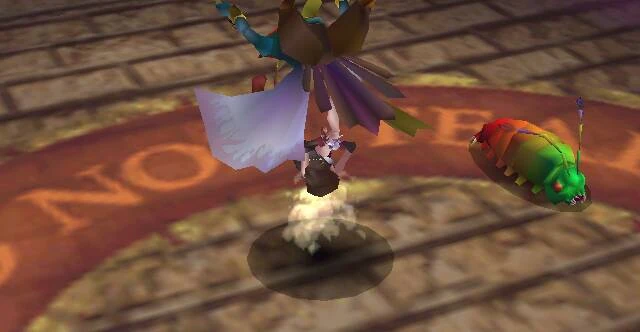
| |
| Picks up the enemy in a vertical suplex position and slams them to the ground, dealing 15⁄8 times normal damage. | |||
| 3 | Dolphin Blow | Kill 96 enemies after obtaining Waterkick. | 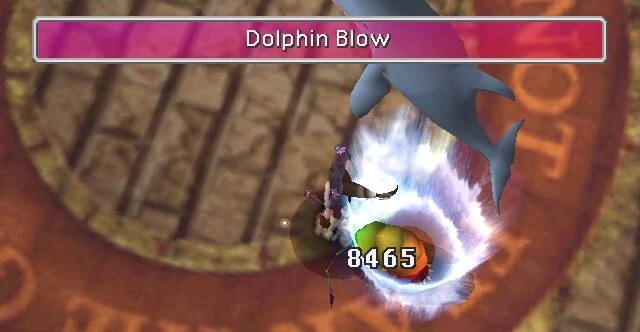
|
| Uppercut accompanied by water and a dolphin, dealing 13⁄4 times normal damage to a single target. | |||
| Meteor Strike | Use Dolphin Blow 6 times. | 
| |
| Picks up the enemy, spins it around, jumps high into the air and flings it downwards, dealing 17⁄8 times normal damage to a single target. | |||
| 4 | Final Heaven | Use the Final Heaven manual after obtaining Tifa's other six Limit Break commands. | 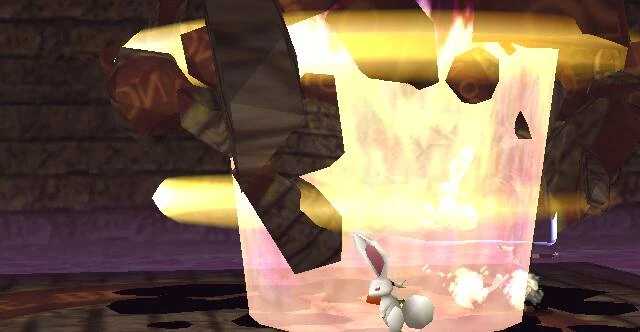
|
| Creates a giant energy blast with a punch, dealing 25⁄8 times normal damage to a single target. |
Aeris
- See the Limit Break sequences here.
Most of Aeris's Limit Breaks revolve around healing the party, and a few buff the party up. They also have the theme of drawing power from the earth, as Aeris was originally planned to be a Geomancer. Fury Brand instantly fills the other two party members' Limit Break bars. Aeris's ultimate Limit Break requires a bit of work to find and teach, but fully heals the party and makes them invincible.
| Level | Name | Obtained / Effect | Image |
|---|---|---|---|
| 1 | Healing Wind | Default | 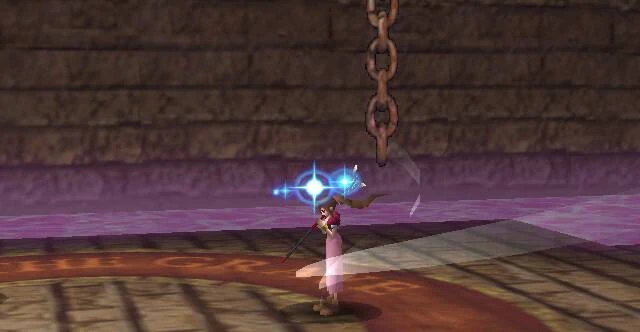
|
| Cures entire party for half of maximum HP. | |||
| Seal Evil | Use Healing Wind 8 times | 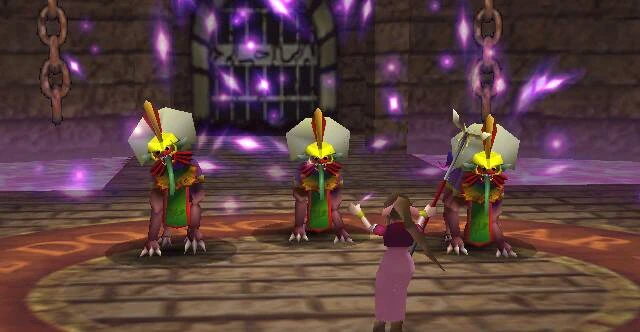
| |
| Casts Stop and Silence on all targets if not immune. | |||
| 2 | Breath of the Earth | Kill 80 enemies | 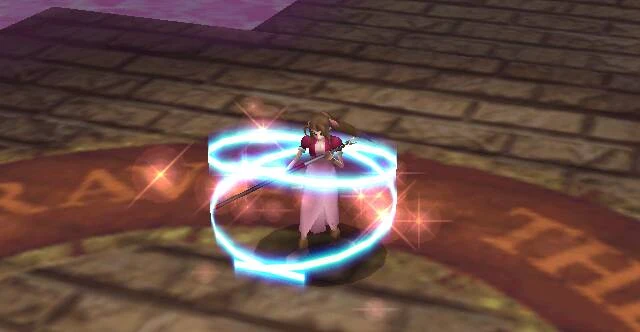
|
| Cures 'Sleep', 'Poison', 'Sadness', 'Fury', 'Confusion', 'Silence', 'Slow', 'Stop', 'Frog', 'Small', 'Slow-numb' and 'Petrify'. | |||
| Fury Brand | Use Breath of the Earth 6 times. | 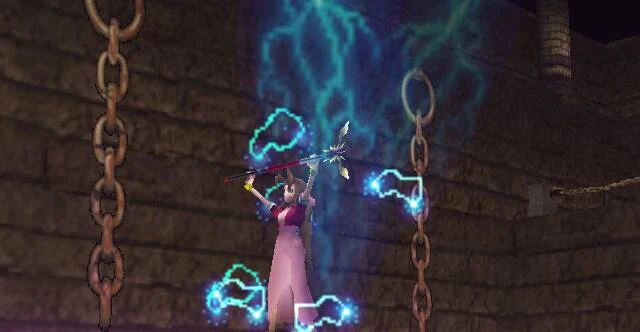
| |
| Fills the two ally Limit Break bars to maximum. | |||
| 3 | Planet Protector | Kill 80 enemies after obtaining Breath of the Earth | 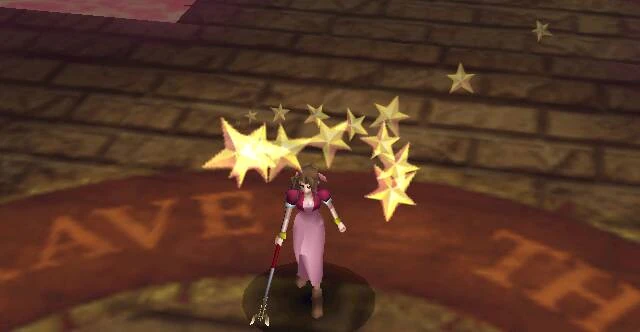
|
| Gives all party members temporary invincibility. | |||
| Pulse of Life | Use Planet Protector 5 times. | 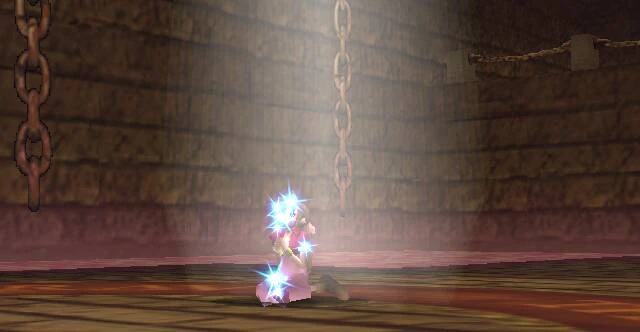
| |
| Fully restores HP and MP and cures all negative status effects. | |||
| 4 | Great Gospel | Use the Great Gospel manual after obtaining Aeris's other six Limit Break commands. | 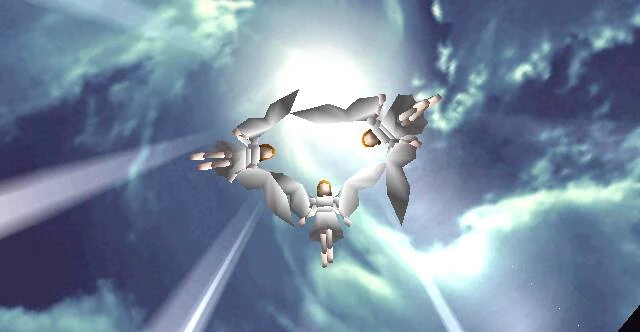
|
| Completely restores the HP and MP of the party, and makes the party temporarily invincible to all physical and magical attacks. |
Red XIII
- See the Limit Break sequences here.
Red XIII's lower-level Limit Breaks involve augmenting his stats, particularly through the use of Haste, which boosts his speed. His later Limit Breaks hit multiple enemies, and his ultimate Limit Break, Cosmo Memory, hits all enemies for almost eight times damage, allowing it to easily do 9,999 damage at a relatively low level.
| Level | Name | Obtained / Effect | Image |
|---|---|---|---|
| 1 | Sled Fang | Default | 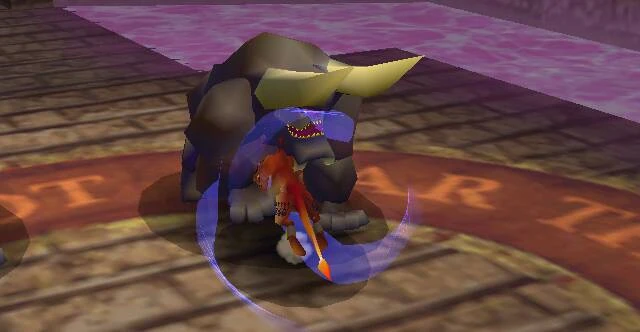
|
| Shoots out and pounces on an enemy, dealing 3 times normal damage. | |||
| Lunatic High | Use Sled Fang 8 times | 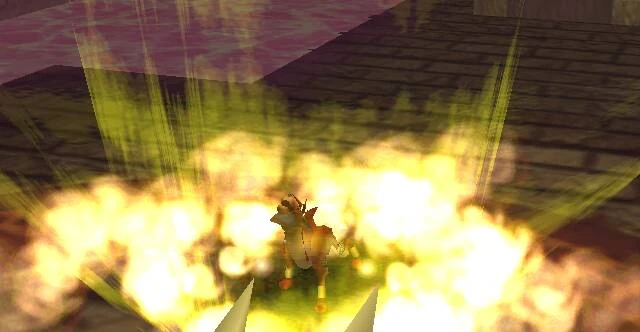
| |
| Adds Haste status to the party and raises Red XIII's "Defense %" by 50% for every party member still alive. | |||
| 2 | Blood Fang | Kill 72 enemies | 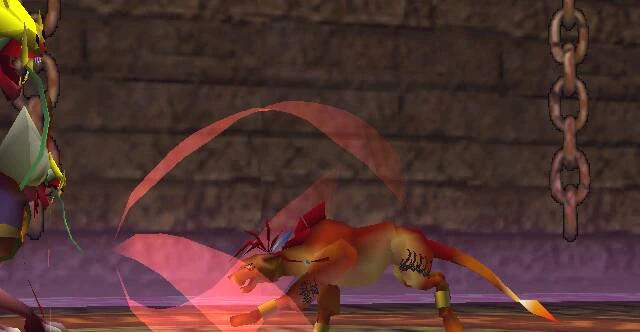
|
| Dashes out at a single enemy dealing 11⁄4 times normal damage, and absorbs some HP and MP. The HP/MP absorbed is equal to roughly 25% of the damage dealt. | |||
| Stardust Ray | Use Blood Fang 7 times. | 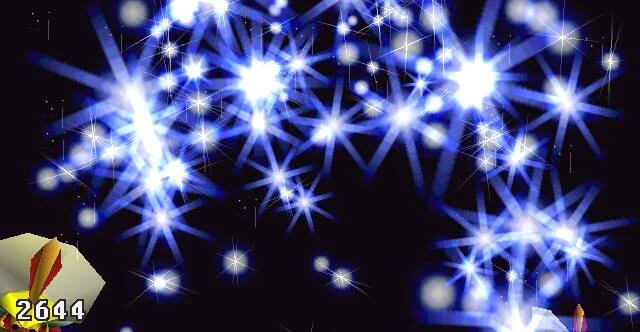
| |
| Stars rain down upon the enemies, hitting ten times randomly for 5⁄8 normal damage each time. | |||
| 3 | Howling Moon | Kill 72 enemies after obtaining Blood Fang | 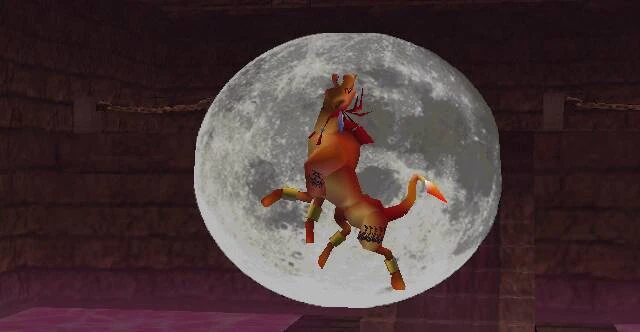
|
| Howls at the moon, which adds Haste and Berserk to Red XIII, and boosts his attack by 60%. This Modifier cannot exceed 100%. | |||
| Earth Rave | Use Howling Moon 6 times. | 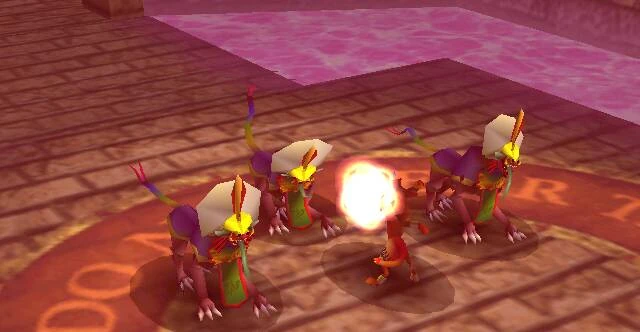
| |
| Attacks random enemies 5 times, doing 17⁄8 times normal damage. | |||
| 4 | Cosmo Memory | Use the Cosmo Memory manual after obtaining Red XIII's other six Limit Break commands. | 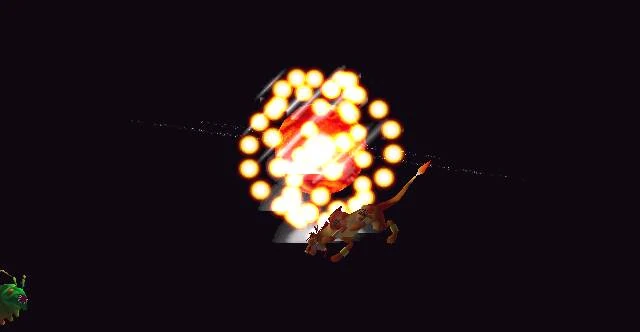
|
| Howls to Cosmo Canyon, summoning a massive beam of plasma that hits all enemies for 713⁄16 times normal damage. |
Yuffie
- See the Limit Break sequences here.
Yuffie's Limit Breaks have fair power, and most of them hit multiple enemies. She learns her Limit Breaks slightly quicker than other party members. Her Clear Tranquil is one of the two healing Limit Breaks not learned by Aeris; the other one is Cait Sith's Moogle Dance. All of Yuffie's Limit Breaks, besides Clear Tranquil, are ordinary Limit attacks.
| Level | Name | Obtained / Effect | Image |
|---|---|---|---|
| 1 | Greased Lightning | Default | 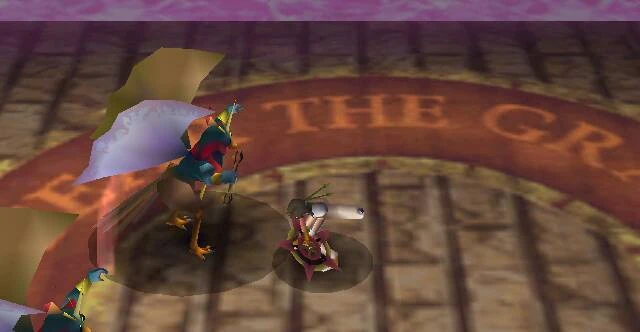
|
| Dashes at an enemy and strikes hard with her weapon, inflicting 31⁄8 times normal damage. | |||
| Clear Tranquil | Use Greased Lightning 8 times | 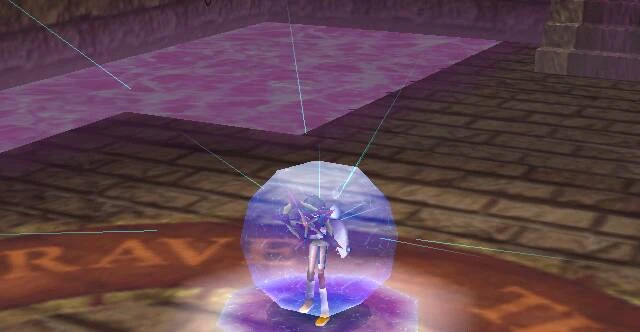
| |
| All party members have their HP restored by half of their maximum HP. | |||
| 2 | Landscaper | Kill 64 enemies | 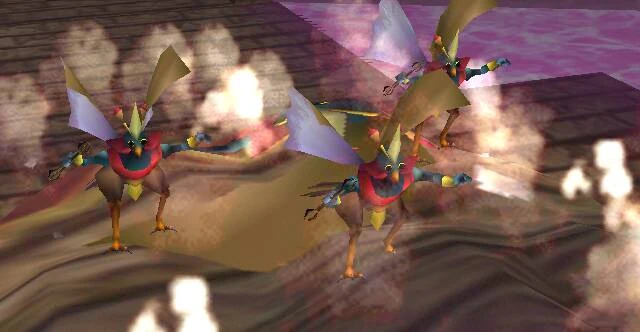
|
| Damages all enemies with an earthquake, doing 3 times normal damage. Misses flying targets. This is an earth-elemental attack. | |||
| Bloodfest | Use Landscaper 7 times. | 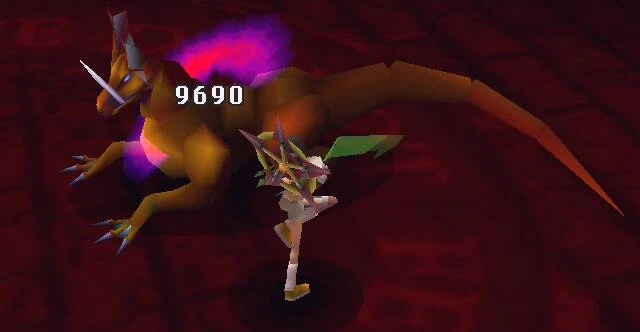
| |
| Attacks random enemies ten times, doing 5⁄8 times normal damage each time. | |||
| 3 | Gauntlet | Kill 64 enemies after obtaining Landscaper | 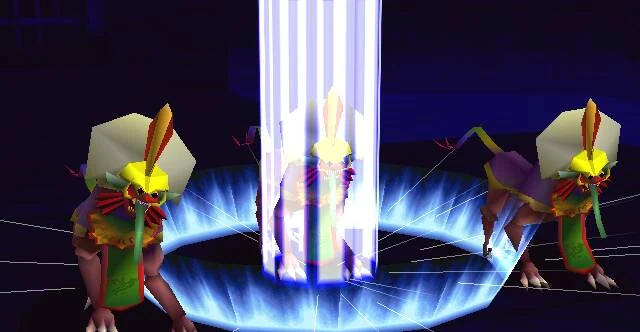
|
| Launches a large bomb that hits all enemies, inflicting 13⁄4 times normal damage. Ignores enemy's defense stats when calculating damage. Always a critical hit. | |||
| Doom of the Living | Use Gauntlet 6 times. | 
| |
| Attacks random enemies 15 times, doing 5⁄8 times normal damage. | |||
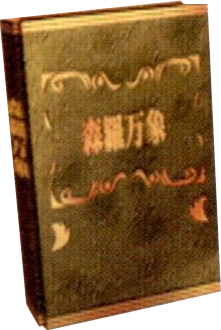
| 4 | All Creation | Use the All Creation manual after obtaining Yuffie's other six Limit Break commands. | 
|
| Hits all enemies with a powerful beam of energy, doing 8 times normal damage. |
Cait Sith
- See the Limit Break sequences here.
Unlike most characters, Cait Sith only has two Limit Breaks, Dice and Slots. The damage they inflict is random, so Cait Sith's Limit Breaks could be strong or weak depending on the results.
| Level | Name | Obtained / Effect | Image |
|---|---|---|---|
| 1 | Dice | Default | 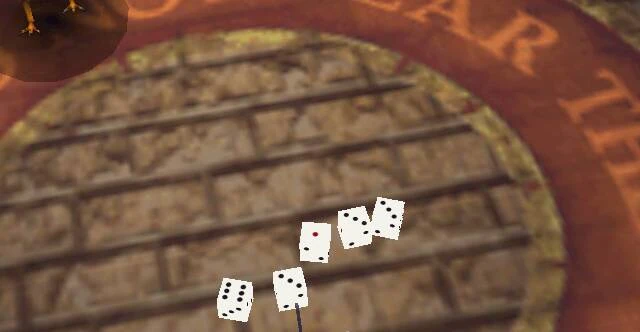
|
| Throws a number of dice down (every ten levels another die is added to the maximum of 6 dice at Lv 60 and above). The sum of the dice "X" is taken along with the sum of the highest repeat of a number "Y". Damage dealt by Dice = X * Y * 100 | |||
| 2 | Slots | Kill 40 enemies | 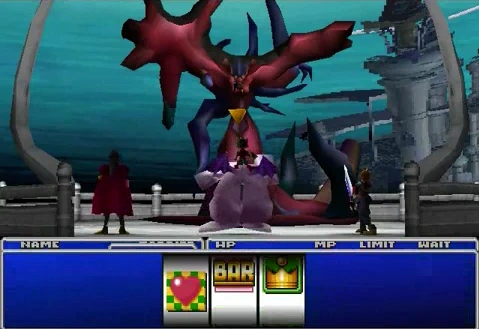
|
| By using a slot machine, the outcome of the reels determines what various effects will occur. |
| Name | Combination | Effect | Image |
|---|---|---|---|
| Toy Soldier | Crown/Crown/Crown | Toy soldiers appear and fire at all of Cait's enemies dealing five times normal damage. | 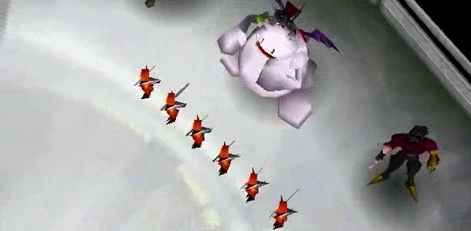
|
| Mog Dance | Star/Star/Star | A moogle appears and dances restoring all allies' HP and MP. | 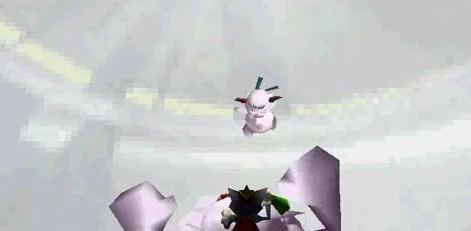
|
| Lucky Girl | Heart/Heart/Heart | A cat-girl appears. Makes all characters' attacks automatic critical hits until the battle ends or a character is KO'd (ceases function for that character). | 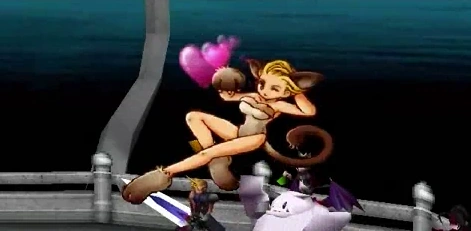
|
| Transform | Moogle/Moogle/Moogle | Will fail if Cait Sith is alone in the battle. Cait's allies disappear and his moogle grows larger; his new stats are the summation of all three allies, but still cannot surpass the natural limits (e.g. he cannot surpass 9999 HP or 255 strength.) In this form, he can do anything Cait can do, except using Limit Breaks. When the battle is over, the amount of HP and MP left are split among all three characters (and in the process, anyone who was dead before Transform was used is revived). This means that using this move may drop the party's current HP level if their HP amount is over 3000 points. | 
|
| Game Over | Face/Face/Face | Causes instant death to all enemies. Game Over is not blocked by death immunity and therefore is effective against any enemy. If the battle is an attack from both sides, only one side of the enemy party is hit, and thus not all enemies are killed. | 
|
| Death Joker | Face/Face/Bar | All allies are instantly killed. This cannot be prevented by normal means of death immunity with Safety Bit or Death Force. If the battle is a Side Attack, only one side of the party is hit, and thus the battle will not end in a Game Over, unless the side not hit was already KOed or under other conditions that would normally result in a Game Over. | 
|
| Summon | Bar/Bar/Bar | A summon is summoned.Random = Rnd(1..10) + Rnd(1..10) + Rnd(1..10) + Rnd(1..10) Variable = Random + [Cait Sith's Level / 21] ID = [Variable / 2] - 3 [1]The ID is then given to the order of the summons. The lower Cait Sith's level, the more likely the player is to use the lower summons and vice-versa. Knights of Round has a very small chance only at higher levels. The attack name is the Materia name, not the summon's name with exceptions to Gunge Lance and Fat Chocobo. |
|
| Toy Box | Else | A random object of seven is dropped on one enemy. The abilities are not named in-game but are listed in the Final Fantasy VII Ultimania Omega[2]: | |
| Falling Rock (落石, Rakuseki?) | Hits a single enemy for 2 times normal damage. | 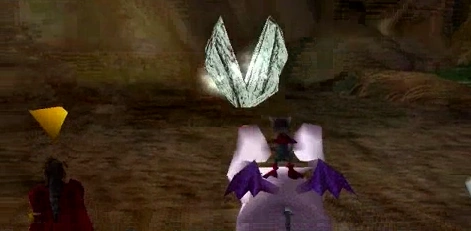
| |
| Icicles (つらら, Tsurara?) | Hits a single enemy for 21⁄2 times normal damage. | 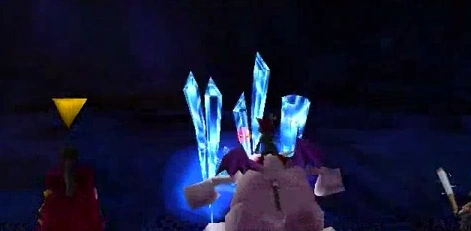
| |
| Weight (分銅, Fundō?) | Hits all enemies for 3 times normal damage. | 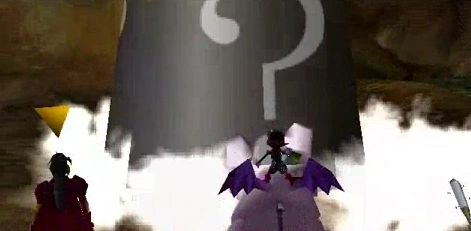
| |
| Hammer (ハンマー, Hanmā?) | Hits a single enemy for 31⁄2 times normal damage. | 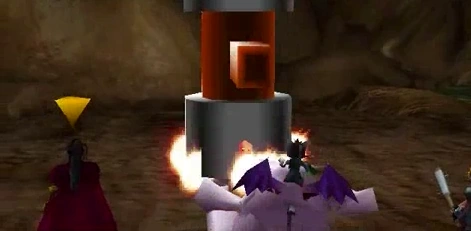
| |
| Fat Chocobo (デブチョコボ, Debu Chokobo?) | Hits a single enemy for 4 times normal damage. | 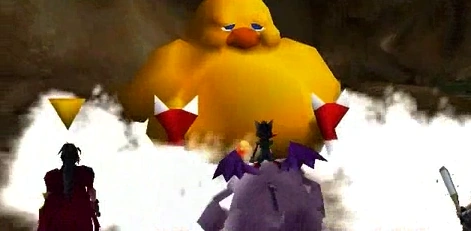
| |
| Hell House (ヘルハウス, Heru Hausu?) | Hits a single enemy for 41⁄2 times normal damage. | 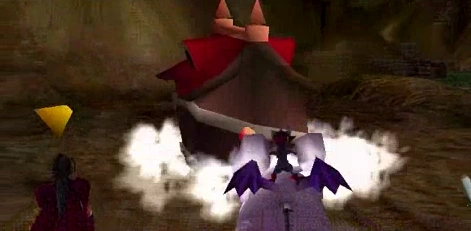
| |
| Meteorites (隕石, Inseki?) | Hits a single enemy for 5 times normal damage. | 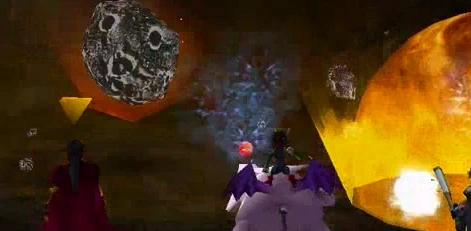
| |
Vincent
- See the Limit Break sequences here.
Vincent has only one Limit Break for each of the four levels, and when he initiates one, he turns into an uncontrollable monster and stays that way until the battle is over, or he falls into Death status, which results in him reverting. When he shifts his form, Vincent's stats increase and his HP refills, but he cannot shift back at will.
While his Limit Breaks can be powerful, they are risky, as some of the elemental attacks can heal enemies. During his transformation Vincent is immune to Berserk, Frog and Confusion. Vincent learns his new Limit Breaks the fastest. The offensive properties of Elemental or Added Effect do not carry over to his Limit Break forms, perhaps because he's not using his weapon to attack. Defensive Materia set-ups continue to work. Vincent's Limit Break forms behave oddly under All Lucky 7s since he seems to revert to using his gun though there is no animation for it.
In the following table, the first attack listed in the description does damage based on Vincent's physical attack, while the second does damage based on Vincent's magic attack. He will use the physical attack 70% of the time.
| Level | Name | Obtained / Effect | Image |
|---|---|---|---|
| 1 | Galian Beast | Default | 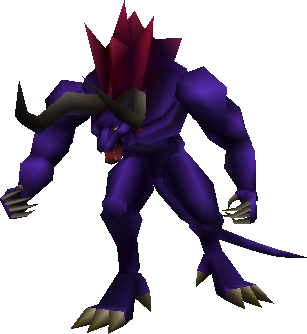
|
| Vincent transforms into "Galian Beast", a wild purple beast. Defense increases by 20%, and Dexterity by 50%. Sets 130 % Max HP. | |||
| Berserk Dance | Physical attack for 11⁄2 times normal damage to a single target. | File:Berserk dance.png | |
| Beast Flare | Magical attack for 33⁄4 times normal fire-elemental damage to all targets. | File:Beast flare.png | |
| 2 | Death Gigas | Kill 40 enemies | 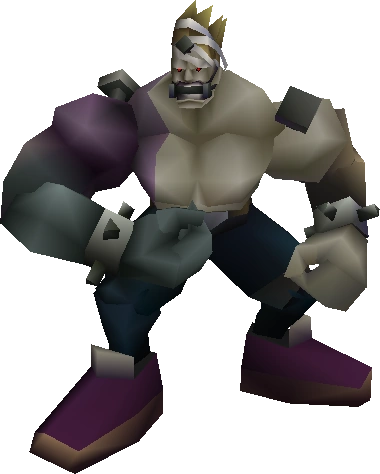
|
| Vincent transforms into "Death Gigas", a hulking monster. Defense increases by 50%, MDefense decreases by 70%, and Dexterity decreases by 20%. Sets 200 % Max HP. | |||
| Gigadunk | Physical attack for 25⁄8 times normal damage to a single target. | File:Gigadunk.jpg | |
| Livewire | Magical attack for 43⁄8 times normal lightning-elemental damage to all enemies. | File:Livewire.jpg | |
| 3 | Hellmasker | Kill 56 enemies after obtaining Death Gigas | 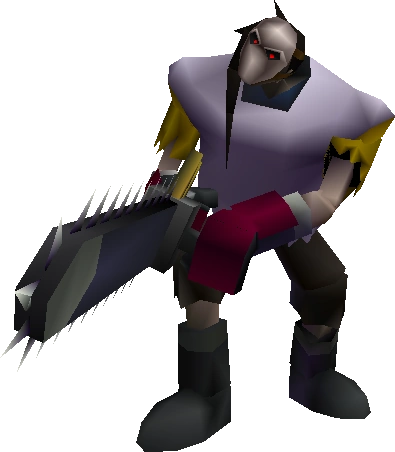
|
| Vincent transforms into "Hellmask", a thug with a rotating head wearing a hockey mask who wields a chainsaw. Defense and MDefense increase by 50%. | |||
| Splattercombo | Physical attack for half damage to five random targets. | 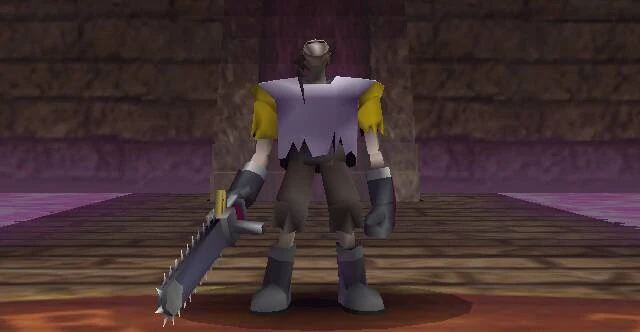
| |
| Nightmare | Inflicts Sleep, Poison, Silence, Confuse, Frog and Mini to a single opponent. | 
| |
| 4 | Chaos | Use the Chaos manual after obtaining Vincent's other three Limit Break commands. | 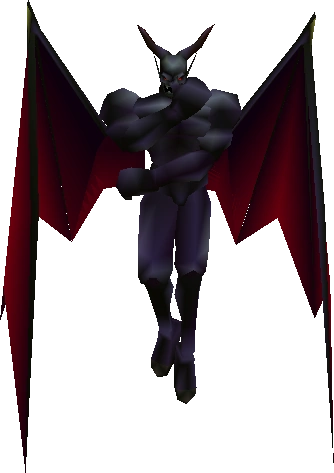
|
| Vincent transforms into "Chaos", a winged demon. Defense and MDefense increase by 100%. | |||
| Chaos Saber | Physical attack for 21⁄2 times normal damage to all enemies. | 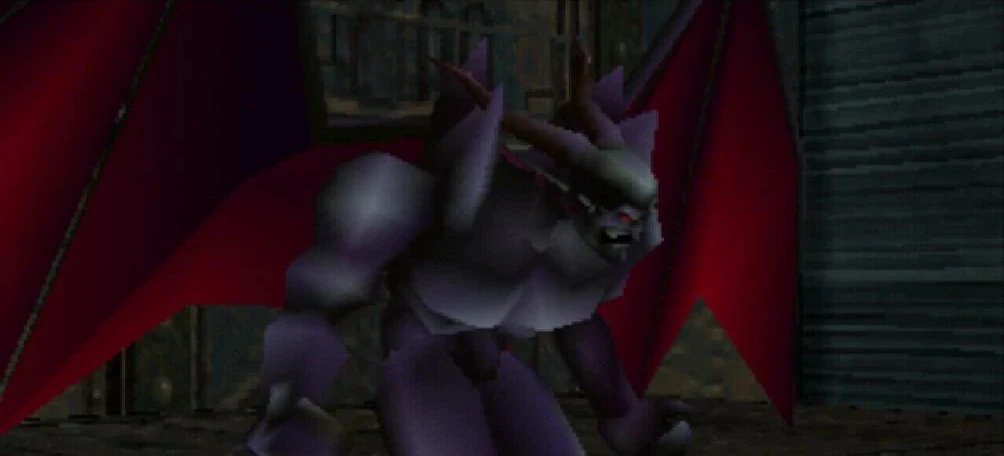
| |
| Satan Slam | Has a 28% chance to inflict Instant Death, or if enemies are immune to death, does 55⁄8 times normal damage to all enemies. | 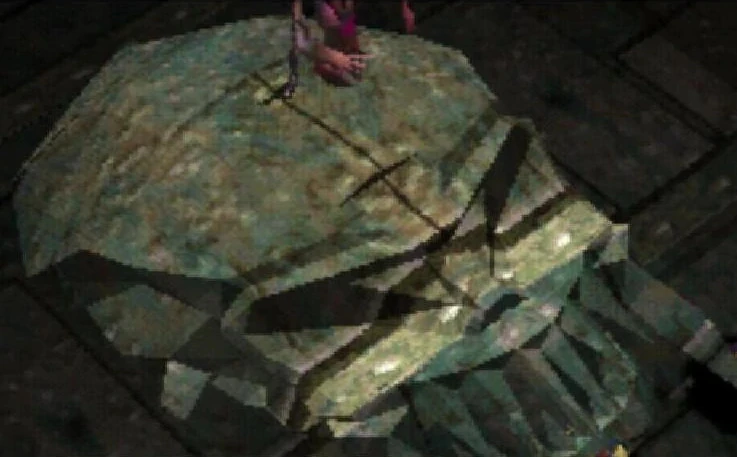
|
Cid
- See the Limit Break sequences here.
Cid's Limit Breaks often hit multiple enemies or hit multiple times, letting him do massive damage. His strongest Limit Break, Highwind, could potentially do 9999 x 18 damage, a feat only Barret's Angermax can match—even Cloud's infamous Omnislash cannot do this much damage. Cid also learns his Limit Breaks fairly quickly. Cid's Limit Breaks use his physical strength to determine their power.
| Level | Name | Obtained / Effect | Image |
|---|---|---|---|
| 1 | Boost Jump | Default | 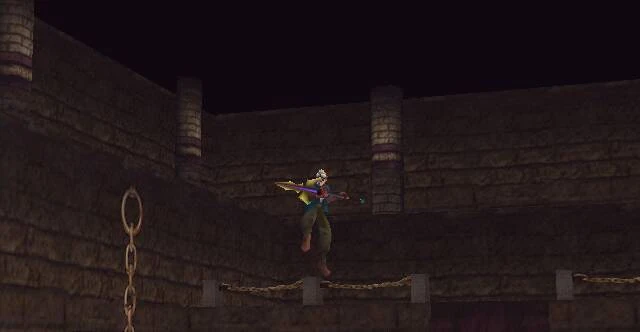
|
| Jumps into the air and strikes down with a spear into an enemy, doing 31⁄4 times normal damage. | |||
| Dynamite | Use Boost Jump 7 times. | 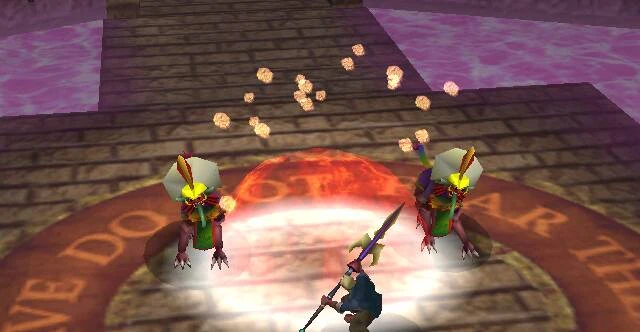
| |
| Lights a stick of dynamite with a cigarette, then hurls it at the enemy party, doing 21⁄4 times normal damage to all enemies. | |||
| 2 | Hyper Jump | Kill 60 enemies | 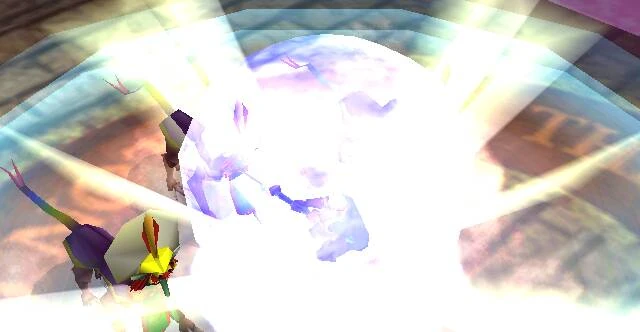
|
| Jumps up and strikes down with a spear, causing an explosion that does 31⁄2 times normal damage to all enemies, and has a 20% chance to inflict Instant Death. | |||
| Dragon | Use Hyper Jump 6 times | 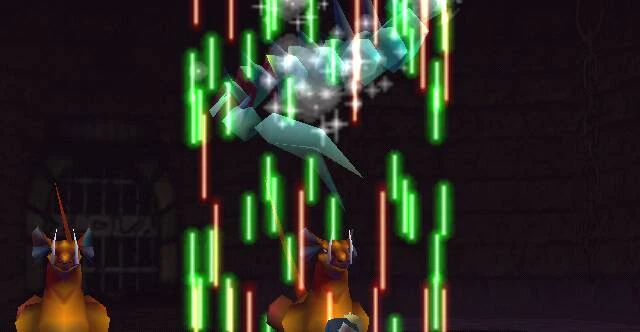
| |
| Summons a dragon that attacks an enemy, doing 11⁄4 times normal damage and healing Cid's HP and MP by an amount equal to approximately 25% of the damage dealt. The amount of HP and MP healed is capped at the enemy's current HP. | |||
| 3 | Dragon Dive | Kill 76 enemies after obtaining Hyper Jump | 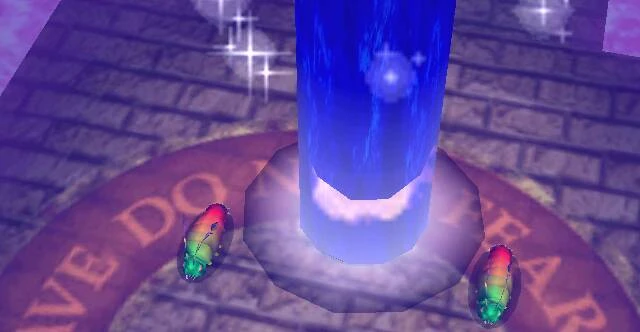
|
| Strikes six random enemies with diving attacks, doing 17⁄16 normal damage, and has a 28% chance to inflict Instant Death. | |||
| Big Brawl | Use Dragon Dive 5 times. | 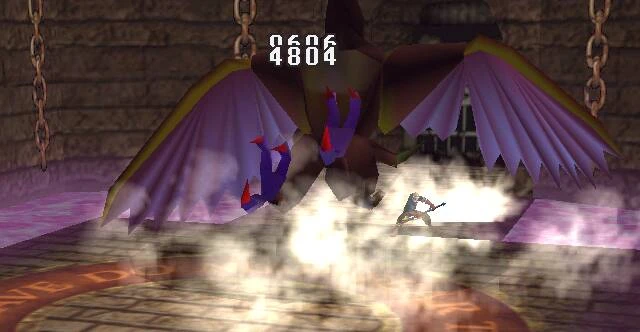
| |
| Slashes eight random enemies, doing 11⁄8 normal damage. | |||
| 4 | Highwind | Use the Highwind manual after obtaining Cid's other six Limit Break commands. | 
|
| Summons the Highwind to drop missiles on eighteen random enemies, doing 11⁄16 times normal damage. |
Behind the scenes
Development
Early screenshots of Final Fantasy VII featuring an early organization of the status window
With each Final Fantasy the entire team contributes to the initial planning and the best ideas are picked from among them. During that highly individual period of brainstorming Tetsuya Nomura came up with the idea of adding Limit Breaks to the battle system as an expansion of the Desperation Attacks of Final Fantasy VI. Since it was planned players would be free to build their party via Materia, Limit Breaks were envisioned as a way to bring out the characters' individual personalities and the unique character animations would further emphasize their individuality.[3]
The first screens of the game with the less defined models in 1995 shows the Limit gauge next to the character's name on the left of the HP. Barret also seemed to use Hammer Blow as a normal attack, indicating his gun-arm was initially meant only for Limit Breaks.
It appears the text in the upper portion of the screen next to each party member's avatar would have indicated status changes. The Japanese kanji for eight different statuses appear all the time, with them likely to have been highlighted should the character have a given status.

The Special gauge as seen in the 1996 Demo release.
The release of the Japanese 1996 demo showed the reorganization of the status window to the format used in the game's final version and a working system and animations. In the English version of the 1996 demo release, there were a number of differences that from the final English version concerning Limit Breaks. They were called "Special Abilities," and to the "Special" command, despite being called "Limit Breaks" in the Japanese demo. Cloud has his first two Limit Breaks available, Braver; a strong attack; and Cross Slash; a strong attack which inflicts Paralysis. Barret can use Heavy Shot, a stronger version of his attack, and Aeris has Healing Wind.
While there were no changes for the Japanese version from the Japanese demo to the final release, the 1996 Aeris demo saw a number of changes between itself and the 1997 Tifa demo that would make it closer to how the final version would be, mainly because the game had been released in Japan by that time. The translation had been altered, and the functionality of Braver and Cross-slash has been changed to what is seen in the final game.
The most notable change to the Limit Break system for the final game was the chance to explore the system fully.
Other Limit Breaks
The pilot of the Highwind is attributed a level when spoken to which increases with plot progression. Flying over the North Crater after defeating Diamond Weapon changes the pilot's name to "Learner Pilot (L14 Limit Break!)", with the lettering of "Limit Break" flashing in multiple colors. The pilot then becomes "Full Pilot" after the Raid on Midgar.
In the Beginner's Hall in Sector 7 Slums, Cloud can advise some children on the use of Limit Breaks and the girl enters the state after receiving a pummeling from a boy, turning the tables.
Other appearances
A number of the Limit Breaks have been alluded to throughout the Compilation of Final Fantasy VII, and beyond. This can be largely attributed to the number of times Cloud has appeared outside the Compilation of Final Fantasy VII. Furthermore, many Limit Breaks which originated from Final Fantasy VII have been alluded to in other games in the series and by Square Enix.
Compilation of Final Fantasy VII
Final Fantasy VII: Advent Children
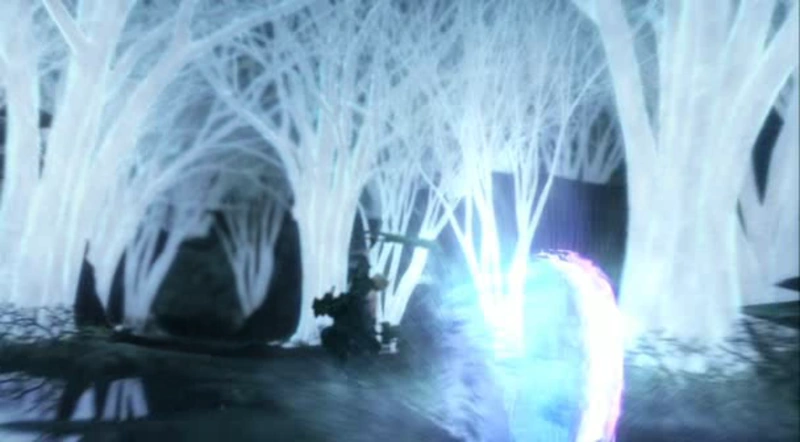
Cloud's Blade Beam.
- See the Limit Break sequences here.
Many of the characters perform techniques based on their Limit Breaks from Final Fantasy VII. Cloud uses Blade Beam against Loz in the Forgotten City and later against Sephiroth, Climhazzard against Bahamut SIN, Braver against both Bahamut SIN and Yazoo and Loz (in a highway tunnel), and Finishing Touch against Kadaj.
In Advent Children Complete, Cloud also uses the original Omnislash in the battle with Sephiroth who evades or parries every strike with the exception of the final blow, which is interrupted as he impales Cloud with the Masamune. Cloud uses a stronger variation of Omnislash, known as Omnislash Version 5, to defeat Sephiroth. The attack utilizes the Fusion Swords and involves Cloud separating the sword into its individual components and attacking once with each sword. The attack was called "Omnislash Version 5" as it was the fifth version of the attack designed for the film. An extended version of this attack used thirteen slashes instead of the six. Due to the reasoning for the "Version 5" of the attack in the original version of the film, this attack is known to fans as "Omnislash Version 6."
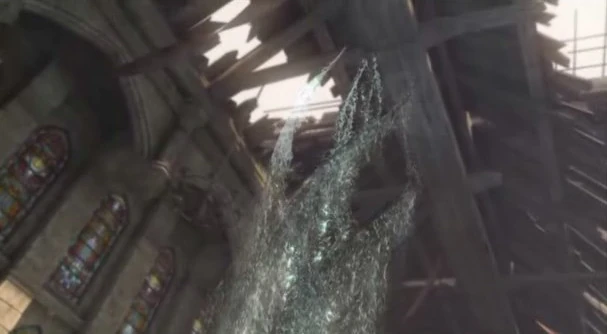
Great Gospel.
Barret fires a green energy blast at Bahamut SIN, similar to Big Shot and Mindblow. Tifa uses attacks similar in appearance to Beat Rush, Waterkick, Dolphin Blow (though without the appearance of water and a dolphin), Somersault, and Meteor Strike when fighting Loz in the Sector 5 Church.
Aerith uses Great Gospel from the Lifestream to cure Geostigma victims.
Crisis Core -Final Fantasy VII-
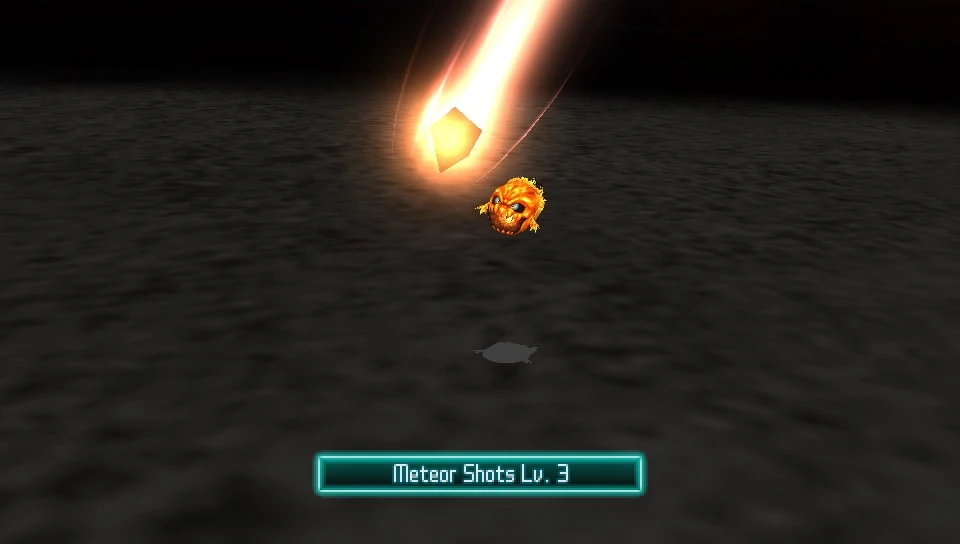
Zack using the Meteor Shots attack.
Zack uses a Limit Break system that relies on other characters being rolled on an automated slots system known as Digital Mind Wave. The Crisis Core Complete Guide[4] explains that when a person's spirit energy rises to its ultimate limit, for a short while it aligns with and emits from the person's body.
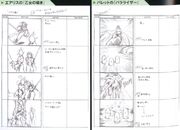
The guide also mentions Zack being unusual in that he can copy Limit Breaks, such as taking Aerith's Healing Wind from Final Fantasy VII and turning it into his Limit Break, Healing Wave. Three Cloud icons allows Zack to use Meteor Shots, the animation of which resembles Cloud's Meteorain Limit Break.
While Cissnei doesn't appear in Final Fantasy VII, her attack, Lucky Stars, gives the Critical status to Zack, much-like Cait Sith's Lucky Girl gives the status to the party. Lining up three Angeal icons allows Zack to use a technique similar to Tifa's Beat Rush, but potentially greater in power, called "Rush Assault."
Dirge of Cerberus -Final Fantasy VII-
Vincent's ability to transform into different creatures is further explained. Vincent is seen in both his Galian Beast form and his Chaos form, albeit their designs are altered from their original designs to incorporate Vincent's appearance into his transformations.
Vincent transforms into Galian Beast when the Limit Breaker item is used. Chaos is playable during the final level and allows him to hover briefly, perform a series of attacks, perform a jump equal to a double jump, and wield a more threatening variation of the Death Penalty gun.
The tutorial is framed as a training session during Vincent's days as a Turk, and features a Limit Break which merely boosts Vincent's strength and defense for a period of time. The same effect appears when Vincent uses a Limit Breaker during his first duel against Weiss (when he uses Chaos's power without transforming) and as Chaos himself.
Final Fantasy VII G-Bike
Support characters could perform a Unison Limit Break with Cloud. Using a Unison Limit Break with Tifa allowed her to use Final Heaven against an enemy.
")
")
")
")
Final Fantasy VII Remake
Cloud and Barret use their Limit Breaks, which appear to be Braver and Big Shot, in the first gameplay trailer revealed 5th December 2015. The E3 2019 footage shows various characters using their Limit Breaks, including Cloud's Cross-slash and Aerith's Healing Wind.
Final Fantasy VIII

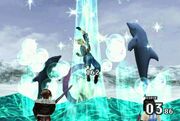
Zell's Dolphin Blow.
Zell's Duel Limit Break functions like Tifa's Limit Breaks in terms of the combo attacks. Instead of her Slots system, Zell uses a character input system. His basic attack, Punch Rush, is similar to Tifa's basic attack, Beat Rush, the attacks Dolphin Blow and Meteor Strike are given the same name as Tifa's Limit Breaks. His ultimate Limit Break, My Final Heaven, is named the same as Tifa's Final Heaven.
Final Fantasy IX
Climhazzard is a Sword Art available to Steiner and Beatrix, an ability originating from Cloud's Limit Break of the same name. Unlike the original, Climhazzard attacks all enemies for twice normal damage.
Final Fantasy XIV
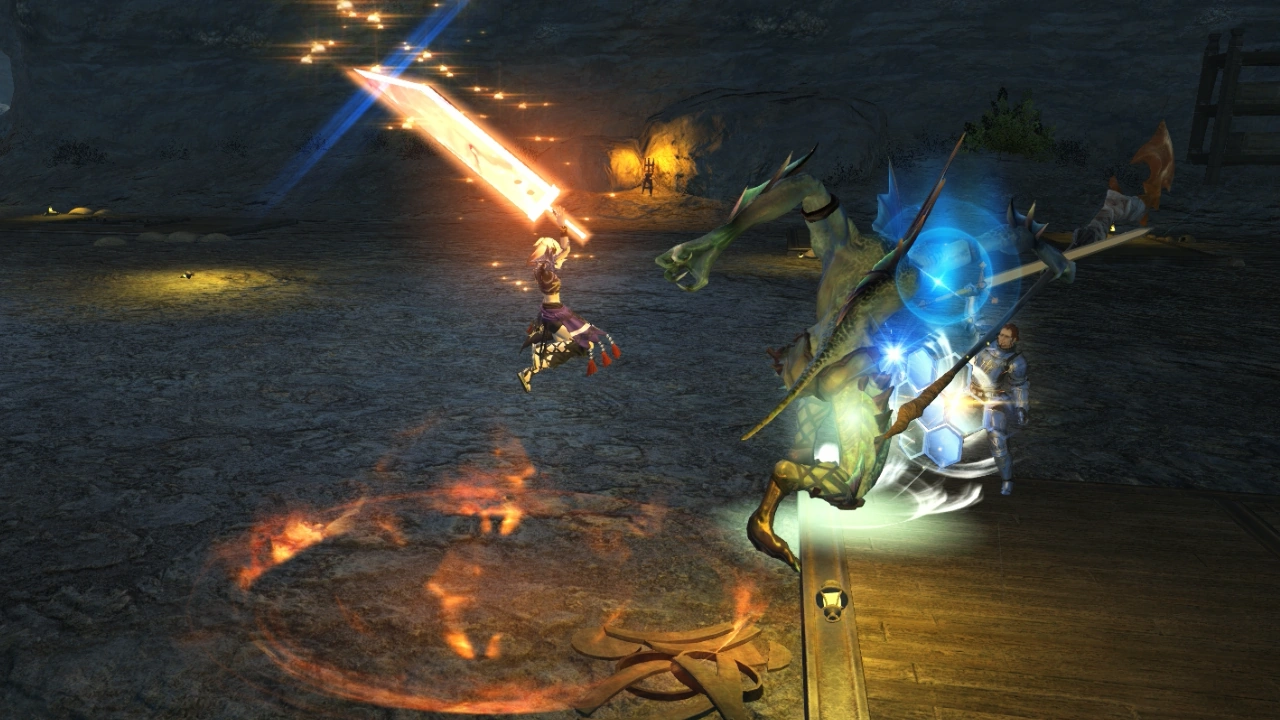

A player using "Braver". Cloud's Buster Sword is featured in the animation.
Several classes and jobs use Limit Breaks that appear in Final Fantasy VII. Only a handful of them were included initially, but as of Patch 3.0, each job received their own unique level 3 Limit Break, increasing this number.
For melee damage dealer jobs, any of them can use Cloud's "Braver" as their level 1 Limit Break. Monks use Tifa's "Final Heaven" as their level 3 Limit Break, Samurai use Yuffie's "Doom of the Living", and Dragoons use "Dragonsong Dive" which is similar to Cid's "Dragon Dive". For physical ranged damage dealing classes/jobs, any of them will use Barret's "Big Shot" as their level 1 Limit Break, while Machinists use his "Satellite Beam" as their level 3 Limit Break. For healer classes/jobs, any of them can use Aerith's "Healing Wind" as their level 1 Limit Break, and her "Breath of the Earth" as their level 2. White Mages use her "Pulse of Life" as their level 3 Limit Break. While undertaking Command Missions with your Adventure Squadron, Barret's "Angermax" (purposely spelled "Ungarmax" in the game) becomes available to use at any Limit Break level.
Final Fantasy Tactics
The job class Soldier, to which Cloud is the only user, can use Limit abilities when equipped with the Materia Blade. While many of the names are the same as in Final Fantasy VII, the attacks' effects differ. Braver, changed to Brave Slash in The War of the Lions release, is a quick strike.
Cross-slash, renamed Cross Slash in the The War of the Lions release, is his second quickest attack where he slices twice in a cross pattern, similar to the original attack, towards the enemy. Blade Beam inflicts damage commensurate with the damage the user has endured, while Climhazzard functions the same but commensurate with the damage the unit being attacked has already endured and with a far higher JP cost, both only sharing their names with the original attacks, not the attack itself. Meteorain summons a single meteor from the sky.
Finish Touch, renamed Finishing Touch for The War of the Lions release, inflicts Death, Doom, or Petrification, but will not do damage if the enemies are immune. Omnislash is a strong attack, while Cherry Blossom, his ultimate attack, is based on the summon Kujata's Tetra-Disaster, and not one of Cloud's Limit Breaks from Final Fantasy VII.
Dissidia Final Fantasy

Cross Slash.
Cloud's attacks originate from Final Fantasy VII, a vast number being his seven Limit Breaks. Two of his Brave attacks, Climhazzard and Blade Beam, are used but slightly redesigned. Climhazzard strikes the opponent and pulls them up before slamming them down, while the sheer size of some enemies in Final Fantasy VII means slicing up through them would have looked more plausible. Blade Beam works the same, although due to battles being one-on-ones there are no repercussion shockwaves for other enemies.
All three of his HP attacks are Limit Breaks. Cross-Slash will make three strikes with the symbol identical to the one in Final Fantasy VII. However, it will only make as many parts of the symbol as he hits with. Meteorain works slightly differently in that Cloud sends the meteors up in the air before slinging them down, unlike the original attack in Final Fantasy VII which just calls them down. The meteors are smaller, but faster, similar to Zack's Meteor Shots in Crisis Core. Braver stabs them before unleashing the jump-attack also seen in the original attack.
Cloud's two Brave to HP attacks are also Limit Breaks. Finishing Touch has little in common with the original attack. Cloud jumps in the air and spins around the opponent and unleashes multiple attacks before knocking them down. The other attack is Omnislash Version 5, a weaker variation of Omnislash, which is five attacks and a leap for a final strike.
Omnislash serves as Cloud's EX Burst. The player must tap ![]() to fill up a gauge (a Limit gauge). If it fills he will unleash fourteen strikes before a stronger fifteenth strike. Failing to fill the gauge will cause Cloud to perform only up to three swings and an upward finishing slash.
to fill up a gauge (a Limit gauge). If it fills he will unleash fourteen strikes before a stronger fifteenth strike. Failing to fill the gauge will cause Cloud to perform only up to three swings and an upward finishing slash.
Dissidia 012 Final Fantasy
Tifa joins Cloud, and in EX Mode spins slot reels the same as in her original Limit Break, then performs up to seven punches followed by Final Heaven. Most of her Bravery is derived from her other Limit Breaks, all of which allows her to perform feints. Beat Rush is her basic attack, combo punching a few times. Waterkick performs some low kicks, and once mastered, allows her to use Somersault as her only Brave to HP attack. Dolphin Blow is an aerial uppercut that launches enemies upward.
Two of her HP attacks are Limit Breaks. Meteodrive is a ground attack that lifts the opponent up with her legs, and then slams them into the ground. Meteor Strike can be charged before she pushes the opponent forward, slams the opponent down sending them up, and then smashes them down.
Although only an Assist-only character, Aerith can use Planet Protector and Seal Evil.
In addition, newcomer Laguna has two attacks derived from Barret's limit breaks: Grenade Bomb and Satellite Beam.
Dissidia Final Fantasy NT
")
")
")
.png "DFF2015 Braver (Charged).png (531 KB)")
")
")
")
")
")
Dissidia Final Fantasy Opera Omnia
Many of the original version's Limit abilities are command abilities. With some exceptions, stronger Limits have become EX abilities when adapted to in-game mechanics.
")
")
")
")
")
")
")
")
")
")
")
")
")
")
Theatrhythm Final Fantasy Curtain Call
Omnislash and Omnislash ver. 5 appear as exclusive reactive abilities for Cloud and Cloud #2 respectively. Great Gospel appears as an exclusive reactive ability for Aerith. Final Heaven appears as an exclusive reactive ability for both Tifa and Tifa #2. Satan Slam appears as an exclusive reactive ability for Vincent.
Theatrhythm Final Fantasy All-Star Carnival
Pictlogica Final Fantasy
Cait Sith's Toy Soldier, Lucky Girl, Mog Dance (renamed "Moogle Dance") and Game Over appear. They are Slots abilities of the Gambler. Toy Soldier requires three crowns to align and deals physical damage to all enemies. Lucky Girl requires three hearts to align and increases Luck to the party. Moogle Dance requires three stars to align and restores full HP to the party. Game Over kills all enemies while summoning a random summon.
")
")
")
")
")
")
")
")
")
")
")
")
")
Final Fantasy Airborne Brigade
Characters from Final Fantasy VII use their Limit Breaks when summoned as Legends. In addition, players can obtain certain Limit Breaks to use as abilities.
- Ability Cards
")
")
")
")
")
")
")
")
")
")
")
")
")
")
")
")
")
")
")
")
")
")
")
")
")
")
")
")
")
")
")
")
")
")
")
")
")
")
")
")
")
_SR.png "FFAB Angermax - Orator (F) SR.png (19 KB)")
")
")
")
")
")
_SR%2B.png "FFAB Angermax - Orator (F) SR+.png (19 KB)")
")
")
")
")
")
")
")
")
")
")
")
")
")
")
")
")
")
")
")
")
")
")
")
")
")
")
")
")
")
")
")
")
")
")
")
")
")
")
")
")
")
")
")
")
")
")
")
")
")
")
")
")
")
")
")
")
")
")
")
")
")
")
")
")
")
")
")
")
")
")
")
")
")
")
")
")
")
_UUR.png "FFAB Howling Moon - Aerith (Assist Red XIII) UUR.png (10 KB)")
")
")
")
")
")
")
")
")
")
")
")
")
")
")
")
")
")
")
")
")
")
")
")
")
")
")
")
")
")
")
")
")
")
")
_UR%2B.png "FFAB Toy Soldier - Aerith (Assist Cait Sith) UR+.png (9 KB)")
")
")
")
")
")
")
")
")
")
")
")
")
")
")
")
")
")
")
")
")
")
")
")
")
")
")
")
")
")
")
")
")
")
")
")
")
")
")
")
")
")
")
")
")
")
")
")
")
")
")
")
")
- Legend Cards
")
")
")
")
")
")
")
")
")
")
")
")
")
")
")
")
")
")
")
")
")
")
")
")
")
")
")
")
")
")
")
")
")
")
")
")
")
")
")
")
")
")
")
")
")
")
")
")
")
")
")
")
")
")
")
")
")
")
")
")
")
")
")
")
")
")
")
")
")
")
")
")
")
")
")
")
")
")
")
")
")
.png "FFAB Meteor Strike - Tifa Legend SR (2).png (20 KB)")
")
")
")
")
_-_Tifa_Legend_SR%2B.png "FFAB Meteor Strike (2) - Tifa Legend SR+.png (20 KB)")
")
")
")
")
")
")
")
")
")
")
")
")
")
")
")
")
")
")
")
")
")
")
")
")
")
")
")
")
")
")
")
")
")
")
")
")
")
")
_Legend_UR%2B.png "FFAB Earth Rave - Aerith (Assist Red XIII) Legend UR+.png (10 KB)")
")
")
_Legend_CR.png "FFAB Howling Moon - Aerith (Assist Red XIII) Legend CR.png (9 KB)")
")
")
")
")
")
")
")
")
")
")
")
")
")
")
")
")
")
")
")
")
")
")
")
")
")
")
")
")
")
")
_Legend_SSR.png "FFAB Lucky Girl - Aerith (Assist Cait Sith) Legend SSR.png (9 KB)")
_Legend_SSR%2B.png "FFAB Lucky Girl - Aerith (Assist Cait Sith) Legend SSR+.png (9 KB)")
_Legend_UR%2B.png "FFAB Lucky Girl - Aerith (Assist Cait) Legend UR+.png (10 KB)")
_Legend_UR%2B_2.png "FFAB Lucky Girl - Aerith (Assist Cait) Legend UR+ 2.png (9 KB)")
")
")
")
")
")
")
")
")
")
")
")
")
")
")
")
")
")
")
")
")
")
")
")
")
")
")
")
")
")
")
")
")
")
")
")
")
")
")
")
")
")
")
")
")
")
")
")
")
")
")
")
")
")
")
")
")
")
")
Final Fantasy All the Bravest
Cloud, Tifa, Aerith, and Red XIII make an appearance. They use their signature Limit Breaks Meteorain, Beat Rush and Somersault, Healing Wind, and Blood Fang as their primary attack.
Final Fantasy Record Keeper
The characters' Limit Breaks appear as Soul Breaks. Many of these skills may behave differently than they do in Final Fantasy VII. For instance, Aerith's Planet Protector does not grant any status like Peerless, but instead boosts the party's Attack attribute.
")
")
")
")
")
")
")
")
")
")
")
")
")
")
")
")
")
")
")
")
")
")
")
")
")
")
")
")
")
")
")
")
")
")
")
")
")
")
")
")
")
")
")
Final Fantasy Explorers
")
")
")
Final Fantasy Brave Exvius
")
")
")
")
")
")
")
")
")
")
")
")
")
")
")
")
")
")
")
")
")
")
")
")
")
")
")
")
")
")
")
")
")
")
")
")
")
")
")
")
")
")
")
")
")
")
")
")
")
![Omnislash [KH version] (5★).](/wiki/File:FFBE_Omnislash_KH.png "FFBE Omnislash KH.png (464 KB)")
![Omnislash [KH version] (6★).](/wiki/File:FFBE_Omnislash_KH_2.png "FFBE Omnislash KH 2.png (376 KB)")
![Omnislash [KH version] (7★).](/wiki/File:FFBE_Omnislash_KH_3.png "FFBE Omnislash KH 3.png (596 KB)")
")
")
")
")
")
")
")
")
")
")
")
")
")
")
")
")
")
")
")
")
Mobius Final Fantasy
")
")
")
")
")
")
")
")
")
World of Final Fantasy
Omnislash is Cloud's Champion summon ability. It inflicts neutral physical damage to one enemy, ignoring defense. It also grants Strength+ to all allies. It is unlocked after completing chapter 17 and costs 2★ gauges to use. When used "Fight On!" plays.
Slayer is an active physical ability that inflicts neutral physical damage, Strength ↓, and Defense ↓ on a single target for 8 AP. It has low topple strength. It can be used by Lann (Cloud's Champion Jewel).
Final Heaven is Tifa's Champion summon ability. It inflicts neutral physical damage to one enemy and ignores defense. It also grants Strength+ to all allies. It is unlocked after completing chapter 10 and costs 1★ gauge to use. When used "Let the Battles Begin!" plays.
Beat Rush is an active physical ability that inflicts neutral physical damage on a single target for 6 AP. It has low topple strength. It can be used by Reynn (Tifa's Champion Jewel).
")
")
")
")
Final Fantasy Trading Card Game
Numerous cards featuring the Final Fantasy cast have their Limit commands as Action Abilities.
Cloud's card, depicting his Dissidia Final Fantasy artwork, has the Meteorain and Omnislash Action Abilities. Meteorain requires the discard of a Cloud card, two Light CP, and Dulling Cloud, and deals 4000 damage to all the opponent's Forwards. Omnislash has the same activation requirements, but needs a payment of four Light CP instead of two, and allows the player to Break a Forward of their choice. Another of Cloud's cards, featuring his Theatrhythm art, can use Finishing Touch. For the discard of a Cloud card, Dulling Cloud and paying one Light CP, the player chooses a Forward and deals it damage equal to Cloud's power.
One of Barret's cards has the Hammer Blow ability. At a cost of two Earth CP and a discard of another Barret card from the hand, Hammer Blow deals 4000 damage to a Forward of the player's choice, then grants Barret +4000 power for the rest of the turn. Another of Barret's cards can use Catastrophe. Catastrophe costs one Earth CP, the discard of a Barret card, and Dulling Barret, and deals 10,000 damage to a Forward of the player's choice.
Aerith's card depicting her promotional CG art has the Planet Protector ability, requiring the discard of an Aerith card and Dulling Aerith. Planet Protector returns all the player's Forwards to Active status, and until the end of the turn they cannot be targeted by summons or abilities.
One of Tifa's cards has Waterkick. For a discard of a Tifa card and a CP cost of one Fire CP and one Light CP, Waterkick deals 6000 damage to a target Forward.
Red XIII has Cosmos Memory, with a heavy cost of four Fire CP, the discard of another Red XIII card, and Dulling Red XIII. Cosmos Memory deals 6000 damage to all the opponent's Forwards.
Yuffie's promotional CG card has Bloodfest. For the cost of Dulling Yuffie, discarding another Yuffie card and paying one Wind CP, Bloodfest allows the player to target up to three Forwards and deal a total of 6000 damage to them in 1000 damage increments, distributing the damage among the targets however they wish.
Cait Sith's CG card has Slots. For the cost of one Thunder CP, Dulling Cait Sith and discarding another Cait Sith card from the hand. The player removes the top card of their deck from the game, and if it was a Forward, the player can Break a Backup card of 2 cost or less.
Cid's card has the Highwind ability. To use Highwind, the player must pay two Wind CP, discard a second "Cid Highwind" card from the hand, and Dull Cid. Highwind forces the opponent to place two cards from the top of their deck into the Break Zone.
Non-Final Fantasy guest appearances
Ehrgeiz: God Bless the Ring
Cloud can use a throw called Omnislash by moving the D-pad in a circle. He uses Meteorain when he uses the special button. A number of sword techniques can be used when wielding his sword, which are Braver, Cross-slash, and three attacks, Clim Hazard, Clim Slash, and Clim Mirage which originate from his Climhazzard Limit Break. Sephiroth also uses Meteorain, but his attack is called Black Materia, as does Zack, his called Meteo Shots.
Tifa can use combo attacks called Dolphin Blow, Dolphin Blow Real, and Water Kick (derived from Waterkick), throws called Meteor Drive (derived from Meteodrive), Beat Rush, Somersault, and Meteor Strike. Pressing special uses Final Heaven, hold special and down for Final Hell, and just holding special uses Hell And Heaven.
Vincent can use combos used Hellmasker, Splattercombo, Chaos Saber, two just frame move, Satan Impact, and Neo Satan Impact, deriving from his Satan Slam impact, and a throw called Giga Dunk, derived from Gigadunk. While his specials don't incorporate his Limit Break attacks, images of his forms can appear when used.
Yuffie has one attack based on her Limit Breaks. Her "The Alive Will Perish" attack derives from the same Japanese as Doom of the Living.
")
")
")
")
")
")
")
")
")
")
")
")
")
")
")
")
Kingdom Hearts
Cloud can use the three-hit chain Cross-slash, in addition to a version where he teleports behind the opponent before the attack called Chain-slash+. In the original Kingdom Hearts, he also has the Omnislash ability, which involves him extending his wing and flying around the arena while slashing the opponent. In Kingdom Hearts II Cloud instead uses Omnislash ver5, which has him circle the field while slashing the opponent, and for the finale, he lands and causes an explosion.
In Kingdom Hearts: Chain Of Memories, using a single Cloud card results in the "Slash" in which Cloud strikes with two slashes with a single enemy. Using 2 Cloud cards in a "Sleight" results in the "Cross Slash" command in which Cloud strikes a single enemy three times. Using 3 consecutive Cloud cards results in the "Omnislash" command, which has Cloud teleporting behind up to 5 different enemies and slashing them for significant damage. When fought as a boss in Re:Chain of Memories, one of Cloud's normal attacks is "Climb Hazard", an alternate translation of Climhazzard.
In Kingdom Hearts: Re:coded, Cloud uses the Omnislash attack while battling Sora and Hercules at Olympus Coliseum. Cloud also makes his debut as a party member. Sometimes in the turn based battles of the Olympus Coliseum, Cloud will randomly use Omnislash, slashing at random enemies several times.
Tifa uses an attack called Final Heaven, which is a combo attack, like her Limit Break is a combo of attacks.
Yuffie can use a number of her Limit Breaks as attacks in Kingdom Hearts II: Greased Lightning where she throws her shuriken at the enemy, unlike Final Fantasy VII where she strikes the enemy; Clear Tranquil, where she heals herself; and Doom of the Living where she throws a massive magic shuriken at the enemy, instead of striking the enemy a number of times.
Zack can use attacks similar to Cloud's Limits in Kingdom Hearts: Birth by Sleep. He has a Braver-like attack called Hero's Entrance where he leaps and stabs his sword into the ground creating a shockwave, a Blade Beam-like attack where he sends a wave of dark energy along the ground, and an attack similar to Meteorain or Meteor Shots where he conjures meteors to bombard the player. His strongest attack, Hero's Pride, is similar to Omnislash, and is a series of sword attacks with Zack rapidly teleporting around the player, ending with a downward overhead swing. The player characters can Hero's Pride as a Finish Command via Zack's D-Link.
")
")
")
")
")
")
")
")
")
")
Gallery
")
")
")
")