The characters level up in Final Fantasy XII.
Level grinding, power leveling, or training, is a term used to describe walking around an enemy-infested location and defeating enemies in battle for the sake of leveling up. The point is to strengthen the team, often for an upcoming boss. Level grinding may also be called farming, usually used for more specific cases, like AP farming or experience farming for Ability Points and Experience Points respectively.
Being a long-time method in role-playing games, level grinding has received negative reactions with reviewers criticizing games that require excessive level grinding to defeat enemies. In early role-playing games, the original Final Fantasy being one of them, level grinding was almost mandatory. Since then, grinding has been somewhat disguised as other gameplay elements. Final Fantasy XII, for example, introduced the Hunt system, which allows players to level up and earn various items by doing sidequest battles.
Appearances
Final Fantasy
Template:Sideicon Early on, the Peninsula of Power has many high level monsters that yield high experience and gil and are easily defeated with Fire, Fira, Firaga, Flare and Dia, Diara, and Diaga, but also has monsters immune to Dia spells. For this place it is best to stock up on Potions and Cottages and Tents, and while leveling to save after every fight until the battles become easy. One can travel to Pravoka to buy more healing items. It is recommended to at be at least to level 25, especially if the party has a Monk. With a Monk, unarmed attacks have 2 Attack Power per level; at level 25, he will have 50 attack power, 5 more than the Excalibur.
Since certain bosses always appear when a character steps on a tile, easy bosses, such as the Dragon Zombies and the Evil Eye, can be fought repeatedly.
On the first floor of the Cavern of Earth, there is a corridor on the far west that contains a fixed encounter on every tile, making it an easy place to level up. It is recommended the player maxes their party's HP/MP and level up until around level 40.
On the second-last floor of Mount Gulg, there are two treasure chests, each guarded by a Fire Lizard, providing 618 EXP per kill and easily healed through with the Heal Staff, providing for indefinite leveling sessions and arguably the most efficient grinding until the Temple of Fiends in the past.
In the late game, the Warmech gives the most experience, but it is very powerful and rare.
Final Fantasy II
Template:Sideicon Similar to the Peninsula of Power in the first game, south of Fynn is an area with powerful monsters that will raise the party's stats quickly early on. Similarly, just south of Altair at the bottom of the peninsula is a 1x3 strip that spawns monsters normally found in Mysidia, which can also be used to level up quickly. Later, the Tropical Island and the Jade Passage have high level monsters that can be defeated with little effort to boost stats. Additionally, in the 20th Anniversary edition and all remakes based on this version, players can use the Arcane Labyrinth to quickly boost their stats.
Players of the NES and Origins can exploit the target-cancel bug, in which the player selects an action and cancels it, but the stat boost still registers. Since there are only three members in the party most of the time, and the player cannot cancel after selecting the final player character's attack, it is best to boost stats when a guest character fills the fourth slot.
Skill growth is based on the number of times an action is performed, so prolonging battles can increase skill experience. As members in the back row cannot strike enemies with melee weapons, the player can put all but one member in the back row and have them attack to prolong battles. This can aid in boosting skills early in the game, when low enemy rank results in little or no experience gain once skills have gained a few levels. As characters gain experience for each weapon type they wield in battle, dual-wielding weapons of the same category results in higher skill experience gained. For spells, it is more efficient to cast multiple different spells once per battle rather than to cast the same spell repeatedly.
Players of all versions can attack their own characters to quickly boost HP. Sap and Osmose can be cast on party members to boost MP; this is particularly effective when Minwu initially joins, as the party's MP totals will likely be low and he joins with the Sap spell.
A good place to grind for gil is outside the towns after Cyclone. Large groups of Sorcerer enemies can be fought in these places, and they drop a variety tomes selling for between 4,000 and 10,000 gil each.
Final Fantasy III
Template:Sideicon On the Floating Continent, there are a few good places to grind, such as Bahamut's Lair, but the Surface World has a few such places.
In the Cave of Shadows, the constant multiplying of enemies can be useful when grinding. Players should kill one of the enemies and have a weaker character as an attacker to duplicate other enemies. This strategy can be done to amass experience points and gil. To successfully farm, players should attack using a katana or magic, and should kill the enemy with one hit. The enemies include Death Claw, Gaap, Silenus, Chronos, Valefor, Haniel, and Vassago.
Another level grinding area can be accessed right after Goldor Manor. From Amur, the player must fly north and in the bay with two forests southwest of the Crystal Tower. This place acts like the same concept as the Peninsula of Power from the original Final Fantasy as the grid ends one tile after the mountainside, and this horizontal strip of land contains monsters from the Crystal Tower area.
After obtaining the Nautilus, players often use the Sunken Cave and the Saronia Catacombs to level up. Later, the Forbidden Land Eureka is another good grinding spot. In the 3D version, there is a useful way to grind in the Crystal Tower's first floor: when in battle with a group of Blucks, the player must kill all except one and continually Guard until the Bluck summons a Kum Kum. The party can defeat the Kum Kum and wait for the Bluck to summon another.
Final Fantasy IV
Template:Sideicon Located north of Mt. Ordeals in the upside-down V-shape area, the enemies are those from the Troia area. This is a great location to build fast levels for Palom and Porom before tackling Mt. Ordeals, especially with Dark Knight Cecil's Deathbringer. The fights are harder than anything encountered at this stage of the game.
The Lunar Subterrane, though the enemies are powerful, is often used to grind. Players of the Advance and Complete Collection versions can use the Lunar Ruins to level up, as the enemies leave plenty of experience and gold.
In the Complete Collection version, the player can set their cursor setting to memory and go into the Passage of the Eidolons in the underworld, and find a Summoner enemy that summons Arachne or Nagaraja. The player should cast Slow on a character and have them attack the Arachne/Nagaraja while the player casts Haste on the Summoner, and the other characters can simply defend. The player can then set the game to Auto.
Alternatively, one can find a Summoner that summons Thunder Dragons and equip a character with the Cursed Ring along with a form of Diamond defensive equipment or the Gold Hairpin. This will raise the character's Lightning-elemental defenses. The player can inflict said character with Slow, doing it twice if the character's speed is too high, i.e. Edge, Kain and Cecil.
The character should endlessly attack the Thunder Dragon, and Haste should be cast on the Summoner. The result is the Thunder Dragon will use thunder magic on the character who will absorb the damage and heal back the health lost from the Summoner's melee attack. If the player is only leveling up a single character, the other party members can be KO'd, but if the player is trying to level up the entire party, they will need elemental armor, or should be revived before finishing off the Summoner.
Final Fantasy IV -Interlude-
Template:Sideicon The best place to grind for experience is right outside the Sealed Cave where the monsters give plenty experience for a four-member party. The player should grind before finding "Rydia" within the cave, as she is a temporary character. Free healing can be found aboard the Falcon nearby. The only drawback is that monsters give little gil. The only nuisance is the Hellflapper's ability to inflict Blind on the player's fighters (Cecil and Cid). If the enemy's party does not have any flying monsters, a simple Quake from Palom will kill them. Otherwise, the player should stick with Bio and equip Palom with a Faerie Rod to increase his potency in Black Magic.
For Edge, the location is either the area around Eblan or in the Upper Section of the Tower of Babil. There is a healing pot located in the Cave of Eblan.
Marionetteer can call forth its minions if left alone making for a good way to grind experience and gil. It can summon Ogres and Cait Siths for Edge. The player must be careful to not accidentally step on the tile that will make Edge jump into the Tower of Babil as there is no return to the original location, and the story will continue from there. The player should put Edge in the back row to reduce the damage he takes, but he can still kill enemies in one blow due to him already being at a high level at the start of his part of the story.
Both of these grinding areas becomes unrevisitable locations.
Final Fantasy IV: The After Years
Template:Sideicon Areas to grind differ from tale to tale, and each have a level cap, with the exception of the game's final tale. The optimal place to grind in the last tale is the Depths of the True Moon. In B5 of the Depths, all monster encounters, with the exception of the Blue Dragon, are susceptible to the Black Magic spell Break. Alternatively, the player can make use of the Assassin's Dagger acquired earlier in the Depths and inflict death on monsters. However, this method will fail sometimes as some monsters are immune to the status. The player is recommended to bring Porom along as she can pray to regain HP back at the cost of no MP.
Final Fantasy V
Template:Sideicon In Bartz's World one can grind consistent ABP and decent EXP from Prototypes on the islands in-between Crescent and Jachol; Prototype will be the only encounter on the islands. The easiest way to do this is to learn Control (from Beastmaster) and use it as the sub ability and have Prototype cast Self-Destruct on itself for an instant kill. The party will gain 4 ABP and 500 EXP per fight. Players may also opt to fight the Mini Dragon enemies near Istory Falls for EXP.
Another way is to fight the Skull Eaters in the Jachol Cave. They drop 5 ABP and 100 EXP along with 100 gil. It has a chance it will flee, but the player will not gain gil if it does.
The island shaped like a key north of Crescent Island only has the Black Flames for enemies. They provide 870 gil, 362 EXP, and 3 ABP and can be killed with any throwing scroll magic from the Ninja, or elemental summons.
After gaining access to Galuf's World, players can use the Objet d'Art in the basement of Castle of Bal to quickly farm ABP since they are susceptible to Level 5 Death. Alternatively, one can choose to throw Lightning Scrolls at the Objets d'Art. They can also be killed one at a time by Gold Needles, which can be purchased in Bal, though this method is time-consuming. Objets d'Art appear in groups of two or five; two give out 4 ABP, and five give out 8 ABP.
In Galuf's World and onwards the player may opt to fight the Shield Dragon by using the Control ability. This earns 2500 EXP and 5 ABP for each party member by simply having the monster use Blaze on itself until it dies.
Another good spot for grinding in Galuf's World is the forest north of Moore. By using the Level 5 Death on the Dechirers there the party can earn easy 1695 gil, 825 EXP and 3 ABP.
A third good spot in Galuf's World is the Underwater Cave located northwest of Surgate Castle accessible with the submarine. The enemies include three Druids worth 1503 gil, 1127 EXP, and 5 AP respectively, three Ironbacks worth 1522 gil, 975 EXP and 4 AP, and a pair of both which give 1005 gil, 700 EXP, and 4 AP. An easy strategy is to have two Blue Mages use Level 4 Graviga and Aqua Breath.
For ABP gain in the Merged World, the player can sail around the sea nearby Crescent to encounter groups of Sea Devil and Rukh. A group of 3 Sea Devils grants 6 ABP, a Rukh 8 ABP and a combined group of 2 Sea Devils and a Rukh will yield 13 ABP. Sea Devils are weak to Lightning and Rukhs can be dispatched quickly with an Aevis Killer.
A quick method to acquire EXP in Merged World is to visit the desert next to the Phoenix Tower. The player can travel to said location after finding the black chocobo trapped in the Phantom Village. The groups of Ankheg and Ammonite give 1170 to 1250 EXP and are easy to defeat. By using Float on the group one can avoid Ankheg's Earthquake.
The Interdimensional Rift is a good farming spot as the enemies pose little threat, but grant high EXP. For ABP farming, the monsters in the final floors of the Interdimensional Rift give lots of AP with little effort (most can be slain by summoning Odin), though the most notable enemy that gives AP is the Mover that gives away 199 ABP per battle, but must be defeated before they escape and end the battle. In the Advance version, if the game is quicksaved in a section of the Interdimensional Rift where Movers are fought, the second group of enemies encountered after resuming the game will always be Movers.
Additionally, players of the Advance and subsequent versions can use the Sealed Temple to grind, and possibly the Cloister of the Dead, as many bosses are fought in a row. However, by unlocking the Cloister of the Dead the player has completed everything in the game and grinding is generally unnecessary, unless not all of the superbosses are defeated yet.
Final Fantasy VI
Template:Sideicon In the World of Balance, the Triangle Island has the Intangir, which can be easily be killed with Death or any available instant death spell in the SNES version, and awards 10 Magic AP.
The last location visited in the World of Balance, the Floating Continent, is an excellent grinding place, offering higher EXP than any other place at the time, and yielding large sums of Magic AP averaging in the 4-6 per battle.
In the World of Ruin, the dinosaur forest is used by many to grind, as its enemies leave plenty of experience. The desert south of Maranda holds Slagworms and Cactuars, both of which give out high amounts of Magic AP and gil (and the Slagworm gives out high EXP as well).
While the Cactuars have high evasion this can be solved by equipping a Sniper Eye, or by using any other technique or spell that ignores evasion. The worms are vulnerable to the Death and Stop spells, which means one can avoid its potentially devastating Sandstorm counterattack. To get the most out of grinding, the party should equip espers that grant stat boost bonuses upon gaining a level.
In the World of Ruin players can use the area just outside of Doma Castle to level grind by casting Vanish on the party and fighting Tumbleweeds. Another area of interest is the Phoenix Cave which can reward great EXP, the least of encounters rewarding approximately 1,000 XP, but some enemy formations can reward up to 3,000 or 4,000 XP, so long as the Chaos Dragon is present.
In the World of Ruin, the forest north of Jidoor is also available for grinding as nearly every enemy there uses only physical attacks (the only exception is Leap Frog, which uses Rippler). The player only has to summon Phantom to become invulnerable.
In the World of Ruin, players can access the Cultists' Tower where they can recruit Strago. Enemies there cast only magic, most of which can be nullified by equipping Reflect Rings. The lower levels have enemy encounters that net 5 or 7 Magic AP per battle. Party members can be equipped with Gold Hairpins and cast Ultima to end battles quickly. This is the best way to farm only magic without gaining experience, but the downside is the party won't gain gil.
Final Fantasy VII
Template:Sideicon One of the earliest points where some players choose to level grind is in the Sector 4 Train Tunnel where, if the player heads to the south end, an infinite amount of troops can be fought. If the player gives a character the Restore Materia and heals until the character runs out of MP, they can switch it and do the same for the other two. This is also a good place to get Limit Breaks quickly, as it is a source for a vast amount of kills. At this point in the game, each character should be able to kill each enemy in one attack from the back row, including Tifa.
Aeris's LEVEL 2 Limit Break, Fury Brand, can be exploited to get the two other party members' Limit Breaks to maximum so they can use Limit Breaks faster. This is a faster way of filling LEVEL 3 and LEVEL 4 Limit Break gauges, and it allows players to draw the benefits from Sadness while still being able to use Limit Breaks relatively often. Another way to get Limit Breaks faster is to use Hypers to get into the Fury status.
After leaving Midgar, if the characters' levels are high enough, players can use the Midgar Zolom to grind, as it will respawn infinitely and give high amounts of experience. Matra Magic Enemy Skill, acquired from outside of Midgar, can be used to defeat enemies outside the Chocobo Farm that appear in large numbers.
In Junon, before the party acquires the Highwind, the player can pull an alarm in the tunnel that leads to the Junon Underwater Reactor to fight strong enemies that otherwise appear only after the party has the airship, yielding high EXP and AP and gil. This method is a sound way to grind in any solo character challenge.
Outside Nibelheim, the player can fight and manipulate the Valron enemy using the appropriate Materia. Using the Dive Kick, which takes off a quarter of the player's maximum health, the player can fill the Limit gauge quickly, while not being threatened with KO since the HP decrease can be calculated beforehand.
After obtaining the Tiny Bronco, the player can head to an island close to Mideel where they can fight the Mideel region enemies, such as Head Hunters. Equipping three Rune Armlets from Bone Village, and each player's double AP growth weapons they should have obtained by this point in the game, the player can stock a lot of AP to level up Materia. With a level 3 Restore Materia equipped with an All Materia, the player can cast Regen and allow the enemy to attack the player and get Limit Breaks. Equipping three Fury Rings from Gongaga Village will allow characters with a high Strength stat to kill the enemies quickly and without need for user input.
With the Highwind the party can visit Cactus Island for its Cactuers that yield moderately high EXP and AP. After the Gold Saucer reopens when Cloud returns to the party, the player can buy the EXP Plus Materia from the Wonder Square to earn 50% more EXP for the equipper, or twice the EXP when it is on LV2. Maxing out the Materia births another version that can be equipped to someone else; equipping more than one on the same character doesn't stack the effect.
After obtaining the submarine, the player may opt to visit the Gelnika, where they can morph powerful enemies into sources for stat boosts, and simultaneously obtain EXP.
Movers in the Northern Cave give 800 AP each, for a total of 2400 AP per battle, but are very rare. Players can also steal Elixirs from Gighee or exploit the W-Item duplication bug to give themselves 99 Elixirs to feed the Magic Pots to amass EXP and AP.
Party members outside the active party gain half of the experience gained by the main party. The levels of newly joining characters are decided by the party's average level. When characters go off on a quest without the others, additional levels they have gained will often elevate the levels of everybody else in the group.
Players attempting a low level challenge often eschew the use of Materia, as both the gil cost and the AP requirements to level them are hard to meet. The Mover is the only enemy that gives AP in large quantities for no EXP. It also drops 90,000 gil. Much earlier in the game, from Corel Prison onwards, the Cactuar makes Materia-using No Item (NI) games easier with its 10,000 gil for only 1 EXP.
Crisis Core -Final Fantasy VII-
Template:Sideicon Leveling up is not determined at random; although it is not shown in the game, enemies still drop EXP, and the more EXP the player gains, the higher the chance the player levels up during a Modulation Phase. If the player wishes to level grind, they can do so by fighting enemies in missions labeled "Very Hard".
As Zack levels up, the rate at which his stats increase slows, meaning at higher levels level grinding is not effective, but players can increase their stats via Materia Fusion.
Players can kill Movers to obtain quick SP, and kill Tonberries for gil. After unlocking Mission 9-6-6: The Reigning Deity, players can equip the Brigand's Gloves and steal 99 Phoenix Downs that can be sold for gil.
One can also buy Dualcast Materia and convert them to SP. A faster way to get SP is by buying HP Up Materia and with the 99 Phoenix Downs turn it to HP Up +999% via Materia Fusion, then convert it to SP to get around 900,000 SP. The Phoenix Downs can also be used in Materia Fusion to max out HP.
Dirge of Cerberus -Final Fantasy VII-
Template:Sideicon During the boss fight against the first helicopter in Chapter 1, at some point it will begin dropping Deepground Soldiers randomly that Vincent can keep defeating. The soldiers drop handgun bullets and potions the player can use to keep ammo and HP up. Each soldier gives Vincent 10 EXP. The helicopter will infinitely drop soldiers until defeated. The player can tempsave in the middle of the boss fight and continue at another time to grind at their own leisure.
Final Fantasy VIII
Template:Sideicon Grinding is almost imperative, but in a different way: since the party's level means less than what magic the player junctions, players grind by drawing spells from enemies, and refining spells from items, cards or lower level spells. The player can easily earn lots of high level junctioning spells early on by playing Triple Triad and modifying the cards into items and refining the items into magic.
An easy way to find high-level spells early is to use the Quezacotl's Card Mod to mod the Quistis card (obtainable at the very beginning of the game) into three Samantha Souls which can be refined into 60 Triples each via the Diablos's Time-Mag RF ability. Junctioning 100 Triples to a character's Strength would allow for them to, combined with the ease of triggering Limit Breaks, easily annihilate any boss up until late game.
Players looking for EXP can visit Island Closest to Heaven and the Island Closest to Hell, where many powerful enemies that give away huge amounts of EXP roam, and can be easily defeated with Quistis's Degenerator. AP grinders can head to Cactuar Island where the Cactuars can be easily slain by Squall's normal attack, and give out 20 AP each.
While Cactuar Island itself is only accessible via the Ragnarok, the desert adjacent can be accessed with a mobile Balamb Garden. To maximize the party's potential it is wise to stay in low levels until obtaining the Cactuar Guardian Force, equip its stat boost abilities, and then fight in the Islands Closest to Heaven and Hell to gain stat boosts along with levels.
For low level games, players may opt to use the Card ability learned from Quezacotl to convert enemies into cards, preventing them from dropping EXP but still dropping items and AP. Later in the game, the player can use the temporarily playable character, Edea, to level up Guardian Forces while having no fear of leveling up members of the party as to avoid over-leveling. This may also be done with Seifer during the Dollet mission but would only level up Quetzalcoatl, Shiva and Ifrit.
Final Fantasy IX
Template:Sideicon Final Fantasy IX has fewer places to grind than its counterparts, but they still exist. One of the earliest level grinding spots is in Alexandria. After Steiner and Marcus break out of their hanging cage they will be assaulted by an endless stream of Alexandrian soldiers. If the player moves Steiner to the middle of the room and equips him with the Blood Sword obtained from Queen Stella in Treno, an infinite number of battles can be fought without the need for healing. If the player keeps the confirm button pressed with a rubber band, Steiner can potentially gain 50 levels overnight.
The Grand Dragon on Sacrobless Island or Popos Heights, and the Yans on Vile Island, both yield large amounts of EXP. Grand Dragons can be easily felled after a certain point, especially with the help of Dragon's Crest, but Yans remain exceptionally difficult even at higher levels.
The party can fight Grand Dragons fairly early on, as they can be fought above Gizamaluke's Grotto (Popos Heights) and die from Quina's Level 5 Death spell. This stays a viable method until the end of the game. While fighting on Vile Island will award the player with more EXP, killing only Grand Dragons on the Popos Heights requires less attention. By equipping Auto-Regen, Auto-Reflect and Antibody on every character, one is unlikely to die against a Grand Dragon, since it nullifies two of his three attacks. The player will never have to manually heal the party, which makes this training ideal for turbo controllers, sped up emulators, and other assisting tools.
The player can also "grind" to max out certain character-specific abilities: Zidane's Thievery powers up whenever he successfully steals from an enemy; Freya's Dragon's Crest can be maxed out by slaying 100 dragons; and Quina's Frog Drop powers up the more frogs s/he has caught in the marshes.
The crystal versions of the Guardians of Terra in the Crystal World right before the final battles yield high amounts of AP.
Final Fantasy X
Template:Sideicon The Omega Ruins' enemies give high amounts of AP, and with Double/Triple AP Double/Triple Overdrive, and Overdrive → AP sphere levels pour in. Fighting Tonberries and their ilk with Overdrive → AP earns lots of sphere levels if the player has killed enough enemies and has the Stoic Overdrive Mode on the party member being attacked, and Comrade on others.
The best AP grinding method involves this setup against the Don Tonberry. The player should cast Hastega on everyone and then get Don Tonberry to counter with Karma on the character whose Overdrive Mode is Stoic, then revive him/her with the other party members and recast Haste. The player should repeat this until Don Tonberry is dead, or gets too close and the player is forced to flee. When Don Tonberry counters with Karma, the damage will fuel the Overdrive, which will triple and then convert into AP, and at the end of the battle the total AP is also tripled. The AP is received even if the player escapes or the Overdrive gauge is full.
It is possible to go from 0 to 99 Sphere Levels in one battle with three characters using this method; it is only limited by the party's MP and how fast Don Tonberry closes in. The amount of Overdrive received is determined by the amount of damage received which, for Don Tonberry, is the number of monsters a character has killed multiplied by 100. Only the Overdrive → AP ability is needed for this trick, but the other two abilities will boost the amount of obtained AP. The only character that needs to receive damage from Karma is the character whose Overdrive Mode is set to Stoic, meaning one can easily level up a weak character by skipping their turn and having a strong healer and a character who has had a lot of kills to perform the trick.
An alternate method is to use weapons with SOS Overdrive and Overdrive → AP, armor with SOS Haste, and Auto-Life. Cactuar King can also be used instead the Tonberry for its 99,999 and 10,000 Needles attacks.
Killing the Monster Arena's Species Conquest enemies gives Spheres that add new stat nodes to the Sphere Grid and boost characters' stats quickly. To get Power Sphere, Ability Sphere, Mana Sphere, and Speed Sphere items quickly, the player can inflict Distill abilities on Kottos or Fafnir to get 20 of them, or 40 for an Overkill.
Dark Matters, a notably rare item used for customizing Break Damage Limit to weapons, and Ribbon to armor can be obtained in two ways. Since all Monster Arena Conquest enemies drop Dark Matter as a rare drop, repeatedly defeating simple enemies, such as Vidatu and Sleep Sprout, preferably with the First Strike ability, is a good way of doing it. A fully-powered Masamune comes equipped with it.
An alternative in the International, PAL and HD Remaster versions is to defeat Dark Yojimbo. The player can defeat him four times and then reset the encounters by saving and resetting the game, exiting the Cavern of the Stolen Fayth, or entering the blitzball menu. While this has seven-times the likelihood of obtaining Dark Matter, most parties would take longer to defeat Yojimbo once than to defeat a mass amount of Monster Arena enemies with less than 99,999 HP.
If the player does not have strong enough characters having Anima is a useful option as it can kill the enemies in one Oblivion. Despite the cost of fighting enemies at the Monster Arena, the selling price of the equipment dropped by the enemies makes up for it. In the PlayStation 2 version the player can also fight Fenrir, which despite the game's claims, costs no money to fight. This was fixed for the HD Remaster.
Final Fantasy X-2
Template:Sideicon In Chapter 1, the player can attempt to grind for EXP in Macalania Woods and the enemies outside the Macalania Lake travel agency. The player can also get the Ice Queen Garment Grid from doing the "Follow that O'aka" mission. Although the enemies may be too strong to fight this early, the player can escape the battles. The Ice Queen Garment Grid allows the wearer to absorb Ice, meaning the White Elementals' attacks will heal the party, and eventually the player will be strong enough to take on the enemies throughout the rest of the Macalania Woods. The Amorphous Gel can easily be dispatched with Ice attacks (as it starts as Fire-elemental by default), which can be used on any dressphere if the Garment Grid is equipped.
The Farplane and Via Infinito hold powerful enemies. Via Infinito's battle difficulty rises as player goes deeper underground. Lady Luck learns the Double EXP ability, which can be used whenever a character wears the dressphere.
When a character equips both the AP Egg (Triple AP) and the Key to Success (Double AP) they will receive 6x the AP they normally earn, a great way to master abilities, but the conditions for earning the Key to Success means the player cannot receive the Mascot dressphere later on during that specific playthrough.
The characters earn AP as they execute commands in battle. If the player can create a continuous loop of actions that kill neither the party nor the enemies, they can easily rake in AP. One of the most effective methods for stockpiling AP involves the Treasure Hunt Garment Grid equipped with the Mug ability; Mug scores AP even if the character is unable to acquire an item from a monster.
The Fiend Arena in the HD Remaster and International versions provides a safe and continuous supply of fiends while also making a Game Over impossible, meaning the player can easily farm for EXP and AP. If the player unlocks the fights against Shiva, Yojimbo, Anima, or the Magus Sisters, the former three fights award 15 AP each, while the Magus Sisters yield 24 AP. Equipping an AP Egg and a Key To Success can yield at least 90 AP for a fight which, at higher levels, can take less than a minute, making learning abilities significantly easier.
Final Fantasy XI
Template:Sideicon As an older MMORPG, level grinding was the principal means of advancement. Until the release of Wings of the Goddess, this was generally restricted to EXP/Merit parties against enemies like crabs, beetles, mandragora, goblins, colibri, and imps, due to the low-risk of grinding. With the fourth expansion, Campaign Battles provided an alternative method of level grinding by participating in Crystal War skirmishes.
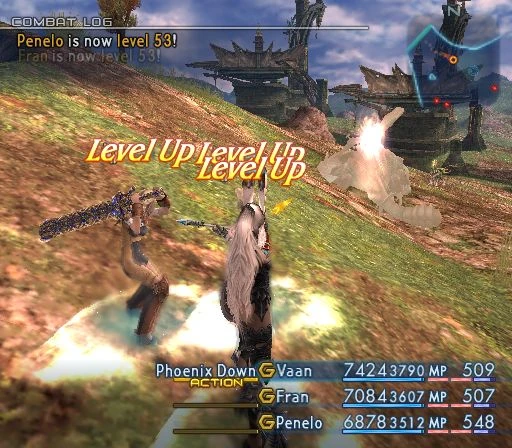
Final Fantasy XII
Template:Sideicon A famous level grinding spot early on is to kill the Rare Game Dustia, which gives plenty of EXP and LP, can be killed with a Phoenix Down, and can be spawned early, as soon as the player can access the Dalmasca Westersand. Phoenix Downs can be bought from the merchant outside Nalbina Fortress, past the Dalmasca Estersand once the Sunstone has been charged in Giza Plains. Dustia drops the Book of Orgain loot commonly, and it sells for a lot of gil, allowing the player to buy more Phoenix Downs. Dustia is good for speedy leveling because it is offers over a thousand EXP, 3 LP, valuable drops including the Flame Staff, and is chainable via the zone out glitch. Using only Vaan the player can gain a lot of EXP especially if exploiting the glitch. Later in Royal Palace of Rabanastre when Fran and Balthier join, their levels will be based on Vaan's, as with any other character who will join the party later.
The gambit system allows for auto-leveling tactics where the player can leave the party leveling and gaining EXP without having to as much as touch the controller.
An easy grinding spot early on is when the alarm sounds after rescuing Ashe on the Dreadnought Leviathan. If the player stays in the area where enemies first appear after the alarm goes off enemies will continue to appear. When the player is close to death they can backtrack to the save crystal to heal.
Negalmuur in Stilshrine of Miriam is a famous auto-level spot: it will frequently summon Ghasts, and by correctly setting up the party's gambits it is possible to create an infinite loop, which allows the game to be left playing while the party continues to gain experience. The party should use gambits such as Foe:HP<3,000 to hit only the Ghasts and not the Negalmuur summoning them, and to prevent the party leader remaining KO'd for too long the party can use Decoy to attract as many attacks as possible to other members, and also use a gambit that prompts the allies to use a Remedy on the party leader when needed.
One spot for grinding is in the The Rustling Chapel area of the Golmore Jungle. If the player defeats all the enemies in the area, Dark Skeletons start to spawn. After 21 have been defeated and the player has moved close enough to the center, the Grave Lord will spawn, preventing further Dark Skeletons from appearing. Defeating the Grave Lord and zoning out and in will spawn more Dark Skeletons allowing for a chain in excess of 90. After this, the player can return to the Eruyt Village to sell loot, save the game, and reset to repeat. With each regular Dark Skeleton awarding over 1000 EXP, doubled with the Embroidered Tippet equipped, and the enemies falling in a few attacks, this is a useful method with little risk other than being overpowered by the Grave Lord at lower levels.
However, if the Vorpal Bunny Hunt has been accepted and not completed, the Grave Lord will not spawn unless the bunny has been defeated. Since the Vorpal Bunny spends most of its time running away it is less of a problem to handle than the Grave Lord.
Henne Mines is renowned for two convenient grinding spots: the first is Pithead Junction B where touching the gate switch sends a limited number of Jellies falling from above, and if they die from the Time Magick Break, they will respawn endlessly. If the player programs their gambits correctly, it is possible to sustain an auto-leveling without touching the controller. Besides the Break spell, it is recommended to have another ally cast Sleepga on the Jellies and another to keep the party alive with curative spells.
The second spot is Pithead Junction C that is riskier than the Pithead Junction B spot. Flipping the gate switch will send Abysteels descending down from the ceiling. They do not respawn endlessly like the Jellies, but are vulnerable to Sleep and are damaged by curative magic. With the proper gambit set-up, the player can use Sleepga to neutralize the Abysteels and kill them with Curaja without waking them up. The Abysteels will leave roughly 3,000 EXP each, which in tandem with their large numbers makes leveling quick and easy. If the party is equipped with Embroidered Tippets they could potentially earn up to of 100,000 EXP with each press of the switch.
In Draklor Laboratory Imperial Pilot, Imperial Swordsman, and Judge will spawn infinitely and are usually in groups of three or four, but if one doesn't kill them quickly, there will soon be many more.
Nabreus Deadlands' Overlooking Eternity area presents a grind similar to the Grave Lord area exploit. Here, upwards of 50 Dead Bones can spawn per visit, each being worth roughly 1200 EXP. With the Embroidered Tippet equipped, the party can expect ~2300 EXP per kill. With a good Holy Lance setup, or use of Curaja, the party can clear the zone in short order for ~120,000 EXP. The mobs also offer several bone-type drops (especially with the correct monograph) that each vend for roughly 2000 gil; if there is a dedicated thief, the player can expect several Golden Skullcaps as well, which vend for 8000 gil each.
Final Fantasy XII: Revenant Wings
Template:Sideicon Because all official missions are one-time-only events, players have to rely on Monster and Summoning Melees to level grind. The Summoning Melee at the Gates of Shattered Time and the challenging yet rewarding gambit of Midlight's Deep are two exceptional grinding locations, though the latter requires some time commitment.
Final Fantasy XIII
Template:Sideicon There are several places that allow accumulation of easy CP. Although many are only accessible (or practical) at or after the endgame, this is also the point at which they become particularly useful.
A relatively early grinding spot is within the Estheim Residence during Chapter 7 where the party is ambushed by PSICOM troops. Two enemy parties appear in the small map, and so as long as the player eliminates them both and moves to the back of the map, they will keep respawning. This point is specially rewarding in gil as the PSICOM troops here drop Incentive Chips, which can be sold by 2,500 gil in the nearby save station, and often drop more than one per battle. While the CP is not as rewarding, the potential accumulate of CP one can acquire while grinding for gil can be large as the enemies are not hard to defeat and yield around 160 CP per battle. And while perhaps not useful for the current party they can be useful for Vanille and Sazh who are used next with an expanded Crystarium.
Another popular spot is in the Archylte Steppe near the Mah'habara Subterra entrance with the fighting Behemoth King and Megistotherian pairing; the party will always get a preemptive strike, and both enemies will be at half HP. One way to kill them is to stagger the Behemoth King and use the Commando's Launch ability to prevent it from replenishing its HP, then killing the Megistotherian. With a strong party the battle will only take approximately 7-14 seconds for 6,600 CP, or 13,200 CP with a Growth Egg.
One popular training method, especially for lower levels, requires the player to repeat Mission 24 in Taejin's Tower with each battle yielding 6,000 CP (12,000 with a Growth Egg). The reward for completing the mission is a Moonblossom Seed that can be sold for 6,000 gil, and it takes only a few seconds to walk from the Cie'th Stone to the Mark, making Mission 24 a good method of getting quick CP with some gil on the side.
In the optional area of the Mah'habara Subterra mines (access granted by riding Atomos back from Sulyya Springs), one will come across an area with six Cryohedrons. They can easily be killed in a matter of seconds for 7,140 CP each time. The bombs will respawn when the player backtracks a little.
A formation of five Pulsework Gladiators can be encountered on Fifth Tier of Taejin's Tower. As each one grants 1,600 CP for being destroyed, defeating them will grant 8,000 CP per battle.
The Adamantoise in Eden is right next to a save station allowing for a quicker restart. It is possible to have Vanille spam Death on an Adamantortoise, which can yield 40,000 CP (80,000 with Growth Egg). Oretoises can also be battled around the Archylte Steppe, and they evolve to even more formidable forms after completing the missions in the "Cie'th Stone circle" on the plains, but at this point, the party is likely so powerful they no longer need to grind.
One notable spot is the penultimate configuration of the Tesseracts in Orphan's Cradle, where a moderately powerful party can defeat the lone Wladislaus in about two minutes (using a slightly risky Evened Odds → Relentless Assault strategy) for 32,000 CP, and it can be respawned quickly by returning to the lower save station. This is a good spot, but one which cannot be revisited after the Tesseracts undergoes the final reconfiguration to access the final bosses.
With some patience, ten minute runs through the Faultwarrens can yield around 75,000 CP (150,000 with Growth Egg). This includes all of the non-marked enemies along the way. Primeval Crossroads → A Dance of Shadow → Via Stellarum → Salamandrine Path → Titan's Trials (Mission 47, Raktavija). Of note are the Cactuars on the Salamandrine Path, which give around 7,500/15,000 CP each if defeated. There are eight of them, but they run from battle if given the chance.
Attacus (Mission 51) gives 75,000/150,000 CP when defeated, although that battle typically lasts at least 15 minutes. Everything considered, an hour in the Faultwarrens can yield almost a million CP. A caveat, though—it's best for the player to be farther along the Crystarium to attempt this, as the fights can be tough.
Final Fantasy XIII-2
Template:Sideicon The best way to quickly accumulate CP is in Academia 400 AF in the southern area of New Town near the automatic pathway where fighting a group of a Taxim and five Nelapsis will yield 500 CP, the highest amount achieved in a normal encounter. This can be raised with finishing the battle with a Paradigm Pack monster ally with learned Bonus CP, like Don Tonberry, as well as turning on Rolling in CP Fragment Skill.
In Oerba 400 AF after completing the main story, in the Ashensand area, the player can encounter a "paradox sphere" which houses arguably the strongest non-DLC enemy, the Raspatil; defeating it without any bonuses will yield the player 25,000 CP as well as 50,000 Gil.
Final Fantasy XIV
Template:Sideicon For most players leveling their first class, the main scenario quests and sidequests will negate the need for level grinding. For subsequent classes though, the fact these quests are one time only will require finding other means to grind, such as guildleves, FATEs, instanced dungeons, the Hunting Log and Challenge Log.
Once the level cap is reached, players seeking endgame progression will largely depend on Allagan Tomestones. One popular method for grinding these is speed-running through Expert level dungeon instances.
Final Fantasy XV
Template:Sideicon Lodgings give a multiplier to accumulated EXP, so the player can save their EXP to sleep in the lodging that gives the best yield to gain the best amount of levels at once. There are food, accessories and Elemancy spells that let the player get more EXP from battles. Cactuars give good EXP, but they are rare enemies. The player can equip Nixperience Band to prevent the tallying of EXP upon resting to save up the EXP and rest in the double or triple EXP hotels in Galdin Quay and Altissia for a massive level boost. If the player wants to do this, they should equip the Nixperience Band on Noctis, as each of the allies leaves the party temporarily at certain points, and the game will force tally EXP at end of each chapter.
To level up the fastest, the player should save their EXP to sleep in to the hotel in Altissia for the triple EXP boost, eat the Lasagna al Forno food at camp/Maagho Lasagna at Altissia, equip all accessory slots with Moogle Charms, and kill enemies with magic infused with experience boosts. The player can then participate repeatedly in Timed Quests.
To grind Gladiolus's survival skill, which levels up the more the player travels, one can tape down the controller's analog stick to have the game run on its own to accumulate steps.
It may be possible to auto-grind for AP in a similar manner, as the party can learn abilities that let the player accumulate AP for riding a chocobo or for driving the car.
Final Fantasy Mystic Quest
Template:Sideicon There are two ways for the player to grind for levels. The first is to clear out the battlefields on the world map. This also yields some decent and rare items. A trick (perhaps a glitch) in the game involves gaining a level in the same fight that clears a Battlefield that rewards XP: this will cause Benjamin to level twice instead of once.
The other is to clear out higher level zones, leave, and reenter making the monsters respawn. Some zones don't respawn once the boss is killed. Final Fantasy Mystic Quest has a level cap of 41.
Final Fantasy Tactics
Template:Sideicon Since EXP and JP are gained by performing successful actions, regardless of who the action is targeting, players can level grind by defeating all but one enemy unit in a battle, prevent the remaining enemy unit from taking action (such as by inflicting Sleep or Disable) and command the player's units to use their commands on each other or themselves, including offensive actions.
Making all characters the same job means that, as JP earned is shared across all party members who have that job available, they progress through the job faster.
EXP gained is based on the difference between the unit's level and the unit with the highest level affected by a command. Lower-level units can gain greater EXP safely by using commands on high-level allies. Conversely, high-level units can use commands on lower-level units in order to increase JP with minimal EXP gain, as the levels of random encounters are based on the party's levels. Enemy parties in Midlight's Deep are usually several levels above the player's party, thus making the dungeon an excellent area to grind high-level units.
If the player lines the party up in an X formation where all five squares have the same elevation, and the middle character can use the Monk's Chakra ability to heal himself and those around him as they use their commands on each other.
Leaving the party lined up allows them to act quickly, as they do not move, and other buffs such as Haste and Protect can be used on the entire party. A prime location for grinding can be found early on in the game at Mandalia Plains.
The Bardsong (for males) and Dance (for females) commands are very useful for grinding, for both the using unit and other units in battle. The fast Charge Time of these abilities and continuous nature mean that a song or dance may activate multiple times between a unit's turns, especially early in the game and for slower classes such as the Summoner or Arithmetician. All songs and dances affect all allies or enemies respectively, making it easy to perform a successful command. The HP/MP-affecting songs and dances are the fastest to execute and 100% accurate. Rousing Melody and Slow Dance enable the user's party to gain more turns, making it easier to perform many commands during a battle and defeat the enemy party.
Final Fantasy Tactics Advance
Template:Sideicon EXP received from an action depends on the relativity between the acting character's level and the target character's level. Though missions usually offer challenging high level enemies, they can be completed only once. Enemies throughout the map in random battles will always be at levels average to the player party, and any enemy at the same level will give the same amount of EXP.
Thus, one random encounter is as good as any other to level up. If a character is to target oneself, preferably with a healing or supporting action, they will gain 10 EXP; targeting a character one level higher will garner 12 EXP; targeting a character one level lower will garner 8 EXP; and so forth. Therefore, weaker characters can easily level up by affecting higher level characters in battle, even if they are party members.
An easy trick to gaining levels fast is the Smile ability the Juggler learns. It is learned by equipping the Orichalcum, and when two moogles are on the field with that ability they can continue using the ability on each other to create a cycle of experience gain and canceling out the other units' chances to move. With this ability, they can easily get to level 50 so the rest of the party can beat up on them to gain levels themselves.
Final Fantasy Type-0
Template:Sideicon There is an exploit in the game that allows the player to gain infinite EXP at minimal effort. The exploit involves using the training NPC (who levels the party members while the player is not playing) and manipulating the in-game clock to simulate the passage of time. With a PlayStation 4 set to offline mode, the player should save at the trainer, set the system clock forward by a week and reload the save to earn a bunch of free experience. This can be done infinitely. This is possible on the Xbox One version if not connected to the Internet.
Dissidia Final Fantasy (2008)
Template:Sideicon
EXP farming
A well-known grinding technique is to use equip the Magic Pot (Manual) summon and to fight a Level 100 Exdeath in Quick Battle at the highest difficulty. The player should attack him with HP attacks to force him to use a Bravery attack, which the player must allow to hit, until the player's Bravery is broken. After recovering to base Bravery, the player should use the summon to copy the opponent's Bravery, enter EX Mode while performing a HP attack against Exdeath, and defeat Exdeath with an EX Burst.
This will also work against Level 100 Gabranth due to his lack of HP attacks until he enters EX Mode. To prevent the AI charging its EX Gauge, the player should attempt to fight in a chase sequence until the opponent's Bravery is broken. To increase the EXP yield at the end of the battle, the player can equip chocobo accessories and the Rabbit's Foot, which increases Luck and shortens the summons' recharge time.
An alternative method for accumulating vast amounts of EXP is to attempt to fight multiple battles against the Exdeath on the Omega Friend Card. The player should commence the battle as usual, preferably on Edge of Madness or other similarly small stage, then allow themselves to have their Bravery broken. Once the player has regained their Bravery, they should continue accepting Bravery breaks until Exdeath's Bravery is higher than his HP. The player should activate a summon which does not reduce the opponent's or the player's Bravery to activate the opposing Barbariccia summon, which swaps Bravery values. Entering EX Mode and using an EX Burst will give the highest EXP gain. Using the manual form of summons, such as Phoenix, Shiva, PuPu, Bahamut and Tonberry in a reserves chain will allow the player fight continuously by using the Retry option once the battle is over.
AP Farming
One way the player can collect a large sum of AP is by fighting Chaos in Quick Battle mode during a Bonus Day. If he or she already had a set of a Diamond Combination to double his or her AP, as well as buying all Calendar bonuses for another double AP, the amount of AP will be quadrupled on the fight.
The reason the player should fight Chaos is because his battle is divided into three segments, and each segment rewards individually (which means, if the player loses on any of the three parts, they will still get the awards for the previous parts of the battle, meaning, for every victory against Chaos equals three battles with a random enemy).
The player should not forget to tackle the AP chances on the fights, as each completed task awards the player with two additional AP when completed. The AP chance will repeat until the last phase of the fight against Chaos, so if the player completes all of the AP chances in the fight, they will get a total of six additional AP.
With these tips combined, the character can get 30+ AP with each victory against Chaos.
Dissidia 012 Final Fantasy
Template:Sideicon
EXP farming
The most convenient method to accrue vast amounts of EXP is by manipulating the speed of each battle, using the Original Rules feature to modify the efficiency and spawn rate of EX Force and Cores respectively; Stage Bravery; and EX Revenge times.
Fighting the aforementioned Level 100 Exdeath or Gabranth will yield a high amount of EXP if the player breaks the opponent's Bravery to receive a high amount of Stage Bravery, then executes an EX Burst. If the player is hit, they can use EX Revenge, obtain an EX Core, which should spawn immediately, and execute the EX Burst as normal.
The player can accumulate vast amounts of EXP in single battles by waiting till their Bonus Day (or by changing the PlayStation Portable's clock), getting a EXP x5 bonus as a reward in the Grind Lover Play Plan, then creating a ruleset which brings the Stage Bravery, Critical Hit Damage and Frequency, and EX Core appearance and absorption rate, and EX Revenge duration to maximum, and fighting a Level 100 Gabranth at the highest difficulty.
Once the battle commences, the player should immediately switch targets to the newly spawned EX core, and should use the ability "Free Air Dash" or an upgraded variant to rapidly obtain it before the opponent can react, which should immediately fill their EX Gauge to full.
The player should wait until Gabranth performs an Bravery attack where the player should allow the attack to hit to activate the EX Revenge, followed by the obtaining of another Core using the same method and perform the EX Burst: breaking Gabranth's Bravery, gaining a high amount of Stage Bravery, and easily defeating him yields the most experience points. If Gabranth does not attempt to use Bravery attacks, one should use HP attacks to threaten him from afar, when he is programmed to respond with Bravery attacks. In the same way, if the player cannot break his Bravery, they can equip a manual Odin summon, and attempt to break his Bravery with that. If the attempts fails, the player can retry the battle.
AP farming
For AP grinding, the most efficient strategy is to set the PSP's clock to Bonus Day, equip a full set of Diamond equipment, along with Diamond Studs, Diamond Necklace, and Diamond Ring, and go to the gateway titled Gateway of Good and Evil in Scenario 000 where the player will find an emblem that will prevent their accessories from breaking, adjacent to a few manikins of the Emperor and Cloud of Darkness.
Depending on if the player successfully completes the AP chance, they should get between 40 and 70 AP per battle. After defeating both manikins, the player can exit the dungeon and re-enter it, getting between 80 and 140 AP per entry.
The player can also still fight Chaos in Quick Battle mode using the same tips and items as in the first Dissidia. A maximum of 189 AP can be earned at the very end of the battle if all +3 AP chances are accomplished with each victory against Chaos.
Final Fantasy Record Keeper
Template:Sideicon The concept of grinding is present in Record Keeper, albeit downplayed, in large part due to the variety of activities in the game itself, which in turn help advance all the characters the player has acquired.
As the player liberates Records, he/she will acquire characters native to the Record Realm that contains them. Characters always start at level 1 with no equipment or abilities, and so must be trained by clearing dungeons or using Growth Eggs.
The game's Record Synergy system actively encourages players to form parties that are native to their specific Records chambers, as doing so grants significant stat boosts to natives of a particular game in the series (e.g. Tidus, Yuna, Wakka, Kimahri, and Auron are native to Final Fantasy X, so when they fight in a Record from that game, they power up). Furthermore, EXP spent on a character in their home Record Realm increases to 150% of normal, making it slightly easier to grind characters that may be underleveled.
The game's Power-Up Dungeons were built purely for grinding, much of which is for crafting materials. However, the Shores of Wisdom, available throughout the week, offers massive EXP to all Heroes regardless of origin and has a chance to drop Growth Eggs that further aid in leveling. Events can also be used as grinding spots.
Final Fantasy Dimensions
Template:Sideicon The best places to grind are usually end-game areas. One of the best grinding areas is in Nil, right before the portal to the final boss. This way of grinding takes a little longer as the mobs have a high amount of HP, but the EXP and Gil are very rewarding. Another easier and somewhat shorter way to grind is outside of the castle that allows a player to access the Gladiators' Hall. The EXP is a little less than the aforementioned area in Nil, but it is easier on the grind so character's (especially lower leveled ones) don't die so easily. Another method to grind efficiently in the game is to exempt Guest characters from taking part in battles, as such characters are not permanent in the story and will leave the party one way or another once the player have completed the specified chapter. The player should then remove the equipment that the Guest wear and distribute them to their own characters, since most Guest characters carry quality equipment. By using this method mentioned above, players can also gain a 25% exp boost for their own characters.
List of Guest characters that appear throughout the story:
Bravely Default
Template:Sideicon Potentially any place in the game can be used for grinding pg, Experience and Job Points, provided the player meets some conditions in battle. Defeating the Enemy Party on a single turn, earns the player the 1-Turn Victor award which gives bonus Exp. Defeating the enemy without getting any damage, will get the party awarded with Unscathed which gives bonus JP. Lastly defeating an enemy party of 2 or more enemies at the same time, provided all the enemy party is defeated on that attack, will award the player with Sweeper which provides extra pg.
If these conditions are fulfilled 5 times in a row, even more bonuses are awarded for each respective condition, and doing so 10 times in a row will award even more bonuses. However if the condition is not fulfilled after building up a successful "chain" then, the chain is broken and the awards must be built from the start, this does not apply in the case of Sweeper. For example, defeating four enemy parties with several enemies in a row, the following party only has one enemy, in which case the chain will resume normally when faced with a party of multiple enemies. Also Sweeper cannot be achieved if for example, they face an enemy party of three monsters and then one of them is defeated and the following two are defeated simultaneously. All of the original enemy party must be defeated for Sweeper to work.
Some tips involve fighting weaker opponents or exploiting elemental weaknesses. The latter is useful if one combines this with the Brave option, which can warrant one, if not all of the awards at the same time several times in a row, resulting in cumulative gain.
Using a party at a slightly higher level than the area is meant to be at, such as the Florem Region in Chapter 3 along with one party member using the Valkyrie job (party level ~30) combined with a strong spear, the Knight Support Ability Two-Handed and encounter rate +100% can beat nearly every encounter in the area with one use of Crescent Moon.
Template:Recurring elements Template:Character growth