No edit summary |
mNo edit summary |
||
| (37 intermediate revisions by 7 users not shown) | |||
| Line 1: | Line 1: | ||
| ⚫ | |||
| − | [[File:Kilika_temple2.jpg|thumb|250px|Kilika Temple.]] |
||
| + | {{infobox location |
||
| + | |name=Kilika Temple |
||
| + | |release=FFX |
||
| + | |image=FFX HD Kilika Temple.png |
||
| + | |type=Temple |
||
| + | |region=[[Kilika]] |
||
| + | |affiliation=*[[Yevon]] |
||
| + | |ffx items=*[[Final Fantasy X armor#Red Armlet|Red Armlet]] (from Cloister of Trials) |
||
| + | {{collapsible text|header=From Chamber of the Fayth after gaining airship|content= |
||
| ⚫ | |||
| + | *[[Final Fantasy X items#Agility Sphere|Agility Sphere]] |
||
| + | *[[Final Fantasy X items#Accuracy Sphere|Accuracy Sphere]] |
||
| + | *[[Final Fantasy X items#Defense Sphere|Defense Sphere]] |
||
| ⚫ | |||
| + | |ffx enemies=*[[Sinspawn Geneaux]], [[Geneaux's Tentacle]] x2 (boss) |
||
| + | |ffx quests=*[[#Cloister of Trials|Cloister of Trials]] |
||
| + | |x2 items=*Many found in [[#Shops|shops]] |
||
| + | |x2 enemies={{collapsible text|header=Chapter 1|content= |
||
| + | *If password is wrong: |
||
| + | **[[Yevon Defender]] |
||
| + | **[[Yevon Guard]] |
||
| + | *[[YSLS-Zero]] (boss) |
||
| ⚫ | |||
| + | {{collapsible text|header=Chapter 3|content= |
||
| + | *[[Daeva]] |
||
| ⚫ | |||
| + | *[[Pairika]] |
||
| + | *[[Zurvan (Final Fantasy X-2)|Zurvan]] |
||
| + | *[[Ifrit (Final Fantasy X-2)|Ifrit]] (boss) |
||
| + | }} |
||
| + | |x2 quests=*[[Missions (Final Fantasy X-2)|Missions]] |
||
| + | **[[#Awesome Sphere Heist!|Awesome Sphere Heist!]] |
||
| + | **[[#Pest Control|Pest Control]] |
||
| + | *[[#Episode Complete|Episode Complete]] |
||
| + | }} |
||
{{Q|High Summoner Ohalland used to live in the Kilika temple here. Yep, Lord Ohalland was once a great blitzer, you know?|[[Wakka]]}} |
{{Q|High Summoner Ohalland used to live in the Kilika temple here. Yep, Lord Ohalland was once a great blitzer, you know?|[[Wakka]]}} |
||
| − | '''Kilika Temple''' is a location in ''Final Fantasy X'' and ''[[Final Fantasy X-2]]''. It is one of [[Yevon]]'s temples situated on a fire mountain, is located on the far side of the [[Kilika Woods|woods]] north of [[Kilika Port]]. The flames around the temple change color when a [[Summoner (Final Fantasy X)|summoner]] prays for the power of the [[Aeon (Final Fantasy X)|aeon]], [[Ifrit |
+ | '''Kilika Temple''' is a location in ''[[Final Fantasy X]]'' and ''[[Final Fantasy X-2]]''. It is one of [[Yevon]]'s temples situated on a fire mountain, is located on the far side of the [[Kilika Woods|woods]] north of [[Kilika Port]]. The flames around the temple change color when a [[Summoner (Final Fantasy X)|summoner]] prays for the power of the [[Aeon (Final Fantasy X)|aeon]], [[Ifrit (Final Fantasy X)|Ifrit]], or when visited by priests and Yevonites. Should the flame turn blue, it means the temple is in danger. |
==Story== |
==Story== |
||
{{spoiler}} |
{{spoiler}} |
||
===''[[Final Fantasy X]]''=== |
===''[[Final Fantasy X]]''=== |
||
| ⚫ | |||
[[File:Sinspawn_Kilika.png|thumb|Sinspawn attacks the party.]] |
[[File:Sinspawn_Kilika.png|thumb|Sinspawn attacks the party.]] |
||
| − | The next day after Sin destroyed [[Kilika Port]], [[Yuna]] and her [[Guardian (Final Fantasy X)|guardians]] head through [[Kilika Woods]] to the temple of Yevon, encountering a [[Sinspawn]] along the way. Outside the temple, after an encounter with the [[Luca Goers]], a rival blitzball team, [[Wakka]] prays for victory at upcoming blitzball tournament while the others meet summoner [[Dona]] and her guardian [[Barthello]]. Upon learning that [[Tidus]] is not officially a guardian, Dona has Barthello push him onto the elevator leading to the [[Cloister of Trials]], hoping he would get in trouble. Shortly after Tidus catches up with the others, Yuna emerges with the new aeon. |
+ | The next day after Sin destroyed [[Kilika Port]], [[Yuna]] and her [[Guardian (Final Fantasy X)|guardians]] head through [[Kilika Woods]] to the temple of Yevon, encountering a [[Sinspawn (Final Fantasy X)|Sinspawn]] along the way. Outside the temple, after an encounter with the [[Luca Goers]], a rival blitzball team, [[Wakka]] prays for victory at upcoming blitzball tournament while the others meet summoner [[Dona]] and her guardian [[Barthello]]. Upon learning that [[Tidus]] is not officially a guardian, Dona has Barthello push him onto the elevator leading to the [[Cloister of Trials (Final Fantasy X)|Cloister of Trials]], hoping he would get in trouble. Shortly after Tidus catches up with the others, Yuna emerges with the new aeon. |
===''[[Final Fantasy X-2]]''=== |
===''[[Final Fantasy X-2]]''=== |
||
| − | {{sideicon|X2}} |
||
[[File:Gullwings_Kilika_Temple.png|thumb|The Gullwings on a mission to eliminate fiends in the temple.]] |
[[File:Gullwings_Kilika_Temple.png|thumb|The Gullwings on a mission to eliminate fiends in the temple.]] |
||
When the [[Gullwings]] learn of an "[[Awesome Sphere|awesome sphere]]" being hoarded by [[New Yevon]], Yuna, [[Rikku]], and [[Paine]] fight their way through the woods to the temple so they can steal the sphere. Depending which side they give the sphere to, the Gullwings gain an allegiance with the side they choose and become enemies with the opposing faction. When fiends start emerging from the temple the Gullwings rush in to stop the outpour. Despite being on opposing sides, Barthello leads his followers to keep the fiends from reaching Dona before YRP defeat [[Ifrit (Final Fantasy X-2)|Ifrit]]. |
When the [[Gullwings]] learn of an "[[Awesome Sphere|awesome sphere]]" being hoarded by [[New Yevon]], Yuna, [[Rikku]], and [[Paine]] fight their way through the woods to the temple so they can steal the sphere. Depending which side they give the sphere to, the Gullwings gain an allegiance with the side they choose and become enemies with the opposing faction. When fiends start emerging from the temple the Gullwings rush in to stop the outpour. Despite being on opposing sides, Barthello leads his followers to keep the fiends from reaching Dona before YRP defeat [[Ifrit (Final Fantasy X-2)|Ifrit]]. |
||
| Line 17: | Line 50: | ||
{{endspoiler}} |
{{endspoiler}} |
||
| − | ==Temple |
+ | ==Temple aeon== |
| − | *[[Ifrit |
+ | *[[Ifrit (Final Fantasy X)|Ifrit]] (Fire-elemental) |
==Locations== |
==Locations== |
||
| Line 26: | Line 59: | ||
===''[[Final Fantasy X]]''=== |
===''[[Final Fantasy X]]''=== |
||
====Cloister of Trials==== |
====Cloister of Trials==== |
||
| − | {{ |
+ | {{Main|Cloister of Trials (Final Fantasy X)}} |
'''''Aim:''' To extinguish the fire in the main room.'' |
'''''Aim:''' To extinguish the fire in the main room.'' |
||
*Remove the '''Kilika Sphere''' from the pedestal to the left and insert it into the recess next to the door ahead, incinerating it. |
*Remove the '''Kilika Sphere''' from the pedestal to the left and insert it into the recess next to the door ahead, incinerating it. |
||
| Line 63: | Line 96: | ||
*Chapter 4 - Speak to Barthello until he breaks the CommSphere. |
*Chapter 4 - Speak to Barthello until he breaks the CommSphere. |
||
| − | == |
+ | ==Items== |
===''Final Fantasy X''=== |
===''Final Fantasy X''=== |
||
| − | *[[ |
+ | *[[Final Fantasy X armor#Red Armlet|Red Armlet]] (from Cloister of Trials) |
| + | *After gaining airship |
||
| − | |||
| + | **[[Final Fantasy X items#Luck Sphere|Luck Sphere]] (from Chamber of the Fayth) |
||
| − | ;After gaining airship and completing mandatory visit to Bevelle |
||
| − | *[[ |
+ | **[[Final Fantasy X items#Agility Sphere|Agility Sphere]] (from Chamber of the Fayth) |
| − | *[[ |
+ | **[[Final Fantasy X items#Accuracy Sphere|Accuracy Sphere]] (from Chamber of the Fayth) |
| − | *[[ |
+ | **[[Final Fantasy X items#Defense Sphere|Defense Sphere]] (from Chamber of the Fayth) |
| ⚫ | |||
===''Final Fantasy X-2''=== |
===''Final Fantasy X-2''=== |
||
[[File:Samurai dressphere location.jpg|right|thumb|The location of the Samurai dressphere.]] |
[[File:Samurai dressphere location.jpg|right|thumb|The location of the Samurai dressphere.]] |
||
| + | {{multicol-begin}} |
||
| − | <tabber> |
||
| − | Chapter 1 |
+ | ;Chapter 1 |
*[[Garment Grid#Menace of the Deep|Menace of the Deep]] [[Garment Grid]] (use passwords correctly without fighting any guards) |
*[[Garment Grid#Menace of the Deep|Menace of the Deep]] [[Garment Grid]] (use passwords correctly without fighting any guards) |
||
| + | {{multicol-separator}} |
||
| − | + | ;Chapter 3 |
|
*[[Samurai (Final Fantasy X-2)|Samurai]] [[dressphere]] (on floor before Antechamber) |
*[[Samurai (Final Fantasy X-2)|Samurai]] [[dressphere]] (on floor before Antechamber) |
||
| + | {{multicol-separator}} |
||
| − | + | ;Chapter 5 |
|
| ⚫ | |||
| − | *[[ |
+ | *[[Final Fantasy X-2 items#Ether|Ether]] |
| − | *[[ |
+ | *[[Final Fantasy X-2 items#Mega-Potion|Mega-Potion]] |
| − | *[[ |
+ | *[[Final Fantasy X-2 items#X-Potion|X-Potion]] |
| − | *[[ |
+ | *[[Final Fantasy X-2 accessories#Wall Ring|Wall Ring]] |
| − | *[[ |
+ | *[[Final Fantasy X-2 accessories#Regen Bangle|Regen Bangle]] |
| − | *[[ |
+ | *[[Final Fantasy X-2 items#Megalixir|Megalixir]] |
| − | *[[ |
+ | *[[Final Fantasy X-2 items#Ether|Ether]] x2 |
| − | *[[ |
+ | *[[Final Fantasy X-2 accessories#Cat's Bell|Cat's Bell]] |
| − | *[[ |
+ | *[[Final Fantasy X-2 items#Turbo Ether|Turbo Ether]] x2 |
| + | *[[Final Fantasy X-2 accessories#Wizard Bracelet|Wizard Bracelet]] |
||
| − | </tabber> |
||
| + | {{multicol-end}} |
||
==Shops== |
==Shops== |
||
===''Final Fantasy X-2''=== |
===''Final Fantasy X-2''=== |
||
The shop is only available during Chapters 3 and 5. |
The shop is only available during Chapters 3 and 5. |
||
| − | {|class="half-width table" |
+ | {|class="half-width article-table X2" |
| − | !class=" |
+ | !class="a"|Item |
| − | !class=" |
+ | !class="a"|Cost |
|- |
|- |
||
| − | !class=" |
+ | !class="b"|[[Final Fantasy X-2 items#Potion|Potion]] |
|50 |
|50 |
||
|- |
|- |
||
| − | !class=" |
+ | !class="b"|[[Final Fantasy X-2 items#Hi-Potion|Hi-Potion]] |
|500 |
|500 |
||
|- |
|- |
||
| − | !class=" |
+ | !class="b"|[[Final Fantasy X-2 items#Phoenix Down|Phoenix Down]] |
|100 |
|100 |
||
|- |
|- |
||
| − | !class=" |
+ | !class="b"|[[Final Fantasy X-2 items#Antidote|Antidote]] |
|50 |
|50 |
||
|- |
|- |
||
| − | !class=" |
+ | !class="b"|[[Final Fantasy X-2 items#Eye Drops|Eye Drops]] |
|50 |
|50 |
||
|- |
|- |
||
| − | !class=" |
+ | !class="b"|[[Final Fantasy X-2 items#Echo Screen|Echo Screen]] |
|50 |
|50 |
||
|- |
|- |
||
| − | !class=" |
+ | !class="b"|[[Final Fantasy X-2 items#Soft|Soft]] |
|50 |
|50 |
||
|- |
|- |
||
| − | !class=" |
+ | !class="b"|[[Final Fantasy X-2 items#Holy Water|Holy Water]] |
|300 |
|300 |
||
|} |
|} |
||
| + | ==Enemies== |
||
| − | ==Enemy Formations== |
||
===''[[Final Fantasy X]]''=== |
===''[[Final Fantasy X]]''=== |
||
*[[Sinspawn Geneaux]], [[Geneaux's Tentacle]] x2 (Boss) |
*[[Sinspawn Geneaux]], [[Geneaux's Tentacle]] x2 (Boss) |
||
===''[[Final Fantasy X-2]]''=== |
===''[[Final Fantasy X-2]]''=== |
||
| + | {{multicol-begin}} |
||
| − | <tabber> |
||
| − | Chapter 1 |
+ | ;Chapter 1 |
*[[Yevon Guard]] x2 (if password is wrong) |
*[[Yevon Guard]] x2 (if password is wrong) |
||
*[[Yevon Guard]] x2, [[Yevon Defender]] (if password is wrong) |
*[[Yevon Guard]] x2, [[Yevon Defender]] (if password is wrong) |
||
*[[YSLS-Zero]] (Boss) |
*[[YSLS-Zero]] (Boss) |
||
| + | {{multicol-separator}} |
||
| − | + | ;Chapter 3 |
|
*[[Daeva]] |
*[[Daeva]] |
||
*[[Haunt (Final Fantasy X-2)|Haunt]] x2 |
*[[Haunt (Final Fantasy X-2)|Haunt]] x2 |
||
| Line 142: | Line 177: | ||
*[[Daeva]] x2 |
*[[Daeva]] x2 |
||
*[[Ifrit (Final Fantasy X-2)|Ifrit]] (Boss) |
*[[Ifrit (Final Fantasy X-2)|Ifrit]] (Boss) |
||
| + | {{multicol-end}} |
||
| − | </tabber> |
||
| − | ==Musical |
+ | ==Musical themes== |
| − | In ''Final Fantasy X'', "Face-Off" plays when the party meet the Luca Goers outside the temple. The choral "[[Hymn of the Fayth]]" is played inside the temple. "The Trials" plays in the Cloister of Trials. "Hymn of the Fayth - Ifrit" plays in the Chamber of the Fayth. |
+ | In ''Final Fantasy X'', "Face-Off" plays when the party meet the Luca Goers outside the temple. The choral "[[Hymn of the Fayth (song)|Hymn of the Fayth]]" is played inside the temple. "The Trials" plays in the Cloister of Trials. "Hymn of the Fayth - Ifrit" plays in the Chamber of the Fayth. |
In ''Final Fantasy X-2'', the theme "Kilika" plays outside the temple. The theme that plays inside the temple and the Cloister of Trials is called "The Temples". |
In ''Final Fantasy X-2'', the theme "Kilika" plays outside the temple. The theme that plays inside the temple and the Cloister of Trials is called "The Temples". |
||
| + | |||
| + | ==Other appearances== |
||
| + | ===''[[Final Fantasy Airborne Brigade]]''=== |
||
| + | [[File:FFAB Kilika Temple FFX Special.png|right]] |
||
| + | {{Locat-stub|Final Fantasy Airborne Brigade}} |
||
| + | |||
| + | ===''[[Final Fantasy Record Keeper]]''=== |
||
| + | {{Locat-stub|Final Fantasy Record Keeper}} |
||
==Gallery== |
==Gallery== |
||
| − | + | ;''Final Fantasy X'' |
|
| + | <gallery> |
||
| − | |File:Kilika_Temple.jpg|Artwork of Kilika Temple. |
||
| − | + | Kilika_Temple.jpg|Artwork of Kilika Temple. |
|
| − | + | Kilika-temple-artwork-ffx.png|Artwork of Kilika Temple. |
|
| − | + | Kilika-temple-artwork2-ffx.png|Artwork of Kilika Temple lift. |
|
| − | + | Kilika-fire-artwork-ffx.png|Artwork of Kilika Temple fire. |
|
| − | + | Glyph - Kilika.jpg|Kilika Temple Glyph. |
|
| − | + | FFX HD Kilika Temple Stone Steps.png|The stone steps to Kilika Temple. |
|
| + | FFX HD Kilika Temple Courtyard.png|The courtyard. |
||
| ⚫ | |||
| + | FFX HD Kilika Temple Front.png|Infront of the temple. |
||
| ⚫ | |||
| + | FFX HD Kilika Temple Entrance.png|The entrance. |
||
| ⚫ | |||
| + | FFX HD Kilika Temple Monks' Chamber Left.png|Monks' Chamber (left). |
||
| − | {{gallery|class=X2a|title=''Final Fantasy X-2''|collapse=hide |
||
| + | FFX HD Kilika Temple Monks' Chamber Right.png|Monks' Chamber (right). |
||
| ⚫ | |||
| + | Kilika_Temple_Inside.png|Kilika Temple interior. |
||
| ⚫ | |||
| ⚫ | |||
| ⚫ | |||
| + | FFX HD Kilika Temple Trial Entrance.png|The entrance to the Cloister of Trial. |
||
| ⚫ | |||
| + | FFX HD CoT Kilika.png|The Cloister of Trials. |
||
| ⚫ | |||
| + | FFX HD Kilika Temple Front Faith Chamber.png|Outside the Chamber of the Fayth. |
||
| + | Ifrit's-Chamber-of-the-Fayth-FFX-HD.png|The Chamber of the Fayth. |
||
| + | </gallery> |
||
| + | ;''Final Fantasy X-2'' |
||
| + | <gallery> |
||
| ⚫ | |||
| ⚫ | |||
| ⚫ | |||
| + | </gallery> |
||
| + | {{-}} |
||
| − | {{FFX}} |
+ | {{navbox setting FFX}} |
| − | {{X2}} |
+ | {{navbox setting X2}} |
| − | [[Category:Final Fantasy X |
+ | [[Category:Locations in Final Fantasy X]] |
| − | [[Category:Final Fantasy X-2 |
+ | [[Category:Locations in Final Fantasy X-2]] |
[[Category:Temples]] |
[[Category:Temples]] |
||
Revision as of 04:08, 14 August 2019
Template:Sideicon
High Summoner Ohalland used to live in the Kilika temple here. Yep, Lord Ohalland was once a great blitzer, you know?
Kilika Temple is a location in Final Fantasy X and Final Fantasy X-2. It is one of Yevon's temples situated on a fire mountain, is located on the far side of the woods north of Kilika Port. The flames around the temple change color when a summoner prays for the power of the aeon, Ifrit, or when visited by priests and Yevonites. Should the flame turn blue, it means the temple is in danger.
Story
Final Fantasy X

Sinspawn attacks the party.
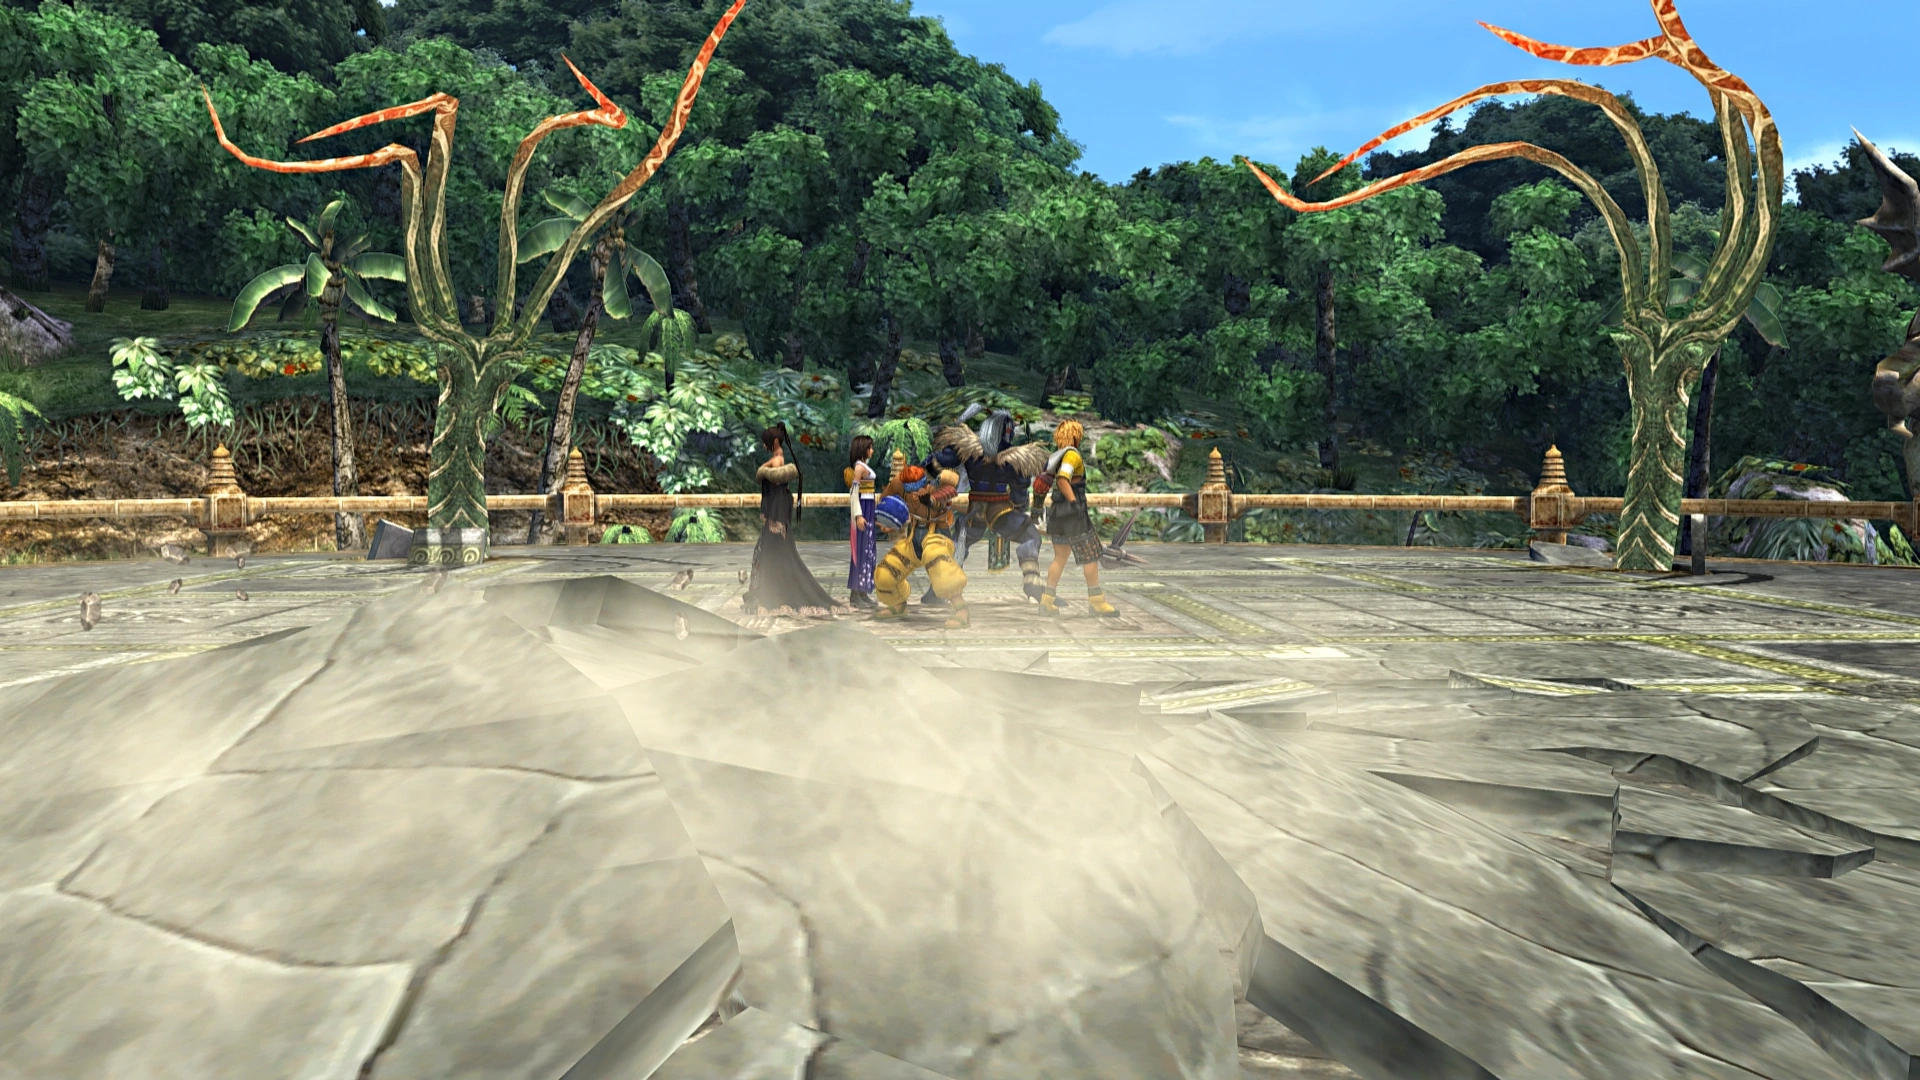
The next day after Sin destroyed Kilika Port, Yuna and her guardians head through Kilika Woods to the temple of Yevon, encountering a Sinspawn along the way. Outside the temple, after an encounter with the Luca Goers, a rival blitzball team, Wakka prays for victory at upcoming blitzball tournament while the others meet summoner Dona and her guardian Barthello. Upon learning that Tidus is not officially a guardian, Dona has Barthello push him onto the elevator leading to the Cloister of Trials, hoping he would get in trouble. Shortly after Tidus catches up with the others, Yuna emerges with the new aeon.
Final Fantasy X-2

The Gullwings on a mission to eliminate fiends in the temple.
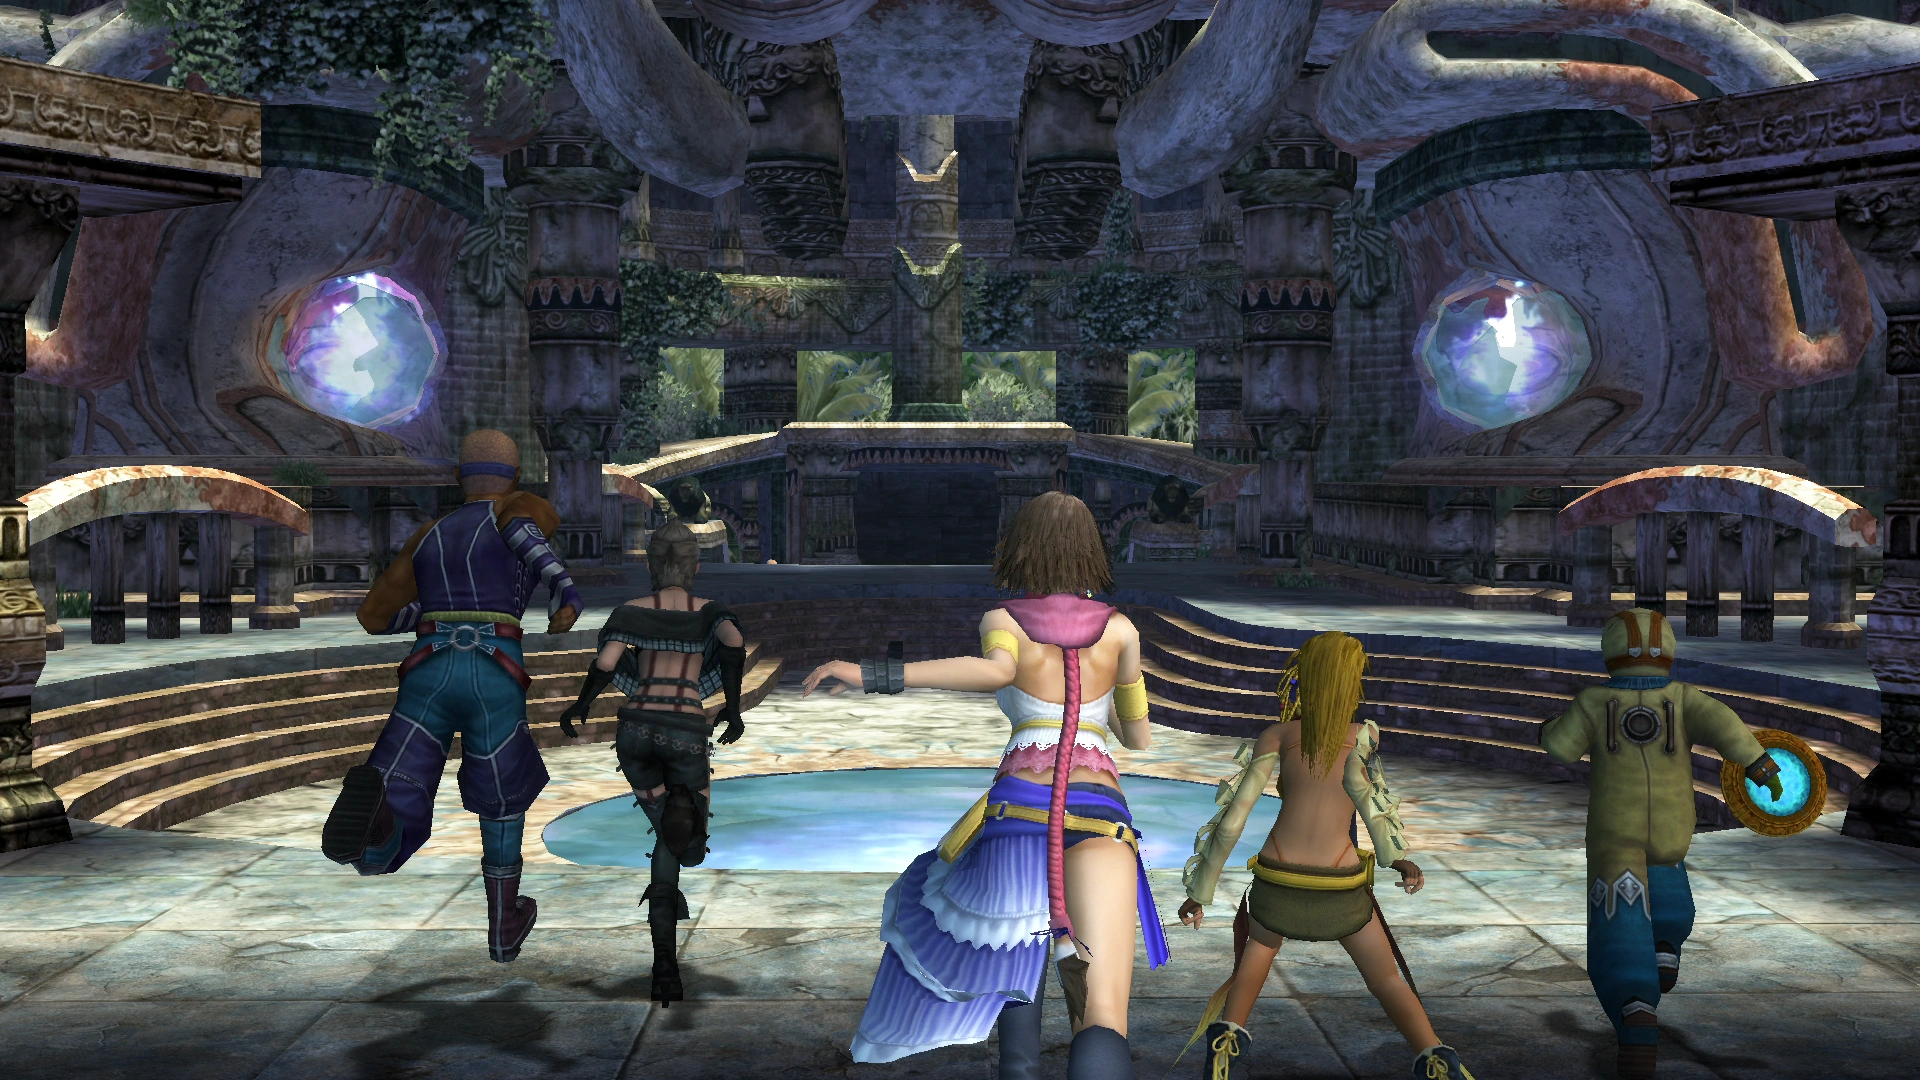
When the Gullwings learn of an "awesome sphere" being hoarded by New Yevon, Yuna, Rikku, and Paine fight their way through the woods to the temple so they can steal the sphere. Depending which side they give the sphere to, the Gullwings gain an allegiance with the side they choose and become enemies with the opposing faction. When fiends start emerging from the temple the Gullwings rush in to stop the outpour. Despite being on opposing sides, Barthello leads his followers to keep the fiends from reaching Dona before YRP defeat Ifrit.
Temple aeon
- Ifrit (Fire-elemental)
Locations
Quests
Final Fantasy X
Cloister of Trials
Aim: To extinguish the fire in the main room.
- Remove the Kilika Sphere from the pedestal to the left and insert it into the recess next to the door ahead, incinerating it.
- Take the sphere out again and head through the opening, inserting it into the north wall, creating a glyph.
- Remove the sphere once more and insert it into one of the recesses on the side walls.
- Examine the charred glyph to open the wall and take the Glyph Sphere from the pedestal.
- Put the sphere into the unoccupied side recesses, and go into room ahead and step on the shining tile to bring the pedestal closer.
- Take the Kilika Sphere from the wall near the tile and insert it into the pedestal. Push the pedestal onto the shining tile so that it moves the platform downwards.
- Return to the previous room and collect the Glyph Sphere and then insert it into the vacant recess where the last Kilika Sphere was, extinguishing the flames and opening another wall.
- Ignore the small room and go down the stairs to where the pedestal ended up to collect a final Kilika Sphere.
- Insert this into the door ahead and then go back into the small room to collect a Destruction Sphere.
- Go back down the stairs and to the right recess and insert the sphere, destroying the wall.
- Collect the Red Armlet from the chest and go to the door ahead, take the Kilika Sphere out and head inside, completing the trials.
Final Fantasy X-2
Missions
Chapter One
Awesome Sphere Heist!


Yuna, Rikku, and Paine before claiming the sphere (HD Remaster).
- Note: This is a compulsory mission which is required to complete the game.
Break through the checkpoints in the woods and at the Temple steps. Once you're in, acquire the sphere that New Yevon's been hiding in the Temple!
- Objective: Capture the Awesome Sphere.
- Unlock: Complete Where's Wakka and Claim the Treasure Sphere.
- Reward: Awesome Sphere.
Chapter Three
Pest Control
- Note: This is a compulsory mission which is required to complete the game.
Restore order by stamping out the fiends coming from Kilika Temple!
- Objective: Put a stop to the fiends' rampage.
- Unlock: Becomes available at beginning of Chapter Three.
Episode Complete
To get Episode Complete in Kilika the player must fulfill the following requirements:
- Chapter 3 - The player must complete the hotspot mission at the temple.
- Chapter 4 - Speak to Barthello until he breaks the CommSphere.
Items
Final Fantasy X
- Red Armlet (from Cloister of Trials)
- After gaining airship
- Luck Sphere (from Chamber of the Fayth)
- Agility Sphere (from Chamber of the Fayth)
- Accuracy Sphere (from Chamber of the Fayth)
- Defense Sphere (from Chamber of the Fayth)
Final Fantasy X-2
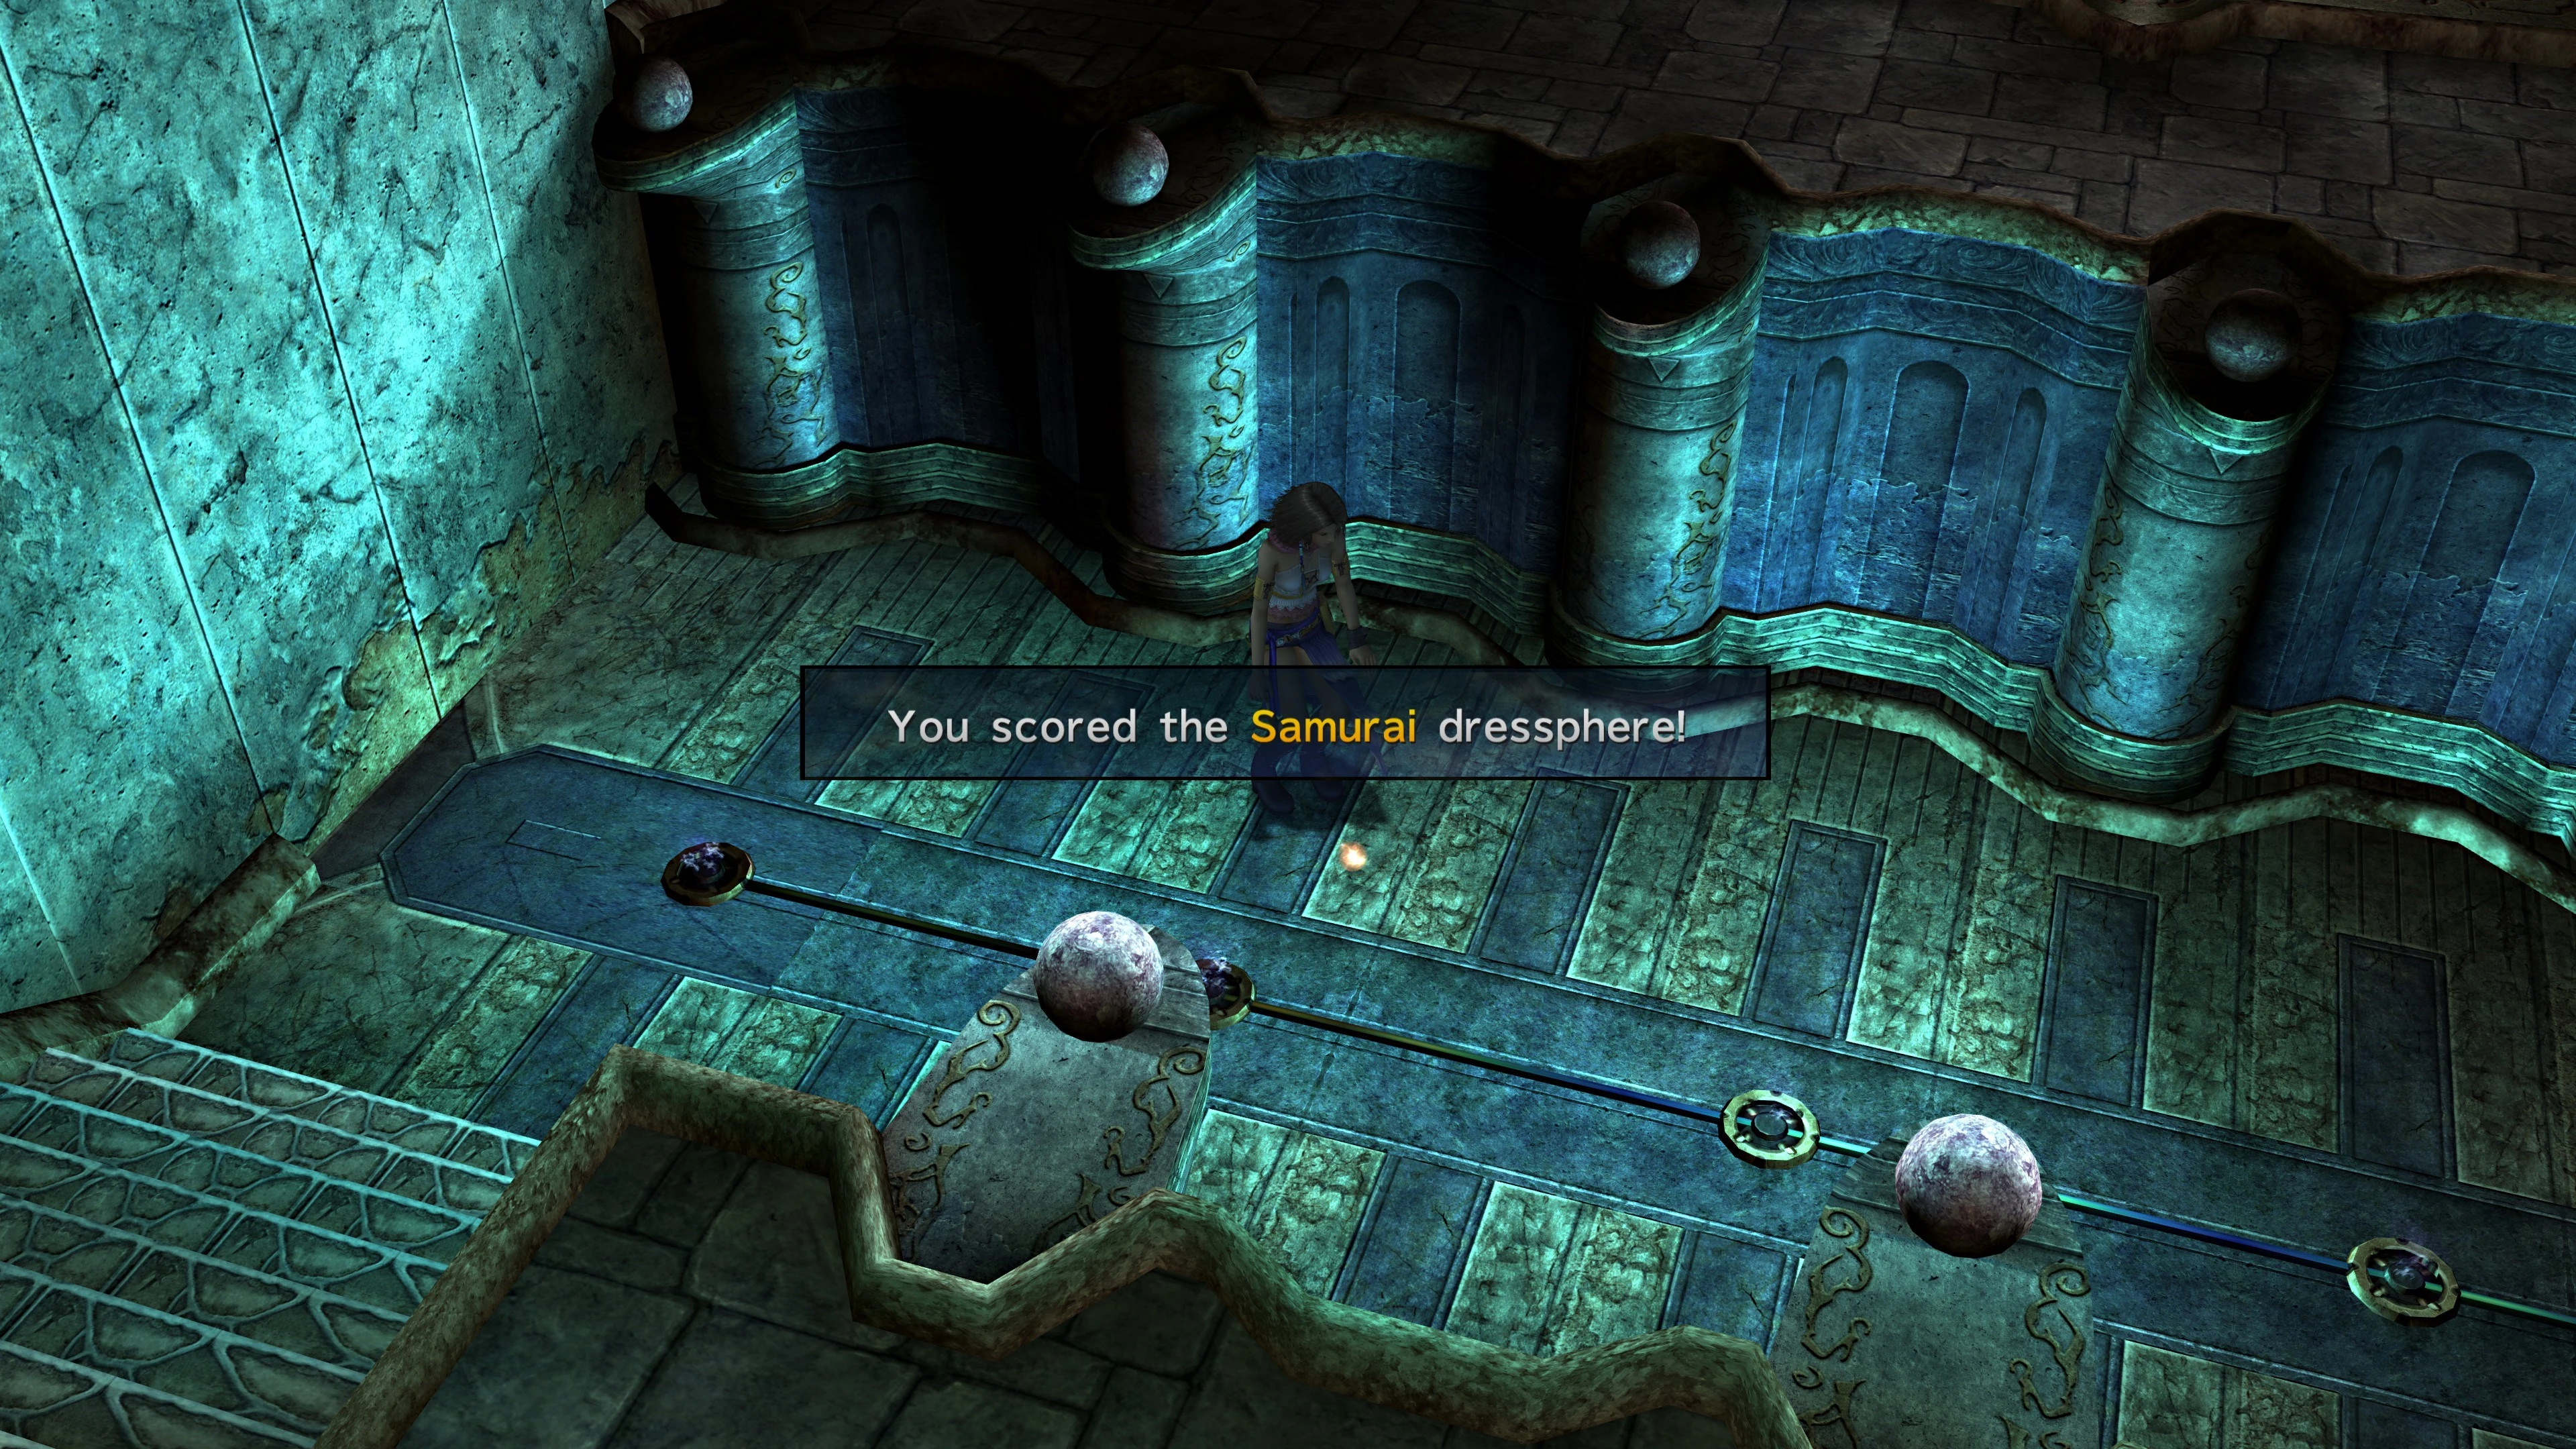

The location of the Samurai dressphere.
- Chapter 1
- Menace of the Deep Garment Grid (use passwords correctly without fighting any guards)
- Chapter 3
- Samurai dressphere (on floor before Antechamber)
- Chapter 5
Shops
Final Fantasy X-2
The shop is only available during Chapters 3 and 5.
| Item | Cost |
|---|---|
| Potion | 50 |
| Hi-Potion | 500 |
| Phoenix Down | 100 |
| Antidote | 50 |
| Eye Drops | 50 |
| Echo Screen | 50 |
| Soft | 50 |
| Holy Water | 300 |
Enemies
Final Fantasy X
- Sinspawn Geneaux, Geneaux's Tentacle x2 (Boss)
Final Fantasy X-2
- Chapter 1
- Yevon Guard x2 (if password is wrong)
- Yevon Guard x2, Yevon Defender (if password is wrong)
- YSLS-Zero (Boss)
Musical themes
In Final Fantasy X, "Face-Off" plays when the party meet the Luca Goers outside the temple. The choral "Hymn of the Fayth" is played inside the temple. "The Trials" plays in the Cloister of Trials. "Hymn of the Fayth - Ifrit" plays in the Chamber of the Fayth.
In Final Fantasy X-2, the theme "Kilika" plays outside the temple. The theme that plays inside the temple and the Cloister of Trials is called "The Temples".
Other appearances
Final Fantasy Airborne Brigade

Final Fantasy Record Keeper
Gallery
- Final Fantasy X
")
")
")
")
")
")
")
")
")
")
")
")
")
")
")
")
")
")
- Final Fantasy X-2
")
")
")