Intangir Bot (talk | contribs) m (Moving Bard to Bard (job)) Tag: apiedit |
Nick O'Demus (talk | contribs) mNo edit summary |
||
| (47 intermediate revisions by 6 users not shown) | |||
| Line 1: | Line 1: | ||
| ⚫ | |||
| − | [[File:Kaipo Worldmap FFIV IOS.PNG|right|thumb|225px|The town of Kaipo on the Overworld (DS/iOS).]] |
||
| + | {{infobox location |
||
| ⚫ | |||
| + | |name=Kaipo |
||
| + | |release=FFIV |
||
| + | |japanese=カイポ |
||
| + | |romaji=Kaipo |
||
| + | |lit= |
||
| + | |image=Kaipo Worldmap FFIV IOS.PNG |
||
| + | |type=[[Town]] |
||
| ⚫ | |||
| + | |affiliation=Independent |
||
| + | |residents=[[Tellah]], [[Anna]] |
||
| + | |ffiv items=*[[Final Fantasy IV items#Ether|Ether]] (2D) |
||
| ⚫ | |||
| + | *Many found in [[#Shops|shops]] |
||
| + | |ffiv enemies={{collapsible text|header=2D|content= |
||
| ⚫ | |||
| ⚫ | |||
| ⚫ | |||
| ⚫ | |||
| ⚫ | |||
| ⚫ | |||
| ⚫ | |||
| + | {{collapsible text|header=3D|content= |
||
| ⚫ | |||
| ⚫ | |||
| ⚫ | |||
| ⚫ | |||
| ⚫ | |||
| ⚫ | |||
| ⚫ | |||
| ⚫ | |||
| + | |ffiv quests=*Providing [[Rydia]] rest |
||
| + | *Healing [[Rosa Joanna Farrell|Rosa]] |
||
| + | *[[#Eidolon search sidequest|Eidolon search sidequest]] |
||
| ⚫ | |||
| ⚫ | |||
| + | *Many found in [[#Shops|shops]] |
||
| + | |ivtay enemies={{collapsible text|header=Kain's Tale|content= |
||
| ⚫ | |||
| ⚫ | |||
| ⚫ | |||
| ⚫ | |||
| + | *[[Evil Flame]] |
||
| ⚫ | |||
| ⚫ | |||
| ⚫ | |||
| ⚫ | |||
| ⚫ | |||
| ⚫ | |||
| + | *[[Skeleripper]] |
||
| ⚫ | |||
| + | {{collapsible text|header=Edward's Tale|content= |
||
| ⚫ | |||
| ⚫ | |||
| ⚫ | |||
| ⚫ | |||
| ⚫ | |||
| ⚫ | |||
| ⚫ | |||
| + | {{collapsible text|header=The Crystals|content= |
||
| + | *[[Abyss Worm (The After Years)|Abyss Worm]] |
||
| + | *[[Blood Eye (The After Years)|Blood Eye]] |
||
| ⚫ | |||
| + | *[[Goblin Captain (The After Years)|Goblin Captain]] |
||
| + | *[[Hellflapper (The After Years)|Hellflapper]] |
||
| + | *[[Tunneler (The After Years)|Tunneler]] |
||
| + | }} |
||
| + | |ivtay quests=*Porom's Tale |
||
| + | **Journeying to become a Sage |
||
| ⚫ | |||
| + | **Catching a ship to Baron |
||
| ⚫ | |||
| + | **Recruiting [[Yang Fang Leiden|Yang]] and [[Ursula]] |
||
| + | }} |
||
| ⚫ | |||
| + | |||
| ⚫ | |||
__TOC__{{-}} |
__TOC__{{-}} |
||
| + | |||
| − | ==Story== |
+ | == Story == |
{{spoiler}} |
{{spoiler}} |
||
| − | ===''[[Final Fantasy IV]]''=== |
+ | === ''[[Final Fantasy IV]]'' === |
| − | {{sideicon|FFIV}} |
||
[[File:Kaipo.png|thumb|200px|The Town of Kaipo (SNES).]] |
[[File:Kaipo.png|thumb|200px|The Town of Kaipo (SNES).]] |
||
| − | Before the adventure begins, [[Tellah]] is living here with his daughter [[Anna]]. [[Edward Chris von Muir]], the prince of Damcyan, travels to Kaipo disguised as a [[Bard (job)|Bard]], and he and Anna fall in love. Tellah does not consent to their union, so they elope and run away to Damcyan. Tellah then tries to pursue them, but he cannot defeat the [[Octomammoth (Final Fantasy IV)|Octomammoth]], a monster living in the [[Underground Waterway (Final Fantasy IV)|Underground Waterway]] that connects Kaipo to Damcyan. |
+ | Before the adventure begins, [[Tellah]] is living here with his daughter [[Anna]]. [[Edward Chris von Muir]], the prince of Damcyan, travels to Kaipo disguised as a [[Bard (job)|Bard]], and he and Anna fall in love. Tellah does not consent to their union, so they elope and run away to Damcyan. Tellah then tries to pursue them, but he cannot defeat the [[Octomammoth (Final Fantasy IV 2D)|Octomammoth]], a monster living in the [[Underground Waterway (Final Fantasy IV)|Underground Waterway]] that connects Kaipo to Damcyan. |
| − | The [[Dark Knight]] [[Cecil Harvey]] arrives here eventually with a wounded girl from [[Mist (Final Fantasy IV)|Mist]]. He lets her rest at the inn, but she will not speak to him. That night, some soldiers from [[Baron (Final Fantasy IV)|Baron]] enter the inn and demand that Cecil hand over the girl, a [[Rydia|Summoner]], as the [[King of Baron]] had proclaimed that the Summoners of Mist were too dangerous to be left alive. Cecil |
+ | The [[Dark Knight]] [[Cecil Harvey]] arrives here eventually with a wounded girl from [[Mist (Final Fantasy IV)|Mist]]. He lets her rest at the inn, but she will not speak to him. That night, some soldiers from [[Baron (Final Fantasy IV)|Baron]] enter the inn and demand that Cecil hand over the girl, a [[Rydia|Summoner]], as the [[King of Baron]] had proclaimed that the Summoners of Mist were too dangerous to be left alive. Cecil refuses to hand her over, and defeats the Baron soldiers. The girl thanks him and introduces herself as [[Rydia]], who then joins Cecil's adventure. The next morning, they hear that a sick girl from Baron was in the hospital. |
[[File:Edward in Kaipo DS.PNG|thumb|180px|left|Edward in Kaipo, after speaking with Anna's spirit.]] |
[[File:Edward in Kaipo DS.PNG|thumb|180px|left|Edward in Kaipo, after speaking with Anna's spirit.]] |
||
| − | Cecil |
+ | Cecil finds out that [[Rosa Joanna Farrell]], his friend from Baron, had come down with a case of Desert Fever, and Cecil needs to find the [[Sand Pearl]] from the [[Antlion's Den]] to cure her. Cecil and Rydia go out in search of the Sand Pearl, and eventually find it and return with Edward's assistance. They use the Sand Pearl on Rosa, and she recovers and joins the party. She informs them that the next target is the [[Crystal (term)|Crystal of Air]] at [[Fabul]], and they needed to cross [[Mt. Hobs]] to reach the castle. |
| − | The night before the party |
+ | The night before the party leaves, Edward goes out to the oasis and plays his harp. A [[Sahagin (Final Fantasy IV 2D)|Sahagin]] appears and attacks Edward. Anna's ghost appears and tells him to believe in himself and to be strong for the two of them. Edward manages to get over his sorrow, and is able to defeat the monster. |
{{-}} |
{{-}} |
||
| − | ===''[[Final Fantasy IV: The After Years]]''=== |
+ | === ''[[Final Fantasy IV: The After Years]]'' === |
| ⚫ | |||
In [[Porom]]'s Tale, she and [[Palom]] journey to Kaipo during Palom's journey to become a sage. Two graves to Tellah and Anna rest on the north side of town, and they pray to the two of them before heading to the waterway to train. |
In [[Porom]]'s Tale, she and [[Palom]] journey to Kaipo during Palom's journey to become a sage. Two graves to Tellah and Anna rest on the north side of town, and they pray to the two of them before heading to the waterway to train. |
||
| Line 29: | Line 102: | ||
{{-}} |
{{-}} |
||
| − | ==Locations== |
+ | == Locations == |
| − | ===Inn=== |
+ | === Inn === |
[[File:Kaipo Inn cutscene ios.PNG|thumb|right|Cecil and Rydia inside the Kaipo inn.]] |
[[File:Kaipo Inn cutscene ios.PNG|thumb|right|Cecil and Rydia inside the Kaipo inn.]] |
||
After the Mist landslide, Cecil and the child Rydia have no choice but to take refuge in Kaipo. Automatically, the player will be walked to the Inn the first time s/he enters the town. A cutscene will then trigger, showing Baron soldiers who were ordered to kill Rydia. They are taken care of, and this earns Rydia's acceptance of the dark knight, and her place in the party. |
After the Mist landslide, Cecil and the child Rydia have no choice but to take refuge in Kaipo. Automatically, the player will be walked to the Inn the first time s/he enters the town. A cutscene will then trigger, showing Baron soldiers who were ordered to kill Rydia. They are taken care of, and this earns Rydia's acceptance of the dark knight, and her place in the party. |
||
{{-}} |
{{-}} |
||
| − | ===Pub=== |
+ | === Pub === |
[[File:Kaipo Pub FFIV IOS.PNG|thumb|left|Kaipo's Pub.]] |
[[File:Kaipo Pub FFIV IOS.PNG|thumb|left|Kaipo's Pub.]] |
||
Kaipo's pub is found on the Inn's second floor. The bartender says that due to the frequenting monsters in the surrounding areas, customers are very scarce. |
Kaipo's pub is found on the Inn's second floor. The bartender says that due to the frequenting monsters in the surrounding areas, customers are very scarce. |
||
{{-}} |
{{-}} |
||
| − | ===Couple's House=== |
+ | === Couple's House === |
[[File:Couple House Kaipo FFIV IOS.PNG|thumb|right|The house.]] |
[[File:Couple House Kaipo FFIV IOS.PNG|thumb|right|The house.]] |
||
After child Rydia joins Cecil, the player must go to the building north of the weapons shop. A Rosa with diagnosed fever rests within it under the care of a couple, who tell Cecil he must obtain a Sand Pearl for Rosa if she is to live. There is a bookshelf, and when prompted, it will inform the player about desert fever. After Cecil returns successful, Rosa is cured. The couple notes that Rosa has been calling for Cecil all the time she was sick, and tells Cecil to take care of her. |
After child Rydia joins Cecil, the player must go to the building north of the weapons shop. A Rosa with diagnosed fever rests within it under the care of a couple, who tell Cecil he must obtain a Sand Pearl for Rosa if she is to live. There is a bookshelf, and when prompted, it will inform the player about desert fever. After Cecil returns successful, Rosa is cured. The couple notes that Rosa has been calling for Cecil all the time she was sick, and tells Cecil to take care of her. |
||
{{-}} |
{{-}} |
||
| − | ===Banks of the Oasis=== |
+ | === Banks of the Oasis === |
[[File:Edward_encounters_the_Sahagin_ffiv_ios.PNG|thumb|left|Edward encounters the Sahagin.]] |
[[File:Edward_encounters_the_Sahagin_ffiv_ios.PNG|thumb|left|Edward encounters the Sahagin.]] |
||
As his companions are sleeping, Edward goes out in the night for some fresh air. Lovesick and missing Anna, he plays on his harp, but is interrupted by a Sahagin. Anna talks to Edward, giving him strength and courage to defeat it, and tells him to have more faith in himself. |
As his companions are sleeping, Edward goes out in the night for some fresh air. Lovesick and missing Anna, he plays on his harp, but is interrupted by a Sahagin. Anna talks to Edward, giving him strength and courage to defeat it, and tells him to have more faith in himself. |
||
{{-}} |
{{-}} |
||
| − | ==Quests== |
+ | == Quests == |
| − | ===Eidolon search sidequest=== |
+ | === Eidolon search sidequest === |
| + | [[File:Kaipo_eidolon_minigame.PNG|thumb|right|Rydia finds the eidolon.]] |
||
{{Main|Eidolon search sidequest}} |
{{Main|Eidolon search sidequest}} |
||
In the iOS version of ''Final Fantasy IV'', the player can embark on a quest to find eidolons scattered around the world. The first eidolon is in Kaipo, and is drinking the oasis water "like crazy". He is around the place where the Item Lore augment is obtained. |
In the iOS version of ''Final Fantasy IV'', the player can embark on a quest to find eidolons scattered around the world. The first eidolon is in Kaipo, and is drinking the oasis water "like crazy". He is around the place where the Item Lore augment is obtained. |
||
| − | == |
+ | == Items == |
[[File:Kaipo Inn.png|thumb|right|150px|Kaipo's Inn.]] |
[[File:Kaipo Inn.png|thumb|right|150px|Kaipo's Inn.]] |
||
| − | ===''Final Fantasy IV''=== |
+ | === ''Final Fantasy IV'' === |
| + | ;2D versions |
||
| − | {|class="FFIV table" |
||
| ⚫ | |||
| − | |-class="a" |
||
| − | !width="30%"|SNES |
||
| − | !width="70%"|DS |
||
| ⚫ | |||
| − | |[[Ether]]1 |
||
| ⚫ | |||
| ⚫ | |||
| + | ;3D versions |
||
| ⚫ | |||
| ⚫ | |||
| ⚫ | |||
| + | |||
| ⚫ | |||
| ⚫ | |||
| + | * [[Final Fantasy IV: The After Years items#Potion|Potion]] (Porom's Tale, Kain's Tale, Edward's Tale) |
||
| + | * Bronze Tail (Edward's Tale only) |
||
| − | ==Shops== |
+ | == Shops == |
| − | ===''Final Fantasy IV''=== |
+ | === ''Final Fantasy IV'' === |
| − | {|class="table" style="text-align:center" |
+ | {|class="article-table" style="text-align:center" |
|+'''[[Inn]]''' |
|+'''[[Inn]]''' |
||
|50 gil/night |
|50 gil/night |
||
| Line 80: | Line 151: | ||
{|class="full-width" |
{|class="full-width" |
||
| valign="top" width="50%"| |
| valign="top" width="50%"| |
||
| − | {|class="half-width FFIV table" style="text-align:center" |
+ | {|class="half-width FFIV article-table" style="text-align:center" |
|+'''[[Item]]s''' |
|+'''[[Item]]s''' |
||
|-class="a" |
|-class="a" |
||
| Line 88: | Line 159: | ||
!width="20%"|SNES |
!width="20%"|SNES |
||
!width="20%"|GBA |
!width="20%"|GBA |
||
| − | !width="20%"| |
+ | !width="20%"|3D |
|- |
|- |
||
!class="b"|[[Potion (item)|Potion]] |
!class="b"|[[Potion (item)|Potion]] |
||
| Line 140: | Line 211: | ||
|60 Gil |
|60 Gil |
||
|- |
|- |
||
| − | !class="b"|[[ |
+ | !class="b"|[[Final Fantasy IV items|Emergency Exit]] |
|N/A |
|N/A |
||
|N/A |
|N/A |
||
| Line 146: | Line 217: | ||
|} |
|} |
||
| valign="top" width="50%"| |
| valign="top" width="50%"| |
||
| − | {|class="half-width FFIV table" style="text-align:center" |
+ | {|class="half-width FFIV article-table" style="text-align:center" |
| − | |+'''[[ |
+ | |+'''[[Final Fantasy IV weapons|Weapons]]''' |
|-class="a" |
|-class="a" |
||
!width="40%" rowspan=2|Weapon |
!width="40%" rowspan=2|Weapon |
||
| Line 154: | Line 225: | ||
!width="20%"|SNES |
!width="20%"|SNES |
||
!width="20%"|GBA |
!width="20%"|GBA |
||
| − | !width="20%"| |
+ | !width="20%"|3D |
|- |
|- |
||
!class="b"|Rod |
!class="b"|Rod |
||
| Line 177: | Line 248: | ||
|} |
|} |
||
| − | {|class="half-width FFIV table" style="text-align:center" |
+ | {|class="half-width FFIV article-table" style="text-align:center" |
| − | |+'''[[ |
+ | |+'''[[Final Fantasy IV armor|Armor]]''' |
|-class="a" |
|-class="a" |
||
!width="40%" rowspan=2|Weapon |
!width="40%" rowspan=2|Weapon |
||
| Line 185: | Line 256: | ||
!width="20%"|SNES |
!width="20%"|SNES |
||
!width="20%"|GBA |
!width="20%"|GBA |
||
| − | !width="20%"| |
+ | !width="20%"|3D |
|- |
|- |
||
!class="b"|[[Leather equipment|Leather Cap]] |
!class="b"|[[Leather equipment|Leather Cap]] |
||
| Line 197: | Line 268: | ||
|50 gil |
|50 gil |
||
|- |
|- |
||
| − | !class="b"|[[Leather equipment|Leather |
+ | !class="b"|[[Leather equipment|Leather Garb]] |
|200 GP |
|200 GP |
||
|200 gil |
|200 gil |
||
|200 gil |
|200 gil |
||
|- |
|- |
||
| − | !class="b"|[[ |
+ | !class="b"|[[Iron Armlet]] |
|100 GP |
|100 GP |
||
|100 gil |
|100 gil |
||
| Line 209: | Line 280: | ||
|} |
|} |
||
| − | ===''The After Years''=== |
+ | === ''The After Years'' === |
| − | {|class="table" style="text-align:center" |
+ | {|class="article-table" style="text-align:center" |
|+'''[[Inn]]''' |
|+'''[[Inn]]''' |
||
|50 gil/night |
|50 gil/night |
||
|} |
|} |
||
| − | ====Kain's Tale==== |
+ | ==== Kain's Tale ==== |
{|class="full-width" |
{|class="full-width" |
||
|width="33%" valign="top"| |
|width="33%" valign="top"| |
||
| − | {|class="IVTAY table" style="text-align:center" width="100%" |
+ | {|class="IVTAY article-table" style="text-align:center" width="100%" |
| − | |+'''[[ |
+ | |+'''[[Final Fantasy IV: The After Years items|Items]]''' |
|-class="a" |
|-class="a" |
||
!width="60%"|Weapon |
!width="60%"|Weapon |
||
| Line 235: | Line 306: | ||
!class="b"|Gold Needle |
!class="b"|Gold Needle |
||
|400 gil |
|400 gil |
||
| ⚫ | |||
| ⚫ | |||
| + | |60 gil |
||
|- |
|- |
||
!class="b"|Diet Rations |
!class="b"|Diet Rations |
||
| Line 265: | Line 339: | ||
!class="b"|Cottage |
!class="b"|Cottage |
||
|500 gil |
|500 gil |
||
| ⚫ | |||
| + | !class="b"|[[Final Fantasy IV: The After Years items#Gnomish Bread|Gnomish Bread]]{{foot|3D only}} |
||
| + | |100 gil |
||
| ⚫ | |||
|} |
|} |
||
| valign="top" width="33%"| |
| valign="top" width="33%"| |
||
| − | {|class="IVTAY table" style="text-align:center" width="100%" |
+ | {|class="IVTAY article-table" style="text-align:center" width="100%" |
| − | |+'''[[ |
+ | |+'''[[Final Fantasy IV: The After Years weapons|Weapons]]''' |
|-class="a" |
|-class="a" |
||
!width="60%"|Weapon |
!width="60%"|Weapon |
||
!width="40%"|Price |
!width="40%"|Price |
||
|- |
|- |
||
| − | !class="b"|Coral Sword |
+ | !class="b"|[[Final Fantasy IV: The After Years weapons#Coral Sword|Coral Sword]] |
|2,500 gil |
|2,500 gil |
||
|- |
|- |
||
| − | !class="b"|Flame Sword |
+ | !class="b"|[[Final Fantasy IV: The After Years weapons#Flame Sword|Flame Sword]] |
|14,000 gil |
|14,000 gil |
||
|- |
|- |
||
| − | !class="b"|Great Bow |
+ | !class="b"|[[Final Fantasy IV: The After Years weapons#Great Bow|Great Bow]] |
|2,000 gil |
|2,000 gil |
||
|- |
|- |
||
| − | !class="b"|Blinding Arrows |
+ | !class="b"|[[Final Fantasy IV: The After Years weapons#Blinding Arrows|Blinding Arrows]] |
|1,000 gil |
|1,000 gil |
||
|} |
|} |
||
| valign="top" width="33%"| |
| valign="top" width="33%"| |
||
| − | {|class="IVTAY table" style="text-align:center" width="100%" |
+ | {|class="IVTAY article-table" style="text-align:center" width="100%" |
| − | |+'''[[ |
+ | |+'''[[Final Fantasy IV: The After Years armor|Armor]]''' |
|-class="a" |
|-class="a" |
||
!width="60%"|Armor |
!width="60%"|Armor |
||
!width="40%"|Price |
!width="40%"|Price |
||
|- |
|- |
||
| − | !class="b"|Iron Shield |
+ | !class="b"|[[Final Fantasy IV: The After Years armor#Iron Shield|Iron Shield]] |
|600 gil |
|600 gil |
||
|- |
|- |
||
| − | !class="b"|Steel |
+ | !class="b"|[[Final Fantasy IV: The After Years armor#Steel Helm|Steel Helm]] |
|2,000 gil |
|2,000 gil |
||
|- |
|- |
||
| − | !class="b"|Cross Helm |
+ | !class="b"|[[Final Fantasy IV: The After Years armor#Cross Helm|Cross Helm]] |
|4,200 gil |
|4,200 gil |
||
|- |
|- |
||
| − | !class="b"|Chainmail |
+ | !class="b"|[[Final Fantasy IV: The After Years armor#Chainmail|Chainmail]] |
|2,200 gil |
|2,200 gil |
||
|- |
|- |
||
| − | !class="b"|Plate |
+ | !class="b"|[[Final Fantasy IV: The After Years armor#Plate Mail|Plate Mail]] |
|5,000 gil |
|5,000 gil |
||
|- |
|- |
||
| − | !class="b"|Bone Wrist |
+ | !class="b"|[[Final Fantasy IV: The After Years armor#Bone Wrist|Bone Wrist]] |
|3,800 gil |
|3,800 gil |
||
|} |
|} |
||
|} |
|} |
||
| − | ====Porom's Tale==== |
+ | ==== Porom's Tale ==== |
{|class="full-width" |
{|class="full-width" |
||
|width="33%" valign="top"| |
|width="33%" valign="top"| |
||
| − | {|class="IVTAY table" style="text-align:center" width="100%" |
+ | {|class="IVTAY article-table" style="text-align:center" width="100%" |
| − | |+'''[[ |
+ | |+'''[[Final Fantasy IV: The After Years items|Items]]''' |
|-class="a" |
|-class="a" |
||
!width="60%"|Item |
!width="60%"|Item |
||
| Line 341: | Line 419: | ||
!class="b"|Tent |
!class="b"|Tent |
||
|100 gil |
|100 gil |
||
| ⚫ | |||
| ⚫ | |||
| + | !class="b"|[[Final Fantasy IV: The After Years items#Gnomish Bread|Gnomish Bread]]{{foot|3D only}} |
||
| + | |100 gil |
||
| ⚫ | |||
|} |
|} |
||
| valign="top" width="33%"| |
| valign="top" width="33%"| |
||
| − | {|class="IVTAY table" style="text-align:center" width="100%" |
+ | {|class="IVTAY article-table" style="text-align:center" width="100%" |
| − | |+'''[[ |
+ | |+'''[[Final Fantasy IV: The After Years weapons|Weapons]]''' |
|-class="a" |
|-class="a" |
||
!width="60%"|Weapon |
!width="60%"|Weapon |
||
!width="40%"|Price |
!width="40%"|Price |
||
|- |
|- |
||
| − | !class="b"|Rod |
+ | !class="b"|[[Final Fantasy IV: The After Years weapons#Rod|Rod]] |
|100 gil |
|100 gil |
||
|- |
|- |
||
| − | !class="b"|Staff |
+ | !class="b"|[[Final Fantasy IV: The After Years weapons#Staff|Staff]] |
|160 gil |
|160 gil |
||
|- |
|- |
||
| − | !class="b"|Bow |
+ | !class="b"|[[Final Fantasy IV: The After Years weapons#Bow|Bow]] |
|220 gil |
|220 gil |
||
|- |
|- |
||
| − | !class="b"|Iron Arrows |
+ | !class="b"|[[Final Fantasy IV: The After Years weapons#Iron Arrows|Iron Arrows]] |
|50 gil |
|50 gil |
||
|} |
|} |
||
| valign="top" width="33%"| |
| valign="top" width="33%"| |
||
| − | {|class="IVTAY table" style="text-align:center" width="100%" |
+ | {|class="IVTAY article-table" style="text-align:center" width="100%" |
| − | |+'''[[ |
+ | |+'''[[Final Fantasy IV: The After Years armor|Armor]]''' |
|-class="a" |
|-class="a" |
||
!width="60%"|Armor |
!width="60%"|Armor |
||
!width="40%"|Price |
!width="40%"|Price |
||
|- |
|- |
||
| − | !class="b"|Leather Cap |
+ | !class="b"|[[Final Fantasy IV: The After Years armor#Leather Cap|Leather Cap]] |
|100 gil |
|100 gil |
||
|- |
|- |
||
| − | !class="b"|Clothing |
+ | !class="b"|[[Final Fantasy IV: The After Years armor#Clothing|Clothing]] |
|50 gil |
|50 gil |
||
|- |
|- |
||
| − | !class="b"|Leather Clothing |
+ | !class="b"|[[Final Fantasy IV: The After Years armor#Leather Clothing|Leather Clothing]] |
|200 gil |
|200 gil |
||
|- |
|- |
||
| − | !class="b"|Iron Armlet |
+ | !class="b"|[[Final Fantasy IV: The After Years armor#Iron Armlet|Iron Armlet]] |
|100 gil |
|100 gil |
||
|} |
|} |
||
|} |
|} |
||
| − | ====Edward's Tale / The Crystals==== |
+ | ==== Edward's Tale / The Crystals ==== |
{|class="full-width" |
{|class="full-width" |
||
|width="33%" valign="top"| |
|width="33%" valign="top"| |
||
| − | {|class="IVTAY table" style="text-align:center" width="100%" |
+ | {|class="IVTAY article-table" style="text-align:center" width="100%" |
| − | |+'''[[ |
+ | |+'''[[Final Fantasy IV: The After Years items|Items]]''' |
|-class="a" |
|-class="a" |
||
!width="60%"|Item |
!width="60%"|Item |
||
| Line 394: | Line 477: | ||
|30 gil |
|30 gil |
||
|- |
|- |
||
| − | !class="b"| |
+ | !class="b"|Hi-Potion |
| − | | |
+ | |150 gil |
|- |
|- |
||
!class="b"|Phoenix Down |
!class="b"|Phoenix Down |
||
| Line 408: | Line 491: | ||
!class="b"|Echo Herbs |
!class="b"|Echo Herbs |
||
|50 gil |
|50 gil |
||
| ⚫ | |||
| ⚫ | |||
| + | |30 gil |
||
|- |
|- |
||
!class="b"|Antidote |
!class="b"|Antidote |
||
| Line 432: | Line 518: | ||
!class="b"|Cottage |
!class="b"|Cottage |
||
|500 gil |
|500 gil |
||
| + | |- |
||
| + | !class="b"|[[Final Fantasy IV: The After Years items#Gnomish Bread|Gnomish Bread]]{{foot|3D only}} |
||
| + | |100 gil |
||
| + | |- |
||
|} |
|} |
||
| valign="top" width="33%"| |
| valign="top" width="33%"| |
||
| − | {|class="IVTAY table" style="text-align:center" width="100%" |
+ | {|class="IVTAY article-table" style="text-align:center" width="100%" |
| − | |+'''[[ |
+ | |+'''[[Final Fantasy IV: The After Years weapons|Weapons]]''' |
|-class="a" |
|-class="a" |
||
!width="60%"|Weapon |
!width="60%"|Weapon |
||
!width="40%"|Price |
!width="40%"|Price |
||
|- |
|- |
||
| − | !class="b"|Silver Harp |
+ | !class="b"|[[Final Fantasy IV: The After Years weapons#Silver Harp|Silver Harp]] |
|880 gil |
|880 gil |
||
|- |
|- |
||
| − | !class="b"|Dark Harp |
+ | !class="b"|[[Final Fantasy IV: The After Years weapons#Dark Harp|Silver Harp]] |
|2,800 gil |
|2,800 gil |
||
|- |
|- |
||
| − | !class="b"|Thorn Whip |
+ | !class="b"|[[Final Fantasy IV: The After Years weapons#Thorn Whip|Thorn Whip]] |
|3,000 gil |
|3,000 gil |
||
|- |
|- |
||
| − | !class="b"|Chain Whip |
+ | !class="b"|[[Final Fantasy IV: The After Years weapons#Chain Whip|Chain Whip]] |
|6,000 gil |
|6,000 gil |
||
|- |
|- |
||
| − | !class="b"|Longsword |
+ | !class="b"|[[Final Fantasy IV: The After Years weapons#Longsword|Longsword]] |
|450 gil |
|450 gil |
||
|- |
|- |
||
| − | !class="b"|Iron Sword |
+ | !class="b"|[[Final Fantasy IV: The After Years weapons#Iron Sword|Iron Sword]] |
|1,000 gil |
|1,000 gil |
||
|} |
|} |
||
| valign="top" width="33%"| |
| valign="top" width="33%"| |
||
| − | {|class="IVTAY table" style="text-align:center" width="100%" |
+ | {|class="IVTAY article-table" style="text-align:center" width="100%" |
| − | |+'''[[ |
+ | |+'''[[Final Fantasy IV: The After Years armor|Armor]]''' |
|-class="a" |
|-class="a" |
||
!width="60%"|Armor |
!width="60%"|Armor |
||
!width="40%"|Price |
!width="40%"|Price |
||
|- |
|- |
||
| − | !class="b"|Beret |
+ | !class="b"|[[Final Fantasy IV: The After Years armor#Beret|Beret]] |
|1,200 gil |
|1,200 gil |
||
|- |
|- |
||
| + | !class="b"|[[Final Fantasy IV: The After Years armor#Bronze Breastplate|Bronze Breastplate]] |
||
| ⚫ | |||
|450 gil |
|450 gil |
||
|- |
|- |
||
| + | !class="b"|[[Final Fantasy IV: The After Years armor#Silver Breastplate|Silver Breastplate]] |
||
| ⚫ | |||
|2,000 gil |
|2,000 gil |
||
|- |
|- |
||
| − | !class="b"|Silver Armlet |
+ | !class="b"|[[Final Fantasy IV: The After Years armor#Silver Armlet|Silver Armlet]] |
|650 gil |
|650 gil |
||
|- |
|- |
||
| − | !class="b"|Rune Armlet |
+ | !class="b"|[[Final Fantasy IV: The After Years armor#Rune Armlet|Rune Armlet]] |
|2,000 gil |
|2,000 gil |
||
|- |
|- |
||
| − | !class="b"|Iron Shield |
+ | !class="b"|[[Final Fantasy IV: The After Years armor#Iron Shield|Iron Shield]] |
|600 gil |
|600 gil |
||
|- |
|- |
||
| − | !class="b"|Iron Armor |
+ | !class="b"|[[Final Fantasy IV: The After Years armor#Iron Armor|Iron Armor]] |
|1,000 gil |
|1,000 gil |
||
|- |
|- |
||
| − | !class="b"|Iron Helm |
+ | !class="b"|[[Final Fantasy IV: The After Years armor#Iron Helm|Iron Helm]] |
|800 gil |
|800 gil |
||
|} |
|} |
||
|} |
|} |
||
| − | ==Enemies== |
+ | == Enemies == |
| − | ===''[[Final Fantasy IV]]''=== |
+ | === ''[[Final Fantasy IV]]'' === |
| + | ;2D versions |
||
| − | ====Outside==== |
||
| + | * [[Desert Sahagin (Final Fantasy IV 2D)|Desert Sahagin]] x4 |
||
| − | {|class="full-width FFIV table" style="text-align:center" |
||
| ⚫ | |||
| − | |-class="a" |
||
| + | * [[Larva (Final Fantasy IV 2D)|Insectus]] x2, [[Eyewing Moth (Final Fantasy IV 2D)|Flying Eyes]] x2 |
||
| − | !width="33%"|SNES |
||
| + | * [[Goblin (Final Fantasy IV 2D)|Goblin]] x4 |
||
| − | !width="33%"|PS |
||
| + | * [[Sand Worm (Final Fantasy IV 2D)|Sand Worm]] |
||
| − | !width="33%"|GBA |
||
| + | * [[Sahagin (Final Fantasy IV 2D)|Sahagin]] |
||
| ⚫ | |||
| − | |[[ |
+ | * [[General (Final Fantasy IV 2D)|General]] x1 and [[Baron Soldier (Final Fantasy IV 2D)|Baron Soldiers]] x3 (boss) |
| ⚫ | |||
| ⚫ | |||
| ⚫ | |||
| ⚫ | |||
| ⚫ | |||
| ⚫ | |||
| ⚫ | |||
| ⚫ | |||
| ⚫ | |||
| ⚫ | |||
| ⚫ | |||
| ⚫ | |||
| ⚫ | |||
| ⚫ | |||
| ⚫ | |||
| ⚫ | |||
| ⚫ | |||
| ⚫ | |||
| ⚫ | |||
| + | ;3D versions |
||
| − | =====DS Formations===== |
||
| − | *[[Desert Sahagin (Final Fantasy IV)|Desert Sahagin]] x3 |
+ | * [[Desert Sahagin (Final Fantasy IV 3D)|Desert Sahagin]] x3 |
| − | *[[Desert Sahagin (Final Fantasy IV)|Desert Sahagin]] x2, [[Hundlegs (Final Fantasy IV)|Hundlegs]] |
+ | * [[Desert Sahagin (Final Fantasy IV 3D)|Desert Sahagin]] x2, [[Hundlegs (Final Fantasy IV 3D)|Hundlegs]] |
| − | *[[Goblin (Final Fantasy IV)|Goblin]] x3, [[Sword Rat (Final Fantasy IV)|Sword Rat]] |
+ | * [[Goblin (Final Fantasy IV 3D)|Goblin]] x3, [[Sword Rat (Final Fantasy IV 3D)|Sword Rat]] |
| − | *[[Goblin (Final Fantasy IV)|Goblin]] x4 |
+ | * [[Goblin (Final Fantasy IV 3D)|Goblin]] x4 |
| − | *[[Sand Worm (Final Fantasy IV)|Sand Worm]] |
+ | * [[Sand Worm (Final Fantasy IV 3D)|Sand Worm]] |
| + | * [[Sahagin (Final Fantasy IV 3D)|Sahagin]] |
||
| + | * [[General (Final Fantasy IV 3D)|General]] x1 and [[Baron Soldier (Final Fantasy IV 3D)|Baron Soldiers]] x3 (boss) |
||
| ⚫ | |||
| − | ====In town==== |
||
| ⚫ | |||
| − | {|class="half-width FFIV table" style="text-align:center" |
||
| ⚫ | |||
| − | |-class="a" |
||
| + | * [[Evil Flame]] x2, [[Ettin Snake (The After Years)|Ettin Snake]] |
||
| − | !width="25%"|SNES |
||
| + | * [[Skeleripper]] x2, [[Gremlin (The After Years)|Gremlin]] |
||
| − | !width="25%"|PS |
||
| + | * [[Skeleripper]] x2, [[Lilith (The After Years)|Lilith]] |
||
| − | !width="25%"|GBA |
||
| + | * [[Cave Naga (The After Years)|Cave Naga]] x2 |
||
| − | !width="25%"|DS |
||
| + | * [[Evil Flame]] x2, [[Ogre (The After Years)|Ogre]] |
||
| ⚫ | |||
| ⚫ | |||
| ⚫ | |||
| + | * [[Ettin Snake (The After Years)|Ettin Snake]], [[Skeleripper]] |
||
| ⚫ | |||
| ⚫ | |||
| ⚫ | |||
| ⚫ | |||
| + | ;Edward's Tale |
||
| ⚫ | |||
| + | * [[Hundlegs (The After Years)|Hundlegs]], [[Desert Sahagin (The After Years)|Desert Sahagin]] x2 |
||
| − | <tabber> |
||
| + | * [[Sand Worm (The After Years)|Sand Worm]] |
||
| ⚫ | |||
| − | * |
+ | * [[Sand Worm (The After Years)|Sand Worm]] x2 |
| − | *[[ |
+ | * [[Sword Rat (The After Years)|Sword Rat]] x2, [[Goblin (The After Years enemy)|Goblin]] x2 |
| − | *[[ |
+ | * [[Goblin (The After Years enemy)|Goblin]] x3, [[Domovoi (The After Years)|Domovoi]] |
| − | *[[ |
+ | * [[Desert Sahagin (The After Years)|Desert Sahagin]] x4 |
| − | *[[ |
+ | * [[Hundlegs (The After Years)|Hundlegs]], [[Sand Worm (The After Years)|Sand Worm]] |
| ⚫ | |||
| ⚫ | |||
| ⚫ | |||
| ⚫ | |||
| ⚫ | |||
| ⚫ | |||
| ⚫ | |||
| ⚫ | |||
| ⚫ | |||
| ⚫ | |||
| ⚫ | |||
| ⚫ | |||
| ⚫ | |||
| ⚫ | |||
| ⚫ | |||
| ⚫ | |||
| ⚫ | |||
| ⚫ | |||
| ⚫ | |||
| − | </tabber> |
||
| + | ;The Crystals |
||
| ⚫ | |||
| + | * [[Caterpillar (The After Years)|Caterpillar]] x4 |
||
| + | * [[Goblin Captain (The After Years)|Goblin Captain]] x4 |
||
| + | * [[Caterpillar (The After Years)|Caterpillar]] x2, [[Hellflapper (The After Years)|Hellflapper]] x2 |
||
| + | * [[Abyss Worm (The After Years)|Abyss Worm]] |
||
| + | * [[Hellflapper (The After Years)|Hellflapper]] x2 |
||
| + | * [[Tunneler (The After Years)|Tunneler]] x2 |
||
| + | * [[Blood Eye (The After Years)|Blood Eye]] |
||
| + | |||
| ⚫ | |||
The background music that plays in Kaipo is the "Town Theme" of ''Final Fantasy IV''. |
The background music that plays in Kaipo is the "Town Theme" of ''Final Fantasy IV''. |
||
| Line 577: | Line 636: | ||
{{-}} |
{{-}} |
||
| − | ==Other appearances== |
+ | == Other appearances == |
| − | ===''[[Final Fantasy Airborne Brigade]]''=== |
+ | === ''[[Final Fantasy Airborne Brigade]]'' === |
| − | {{sideicon|FFAB}} |
||
[[File:FFAB Kaipo FFIV Special.png|right]] |
[[File:FFAB Kaipo FFIV Special.png|right]] |
||
{{Locat-stub|Final Fantasy Airborne Brigade}} |
{{Locat-stub|Final Fantasy Airborne Brigade}} |
||
| − | ==Gallery== |
+ | == Gallery == |
| + | <gallery> |
||
| − | {{Gallery|class=FFIV|title=Gallery|collapse=hide |
||
| − | + | Kaipo FFIV iOS.PNG|The town of Kaipo (DS/iOS). |
|
| − | + | Streets_of_kaipo_ffiv_ios.PNG|The streets of Kaipo (DS/iOS). |
|
| − | + | Battle_Kaipo_Inn_iOS.PNG|Battle in the inn (iOS). |
|
| − | + | Kaipo_Inn_iOS_Victory_Screen.PNG|Victory screen (iOS). |
|
| − | + | Kaipo Sahagin Victory Screen iOS.PNG|Victory screen in Edward's battle (iOS). |
|
| − | + | FFIV_Battle_Background_Kaipo_SNES.png|Battle Background in the night (SNES). |
|
| − | + | FFIV_Kaipo_Background_GBA.png|Battle Background in the night (GBA). |
|
| − | + | FFIV PSP Grass Night Battle.png|Battle Background in the night (PSP). |
|
| − | + | FFIV_Battle_Background_Castle_SNES.png|Battle Background in the Inn (SNES). |
|
| − | + | FFIV_Castle_Background_GBA.png|Battle Background in the Inn (GBA). |
|
| − | + | FFIV PSP Castle Battle.png|Battle Background in the Inn (PSP). |
|
| − | + | FFIV Kaipo PSP.png|''[[Final Fantasy IV: The Complete Collection]]''. |
|
| − | + | FFIV Kaipo WM PSP.png|Kaipo on the world map in ''[[Final Fantasy IV: The Complete Collection]]''. |
|
| − | + | Kaipo Item Shop.png|Kaipo's Item Shop. |
|
| − | + | Kaipo Weapon Shop.png|Kaipo's Weapon Shop. |
|
| − | + | Kaipo Armor Shop.png|Kaipo's Armor Shop. |
|
| − | + | Kaipo Pub.png|Kaipo's Pub. |
|
| − | + | Kaipo Inn ffiv ios.PNG|Inn (DS/iOS). |
|
| − | + | Kaipo items shop ffiv ios.PNG|Item Shop (DS/iOS). |
|
| − | + | Kaipo weapons shop ffiv ios.PNG|Weapon Shop (DS/iOS). |
|
| − | + | Kaipo armor shop ffiv ios.PNG|Armor Shop (DS/iOS). |
|
| − | + | FFIVDS Kaipo Map.PNG|Map of Kaipo (DS). |
|
| − | + | Kaipo IOS render.png|Kaipo render (iOS). |
|
| − | + | Kaipo boy NPC render ffiv ios.PNG|Render of a Kaipo boy (DS/iOS). |
|
| − | + | Kaipo man NPC render ffiv ios.PNG|Render of a Kaipo man (DS/iOS). |
|
| − | + | Kaipo woman NPC render ffiv ios.PNG|Render of a Kaipo woman (DS/iOS). |
|
| − | + | Kaipo damcyan old man NPC render ffiv ios.PNG|Render of a Kaipo old man (DS/iOS). |
|
| − | + | Kaipo damcyan old woman NPC render ffiv ios.PNG|Render of a Kaipo old woman (DS/iOS). |
|
| + | TAY Wii Kaipo WM.jpg|Kaipo on the world map in ''[[Final Fantasy IV: The After Years]]'' (Wii). |
||
| ⚫ | |||
| + | TAY Wii Kaipo.jpg|''[[Final Fantasy IV: The After Years]]'' (Wii). |
||
| + | </gallery> |
||
| + | |||
| + | {{navbox setting FFIV}} |
||
| + | {{navbox setting IVTAY}} |
||
| − | {{FFIV}} |
||
| − | {{IVTAY}} |
||
[[de:Kaipo]] |
[[de:Kaipo]] |
||
[[pt-br:Kaipo]] |
[[pt-br:Kaipo]] |
||
| − | [[Category:Final Fantasy IV |
+ | [[Category:Locations in Final Fantasy IV]] |
[[Category:Towns]] |
[[Category:Towns]] |
||
| − | [[Category:Final Fantasy IV: The After Years |
+ | [[Category:Locations in Final Fantasy IV: The After Years]] |
Revision as of 05:22, 24 October 2019
Template:Sideicon Kaipo is a town in Final Fantasy IV. It is the only town located in the southern part of Damcyan's desert, near an oasis. It is the homeland of Sage Tellah and his daughter Anna.
In the English localization of the 3D version, Kaipo is pronounced [ˈkaɪ.poʊ].
Story
Final Fantasy IV


The Town of Kaipo (SNES).
Before the adventure begins, Tellah is living here with his daughter Anna. Edward Chris von Muir, the prince of Damcyan, travels to Kaipo disguised as a Bard, and he and Anna fall in love. Tellah does not consent to their union, so they elope and run away to Damcyan. Tellah then tries to pursue them, but he cannot defeat the Octomammoth, a monster living in the Underground Waterway that connects Kaipo to Damcyan.
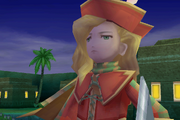
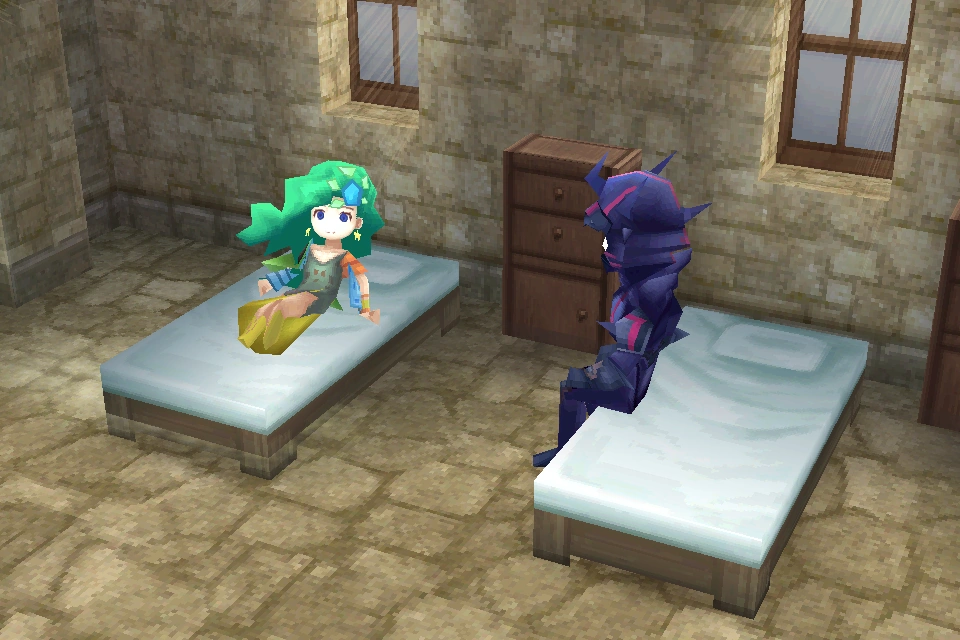
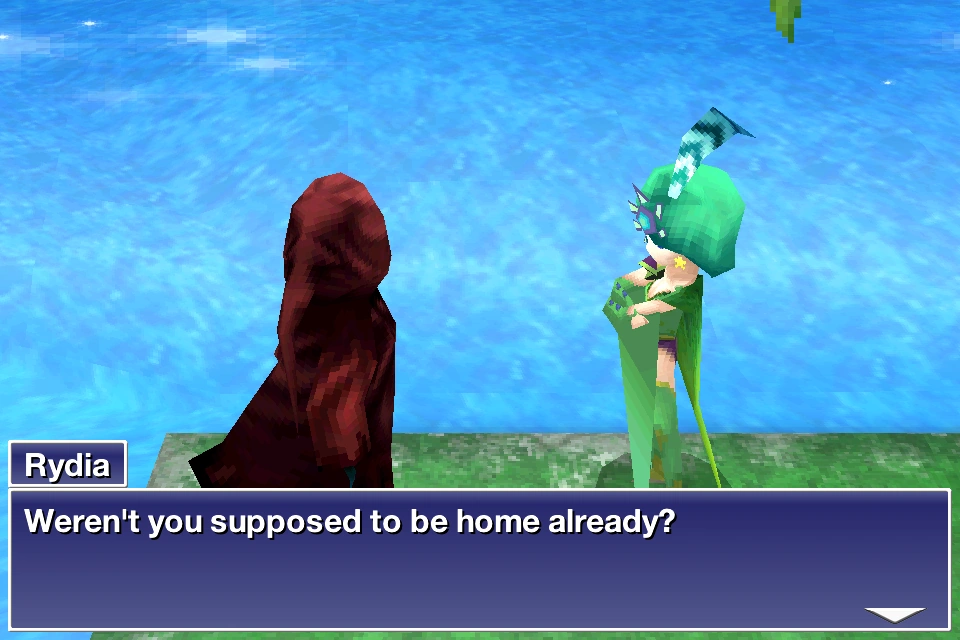
The Dark Knight Cecil Harvey arrives here eventually with a wounded girl from Mist. He lets her rest at the inn, but she will not speak to him. That night, some soldiers from Baron enter the inn and demand that Cecil hand over the girl, a Summoner, as the King of Baron had proclaimed that the Summoners of Mist were too dangerous to be left alive. Cecil refuses to hand her over, and defeats the Baron soldiers. The girl thanks him and introduces herself as Rydia, who then joins Cecil's adventure. The next morning, they hear that a sick girl from Baron was in the hospital.

Edward in Kaipo, after speaking with Anna's spirit.
Cecil finds out that Rosa Joanna Farrell, his friend from Baron, had come down with a case of Desert Fever, and Cecil needs to find the Sand Pearl from the Antlion's Den to cure her. Cecil and Rydia go out in search of the Sand Pearl, and eventually find it and return with Edward's assistance. They use the Sand Pearl on Rosa, and she recovers and joins the party. She informs them that the next target is the Crystal of Air at Fabul, and they needed to cross Mt. Hobs to reach the castle.
The night before the party leaves, Edward goes out to the oasis and plays his harp. A Sahagin appears and attacks Edward. Anna's ghost appears and tells him to believe in himself and to be strong for the two of them. Edward manages to get over his sorrow, and is able to defeat the monster.
Final Fantasy IV: The After Years
In Porom's Tale, she and Palom journey to Kaipo during Palom's journey to become a sage. Two graves to Tellah and Anna rest on the north side of town, and they pray to the two of them before heading to the waterway to train.
In Edward's Tale, Edward, Harley and several guards travel through the waterway to catch a ship to Baron, but Harley collapses from desert fever. Edward heads to the Antlion's Den in order to get a Sand Pearl to cure her.
In The Crystals, Yang and Ursula are being cared for here after their ship is destroyed by Leviathan on their way to Baron. After a visit to Yang's wife Sheila, the party uses her frying pan and ladle to knock the two monks to their senses.
Locations
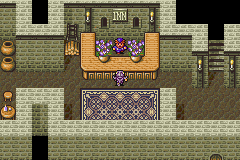
Inn

Cecil and Rydia inside the Kaipo inn.
After the Mist landslide, Cecil and the child Rydia have no choice but to take refuge in Kaipo. Automatically, the player will be walked to the Inn the first time s/he enters the town. A cutscene will then trigger, showing Baron soldiers who were ordered to kill Rydia. They are taken care of, and this earns Rydia's acceptance of the dark knight, and her place in the party.
Pub

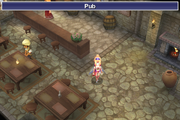
Kaipo's Pub.
Kaipo's pub is found on the Inn's second floor. The bartender says that due to the frequenting monsters in the surrounding areas, customers are very scarce.
Couple's House


The house.
After child Rydia joins Cecil, the player must go to the building north of the weapons shop. A Rosa with diagnosed fever rests within it under the care of a couple, who tell Cecil he must obtain a Sand Pearl for Rosa if she is to live. There is a bookshelf, and when prompted, it will inform the player about desert fever. After Cecil returns successful, Rosa is cured. The couple notes that Rosa has been calling for Cecil all the time she was sick, and tells Cecil to take care of her.
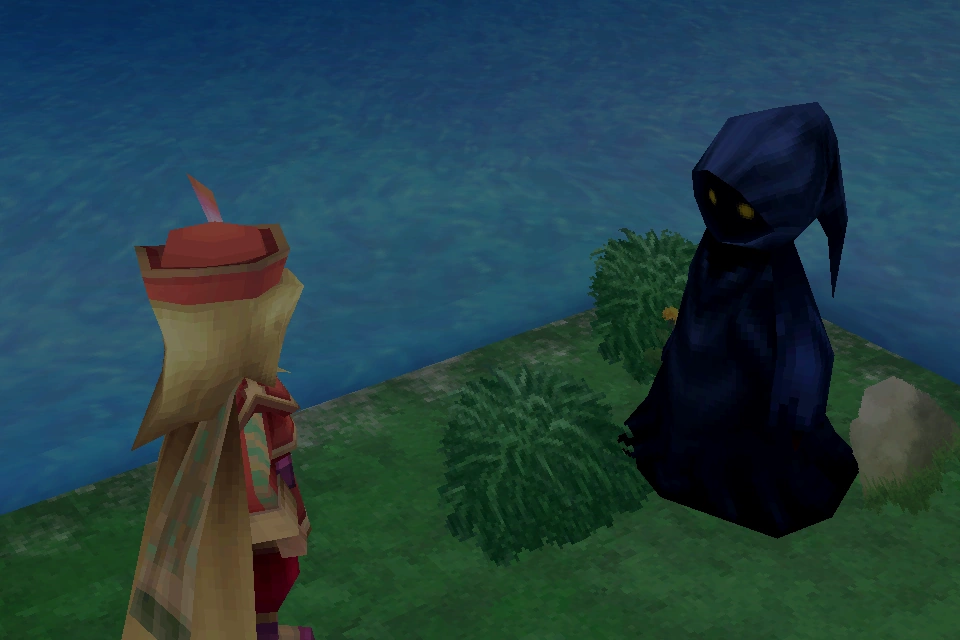
Banks of the Oasis

Edward encounters the Sahagin.
As his companions are sleeping, Edward goes out in the night for some fresh air. Lovesick and missing Anna, he plays on his harp, but is interrupted by a Sahagin. Anna talks to Edward, giving him strength and courage to defeat it, and tells him to have more faith in himself.
Quests
Eidolon search sidequest
Rydia finds the eidolon.
In the iOS version of Final Fantasy IV, the player can embark on a quest to find eidolons scattered around the world. The first eidolon is in Kaipo, and is drinking the oasis water "like crazy". He is around the place where the Item Lore augment is obtained.
Items
Kaipo's Inn.
Final Fantasy IV
- 2D versions
- 3D versions
The After Years
- Potion (Porom's Tale, Kain's Tale, Edward's Tale)
- Bronze Tail (Edward's Tale only)
Shops
Final Fantasy IV
| 50 gil/night |
|
| |||||||||||||||||||||||||||||||||||||||||||||||||||||||||||||||||||||||||||||||||||||||||||||||||
The After Years
| 50 gil/night |
Kain's Tale
|
|
|
Porom's Tale
|
|
|
Edward's Tale / The Crystals
|
|
|
Enemies
Final Fantasy IV
- 2D versions
- Desert Sahagin x4
- Desert Sahagin x2, Hundlegs
- Insectus x2, Flying Eyes x2
- Goblin x4
- Sand Worm
- Sahagin
- General x1 and Baron Soldiers x3 (boss)
- 3D versions
- Desert Sahagin x3
- Desert Sahagin x2, Hundlegs
- Goblin x3, Sword Rat
- Goblin x4
- Sand Worm
- Sahagin
- General x1 and Baron Soldiers x3 (boss)
Final Fantasy IV: The After Years
- Kain's Tale
- Magma Tortoise, Goblin Captain x2
- Evil Flame x2, Ettin Snake
- Skeleripper x2, Gremlin
- Skeleripper x2, Lilith
- Cave Naga x2
- Evil Flame x2, Ogre
- Bloodbones, Needlehog
- Ettin Snake, Skeleripper
- Edward's Tale
- Hundlegs, Desert Sahagin x2
- Sand Worm
- Sand Worm x2
- Sword Rat x2, Goblin x2
- Goblin x3, Domovoi
- Desert Sahagin x4
- Hundlegs, Sand Worm
- The Crystals
- Caterpillar x4
- Goblin Captain x4
- Caterpillar x2, Hellflapper x2
- Abyss Worm
- Hellflapper x2
- Tunneler x2
- Blood Eye
Musical themes
The background music that plays in Kaipo is the "Town Theme" of Final Fantasy IV.
In The After Years, when the blue planet invaded in chaos by the True Moon in The Crystals chapter, the track "Castle Damcyan" is played instead.
Other appearances
Final Fantasy Airborne Brigade

Gallery
")
")
")
")
")
")
")
")
")
")
")
")
")
")
")
")
")
")
")
")
")
")
")
")
")
")
")
")
")
")