(→Layout) Tag: Source edit |
Intangir Bot (talk | contribs) m (Bot: Automated text replacement (-Sephiroth Clone +Sephiroth-clone, -Sephiroth-clone +Sephiroth-clone)) |
||
| (26 intermediate revisions by 5 users not shown) | |||
| Line 15: | Line 15: | ||
*[[#Junon Exterior|Junon Exterior]] |
*[[#Junon Exterior|Junon Exterior]] |
||
*[[#Junon Path|Junon Path]] |
*[[#Junon Path|Junon Path]] |
||
| − | *[[ |
+ | *[[Underwater Reactor (field)|Underwater Reactor]] |
|items= |
|items= |
||
* [[1/35 Soldier]] x2 |
* [[1/35 Soldier]] x2 |
||
| Line 24: | Line 24: | ||
* [[Enemy Skill (Final Fantasy VII)|Enemy Skill Materia]] |
* [[Enemy Skill (Final Fantasy VII)|Enemy Skill Materia]] |
||
* [[Speed Source]] |
* [[Speed Source]] |
||
| − | * Various rewards for [[#Junon parade|partaking in the parade]] |
+ | * Various rewards for [[The Stowaway Strategy#Junon parade|partaking in the parade]] |
* Many found in [[#Shops|shops]] |
* Many found in [[#Shops|shops]] |
||
|enemies= |
|enemies= |
||
| Line 37: | Line 37: | ||
*[[Clash in the Deep Sea]] |
*[[Clash in the Deep Sea]] |
||
}} |
}} |
||
| − | '''Junon''' is a field map in ''[[Final Fantasy VII]]'' located in the [[Junon Area]] of the eastern continent. It is not accessed directly from the [[world map]], rather, it is situated above [[Under Junon (field)|Under Junon]] and accessed by using the elevator there. It is first visited during "[[The Stowaway Strategy]]", when a [[party]] led by [[Cloud (Final Fantasy VII party member)|Cloud]] tries to board the [[Cargo Ship (Final Fantasy VII)|Cargo Ship]] to cross the ocean. It is revisited during "[[In a World Approaching Its End]]" by [[Tifa (Final Fantasy VII party member)|Tifa's]] party as they flee Junon to escape execution, and again during "[[Clash in the Deep Sea]]" when Cloud's party makes its way to the [[ |
+ | '''Junon''' is a field map in ''[[Final Fantasy VII]]'' located in the [[Junon Area]] of the eastern continent. It is not accessed directly from the [[world map]], rather, it is situated above [[Under Junon (field)|Under Junon]] and accessed by using the elevator there. It is first visited during "[[The Stowaway Strategy]]", when a [[party]] led by [[Cloud (Final Fantasy VII party member)|Cloud]] tries to board the [[Cargo Ship (Final Fantasy VII field)|Cargo Ship]] to cross the ocean. It is revisited during "[[In a World Approaching Its End]]" by [[Tifa (Final Fantasy VII party member)|Tifa's]] party as they flee Junon to escape execution, and again during "[[Clash in the Deep Sea]]" when Cloud's party makes its way to the [[Underwater Reactor (field)|Underwater Reactor]]. |
| − | Junon has numerous [[Final Fantasy VII shops|shops]]. After the ''[[Highwind (Final Fantasy VII)|Highwind]]'' is obtained, Junon sells a variety of useful [[Final Fantasy VII weapons|weapons]]. |
+ | Junon has numerous [[Final Fantasy VII shops|shops]]. After the ''[[Highwind (Final Fantasy VII transportation)|Highwind]]'' is obtained, Junon sells a variety of useful [[Final Fantasy VII weapons|weapons]]. |
== Layout == |
== Layout == |
||
| + | === Overview === |
||
{{multiple image |
{{multiple image |
||
|direction = vertical |
|direction = vertical |
||
| Line 54: | Line 55: | ||
|footer = Junon is located on the western coast of the eastern continent. |
|footer = Junon is located on the western coast of the eastern continent. |
||
}} |
}} |
||
| − | Junon is located to the west on the eastern continent, the Junon Area. It is located on the coast and there is a [[submarine (Final Fantasy VII)|submarine]] bay next to it. It can be accessed by boarding the cargo ship from [[Costa del Sol (Final Fantasy VII)|Costa del Sol]], whereupon the player arrives at the dock at the end of town, or via the elevator from Under Junon. |
+ | Junon is located to the west on the eastern continent, the Junon Area. It is located on the coast and there is a [[submarine (Final Fantasy VII transportation)|submarine]] bay next to it. It can be accessed by boarding the cargo ship from [[Costa del Sol (Final Fantasy VII)|Costa del Sol]], whereupon the player arrives at the dock at the end of town, or via the elevator from Under Junon. |
Junon is divided into two halves, Lower Junon {{j|エルジュノン|Erujunon}} and Upper Junon {{j|アルジュノン|Arujunon}}. Upper Junon has the airport, while Lower Junon has the dock. In the middle is the Junon Branch, the cannon, and a path down to the submarine dock and the [[Junon Underwater Reactor]]. At the foot of Junon's right side is the [[Under Junon]] settlement. |
Junon is divided into two halves, Lower Junon {{j|エルジュノン|Erujunon}} and Upper Junon {{j|アルジュノン|Arujunon}}. Upper Junon has the airport, while Lower Junon has the dock. In the middle is the Junon Branch, the cannon, and a path down to the submarine dock and the [[Junon Underwater Reactor]]. At the foot of Junon's right side is the [[Under Junon]] settlement. |
||
| − | |||
| − | The Japanese names are likely intended to be "L-Junon" and "R-Junon", with "L" and "R" representing "left" and "right". This refers to the sides of the city in relation to the cannon.<!--To support the notion that it is referencing "L" and "R", the game files are named "junonl*" and "junonr*" for the respective areas. Outside Junon Branch on right side are the letters "SRJ-R 80e", while on the left side are the letters "SRJ-L 59e" (here "SR" likely standing for Shin-Ra, and "J" for Junon).--> |
||
=== Elevator to Junon === |
=== Elevator to Junon === |
||
The elevator is accessed in the back of Under Junon town. When the player first arrives, access to Junon is blocked due to [[Rufus Shinra]]'s welcoming ceremony, but afterward, the player can bribe the guard for 10 gil to get through. |
The elevator is accessed in the back of Under Junon town. When the player first arrives, access to Junon is blocked due to [[Rufus Shinra]]'s welcoming ceremony, but afterward, the player can bribe the guard for 10 gil to get through. |
||
| − | |||
| − | === Lower Junon === |
||
| − | ==== Branch Entrance ==== |
||
| − | ==== Lift ==== |
||
| − | ==== Road ==== |
||
| − | ==== Shinra Member's Bar ==== |
||
| − | ==== Junon Inn ==== |
||
| − | ==== Materia Store ==== |
||
| − | ==== Item Store ==== |
||
| − | ==== Barracks ==== |
||
| − | ;{{A|Barracks 1f.|1f.}} |
||
| − | |||
| − | ;{{A|Barracks 2f.|2f.}} |
||
| − | [[Shinra Manager]] can be found here. |
||
| − | |||
| − | ==== Weapon Store ==== |
||
| − | |||
| − | ==== Dock ==== |
||
=== Upper Junon === |
=== Upper Junon === |
||
==== Airport Path ==== |
==== Airport Path ==== |
||
| + | The Airport Path is the first area of Junon reached after Cloud climbs there with the help of [[Mr. Dolphin]] in "The Stowaway Strategy". The ''[[Highwind (Final Fantasy VII)|Highwind]]'' is initially docked on the Airport Path, and is obtained later during "In a World Approaching Its End". South from the Airport Path is the Airport itself. |
||
| + | |||
==== Airport ==== |
==== Airport ==== |
||
| + | The Airport contains a simple elevator up to the Airport Path, and is located adjacent to the Locker Room. The screen itself contains little of note. |
||
| + | |||
==== Locker Room ==== |
==== Locker Room ==== |
||
| + | The Locker Room comprises a few small rooms, contains a [[save point]], and connects the Airport and the Road. In the room in the back, during "The Stowaway Strategy", Cloud is taught how to perform the [[The Stowaway Strategy#Junon parade|parade]] and [[The Stowaway Strategy#Performance for Rufus|posing]] minigames. |
||
| + | |||
==== Road ==== |
==== Road ==== |
||
| + | Several open doors alongside the Road lead directly into shops, while the alleyway leads into the Weapon Store and Bar. At the end of the road is the Junon Path, and eventually Lower Junon. During "The Stowaway Strategy", the Junon parade takes place here. |
||
| + | |||
==== Materia Store ==== |
==== Materia Store ==== |
||
| + | Located as the first door on the Road from the Locker Room, the clerk for the Upper Junon Materia Store stands outside the shop initially, beckoning customers to come in. The Upper Junon Materia Store sells more valuable stock than the Lower Junon Materia Store. |
||
| − | There are three women in the shop who enthusiastically greet any would-be customers. |
||
| + | |||
==== Weapon Store ==== |
==== Weapon Store ==== |
||
| + | Located in the first alleyway on the Road from the Locker Room, the Upper Junon Weapon Store sells more valuable [[Final Fantasy VII weapons|weapons]] than the Lower Junon Weapon Store. |
||
| − | The shopkeeper is an older man who used to be in [[SOLDIER]]. If visited from Part 2 onwards, he begins to dress like a [[Sephiroth Clone|Sephiroth-clone]], but displays no other markers of their fanatic behavior. |
||
==== Bar ==== |
==== Bar ==== |
||
| + | [[File:Junon Bar background from FFVII.png|thumb]] |
||
| − | ==== Item Store ==== |
||
| + | Located downstairs from the Weapon Store, the Bar is frequented by a number of individuals. During "The Stowaway Strategy", it is attended by [[Rude]], who is found sitting with four other men (they may be gambling); later, the other customers profess to missing him. |
||
| + | {{clear}} |
||
| + | ==== Item Shop ==== |
||
| + | Located left from from the Weapon Store, the Upper Junon Item Shop is owned by an older man who says he used to be in [[SOLDIER]]. If visited after "In a World Approaching Its End" onwards, he begins to dress like a [[Sephiroth-clone]], but displays no other markers of their fanatic behavior. |
||
| + | |||
==== Barracks ==== |
==== Barracks ==== |
||
| + | Located left from the Item Shop. Several [[Final Fantasy VII items|items]] can be found dotted across its three floors, along with [[non-player character]]s to interact with. |
||
| + | |||
;{{A|Barracks 1f.|1f.}} |
;{{A|Barracks 1f.|1f.}} |
||
| + | The first floor of the Barracks contains a basic layout with a kitchen and a bedroom. There are two non-player characters, but no notable items. In the corner is a soldier who stands in front of the basement entrance to the Respectable Inn. |
||
;{{A|Barracks 2f.|2f.}} |
;{{A|Barracks 2f.|2f.}} |
||
| + | A metal floor with a common area and a bedroom. Across the floors are a [[Mind Source]] and a [[1/35 soldier]] in the common area, and a [[Luck Source]] in the bedroom. |
||
;{{A|Barracks 3f.|3f.}} |
;{{A|Barracks 3f.|3f.}} |
||
| + | The top floor contains a bedroom and a study room. Across the floors are a [[Power Source]] in the left room and a [[Guard Source]] on the right in the hallway. |
||
==== Respectable Inn ==== |
==== Respectable Inn ==== |
||
| + | [[File:Junon basement.png|Respectable Inn.|thumb]] |
||
| + | The basement floor of the Barracks, reached through an entrance guarded by a soldier, houses the Respectable Inn, or the [[Beginner's Hall]] (Intermediate). This is a darker room surrounded by machinery, with several ghosts from the previous [[Sector 7 Slums (Final Fantasy VII field)|Sector 7 Slums]], and a few soldiers. The area has an [[Enemy Skill (Final Fantasy VII)|Enemy Skill Materia]] the player can pick up. |
||
| + | {{clear}} |
||
==== Lift ==== |
==== Lift ==== |
||
==== Branch Entrance ==== |
==== Branch Entrance ==== |
||
| + | |||
| + | === Lower Junon === |
||
| + | ==== Branch Entrance ==== |
||
| + | ==== Lift ==== |
||
| + | ==== Road ==== |
||
| + | Similar to that in Upper Junon, the Road contains several open doors alongside it that lead to shops. |
||
| + | |||
| + | ==== Shinra Member's Bar ==== |
||
| + | [[File:Junon bar.png|thumb]] |
||
| + | Located in the first door on the Road from the Branch Entrance, the Shinra Member's Bar contains a few non-player characters, but no notable items. In "The Stowaway Strategy", [[Reno]], [[Tseng]], and [[Elena (Final Fantasy VII)|Elena]] are found here; after "In a World Approaching Its End", the bartender talks about plans to close the shop. |
||
| + | |||
| + | There are hints that this field map was the original field map for [[Seventh Heaven (Final Fantasy VII)|Seventh Heaven]] (see [[#Behind the scenes|below]]). |
||
| + | {{clear}} |
||
| + | ==== Junon Inn ==== |
||
| + | Located to the left from the Shinra Member's Bar, the Junon Inn contains a [[save point]], and a staircase leading up to the Materia Store and Accessory Shop. |
||
| + | |||
| + | ==== Materia Store ==== |
||
| + | Located upstairs from the Junon Inn, the Lower Junon Materia Store has three hired women outside who enthusiastically greet any would-be customers. After "In a World Approaching Its End", two additional women are hired. The store sells less valuable Materia than the Upper Junon Materia Store. Upstairs from this is the Accessory Shop. |
||
| + | |||
| + | ==== Accessory Shop ==== |
||
| + | Located upstairs from the Item Store and Junon Inn, the Lower Junon Accessory Shop is ran by an old man who used to be in SOLDIER. |
||
| + | |||
| + | ==== Barracks ==== |
||
| + | Located to the left of the Junon Inn. |
||
| + | |||
| + | ;{{A|Barracks 1f.|1f.}} |
||
| + | The first floor is an armory, with one non-player characters. A [[Speed Source]] is found in the closet in the top-left. |
||
| + | |||
| + | ;{{A|Barracks 2f.|2f.}} |
||
| + | The second floor contains a common area and a bedroom. The [[Shinra Manager]] can be found in the bedroom, and a 1/35 soldier can be found in the common area. |
||
| + | |||
| + | ==== Weapon Store ==== |
||
| + | Located to the left of the Barracks, the Lower Junon Weapon Store is a vaster, more impressive store, but has less valuable items than the Upper Junon Weapon Store. |
||
| + | |||
| + | ==== Dock ==== |
||
| + | Located at the very end, during "The Stowaway Strategy", the Dock is where the [[The Stowaway Strategy#Performance for Rufus|send-off performance for Rufus]] occurs. Later, a sailor can be spoken to here. |
||
=== Junon Branch === |
=== Junon Branch === |
||
| Line 136: | Line 175: | ||
==== Underwater Reactor Entrance ==== |
==== Underwater Reactor Entrance ==== |
||
=== Underwater Reactor === |
=== Underwater Reactor === |
||
| − | {{main| |
+ | {{main|Underwater Reactor (field)}} |
== Quests == |
== Quests == |
||
| + | [[File:FFVII Junon Minigame.jpg|thumb|The march minigame.]] |
||
| − | === Main scenario === |
||
* [[The Stowaway Strategy]] |
* [[The Stowaway Strategy]] |
||
* [[In a World Approaching Its End]] |
* [[In a World Approaching Its End]] |
||
| − | During "The Stowaway Strategy", a party led by Cloud attempts to sneak on board the Cargo Ship. Cloud must [[disguise]] himself as a [[Shinra |
+ | During "The Stowaway Strategy", a party led by Cloud attempts to sneak on board the Cargo Ship. Cloud must [[disguise]] himself as a [[Shinra Public Security Division|Shinra MP]] soldier and partake in a [[The Stowaway Strategy#Junon parade|parade minigame]]. Following this is another related minigame, in which Cloud and his soldiers must perform for Rufus, where the item rewards are more substantial (either the [[Silver Glasses (Final Fantasy VII)|Silver Glasses]] accessory, the [[HP Plus (Final Fantasy VII)|HP Plus Materia]], or the [[Force Stealer (Final Fantasy VII)|Force Stealer]]). |
| − | Later, during "In a World Approaching Its End", Tifa and the rest of Cloud's party are set to be executed. The quest begins with a series of events where the player is required to control |
+ | Later, during "In a World Approaching Its End", Tifa and the rest of Cloud's party are set to be executed. The quest begins with a series of events where the player is required to control a few party members through combat and then direct them to the airport. After this, the player must partake in two minigames with Tifa, first to free her from the gas chamber, and then to win a slap fight against Scarlet. |
| − | |||
| − | === Junon parade === |
||
| − | [[File:FFVII Junon Minigame.jpg|thumb|The march minigame.]] |
||
| − | During the parade the player disguises as a [[Shinra Public Security Division|Shinra MP]] and takes part in the celebrations. Depending on the player's success, they are rewarded with items. |
||
| − | |||
| − | During the marching minigame the player must march in-tune with the other soldiers and raise their weapon during live television broadcast. The viewer ratings determine the player's success. To get a high score the player must run immediately downwards, straight through the line of soldiers, and take the empty spot, rather than by following the example of the soldiers that go before Cloud. Walking to the left while staying in line and mashing the {{button|ps|o symbol}} on controller or [OK] button on PC makes the ratings shoot up. |
||
| − | |||
| − | :0–29% = [[Grenade (Final Fantasy VII item)|Grenade]] |
||
| − | :30%–39% = [[Potion (Final Fantasy VII)|Potion]] x6 |
||
| − | :40%–49% = [[Ether (Final Fantasy VII)|Ether]] x6 |
||
| − | :50%+ = 5000 Gil |
||
| − | |||
| − | The controller setup must be set to "normal" to gain points in the marching game. The minigame uses field buttons, rather than a separate setup, and thus {{button|ps|o symbol}} or [OK] is not available to use to bob the weapon in a Config > Controller > Custom configuration. |
||
| − | |||
| − | During the posing minigame the commander gives the soldiers orders, and the player must follow by correctly pressing the buttons and staying in line with the formation. The player earns 10 points for every correct move, except for turning. Cloud must face the same direction as the others in order to score points. Performing the victory pose earns 30 points. |
||
| − | |||
| − | :0–50 Points = [[Silver Glasses (Final Fantasy VII)|Silver Glasses]] accessory |
||
| − | :60–90 Points = [[HP Plus (Final Fantasy VII)|HP Plus Materia]] |
||
| − | :100+ Points = [[Force Stealer (Final Fantasy VII)|Force Stealer]] weapon for Cloud |
||
| − | |||
| − | Many players consider the HP Plus the superior reward to a new sword for Cloud, and intentionally avoid getting the best score. |
||
=== Freeing Tifa from the gas chamber === |
=== Freeing Tifa from the gas chamber === |
||
| − | To free Tifa from the gas chamber |
+ | To free Tifa from the gas chamber in "In a World Approaching Its End", the player must perform specific actions to retrieve the key from the floor and use it to free her from the seat she is bound in. The {{button|ps|x symbol}} or [CANCEL] button controls her legs, the {{button|ps|square symbol}} or [SWITCH] button controls her right arm, the {{button|ps|o symbol}} or [OK] control her left arm while the {{button|ps|triangle symbol}} or [MENU] control her head. |
| − | The player must first control the legs to grab the key, and then move both the head and legs for her to grab the key with her teeth. Moving the head and right arm will then allow her to unlock her right arm, then finally moving her right arm allows her to escape. The player can also unlock the left arm first if they choose |
+ | The player must first control the legs to grab the key, and then move both the head and legs for her to grab the key with her teeth. Moving the head and right arm will then allow her to unlock her right arm, then finally moving her right arm allows her to escape. The player can also unlock the left arm first if they choose. |
| + | |||
| + | Despite the circumstances, there is no time limit for the challenge. |
||
=== Tifa and Scarlet slap fight === |
=== Tifa and Scarlet slap fight === |
||
[[File:Tifa-Scarlet-Slap.png|thumb|Scarlet slaps Tifa.]] |
[[File:Tifa-Scarlet-Slap.png|thumb|Scarlet slaps Tifa.]] |
||
| − | After escaping the gas chamber Tifa runs to the end of the [[Sister Ray|Mako Cannon]] where [[Scarlet]] catches up with her and the two begin slapping one another. Whoever receives five slaps first loses. The player must time their slaps by using {{button|ps|o symbol}}. |
+ | After escaping the gas chamber in "In a World Approaching Its End", Tifa runs to the end of the [[Sister Ray|Mako Cannon]] where [[Scarlet (Final Fantasy VII)|Scarlet]] catches up with her and the two begin slapping one another. Whoever receives five slaps first loses. The player must time their slaps by using {{button|ps|o symbol}}. |
| − | Normally, whether the player wins or loses, Scarlet will say "Take her away" afterwards. An error in the programming prevents the player from seeing the Tifa-win-version of Scarlet's line, as the requirement for Scarlet's unused line is that she be slapped six times and this is impossible because the minigame ends at five slaps. |
+ | Normally, whether the player wins or loses, Scarlet will say "Take her away" afterwards. An error in the programming prevents the player from seeing the Tifa-win-version of Scarlet's line, as the requirement for Scarlet's unused line is that she be slapped six times and this is impossible because the minigame ends at five slaps. |
| + | {{clear}} |
||
| + | |||
| + | == Encounters == |
||
| + | [[File:Battlebg-ffvii-junonairport.png|right|thumb|200px|Airport battle background.]] |
||
| + | {|class="article-table FFVII" |
||
| + | |- |
||
| + | !Encounters |
||
| + | !Areas |
||
| + | |- |
||
| + | | |
||
| + | * [[Attack Squad]] x2 (boss) |
||
| + | |Press room (during "In a World Approaching Its End") |
||
| + | |- |
||
| + | | |
||
| + | *[64/64] [[SOLDIER:2nd]] |
||
| + | |Outside press room (during "In a World Approaching Its End") |
||
| + | |- |
||
| + | | |
||
| + | *[24/64] [[SOLDIER:2nd]] |
||
| + | *[22/64] [[Roulette Cannon]] |
||
| + | *[18/64] [[SOLDIER:2nd]] x2 |
||
| + | |Barret's escape on main concourse, and airport (during "In a World Approaching Its End") |
||
| + | |- |
||
| + | | |
||
| + | *[24/64] [[Roulette Cannon]] |
||
| + | *[22/64] [[SOLDIER:2nd]] x2 |
||
| + | *[18/64] [[SOLDIER:2nd]] x2, [[Roulette Cannon]] |
||
| + | *[8/64] [[SOLDIER:2nd]] x2 (Ambush) |
||
| + | |Airport (after "In a World Approaching Its End") |
||
| + | |- |
||
| + | | |
||
| + | *[24/64] [[Slalom]] x2 |
||
| + | *[22/64] [[Slalom]] x3 |
||
| + | *[18/64] [[Death Machine (Final Fantasy VII)|Death Machine]] |
||
| + | *[8/64] [[Slalom]] x2 (Back attack) |
||
| + | *[8/64] [[Death Machine (Final Fantasy VII)|Death Machine]] (Side attack) |
||
| + | |Outside press room (after "In a World Approaching Its End") |
||
| + | |} |
||
| + | Prior to the return to Junon for "In a World Approaching Its End", no [[Final Fantasy VII battle system|battles]] occur in Junon itself. The battles begin during and after this quest, and are concentrated around the airport and the press room seen during the chapter. Most battles instead occur in the underwater reactor. |
||
| + | |||
| + | Against all encounters, group hits, such as [[Enemy Skill (Final Fantasy VII)|Enemy Skill Materia attacks]] and [[Materia (Final Fantasy VII)|Materia]] paired with [[All (Final Fantasy VII)|All]] are best. The encounters are not especially challenging, with the main difficulty arising if the player invested heavily in Cloud and less heavily in the mandatory party members during the chapter; on subsequent visits, they present little issue for the player. |
||
{{clear}} |
{{clear}} |
||
== Items == |
== Items == |
||
[[File:Junon Street.jpg|thumb|right|A street in Junon.]] |
[[File:Junon Street.jpg|thumb|right|A street in Junon.]] |
||
| + | |||
| − | * [[1/35 Soldier]] x2 |
||
| + | {|class="article-table FFVII" |
||
| + | |- |
||
| + | !Items |
||
| + | !Area |
||
| + | |- |
||
| + | | |
||
* [[Mind Source]] |
* [[Mind Source]] |
||
* [[Luck Source]] |
* [[Luck Source]] |
||
| + | |Barracks (left of Item Shop) 2f |
||
| + | |- |
||
| + | | |
||
* [[Power Source]] |
* [[Power Source]] |
||
* [[Guard Source]] |
* [[Guard Source]] |
||
| + | |Barracks (left of Item Shop) 3f |
||
| − | * [[Enemy Skill (Final Fantasy VII)|Enemy Skill Materia]] (Beginner's Hall) |
||
| + | |- |
||
| + | | |
||
| + | * [[Enemy Skill (Final Fantasy VII)|Enemy Skill Materia]] |
||
| + | |Beginner's Hall |
||
| + | |- |
||
| + | | |
||
* [[Speed Source]] |
* [[Speed Source]] |
||
| + | |Barracks (left of Junon inn) 1f |
||
| + | |- |
||
| + | | |
||
| + | * [[1/35 Soldier]] x2 |
||
| + | |Barracks (left of Junon inn) 2f |
||
| + | |} |
||
== [[Final Fantasy VII shops|Shop]]s == |
== [[Final Fantasy VII shops|Shop]]s == |
||
| − | === ''Final Fantasy VII'' === |
||
The shops in Junon update their merchandise after the party gets the ''Highwind'', except for the Upper Junon Materia Store. The Materia store is coded like the other shops, but instead of calling for the second version of the shop after the plot advancement, it calls for the original one. The [[Final Fantasy VII dummied content|unused]] shop is unique, as it would have sold [[Magic Plus (Final Fantasy VII)|Magic Plus]] Materia, a Materia not sold by any accessible store in the game. It also contains [[Revive (Final Fantasy VII)|Revive]], [[MP Plus (Final Fantasy VII)|MP Plus]], [[Barrier (Final Fantasy VII)|Barrier]], and [[Exit (Final Fantasy VII)|Exit]]. |
The shops in Junon update their merchandise after the party gets the ''Highwind'', except for the Upper Junon Materia Store. The Materia store is coded like the other shops, but instead of calling for the second version of the shop after the plot advancement, it calls for the original one. The [[Final Fantasy VII dummied content|unused]] shop is unique, as it would have sold [[Magic Plus (Final Fantasy VII)|Magic Plus]] Materia, a Materia not sold by any accessible store in the game. It also contains [[Revive (Final Fantasy VII)|Revive]], [[MP Plus (Final Fantasy VII)|MP Plus]], [[Barrier (Final Fantasy VII)|Barrier]], and [[Exit (Final Fantasy VII)|Exit]]. |
||
| − | In the English localization the three stores in each half of Junon have the same name, however, it appears the original intention was to give each shop a unique name. The Item Store in Lower Junon is actually "Accessory Store" in Japanese, which is why "Accessory Shop" is the name of the menus even though during Meteorfall the shop instead sells armor and weapons. The Materia Store in Lower Junon is roughly called the "General Store" in Japanese, which is why during Meteorfall its wares change from Materia to weapons. In the Japanese version both Weapon Stores have the same name, but they are distinguished in the game files with the Upper Junon store using the initial "w" and the Lower Junon store using the initial "wa". The Lower Junon store has a sign for "Weapon" and "Accessory", so this store was likely intended to be called the "Weapon & Accessory Store", however, in the final game it sells no accessories. |
+ | In the English localization the three stores in each half of Junon have the same name, however, it appears the original intention was to give each shop a unique name. The Item Store in Lower Junon is actually "Accessory Store" in Japanese, which is why "Accessory Shop" is the name of the menus even though during [[Meteorfall]] the shop instead sells armor and weapons. The Materia Store in Lower Junon is roughly called the "General Store" in Japanese, which is why during Meteorfall its wares change from Materia to weapons. In the Japanese version both Weapon Stores have the same name, but they are distinguished in the game files with the Upper Junon store using the initial "w" and the Lower Junon store using the initial "wa". The Lower Junon store has a sign for "Weapon" and "Accessory", so this store was likely intended to be called the "Weapon & Accessory Store", however, in the final game it sells no accessories. |
During Meteorfall, the Upper Junon Item Store starts to sell weapons, however, the shop window's name is still "Item Shop". This is likely intentional as the weapons are [[joke equipment]], most of which aren't traditionally used as weapons. |
During Meteorfall, the Upper Junon Item Store starts to sell weapons, however, the shop window's name is still "Item Shop". This is likely intentional as the weapons are [[joke equipment]], most of which aren't traditionally used as weapons. |
||
| Line 200: | Line 281: | ||
===Initial=== |
===Initial=== |
||
| + | |||
| − | ====Lower Junon Weapon Store==== |
||
| + | ====Upper Junon Weapon Store==== |
||
{{multicol-begin}} |
{{multicol-begin}} |
||
| − | Before ''Highwind'' |
+ | Before ''Highwind''. |
{|class="half-width article-table FFVII" |
{|class="half-width article-table FFVII" |
||
| − | |+[[Final Fantasy VII weapons|Weapon]] |
+ | |+[[Final Fantasy VII weapons|Weapon]] Shop |
| + | |- |
||
| − | |-class="a" |
||
!width="50%"|Name |
!width="50%"|Name |
||
!width="50%"|Cost |
!width="50%"|Cost |
||
|- |
|- |
||
| − | ! |
+ | ![[Hardedge (Final Fantasy VII)|Hardedge]] |
| − | |1, |
+ | |1,500 gil |
|- |
|- |
||
| − | ! |
+ | ![[Grand Glove (Final Fantasy VII)|Grand Glove]] |
| − | | |
+ | |1,200 gil |
|- |
|- |
||
| − | ! |
+ | ![[Atomic Scissors (Final Fantasy VII)|Atomic Scissors]] |
| − | | |
+ | |1,400 gil |
|- |
|- |
||
| − | ! |
+ | ![[Striking Staff (Final Fantasy VII)|Striking Staff]] |
| − | | |
+ | |1,300 gil |
|- |
|- |
||
| − | ! |
+ | ![[Diamond Pin (Final Fantasy VII)|Diamond Pin]] |
| − | | |
+ | |1,300 gil |
| + | |- |
||
| + | ![[Boomerang (Final Fantasy VII)|Boomerang]] |
||
| + | |1,400 gil |
||
|} |
|} |
||
{{Multicol-separator}} |
{{Multicol-separator}} |
||
| − | After ''Highwind'' |
+ | After ''Highwind'' |
{|class="half-width article-table FFVII" |
{|class="half-width article-table FFVII" |
||
|+[[Final Fantasy VII weapons|Weapon]] Shop |
|+[[Final Fantasy VII weapons|Weapon]] Shop |
||
| + | |- |
||
| − | |-class="a" |
||
!width="50%"|Name |
!width="50%"|Name |
||
!width="50%"|Cost |
!width="50%"|Cost |
||
|- |
|- |
||
| − | ! |
+ | ![[Rune Blade (Final Fantasy VII)|Rune Blade]] |
| − | | |
+ | |3,800 gil |
|- |
|- |
||
| − | ! |
+ | ![[Enhance Sword (Final Fantasy VII)|Enhance Sword]] |
| − | | |
+ | |12,000 gil |
|- |
|- |
||
| − | ! |
+ | ![[W Machine Gun (Final Fantasy VII)|W Machine Gun]] |
| − | | |
+ | |2,000 gil |
|- |
|- |
||
| − | ! |
+ | ![[Drill Arm (Final Fantasy VII)|Drill Arm]] |
| − | | |
+ | |3,300 gil |
|- |
|- |
||
| − | ! |
+ | ![[Platinum Fist (Final Fantasy VII)|Platinum Fist]] |
| − | | |
+ | |2,700 gil |
|- |
|- |
||
| + | ![[Kaiser Knuckle (Final Fantasy VII)|Kaiser Knuckle]] |
||
| − | !class="b"|[[Yellow M-phone]] |
||
| − | | |
+ | |15,000 gil |
|- |
|- |
||
| − | ! |
+ | ![[Fairy Tale (Final Fantasy VII)|Fairy Tale]] |
| − | | |
+ | |2,500 gil |
| − | |- |
||
| − | !class="b"|[[Trident (Final Fantasy VII)|Trident]] |
||
| − | |7,500 gil |
||
| − | |- |
||
| − | !class="b"|[[Quicksilver (Final Fantasy VII)|Quicksilver]] |
||
| − | |1,000 gil |
||
|} |
|} |
||
{{Multicol-end}} |
{{Multicol-end}} |
||
| − | ==== |
+ | ====Upper Junon Item Store==== |
{{Multicol-begin}} |
{{Multicol-begin}} |
||
Before ''Highwind''. |
Before ''Highwind''. |
||
{|class="half-width article-table FFVII" |
{|class="half-width article-table FFVII" |
||
| − | |+[[Final Fantasy VII |
+ | |+[[Final Fantasy VII items|Item]] Shop |
| + | |- |
||
| − | |-class="a" |
||
!width="50%"|Name |
!width="50%"|Name |
||
!width="50%"|Cost |
!width="50%"|Cost |
||
|- |
|- |
||
| − | ! |
+ | ![[Potion (Final Fantasy VII)|Potion]] |
| − | | |
+ | |50 gil |
|- |
|- |
||
| − | ! |
+ | ![[Hi-Potion (Final Fantasy VII)|Hi-Potion]] |
| − | | |
+ | |300 gil |
| + | |- |
||
| + | ![[Phoenix Down (Final Fantasy VII)|Phoenix Down]] |
||
| + | |300 gil |
||
| + | |- |
||
| + | ![[Antidote (Final Fantasy VII)|Antidote]] |
||
| + | |80 gil |
||
| + | |- |
||
| + | ![[Eye drop]] |
||
| + | |50 gil |
||
| + | |- |
||
| + | ![[Echo Screen (Final Fantasy VII)|Echo Screen]] |
||
| + | |100 gil |
||
| + | |- |
||
| + | ![[Hyper (Final Fantasy VII)|Hyper]] |
||
| + | |100 gil |
||
| + | |- |
||
| + | ![[Tranquilizer (Final Fantasy VII)|Tranquilizer]] |
||
| + | |100 gil |
||
| + | |- |
||
| + | ![[Tent (Final Fantasy VII)|Tent]] |
||
| + | |500 gil |
||
|} |
|} |
||
{{Multicol-separator}} |
{{Multicol-separator}} |
||
| − | After ''Highwind''. |
+ | After ''Highwind'' the "item store" sells weapons. |
{|class="half-width article-table FFVII" |
{|class="half-width article-table FFVII" |
||
| − | |+[[Final Fantasy VII |
+ | |+[[Final Fantasy VII items|Item]] Shop |
| + | |- |
||
| − | |-class="a" |
||
!width="50%"|Name |
!width="50%"|Name |
||
!width="50%"|Cost |
!width="50%"|Cost |
||
|- |
|- |
||
| − | ! |
+ | ![[Wind Slash (Final Fantasy VII)|Wind Slash]] |
| − | | |
+ | |2,000 gil |
|- |
|- |
||
| − | ! |
+ | ![[Twin Viper (Final Fantasy VII)|Twin Viper]] |
| − | | |
+ | |3,200 gil |
|- |
|- |
||
| − | ! |
+ | ![[Viper Halberd (Final Fantasy VII)|Viper Halberd]] |
| − | | |
+ | |7,000 gil |
|- |
|- |
||
| − | ! |
+ | ![[Dragoon Lance (Final Fantasy VII)|Dragoon Lance]] |
| − | |6, |
+ | |6,200 gil |
|- |
|- |
||
| + | ![[Peacemaker (Final Fantasy VII)|Peacemaker]] |
||
| − | !class="b"|[[White M-phone]] |
||
| − | | |
+ | |3,500 gil |
|- |
|- |
||
| + | ![[Buntline (Final Fantasy VII)|Buntline]] |
||
| − | !class="b"|[[Black M-phone]] |
||
| − | | |
+ | |6,800 gil |
|- |
|- |
||
| + | ![[Magic Comb (Final Fantasy VII)|Magic Comb]] |
||
| − | !class="b"|[[Silver M-phone]] |
||
| − | | |
+ | |2,000 gil |
|- |
|- |
||
| − | ! |
+ | ![[Plus Barrette (Final Fantasy VII)|Plus Barrette]] |
| − | |3, |
+ | |3,500 gil |
| + | |- |
||
| + | ![[Wizard Staff (Final Fantasy VII)|Wizard Staff]] |
||
| + | |1,800 gil |
||
| + | |- |
||
| + | ![[Wizer Staff (Final Fantasy VII)|Wizer Staff]] |
||
| + | |3,200 gil |
||
|} |
|} |
||
{{Multicol-end}} |
{{Multicol-end}} |
||
| − | ==== |
+ | ====Upper Junon Materia Store==== |
{{Multicol-begin}} |
{{Multicol-begin}} |
||
Before ''Highwind''. |
Before ''Highwind''. |
||
{|class="half-width article-table FFVII" |
{|class="half-width article-table FFVII" |
||
|+[[Materia (Final Fantasy VII)|Materia]] Shop |
|+[[Materia (Final Fantasy VII)|Materia]] Shop |
||
| + | |- |
||
| − | |-class="a" |
||
!width="50%"|Name |
!width="50%"|Name |
||
!width="50%"|Cost |
!width="50%"|Cost |
||
|- |
|- |
||
| − | ! |
+ | ![[Sense (Final Fantasy VII)|Sense]] |
| − | | |
+ | |1,000 gil |
|- |
|- |
||
| − | ! |
+ | ![[Seal (Final Fantasy VII)|Seal]] |
| − | | |
+ | |3,000 gil |
|- |
|- |
||
| − | ! |
+ | ![[Restore (Final Fantasy VII)|Restore]] |
| − | | |
+ | |750 gil |
|- |
|- |
||
| − | ! |
+ | ![[Heal (Final Fantasy VII)|Heal]] |
|1,500 gil |
|1,500 gil |
||
|- |
|- |
||
| − | ! |
+ | ![[Revive (Final Fantasy VII)|Revive]] |
| − | | |
+ | |3,000 gil |
|} |
|} |
||
{{Multicol-separator}} |
{{Multicol-separator}} |
||
| + | After ''Highwind''. |
||
| − | After ''Highwind'' the shop sells the party's [[Joke equipment|joke weapons]]; all of them can be acquired by a different way as well, and none have Materia slots; the weapons are rather intended to look amusing when equipped in battle, although [[Red XIII (Final Fantasy VII party member)|Red XIII's]] weapons don't actually render. |
||
{|class="half-width article-table FFVII" |
{|class="half-width article-table FFVII" |
||
| − | |+[[Final Fantasy VII |
+ | |+[[Materia (Final Fantasy VII)|Materia]] Shop |
| + | |- |
||
| − | |-class="a" |
||
!width="50%"|Name |
!width="50%"|Name |
||
!width="50%"|Cost |
!width="50%"|Cost |
||
|- |
|- |
||
| − | ! |
+ | ![[Sense (Final Fantasy VII)|Sense]] |
| − | | |
+ | |1,000 gil |
| − | |- |
||
| − | !class="b"|[[Rocket Punch (Final Fantasy VII)|Rocket Punch]] |
||
| − | |3,200 gil |
||
| − | |- |
||
| − | !class="b"|[[Work Glove (Final Fantasy VII)|Work Glove]] |
||
| − | |2,200 gil |
||
| − | |- |
||
| − | !class="b"|[[Hairpin (Final Fantasy VII)|Hairpin]] |
||
| − | |6,000 gil |
||
|- |
|- |
||
| − | ! |
+ | ![[Seal (Final Fantasy VII)|Seal]] |
|3,000 gil |
|3,000 gil |
||
|- |
|- |
||
| − | ! |
+ | ![[Restore (Final Fantasy VII)|Restore]] |
| − | | |
+ | |750 gil |
|- |
|- |
||
| − | ! |
+ | ![[Heal (Final Fantasy VII)|Heal]] |
| − | | |
+ | |1,500 gil |
|- |
|- |
||
| − | ! |
+ | ![[Revive (Final Fantasy VII)|Revive]] |
|3,000 gil |
|3,000 gil |
||
|} |
|} |
||
{{Multicol-end}} |
{{Multicol-end}} |
||
| − | ==== |
+ | ====Lower Junon Weapon Store==== |
{{multicol-begin}} |
{{multicol-begin}} |
||
| − | Before ''Highwind'' |
+ | Before ''Highwind'' |
{|class="half-width article-table FFVII" |
{|class="half-width article-table FFVII" |
||
| − | |+[[Final Fantasy VII weapons|Weapon]] |
+ | |+[[Final Fantasy VII weapons|Weapon]] Store |
| + | |- |
||
| − | |-class="a" |
||
!width="50%"|Name |
!width="50%"|Name |
||
!width="50%"|Cost |
!width="50%"|Cost |
||
|- |
|- |
||
| − | ! |
+ | ![[Mythril Saber (Final Fantasy VII)|Mythril Saber]] |
| − | |1, |
+ | |1,000 gil |
|- |
|- |
||
| − | ! |
+ | ![[Cannon Ball (Final Fantasy VII)|Cannon Ball]] |
| − | | |
+ | |950 gil |
|- |
|- |
||
| − | ! |
+ | ![[Mythril Claw (Final Fantasy VII)|Mythril Claw]] |
| − | | |
+ | |750 gil |
|- |
|- |
||
| − | ! |
+ | ![[Full Metal Staff (Final Fantasy VII)|Full Metal Staff]] |
| − | | |
+ | |800 gil |
|- |
|- |
||
| − | ! |
+ | ![[Mythril Clip (Final Fantasy VII)|Mythril Clip]] |
| − | | |
+ | |800 gil |
| − | |- |
||
| − | !class="b"|[[Boomerang (Final Fantasy VII)|Boomerang]] |
||
| − | |1,400 gil |
||
|} |
|} |
||
{{Multicol-separator}} |
{{Multicol-separator}} |
||
| − | After ''Highwind'' |
+ | After ''Highwind''. |
{|class="half-width article-table FFVII" |
{|class="half-width article-table FFVII" |
||
|+[[Final Fantasy VII weapons|Weapon]] Shop |
|+[[Final Fantasy VII weapons|Weapon]] Shop |
||
| + | |- |
||
| − | |-class="a" |
||
!width="50%"|Name |
!width="50%"|Name |
||
!width="50%"|Cost |
!width="50%"|Cost |
||
|- |
|- |
||
| − | ! |
+ | ![[Atomic Scissors (Final Fantasy VII)|Atomic Scissors]] |
| − | | |
+ | |1,400 gil |
|- |
|- |
||
| − | ! |
+ | ![[Grand Glove (Final Fantasy VII)|Grand Glove]] |
| − | | |
+ | |1,200 gil |
|- |
|- |
||
| − | ! |
+ | ![[Striking Staff (Final Fantasy VII)|Striking Staff]] |
| − | | |
+ | |1,300 gil |
|- |
|- |
||
| − | ! |
+ | ![[Diamond Pin (Final Fantasy VII)|Diamond Pin]] |
| − | | |
+ | |1,300 gil |
|- |
|- |
||
| − | ! |
+ | ![[Boomerang (Final Fantasy VII)|Boomerang]] |
| − | | |
+ | |1,400 gil |
|- |
|- |
||
| + | ![[Yellow M-phone]] |
||
| − | !class="b"|[[Kaiser Knuckle (Final Fantasy VII)|Kaiser Knuckle]] |
||
| − | | |
+ | |500 gil |
| + | |- |
||
| + | ![[Spear (Final Fantasy VII)|Spear]] |
||
| + | |1,200 gil |
||
|- |
|- |
||
| − | ! |
+ | ![[Trident (Final Fantasy VII)|Trident]] |
| − | | |
+ | |7,500 gil |
| + | |- |
||
| + | ![[Quicksilver (Final Fantasy VII)|Quicksilver]] |
||
| + | |1,000 gil |
||
|} |
|} |
||
{{Multicol-end}} |
{{Multicol-end}} |
||
| − | ==== |
+ | ====Lower Junon Item Store==== |
{{Multicol-begin}} |
{{Multicol-begin}} |
||
Before ''Highwind''. |
Before ''Highwind''. |
||
{|class="half-width article-table FFVII" |
{|class="half-width article-table FFVII" |
||
| − | |+[[Final Fantasy VII |
+ | |+[[Final Fantasy VII accessories|Accessory]] Shop |
| + | |- |
||
| − | |-class="a" |
||
!width="50%"|Name |
!width="50%"|Name |
||
!width="50%"|Cost |
!width="50%"|Cost |
||
|- |
|- |
||
| − | ! |
+ | ![[Silver Glasses (Final Fantasy VII)|Silver Glasses]] |
| − | | |
+ | |3,000 gil |
| − | |- |
||
| − | !class="b"|[[Hi-Potion (Final Fantasy VII)|Hi-Potion]] |
||
| − | |300 gil |
||
| − | |- |
||
| − | !class="b"|[[Phoenix Down (Final Fantasy VII)|Phoenix Down]] |
||
| − | |300 gil |
||
| − | |- |
||
| − | !class="b"|[[Antidote (Final Fantasy VII)|Antidote]] |
||
| − | |80 gil |
||
| − | |- |
||
| − | !class="b"|[[Eye drop]] |
||
| − | |50 gil |
||
| − | |- |
||
| − | !class="b"|[[Echo Screen (Final Fantasy VII)|Echo Screen]] |
||
| − | |100 gil |
||
|- |
|- |
||
| − | ! |
+ | ![[Headband (Final Fantasy VII)|Headband]] |
| − | | |
+ | |3,000 gil |
| − | |- |
||
| − | !class="b"|[[Tranquilizer (Final Fantasy VII)|Tranquilizer]] |
||
| − | |100 gil |
||
| − | |- |
||
| − | !class="b"|[[Tent (Final Fantasy VII)|Tent]] |
||
| − | |500 gil |
||
|} |
|} |
||
{{Multicol-separator}} |
{{Multicol-separator}} |
||
| − | After ''Highwind'' |
+ | After ''Highwind''. |
{|class="half-width article-table FFVII" |
{|class="half-width article-table FFVII" |
||
| − | |+[[Final Fantasy VII |
+ | |+[[Final Fantasy VII accessories|Accessory]] Shop |
| + | |- |
||
| − | |-class="a" |
||
!width="50%"|Name |
!width="50%"|Name |
||
!width="50%"|Cost |
!width="50%"|Cost |
||
|- |
|- |
||
| − | ! |
+ | ![[Platinum Bangle (Final Fantasy VII)|Platinum Bangle]] |
| − | | |
+ | |1,800 gil |
|- |
|- |
||
| − | ! |
+ | ![[Powersoul (Final Fantasy VII)|Powersoul]] |
| − | | |
+ | |4,200 gil |
|- |
|- |
||
| − | ! |
+ | ![[Enemy Launcher (Final Fantasy VII)|Enemy Launcher]] |
| − | | |
+ | |3,300 gil |
|- |
|- |
||
| − | ! |
+ | ![[Magic Shuriken (Final Fantasy VII)|Magic Shuriken]] |
| − | |6, |
+ | |6,000 gil |
|- |
|- |
||
| + | ![[White M-phone]] |
||
| − | !class="b"|[[Peacemaker (Final Fantasy VII)|Peacemaker]] |
||
| − | | |
+ | |2,300 gil |
|- |
|- |
||
| + | ![[Black M-phone]] |
||
| − | !class="b"|[[Buntline (Final Fantasy VII)|Buntline]] |
||
| − | | |
+ | |2,800 gil |
|- |
|- |
||
| + | ![[Silver M-phone]] |
||
| − | !class="b"|[[Magic Comb (Final Fantasy VII)|Magic Comb]] |
||
| − | | |
+ | |3,300 gil |
|- |
|- |
||
| − | ! |
+ | ![[Sniper CR (Final Fantasy VII)|Sniper CR]] |
| − | |3, |
+ | |3,300 gil |
| − | |- |
||
| − | !class="b"|[[Wizard Staff (Final Fantasy VII)|Wizard Staff]] |
||
| − | |1,800 gil |
||
| − | |- |
||
| − | !class="b"|[[Wizer Staff (Final Fantasy VII)|Wizer Staff]] |
||
| − | |3,200 gil |
||
|} |
|} |
||
{{Multicol-end}} |
{{Multicol-end}} |
||
| − | ==== |
+ | ====Lower Junon Materia Store==== |
{{Multicol-begin}} |
{{Multicol-begin}} |
||
Before ''Highwind''. |
Before ''Highwind''. |
||
{|class="half-width article-table FFVII" |
{|class="half-width article-table FFVII" |
||
|+[[Materia (Final Fantasy VII)|Materia]] Shop |
|+[[Materia (Final Fantasy VII)|Materia]] Shop |
||
| + | |- |
||
| − | |-class="a" |
||
!width="50%"|Name |
!width="50%"|Name |
||
!width="50%"|Cost |
!width="50%"|Cost |
||
|- |
|- |
||
| − | ! |
+ | ![[Fire (Final Fantasy VII)|Fire]] |
| − | | |
+ | |600 gil |
|- |
|- |
||
| − | ! |
+ | ![[Ice (Final Fantasy VII)|Ice]] |
| − | | |
+ | |600 gil |
|- |
|- |
||
| − | ! |
+ | ![[Lightning (Final Fantasy VII)|Lightning]] |
| − | | |
+ | |600 gil |
|- |
|- |
||
| − | ! |
+ | ![[Earth (Final Fantasy VII)|Earth]] |
|1,500 gil |
|1,500 gil |
||
|- |
|- |
||
| − | ! |
+ | ![[Poison (Final Fantasy VII)|Poison]] |
| − | | |
+ | |1,500 gil |
|} |
|} |
||
{{Multicol-separator}} |
{{Multicol-separator}} |
||
| + | After ''Highwind'' the shop sells the party's [[Joke equipment|joke weapons]]; all of them can be acquired by a different way as well, and none have Materia slots; the weapons are rather intended to look amusing when equipped in battle, although [[Red XIII (Final Fantasy VII party member)|Red XIII's]] weapons don't actually render. |
||
| − | After ''Highwind''. |
||
{|class="half-width article-table FFVII" |
{|class="half-width article-table FFVII" |
||
| − | |+[[ |
+ | |+[[Final Fantasy VII items|Item]] Shop |
| + | |- |
||
| − | |-class="a" |
||
!width="50%"|Name |
!width="50%"|Name |
||
!width="50%"|Cost |
!width="50%"|Cost |
||
|- |
|- |
||
| − | ! |
+ | ![[Nail Bat (Final Fantasy VII)|Nail Bat]] |
| − | | |
+ | |2,800 gil |
|- |
|- |
||
| − | ! |
+ | ![[Rocket Punch (Final Fantasy VII)|Rocket Punch]] |
| + | |3,200 gil |
||
| + | |- |
||
| + | ![[Work Glove (Final Fantasy VII)|Work Glove]] |
||
| + | |2,200 gil |
||
| + | |- |
||
| + | ![[Hairpin (Final Fantasy VII)|Hairpin]] |
||
| + | |6,000 gil |
||
| + | |- |
||
| + | ![[Superball (Final Fantasy VII)|Superball]] |
||
|3,000 gil |
|3,000 gil |
||
|- |
|- |
||
| − | ! |
+ | ![[Trumpet Shell (Final Fantasy VII)|Trumpet Shell]] |
| − | | |
+ | |3,000 gil |
|- |
|- |
||
| − | ! |
+ | ![[Mop (Final Fantasy VII)|Mop]] |
| − | | |
+ | |3,200 gil |
|- |
|- |
||
| − | ! |
+ | ![[Silver Rifle (Final Fantasy VII)|Silver Rifle]] |
|3,000 gil |
|3,000 gil |
||
|} |
|} |
||
{{Multicol-end}} |
{{Multicol-end}} |
||
| − | |||
| − | == Enemies == |
||
| − | === Press Room (Disc 2 - During Escape) === |
||
| − | * [[Attack Squad]] x2 (boss) |
||
| − | |||
| − | === Outside Press Room (Disc 2 - During Escape) === |
||
| − | *[64/64] [[SOLDIER:2nd]] |
||
| − | |||
| − | [[File:Battlebg-ffvii-junonairport.png|right|thumb|200px|Airport battle background.]] |
||
| − | === Barret's Escape on Main Concourse, and Airport (Disc 2 - During Escape) === |
||
| − | *[24/64] [[SOLDIER:2nd]] |
||
| − | *[22/64] [[Roulette Cannon]] |
||
| − | *[18/64] [[SOLDIER:2nd]] x2 |
||
| − | |||
| − | === Airport (Disc 2 - After Escape) === |
||
| − | *[24/64] [[Roulette Cannon]] |
||
| − | *[22/64] [[SOLDIER:2nd]] x2 |
||
| − | *[18/64] [[SOLDIER:2nd]] x2, [[Roulette Cannon]] |
||
| − | *[8/64] [[SOLDIER:2nd]] x2 (Ambush) |
||
| − | |||
| − | === Outside Press Room (Disc 2 - After Escape) === |
||
| − | *[24/64] [[Slalom]] x2 |
||
| − | *[22/64] [[Slalom]] x3 |
||
| − | *[18/64] [[Death Machine (Final Fantasy VII)|Death Machine]] |
||
| − | *[8/64] [[Slalom]] x2 (Back attack) |
||
| − | *[8/64] [[Death Machine (Final Fantasy VII)|Death Machine]] (Side attack) |
||
| − | {{clear}} |
||
== Musical themes == |
== Musical themes == |
||
| Line 585: | Line 640: | ||
==Behind the scenes== |
==Behind the scenes== |
||
| + | [[File:Junon-pub-prerelease.jpg|thumb|Cloud: "Make no mistake! I don't care about you AVALANCHE. Once I get my reward, I'm off to look for my next job".]] |
||
| − | A man who keeps a shop in the top floor of a building, who on a visit during "The Stowaway Strategy", mentions he used to be in SOLDIER. When visited later after "In a World Approaching Its End", he has dressed up as a [[Sephiroth Clones|black cape]] and mentions he suddenly got an urge to start dressing like that. This is an allusion to how the treatment the SOLDIER members receive is the same as the one of making of Sephiroth-clones. |
||
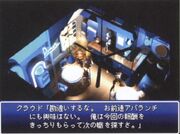
| + | It appears the early designs for Seventh Heaven were later used for the Shinra Member's Bar in Junon. The "Making Of" bonus disc included with ''Final Fantasy VII International'' includes a pre-release shot of the Junon pub where Cloud uses lines he says in Seventh Heaven in the final game. The Junon pub also appeared in a ''GameFan'' article written nine months before the release of ''Final Fantasy VII'', which suggests it was originally planned to be a more important location than it ended up being in the final game.{{citation needed}} Comparing the layout of the Junon pub to the Beginner's Hall in Junon suggests that the underground level may have been the original Avalanche hideout, situated below the Seventh Heaven bar. |
||
| + | |||
| + | A man who keeps a shop in the top floor of a building, who on a visit during "The Stowaway Strategy", mentions he used to be in SOLDIER. When visited later after "In a World Approaching Its End", he has dressed up as a [[Sephiroth-clones|black cape]] and mentions he suddenly got an urge to start dressing like that. This is an allusion to how the treatment the SOLDIER members receive is the same as the one of making of Sephiroth-clones. |
||
| + | |||
| + | In the endgame, the player can find a lone Shinra soldier in Junon who mentions the "[[Great Sephiroth Plan]]"{{cite|FFVII|script=Junon optional dialogue|name=Junon optional dialogue}} and how everyone else has followed the order but him, because he wants to stay behind to see the world end. Earlier in the game, people in [[Kalm (field)|Kalm]] talk that Shinra is going to dispatch the entire Shinra army to the [[North Crater]] to fight Sephiroth once the barrier has been destroyed.<ref name="Junon optional dialogue"/> There are no Shinra troops to be found in the North Crater, however, so what became of the "Great Sephiroth Plan" is unknown. |
||
| + | |||
| + | In the slap fight, whether the player wins or loses, Scarlet will say "Take her away" in her [[Final Fantasy VII script|dialogue]] afterwards. An error in the programming prevents the player from seeing the Tifa-win-version of Scarlet's line, as the requirement for Scarlet's unused line is that she be slapped six times and this is impossible because the minigame ends at five slaps. Scarlet was meant to say "God! I can't stand it!" if Tifa wins.<ref>{{ref|id=Lifestream |entry=Final Fantasy VII: The Unused Text – Part 9|url=https://thelifestream.net/ffvii-the-original/final-fantasy-vii-the-unused-text-series/part-9/|title=The Lifestream|access-date=15 January, 2021}}</ref> |
||
| + | {{clear}} |
||
| − | In the endgame, the player can find a lone Shinra soldier in Junon who mentions the "[[Great Sephiroth Plan]]"<ref>Soldier in Junon: "I finally got orders to join the Great Sephiroth Plan. I even get to go on the Gelnika, too..."<br/>"But, I'm just gonna ignore them. I wanna live to see the end of the world."<br/>"If I'm lucky... There'll be a good place for me in the New World."</ref> and how everyone else has followed the order but him, because he wants to stay behind to see the world end. Earlier in the game, people in [[Kalm (field)|Kalm]] talk that Shinra is going to dispatch the entire Shinra army to the [[North Crater]] to fight Sephiroth once the barrier has been destroyed<ref>NPC in Kalm: "Sephiroth put up a huge barrier around the North Crater".<br/>"Rufus wants to use a mammoth cannon to smash the barrier."<br/>"He plans to have Shinra troops rush in and attack Sephiroth after the barrier falls".</ref>. There are no Shinra troops to be found in the North Crater, however, so what became of the "Great Sephiroth Plan" is unknown. |
||
== Gallery == |
== Gallery == |
||
<gallery> |
<gallery> |
||
| − | Junon bar.png|Junon bar. |
||
| − | Junon basement.png|Beginner's Hall. |
||
Junon inside.png|Inside Junon. |
Junon inside.png|Inside Junon. |
||
Junon press room.png|Press room. |
Junon press room.png|Press room. |
||
| − | Junon residence.png|Residence. |
||
Junon shop.png|Shop. |
Junon shop.png|Shop. |
||
Junon shop2.png|Shop. |
Junon shop2.png|Shop. |
||
| Line 607: | Line 666: | ||
</gallery> |
</gallery> |
||
| − | == |
+ | == Citations == |
| − | {{ |
+ | {{citations}} |
{{navbox gameplay FFVII}} |
{{navbox gameplay FFVII}} |
||
Latest revision as of 19:11, 27 January 2024
Junon is a field map in Final Fantasy VII located in the Junon Area of the eastern continent. It is not accessed directly from the world map, rather, it is situated above Under Junon and accessed by using the elevator there. It is first visited during "The Stowaway Strategy", when a party led by Cloud tries to board the Cargo Ship to cross the ocean. It is revisited during "In a World Approaching Its End" by Tifa's party as they flee Junon to escape execution, and again during "Clash in the Deep Sea" when Cloud's party makes its way to the Underwater Reactor.
Junon has numerous shops. After the Highwind is obtained, Junon sells a variety of useful weapons.
Layout[]
Overview[]
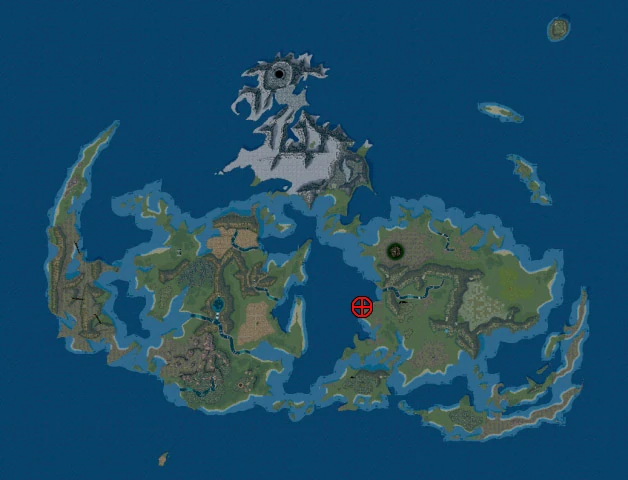
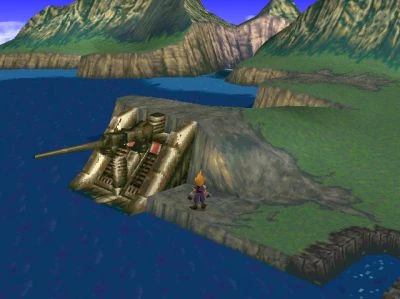
Junon is located on the western coast of the eastern continent.
Junon is located to the west on the eastern continent, the Junon Area. It is located on the coast and there is a submarine bay next to it. It can be accessed by boarding the cargo ship from Costa del Sol, whereupon the player arrives at the dock at the end of town, or via the elevator from Under Junon.
Junon is divided into two halves, Lower Junon (エルジュノン, Erujunon?) and Upper Junon (アルジュノン, Arujunon?). Upper Junon has the airport, while Lower Junon has the dock. In the middle is the Junon Branch, the cannon, and a path down to the submarine dock and the Junon Underwater Reactor. At the foot of Junon's right side is the Under Junon settlement.
Elevator to Junon[]
The elevator is accessed in the back of Under Junon town. When the player first arrives, access to Junon is blocked due to Rufus Shinra's welcoming ceremony, but afterward, the player can bribe the guard for 10 gil to get through.
Upper Junon[]
Airport Path[]
The Airport Path is the first area of Junon reached after Cloud climbs there with the help of Mr. Dolphin in "The Stowaway Strategy". The Highwind is initially docked on the Airport Path, and is obtained later during "In a World Approaching Its End". South from the Airport Path is the Airport itself.
Airport[]
The Airport contains a simple elevator up to the Airport Path, and is located adjacent to the Locker Room. The screen itself contains little of note.
Locker Room[]
The Locker Room comprises a few small rooms, contains a save point, and connects the Airport and the Road. In the room in the back, during "The Stowaway Strategy", Cloud is taught how to perform the parade and posing minigames.
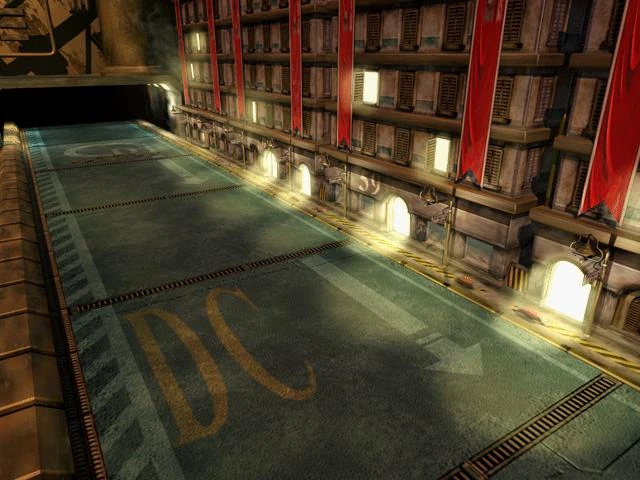
Road[]
Several open doors alongside the Road lead directly into shops, while the alleyway leads into the Weapon Store and Bar. At the end of the road is the Junon Path, and eventually Lower Junon. During "The Stowaway Strategy", the Junon parade takes place here.
Materia Store[]
Located as the first door on the Road from the Locker Room, the clerk for the Upper Junon Materia Store stands outside the shop initially, beckoning customers to come in. The Upper Junon Materia Store sells more valuable stock than the Lower Junon Materia Store.
Weapon Store[]
Located in the first alleyway on the Road from the Locker Room, the Upper Junon Weapon Store sells more valuable weapons than the Lower Junon Weapon Store.
Bar[]
Located downstairs from the Weapon Store, the Bar is frequented by a number of individuals. During "The Stowaway Strategy", it is attended by Rude, who is found sitting with four other men (they may be gambling); later, the other customers profess to missing him.
Item Shop[]
Located left from from the Weapon Store, the Upper Junon Item Shop is owned by an older man who says he used to be in SOLDIER. If visited after "In a World Approaching Its End" onwards, he begins to dress like a Sephiroth-clone, but displays no other markers of their fanatic behavior.
Barracks[]
Located left from the Item Shop. Several items can be found dotted across its three floors, along with non-player characters to interact with.
- 1f.
The first floor of the Barracks contains a basic layout with a kitchen and a bedroom. There are two non-player characters, but no notable items. In the corner is a soldier who stands in front of the basement entrance to the Respectable Inn.
- 2f.
A metal floor with a common area and a bedroom. Across the floors are a Mind Source and a 1/35 soldier in the common area, and a Luck Source in the bedroom.
- 3f.
The top floor contains a bedroom and a study room. Across the floors are a Power Source in the left room and a Guard Source on the right in the hallway.
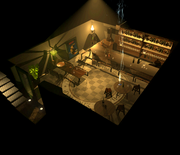
Respectable Inn[]

Respectable Inn.
The basement floor of the Barracks, reached through an entrance guarded by a soldier, houses the Respectable Inn, or the Beginner's Hall (Intermediate). This is a darker room surrounded by machinery, with several ghosts from the previous Sector 7 Slums, and a few soldiers. The area has an Enemy Skill Materia the player can pick up.
Lift[]
Branch Entrance[]
Lower Junon[]
Branch Entrance[]
Lift[]
Road[]
Similar to that in Upper Junon, the Road contains several open doors alongside it that lead to shops.
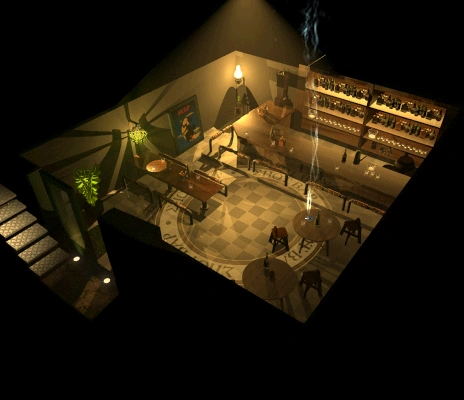
Shinra Member's Bar[]

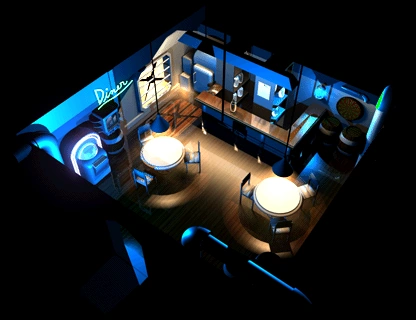
Located in the first door on the Road from the Branch Entrance, the Shinra Member's Bar contains a few non-player characters, but no notable items. In "The Stowaway Strategy", Reno, Tseng, and Elena are found here; after "In a World Approaching Its End", the bartender talks about plans to close the shop.
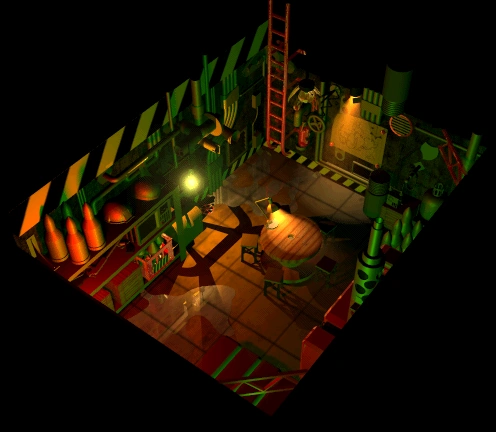
There are hints that this field map was the original field map for Seventh Heaven (see below).
Junon Inn[]
Located to the left from the Shinra Member's Bar, the Junon Inn contains a save point, and a staircase leading up to the Materia Store and Accessory Shop.
Materia Store[]
Located upstairs from the Junon Inn, the Lower Junon Materia Store has three hired women outside who enthusiastically greet any would-be customers. After "In a World Approaching Its End", two additional women are hired. The store sells less valuable Materia than the Upper Junon Materia Store. Upstairs from this is the Accessory Shop.
Accessory Shop[]
Located upstairs from the Item Store and Junon Inn, the Lower Junon Accessory Shop is ran by an old man who used to be in SOLDIER.
Barracks[]
Located to the left of the Junon Inn.
- 1f.
The first floor is an armory, with one non-player characters. A Speed Source is found in the closet in the top-left.
- 2f.
The second floor contains a common area and a bedroom. The Shinra Manager can be found in the bedroom, and a 1/35 soldier can be found in the common area.
Weapon Store[]
Located to the left of the Barracks, the Lower Junon Weapon Store is a vaster, more impressive store, but has less valuable items than the Upper Junon Weapon Store.
Dock[]
Located at the very end, during "The Stowaway Strategy", the Dock is where the send-off performance for Rufus occurs. Later, a sailor can be spoken to here.
Junon Branch[]
Path[]
Press Room[]
Gas Room[]
Staircase[]
- 1f.
- 2f.
Office[]
Doctor's Office[]
Junon Exterior[]
Branch[]
Cannon Base[]
Cannon[]
Junon Path[]
Upper Path[]
Elevator[]
Submarine Dock[]
Not to be confused with the underwater reactor's submarine dock.
Lower Path 1[]
Lower Path 2[]
Lower Path 3[]
Lower Path 4[]
Underground Elevator[]
Underground Gate[]
Underwater Tunnel[]
Underwater Reactor Entrance[]
Underwater Reactor[]
Quests[]
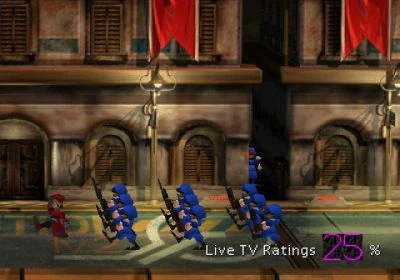
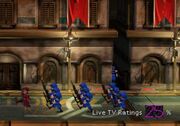
The march minigame.
During "The Stowaway Strategy", a party led by Cloud attempts to sneak on board the Cargo Ship. Cloud must disguise himself as a Shinra MP soldier and partake in a parade minigame. Following this is another related minigame, in which Cloud and his soldiers must perform for Rufus, where the item rewards are more substantial (either the Silver Glasses accessory, the HP Plus Materia, or the Force Stealer).
Later, during "In a World Approaching Its End", Tifa and the rest of Cloud's party are set to be executed. The quest begins with a series of events where the player is required to control a few party members through combat and then direct them to the airport. After this, the player must partake in two minigames with Tifa, first to free her from the gas chamber, and then to win a slap fight against Scarlet.
Freeing Tifa from the gas chamber[]
To free Tifa from the gas chamber in "In a World Approaching Its End", the player must perform specific actions to retrieve the key from the floor and use it to free her from the seat she is bound in. The ![]() or [CANCEL] button controls her legs, the
or [CANCEL] button controls her legs, the ![]() or [SWITCH] button controls her right arm, the
or [SWITCH] button controls her right arm, the ![]() or [OK] control her left arm while the
or [OK] control her left arm while the ![]() or [MENU] control her head.
or [MENU] control her head.
The player must first control the legs to grab the key, and then move both the head and legs for her to grab the key with her teeth. Moving the head and right arm will then allow her to unlock her right arm, then finally moving her right arm allows her to escape. The player can also unlock the left arm first if they choose.
Despite the circumstances, there is no time limit for the challenge.
Tifa and Scarlet slap fight[]

Scarlet slaps Tifa.
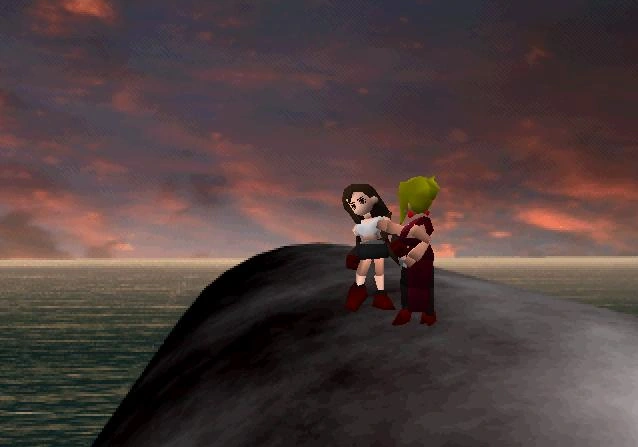
After escaping the gas chamber in "In a World Approaching Its End", Tifa runs to the end of the Mako Cannon where Scarlet catches up with her and the two begin slapping one another. Whoever receives five slaps first loses. The player must time their slaps by using ![]() .
.
Normally, whether the player wins or loses, Scarlet will say "Take her away" afterwards. An error in the programming prevents the player from seeing the Tifa-win-version of Scarlet's line, as the requirement for Scarlet's unused line is that she be slapped six times and this is impossible because the minigame ends at five slaps.
Encounters[]

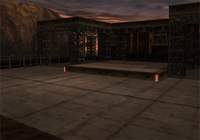
Airport battle background.
| Encounters | Areas |
|---|---|
|
Press room (during "In a World Approaching Its End") |
|
Outside press room (during "In a World Approaching Its End") |
|
Barret's escape on main concourse, and airport (during "In a World Approaching Its End") |
|
Airport (after "In a World Approaching Its End") |
|
Outside press room (after "In a World Approaching Its End") |
Prior to the return to Junon for "In a World Approaching Its End", no battles occur in Junon itself. The battles begin during and after this quest, and are concentrated around the airport and the press room seen during the chapter. Most battles instead occur in the underwater reactor.
Against all encounters, group hits, such as Enemy Skill Materia attacks and Materia paired with All are best. The encounters are not especially challenging, with the main difficulty arising if the player invested heavily in Cloud and less heavily in the mandatory party members during the chapter; on subsequent visits, they present little issue for the player.
Items[]

A street in Junon.
| Items | Area |
|---|---|
| Barracks (left of Item Shop) 2f | |
| Barracks (left of Item Shop) 3f | |
| Beginner's Hall | |
| Barracks (left of Junon inn) 1f | |
|
Barracks (left of Junon inn) 2f |
Shops[]
The shops in Junon update their merchandise after the party gets the Highwind, except for the Upper Junon Materia Store. The Materia store is coded like the other shops, but instead of calling for the second version of the shop after the plot advancement, it calls for the original one. The unused shop is unique, as it would have sold Magic Plus Materia, a Materia not sold by any accessible store in the game. It also contains Revive, MP Plus, Barrier, and Exit.
In the English localization the three stores in each half of Junon have the same name, however, it appears the original intention was to give each shop a unique name. The Item Store in Lower Junon is actually "Accessory Store" in Japanese, which is why "Accessory Shop" is the name of the menus even though during Meteorfall the shop instead sells armor and weapons. The Materia Store in Lower Junon is roughly called the "General Store" in Japanese, which is why during Meteorfall its wares change from Materia to weapons. In the Japanese version both Weapon Stores have the same name, but they are distinguished in the game files with the Upper Junon store using the initial "w" and the Lower Junon store using the initial "wa". The Lower Junon store has a sign for "Weapon" and "Accessory", so this store was likely intended to be called the "Weapon & Accessory Store", however, in the final game it sells no accessories.
During Meteorfall, the Upper Junon Item Store starts to sell weapons, however, the shop window's name is still "Item Shop". This is likely intentional as the weapons are joke equipment, most of which aren't traditionally used as weapons.
Another curiosity of the Junon shops is that most of the wares from the Upper Junon Weapon Store pre-Meteorfall are instead sold at the Lower Junon Materia Store during Meteorfall. The weapons that were not sold in the previous store are the starting weapons for the four characters obtained after the first visit to Junon.
Initial[]
Upper Junon Weapon Store[]
Before Highwind.
| Name | Cost |
|---|---|
| Hardedge | 1,500 gil |
| Grand Glove | 1,200 gil |
| Atomic Scissors | 1,400 gil |
| Striking Staff | 1,300 gil |
| Diamond Pin | 1,300 gil |
| Boomerang | 1,400 gil |
After Highwind
| Name | Cost |
|---|---|
| Rune Blade | 3,800 gil |
| Enhance Sword | 12,000 gil |
| W Machine Gun | 2,000 gil |
| Drill Arm | 3,300 gil |
| Platinum Fist | 2,700 gil |
| Kaiser Knuckle | 15,000 gil |
| Fairy Tale | 2,500 gil |
Upper Junon Item Store[]
Before Highwind.
| Name | Cost |
|---|---|
| Potion | 50 gil |
| Hi-Potion | 300 gil |
| Phoenix Down | 300 gil |
| Antidote | 80 gil |
| Eye drop | 50 gil |
| Echo Screen | 100 gil |
| Hyper | 100 gil |
| Tranquilizer | 100 gil |
| Tent | 500 gil |
After Highwind the "item store" sells weapons.
| Name | Cost |
|---|---|
| Wind Slash | 2,000 gil |
| Twin Viper | 3,200 gil |
| Viper Halberd | 7,000 gil |
| Dragoon Lance | 6,200 gil |
| Peacemaker | 3,500 gil |
| Buntline | 6,800 gil |
| Magic Comb | 2,000 gil |
| Plus Barrette | 3,500 gil |
| Wizard Staff | 1,800 gil |
| Wizer Staff | 3,200 gil |
Upper Junon Materia Store[]
Lower Junon Weapon Store[]
Before Highwind
| Name | Cost |
|---|---|
| Mythril Saber | 1,000 gil |
| Cannon Ball | 950 gil |
| Mythril Claw | 750 gil |
| Full Metal Staff | 800 gil |
| Mythril Clip | 800 gil |
After Highwind.
| Name | Cost |
|---|---|
| Atomic Scissors | 1,400 gil |
| Grand Glove | 1,200 gil |
| Striking Staff | 1,300 gil |
| Diamond Pin | 1,300 gil |
| Boomerang | 1,400 gil |
| Yellow M-phone | 500 gil |
| Spear | 1,200 gil |
| Trident | 7,500 gil |
| Quicksilver | 1,000 gil |
Lower Junon Item Store[]
Before Highwind.
| Name | Cost |
|---|---|
| Silver Glasses | 3,000 gil |
| Headband | 3,000 gil |
After Highwind.
| Name | Cost |
|---|---|
| Platinum Bangle | 1,800 gil |
| Powersoul | 4,200 gil |
| Enemy Launcher | 3,300 gil |
| Magic Shuriken | 6,000 gil |
| White M-phone | 2,300 gil |
| Black M-phone | 2,800 gil |
| Silver M-phone | 3,300 gil |
| Sniper CR | 3,300 gil |
Lower Junon Materia Store[]
Before Highwind.
| Name | Cost |
|---|---|
| Fire | 600 gil |
| Ice | 600 gil |
| Lightning | 600 gil |
| Earth | 1,500 gil |
| Poison | 1,500 gil |
After Highwind the shop sells the party's joke weapons; all of them can be acquired by a different way as well, and none have Materia slots; the weapons are rather intended to look amusing when equipped in battle, although Red XIII's weapons don't actually render.
| Name | Cost |
|---|---|
| Nail Bat | 2,800 gil |
| Rocket Punch | 3,200 gil |
| Work Glove | 2,200 gil |
| Hairpin | 6,000 gil |
| Superball | 3,000 gil |
| Trumpet Shell | 3,000 gil |
| Mop | 3,200 gil |
| Silver Rifle | 3,000 gil |
Musical themes[]
During the first visit to Junon, the music that plays is "Rufus's Welcoming Ceremony" (ルーファウス歓迎式典, Rūfausu Kangei Shikiten?), a fanfare played for Rufus's inauguration. "Turks' Theme" (タークスのテーマ, Tākusu no Tēma?) plays during the return to Junon, specifically before Sapphire Weapon attacks. After the Weapon attack the music changes to "Hurry Up!" (もっと急げ!, Motto Isoge!?).
The music changes to "Attack of the WEAPON" (ウェポン襲来, Wepon Shūrai?) after the first shot is fired at the Weapon. Finally, when Tifa attempts to escape the gas chamber, the music changes once more to "Who...Am I?" (俺は...誰だ, Ore wa...Dareda?). Later on, after the Weapon's demise, the music changes to "Shinra's Full-Scale Assault" (神羅軍総攻撃, Shinra-gun Sōkōgeki?).
Behind the scenes[]
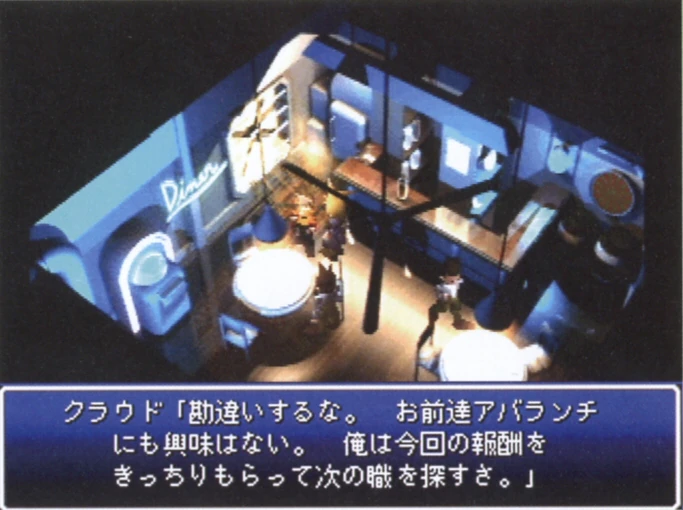
Cloud: "Make no mistake! I don't care about you AVALANCHE. Once I get my reward, I'm off to look for my next job".
It appears the early designs for Seventh Heaven were later used for the Shinra Member's Bar in Junon. The "Making Of" bonus disc included with Final Fantasy VII International includes a pre-release shot of the Junon pub where Cloud uses lines he says in Seventh Heaven in the final game. The Junon pub also appeared in a GameFan article written nine months before the release of Final Fantasy VII, which suggests it was originally planned to be a more important location than it ended up being in the final game.[citation needed] Comparing the layout of the Junon pub to the Beginner's Hall in Junon suggests that the underground level may have been the original Avalanche hideout, situated below the Seventh Heaven bar.
A man who keeps a shop in the top floor of a building, who on a visit during "The Stowaway Strategy", mentions he used to be in SOLDIER. When visited later after "In a World Approaching Its End", he has dressed up as a black cape and mentions he suddenly got an urge to start dressing like that. This is an allusion to how the treatment the SOLDIER members receive is the same as the one of making of Sephiroth-clones.
In the endgame, the player can find a lone Shinra soldier in Junon who mentions the "Great Sephiroth Plan"[1] and how everyone else has followed the order but him, because he wants to stay behind to see the world end. Earlier in the game, people in Kalm talk that Shinra is going to dispatch the entire Shinra army to the North Crater to fight Sephiroth once the barrier has been destroyed.[1] There are no Shinra troops to be found in the North Crater, however, so what became of the "Great Sephiroth Plan" is unknown.
In the slap fight, whether the player wins or loses, Scarlet will say "Take her away" in her dialogue afterwards. An error in the programming prevents the player from seeing the Tifa-win-version of Scarlet's line, as the requirement for Scarlet's unused line is that she be slapped six times and this is impossible because the minigame ends at five slaps. Scarlet was meant to say "God! I can't stand it!" if Tifa wins.[2]
Gallery[]
")
")
")
")
")
")
")
")
")
")
")
Citations[]
- ↑ 1.0 1.1 Final Fantasy VII script § "Junon optional dialogue"
- ↑ (n.d.) . "Final Fantasy VII: The Unused Text – Part 9". From The Lifestream. Archived from the original on 15 January, 2021.