DarthKitty (talk | contribs) mNo edit summary Tag: sourceedit |
Intangir Bot (talk | contribs) m (Bot: Changing template: Galleryincomplete) |
||
| (44 intermediate revisions by 7 users not shown) | |||
| Line 1: | Line 1: | ||
| + | {{sideicon|FFII|FFIII|FFIV|IVCCI|IVTAY|FFV|FFVI|FFVII|FFIX|FFX|FFXI|FFXII|FFXIII|FFMQ|FFL3|BravelyD|FFD|FFBE}} |
||
| − | {{Expand}} |
||
| + | {{Expand|BravelyD|FFVII|IVTAY|FFIV|FFV|FFIII|FFII}} |
||
| − | {{IncompleteTable}} |
||
| + | {{Table incomplete|FFV|FFII|FFIII|FFVII|FFIV}} |
||
| − | {{Images|FFVI hidden passage}} |
||
| ⚫ | |||
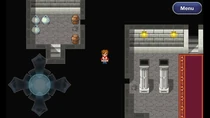
[[File:FFIV Hidden Passage.png|thumb|right|250px|A hidden passage in ''[[Final Fantasy IV]]''.]] |
[[File:FFIV Hidden Passage.png|thumb|right|250px|A hidden passage in ''[[Final Fantasy IV]]''.]] |
||
'''Hidden passages''' {{J|隠し通路|Kakushi Tsuuro}} are a recurring feature found in the [[Final Fantasy series|series]], mainly in older installments. Hidden passages are passages impossible to detect unless the player pays close attention to suspicious areas or checks along walls, and usually lead to optional areas that house useful items and equipment. Several hidden areas can only be found via thorough searching. |
'''Hidden passages''' {{J|隠し通路|Kakushi Tsuuro}} are a recurring feature found in the [[Final Fantasy series|series]], mainly in older installments. Hidden passages are passages impossible to detect unless the player pays close attention to suspicious areas or checks along walls, and usually lead to optional areas that house useful items and equipment. Several hidden areas can only be found via thorough searching. |
||
| − | ==Appearances== |
+ | == Appearances == |
| − | ===''[[Final Fantasy II]]''=== |
+ | === ''[[Final Fantasy II]]'' === |
| + | |||
| − | {{sideicon|FFII}} |
||
| − | [[File:FFII NES Hidden Passage.png|right|thumb|Hidden passage |
+ | [[File:FFII NES Hidden Passage.png|right|thumb|Hidden passage.]] |
| − | {|class="full-width FFII table" |
+ | {|class="full-width FFII article-table" |
|-class="a" |
|-class="a" |
||
!style="width:20%"|Location |
!style="width:20%"|Location |
||
| Line 20: | Line 21: | ||
|- |
|- |
||
|} |
|} |
||
| − | {{ |
+ | {{Section|Final Fantasy II}} |
| − | {{ |
+ | {{clear}} |
| + | |||
| ⚫ | |||
| ⚫ | |||
| ⚫ | |||
| ⚫ | |||
| − | {{sideicon|FFIII}} |
||
| ⚫ | |||
| ⚫ | |||
|-class="a" |
|-class="a" |
||
!style="width:20%"|Location |
!style="width:20%"|Location |
||
| Line 37: | Line 38: | ||
|- |
|- |
||
|} |
|} |
||
| − | {{ |
+ | {{Section|Final Fantasy III}} |
| − | {{ |
+ | {{clear}} |
| − | ===''[[Final Fantasy IV]]''=== |
+ | === ''[[Final Fantasy IV]]'' === |
| + | [[File:FFIV Kokkol's Forge Hidden Passage SNES.png|thumb|right|Hidden passage.]] |
||
| − | {{sideicon|FFIV}} |
||
| + | |||
| − | {|class="full-width FFIV table" |
+ | {|class="full-width FFIV article-table" |
|-class="a" |
|-class="a" |
||
!style="width:20%"|Location |
!style="width:20%"|Location |
||
| Line 61: | Line 63: | ||
|- |
|- |
||
!class="b"|Ancient Waterway |
!class="b"|Ancient Waterway |
||
| ⚫ | |||
| |
| |
||
|- |
|- |
||
| Line 69: | Line 70: | ||
|- |
|- |
||
|} |
|} |
||
| − | {{ |
+ | {{Section|Final Fantasy IV}} |
| − | {{ |
+ | {{clear}} |
| + | |||
| ⚫ | |||
| ⚫ | |||
| − | {{sideicon|IVCCI}} |
||
A hidden passage can be found in [[Damcyan]] Castle. Right after arriving in the storehouse, the player should move downward and this will lead to the visible chest containing an [[Antidote (item)|Antidote]]. Going further up after picking up the chest will lead to a [[Ether]]. |
A hidden passage can be found in [[Damcyan]] Castle. Right after arriving in the storehouse, the player should move downward and this will lead to the visible chest containing an [[Antidote (item)|Antidote]]. Going further up after picking up the chest will lead to a [[Ether]]. |
||
| − | ====''[[Final Fantasy IV: The After Years]]''==== |
+ | ==== ''[[Final Fantasy IV: The After Years]]'' ==== |
| + | |||
| − | {{sideicon|IVTAY}} |
||
| − | {{ |
+ | {{Section|Final Fantasy IV: The After Years}} |
| + | |||
| ⚫ | |||
| ⚫ | |||
| ⚫ | |||
| − | {{sideicon|FFV}} |
||
| ⚫ | |||
The [[Thief (Final Fantasy V)|Thief]] job learns an ability called Find Passages that displays all hidden areas on the field. |
The [[Thief (Final Fantasy V)|Thief]] job learns an ability called Find Passages that displays all hidden areas on the field. |
||
| − | {|class="full-width FFV table" |
+ | {|class="full-width FFV article-table" |
|-class="a" |
|-class="a" |
||
!style="width:20%"|Location |
!style="width:20%"|Location |
||
| Line 132: | Line 133: | ||
|- |
|- |
||
|} |
|} |
||
| − | {{ |
+ | {{Section|Final Fantasy V}} |
| − | {{ |
+ | {{clear}} |
| − | ===''[[Final Fantasy VI]]''=== |
+ | === ''[[Final Fantasy VI]]'' === |
| + | [[File:South Figaro Secret Passage.PNG|thumb|Rich man's house basement]] |
||
| ⚫ | |||
| + | ''Final Fantasy VI'' has hidden passages, but there is no in-game way to find them other than knowing beforehand or with a trial and error method. If the player has a cheat device, a background layer can be disabled to see them being rendered in most cases. |
||
| + | |||
| ⚫ | |||
|-class="a" |
|-class="a" |
||
!style="width:20%"|Location |
!style="width:20%"|Location |
||
| Line 142: | Line 146: | ||
!style="width:60%"|Leads to |
!style="width:60%"|Leads to |
||
|- |
|- |
||
| − | !class="b"| |
+ | !class="b"|[[South Figaro]] |
| + | |Next to the Pub. |
||
| ⚫ | |||
| + | |Secret bridge over the water. |
||
| ⚫ | |||
|- |
|- |
||
| + | !class="b"|[[South Figaro]] |
||
| + | |Rich man's house |
||
| + | |Old man's house |
||
| ⚫ | |||
| + | !class="b"|[[South Figaro]] |
||
| + | |Outside |
||
| + | |Secret entrance to old man's house |
||
| ⚫ | |||
| + | !class="b"|[[South Figaro]] |
||
| + | |Rich man's house |
||
| + | |Basement |
||
| ⚫ | |||
| + | !class="b"|[[South Figaro]] |
||
| + | |Rich man's house basement - Several |
||
| + | |Basements 1 and 2 |
||
| + | |- |
||
| + | !class="b"|[[Mt. Kolts]] |
||
| + | |Before a bridge inside a cave. |
||
| + | |[[Relic (Final Fantasy VI)#Gigas Glove|Giga Glove]] |
||
| + | |- |
||
| + | !class="b"|[[Returners' Hideout]] |
||
| + | |Supply room |
||
| + | |[[Relic (Final Fantasy VI)#White Cape|White Cape]] |
||
| + | |- |
||
| + | !class="b"|[[Returners' Hideout]] |
||
| + | |Save point room |
||
| + | |[[Lethe River]] |
||
| + | |- |
||
| + | !class="b"|[[Magitek Factory]] |
||
| + | |South end |
||
| + | |[[Final Fantasy VI armor#Golden Armor|Golden Armor]] |
||
| + | |- |
||
| + | !class="b"|[[Magitek Research Facility (Final Fantasy VI)|Magitek Research Facility]] |
||
| + | |Tube room - South-west |
||
| + | |[[Final Fantasy VI weapons#Stoneblade|Stoneblade]] |
||
| + | |- |
||
| + | !class="b"|[[Cave to the Sealed Gate]] |
||
| + | |Basement 3 |
||
| + | |Player must pass through this to continue. |
||
| + | |- |
||
| + | !class="b"|[[Darill's Tomb]] |
||
| + | |Basement 3 |
||
| + | |[[Relic (Final Fantasy VI)#Growth Egg|Growth Egg]] |
||
| + | |- |
||
| + | !class="b"|[[Mobliz]] (Wor) |
||
| + | |Wounded soldier's house |
||
| + | |Basement |
||
| + | |- |
||
| + | !class="b"|[[Kefka's Tower]] |
||
| + | |Magitek Factory area |
||
| + | |[[Final Fantasy VI armor#Aegis Shield|Aegis Shield]] |
||
| + | |- |
||
| + | !class="b"|[[Kefka's Tower]] |
||
| + | |Wall south of [[Demon (Final Fantasy VI)|Demon]] |
||
| + | |[[Relic (Final Fantasy VI)#Ribbon|Ribbon]] |
||
| + | |- |
||
| + | !class="b"|[[Dragons' Den]] |
||
| + | |Flame Labyrinth - North-west |
||
| + | |[[Final Fantasy VI items#Megalixir|Megalixir]] |
||
|} |
|} |
||
| ⚫ | |||
| − | ===''[[Final Fantasy VII]]''=== |
+ | === ''[[Final Fantasy VII]]'' === |
| + | |||
| − | {{sideicon|FFVII}} |
||
[[File:FFVII Wutai Secret Passage.png|right|thumb|150px|A secret passage in Wutai.]] |
[[File:FFVII Wutai Secret Passage.png|right|thumb|150px|A secret passage in Wutai.]] |
||
| − | In [[Godo Kisaragi|Godo |
+ | In [[Godo Kisaragi|Godo's]] house in [[Wutai]], the player can find two hidden passages behind fake walls to find a [[Final Fantasy VII weapons#Magic Shuriken|Magic Shuriken]] for [[Yuffie Kisaragi|Yuffie]] and a [[Final Fantasy VII weapons#Hairpin|Hairpin]] for [[Red XIII]]. Also, a cave on [[Gaea's Cliff]] contains a well hidden [[Final Fantasy VII accessories#Ribbon|Ribbon]] in a room hidden from view. |
| − | {|class="full-width FFVII table" |
+ | {|class="full-width FFVII article-table" |
|-class="a" |
|-class="a" |
||
!style="width:20%"|Location |
!style="width:20%"|Location |
||
| Line 165: | Line 227: | ||
|- |
|- |
||
|} |
|} |
||
| − | {{ |
+ | {{Section|Final Fantasy VII}} |
| + | |||
| ⚫ | |||
| ⚫ | |||
| − | {{sideicon|FFIX}} |
||
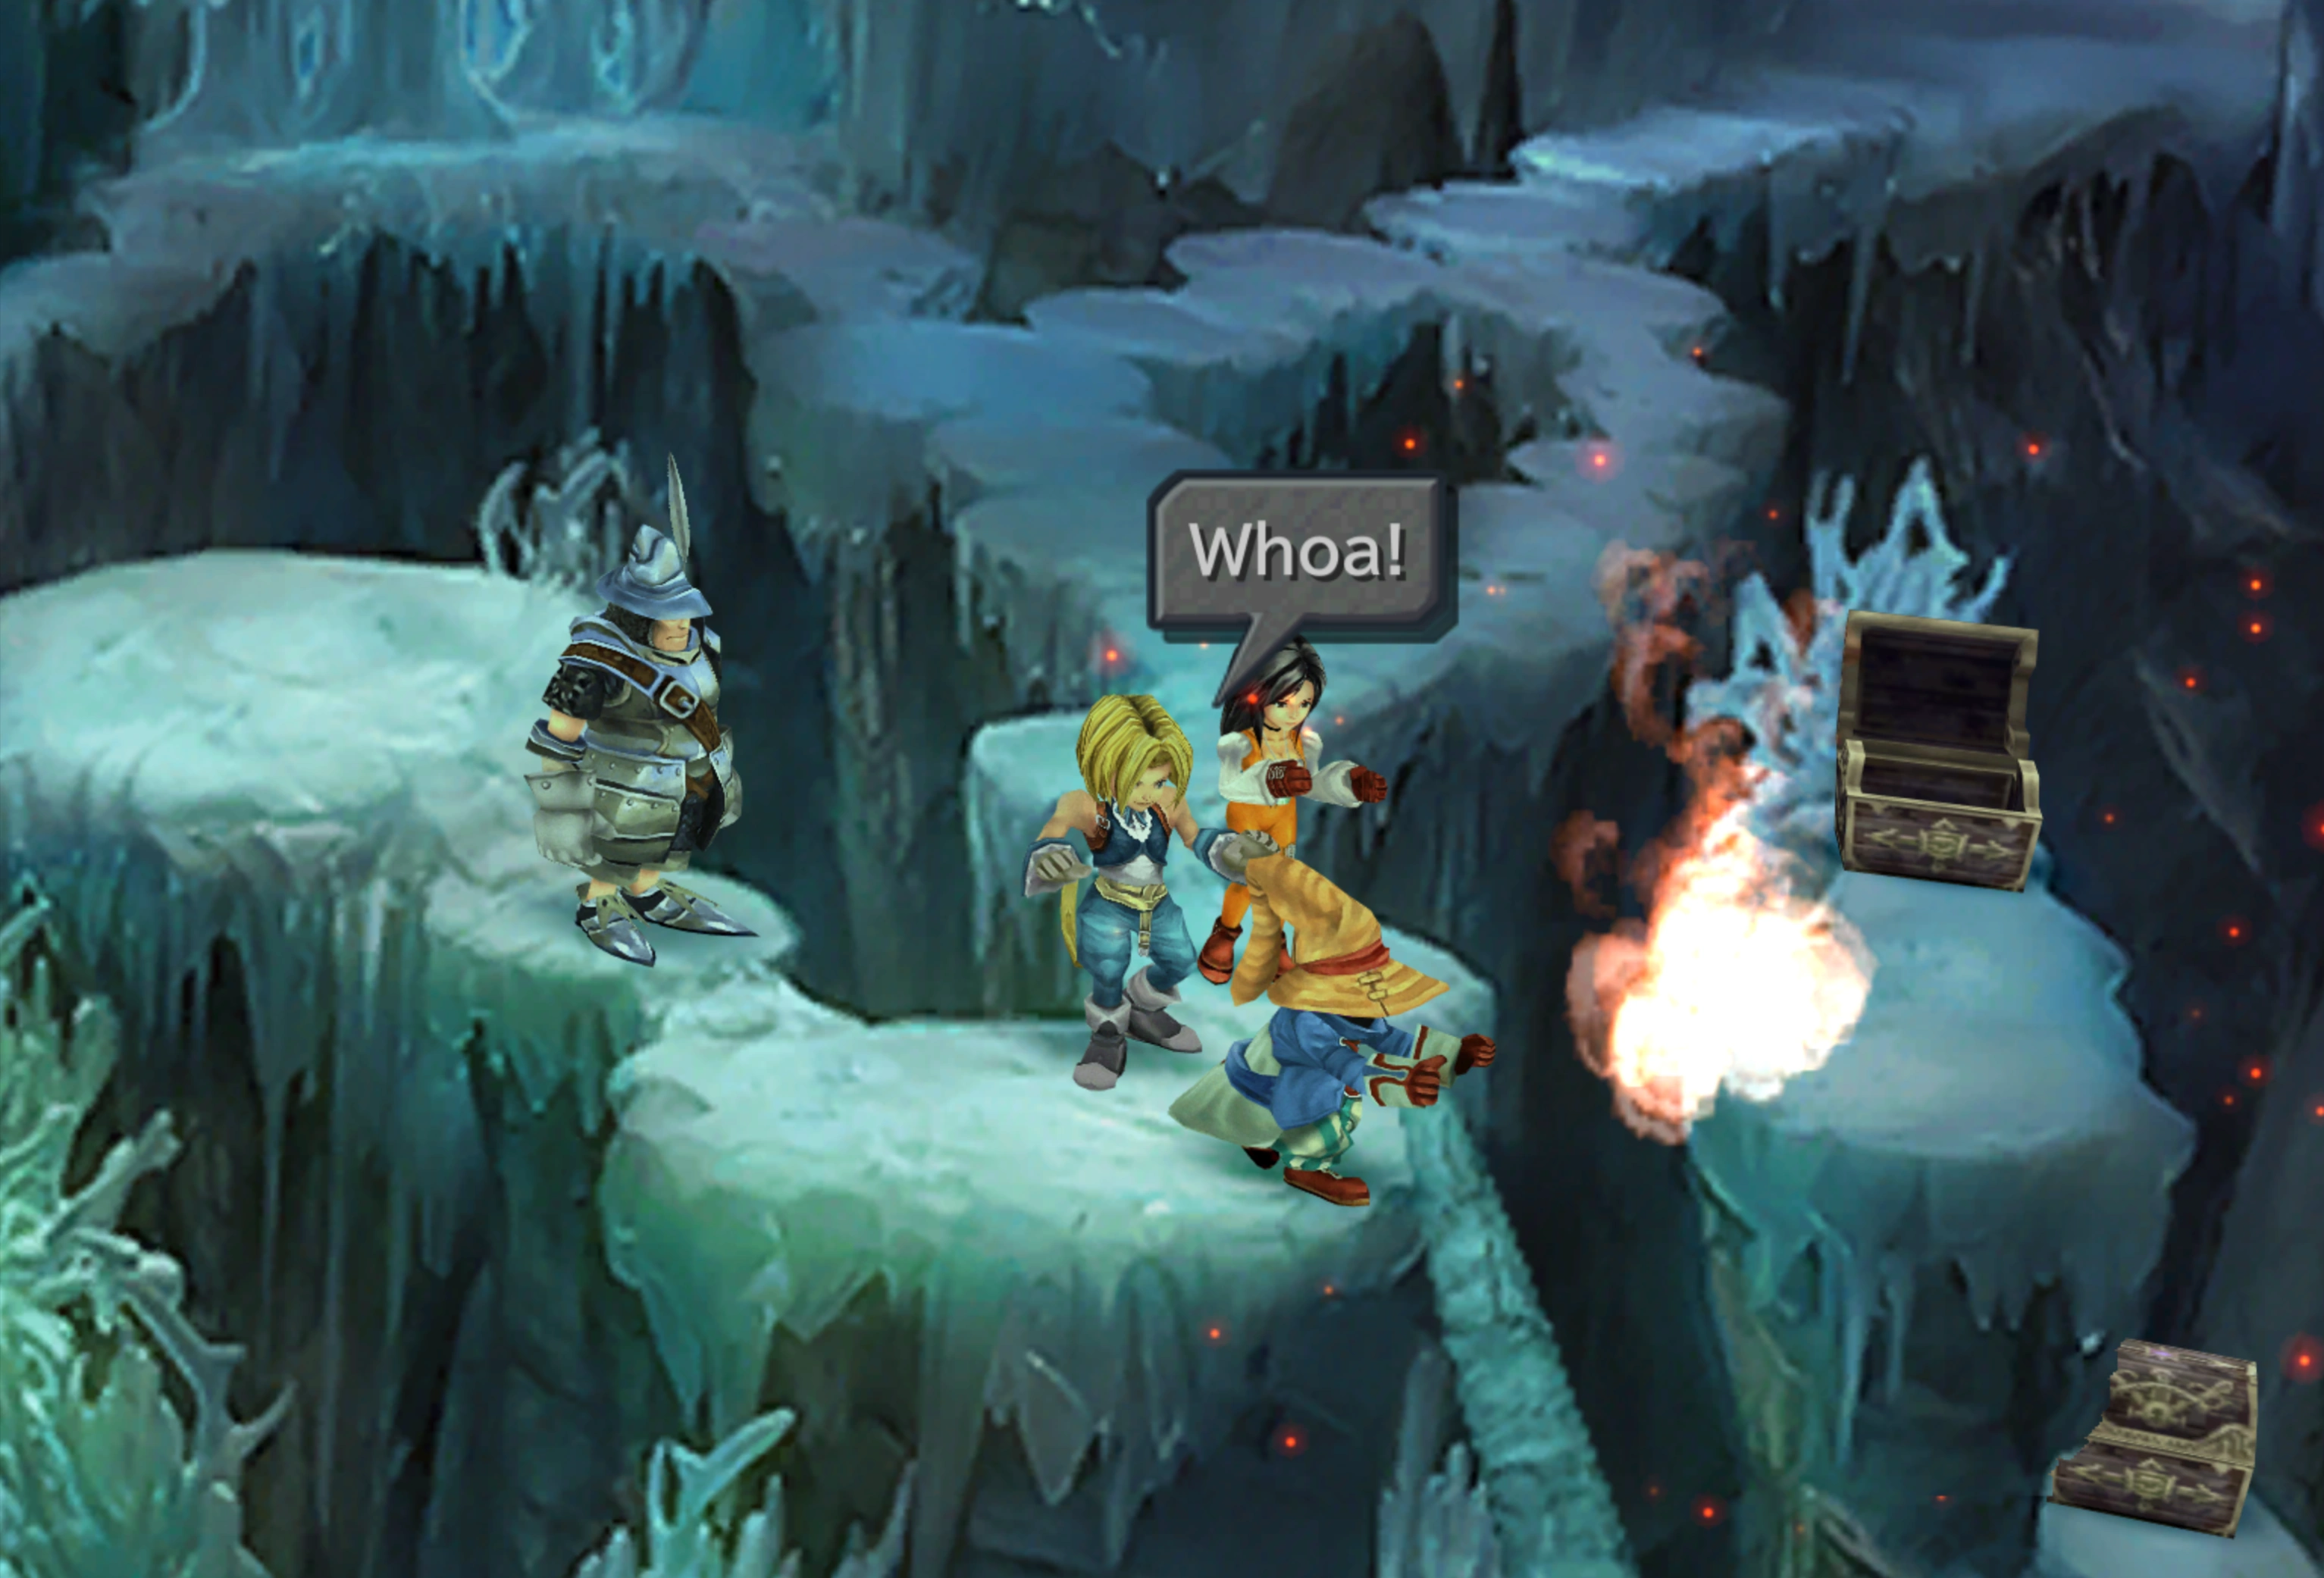
[[File:Ice-Cavern-Hidden-Treasures.png|thumb|Vivi revealing treasures from behind ice walls.]] |
[[File:Ice-Cavern-Hidden-Treasures.png|thumb|Vivi revealing treasures from behind ice walls.]] |
||
In the [[Ice Cavern (Final Fantasy IX)|Ice Cavern]], [[Vivi Ornitier|Vivi]] can reveal hidden treasures by blasting away the walls of ice with his fire magic. To find the walls that can be destroyed, an exclamation mark will appear on the field. |
In the [[Ice Cavern (Final Fantasy IX)|Ice Cavern]], [[Vivi Ornitier|Vivi]] can reveal hidden treasures by blasting away the walls of ice with his fire magic. To find the walls that can be destroyed, an exclamation mark will appear on the field. |
||
| − | {{ |
+ | {{clear}} |
| + | |||
| ⚫ | |||
| ⚫ | |||
| − | {{sideicon|FFX}} |
||
[[File:Hidden Path to Remiem Temple.png|thumb|The hidden path to Remiem Temple.]] |
[[File:Hidden Path to Remiem Temple.png|thumb|The hidden path to Remiem Temple.]] |
||
The path to [[Remiem Temple]] is located in the [[Calm Lands]] near the entrance to the [[Macalania Woods]], but can only be accessed by riding a chocobo. |
The path to [[Remiem Temple]] is located in the [[Calm Lands]] near the entrance to the [[Macalania Woods]], but can only be accessed by riding a chocobo. |
||
| − | {{ |
+ | {{clear}} |
| + | |||
| ⚫ | |||
| ⚫ | |||
| − | {{sideicon|FFXI}} |
||
Many locations, such as the [[Derfland#Crawlers' Nest|Crawlers' Nest]] and [[Fauregandi#Pso'Xja|Pso'Xja]], have walls that appear solid but can be passed through. It is suspected that the [[Zilart]] originally created these illusory walls. Sometimes a person can pass through these secret passages freely. Other passages are one-way only, however. |
Many locations, such as the [[Derfland#Crawlers' Nest|Crawlers' Nest]] and [[Fauregandi#Pso'Xja|Pso'Xja]], have walls that appear solid but can be passed through. It is suspected that the [[Zilart]] originally created these illusory walls. Sometimes a person can pass through these secret passages freely. Other passages are one-way only, however. |
||
| − | ===''[[Final Fantasy XII]]''=== |
+ | === ''[[Final Fantasy XII]]'' === |
| + | |||
| − | {{sideicon|FFXII}} |
||
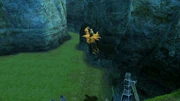
[[File:Nabreus secret2.jpg|thumb|Nabreus Deadlands hidden path.]] |
[[File:Nabreus secret2.jpg|thumb|Nabreus Deadlands hidden path.]] |
||
In some places, it is possible to walk off the map to hidden areas. Walls that prevent passage to hidden areas, known as fools façades, can be removed by examining or damaging them, and other obstructions can be similarly moved or removed. |
In some places, it is possible to walk off the map to hidden areas. Walls that prevent passage to hidden areas, known as fools façades, can be removed by examining or damaging them, and other obstructions can be similarly moved or removed. |
||
| Line 190: | Line 252: | ||
In [[Zertinan Caverns]], The Hourglass Basin area has a cut-off area in the east that can only be accessed via a hidden passage from the Save Crystal area. It is necessary to use this passage to complete the [[Catoblepas (Final Fantasy XII)|Catoblepas]] hunt. |
In [[Zertinan Caverns]], The Hourglass Basin area has a cut-off area in the east that can only be accessed via a hidden passage from the Save Crystal area. It is necessary to use this passage to complete the [[Catoblepas (Final Fantasy XII)|Catoblepas]] hunt. |
||
| − | In the [[Tomb of Raithwall]], after defeating both [[Demon Wall (Final Fantasy XII)|Demon Walls]], the player can examine the wall where the optional Demon Wall came out to open a secret passage. The secret passage has a random chance of spawning a [[Treasure (Final Fantasy XII)|treasure chest]] that contains the [[ |
+ | In the [[Tomb of Raithwall]], after defeating both [[Demon Wall (Final Fantasy XII)|Demon Walls]], the player can examine the wall where the optional Demon Wall came out to open a secret passage. The secret passage has a random chance of spawning a [[Treasure (Final Fantasy XII)|treasure chest]] that contains the [[Final Fantasy XII weapons#Demonsbane|Demonsbane]] sword. In the International Zodiac Job System version the treasure always has a [[Final Fantasy XII items#Scathe Mote|Scathe Mote]]. |
| − | [[Henne Mines]] has many off-the-map areas. Some are only shortcuts, but some contain good treasure. For example, one of the off-the-map areas that can be accessed the first time the player enters the mines has a random chance of spawning an [[ |
+ | [[Henne Mines]] has many off-the-map areas. Some are only shortcuts, but some contain good treasure. For example, one of the off-the-map areas that can be accessed the first time the player enters the mines has a random chance of spawning an [[Final Fantasy XII items#Elixir|Elixir]] chest. |
| − | In the [[Stilshrine of Miriam]], the player can find a hidden passage in the Ward of the Sword-King area; at the junction the path to the left has a wall that will vanish if the player approaches it in a way the camera will attempt to go "inside" the wall. At the end of the hidden section the player finds a treasure containing the [[ |
+ | In the [[Stilshrine of Miriam]], the player can find a hidden passage in the Ward of the Sword-King area; at the junction the path to the left has a wall that will vanish if the player approaches it in a way the camera will attempt to go "inside" the wall. At the end of the hidden section the player finds a treasure containing the [[Final Fantasy XII armor#Shell Shield|Shell Shield]]. The [[Rare Game]] [[Matriarch Bomb]] can be found in the area. |
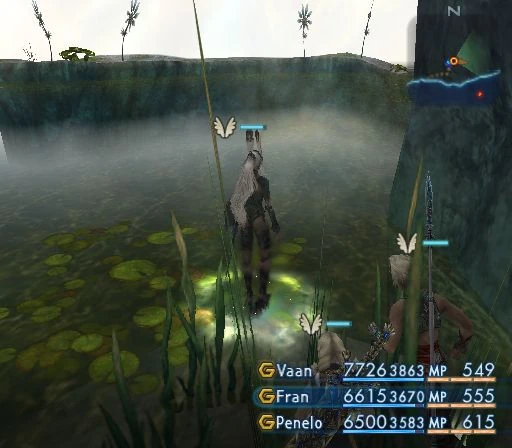
The [[Nabreus Deadlands]] have a hidden passage through the swamp to enter the area in the north. The player must visit this area as part of the [[three medallions sidequest]], and to fight [[Roblon]]. |
The [[Nabreus Deadlands]] have a hidden passage through the swamp to enter the area in the north. The player must visit this area as part of the [[three medallions sidequest]], and to fight [[Roblon]]. |
||
| Line 201: | Line 263: | ||
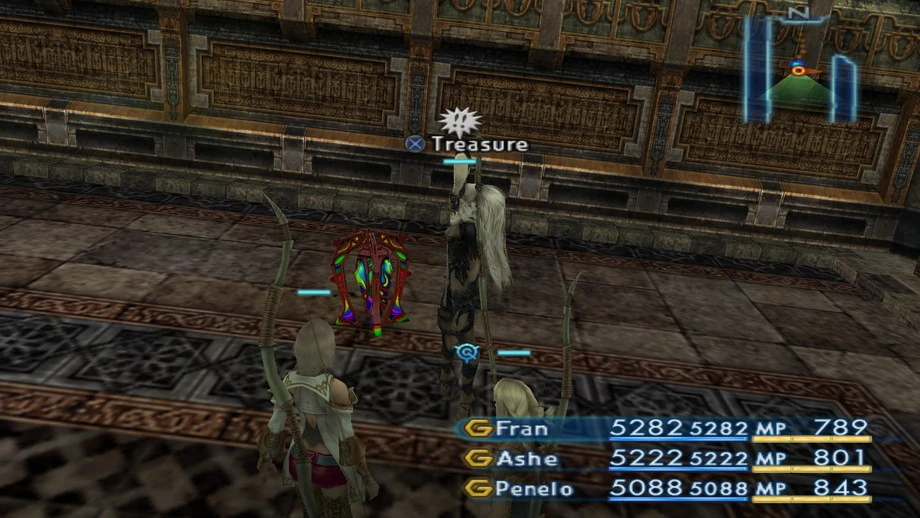
[[File:Pandora.jpg|thumb|Party at the hidden off-the-map section.]] |
[[File:Pandora.jpg|thumb|Party at the hidden off-the-map section.]] |
||
| − | In the [[Necrohol of Nabudis]] the player can find an off-the-map room in the north of the Hall of Effulgent Light ([[Salikawood (Final Fantasy XII)|Salikawood]] entrance). In the center of the room is a Pandora, but in the corner of the room, a ??? can be found; inspecting it gives a cutscene and access to a Baknamy merchant who sells some of the best equipment, items, spells and technicks |
+ | In the [[Necrohol of Nabudis]] the player can find an off-the-map room in the north of the Hall of Effulgent Light ([[Salikawood (Final Fantasy XII)|Salikawood]] entrance). In the center of the room is a Pandora, but in the corner of the room, a ??? can be found; inspecting it gives a cutscene and access to a Baknamy merchant who sells some of the best equipment, items, spells and technicks. |
On the [[Phon Coast]], the player can find a hidden passage between The Vaddu Strand and Limatra Hills. In Vaddu Stand the player can keep running left to find the hidden path under the cliff. |
On the [[Phon Coast]], the player can find a hidden passage between The Vaddu Strand and Limatra Hills. In Vaddu Stand the player can keep running left to find the hidden path under the cliff. |
||
| Line 213: | Line 275: | ||
On top of the other hidden areas, there are a number of off-the-map areas that can only be accessed by riding a [[Chocobo#Final Fantasy XII|chocobo]]. On the [[Ozmone Plain]] the player can only access the Henne Mines entrance by a chocobo. On the [[Mosphoran Highwaste]] the player must use a chocobo to unlock the area where [[Exodus (Final Fantasy XII boss)|Exodus]] is fought. The player can even cross [[Tchita Uplands]] on a chocobo to enter the [[Cerobi Steppe]] before having gone to [[Archades]]. |
On top of the other hidden areas, there are a number of off-the-map areas that can only be accessed by riding a [[Chocobo#Final Fantasy XII|chocobo]]. On the [[Ozmone Plain]] the player can only access the Henne Mines entrance by a chocobo. On the [[Mosphoran Highwaste]] the player must use a chocobo to unlock the area where [[Exodus (Final Fantasy XII boss)|Exodus]] is fought. The player can even cross [[Tchita Uplands]] on a chocobo to enter the [[Cerobi Steppe]] before having gone to [[Archades]]. |
||
| − | {{ |
+ | {{clear}} |
| + | |||
| ⚫ | |||
| ⚫ | |||
[[File:Palumpolum Balcony.png|thumb|A hidden passage in Palumpolum.]] |
[[File:Palumpolum Balcony.png|thumb|A hidden passage in Palumpolum.]] |
||
In [[Palumpolum]] - Western Promenade, there is a hidden passage leads to a treasure sphere. |
In [[Palumpolum]] - Western Promenade, there is a hidden passage leads to a treasure sphere. |
||
| − | {{ |
+ | {{clear}} |
| + | |||
| ⚫ | |||
| ⚫ | |||
| − | {{sideicon|FFMQ}} |
||
[[File:Focus Tower Hidden Passage.png|thumb|Hidden passage in [[Focus Tower]].]] |
[[File:Focus Tower Hidden Passage.png|thumb|Hidden passage in [[Focus Tower]].]] |
||
Upon entering [[Focus Tower]] from the Earth Region, a hidden passage is located right near the entrance. This passage allows the player to reach the steps leading to the first floor faster, acting like a shortcut. If the shortcut is not taken, the player will have to go around the long path to reach the stairs. |
Upon entering [[Focus Tower]] from the Earth Region, a hidden passage is located right near the entrance. This passage allows the player to reach the steps leading to the first floor faster, acting like a shortcut. If the shortcut is not taken, the player will have to go around the long path to reach the stairs. |
||
| − | {{ |
+ | {{clear}} |
| + | |||
| ⚫ | |||
| ⚫ | |||
| − | {{sideicon|FFL3}} |
||
After becoming separated from [[Arthur (Legend III)|Arthur]]'s party in [[Maitreya's Tower]], [[Dion]] finds a hidden door leading him straight to Maitreya. |
After becoming separated from [[Arthur (Legend III)|Arthur]]'s party in [[Maitreya's Tower]], [[Dion]] finds a hidden door leading him straight to Maitreya. |
||
| − | ===''[[Bravely Default]]''=== |
+ | === ''[[Bravely Default]]'' === |
| ⚫ | |||
| ⚫ | |||
| + | |||
| ⚫ | |||
| + | ==== ''[[Bravely Second: End Layer]]'' ==== |
||
| + | {{Section|Bravely Second: End Layer}} |
||
| + | |||
| ⚫ | |||
| ⚫ | |||
| − | {{sideicon|FFD}} |
||
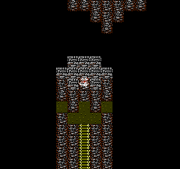
[[File:HiddenPassageCastleLux.PNG|thumb|right|210px|Hidden passage in Castle Lux]] |
[[File:HiddenPassageCastleLux.PNG|thumb|right|210px|Hidden passage in Castle Lux]] |
||
| − | Hidden passages can be found |
+ | Hidden passages can be found as early as [[Castle Lux]], and are necessary to use in some cases to progress, for example when bridging between [[Below Castle Lux]] and the main castle itself. The hidden passages are typically marked by a discontinuity in tile work or wall, showing that areas are accessible through there. |
| − | {{ |
+ | {{clear}} |
| + | |||
| ⚫ | |||
| − | ===''[[Final Fantasy Brave Exvius]]''=== |
||
| − | {{sideicon|FFBE}} |
||
Towns and dungeons are full of hidden passages. |
Towns and dungeons are full of hidden passages. |
||
| − | {{ |
+ | {{Section|Final Fantasy Brave Exvius}} |
| − | ==Gallery== |
+ | == Gallery == |
<gallery> |
<gallery> |
||
FFII PSP Hidden Passage.png|''[[Final Fantasy II]]'' (PSP). |
FFII PSP Hidden Passage.png|''[[Final Fantasy II]]'' (PSP). |
||
FFIII NES Hidden Passage 2.png|Another type of hidden passages in ''[[Final Fantasy III]]'' (NES). |
FFIII NES Hidden Passage 2.png|Another type of hidden passages in ''[[Final Fantasy III]]'' (NES). |
||
FFIIIDS Secret Passage.png|''[[Final Fantasy III]]'' (DS). |
FFIIIDS Secret Passage.png|''[[Final Fantasy III]]'' (DS). |
||
| − | Underground_Waterway_ffiv_ios_secret_passage.PNG|The first secret passage |
+ | Underground_Waterway_ffiv_ios_secret_passage.PNG|The first secret passage is found in the [[Underground Waterway (Final Fantasy IV)|Underground Waterway]] in ''[[Final Fantasy IV]]'' (3D). |
FFIV PSP Hidden Passage.png|''[[Final Fantasy IV]]'' (PSP). |
FFIV PSP Hidden Passage.png|''[[Final Fantasy IV]]'' (PSP). |
||
TAY Wii Hidden Passage.jpg|''[[Final Fantasy IV: The After Years]]'' (Wii). |
TAY Wii Hidden Passage.jpg|''[[Final Fantasy IV: The After Years]]'' (Wii). |
||
| Line 257: | Line 322: | ||
FFD Hidden Passage.PNG|''[[Final Fantasy Dimensions]]''. |
FFD Hidden Passage.PNG|''[[Final Fantasy Dimensions]]''. |
||
</gallery> |
</gallery> |
||
| − | {{ |
+ | {{Gallery incomplete|''[[Final Fantasy Brave Exvius]]''}} |
| − | {{ |
+ | {{navbox recurring}} |
| − | [[Category:Recurring gameplay |
+ | [[Category:Recurring gameplay components]] |
Revision as of 20:00, 13 January 2020
Template:Sideicon

Oh, shut up and help me remodel the Hidden passage page!
- BravelyD.
This request can be discussed on the associated discussion page. Remove this notice upon completion.

I couldn't finish 'em. Looks like this's gonna get complicated.

I couldn't miss the chance to practice my drawing!
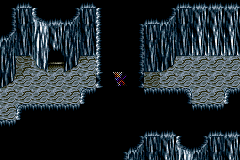
A hidden passage in Final Fantasy IV.
Hidden passages (隠し通路, Kakushi Tsuuro?) are a recurring feature found in the series, mainly in older installments. Hidden passages are passages impossible to detect unless the player pays close attention to suspicious areas or checks along walls, and usually lead to optional areas that house useful items and equipment. Several hidden areas can only be found via thorough searching.
Appearances
Final Fantasy II
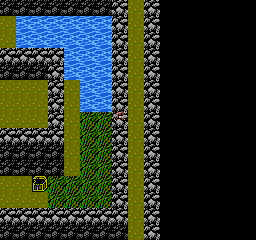
Hidden passage.
| Location | Sub-location | Leads to |
|---|---|---|
Final Fantasy III

Hidden passage.
| Location | Sub-location | Leads to |
|---|---|---|
Final Fantasy IV

Hidden passage.
| Location | Sub-location | Leads to |
|---|---|---|
| Underground Waterway | Underground Waterway, North- B2 (DS version) | Treasure Chest with Feathered Cap |
| Damcyan Castle | Dungeon, south-west corner | Treasure room |
| Fabul Castle | Throne Room, wall on top-right corner | Treasure Chests with Ether, Spider Silk, and Demon Shield |
| Ancient Waterway | ||
| Baron Castle East Tower Passage | Passage on the locked door | Treasure room |
Final Fantasy IV -Interlude-
A hidden passage can be found in Damcyan Castle. Right after arriving in the storehouse, the player should move downward and this will lead to the visible chest containing an Antidote. Going further up after picking up the chest will lead to a Ether.
Final Fantasy IV: The After Years
Final Fantasy V
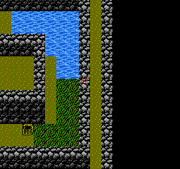
A hidden passage with Find Passages active.
The Thief job learns an ability called Find Passages that displays all hidden areas on the field.
| Location | Sub-location | Leads to |
|---|---|---|
| Tycoon Meteorite | Phoenix Down | |
| Wind Shrine | A little shortcut to the door of the crystal room. | |
| Carwen | Pub | 1,000 Gil |
| Tycoon Castle | Ashura, Healing Staff, Storehouse, and Diamond Bell. | |
| Walse Castle | Shiva | |
| Ronka Ruins | Treasure chests. | |
| Regole | Pub | Piano |
| Pyramid of Moore | Treasure chests | |
| Moore | Brave Blade or Chicken Knife (Merged World only) | |
| Phantom Village | Piano and Black Chocobo |
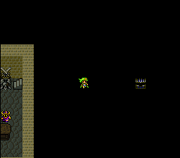
Final Fantasy VI
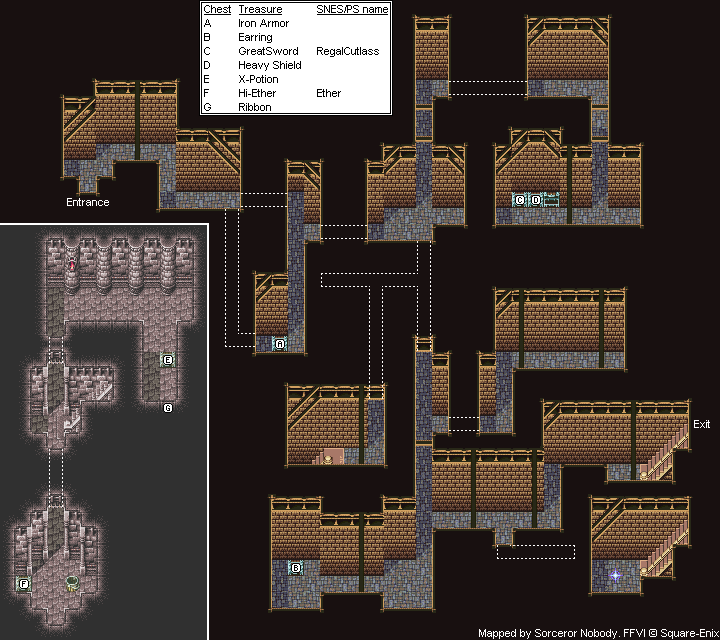
Rich man's house basement
Final Fantasy VI has hidden passages, but there is no in-game way to find them other than knowing beforehand or with a trial and error method. If the player has a cheat device, a background layer can be disabled to see them being rendered in most cases.
| Location | Sub-location | Leads to |
|---|---|---|
| South Figaro | Next to the Pub. | Secret bridge over the water. |
| South Figaro | Rich man's house | Old man's house |
| South Figaro | Outside | Secret entrance to old man's house |
| South Figaro | Rich man's house | Basement |
| South Figaro | Rich man's house basement - Several | Basements 1 and 2 |
| Mt. Kolts | Before a bridge inside a cave. | Giga Glove |
| Returners' Hideout | Supply room | White Cape |
| Returners' Hideout | Save point room | Lethe River |
| Magitek Factory | South end | Golden Armor |
| Magitek Research Facility | Tube room - South-west | Stoneblade |
| Cave to the Sealed Gate | Basement 3 | Player must pass through this to continue. |
| Darill's Tomb | Basement 3 | Growth Egg |
| Mobliz (Wor) | Wounded soldier's house | Basement |
| Kefka's Tower | Magitek Factory area | Aegis Shield |
| Kefka's Tower | Wall south of Demon | Ribbon |
| Dragons' Den | Flame Labyrinth - North-west | Megalixir |
Final Fantasy VII
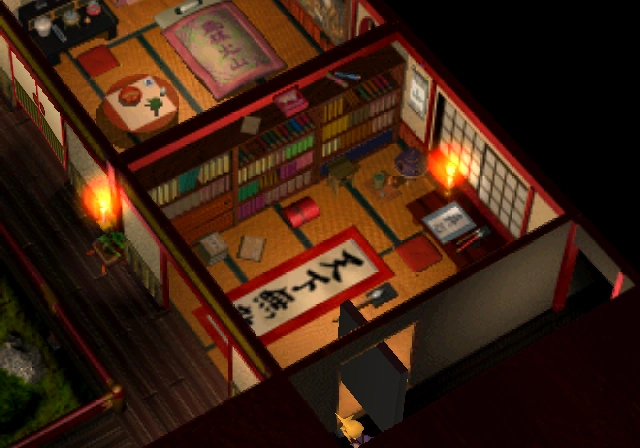

A secret passage in Wutai.
In Godo's house in Wutai, the player can find two hidden passages behind fake walls to find a Magic Shuriken for Yuffie and a Hairpin for Red XIII. Also, a cave on Gaea's Cliff contains a well hidden Ribbon in a room hidden from view.
| Location | Sub-location | Leads to |
|---|---|---|
Final Fantasy IX

Vivi revealing treasures from behind ice walls.
In the Ice Cavern, Vivi can reveal hidden treasures by blasting away the walls of ice with his fire magic. To find the walls that can be destroyed, an exclamation mark will appear on the field.
Final Fantasy X

The hidden path to Remiem Temple.
The path to Remiem Temple is located in the Calm Lands near the entrance to the Macalania Woods, but can only be accessed by riding a chocobo.
Final Fantasy XI
Many locations, such as the Crawlers' Nest and Pso'Xja, have walls that appear solid but can be passed through. It is suspected that the Zilart originally created these illusory walls. Sometimes a person can pass through these secret passages freely. Other passages are one-way only, however.
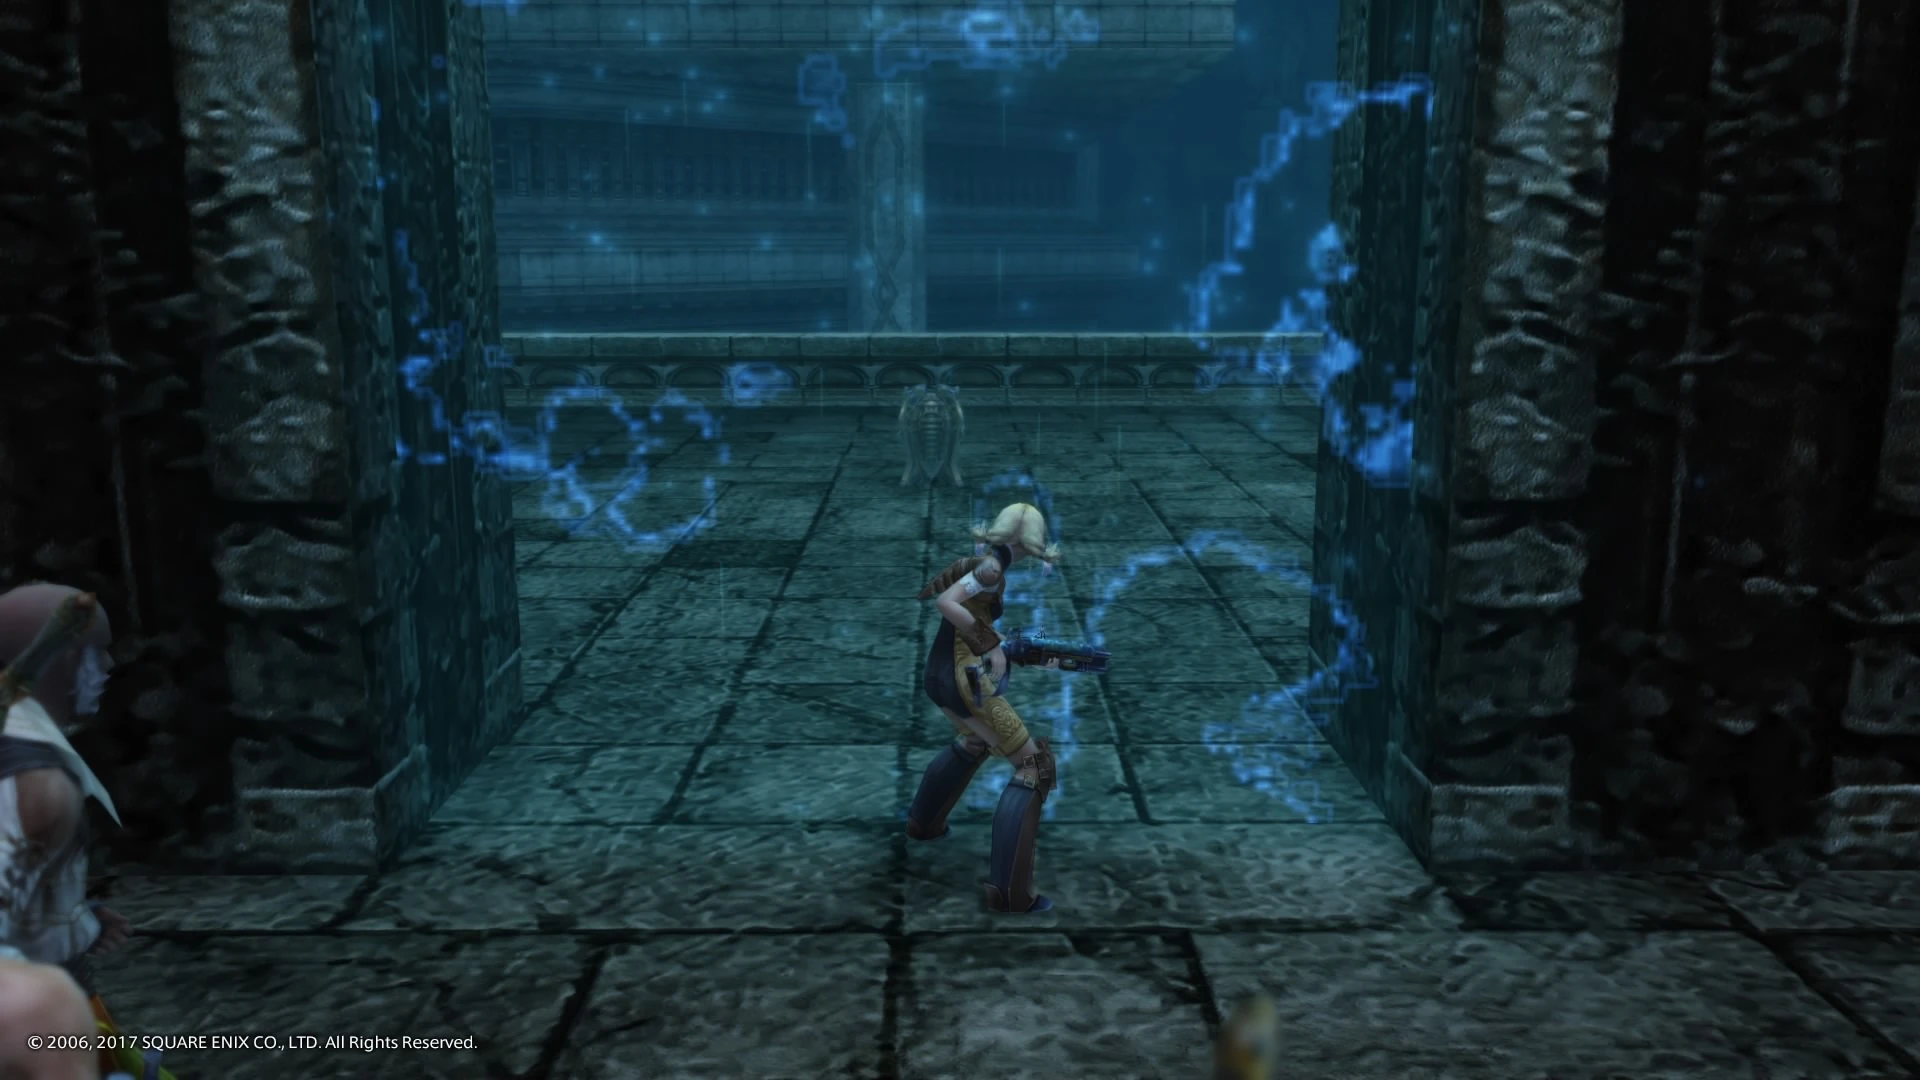
Final Fantasy XII

Nabreus Deadlands hidden path.
In some places, it is possible to walk off the map to hidden areas. Walls that prevent passage to hidden areas, known as fools façades, can be removed by examining or damaging them, and other obstructions can be similarly moved or removed.
In Zertinan Caverns, The Hourglass Basin area has a cut-off area in the east that can only be accessed via a hidden passage from the Save Crystal area. It is necessary to use this passage to complete the Catoblepas hunt.
In the Tomb of Raithwall, after defeating both Demon Walls, the player can examine the wall where the optional Demon Wall came out to open a secret passage. The secret passage has a random chance of spawning a treasure chest that contains the Demonsbane sword. In the International Zodiac Job System version the treasure always has a Scathe Mote.
Henne Mines has many off-the-map areas. Some are only shortcuts, but some contain good treasure. For example, one of the off-the-map areas that can be accessed the first time the player enters the mines has a random chance of spawning an Elixir chest.
In the Stilshrine of Miriam, the player can find a hidden passage in the Ward of the Sword-King area; at the junction the path to the left has a wall that will vanish if the player approaches it in a way the camera will attempt to go "inside" the wall. At the end of the hidden section the player finds a treasure containing the Shell Shield. The Rare Game Matriarch Bomb can be found in the area.
The Nabreus Deadlands have a hidden passage through the swamp to enter the area in the north. The player must visit this area as part of the three medallions sidequest, and to fight Roblon.
On the map of Lhusu Mines, a T-junction is shown at the north of Site 6 South; it is, in fact, a crossroads, with a tunnel leading to the Site 6 North area with chests and multiple Pandoras.

Party at the hidden off-the-map section.
In the Necrohol of Nabudis the player can find an off-the-map room in the north of the Hall of Effulgent Light (Salikawood entrance). In the center of the room is a Pandora, but in the corner of the room, a ??? can be found; inspecting it gives a cutscene and access to a Baknamy merchant who sells some of the best equipment, items, spells and technicks.
On the Phon Coast, the player can find a hidden passage between The Vaddu Strand and Limatra Hills. In Vaddu Stand the player can keep running left to find the hidden path under the cliff.
In the Barheim Passage, a mining cart in the south of The Zeviah Span can be dislodged by striking it; it rolls down to make a new path to an otherwise inaccessible area.

Fool's Façade.
In the Pharos, the player can chop down fake walls, called fool's façades, to reveal hidden areas that may lead to waystones or treasures.
In the Subterra only a small part of the map is visible. The player can find more fool's façades to reveal areas behind walls.
On top of the other hidden areas, there are a number of off-the-map areas that can only be accessed by riding a chocobo. On the Ozmone Plain the player can only access the Henne Mines entrance by a chocobo. On the Mosphoran Highwaste the player must use a chocobo to unlock the area where Exodus is fought. The player can even cross Tchita Uplands on a chocobo to enter the Cerobi Steppe before having gone to Archades.
Final Fantasy XIII
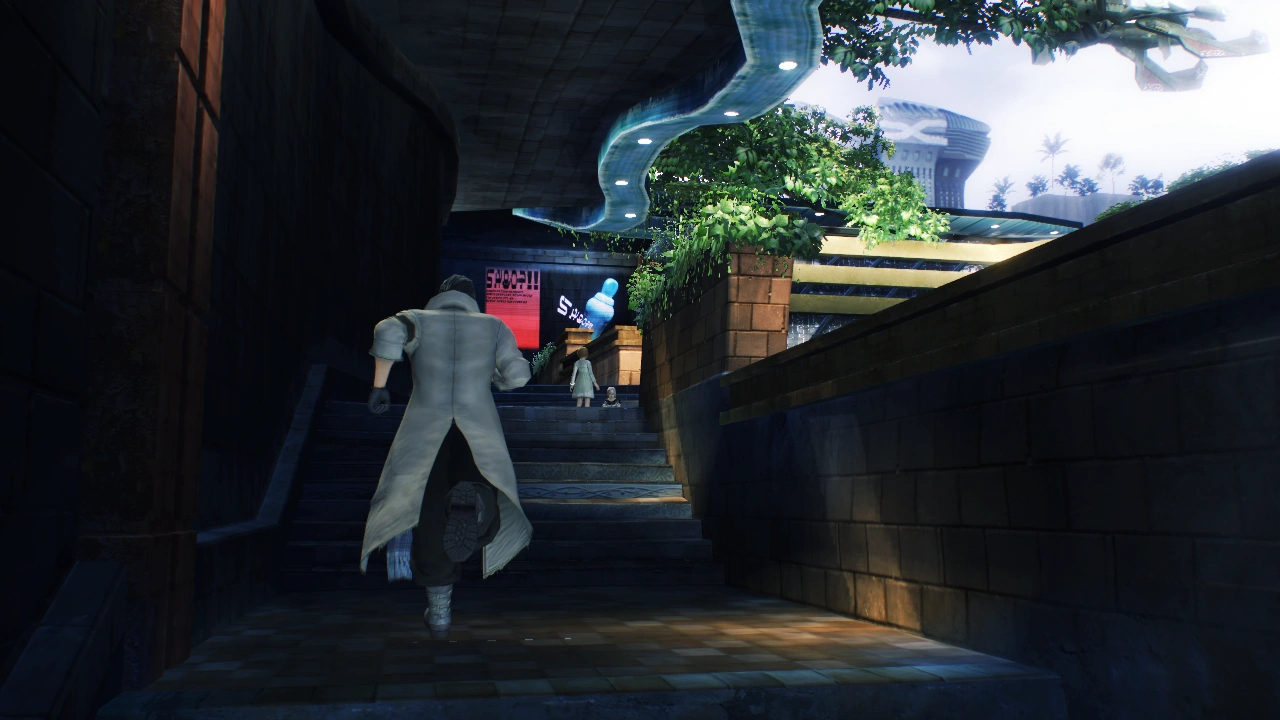
A hidden passage in Palumpolum.
In Palumpolum - Western Promenade, there is a hidden passage leads to a treasure sphere.
Final Fantasy Mystic Quest


Hidden passage in Focus Tower.
Upon entering Focus Tower from the Earth Region, a hidden passage is located right near the entrance. This passage allows the player to reach the steps leading to the first floor faster, acting like a shortcut. If the shortcut is not taken, the player will have to go around the long path to reach the stairs.
Final Fantasy Legend III
After becoming separated from Arthur's party in Maitreya's Tower, Dion finds a hidden door leading him straight to Maitreya.
Bravely Default
Bravely Second: End Layer
Final Fantasy Dimensions
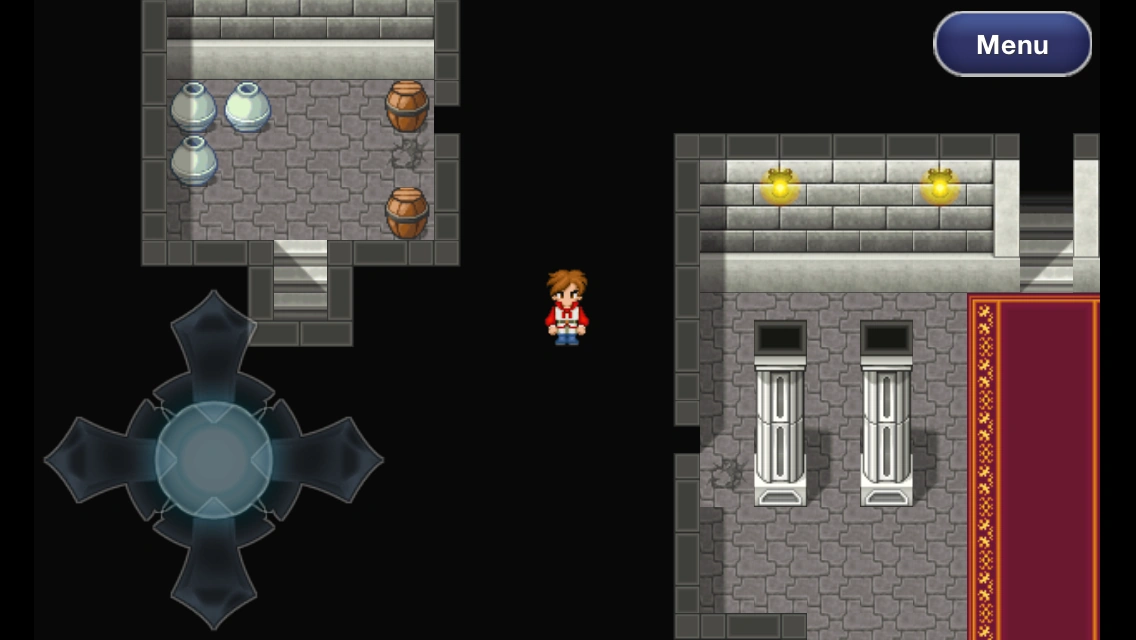
Hidden passage in Castle Lux
Hidden passages can be found as early as Castle Lux, and are necessary to use in some cases to progress, for example when bridging between Below Castle Lux and the main castle itself. The hidden passages are typically marked by a discontinuity in tile work or wall, showing that areas are accessible through there.
Final Fantasy Brave Exvius
Towns and dungeons are full of hidden passages.
Gallery
")
")
")
")
")
")
")
")
")