Mymindislost (talk | contribs) m (italics, image caption, and linkage) |
Intangir Bot (talk | contribs) |
||
| (163 intermediate revisions by 45 users not shown) | |||
| Line 1: | Line 1: | ||
| + | {{sideicon|prime=FFXII|FFRK|FFBE}} |
||
| − | [[Image:Henne 1 0004.jpg|250px|right|The entrance to the Henne Mines.]] |
||
| + | {{Expand|FFXII|FFXII|Adding a Locations section, with images and brief descriptions of the areas within the location}} |
||
| − | The '''Henne Mines''' is a location in the land of [[Ivalice]] in ''[[Final Fantasy XII]]''. It is an underground [[Magicite#Final Fantasy XII|magicite]] mine explored by the Archadian Empire. At first only the Phase 1 site and dig are accessible, however after defeating at least 10 [[Esper (Final Fantasy XII)|Espers]], the [[Garif]] Geomancer will open up the gate to Phase 2 where the enemies become much tougher and the Esper [[Zodiark]] can be located and fought. Phase 2 can be accessed from the [[Feywood]], but it's recommended that you wait to explore the area until your party's average level is reasonably high. |
||
| + | {{infobox location |
||
| + | |name=Henne Mines |
||
| + | |release=FFXII |
||
| + | |japanese=ヘネ魔石鉱 |
||
| + | |romaji=Hene Maseki-kō |
||
| + | |image=Henne mines.jpg |
||
| + | |type=[[Cave (location)|Cave]] |
||
| + | |region=[[Bancour]] |
||
| + | |items=*[[#Treasures|Treasures]] |
||
| + | |enemies=*[[Seeker (Final Fantasy XII)|Seeker]] |
||
| + | *[[Etém]] |
||
| + | *[[Hecteyes (Final Fantasy XII)|Hecteyes]] |
||
| + | *[[Jelly (Final Fantasy XII)|Jelly]] |
||
| + | *[[Nightmare (Final Fantasy XII enemy)|Nightmare]] |
||
| + | *[[Redmaw (Final Fantasy XII)|Redmaw]] |
||
| + | *[[Tyranorox]] |
||
| + | *[[Thunderbug]] |
||
| + | *[[Abysteel (Final Fantasy XII)|Abysteel]] |
||
| + | *[[Gizamaluk]] |
||
| + | *[[Necrofiend]] |
||
| + | *[[Tiamat (Final Fantasy XII)|Tiamat]] (Boss) |
||
| + | *[[Zodiark (Final Fantasy XII boss)|Zodiark]] (Hidden Esper) |
||
| + | *Hunts and Rares |
||
| + | |quests=*[[#Hunts|Hunts]]: [[Ixtab (Final Fantasy XII)|Ixtab]], [[Mindflayer (Final Fantasy XII)|Mindflayer]] |
||
| + | *[[#Rare Game|Rare Game]]: [[Glaring Eye]], [[Melt (Final Fantasy XII)|Melt]] |
||
| + | *[[#Grinding spots|Grinding spots]] |
||
| + | *[[#Optional area|Optional area]] |
||
| + | }} |
||
| + | {{Quote|The Henne Magicite Mines—maybe that's what she meant. They lie in Bancour, south of the Ozmone Plain. The entire region is a colony of the Archadian Empire. There would be soldiers.|Larsa Ferrinas Solidor}} |
||
| + | The '''Henne Mines''' is a location in the land of [[Ivalice (Final Fantasy XII)|Ivalice]] in ''[[Final Fantasy XII]]''. It is an underground [[Magicite#Final Fantasy XII|magicite]] mine explored by the [[Archadia|Archadian Empire]]. |
||
| + | At first only the Phase 1 site and dig are accessible from the [[Ozmone Plain]]; also, Phase 2 can be accessed from the [[Feywood]], but only a small portion is accessible until the [[Esper (Final Fantasy XII)|Esper]] [[Zodiark (Final Fantasy XII boss)|Zodiark]] is defeated. Phase 2 can also be accessed via the Ore Separation area once the player has acquired 10 or more Espers and spoken with Geomancer Yugelu in [[Jahara]]. When accessing Phase 2, it is recommended to wait until the party's average [[level]] is above 70. |
||
| − | ==Location== |
||
| + | == [[Sage Knowledge]] == |
||
| − | The Henne Mines are located just to the southwest of [[Jahara]], and at first are only accessible via [[Chocobo#Final Fantasy XII|Chocobo]] through the [[Ozmone Plains]]. |
||
| + | {{Quote|Crystal mines in the mountainous region of Bancour still producing a great variety of magicite, even as other mines around them close, their veins dry and spent. The Archadian Empire possesses mining rights here, making this a key location for their acquisition of the stones, bypassing intermediaries and fluctuating markets.|Sage Knowledge 74, The Henne Magicite Mines}} |
||
| − | == |
+ | == Locations == |
| + | The Henne Mines are located just to the southeast of [[Jahara]], and at first are only accessible via [[Chocobo (Final Fantasy XII)|chocobo]] through the Ozmone Plain. |
||
| + | Guaranteed treasures listed in this section are found in the Zodiac versions. For a summary of treasures in the original version, see [[#Treasures|Treasures]]. |
||
| − | * [[Seeker]] |
||
| + | |||
| + | === Phase 1 === |
||
| + | See [[#Map|Map]]. No chests that always spawn and always contain certain treasures are found in Phase 1 |
||
| + | * '''<big>North Entrance'''</big> (to Ozmone Plain) |
||
| + | * '''<big>Pithead Junction A'''</big>. West to Phase 1 Shaft; south and east is a loop, with the Henne Mines map urn |
||
| + | * '''<big>Phase 1 Shaft'''</big>. West to Phase 1 Dig. |
||
| + | * '''<big>Phase 1 Dig'''</big>. South and east to Crossover A. [[#Phase 1 Dig|Phase 1 Dig treasures]]. |
||
| + | * '''<big>Crossover A'''</big>. North to the northeast exit to Crossover B. [[#Crossover|Crossover treasures]]. |
||
| + | * '''<big>Crossover B'''</big>. North to Staging Shaft, but the door must be opened with a switch in Pithead Junction B, which is east then south |
||
| + | * '''<big>Pithead Junction B'''</big>. [[#Grinding spots|Grinding spot]] with [[Jelly (Final Fantasy XII)|Jellies]]. Activate switch to toggle the door in Crossover B. |
||
| + | * '''<big>Staging Shaft'''</big>. Teleport stone |
||
| + | * '''<big>Ore Separation'''</big>. [[Tiamat (Final Fantasy XII)|Tiamat]] boss; after cutscenes, transported to [[Eruyt Village]]. Exit to Phase 2 Dig, once requirements are met. |
||
| + | {{Location section|Final Fantasy XII}} |
||
| + | |||
| + | === Phase 2 === |
||
| + | Phase 2 is also accessible through the Feywood, but only a portion of the Phase 2 Shaft. The rest of Phase 2 is blocked off unless the [[Mindflayer (Final Fantasy XII)|Mindflayer]] clan [[Hunt (Final Fantasy XII)|Hunt]] is completed, the player has obtained 10 Espers and has spoken to the [[garif]] Geomancer in Jahara. He will send a Garif to open the east gate in the Ore Separation section of Henne Mines. |
||
| + | |||
| + | The entry to Phase 2 seen on the map from early on, Phase 2 Shaft linked to Feywood, is blocked off by a mine cart until the Esper Zodiark is defeated. |
||
| + | |||
| + | * '''<big>Phase 2 Dig'''</big>. Chests that always spawn, always contain these treasures: [[Final Fantasy XII armor#Dueling Mask|Dueling Mask]], [[Fomalhaut (Final Fantasy XII)|Fomalhaut]], [[Final Fantasy XII armor#Circlet|Circlet]], [[Makara (Final Fantasy XII)|Makara]] and [[Mythril Sword (Final Fantasy XII)|Mythril Sword]]. Chests that spawn 25% of the time always contain [[Final Fantasy XII accessories#Nihopalaoa|Nihopalaoa]] and [[Final Fantasy XII armor#Grand Helm|Grand Helm]]. |
||
| + | * '''<big>Crossover C'''</big>. [[#Grinding spots|Grinding spot]] with [[Abysteel (Final Fantasy XII)|Abysteels]]. A chest that always spawns, always contains [[Final Fantasy XII accessories#Germinas Boots|Germinas Boots]]. A chest that spawns 25% of the time always contains [[Final Fantasy XII accessories#Bubble Belt|Bubble Belt]]. |
||
| + | * '''<big>Pithead Junction C'''</big>. |
||
| + | * <big>[[#Phase 2 Shaft|Phase 2 Shaft]]</big> (to the Feywood). A chest that always spawns, always contains [[Makara (Final Fantasy XII)|Makara]]. A chest that spawns 25% of the time always contains [[Final Fantasy XII accessories#Sage's Ring|Sage's Ring]] |
||
| + | * <big>[[#Special Charter Shaft|Special Charter Shaft]]</big>. Chests that always spawn, always contain [[Full Cure (ability)#Final Fantasy XII|Renew]] and [[Final Fantasy XII armor#Lordly Robes|Lordly Robes]]. Chests that spawn 25% of the time, always contain [[Final Fantasy XII armor#Brave Suit|Brave Suit]] and [[Final Fantasy XII armor#Grand Armor|Grand Armor]]. A chest that spawns 15%, 10% and 1% of the time, respectively always contain [[Ribbon (Final Fantasy XII)|Ribbon]], [[Addle (Final Fantasy XII)|Addle]] and [[Zodiac Spear (Final Fantasy XII)|Zodiac Spear]] |
||
| + | * '''<big>Special Charter Dig'''</big>. |
||
| + | {{Location section|Final Fantasy XII}} |
||
| + | |||
| + | == Treasures == |
||
| + | {{See|Treasure (Final Fantasy XII)}} |
||
| + | Summaries of treasures in this section are as in the original version. For guaranteed treasures in the Zodiac versions, see [[#Treasures|Treasures]]. |
||
| + | |||
| + | During the player's first venture into the mines treasures can be found in the Phase 1 Dig, although a few of them are actually the [[Thunderbug]] mimic. Some good items can be found here; all the treasures are either [[gil]], [[Final Fantasy XII items#Knot of Rust|Knot of Rust]] or a good item. The good items include [[Final Fantasy XII items#Elixir|Elixir]] and [[Final Fantasy XII armor#Shielded Armor|Shielded Armor]] in the [[hidden passage]] section of the map in the lower western corner, [[Final Fantasy XII accessories#Golden Amulet|Golden Amulet]] in the southeastern dead-end, and [[Final Fantasy XII weapons#Musk Stick|Musk Stick]] near the middle of the map in a cave where enemies can be found fighting each other. |
||
| + | |||
| + | Many of the treasures can also contain Motes. When the [[Final Fantasy XII accessories#Diamond Armlet|Diamond Armlet]] is equipped the item treasures are either Knot of Rust or [[Final Fantasy XII items#Haste Mote|Hastega]]/[[Final Fantasy XII items#Scathe Mote|Scathe Motes]]. |
||
| + | |||
| + | [[File:Brave-Suit-Treasure.jpg|thumb|Brave Suit found.]] |
||
| + | After gaining access to Phase 2 Dig the player can find more treasures, and acquire special rare treasures if the Diamond Armlet is equipped. |
||
| + | |||
| + | There is a [[Treasure (Final Fantasy XII)#Random number generator method|method]], which lets the player get any rare treasure from a chest 100% of the time, by exploiting the games console's predictable random number generator. Without equipping the Diamond Armlet the player can still get good treasures from Phase 2 Dig, such as Elixirs, the [[Platinum Dagger (Final Fantasy XII)|Platinum Dagger]], the [[Final Fantasy XII armor#Gold Hairpin|Gold Hairpin]], [[Final Fantasy XII accessories#Ring of Renewal|Ring of Renewal]] and [[Final Fantasy XII items#Dark Matter|Dark Matter]]. |
||
| + | |||
| + | Deeper into the mines still, the player can find more treasures in the Special Charter Shaft at the deepest end of the mines. Most of the treasures can rarely be Megalixir when the Diamond Armlet is equipped (the other treasure is Knot of Rust, as usual), except the northernmost treasure which is either the [[Fomalhaut (Final Fantasy XII)|Fomalhaut]] (80%) or gil (20%); when the Diamond Armlet is not equipped, this treasure is Dark Matter or gil. |
||
| + | |||
| + | This treasure will never respawn. Without equipping the Diamond Armlet, the other treasures can contain other good items such as [[Final Fantasy XII accessories#Ribbon|Ribbon]], [[Final Fantasy XII armor#Renewing Morion|Renewing Morion]], Brave Suit, [[Final Fantasy XII accessories#Sage's Ring|Sage's Ring]], [[Final Fantasy XII armor#Lordly Robes|Lordly Robes]], [[Final Fantasy XII armor#Ensanguined Shield|Ensanguined Shield]] and [[Judicer's Staff (Final Fantasy XII)|Judicer's Staff]]. |
||
| + | |||
| + | === Phase 1 Dig === |
||
| + | ;Zodiac |
||
| + | {|class="full-width FFXII article-table" style="text-align:center" |
||
| + | |-class="a" |
||
| + | !style="width:20%"|Chest |
||
| + | !style="width:10%"|Spawns |
||
| + | !style="width:10%"|Holds Gil% |
||
| + | !style="width:10%"|Gil |
||
| + | !style="width:25%" colspan="2"|Normal Treasure |
||
| + | !style="width:25%" colspan="2"|Diamond Armlet Treasure |
||
| + | |- |
||
| + | |class="b" rowspan="2"|1 |
||
| + | |rowspan="2"|80% |
||
| + | |rowspan="2"|30% |
||
| + | |rowspan="2"|≤ 100 gil |
||
| + | |class="a" width="12%"|Item 1 |
||
| + | |class="a" width="12%"|Item 2 |
||
| + | |class="a" width="12%"|Common |
||
| + | |class="a" width="12%"|Rare |
||
| + | |- |
||
| + | |Balance Mote |
||
| + | |Aero Mote |
||
| + | |Knot of Rust |
||
| + | |Meteorite (A) |
||
| + | |- |
||
| + | |class="b" rowspan="2"|2 |
||
| + | |rowspan="2"|80% |
||
| + | |rowspan="2"|30% |
||
| + | |rowspan="2"|≤ 100 gil |
||
| + | |class="a" width="12%"|Item 1 |
||
| + | |class="a" width="12%"|Item 2 |
||
| + | |class="a" width="12%"|Common |
||
| + | |class="a" width="12%"|Rare |
||
| + | |- |
||
| + | |Gravity Mote |
||
| + | |Dark Mote |
||
| + | |Knot of Rust |
||
| + | |Meteorite (A) |
||
| + | |- |
||
| + | |class="b" rowspan="2"|3 |
||
| + | |rowspan="2"|80% |
||
| + | |rowspan="2"|30% |
||
| + | |rowspan="2"|≤ 100 gil |
||
| + | |class="a" width="12%"|Item 1 |
||
| + | |class="a" width="12%"|Item 2 |
||
| + | |class="a" width="12%"|Common |
||
| + | |class="a" width="12%"|Rare |
||
| + | |- |
||
| + | |Aeroga Mote |
||
| + | |Dark Mote |
||
| + | |Knot of Rust |
||
| + | |Meteorite (A) |
||
| + | |- |
||
| + | |class="b" rowspan="2"|4 |
||
| + | |rowspan="2"|80% |
||
| + | |rowspan="2"|30% |
||
| + | |rowspan="2"|≤ 100 gil |
||
| + | |class="a" width="12%"|Item 1 |
||
| + | |class="a" width="12%"|Item 2 |
||
| + | |class="a" width="12%"|Common |
||
| + | |class="a" width="12%"|Rare |
||
| + | |- |
||
| + | |Dispel Mote |
||
| + | |Dark Mote |
||
| + | |Knot of Rust |
||
| + | |Meteorite (C) |
||
| + | |- |
||
| + | |class="b" rowspan="2"|5 |
||
| + | |rowspan="2"|80% |
||
| + | |rowspan="2"|30% |
||
| + | |rowspan="2"|≤ 100 gil |
||
| + | |class="a" width="12%"|Item 1 |
||
| + | |class="a" width="12%"|Item 2 |
||
| + | |class="a" width="12%"|Common |
||
| + | |class="a" width="12%"|Rare |
||
| + | |- |
||
| + | |Aquara Mote |
||
| + | |Dark Mote |
||
| + | |Knot of Rust |
||
| + | |Meteorite (A) |
||
| + | |- |
||
| + | |class="b" rowspan="2"|6 |
||
| + | |rowspan="2"|80% |
||
| + | |rowspan="2"|30% |
||
| + | |rowspan="2"|≤ 100 gil |
||
| + | |class="a" width="12%"|Item 1 |
||
| + | |class="a" width="12%"|Item 2 |
||
| + | |class="a" width="12%"|Common |
||
| + | |class="a" width="12%"|Rare |
||
| + | |- |
||
| + | |Cura Mote |
||
| + | |Dark Mote |
||
| + | |Knot of Rust |
||
| + | |Meteorite (A) |
||
| + | |- |
||
| + | |class="b" rowspan="2"|7 |
||
| + | |rowspan="2"|75% |
||
| + | |rowspan="2"|60% |
||
| + | |rowspan="2"|≤ 600 gil |
||
| + | |class="a" width="12%"|Item 1 |
||
| + | |class="a" width="12%"|Item 2 |
||
| + | |class="a" width="12%"|Common |
||
| + | |class="a" width="12%"|Rare |
||
| + | |- |
||
| + | |Hastega Mote |
||
| + | |[[Final Fantasy XII armor#Mage's Habit|Mage's Habit]] |
||
| + | |Knot of Rust |
||
| + | |Meteorite (A) |
||
| + | |- |
||
| + | |class="b" rowspan="2"|8 |
||
| + | |rowspan="2"|75% |
||
| + | |rowspan="2"|60% |
||
| + | |rowspan="2"|≤ 600 gil |
||
| + | |class="a" width="12%"|Item 1 |
||
| + | |class="a" width="12%"|Item 2 |
||
| + | |class="a" width="12%"|Common |
||
| + | |class="a" width="12%"|Rare |
||
| + | |- |
||
| + | |Holy Mote |
||
| + | |[[Final Fantasy XII armor#Brigandine|Brigandine]] |
||
| + | |Knot of Rust |
||
| + | |Meteorite (A) |
||
| + | |- |
||
| + | |class="b" rowspan="2"|9 |
||
| + | |rowspan="2"|80% |
||
| + | |rowspan="2"|30% |
||
| + | |rowspan="2"|≤ 100 gil |
||
| + | |class="a" width="12%"|Item 1 |
||
| + | |class="a" width="12%"|Item 2 |
||
| + | |class="a" width="12%"|Common |
||
| + | |class="a" width="12%"|Rare |
||
| + | |- |
||
| + | |Balance Mote |
||
| + | |Dark Mote |
||
| + | |Knot of Rust |
||
| + | |Meteorite (A) |
||
| + | |- |
||
| + | |class="b" rowspan="2"|10 |
||
| + | |rowspan="2"|80% |
||
| + | |rowspan="2"|30% |
||
| + | |rowspan="2"|≤ 100 gil |
||
| + | |class="a" width="12%"|Item 1 |
||
| + | |class="a" width="12%"|Item 2 |
||
| + | |class="a" width="12%"|Common |
||
| + | |class="a" width="12%"|Rare |
||
| + | |- |
||
| + | |Gravity Mote |
||
| + | |Dark Mote |
||
| + | |Knot of Rust |
||
| + | |Meteorite (A) |
||
| + | |- |
||
| + | |class="b" rowspan="2"|11 |
||
| + | |rowspan="2"|80% |
||
| + | |rowspan="2"|30% |
||
| + | |rowspan="2"|≤ 100 gil |
||
| + | |class="a" width="12%"|Item 1 |
||
| + | |class="a" width="12%"|Item 2 |
||
| + | |class="a" width="12%"|Common |
||
| + | |class="a" width="12%"|Rare |
||
| + | |- |
||
| + | |Bio Mote |
||
| + | |Dark Mote |
||
| + | |Knot of Rust |
||
| + | |Meteorite (A) |
||
| + | |- |
||
| + | |class="b" rowspan="2"|12 |
||
| + | |rowspan="2"|75% |
||
| + | |rowspan="2"|40% |
||
| + | |rowspan="2"|≤ 200 gil |
||
| + | |class="a" width="12%"|Item 1 |
||
| + | |class="a" width="12%"|Item 2 |
||
| + | |class="a" width="12%"|Common |
||
| + | |class="a" width="12%"|Rare |
||
| + | |- |
||
| + | |Cura Mote |
||
| + | |[[Final Fantasy XII armor#Shielded Armor|Shielded Armor]] |
||
| + | |Knot of Rust |
||
| + | |Meteorite (B) |
||
| + | |- |
||
| + | |class="b"|13<sup>[[#1|[1]]]</sup> |
||
| + | |100% |
||
| + | |0% |
||
| + | |N/A |
||
| + | |colspan="4"|[[Bonecrusher#Final Fantasy XII|Bonecrusher]] |
||
| + | |} |
||
| + | * '''''{{A|1}}''''' - Chest does not respawn. |
||
| + | ;Original |
||
| + | {|class="full-width FFXII article-table" style="text-align:center" |
||
| + | |-class="a" |
||
| + | !style="width:20%"|Chest |
||
| + | !style="width:10%"|Spawns |
||
| + | !style="width:10%"|Holds Gil% |
||
| + | !style="width:30%" colspan="3"|Normal Treasure |
||
| + | !style="width:30%" colspan="3"|Diamond Armlet Treasure |
||
| + | |- |
||
| + | |class="b" rowspan="2"|1 |
||
| + | |rowspan="2"|45% |
||
| + | |rowspan="2"|45% |
||
| + | |class="a" width="10%"|Gil |
||
| + | |class="a" width="10%"|Item 1 |
||
| + | |class="a" width="10%"|Item 2 |
||
| + | |class="a" width="10%"|Gil |
||
| + | |class="a" width="10%"|Common |
||
| + | |class="a" width="10%"|Rare |
||
| + | |- |
||
| + | |≤ 600 gil |
||
| + | |Knot of Rust |
||
| + | |Reflecta Mote |
||
| + | |≤ 2,000 gil |
||
| + | |Knot of Rust |
||
| + | |Hastega Mote |
||
| + | |- |
||
| + | |class="b" rowspan="2"|2 |
||
| + | |rowspan="2"|62% |
||
| + | |rowspan="2"|20% |
||
| + | |class="a" width="10%"|Gil |
||
| + | |class="a" width="10%"|Item 1 |
||
| + | |class="a" width="10%"|Item 2 |
||
| + | |class="a" width="10%"|Gil |
||
| + | |class="a" width="10%"|Common |
||
| + | |class="a" width="10%"|Rare |
||
| + | |- |
||
| + | |≤ 300 gil |
||
| + | |Knot of Rust |
||
| + | |Water Mote |
||
| + | |≤ 2,000 gil |
||
| + | |Knot of Rust |
||
| + | |Hastega Mote |
||
| + | |- |
||
| + | |class="b" rowspan="2"|3 |
||
| + | |rowspan="2"|45% |
||
| + | |rowspan="2"|45% |
||
| + | |class="a" width="10%"|Gil |
||
| + | |class="a" width="10%"|Item 1 |
||
| + | |class="a" width="10%"|Item 2 |
||
| + | |class="a" width="10%"|Gil |
||
| + | |class="a" width="10%"|Common |
||
| + | |class="a" width="10%"|Rare |
||
| + | |- |
||
| + | |≤ 300 gil |
||
| + | |Knot of Rust |
||
| + | |[[Final Fantasy XII accessories#Gillie Boots|Gillie Boots]] |
||
| + | |≤ 2,000 gil |
||
| + | |Knot of Rust |
||
| + | |Scathe Mote |
||
| + | |- |
||
| + | |class="b" rowspan="2"|4 |
||
| + | |rowspan="2"|62% |
||
| + | |rowspan="2"|20% |
||
| + | |class="a" width="10%"|Gil |
||
| + | |class="a" width="10%"|Item 1 |
||
| + | |class="a" width="10%"|Item 2 |
||
| + | |class="a" width="10%"|Gil |
||
| + | |class="a" width="10%"|Common |
||
| + | |class="a" width="10%"|Rare |
||
| + | |- |
||
| + | |≤ 300 gil |
||
| + | |Knot of Rust |
||
| + | |Vanishga Mote |
||
| + | |≤ 2,000 gil |
||
| + | |Knot of Rust |
||
| + | |Scathe Mote |
||
| + | |- |
||
| + | |class="b" rowspan="2"|5 |
||
| + | |rowspan="2"|70% |
||
| + | |rowspan="2"|15% |
||
| + | |class="a" width="10%"|Gil |
||
| + | |class="a" width="10%"|Item 1 |
||
| + | |class="a" width="10%"|Item 2 |
||
| + | |class="a" width="10%"|Gil |
||
| + | |class="a" width="10%"|Common |
||
| + | |class="a" width="10%"|Rare |
||
| + | |- |
||
| + | |≤ 360 gil |
||
| + | |Knot of Rust |
||
| + | |G-Foe: highest HP |
||
| + | |≤ 2,000 gil |
||
| + | |Knot of Rust |
||
| + | |Hastega Mote |
||
| + | |- |
||
| + | |class="b" rowspan="2"|6 |
||
| + | |rowspan="2"|70% |
||
| + | |rowspan="2"|15% |
||
| + | |class="a" width="10%"|Gil |
||
| + | |class="a" width="10%"|Item 1 |
||
| + | |class="a" width="10%"|Item 2 |
||
| + | |class="a" width="10%"|Gil |
||
| + | |class="a" width="10%"|Common |
||
| + | |class="a" width="10%"|Rare |
||
| + | |- |
||
| + | |≤ 360 gil |
||
| + | |Knot of Rust |
||
| + | |G-Foe: lowest HP |
||
| + | |≤ 2,000 gil |
||
| + | |Knot of Rust |
||
| + | |Hastega Mote |
||
| + | |- |
||
| + | |class="b" rowspan="2"|7 |
||
| + | |rowspan="2"|50% |
||
| + | |rowspan="2"|35% |
||
| + | |class="a" width="10%"|Gil |
||
| + | |class="a" width="10%"|Item 1 |
||
| + | |class="a" width="10%"|Item 2 |
||
| + | |class="a" width="10%"|Gil |
||
| + | |class="a" width="10%"|Common |
||
| + | |class="a" width="10%"|Rare |
||
| + | |- |
||
| + | |≤ 500 gil |
||
| + | |Knot of Rust |
||
| + | |[[Final Fantasy XII armor#Shielded Armor|Shielded Armor]] |
||
| + | |≤ 2,000 gil |
||
| + | |Knot of Rust |
||
| + | |Scathe Mote |
||
| + | |- |
||
| + | |class="b" rowspan="2"|8 |
||
| + | |rowspan="2"|62% |
||
| + | |rowspan="2"|20% |
||
| + | |class="a" width="10%"|Gil |
||
| + | |class="a" width="10%"|Item 1 |
||
| + | |class="a" width="10%"|Item 2 |
||
| + | |class="a" width="10%"|Gil |
||
| + | |class="a" width="10%"|Common |
||
| + | |class="a" width="10%"|Rare |
||
| + | |- |
||
| + | |≤ 300 gil |
||
| + | |Knot of Rust |
||
| + | |Elixir |
||
| + | |≤ 2,000 gil |
||
| + | |Knot of Rust |
||
| + | |Hastega Mote |
||
| + | |- |
||
| + | |class="b" rowspan="2"|9 |
||
| + | |rowspan="2"|62% |
||
| + | |rowspan="2"|20% |
||
| + | |class="a" width="10%"|Gil |
||
| + | |class="a" width="10%"|Item 1 |
||
| + | |class="a" width="10%"|Item 2 |
||
| + | |class="a" width="10%"|Gil |
||
| + | |class="a" width="10%"|Common |
||
| + | |class="a" width="10%"|Rare |
||
| + | |- |
||
| + | |≤ 300 gil |
||
| + | |Knot of Rust |
||
| + | |Hastega Mote |
||
| + | |≤ 2,000 gil |
||
| + | |Knot of Rust |
||
| + | |Scathe Mote |
||
| + | |- |
||
| + | |class="b" rowspan="2"|10 |
||
| + | |rowspan="2"|48% |
||
| + | |rowspan="2"|30% |
||
| + | |class="a" width="10%"|Gil |
||
| + | |class="a" width="10%"|Item 1 |
||
| + | |class="a" width="10%"|Item 2 |
||
| + | |class="a" width="10%"|Gil |
||
| + | |class="a" width="10%"|Common |
||
| + | |class="a" width="10%"|Rare |
||
| + | |- |
||
| + | |≤ 400 gil |
||
| + | |Knot of Rust |
||
| + | |[[Final Fantasy XII accessories#Golden Amulet|Golden Amulet]] |
||
| + | |≤ 2,000 gil |
||
| + | |Knot of Rust |
||
| + | |Scathe Mote |
||
| + | |- |
||
| + | |class="b" rowspan="2"|11 |
||
| + | |rowspan="2"|45% |
||
| + | |rowspan="2"|30% |
||
| + | |class="a" width="10%"|Gil |
||
| + | |class="a" width="10%"|Item 1 |
||
| + | |class="a" width="10%"|Item 2 |
||
| + | |class="a" width="10%"|Gil |
||
| + | |class="a" width="10%"|Common |
||
| + | |class="a" width="10%"|Rare |
||
| + | |- |
||
| + | |≤ 400 gil |
||
| + | |Knot of Rust |
||
| + | |[[Musk Stick (Final Fantasy XII)|Musk Stick]] |
||
| + | |≤ 2,000 gil |
||
| + | |Knot of Rust |
||
| + | |Scathe Mote |
||
| + | |} |
||
| + | {{clear}} |
||
| + | === The Crossover === |
||
| + | These chests only appear in the ''Zodiac'' versions. |
||
| + | |||
| + | {|class="full-width FFXII article-table" style="text-align:center" |
||
| + | |-class="a" |
||
| + | !style="width:20%"|Chest |
||
| + | !style="width:10%"|Spawns |
||
| + | !style="width:10%"|Holds Gil% |
||
| + | !style="width:10%"|Gil |
||
| + | !style="width:25%" colspan="2"|Normal Treasure |
||
| + | !style="width:25%" colspan="2"|Diamond Armlet Treasure |
||
| + | |- |
||
| + | |class="b" rowspan="2"|14 |
||
| + | |rowspan="2"|75% |
||
| + | |rowspan="2"|40% |
||
| + | |rowspan="2"|≤ 200 gil |
||
| + | |class="a" width="12%"|Item 1 |
||
| + | |class="a" width="12%"|Item 2 |
||
| + | |class="a" width="12%"|Common |
||
| + | |class="a" width="12%"|Rare |
||
| + | |- |
||
| + | |Dispel Mote |
||
| + | |[[Final Fantasy XII armor#Flame Shield|Flame Shield]] |
||
| + | |Knot of Rust |
||
| + | |Meteorite (A) |
||
| + | |- |
||
| + | |class="b" rowspan="2"|15 |
||
| + | |rowspan="2"|80% |
||
| + | |rowspan="2"|30% |
||
| + | |rowspan="2"|≤ 120 gil |
||
| + | |class="a" width="12%"|Item 1 |
||
| + | |class="a" width="12%"|Item 2 |
||
| + | |class="a" width="12%"|Common |
||
| + | |class="a" width="12%"|Rare |
||
| + | |- |
||
| + | |Gravity Mote |
||
| + | |Dark Mote |
||
| + | |Knot of Rust |
||
| + | |Meteorite (A) |
||
| + | |- |
||
| + | |class="b" rowspan="2"|16 |
||
| + | |rowspan="2"|80% |
||
| + | |rowspan="2"|50% |
||
| + | |rowspan="2"|≤ 500 gil |
||
| + | |class="a" width="12%"|Item 1 |
||
| + | |class="a" width="12%"|Item 2 |
||
| + | |class="a" width="12%"|Common |
||
| + | |class="a" width="12%"|Rare |
||
| + | |- |
||
| + | |Vanishga Mote |
||
| + | |Dark Mote |
||
| + | |Knot of Rust |
||
| + | |Meteorite (B) |
||
| + | |- |
||
| + | |class="b" rowspan="2"|17 |
||
| + | |rowspan="2"|80% |
||
| + | |rowspan="2"|30% |
||
| + | |rowspan="2"|≤ 120 gil |
||
| + | |class="a" width="12%"|Item 1 |
||
| + | |class="a" width="12%"|Item 2 |
||
| + | |class="a" width="12%"|Common |
||
| + | |class="a" width="12%"|Rare |
||
| + | |- |
||
| + | |Bio Mote |
||
| + | |Dark Mote |
||
| + | |Knot of Rust |
||
| + | |Meteorite (A) |
||
| + | |} |
||
| + | {{clear}} |
||
| + | === Phase 2 Dig === |
||
| + | ;Zodiac |
||
| + | {|class="full-width FFXII article-table" style="text-align:center" |
||
| + | |-class="a" |
||
| + | !style="width:20%"|Chest |
||
| + | !style="width:10%"|Spawns |
||
| + | !style="width:10%"|Holds Gil% |
||
| + | !style="width:10%"|Gil |
||
| + | !style="width:25%" colspan="2"|Normal Treasure |
||
| + | !style="width:25%" colspan="2"|Diamond Armlet Treasure |
||
| + | |- |
||
| + | |class="b" rowspan="2"|18 |
||
| + | |rowspan="2"|75% |
||
| + | |rowspan="2"|50% |
||
| + | |rowspan="2"|≤ 700 gil |
||
| + | |class="a" width="12%"|Item 1 |
||
| + | |class="a" width="12%"|Item 2 |
||
| + | |class="a" width="12%"|Common |
||
| + | |class="a" width="12%"|Rare |
||
| + | |- |
||
| + | |Bio Mote |
||
| + | |Aeroga Mote |
||
| + | |Knot of Rust |
||
| + | |Meteorite (A) |
||
| + | |- |
||
| + | |class="b" rowspan="2"|19 |
||
| + | |rowspan="2"|75% |
||
| + | |rowspan="2"|50% |
||
| + | |rowspan="2"|≤ 700 gil |
||
| + | |class="a" width="12%"|Item 1 |
||
| + | |class="a" width="12%"|Item 2 |
||
| + | |class="a" width="12%"|Common |
||
| + | |class="a" width="12%"|Rare |
||
| + | |- |
||
| + | |Balance Mote |
||
| + | |Shock Mote |
||
| + | |Knot of Rust |
||
| + | |Meteorite (B) |
||
| + | |- |
||
| + | |class="b"|20<sup>[[#1|[1]]]</sup> |
||
| + | |100% |
||
| + | |0% |
||
| + | |N/A |
||
| + | |colspan="4"|[[Final Fantasy XII armor#Dueling Mask|Dueling Mask]] |
||
| + | |- |
||
| + | |class="b"|21<sup>[[#1|[1]]]</sup> |
||
| + | |100% |
||
| + | |0% |
||
| + | |N/A |
||
| + | |colspan="4"|[[Fomalhaut (Final Fantasy XII)|Fomalhaut]] |
||
| + | |- |
||
| + | |class="b" rowspan="2"|22 |
||
| + | |rowspan="2"|75% |
||
| + | |rowspan="2"|50% |
||
| + | |rowspan="2"|≤ 700 gil |
||
| + | |class="a" width="12%"|Item 1 |
||
| + | |class="a" width="12%"|Item 2 |
||
| + | |class="a" width="12%"|Common |
||
| + | |class="a" width="12%"|Rare |
||
| + | |- |
||
| + | |Bio Mote |
||
| + | |Bubble Mote |
||
| + | |Knot of Rust |
||
| + | |Meteorite (B) |
||
| + | |- |
||
| + | |class="b" rowspan="2"|23 |
||
| + | |rowspan="2"|75% |
||
| + | |rowspan="2"|50% |
||
| + | |rowspan="2"|≤ 700 gil |
||
| + | |class="a" width="12%"|Item 1 |
||
| + | |class="a" width="12%"|Item 2 |
||
| + | |class="a" width="12%"|Common |
||
| + | |class="a" width="12%"|Rare |
||
| + | |- |
||
| + | |Bubble Mote |
||
| + | |Holy Mote |
||
| + | |Knot of Rust |
||
| + | |Meteorite (A) |
||
| + | |- |
||
| + | |class="b"|24<sup>[[#1|[1]]]</sup> |
||
| + | |25% |
||
| + | |0% |
||
| + | |N/A |
||
| + | |colspan="4"|[[Final Fantasy XII accessories#Nihopalaoa|Nihopalaoa]] |
||
| + | |- |
||
| + | |class="b"|25<sup>[[#1|[1]]]</sup> |
||
| + | |25% |
||
| + | |0% |
||
| + | |N/A |
||
| + | |colspan="4"|[[Final Fantasy XII armor#Grand Helm|Grand Helm]] |
||
| + | |- |
||
| + | |class="b"|26<sup>[[#1|[1]]]</sup> |
||
| + | |100% |
||
| + | |0% |
||
| + | |N/A |
||
| + | |colspan="4"|[[Final Fantasy XII armor#Circlet|Circlet]] |
||
| + | |- |
||
| + | |class="b" rowspan="2"|27 |
||
| + | |rowspan="2"|75% |
||
| + | |rowspan="2"|50% |
||
| + | |rowspan="2"|≤ 700 gil |
||
| + | |class="a" width="12%"|Item 1 |
||
| + | |class="a" width="12%"|Item 2 |
||
| + | |class="a" width="12%"|Common |
||
| + | |class="a" width="12%"|Rare |
||
| + | |- |
||
| + | |Balance Mote |
||
| + | |Aeroga Mote |
||
| + | |Knot of Rust |
||
| + | |Meteorite (B) |
||
| + | |- |
||
| + | |class="b" rowspan="2"|28<sup>[[#1|[1]]]</sup> |
||
| + | |rowspan="2"|2% |
||
| + | |rowspan="2"|0% |
||
| + | |rowspan="2"|N/A |
||
| + | |class="a" width="12%"|Item 1 |
||
| + | |class="a" width="12%"|Item 2 |
||
| + | |rowspan="2" colspan="2"|Meteorite D |
||
| + | |- |
||
| + | |Scathe Mote |
||
| + | |Holy Mote |
||
| + | |- |
||
| + | |class="b"|29<sup>[[#1|[1]]]</sup> |
||
| + | |100% |
||
| + | |0% |
||
| + | |N/A |
||
| + | |colspan="4"|[[Makara (Final Fantasy XII)|Makara]] |
||
| + | |- |
||
| + | |class="b" rowspan="2"|30 |
||
| + | |rowspan="2"|75% |
||
| + | |rowspan="2"|50% |
||
| + | |rowspan="2"|≤ 700 gil |
||
| + | |class="a" width="12%"|Item 1 |
||
| + | |class="a" width="12%"|Item 2 |
||
| + | |class="a" width="12%"|Common |
||
| + | |class="a" width="12%"|Rare |
||
| + | |- |
||
| + | |Float Mote |
||
| + | |Aeroga Mote |
||
| + | |Knot of Rust |
||
| + | |Meteorite (A) |
||
| + | |- |
||
| + | |class="b"|31<sup>[[#1|[1]]]</sup> |
||
| + | |100% |
||
| + | |0% |
||
| + | |N/A |
||
| + | |colspan="4"|[[Mythril Sword (Final Fantasy XII)|Mythril Sword]] |
||
| + | |- |
||
| + | |class="b" rowspan="2"|32 |
||
| + | |rowspan="2"|75% |
||
| + | |rowspan="2"|50% |
||
| + | |rowspan="2"|≤ 700 gil |
||
| + | |class="a" width="12%"|Item 1 |
||
| + | |class="a" width="12%"|Item 2 |
||
| + | |class="a" width="12%"|Common |
||
| + | |class="a" width="12%"|Rare |
||
| + | |- |
||
| + | |Bio Mote |
||
| + | |Holy Mote |
||
| + | |Knot of Rust |
||
| + | |Meteorite (C) |
||
| + | |} |
||
| + | * '''''{{A|1}}''''' - Chest does not respawn. |
||
| + | ;Original |
||
| + | {|class="full-width FFXII article-table" style="text-align:center" |
||
| + | |-class="a" |
||
| + | !style="width:20%"|Chest |
||
| + | !style="width:10%"|Spawns |
||
| + | !style="width:10%"|Holds Gil% |
||
| + | !style="width:30%" colspan="3"|Normal Treasure |
||
| + | !style="width:30%" colspan="3"|Diamond Armlet Treasure |
||
| + | |- |
||
| + | |class="b" rowspan="2"|12 |
||
| + | |rowspan="2"|25% |
||
| + | |rowspan="2"|80% |
||
| + | |class="a" width="10%"|Gil |
||
| + | |class="a" width="10%"|Item 1 |
||
| + | |class="a" width="10%"|Item 2 |
||
| + | |class="a" width="10%"|Gil |
||
| + | |class="a" width="10%"|Common |
||
| + | |class="a" width="10%"|Rare |
||
| + | |- |
||
| + | |≤ 300 gil |
||
| + | |Knot of Rust |
||
| + | |Scathe Mote |
||
| + | |≤ 7,000 gil |
||
| + | |Knot of Rust |
||
| + | |[[Final Fantasy XII armor#Brave Suit|Brave Suit]] |
||
| + | |- |
||
| + | |class="b" rowspan="2"|13 |
||
| + | |rowspan="2"|60% |
||
| + | |rowspan="2"|28% |
||
| + | |class="a" width="10%"|Gil |
||
| + | |class="a" width="10%"|Item 1 |
||
| + | |class="a" width="10%"|Item 2 |
||
| + | |class="a" width="10%"|Gil |
||
| + | |class="a" width="10%"|Common |
||
| + | |class="a" width="10%"|Rare |
||
| + | |- |
||
| + | |≤ 300 gil |
||
| + | |Knot of Rust |
||
| + | |Hi-Ether |
||
| + | |≤ 7,000 gil |
||
| + | |Knot of Rust |
||
| + | |Megalixir |
||
| + | |- |
||
| + | |class="b" rowspan="2"|14 |
||
| + | |rowspan="2"|55% |
||
| + | |rowspan="2"|28% |
||
| + | |class="a" width="10%"|Gil |
||
| + | |class="a" width="10%"|Item 1 |
||
| + | |class="a" width="10%"|Item 2 |
||
| + | |class="a" width="10%"|Gil |
||
| + | |class="a" width="10%"|Common |
||
| + | |class="a" width="10%"|Rare |
||
| + | |- |
||
| + | |≤ 300 gil |
||
| + | |Knot of Rust |
||
| + | |[[Final Fantasy XII armor#Gold Hairpin|Gold Hairpin]] |
||
| + | |≤ 7,000 gil |
||
| + | |Knot of Rust |
||
| + | |Megalixir |
||
| + | |- |
||
| + | |class="b" rowspan="2"|15 |
||
| + | |rowspan="2"|10% |
||
| + | |rowspan="2"|90% |
||
| + | |class="a" width="10%"|Gil |
||
| + | |class="a" width="20%" colspan="2"|Item |
||
| + | |class="a" width="10%"|Gil |
||
| + | |class="a" width="10%"|Common |
||
| + | |class="a" width="10%"|Rare |
||
| + | |- |
||
| + | |≤ 20 gil |
||
| + | |colspan="2"|Elixir |
||
| + | |≤ 10,000 gil |
||
| + | |Elixir |
||
| + | |[[Zodiac Spear (Final Fantasy XII)|Zodiac Spear]] |
||
| + | |- |
||
| + | |class="b" rowspan="2"|16 |
||
| + | |rowspan="2"|55% |
||
| + | |rowspan="2"|28% |
||
| + | |class="a" width="10%"|Gil |
||
| + | |class="a" width="10%"|Item 1 |
||
| + | |class="a" width="10%"|Item 2 |
||
| + | |class="a" width="10%"|Gil |
||
| + | |class="a" width="10%"|Common |
||
| + | |class="a" width="10%"|Rare |
||
| + | |- |
||
| + | |≤ 300 gil |
||
| + | |Knot of Rust |
||
| + | |Scathe Mote |
||
| + | |≤ 7,000 gil |
||
| + | |Knot of Rust |
||
| + | |Megalixir |
||
| + | |- |
||
| + | |class="b" rowspan="2"|17 |
||
| + | |rowspan="2"|55% |
||
| + | |rowspan="2"|28% |
||
| + | |class="a" width="10%"|Gil |
||
| + | |class="a" width="10%"|Item 1 |
||
| + | |class="a" width="10%"|Item 2 |
||
| + | |class="a" width="10%"|Gil |
||
| + | |class="a" width="10%"|Common |
||
| + | |class="a" width="10%"|Rare |
||
| + | |- |
||
| + | |≤ 300 gil |
||
| + | |Knot of Rust |
||
| + | |Vanishga Mote |
||
| + | |≤ 7,000 gil |
||
| + | |Knot of Rust |
||
| + | |Megalixir |
||
| + | |- |
||
| + | |class="b" rowspan="2"|18 |
||
| + | |rowspan="2"|55% |
||
| + | |rowspan="2"|50% |
||
| + | |class="a" width="10%"|Gil |
||
| + | |class="a" width="10%"|Item 1 |
||
| + | |class="a" width="10%"|Item 2 |
||
| + | |class="a" width="10%"|Gil |
||
| + | |class="a" width="10%"|Common |
||
| + | |class="a" width="10%"|Rare |
||
| + | |- |
||
| + | |≤ 300 gil |
||
| + | |Knot of Rust |
||
| + | |[[Platinum Dagger (Final Fantasy XII)|Platinum Dagger]] |
||
| + | |≤ 7,000 gil |
||
| + | |Knot of Rust |
||
| + | |Megalixir |
||
| + | |- |
||
| + | |class="b" rowspan="2"|19 |
||
| + | |rowspan="2"|60% |
||
| + | |rowspan="2"|50% |
||
| + | |class="a" width="10%"|Gil |
||
| + | |class="a" width="10%"|Item 1 |
||
| + | |class="a" width="10%"|Item 2 |
||
| + | |class="a" width="10%"|Gil |
||
| + | |class="a" width="10%"|Common |
||
| + | |class="a" width="10%"|Rare |
||
| + | |- |
||
| + | |≤ 3,000 gil |
||
| + | |Knot of Rust |
||
| + | |[[Final Fantasy XII accessories#Ring of Renewal|Ring of Renewal]] |
||
| + | |≤ 7,000 gil |
||
| + | |Knot of Rust |
||
| + | |Megalixir |
||
| + | |- |
||
| + | |class="b" rowspan="2"|20 |
||
| + | |rowspan="2"|55% |
||
| + | |rowspan="2"|28% |
||
| + | |class="a" width="10%"|Gil |
||
| + | |class="a" width="10%"|Item 1 |
||
| + | |class="a" width="10%"|Item 2 |
||
| + | |class="a" width="10%"|Gil |
||
| + | |class="a" width="10%"|Common |
||
| + | |class="a" width="10%"|Rare |
||
| + | |- |
||
| + | |≤ 300 gil |
||
| + | |Knot of Rust |
||
| + | |Dark Matter |
||
| + | |≤ 7,000 gil |
||
| + | |Knot of Rust |
||
| + | |Megalixir |
||
| + | |} |
||
| + | {{clear}} |
||
| + | |||
| + | === Crossover C === |
||
| + | These chests only appear in the ''Zodiac'' versions. |
||
| + | |||
| + | {|class="full-width FFXII article-table" style="text-align:center" |
||
| + | |-class="a" |
||
| + | !style="width:20%"|Chest |
||
| + | !style="width:10%"|Spawns |
||
| + | !style="width:10%"|Holds Gil% |
||
| + | !style="width:10%"|Gil |
||
| + | !style="width:25%" colspan="2"|Normal Treasure |
||
| + | !style="width:25%" colspan="2"|Diamond Armlet Treasure |
||
| + | |- |
||
| + | |class="b" rowspan="2"|33 |
||
| + | |rowspan="2"|80% |
||
| + | |rowspan="2"|50% |
||
| + | |rowspan="2"|≤ 700 gil |
||
| + | |class="a" width="12%"|Item 1 |
||
| + | |class="a" width="12%"|Item 2 |
||
| + | |class="a" width="12%"|Common |
||
| + | |class="a" width="12%"|Rare |
||
| + | |- |
||
| + | |Gravity Mote |
||
| + | |Hi-Ether |
||
| + | |Knot of Rust |
||
| + | |Meteorite (B) |
||
| + | |- |
||
| + | |class="b" rowspan="2"|34 |
||
| + | |rowspan="2"|80% |
||
| + | |rowspan="2"|50% |
||
| + | |rowspan="2"|≤ 700 gil |
||
| + | |class="a" width="12%"|Item 1 |
||
| + | |class="a" width="12%"|Item 2 |
||
| + | |class="a" width="12%"|Common |
||
| + | |class="a" width="12%"|Rare |
||
| + | |- |
||
| + | |Balance Mote |
||
| + | |Bubble Mote |
||
| + | |Knot of Rust |
||
| + | |Meteorite (B) |
||
| + | |- |
||
| + | |class="b" rowspan="2"|35 |
||
| + | |rowspan="2"|75% |
||
| + | |rowspan="2"|50% |
||
| + | |rowspan="2"|≤ 700 gil |
||
| + | |class="a" width="12%"|Item 1 |
||
| + | |class="a" width="12%"|Item 2 |
||
| + | |class="a" width="12%"|Common |
||
| + | |class="a" width="12%"|Rare |
||
| + | |- |
||
| + | |Aero Mote |
||
| + | |Reverse Mote |
||
| + | |Knot of Rust |
||
| + | |Meteorite (B) |
||
| + | |- |
||
| + | |class="b" rowspan="2"|36 |
||
| + | |rowspan="2"|75% |
||
| + | |rowspan="2"|50% |
||
| + | |rowspan="2"|≤ 700 gil |
||
| + | |class="a" width="12%"|Item 1 |
||
| + | |class="a" width="12%"|Item 2 |
||
| + | |class="a" width="12%"|Common |
||
| + | |class="a" width="12%"|Rare |
||
| + | |- |
||
| + | |Balance Mote |
||
| + | |[[Final Fantasy XII ammunition#Chaos Bombs|Chaos Bombs]] |
||
| + | |Knot of Rust |
||
| + | |Meteorite (A) |
||
| + | |- |
||
| + | |class="b" rowspan="2"|37 |
||
| + | |rowspan="2"|75% |
||
| + | |rowspan="2"|50% |
||
| + | |rowspan="2"|≤ 700 gil |
||
| + | |class="a" width="12%"|Item 1 |
||
| + | |class="a" width="12%"|Item 2 |
||
| + | |class="a" width="12%"|Common |
||
| + | |class="a" width="12%"|Rare |
||
| + | |- |
||
| + | |Warp Mote |
||
| + | |[[Final Fantasy XII accessories#Power Armlet|Power Armlet]] |
||
| + | |Knot of Rust |
||
| + | |Meteorite (A) |
||
| + | |- |
||
| + | |class="b" rowspan="2"|38 |
||
| + | |rowspan="2"|80% |
||
| + | |rowspan="2"|50% |
||
| + | |rowspan="2"|≤ 700 gil |
||
| + | |class="a" width="12%"|Item 1 |
||
| + | |class="a" width="12%"|Item 2 |
||
| + | |class="a" width="12%"|Common |
||
| + | |class="a" width="12%"|Rare |
||
| + | |- |
||
| + | |Aeroga Mote |
||
| + | |Hi-Ether |
||
| + | |Knot of Rust |
||
| + | |Meteorite (A) |
||
| + | |- |
||
| + | |class="b"|39<sup>[[#1|[1]]]</sup> |
||
| + | |25% |
||
| + | |0% |
||
| + | |N/A |
||
| + | |colspan="4"|[[Final Fantasy XII accessories#Bubble Belt|Bubble Belt]] |
||
| + | |- |
||
| + | |class="b"|40<sup>[[#1|[1]]]</sup> |
||
| + | |100% |
||
| + | |0% |
||
| + | |N/A |
||
| + | |colspan="4"|[[Final Fantasy XII accessories#Germinas Boots|Germinas Boots]] |
||
| + | |} |
||
| + | * '''''{{A|1}}''''' - Chest does not respawn. |
||
| + | {{clear}} |
||
| + | === Phase 2 Shaft === |
||
| + | These chests only appear in the ''Zodiac'' versions. |
||
| + | |||
| + | {|class="full-width FFXII article-table" style="text-align:center" |
||
| + | |-class="a" |
||
| + | !style="width:20%"|Chest |
||
| + | !style="width:10%"|Spawns |
||
| + | !style="width:10%"|Holds Gil% |
||
| + | !style="width:10%"|Gil |
||
| + | !style="width:25%" colspan="2"|Normal Treasure |
||
| + | !style="width:25%" colspan="2"|Diamond Armlet Treasure |
||
| + | |- |
||
| + | |class="b"|41<sup>[[#1|[1]]]</sup> |
||
| + | |25% |
||
| + | |0% |
||
| + | |N/A |
||
| + | |colspan="4"|[[Final Fantasy XII accessories#Sage's Ring|Sage's Ring]] |
||
| + | |- |
||
| + | |class="b"|42<sup>[[#1|[1]]]</sup> |
||
| + | |100% |
||
| + | |0% |
||
| + | |N/A |
||
| + | |colspan="4"|Aeroga Mote |
||
| + | |- |
||
| + | |class="b" rowspan="2"|43 |
||
| + | |rowspan="2"|75% |
||
| + | |rowspan="2"|50% |
||
| + | |rowspan="2"|≤ 700 gil |
||
| + | |class="a" width="12%"|Item 1 |
||
| + | |class="a" width="12%"|Item 2 |
||
| + | |class="a" width="12%"|Common |
||
| + | |class="a" width="12%"|Rare |
||
| + | |- |
||
| + | |Bio Mote |
||
| + | |[[Final Fantasy XII ammunition#Assassin's Arrows|Assassin's Arrows]] |
||
| + | |Knot of Rust |
||
| + | |Meteorite (B) |
||
| + | |- |
||
| + | |class="b"|44<sup>[[#1|[1]]]</sup> |
||
| + | |100% |
||
| + | |0% |
||
| + | |N/A |
||
| + | |colspan="4"|[[Makara (Final Fantasy XII)|Makara]] |
||
| + | |- |
||
| + | |class="b" rowspan="2"|45 |
||
| + | |rowspan="2"|75% |
||
| + | |rowspan="2"|50% |
||
| + | |rowspan="2"|≤ 700 gil |
||
| + | |class="a" width="12%"|Item 1 |
||
| + | |class="a" width="12%"|Item 2 |
||
| + | |class="a" width="12%"|Common |
||
| + | |class="a" width="12%"|Rare |
||
| + | |- |
||
| + | |Dark Mote |
||
| + | |Aeroga Mote |
||
| + | |Knot of Rust |
||
| + | |Meteorite (A) |
||
| + | |- |
||
| + | |class="b" rowspan="2"|46 |
||
| + | |rowspan="2"|75% |
||
| + | |rowspan="2"|50% |
||
| + | |rowspan="2"|≤ 700 gil |
||
| + | |class="a" width="12%"|Item 1 |
||
| + | |class="a" width="12%"|Item 2 |
||
| + | |class="a" width="12%"|Common |
||
| + | |class="a" width="12%"|Rare |
||
| + | |- |
||
| + | |Aero Mote |
||
| + | |Gravity Mote |
||
| + | |Knot of Rust |
||
| + | |Meteorite (A) |
||
| + | |} |
||
| + | * '''''{{A|1}}''''' - Chest does not respawn. |
||
| + | {{clear}} |
||
| + | |||
| + | === Special Charter Shaft === |
||
| + | ;Zodiac |
||
| + | {|class="full-width FFXII article-table" style="text-align:center" |
||
| + | |-class="a" |
||
| + | !style="width:20%"|Chest |
||
| + | !style="width:10%"|Spawns |
||
| + | !style="width:10%"|Holds Gil% |
||
| + | !style="width:10%"|Gil |
||
| + | !style="width:25%" colspan="2"|Normal Treasure |
||
| + | !style="width:25%" colspan="2"|Diamond Armlet Treasure |
||
| + | |- |
||
| + | |class="b" rowspan="2"|47 |
||
| + | |rowspan="2"|75% |
||
| + | |rowspan="2"|50% |
||
| + | |rowspan="2"|≤ 700 gil |
||
| + | |class="a" width="12%"|Item 1 |
||
| + | |class="a" width="12%"|Item 2 |
||
| + | |class="a" width="12%"|Common |
||
| + | |class="a" width="12%"|Rare |
||
| + | |- |
||
| + | |Vanishga Mote |
||
| + | |Cura Mote |
||
| + | |Knot of Rust |
||
| + | |Meteorite (A) |
||
| + | |- |
||
| + | |class="b"|48 |
||
| + | |1% |
||
| + | |0% |
||
| + | |N/A |
||
| + | |colspan="4"|[[Zodiac Spear (Final Fantasy XII)|Zodiac Spear]] |
||
| + | |- |
||
| + | |class="b" rowspan="2"|49 |
||
| + | |rowspan="2"|75% |
||
| + | |rowspan="2"|50% |
||
| + | |rowspan="2"|≤ 700 gil |
||
| + | |class="a" width="12%"|Item 1 |
||
| + | |class="a" width="12%"|Item 2 |
||
| + | |class="a" width="12%"|Common |
||
| + | |class="a" width="12%"|Rare |
||
| + | |- |
||
| + | |Balance Mote |
||
| + | |Shock Mote |
||
| + | |Knot of Rust |
||
| + | |Meteorite (C) |
||
| + | |- |
||
| + | |class="b" rowspan="2"|50 |
||
| + | |rowspan="2"|75% |
||
| + | |rowspan="2"|50% |
||
| + | |rowspan="2"|≤ 700 gil |
||
| + | |class="a" width="12%"|Item 1 |
||
| + | |class="a" width="12%"|Item 2 |
||
| + | |class="a" width="12%"|Common |
||
| + | |class="a" width="12%"|Rare |
||
| + | |- |
||
| + | |Reflectga Mote |
||
| + | |Holy Mote |
||
| + | |Knot of Rust |
||
| + | |Meteorite (B) |
||
| + | |- |
||
| + | |class="b" rowspan="2"|51 |
||
| + | |rowspan="2"|75% |
||
| + | |rowspan="2"|50% |
||
| + | |rowspan="2"|≤ 700 gil |
||
| + | |rowspan="2" colspan="2"|Aero Mote |
||
| + | |class="a" width="12%"|Common |
||
| + | |class="a" width="12%"|Rare |
||
| + | |- |
||
| + | |Knot of Rust |
||
| + | |Meteorite (B) |
||
| + | |- |
||
| + | |class="b"|52<sup>[[#1|[1]]]</sup> |
||
| + | |100% |
||
| + | |0% |
||
| + | |N/A |
||
| + | |colspan="4"|[[Full Cure (ability)#Final Fantasy XII|Renew]] |
||
| + | |- |
||
| + | |class="b"|53<sup>[[#1|[1]]]</sup> |
||
| + | |10% |
||
| + | |0% |
||
| + | |N/A |
||
| + | |colspan="4"|[[Addle (Final Fantasy XII)|Addle]] |
||
| + | |- |
||
| + | |class="b"|54<sup>[[#1|[1]]]</sup> |
||
| + | |25% |
||
| + | |0% |
||
| + | |N/A |
||
| + | |colspan="4"|[[Final Fantasy XII armor#Brave Suit|Brave Suit]] |
||
| + | |- |
||
| + | |class="b" rowspan="2"|55 |
||
| + | |rowspan="2"|75% |
||
| + | |rowspan="2"|50% |
||
| + | |rowspan="2"|≤ 700 gil |
||
| + | |class="a" width="12%"|Item 1 |
||
| + | |class="a" width="12%"|Item 2 |
||
| + | |class="a" width="12%"|Common |
||
| + | |class="a" width="12%"|Rare |
||
| + | |- |
||
| + | |Hastega Mote |
||
| + | |[[Final Fantasy XII ammunition#Black Bolts|Black Bolts]] |
||
| + | |Knot of Rust |
||
| + | |Meteorite (A) |
||
| + | |- |
||
| + | |class="b" rowspan="2"|56 |
||
| + | |rowspan="2"|75% |
||
| + | |rowspan="2"|50% |
||
| + | |rowspan="2"|≤ 700 gil |
||
| + | |class="a" width="12%"|Item 1 |
||
| + | |class="a" width="12%"|Item 2 |
||
| + | |class="a" width="12%"|Common |
||
| + | |class="a" width="12%"|Rare |
||
| + | |- |
||
| + | |Vanishga Mote |
||
| + | |Shock Mote |
||
| + | |Knot of Rust |
||
| + | |Meteorite (A) |
||
| + | |- |
||
| + | |class="b"|57<sup>[[#1|[1]]]</sup> |
||
| + | |15% |
||
| + | |0% |
||
| + | |N/A |
||
| + | |colspan="4"|[[Final Fantasy XII accessories#Ribbon|Ribbon]] |
||
| + | |- |
||
| + | |class="b" rowspan="2"|58 |
||
| + | |rowspan="2"|75% |
||
| + | |rowspan="2"|50% |
||
| + | |rowspan="2"|≤ 700 gil |
||
| + | |class="a" width="12%"|Item 1 |
||
| + | |class="a" width="12%"|Item 2 |
||
| + | |class="a" width="12%"|Common |
||
| + | |class="a" width="12%"|Rare |
||
| + | |- |
||
| + | |Aeroga Mote |
||
| + | |[[Final Fantasy XII ammunition#Mud Shot|Mud Shot]] |
||
| + | |Knot of Rust |
||
| + | |Meteorite (A) |
||
| + | |- |
||
| + | |class="b"|59<sup>[[#1|[1]]]</sup> |
||
| + | |25% |
||
| + | |0% |
||
| + | |N/A |
||
| + | |colspan="4"|[[Final Fantasy XII armor#Grand Armor|Grand Armor]] |
||
| + | |- |
||
| + | |class="b"|60<sup>[[#1|[1]]]</sup> |
||
| + | |100% |
||
| + | |0% |
||
| + | |N/A |
||
| + | |colspan="4"|[[Final Fantasy XII armor#Lordly Robes|Lordly Robes]] |
||
| + | |- |
||
| + | |class="b" rowspan="2"|61 |
||
| + | |rowspan="2"|75% |
||
| + | |rowspan="2"|50% |
||
| + | |rowspan="2"|≤ 700 gil |
||
| + | |class="a" width="12%"|Item 1 |
||
| + | |class="a" width="12%"|Item 2 |
||
| + | |class="a" width="12%"|Common |
||
| + | |class="a" width="12%"|Rare |
||
| + | |- |
||
| + | |Reflectga Mote |
||
| + | |Holy Mote |
||
| + | |Knot of Rust |
||
| + | |Meteorite (B) |
||
| + | |} |
||
| + | * '''''{{A|1}}''''' - Chest does not respawn. |
||
| + | ;Original |
||
| + | {|class="full-width FFXII article-table" style="text-align:center" |
||
| + | |-class="a" |
||
| + | !style="width:20%"|Chest |
||
| + | !style="width:10%"|Spawns |
||
| + | !style="width:10%"|Holds Gil% |
||
| + | !style="width:30%" colspan="3"|Normal Treasure |
||
| + | !style="width:30%" colspan="3"|Diamond Armlet Treasure |
||
| + | |- |
||
| + | |class="b" rowspan="2"|21 |
||
| + | |rowspan="2"|55% |
||
| + | |rowspan="2"|28% |
||
| + | |class="a" width="10%"|Gil |
||
| + | |class="a" width="10%"|Item 1 |
||
| + | |class="a" width="10%"|Item 2 |
||
| + | |class="a" width="10%"|Gil |
||
| + | |class="a" width="10%"|Common |
||
| + | |class="a" width="10%"|Rare |
||
| + | |- |
||
| + | |≤ 600 gil |
||
| + | |Knot of Rust |
||
| + | |Dark Matter |
||
| + | |≤ 7,000 gil |
||
| + | |Knot of Rust |
||
| + | |Megalixir |
||
| + | |- |
||
| + | |class="b" rowspan="2"|22<sup>[[#1|[1]]]</sup> |
||
| + | |rowspan="2"|40% |
||
| + | |rowspan="2"|0% |
||
| + | |class="a" width="10%"|Gil |
||
| + | |class="a" width="20%" colspan="2"|Item |
||
| + | |class="a" width="10%"|Gil |
||
| + | |class="a" width="10%"|Common |
||
| + | |class="a" width="10%"|Rare |
||
| + | |- |
||
| + | |N/A |
||
| + | |colspan="2"|[[Final Fantasy XII armor#Ensanguined Shield|Ensanguined Shield]] |
||
| + | |N/A |
||
| + | |Knot of Rust |
||
| + | |Megalixir |
||
| + | |- |
||
| + | |class="b" rowspan="2"|23 |
||
| + | |rowspan="2"|55% |
||
| + | |rowspan="2"|28% |
||
| + | |class="a" width="10%"|Gil |
||
| + | |class="a" width="10%"|Item 1 |
||
| + | |class="a" width="10%"|Item 2 |
||
| + | |class="a" width="10%"|Gil |
||
| + | |class="a" width="10%"|Common |
||
| + | |class="a" width="10%"|Rare |
||
| + | |- |
||
| + | |≤ 300 gil |
||
| + | |Knot of Rust |
||
| + | |Scathe Mote |
||
| + | |≤ 7,000 gil |
||
| + | |Knot of Rust |
||
| + | |Megalixir |
||
| + | |- |
||
| + | |class="b" rowspan="2"|24 |
||
| + | |rowspan="2"|40% |
||
| + | |rowspan="2"|45% |
||
| + | |class="a" width="10%"|Gil |
||
| + | |class="a" width="10%"|Item 1 |
||
| + | |class="a" width="10%"|Item 2 |
||
| + | |class="a" width="10%"|Gil |
||
| + | |class="a" width="10%"|Common |
||
| + | |class="a" width="10%"|Rare |
||
| + | |- |
||
| + | |≤ 1,000 gil |
||
| + | |Knot of Rust |
||
| + | |[[Final Fantasy XII armor#Lordly Robes|Lordly Robes]] |
||
| + | |≤ 7,000 gil |
||
| + | |Knot of Rust |
||
| + | |Megalixir |
||
| + | |- |
||
| + | |class="b" rowspan="2"|25 |
||
| + | |rowspan="2"|55% |
||
| + | |rowspan="2"|65% |
||
| + | |class="a" width="10%"|Gil |
||
| + | |class="a" width="10%"|Item 1 |
||
| + | |class="a" width="10%"|Item 2 |
||
| + | |class="a" width="10%"|Gil |
||
| + | |class="a" width="10%"|Common |
||
| + | |class="a" width="10%"|Rare |
||
| + | |- |
||
| + | |≤ 300 gil |
||
| + | |Knot of Rust |
||
| + | |[[Final Fantasy XII accessories#Sage's Ring|Sage's Ring]] |
||
| + | |≤ 7,000 gil |
||
| + | |Knot of Rust |
||
| + | |Megalixir |
||
| + | |- |
||
| + | |class="b" rowspan="2"|26 |
||
| + | |rowspan="2"|55% |
||
| + | |rowspan="2"|60% |
||
| + | |class="a" width="10%"|Gil |
||
| + | |class="a" width="10%"|Item 1 |
||
| + | |class="a" width="10%"|Item 2 |
||
| + | |class="a" width="10%"|Gil |
||
| + | |class="a" width="10%"|Common |
||
| + | |class="a" width="10%"|Rare |
||
| + | |- |
||
| + | |≤ 300 gil |
||
| + | |Knot of Rust |
||
| + | |[[Judicer's Staff (Final Fantasy XII)|Judicer's Staff]] |
||
| + | |≤ 7,000 gil |
||
| + | |Knot of Rust |
||
| + | |Megalixir |
||
| + | |- |
||
| + | |class="b" rowspan="2"|27<sup>[[#1|[1]]]</sup> |
||
| + | |rowspan="2"|25% |
||
| + | |rowspan="2"|0% |
||
| + | |class="a" width="10%"|Gil |
||
| + | |class="a" width="20%" colspan="2"|Item |
||
| + | |class="a" width="10%"|Gil |
||
| + | |class="a" width="10%"|Common |
||
| + | |class="a" width="10%"|Rare |
||
| + | |- |
||
| + | |N/A |
||
| + | |colspan="2"|[[Final Fantasy XII armor#Brave Suit|Brave Suit]] |
||
| + | |N/A |
||
| + | |Knot of Rust |
||
| + | |Megalixir |
||
| + | |- |
||
| + | |class="b" rowspan="2"|28 |
||
| + | |rowspan="2"|55% |
||
| + | |rowspan="2"|60% |
||
| + | |class="a" width="10%"|Gil |
||
| + | |class="a" width="10%"|Item 1 |
||
| + | |class="a" width="10%"|Item 2 |
||
| + | |class="a" width="10%"|Gil |
||
| + | |class="a" width="10%"|Common |
||
| + | |class="a" width="10%"|Rare |
||
| + | |- |
||
| + | |≤ 300 gil |
||
| + | |[[Final Fantasy XII armor#Renewing Morion|Renewing Morion]] |
||
| + | |[[Final Fantasy XII accessories#Ribbon|Ribbon]] |
||
| + | |≤ 7,000 gil |
||
| + | |Knot of Rust |
||
| + | |Megalixir |
||
| + | |- |
||
| + | |class="b" rowspan="2"|29<sup>[[#1|[1]]]</sup> |
||
| + | |rowspan="2"|40% |
||
| + | |rowspan="2"|20% |
||
| + | |class="a" width="10%"|Gil |
||
| + | |class="a" width="20%" colspan="2"|Item |
||
| + | |class="a" width="10%"|Gil |
||
| + | |class="a" width="20%" colspan="2"|Item |
||
| + | |- |
||
| + | |≤ 5,000 gil |
||
| + | |colspan="2"|Dark Matter |
||
| + | |≤ 10,000 gil |
||
| + | |colspan="2"|[[Fomalhaut (Final Fantasy XII)|Fomalhaut]] |
||
| + | |} |
||
| + | * '''''{{A|1}}''''' - Chest does not respawn. |
||
| + | |||
| + | == Story == |
||
| + | {{spoiler}} |
||
| + | [[File:Sisters-large.jpg|thumb|left|Fran saves Mjrn inside Henne Mines.]] |
||
| + | The party is on their way to [[Mt Bur-Omisace]] when they find they can't get past [[Golmore Jungle]] because of the [[viera]]'s magickal barriers. [[Fran]] thinks her younger sister [[Mjrn]] could help them, she has gone missing in the mines. The party ventures into the mines looking for her, and find [[Archadia|Imperial]] soldiers dead at the entrance. |
||
| + | |||
| + | The party finally find Mjrn, who has been used for scientific experiments during the Empire's [[nethicite]] research, and she has gone [[Mist (Final Fantasy XII)|Mist]]-crazy and is possessed by [[Venat (Final Fantasy XII)|Venat]] by the time she is found. The party defeat the mist monster Mjrn sends after them and she is released. The party take her back to [[Eruyt Village]]. |
||
| + | |||
| + | Later, after the party has acquired ten Espers, Geomancer Yugelu of [[Jahara]] will open the way into the deep section of the mines. Zodiark, the thirteenth Esper, can be fought at the very end of the mines. |
||
| + | {{clear}} |
||
| + | {{endspoiler}} |
||
| + | |||
| + | == Quests == |
||
| + | === Hunts === |
||
| + | {{See|Hunt (Final Fantasy XII)}} |
||
| + | [[Ixtab (Final Fantasy XII)|Ixtab]] is a Rank II Mark found in the Phase 1 - Shaft area. It becomes available to hunt after the storyline events in Eruyt Village are complete. It is petitioned by High-chief Zayalu in [[Jahara]]. Ixtab will use physical attacks, may summon undead monsters to aid him, and also casts Doom and other status ailments. |
||
| + | |||
| + | The [[Mindflayer (Final Fantasy XII)|Mindflayer]] is a Rank IV Mark found in the Phase 1 Dig area if the party has full [[MP (stat)|MP]]. The hunt becomes available after felling [[Judge Bergan (boss)|Judge Bergan]] at [[Mt Bur-Omisace]]. While the hunt is undertaken, a [[garif]] named Asdalu can be spoken to in the Staging Shaft of the Henne Mines. The hunt is petitioned by Warrior Guromu in Jahara. |
||
| + | |||
| + | === Rare Game === |
||
| + | {{See|Rare Game}} |
||
| + | [[Glaring Eye]] can [[Spawning enemies|spawn]] after defeating at least one [[Hecteyes (Final Fantasy XII)|Hecteyes]]. There is a 10% chance Glaring Eye will spawn in six possible locations where a Hecteyes has been defeated. In the ''Zodiac'' versions, Glaring Eye drops the [[Scorpion Tail (Final Fantasy XII)|Scorpion Tail]]. |
||
| + | |||
| + | To find the [[Melt (Final Fantasy XII)|Melt]] the player must have spoken to the "Huntmaster" in [[Phon Coast]] and defeated [[Thalassinon (Final Fantasy XII)|Thalassinon]], which will trigger the start of the Rare Game quest. The Melt will then appear in the Henne Mines at Pithead Junction B. It has a 50% chance of appearing when the party flips the gate switch found in the room. Once killed, it will never spawn again. |
||
| + | |||
| + | === Grinding spots === |
||
| + | [[File:Ff12 hennemines pithead junction b.jpg|thumb|Grinding in Pithead Junction B.]] |
||
| + | Henne Mines is renowned for two convenient [[level grinding]] spots. The first is Pithead Junction B, which is closer to the [[Save point#Final Fantasy XII|Gate Crystal]]. After touching the gate switch in the room, a limited number of [[Jelly (Final Fantasy XII)|Jellies]] fall from above, and if they die from the [[Time Magicks (Final Fantasy XII)|Time Magick]] [[Break (ability)|Break]], they will respawn endlessly. If player programs their [[Gambits]] correctly, it is possible to sustain an auto-leveling without touching the controller. Besides the Break spell, it is recommended to have another ally to cast [[Sleepga]] on the Jellies and another one prepares curative spells to keep the party alive. |
||
| + | |||
| + | [[File:Henne-Mines-Grinding-Spot.jpg|thumb|Grinding in Pithead Junction C.]] |
||
| + | The second spot is Pithead Junction C. It is quite far from the Gate Crystal and riskier than Pithead Junction B. After flipping the gate switch [[Abysteel (Final Fantasy XII)|Abysteels]] will appear. They do not respawn endlessly like the Jellies because of immunity against the Break spell, but are vulnerable to [[Sleep (status)|Sleep]] and [[Disable (status)|Disable]], and are damaged by curative magick. With the proper gambit set-up, the player can use Sleepga or Disable to neutralize the Abysteels and kill them with [[Curaja]] ([[Full Cure (ability)|Renew]] does not work on them) or [[Black Magicks (Final Fantasy XII)|Black Magick]] without waking them up. |
||
| + | |||
| + | Once all the Abysteels are slain, the player must move two areas away and return to spawn more when the switch is flipped again. The Abysteels will leave roughly 3,000 EXP each, which in tandem with their large numbers makes leveling quick and easy. If the party is equipped with [[Final Fantasy XII accessories#Embroidered Tippet|Embroidered Tippets]], they could potentially earn up to of 100,000 EXP with each press of the switch. |
||
| + | {{clear}} |
||
| + | |||
| + | === Optional area === |
||
| + | [[File:Henne-Mines-Final-Room-FFXII-TZA.jpg|thumb|Final area.]] |
||
| + | The deep section of the Henne Mines is one of the hardest areas, with plenty of strong enemies to face. The geomancer in Jahara opens the path found in Ore Separation once the player has obtained ten Espers. |
||
| + | |||
| + | Some tricks can be used to get past the area more easily. Firstly, the reaper type enemies will ignore the players if under [[Invisible (status)|Vanish]], so casting [[Vanishga]] on them neutralizes them. The player can also use the [[Immobilize glitch]] to make all nearby enemies disappear. The enemies here tend to be undead, so casting Curaja on them deals great area damage. Holy-elemental weapons are also good, especially when paired with [[Final Fantasy XII armor#White Robes|White Robes]]. |
||
| + | |||
| + | The player can find some good treasures here (see above section) and at the end of the path, fight Zodiark. |
||
| + | |||
| + | [[Great Trango]], the invisible [[Ultimate weapon (term)|ultimate]] one-handed sword added in the ''Zodiac'' versions, can be rarely [[steal|stolen]] from Zodiark. If the player really wants one, the following strategy can be used in ''The Zodiac Age'' version: The player can clear Special Charter Shaft off all enemies, leave, and then return. If there are still enemies around, the player should again kill them and leave and return. The goal is to create an [[auto-save]] at the start of Special Charter Shaft to a state where Special Charter Shaft has no enemies. The player can then run to Zodiark's lair unopposed, steal, and if they don't get the Great Trango, start again from the auto-save. |
||
| + | |||
| + | == Enemies == |
||
| + | * [[Seeker (Final Fantasy XII)|Seeker]] |
||
* [[Etém]] |
* [[Etém]] |
||
* [[Hecteyes (Final Fantasy XII)|Hecteyes]] |
* [[Hecteyes (Final Fantasy XII)|Hecteyes]] |
||
* [[Jelly (Final Fantasy XII)|Jelly]] |
* [[Jelly (Final Fantasy XII)|Jelly]] |
||
| − | * [[Nightmare (Final Fantasy XII)|Nightmare]] |
+ | * [[Nightmare (Final Fantasy XII enemy)|Nightmare]] |
| − | * [[Redmaw]] |
+ | * [[Redmaw (Final Fantasy XII)|Redmaw]] |
* [[Tyranorox]] |
* [[Tyranorox]] |
||
* [[Thunderbug]] |
* [[Thunderbug]] |
||
| − | * [[Abysteel]] |
+ | * [[Abysteel (Final Fantasy XII)|Abysteel]] |
* [[Gizamaluk]] |
* [[Gizamaluk]] |
||
* [[Necrofiend]] |
* [[Necrofiend]] |
||
* [[Glaring Eye]] (Rare) |
* [[Glaring Eye]] (Rare) |
||
| − | * [[Melt]] (Rare) |
+ | * [[Melt (Final Fantasy XII)|Melt]] (Rare) |
| − | * [[Ixtab]] (Mark) |
+ | * [[Ixtab (Final Fantasy XII)|Ixtab]] (Mark) |
* [[Mindflayer (Final Fantasy XII)|Mindflayer]] (Mark) |
* [[Mindflayer (Final Fantasy XII)|Mindflayer]] (Mark) |
||
* [[Tiamat (Final Fantasy XII)|Tiamat]] (Boss) |
* [[Tiamat (Final Fantasy XII)|Tiamat]] (Boss) |
||
| − | * [[Zodiark]] (Hidden Esper) |
+ | * [[Zodiark (Final Fantasy XII boss)|Zodiark]] (Hidden Esper) |
| + | |||
| + | == Map == |
||
| + | The map can be found in the Phase 1 Shaft in the u-shaped section. |
||
| + | |||
| + | The candle to reveal the full map can be found in the east most section of the Phase 2 Dig. |
||
| + | |||
| + | :''Areas highlighted in red are hidden passages that do not appear on the map.'' |
||
| + | <div style="overflow:auto; width: 100%; height:300px"> |
||
| + | [[File:FF12 Map - Henne Mines.png]]</div> |
||
| + | |||
| + | [[:File:Map_15_Henne_Mines.png|Map from the original ''Final Fantasy XII'' that includes all treasure information.]] |
||
| + | |||
| + | ==Musical themes== |
||
| + | The theme of Henne Mines is "Threat Impendent" {{J|迫る脅威|Semaru Kyōi}}. |
||
| + | |||
| + | == Other appearances == |
||
| + | === ''[[Final Fantasy Record Keeper]]'' === |
||
| + | |||
| + | [[File:FFRK Henne Mines FFXII.png|right|150px]] |
||
| + | {{Location section|Final Fantasy Record Keeper}} |
||
| + | |||
| + | === ''[[Final Fantasy Brave Exvius]]'' === |
||
| + | [[File:FFBE Henne Mines.png|right|250px]] |
||
| + | {{Location section|Final Fantasy Brave Exvius}} |
||
| + | {{clear}} |
||
| + | |||
| + | == Gallery == |
||
| + | <gallery> |
||
| + | Henne-Mines-Entrance-FFXII-TZA.png|Entrance. |
||
| + | Henne-Mines-FFXII-TZA.png |
||
| + | Henne-Mines-Gate-FFXII-TZA.jpg |
||
| + | Henne-Mines-Optional-Area.jpg|Henne Mines optional area. |
||
| + | Henne-Mines.jpg |
||
| + | Ixtab.jpg |
||
| + | Zodiark's-Lair.jpg|Zodiark's Lair. |
||
| + | </gallery> |
||
| + | |||
| + | {{navbox setting FFXII}} |
||
| − | ==Map== |
||
| − | [[ Image:Hennemap.jpg |center]] |
||
| + | [[de:Henna-Minen]] |
||
| − | {{FFXII}} |
||
| − | [[Category: Final Fantasy XII |
+ | [[Category:Locations in Final Fantasy XII]] |
| + | [[Category:Mines]] |
||
Revision as of 19:54, 26 February 2020
Template:Sideicon

Oh, shut up and help me remodel the Henne Mines page!
- Adding a Locations section, with images and brief descriptions of the areas within the location.
This request can be discussed on the associated discussion page. Remove this notice upon completion.
The Henne Magicite Mines—maybe that's what she meant. They lie in Bancour, south of the Ozmone Plain. The entire region is a colony of the Archadian Empire. There would be soldiers.
Larsa Ferrinas Solidor
The Henne Mines is a location in the land of Ivalice in Final Fantasy XII. It is an underground magicite mine explored by the Archadian Empire.
At first only the Phase 1 site and dig are accessible from the Ozmone Plain; also, Phase 2 can be accessed from the Feywood, but only a small portion is accessible until the Esper Zodiark is defeated. Phase 2 can also be accessed via the Ore Separation area once the player has acquired 10 or more Espers and spoken with Geomancer Yugelu in Jahara. When accessing Phase 2, it is recommended to wait until the party's average level is above 70.
Sage Knowledge
Crystal mines in the mountainous region of Bancour still producing a great variety of magicite, even as other mines around them close, their veins dry and spent. The Archadian Empire possesses mining rights here, making this a key location for their acquisition of the stones, bypassing intermediaries and fluctuating markets.
Sage Knowledge 74, The Henne Magicite Mines
Locations
The Henne Mines are located just to the southeast of Jahara, and at first are only accessible via chocobo through the Ozmone Plain.
Guaranteed treasures listed in this section are found in the Zodiac versions. For a summary of treasures in the original version, see Treasures.
Phase 1
See Map. No chests that always spawn and always contain certain treasures are found in Phase 1
- North Entrance (to Ozmone Plain)
- Pithead Junction A. West to Phase 1 Shaft; south and east is a loop, with the Henne Mines map urn
- Phase 1 Shaft. West to Phase 1 Dig.
- Phase 1 Dig. South and east to Crossover A. Phase 1 Dig treasures.
- Crossover A. North to the northeast exit to Crossover B. Crossover treasures.
- Crossover B. North to Staging Shaft, but the door must be opened with a switch in Pithead Junction B, which is east then south
- Pithead Junction B. Grinding spot with Jellies. Activate switch to toggle the door in Crossover B.
- Staging Shaft. Teleport stone
- Ore Separation. Tiamat boss; after cutscenes, transported to Eruyt Village. Exit to Phase 2 Dig, once requirements are met.
Phase 2
Phase 2 is also accessible through the Feywood, but only a portion of the Phase 2 Shaft. The rest of Phase 2 is blocked off unless the Mindflayer clan Hunt is completed, the player has obtained 10 Espers and has spoken to the garif Geomancer in Jahara. He will send a Garif to open the east gate in the Ore Separation section of Henne Mines.
The entry to Phase 2 seen on the map from early on, Phase 2 Shaft linked to Feywood, is blocked off by a mine cart until the Esper Zodiark is defeated.
- Phase 2 Dig. Chests that always spawn, always contain these treasures: Dueling Mask, Fomalhaut, Circlet, Makara and Mythril Sword. Chests that spawn 25% of the time always contain Nihopalaoa and Grand Helm.
- Crossover C. Grinding spot with Abysteels. A chest that always spawns, always contains Germinas Boots. A chest that spawns 25% of the time always contains Bubble Belt.
- Pithead Junction C.
- Phase 2 Shaft (to the Feywood). A chest that always spawns, always contains Makara. A chest that spawns 25% of the time always contains Sage's Ring
- Special Charter Shaft. Chests that always spawn, always contain Renew and Lordly Robes. Chests that spawn 25% of the time, always contain Brave Suit and Grand Armor. A chest that spawns 15%, 10% and 1% of the time, respectively always contain Ribbon, Addle and Zodiac Spear
- Special Charter Dig.
Treasures
Summaries of treasures in this section are as in the original version. For guaranteed treasures in the Zodiac versions, see Treasures.
During the player's first venture into the mines treasures can be found in the Phase 1 Dig, although a few of them are actually the Thunderbug mimic. Some good items can be found here; all the treasures are either gil, Knot of Rust or a good item. The good items include Elixir and Shielded Armor in the hidden passage section of the map in the lower western corner, Golden Amulet in the southeastern dead-end, and Musk Stick near the middle of the map in a cave where enemies can be found fighting each other.
Many of the treasures can also contain Motes. When the Diamond Armlet is equipped the item treasures are either Knot of Rust or Hastega/Scathe Motes.
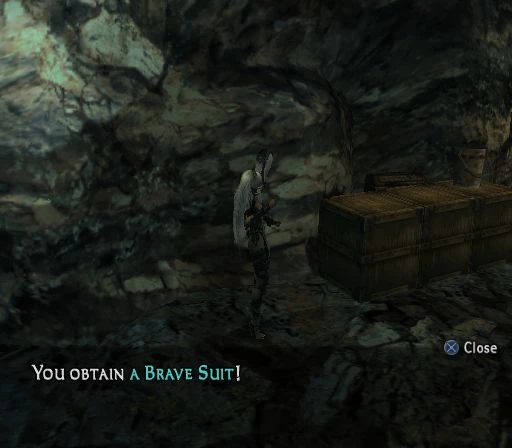
Brave Suit found.
After gaining access to Phase 2 Dig the player can find more treasures, and acquire special rare treasures if the Diamond Armlet is equipped.
There is a method, which lets the player get any rare treasure from a chest 100% of the time, by exploiting the games console's predictable random number generator. Without equipping the Diamond Armlet the player can still get good treasures from Phase 2 Dig, such as Elixirs, the Platinum Dagger, the Gold Hairpin, Ring of Renewal and Dark Matter.
Deeper into the mines still, the player can find more treasures in the Special Charter Shaft at the deepest end of the mines. Most of the treasures can rarely be Megalixir when the Diamond Armlet is equipped (the other treasure is Knot of Rust, as usual), except the northernmost treasure which is either the Fomalhaut (80%) or gil (20%); when the Diamond Armlet is not equipped, this treasure is Dark Matter or gil.
This treasure will never respawn. Without equipping the Diamond Armlet, the other treasures can contain other good items such as Ribbon, Renewing Morion, Brave Suit, Sage's Ring, Lordly Robes, Ensanguined Shield and Judicer's Staff.
Phase 1 Dig
- Zodiac
| Chest | Spawns | Holds Gil% | Gil | Normal Treasure | Diamond Armlet Treasure | ||
|---|---|---|---|---|---|---|---|
| 1 | 80% | 30% | ≤ 100 gil | Item 1 | Item 2 | Common | Rare |
| Balance Mote | Aero Mote | Knot of Rust | Meteorite (A) | ||||
| 2 | 80% | 30% | ≤ 100 gil | Item 1 | Item 2 | Common | Rare |
| Gravity Mote | Dark Mote | Knot of Rust | Meteorite (A) | ||||
| 3 | 80% | 30% | ≤ 100 gil | Item 1 | Item 2 | Common | Rare |
| Aeroga Mote | Dark Mote | Knot of Rust | Meteorite (A) | ||||
| 4 | 80% | 30% | ≤ 100 gil | Item 1 | Item 2 | Common | Rare |
| Dispel Mote | Dark Mote | Knot of Rust | Meteorite (C) | ||||
| 5 | 80% | 30% | ≤ 100 gil | Item 1 | Item 2 | Common | Rare |
| Aquara Mote | Dark Mote | Knot of Rust | Meteorite (A) | ||||
| 6 | 80% | 30% | ≤ 100 gil | Item 1 | Item 2 | Common | Rare |
| Cura Mote | Dark Mote | Knot of Rust | Meteorite (A) | ||||
| 7 | 75% | 60% | ≤ 600 gil | Item 1 | Item 2 | Common | Rare |
| Hastega Mote | Mage's Habit | Knot of Rust | Meteorite (A) | ||||
| 8 | 75% | 60% | ≤ 600 gil | Item 1 | Item 2 | Common | Rare |
| Holy Mote | Brigandine | Knot of Rust | Meteorite (A) | ||||
| 9 | 80% | 30% | ≤ 100 gil | Item 1 | Item 2 | Common | Rare |
| Balance Mote | Dark Mote | Knot of Rust | Meteorite (A) | ||||
| 10 | 80% | 30% | ≤ 100 gil | Item 1 | Item 2 | Common | Rare |
| Gravity Mote | Dark Mote | Knot of Rust | Meteorite (A) | ||||
| 11 | 80% | 30% | ≤ 100 gil | Item 1 | Item 2 | Common | Rare |
| Bio Mote | Dark Mote | Knot of Rust | Meteorite (A) | ||||
| 12 | 75% | 40% | ≤ 200 gil | Item 1 | Item 2 | Common | Rare |
| Cura Mote | Shielded Armor | Knot of Rust | Meteorite (B) | ||||
| 13[1] | 100% | 0% | N/A | Bonecrusher | |||
- 1 - Chest does not respawn.
- Original
| Chest | Spawns | Holds Gil% | Normal Treasure | Diamond Armlet Treasure | ||||
|---|---|---|---|---|---|---|---|---|
| 1 | 45% | 45% | Gil | Item 1 | Item 2 | Gil | Common | Rare |
| ≤ 600 gil | Knot of Rust | Reflecta Mote | ≤ 2,000 gil | Knot of Rust | Hastega Mote | |||
| 2 | 62% | 20% | Gil | Item 1 | Item 2 | Gil | Common | Rare |
| ≤ 300 gil | Knot of Rust | Water Mote | ≤ 2,000 gil | Knot of Rust | Hastega Mote | |||
| 3 | 45% | 45% | Gil | Item 1 | Item 2 | Gil | Common | Rare |
| ≤ 300 gil | Knot of Rust | Gillie Boots | ≤ 2,000 gil | Knot of Rust | Scathe Mote | |||
| 4 | 62% | 20% | Gil | Item 1 | Item 2 | Gil | Common | Rare |
| ≤ 300 gil | Knot of Rust | Vanishga Mote | ≤ 2,000 gil | Knot of Rust | Scathe Mote | |||
| 5 | 70% | 15% | Gil | Item 1 | Item 2 | Gil | Common | Rare |
| ≤ 360 gil | Knot of Rust | G-Foe: highest HP | ≤ 2,000 gil | Knot of Rust | Hastega Mote | |||
| 6 | 70% | 15% | Gil | Item 1 | Item 2 | Gil | Common | Rare |
| ≤ 360 gil | Knot of Rust | G-Foe: lowest HP | ≤ 2,000 gil | Knot of Rust | Hastega Mote | |||
| 7 | 50% | 35% | Gil | Item 1 | Item 2 | Gil | Common | Rare |
| ≤ 500 gil | Knot of Rust | Shielded Armor | ≤ 2,000 gil | Knot of Rust | Scathe Mote | |||
| 8 | 62% | 20% | Gil | Item 1 | Item 2 | Gil | Common | Rare |
| ≤ 300 gil | Knot of Rust | Elixir | ≤ 2,000 gil | Knot of Rust | Hastega Mote | |||
| 9 | 62% | 20% | Gil | Item 1 | Item 2 | Gil | Common | Rare |
| ≤ 300 gil | Knot of Rust | Hastega Mote | ≤ 2,000 gil | Knot of Rust | Scathe Mote | |||
| 10 | 48% | 30% | Gil | Item 1 | Item 2 | Gil | Common | Rare |
| ≤ 400 gil | Knot of Rust | Golden Amulet | ≤ 2,000 gil | Knot of Rust | Scathe Mote | |||
| 11 | 45% | 30% | Gil | Item 1 | Item 2 | Gil | Common | Rare |
| ≤ 400 gil | Knot of Rust | Musk Stick | ≤ 2,000 gil | Knot of Rust | Scathe Mote | |||
The Crossover
These chests only appear in the Zodiac versions.
| Chest | Spawns | Holds Gil% | Gil | Normal Treasure | Diamond Armlet Treasure | ||
|---|---|---|---|---|---|---|---|
| 14 | 75% | 40% | ≤ 200 gil | Item 1 | Item 2 | Common | Rare |
| Dispel Mote | Flame Shield | Knot of Rust | Meteorite (A) | ||||
| 15 | 80% | 30% | ≤ 120 gil | Item 1 | Item 2 | Common | Rare |
| Gravity Mote | Dark Mote | Knot of Rust | Meteorite (A) | ||||
| 16 | 80% | 50% | ≤ 500 gil | Item 1 | Item 2 | Common | Rare |
| Vanishga Mote | Dark Mote | Knot of Rust | Meteorite (B) | ||||
| 17 | 80% | 30% | ≤ 120 gil | Item 1 | Item 2 | Common | Rare |
| Bio Mote | Dark Mote | Knot of Rust | Meteorite (A) | ||||
Phase 2 Dig
- Zodiac
| Chest | Spawns | Holds Gil% | Gil | Normal Treasure | Diamond Armlet Treasure | ||
|---|---|---|---|---|---|---|---|
| 18 | 75% | 50% | ≤ 700 gil | Item 1 | Item 2 | Common | Rare |
| Bio Mote | Aeroga Mote | Knot of Rust | Meteorite (A) | ||||
| 19 | 75% | 50% | ≤ 700 gil | Item 1 | Item 2 | Common | Rare |
| Balance Mote | Shock Mote | Knot of Rust | Meteorite (B) | ||||
| 20[1] | 100% | 0% | N/A | Dueling Mask | |||
| 21[1] | 100% | 0% | N/A | Fomalhaut | |||
| 22 | 75% | 50% | ≤ 700 gil | Item 1 | Item 2 | Common | Rare |
| Bio Mote | Bubble Mote | Knot of Rust | Meteorite (B) | ||||
| 23 | 75% | 50% | ≤ 700 gil | Item 1 | Item 2 | Common | Rare |
| Bubble Mote | Holy Mote | Knot of Rust | Meteorite (A) | ||||
| 24[1] | 25% | 0% | N/A | Nihopalaoa | |||
| 25[1] | 25% | 0% | N/A | Grand Helm | |||
| 26[1] | 100% | 0% | N/A | Circlet | |||
| 27 | 75% | 50% | ≤ 700 gil | Item 1 | Item 2 | Common | Rare |
| Balance Mote | Aeroga Mote | Knot of Rust | Meteorite (B) | ||||
| 28[1] | 2% | 0% | N/A | Item 1 | Item 2 | Meteorite D | |
| Scathe Mote | Holy Mote | ||||||
| 29[1] | 100% | 0% | N/A | Makara | |||
| 30 | 75% | 50% | ≤ 700 gil | Item 1 | Item 2 | Common | Rare |
| Float Mote | Aeroga Mote | Knot of Rust | Meteorite (A) | ||||
| 31[1] | 100% | 0% | N/A | Mythril Sword | |||
| 32 | 75% | 50% | ≤ 700 gil | Item 1 | Item 2 | Common | Rare |
| Bio Mote | Holy Mote | Knot of Rust | Meteorite (C) | ||||
- 1 - Chest does not respawn.
- Original
| Chest | Spawns | Holds Gil% | Normal Treasure | Diamond Armlet Treasure | ||||
|---|---|---|---|---|---|---|---|---|
| 12 | 25% | 80% | Gil | Item 1 | Item 2 | Gil | Common | Rare |
| ≤ 300 gil | Knot of Rust | Scathe Mote | ≤ 7,000 gil | Knot of Rust | Brave Suit | |||
| 13 | 60% | 28% | Gil | Item 1 | Item 2 | Gil | Common | Rare |
| ≤ 300 gil | Knot of Rust | Hi-Ether | ≤ 7,000 gil | Knot of Rust | Megalixir | |||
| 14 | 55% | 28% | Gil | Item 1 | Item 2 | Gil | Common | Rare |
| ≤ 300 gil | Knot of Rust | Gold Hairpin | ≤ 7,000 gil | Knot of Rust | Megalixir | |||
| 15 | 10% | 90% | Gil | Item | Gil | Common | Rare | |
| ≤ 20 gil | Elixir | ≤ 10,000 gil | Elixir | Zodiac Spear | ||||
| 16 | 55% | 28% | Gil | Item 1 | Item 2 | Gil | Common | Rare |
| ≤ 300 gil | Knot of Rust | Scathe Mote | ≤ 7,000 gil | Knot of Rust | Megalixir | |||
| 17 | 55% | 28% | Gil | Item 1 | Item 2 | Gil | Common | Rare |
| ≤ 300 gil | Knot of Rust | Vanishga Mote | ≤ 7,000 gil | Knot of Rust | Megalixir | |||
| 18 | 55% | 50% | Gil | Item 1 | Item 2 | Gil | Common | Rare |
| ≤ 300 gil | Knot of Rust | Platinum Dagger | ≤ 7,000 gil | Knot of Rust | Megalixir | |||
| 19 | 60% | 50% | Gil | Item 1 | Item 2 | Gil | Common | Rare |
| ≤ 3,000 gil | Knot of Rust | Ring of Renewal | ≤ 7,000 gil | Knot of Rust | Megalixir | |||
| 20 | 55% | 28% | Gil | Item 1 | Item 2 | Gil | Common | Rare |
| ≤ 300 gil | Knot of Rust | Dark Matter | ≤ 7,000 gil | Knot of Rust | Megalixir | |||
Crossover C
These chests only appear in the Zodiac versions.
| Chest | Spawns | Holds Gil% | Gil | Normal Treasure | Diamond Armlet Treasure | ||
|---|---|---|---|---|---|---|---|
| 33 | 80% | 50% | ≤ 700 gil | Item 1 | Item 2 | Common | Rare |
| Gravity Mote | Hi-Ether | Knot of Rust | Meteorite (B) | ||||
| 34 | 80% | 50% | ≤ 700 gil | Item 1 | Item 2 | Common | Rare |
| Balance Mote | Bubble Mote | Knot of Rust | Meteorite (B) | ||||
| 35 | 75% | 50% | ≤ 700 gil | Item 1 | Item 2 | Common | Rare |
| Aero Mote | Reverse Mote | Knot of Rust | Meteorite (B) | ||||
| 36 | 75% | 50% | ≤ 700 gil | Item 1 | Item 2 | Common | Rare |
| Balance Mote | Chaos Bombs | Knot of Rust | Meteorite (A) | ||||
| 37 | 75% | 50% | ≤ 700 gil | Item 1 | Item 2 | Common | Rare |
| Warp Mote | Power Armlet | Knot of Rust | Meteorite (A) | ||||
| 38 | 80% | 50% | ≤ 700 gil | Item 1 | Item 2 | Common | Rare |
| Aeroga Mote | Hi-Ether | Knot of Rust | Meteorite (A) | ||||
| 39[1] | 25% | 0% | N/A | Bubble Belt | |||
| 40[1] | 100% | 0% | N/A | Germinas Boots | |||
- 1 - Chest does not respawn.
Phase 2 Shaft
These chests only appear in the Zodiac versions.
| Chest | Spawns | Holds Gil% | Gil | Normal Treasure | Diamond Armlet Treasure | ||
|---|---|---|---|---|---|---|---|
| 41[1] | 25% | 0% | N/A | Sage's Ring | |||
| 42[1] | 100% | 0% | N/A | Aeroga Mote | |||
| 43 | 75% | 50% | ≤ 700 gil | Item 1 | Item 2 | Common | Rare |
| Bio Mote | Assassin's Arrows | Knot of Rust | Meteorite (B) | ||||
| 44[1] | 100% | 0% | N/A | Makara | |||
| 45 | 75% | 50% | ≤ 700 gil | Item 1 | Item 2 | Common | Rare |
| Dark Mote | Aeroga Mote | Knot of Rust | Meteorite (A) | ||||
| 46 | 75% | 50% | ≤ 700 gil | Item 1 | Item 2 | Common | Rare |
| Aero Mote | Gravity Mote | Knot of Rust | Meteorite (A) | ||||
- 1 - Chest does not respawn.
Special Charter Shaft
- Zodiac
| Chest | Spawns | Holds Gil% | Gil | Normal Treasure | Diamond Armlet Treasure | ||
|---|---|---|---|---|---|---|---|
| 47 | 75% | 50% | ≤ 700 gil | Item 1 | Item 2 | Common | Rare |
| Vanishga Mote | Cura Mote | Knot of Rust | Meteorite (A) | ||||
| 48 | 1% | 0% | N/A | Zodiac Spear | |||
| 49 | 75% | 50% | ≤ 700 gil | Item 1 | Item 2 | Common | Rare |
| Balance Mote | Shock Mote | Knot of Rust | Meteorite (C) | ||||
| 50 | 75% | 50% | ≤ 700 gil | Item 1 | Item 2 | Common | Rare |
| Reflectga Mote | Holy Mote | Knot of Rust | Meteorite (B) | ||||
| 51 | 75% | 50% | ≤ 700 gil | Aero Mote | Common | Rare | |
| Knot of Rust | Meteorite (B) | ||||||
| 52[1] | 100% | 0% | N/A | Renew | |||
| 53[1] | 10% | 0% | N/A | Addle | |||
| 54[1] | 25% | 0% | N/A | Brave Suit | |||
| 55 | 75% | 50% | ≤ 700 gil | Item 1 | Item 2 | Common | Rare |
| Hastega Mote | Black Bolts | Knot of Rust | Meteorite (A) | ||||
| 56 | 75% | 50% | ≤ 700 gil | Item 1 | Item 2 | Common | Rare |
| Vanishga Mote | Shock Mote | Knot of Rust | Meteorite (A) | ||||
| 57[1] | 15% | 0% | N/A | Ribbon | |||
| 58 | 75% | 50% | ≤ 700 gil | Item 1 | Item 2 | Common | Rare |
| Aeroga Mote | Mud Shot | Knot of Rust | Meteorite (A) | ||||
| 59[1] | 25% | 0% | N/A | Grand Armor | |||
| 60[1] | 100% | 0% | N/A | Lordly Robes | |||
| 61 | 75% | 50% | ≤ 700 gil | Item 1 | Item 2 | Common | Rare |
| Reflectga Mote | Holy Mote | Knot of Rust | Meteorite (B) | ||||
- 1 - Chest does not respawn.
- Original
| Chest | Spawns | Holds Gil% | Normal Treasure | Diamond Armlet Treasure | ||||
|---|---|---|---|---|---|---|---|---|
| 21 | 55% | 28% | Gil | Item 1 | Item 2 | Gil | Common | Rare |
| ≤ 600 gil | Knot of Rust | Dark Matter | ≤ 7,000 gil | Knot of Rust | Megalixir | |||
| 22[1] | 40% | 0% | Gil | Item | Gil | Common | Rare | |
| N/A | Ensanguined Shield | N/A | Knot of Rust | Megalixir | ||||
| 23 | 55% | 28% | Gil | Item 1 | Item 2 | Gil | Common | Rare |
| ≤ 300 gil | Knot of Rust | Scathe Mote | ≤ 7,000 gil | Knot of Rust | Megalixir | |||
| 24 | 40% | 45% | Gil | Item 1 | Item 2 | Gil | Common | Rare |
| ≤ 1,000 gil | Knot of Rust | Lordly Robes | ≤ 7,000 gil | Knot of Rust | Megalixir | |||
| 25 | 55% | 65% | Gil | Item 1 | Item 2 | Gil | Common | Rare |
| ≤ 300 gil | Knot of Rust | Sage's Ring | ≤ 7,000 gil | Knot of Rust | Megalixir | |||
| 26 | 55% | 60% | Gil | Item 1 | Item 2 | Gil | Common | Rare |
| ≤ 300 gil | Knot of Rust | Judicer's Staff | ≤ 7,000 gil | Knot of Rust | Megalixir | |||
| 27[1] | 25% | 0% | Gil | Item | Gil | Common | Rare | |
| N/A | Brave Suit | N/A | Knot of Rust | Megalixir | ||||
| 28 | 55% | 60% | Gil | Item 1 | Item 2 | Gil | Common | Rare |
| ≤ 300 gil | Renewing Morion | Ribbon | ≤ 7,000 gil | Knot of Rust | Megalixir | |||
| 29[1] | 40% | 20% | Gil | Item | Gil | Item | ||
| ≤ 5,000 gil | Dark Matter | ≤ 10,000 gil | Fomalhaut | |||||
- 1 - Chest does not respawn.
Story
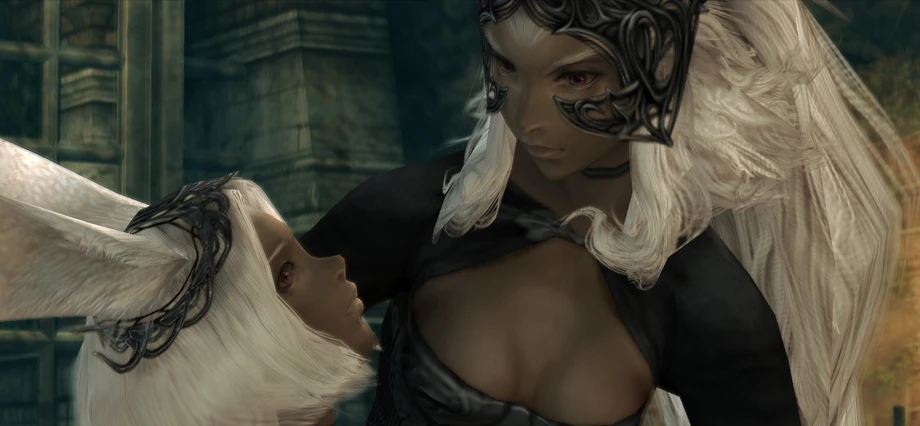

Fran saves Mjrn inside Henne Mines.
The party is on their way to Mt Bur-Omisace when they find they can't get past Golmore Jungle because of the viera's magickal barriers. Fran thinks her younger sister Mjrn could help them, she has gone missing in the mines. The party ventures into the mines looking for her, and find Imperial soldiers dead at the entrance.
The party finally find Mjrn, who has been used for scientific experiments during the Empire's nethicite research, and she has gone Mist-crazy and is possessed by Venat by the time she is found. The party defeat the mist monster Mjrn sends after them and she is released. The party take her back to Eruyt Village.
Later, after the party has acquired ten Espers, Geomancer Yugelu of Jahara will open the way into the deep section of the mines. Zodiark, the thirteenth Esper, can be fought at the very end of the mines.
Quests
Hunts
Ixtab is a Rank II Mark found in the Phase 1 - Shaft area. It becomes available to hunt after the storyline events in Eruyt Village are complete. It is petitioned by High-chief Zayalu in Jahara. Ixtab will use physical attacks, may summon undead monsters to aid him, and also casts Doom and other status ailments.
The Mindflayer is a Rank IV Mark found in the Phase 1 Dig area if the party has full MP. The hunt becomes available after felling Judge Bergan at Mt Bur-Omisace. While the hunt is undertaken, a garif named Asdalu can be spoken to in the Staging Shaft of the Henne Mines. The hunt is petitioned by Warrior Guromu in Jahara.
Rare Game
Glaring Eye can spawn after defeating at least one Hecteyes. There is a 10% chance Glaring Eye will spawn in six possible locations where a Hecteyes has been defeated. In the Zodiac versions, Glaring Eye drops the Scorpion Tail.
To find the Melt the player must have spoken to the "Huntmaster" in Phon Coast and defeated Thalassinon, which will trigger the start of the Rare Game quest. The Melt will then appear in the Henne Mines at Pithead Junction B. It has a 50% chance of appearing when the party flips the gate switch found in the room. Once killed, it will never spawn again.
Grinding spots
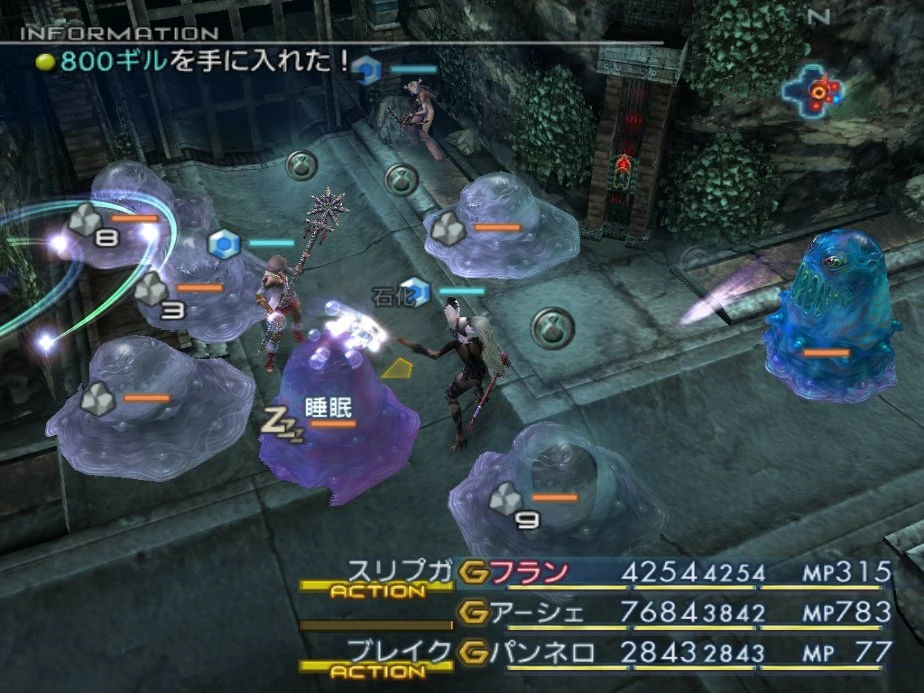

Grinding in Pithead Junction B.
Henne Mines is renowned for two convenient level grinding spots. The first is Pithead Junction B, which is closer to the Gate Crystal. After touching the gate switch in the room, a limited number of Jellies fall from above, and if they die from the Time Magick Break, they will respawn endlessly. If player programs their Gambits correctly, it is possible to sustain an auto-leveling without touching the controller. Besides the Break spell, it is recommended to have another ally to cast Sleepga on the Jellies and another one prepares curative spells to keep the party alive.

Grinding in Pithead Junction C.
The second spot is Pithead Junction C. It is quite far from the Gate Crystal and riskier than Pithead Junction B. After flipping the gate switch Abysteels will appear. They do not respawn endlessly like the Jellies because of immunity against the Break spell, but are vulnerable to Sleep and Disable, and are damaged by curative magick. With the proper gambit set-up, the player can use Sleepga or Disable to neutralize the Abysteels and kill them with Curaja (Renew does not work on them) or Black Magick without waking them up.
Once all the Abysteels are slain, the player must move two areas away and return to spawn more when the switch is flipped again. The Abysteels will leave roughly 3,000 EXP each, which in tandem with their large numbers makes leveling quick and easy. If the party is equipped with Embroidered Tippets, they could potentially earn up to of 100,000 EXP with each press of the switch.
Optional area
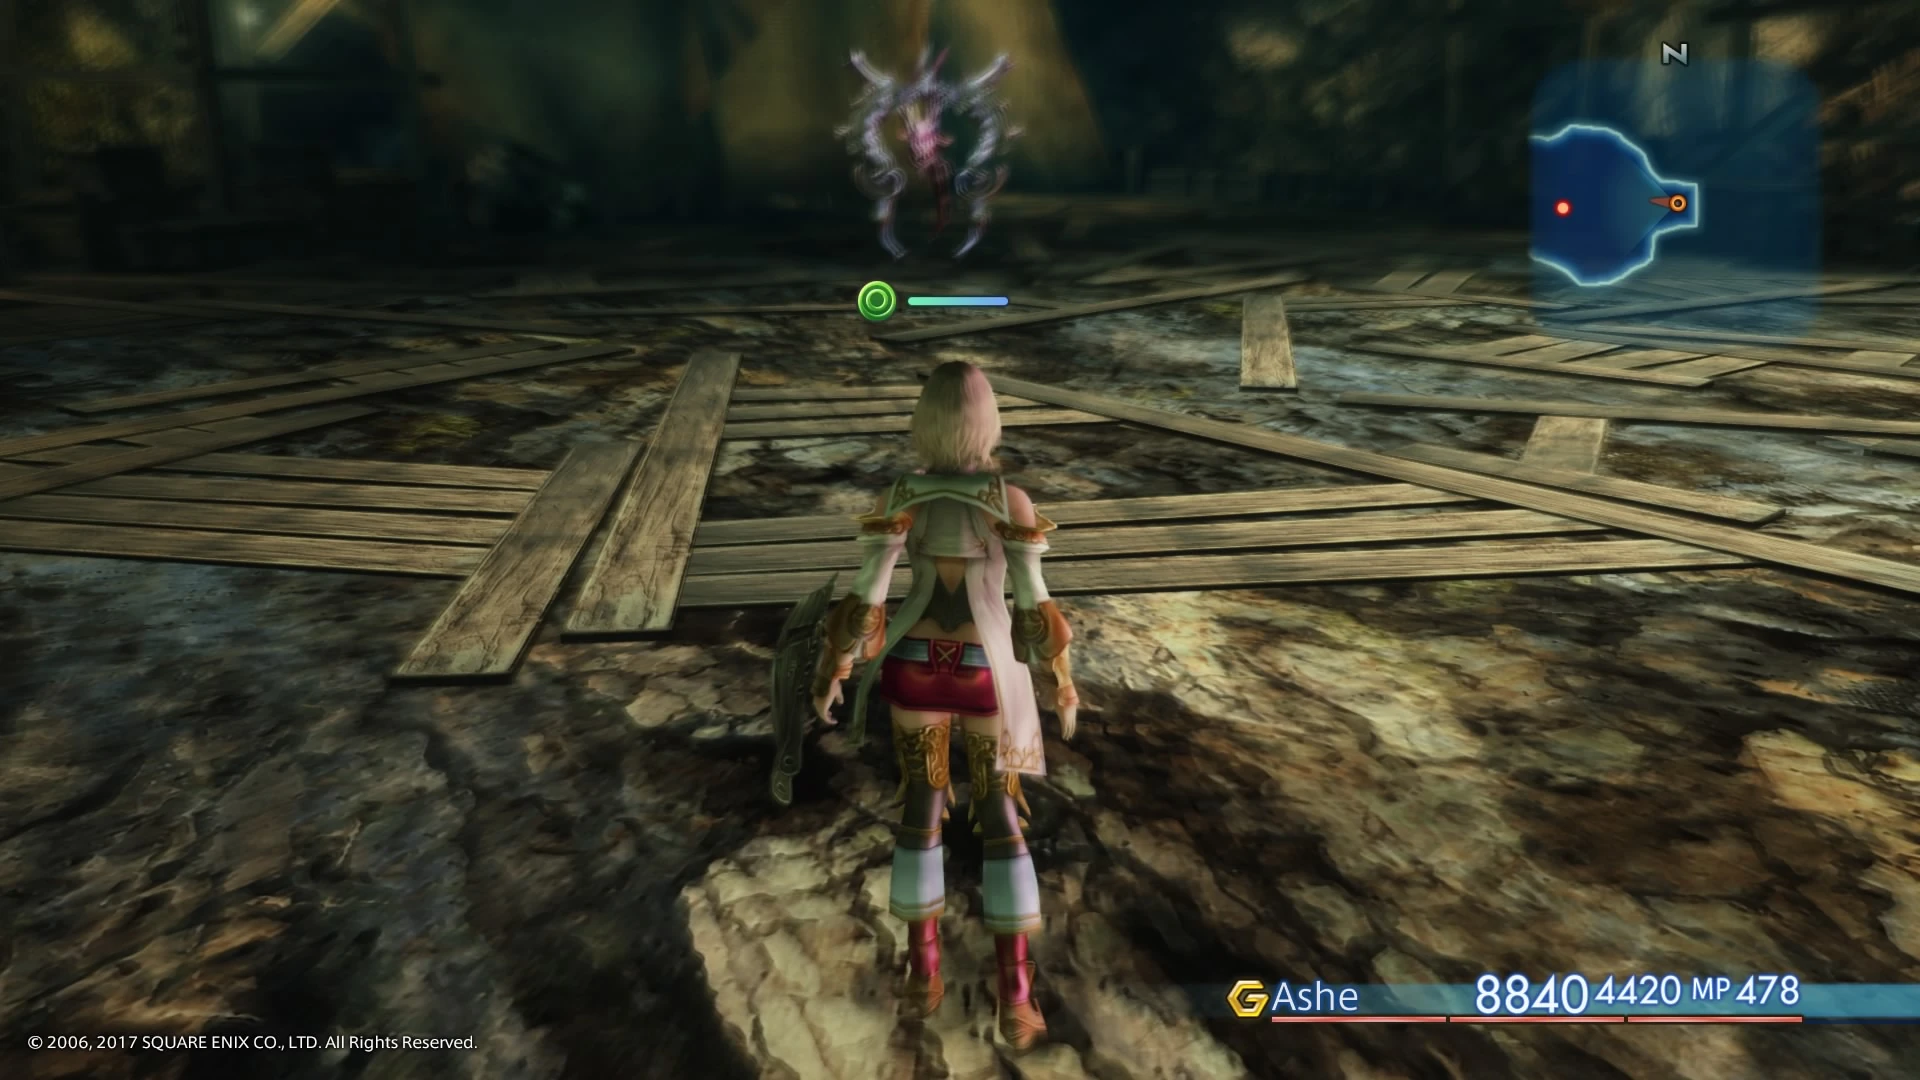

Final area.
The deep section of the Henne Mines is one of the hardest areas, with plenty of strong enemies to face. The geomancer in Jahara opens the path found in Ore Separation once the player has obtained ten Espers.
Some tricks can be used to get past the area more easily. Firstly, the reaper type enemies will ignore the players if under Vanish, so casting Vanishga on them neutralizes them. The player can also use the Immobilize glitch to make all nearby enemies disappear. The enemies here tend to be undead, so casting Curaja on them deals great area damage. Holy-elemental weapons are also good, especially when paired with White Robes.
The player can find some good treasures here (see above section) and at the end of the path, fight Zodiark.
Great Trango, the invisible ultimate one-handed sword added in the Zodiac versions, can be rarely stolen from Zodiark. If the player really wants one, the following strategy can be used in The Zodiac Age version: The player can clear Special Charter Shaft off all enemies, leave, and then return. If there are still enemies around, the player should again kill them and leave and return. The goal is to create an auto-save at the start of Special Charter Shaft to a state where Special Charter Shaft has no enemies. The player can then run to Zodiark's lair unopposed, steal, and if they don't get the Great Trango, start again from the auto-save.
Enemies
- Seeker
- Etém
- Hecteyes
- Jelly
- Nightmare
- Redmaw
- Tyranorox
- Thunderbug
- Abysteel
- Gizamaluk
- Necrofiend
- Glaring Eye (Rare)
- Melt (Rare)
- Ixtab (Mark)
- Mindflayer (Mark)
- Tiamat (Boss)
- Zodiark (Hidden Esper)
Map
The map can be found in the Phase 1 Shaft in the u-shaped section.
The candle to reveal the full map can be found in the east most section of the Phase 2 Dig.
- Areas highlighted in red are hidden passages that do not appear on the map.
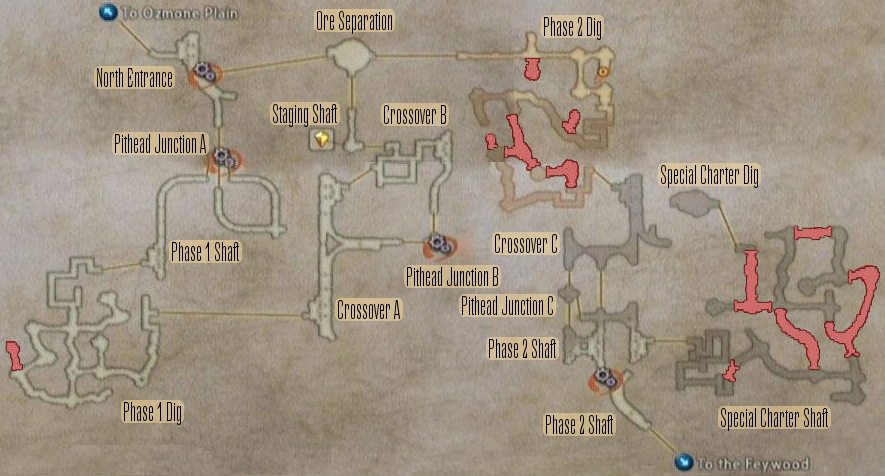
Map from the original Final Fantasy XII that includes all treasure information.
Musical themes
The theme of Henne Mines is "Threat Impendent" (迫る脅威, Semaru Kyōi?).
Other appearances
Final Fantasy Record Keeper
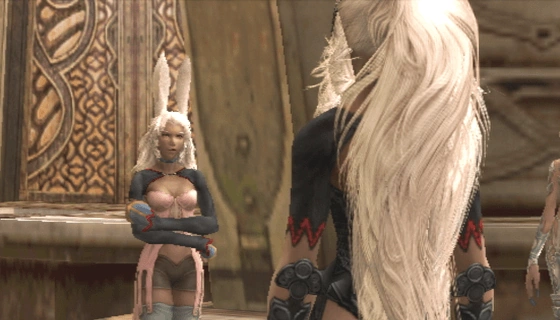
Final Fantasy Brave Exvius
Gallery
")
")
")
")
")
")
")