Intangir Bot (talk | contribs) m (Robot Techno: removing temp cat; cosmetic changes) |
No edit summary |
||
| (36 intermediate revisions by 8 users not shown) | |||
| Line 1: | Line 1: | ||
| − | {{ |
+ | {{sideicon|prime=FFVI|FFRK}} |
| + | {{infobox enemy |
||
| − | {{FFVI Enemy |
||
| + | | release = FFVI |
||
| japanese = ガードリーダー |
| japanese = ガードリーダー |
||
| romaji = Gādo Rīdā |
| romaji = Gādo Rīdā |
||
| + | | image = <gallery> |
||
| ⚫ | |||
| ⚫ | |||
| ⚫ | |||
| + | </gallery> |
||
| + | |location = [[Narshe Mines]] |
||
| + | |type = Boss |
||
| + | |formations = true |
||
| + | |aiscript = true |
||
| ⚫ | |||
| ⚫ | |||
| + | [[File:FFVI Narshe Guard 2.png|left|Field Sprite]] |
||
| ⚫ | The '''Guard Leader''', otherwise known as '''Marshal''', is a [[boss]] in ''[[Final Fantasy VI]]'' fought in the [[Narshe Mines]] when [[Locke Cole/Gameplay|Locke]] and the [[Ten Moogles]] face him and his guards to protect [[Terra Branford|Terra]]. The player may battle the Guard Leader with any of the three [[Party|parties]]. |
||
| + | He's the commander of [[Narshe]]'s defense forces and fights alongside two [[Silver Lobo (Final Fantasy VI)|Silver Lobos]], overseeing the operation from the other side of the room. |
||
| + | |||
| + | == Stats == |
||
| + | {{infobox enemy stats FFVI |
||
| snes = Marshal |
| snes = Marshal |
||
| ps = Marshal |
| ps = Marshal |
||
| gba = Guard Leader |
| gba = Guard Leader |
||
| ios = Guard Leader |
| ios = Guard Leader |
||
| ⚫ | |||
| ⚫ | |||
| ⚫ | |||
| gba prev = Ymir (Final Fantasy VI) |
| gba prev = Ymir (Final Fantasy VI) |
||
| gba bestiary = 278 |
| gba bestiary = 278 |
||
| − | | gba next = Magitek Armor ( |
+ | | gba next = Magitek Armor (enemy) |
| ios prev = Ice Dragon (Final Fantasy VI) |
| ios prev = Ice Dragon (Final Fantasy VI) |
||
| ios boss = 011 |
| ios boss = 011 |
||
| − | | ios next = Magitek Armor ( |
+ | | ios next = Magitek Armor (enemy) |
| snes location = [[Narshe Mines]] |
| snes location = [[Narshe Mines]] |
||
| gba location = [[Narshe Mines]] |
| gba location = [[Narshe Mines]] |
||
| Line 33: | Line 48: | ||
| morph miss rate = 100% |
| morph miss rate = 100% |
||
| poison = Weak |
| poison = Weak |
||
| − | | snes steal 1 = [[Mythril |
+ | | snes steal 1 = [[Final Fantasy VI weapons#Mythril Knife|Mythril Knife]] |
| − | | snes |
+ | | snes drop 1 = [[Final Fantasy VI items#Hi-Potion|Potion]] |
| − | | snes |
+ | | snes drop 2 = [[Final Fantasy VI items#Hi-Potion|Potion]] |
| + | | morph id = 0 |
||
| − | | snes special attack = [[ |
+ | | snes special attack = [[Final Fantasy VI enemy abilities#Charge|Charge]] (Level 2 = Attack x 2) |
| − | | snes rage = Battle, [[Wind Slash (Ability)|Wind Slash]] |
||
| − | | snes |
+ | | snes rage = Battle, [[Final Fantasy VI enemy abilities#Wind Slash|Wind Slash]] |
| − | | snes |
+ | | snes sketch = Battle, [[Final Fantasy VI enemy abilities#Charge|Charge]] |
| + | | snes control = Battle, [[Final Fantasy VI enemy abilities#Charge|Charge]], [[Final Fantasy VI enemy abilities#Thundara|Bolt 2]] |
||
| − | | gba steal 1 = [[Mythril |
+ | | gba steal 1 = [[Final Fantasy VI weapons#Mythril Knife|Mythril Knife]] |
| − | | gba always drop = [[Hi-Potion]] |
||
| − | | gba |
+ | | gba always drop 1 = [[Final Fantasy VI items#Hi-Potion|Hi-Potion]] |
| + | | gba drop 2 = [[Final Fantasy VI items#Hi-Potion|Hi-Potion]] |
||
| − | | gba special attack = [[ |
+ | | gba special attack = [[Final Fantasy VI enemy abilities#Charge|Charge]] (Level 2 = Attack x 2) |
| − | | gba rage = Attack, [[Wind Slash (Ability)|Wind Slash]] |
||
| − | | gba |
+ | | gba rage = Attack, [[Final Fantasy VI enemy abilities#Wind Slash|Wind Slash]] |
| − | | gba |
+ | | gba sketch = Attack, [[Final Fantasy VI enemy abilities#Charge|Charge]] |
| + | | gba control = Attack, [[Final Fantasy VI enemy abilities#Charge|Charge]], [[Final Fantasy VI enemy abilities#Thundara|Thundara]] |
||
| poison status = Immune |
| poison status = Immune |
||
| invisible = Immune |
| invisible = Immune |
||
| Line 52: | Line 68: | ||
| first strike = true |
| first strike = true |
||
| cannot escape = true |
| cannot escape = true |
||
| − | | snes normal attack = Dirk |
+ | | snes normal attack = [[Final Fantasy VI weapons#Dagger|Dirk]] |
| − | | gba normal attack = Dagger |
+ | | gba normal attack = [[Final Fantasy VI weapons#Dagger|Dagger]] |
| − | | snes other abilities = Net |
+ | | snes other abilities = [[Final Fantasy VI enemy abilities#Net|Net]] |
| − | | gba other abilities = Net |
+ | | gba other abilities = [[Final Fantasy VI enemy abilities#Net|Net]] |
}} |
}} |
||
| ⚫ | |||
| ⚫ | The '''Guard Leader''', otherwise known as '''Marshal''', is a boss in ''[[Final Fantasy VI]]'' fought in the [[Narshe Mines]] when [[Locke Cole|Locke]] and the [[Ten Moogles]] |
||
| − | ==Battle== |
+ | == Battle == |
| − | The Guard Leader is flanked by two |
+ | The Guard Leader is flanked by two Silver Lobos, which are easily dispatched. When the Silver Lobos are alive, he will use Net to inflict [[Stop (status)|Stop]] on one character, stopping them from most of the [[Battle (term)|battle]]. Once the Silver Lobos are dead, Guard Leader begins attacking with [[Charge (physical attack ability)|Charge]], a powerful physical attack. |
| ⚫ | If any of the three parties attempting to battle Guard Leader are defeated, they are revived with 1 HP per character. If the player wishes to steal multiple Mythril Knives, it is possible to repeatedly battle with Locke's group, and attempt a steal each time, then defeat Guard Leader with another group when ready to move on. However, having multiple copies of the knife is not really useful. |
||
| ⚫ | |||
| ⚫ | |||
| ⚫ | If any of the three parties attempting to battle Guard Leader are defeated, they are revived with 1 HP per character. If |
||
| − | == |
+ | ===Strategy=== |
| + | One strategy is to fight with [[Mog (Final Fantasy VI)/Gameplay|Mog]]'s party, as Mog has the [[Dance (Final Fantasy VI)#Twilight Requiem|Twilight Requiem]] Dance that will kill the Guard Leader in one hit if he attacks with [[Sinkhole|Snare]]. |
||
| + | |||
| + | Another strategy is to bring Locke's party so he can try to [[steal]] a [[Mythril Knife (Final Fantasy VI)|Mythril Knife]]. However, the knife is not an essential, and the player can also unequip Mog before Locke engages the leader to keep his spear, useful to equip to a character that will join soon after this segment. |
||
| + | |||
| + | == Formations == |
||
| + | {|class="full-width article-table FFVI" style="text-align:center" |
||
| + | |-class="a" |
||
| + | !rowspan="2" style="width:10%"|Number |
||
| + | !rowspan="2" style="width:25%"|Enemies |
||
| + | !colspan="4" style="width:10%"|Encounter flags |
||
| + | !rowspan="2" style="width:10%"|Introduction flag |
||
| + | !rowspan="2" style="width:10%"|Musical theme |
||
| + | !rowspan="2" style="width:5%"|Magic AP |
||
| + | |-class="a" |
||
| + | !style="width:2.5%"|Normal |
||
| + | !style="width:2.5%"|Back |
||
| + | !style="width:2.5%"|Surrounded |
||
| + | !style="width:2.5%"|Side |
||
| + | |- |
||
| + | !class="b"|{{A|004}} |
||
| + | |[[Silver Lobo (Final Fantasy VI)|Silver Lobo]] x2, Guard Leader |
||
| + | |{{y}} |
||
| + | |{{x}} |
||
| + | |{{x}} |
||
| + | |{{x}} |
||
| + | |Sides, individual |
||
| + | |[[The Decisive Battle (Final Fantasy VI)|The Decisive Battle]] |
||
| + | |0 |
||
| + | |- |
||
| + | |} |
||
| + | |||
| + | == AI script == |
||
Attack Turns:<br/> |
Attack Turns:<br/> |
||
1st Turn: Attack (66%) or Net (33%)<br/> |
1st Turn: Attack (66%) or Net (33%)<br/> |
||
| Line 76: | Line 122: | ||
If monster is by itself: Attack (33%) or Charge (66%) |
If monster is by itself: Attack (33%) or Charge (66%) |
||
| + | == Other appearances == |
||
| ⚫ | |||
| + | === ''[[Final Fantasy Record Keeper]]'' === |
||
| − | {{Gallery |
||
| − | + | [[File:FFRK Guard Leader FFVI.png|right]] |
|
| + | Guard Leader appears as a boss, fought in the Record of the Abandoned Mineshaft. |
||
| ⚫ | |||
| + | |||
| ⚫ | |||
| + | ;Target Score |
||
| ⚫ | |||
| + | * Defeat the Guard Leader before he uses Charge |
||
| + | |||
| + | ;Abilities |
||
| + | * '''Attack''' |
||
| + | * '''Net:''' Temporarily Stops one target |
||
| + | * '''Charge:''' Rush one target for strong physical damage |
||
| + | <!--Gale Cut?--> |
||
| + | |||
| + | ;Strategy |
||
| + | As in his source game, the Guard Leader is fronted by two Silver Lobos. While a player's natural inclination might be to rush the flunkies before taking on the big guy himself, this is once again a case in which first instincts could cost the party dearly; the Guard Leader will unleash his Charge attack to try and take the party down. Use a triangular assault pattern to avoid this threat; take a wolf, then charge him even as the remaining wolf is still attacking. The Nets he throws are mildly annoying at best, but he will fall easily. |
||
| + | |||
| + | If defeated on Elite difficulty with a Bonus Quest in play. the player could acquire [[Mog (Final Fantasy VI)/Other appearances#Final Fantasy Record Keeper|Mog]] between [[Back to the Skies]] and the Quest system's retirement. Here, Mog is a dancer, a capable fighter and Red Mage whose [[Soul Break]]s assist his party in a variety of ways. |
||
| + | {{clear}} |
||
| + | |||
| ⚫ | |||
| + | <gallery> |
||
| + | FFVI Net.png|Net. |
||
| ⚫ | |||
| ⚫ | |||
| + | </gallery> |
||
| − | ==Related |
+ | == Related enemies == |
| − | *[[Guard (Final Fantasy VI)|Guard]] |
+ | * [[Guard (Final Fantasy VI)|Guard]] |
| − | *[[Living Dead]] |
+ | * [[Living Dead (Final Fantasy VI)|Living Dead]] |
| ⚫ | |||
[[de:Hauptmann (FFVI)]] |
[[de:Hauptmann (FFVI)]] |
||
[[ru:Начальник Стражи]] |
[[ru:Начальник Стражи]] |
||
| + | [[Category:Bosses in Final Fantasy VI]] |
||
| ⚫ | |||
Revision as of 19:27, 7 April 2020
Template:Sideicon
Mog can easily win here with his Dusk Requiem dance, Make sure he's in the party you use to attack the Marshal.
Final Fantasy VI PlayStation Bestiary entry
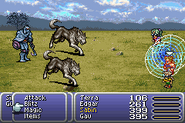
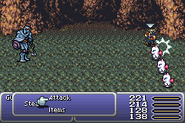
The Guard Leader, otherwise known as Marshal, is a boss in Final Fantasy VI fought in the Narshe Mines when Locke and the Ten Moogles face him and his guards to protect Terra. The player may battle the Guard Leader with any of the three parties. He's the commander of Narshe's defense forces and fights alongside two Silver Lobos, overseeing the operation from the other side of the room.
Stats
Battle
The Guard Leader is flanked by two Silver Lobos, which are easily dispatched. When the Silver Lobos are alive, he will use Net to inflict Stop on one character, stopping them from most of the battle. Once the Silver Lobos are dead, Guard Leader begins attacking with Charge, a powerful physical attack.
If any of the three parties attempting to battle Guard Leader are defeated, they are revived with 1 HP per character. If the player wishes to steal multiple Mythril Knives, it is possible to repeatedly battle with Locke's group, and attempt a steal each time, then defeat Guard Leader with another group when ready to move on. However, having multiple copies of the knife is not really useful.
The Guard Leader is one of the few bosses to appear on the Veldt and have a Rage.
Strategy
One strategy is to fight with Mog's party, as Mog has the Twilight Requiem Dance that will kill the Guard Leader in one hit if he attacks with Snare.
Another strategy is to bring Locke's party so he can try to steal a Mythril Knife. However, the knife is not an essential, and the player can also unequip Mog before Locke engages the leader to keep his spear, useful to equip to a character that will join soon after this segment.
Formations
| Number | Enemies | Encounter flags | Introduction flag | Musical theme | Magic AP | |||
|---|---|---|---|---|---|---|---|---|
| Normal | Back | Surrounded | Side | |||||
| 004 | Silver Lobo x2, Guard Leader | Sides, individual | The Decisive Battle | 0 | ||||
AI script
Attack Turns:
1st Turn: Attack (66%) or Net (33%)
2nd Turn: Attack (100%)
3rd Turn: Net (66%) or Attack (33%)
4th Turn: Attack (100%)
If monster is by itself: Attack (33%) or Charge (66%)
Other appearances
Final Fantasy Record Keeper
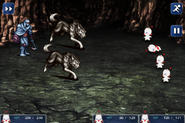
Guard Leader appears as a boss, fought in the Record of the Abandoned Mineshaft.
- Target Score
- Defeat the Guard Leader before he uses Charge
- Abilities
- Attack
- Net: Temporarily Stops one target
- Charge: Rush one target for strong physical damage
- Strategy
As in his source game, the Guard Leader is fronted by two Silver Lobos. While a player's natural inclination might be to rush the flunkies before taking on the big guy himself, this is once again a case in which first instincts could cost the party dearly; the Guard Leader will unleash his Charge attack to try and take the party down. Use a triangular assault pattern to avoid this threat; take a wolf, then charge him even as the remaining wolf is still attacking. The Nets he throws are mildly annoying at best, but he will fall easily.
If defeated on Elite difficulty with a Bonus Quest in play. the player could acquire Mog between Back to the Skies and the Quest system's retirement. Here, Mog is a dancer, a capable fighter and Red Mage whose Soul Breaks assist his party in a variety of ways.


