Tag: Source edit |
No edit summary |
||
| (23 intermediate revisions by 5 users not shown) | |||
| Line 1: | Line 1: | ||
| − | {{sideicon|prime=FFXII|FFBE}} |
||
{{DISPLAYTITLE:Great Crystal (''Final Fantasy XII'')}} |
{{DISPLAYTITLE:Great Crystal (''Final Fantasy XII'')}} |
||
{{infobox location |
{{infobox location |
||
| Line 31: | Line 30: | ||
*[[#Finding Omega Mark XII|Finding Omega Mark XII]] |
*[[#Finding Omega Mark XII|Finding Omega Mark XII]] |
||
}} |
}} |
||
| − | {{Dialogue|Ashe|With that much nethicite in one's |
+ | {{Dialogue|Ashe|With that much nethicite in one's grasp—|Fran|You could destroy all of Ivalice. If you wished it.|context=Ashe and Fran talking about the Great Crystal}} |
| − | The '''Great Crystal''' is a location in the land of [[Ivalice (Final Fantasy XII)|Ivalice]] in ''[[Final Fantasy XII]]''. It is a large [[Crystal (term)|crystal]] located in the deepest reaches of the [[Giruvegan]] |
+ | The '''Great Crystal''' is a location in the land of [[Ivalice (Final Fantasy XII)|Ivalice]] in ''[[Final Fantasy XII]]''. It is a large [[Crystal (term)|crystal]] located in the deepest reaches of the [[Giruvegan]]. |
| − | The core of the crystal is a great orb of [[magicite]], constantly spewing [[Mist (Final Fantasy XII)|Mist]]. The party speculates that it might be [[nethicite]]. While its purpose is never revealed, the Great Crystal could be the [[Occuria]]'s deposit of nethicite, or perhaps the source of magicite and Mist. Whatever the case, it acts as a deadly gateway to the Occurian dwelling, filled with powerful [[Monster (term)|monsters]] and a twisting maze. Also sealed within are the fearsome prisoners, the [[Esper (Final Fantasy XII)|Espers]] |
+ | The core of the crystal is a great orb of [[magicite]], constantly spewing [[Mist (Final Fantasy XII)|Mist]]. The [[party]] speculates that it might be [[nethicite]]. While its purpose is never revealed, the Great Crystal could be the [[Occuria]]'s deposit of nethicite, or perhaps the source of magicite and Mist. Whatever the case, it acts as a deadly gateway to the Occurian dwelling, filled with powerful [[Monster (term)|monsters]] and a twisting maze. Also sealed within are the fearsome prisoners, the [[Esper (Final Fantasy XII)|Espers]] [[Ultima (Final Fantasy XII boss)|Ultima]] and [[Shemhazai (Final Fantasy XII boss)|Shemhazai]]. |
==Story== |
==Story== |
||
{{Spoiler}} |
{{Spoiler}} |
||
| − | {{Quote|By this path and no other, reach ye the Round of the Undying, walk of the Chosen.|Empyrean Way Stone}} |
+ | {{Quote|By this path, and no other, reach ye the Round of the Undying, walk of the Chosen.|Empyrean Way Stone}} |
| − | [[Ashelia B'nargin Dalmasca|Princess Ashe]] and her comrades come to Great Crystal in their hunt for [[Cidolfus Demen Bunansa|Dr. Cid]] who claimed he is taking the [[Archadia|Empire's]] pieces of deifacted nethicite with him to Giruvegan. As the party arrives on the gates of the ancient city they can't see Cid, and prompted by an apparition of her late husband, [[Rasler Heios Nabradia|Lord Rasler]], Ashe ventures deeper into the ruins where the party finds Great Crystal at its core. |
+ | [[Ashelia B'nargin Dalmasca|Princess Ashe]] and her comrades come to the Great Crystal in their hunt for [[Cidolfus Demen Bunansa|Dr. Cid]] who claimed he is taking the [[Archadia|Empire's]] pieces of deifacted nethicite with him to Giruvegan. As the party arrives on the gates of the ancient city they can't see Cid, and prompted by an apparition of her late husband, [[Rasler Heios Nabradia|Lord Rasler]], Ashe ventures deeper into the ruins where the party finds the Great Crystal at its core. |
[[File:Ashe-receives-Treaty-Blade.png|thumb|Ashe receives the Treaty-Blade.]] |
[[File:Ashe-receives-Treaty-Blade.png|thumb|Ashe receives the Treaty-Blade.]] |
||
| Line 51: | Line 50: | ||
===Navigation=== |
===Navigation=== |
||
| + | The Great Crystal is divided in two halves: the section that is part of the storyline and rather straightforward, and the optional section that opens up only after the story portion has been completed. In contrast to other locations in the game, the player will not be able to view a detailed map of the area, but a sketch of the outside of the crystal and an indicator showing an approximation of where they are from the outside (near the bottom, as opposed to near the top). The player may use the unique naming system for the crystal's areas as a reference to where they currently are. |
||
| − | The Great Crystal is difficult to navigate due to there not being a full map. The player may use the unique naming system for the crystal's areas (see below) to navigate the crystal. There is also a full map in the gallery at the bottom of this page. |
||
| ⚫ | Further complicating navigation are the zodiac gates that block some of the paths between areas. Each gate has a stone that deactivates it, indicated by the shared name (e.g. the Pisces Gate Stone deactivates Gate Pisces). In the storyline area, they behave much like those in Giruvegan—once activated, the corresponding gate is removed. However, in the optional area, each stone can open one of two gates (e.g. the Leo Gate Stone can open either Gate Leo I or Gate Leo II). |
||
| − | The Great Crystal is divided in two halves: the section that is part of the storyline and rather straightforward, and the optional section that opens up only after the story in the place has been completed. |
||
| − | |||
| ⚫ | |||
Crucially, only one of the pair can be open at any one time. When the stone is activated, both gates are closed and a countdown timer activates. The player has to reach whichever gate requires opening, and activate it within the time limit to remove the gate. The time varies between stones, and is sufficient to reach either gate if the player goes directly there without engaging in too much combat. The state of the gates is retained for future visits. |
Crucially, only one of the pair can be open at any one time. When the stone is activated, both gates are closed and a countdown timer activates. The player has to reach whichever gate requires opening, and activate it within the time limit to remove the gate. The time varies between stones, and is sufficient to reach either gate if the player goes directly there without engaging in too much combat. The state of the gates is retained for future visits. |
||
===Location names=== |
===Location names=== |
||
| − | + | The names of each the areas resemble Sanskrit, but are actually contractions and bastardizations of English words and some scientific terms, which help to indicate where the player is: |
|
{{multicol-begin|1}} |
{{multicol-begin|1}} |
||
{|class="half-width FFXII article-table" |
{|class="half-width FFXII article-table" |
||
| + | |- |
||
| − | |-class="a" |
||
!width="20%|Name |
!width="20%|Name |
||
!width="20%"|Meaning |
!width="20%"|Meaning |
||
!width="60%"|Purpose |
!width="60%"|Purpose |
||
|- |
|- |
||
| + | !A |
||
| − | !class="b"|A |
||
|Up |
|Up |
||
|rowspan="5"|A, Dha, Si, Ra, and Vikaari are used to indicate where a teleporter will take the party. "A Vikaari" means move up a layer and "Dha Vikaari" means to move down a layer. |
|rowspan="5"|A, Dha, Si, Ra, and Vikaari are used to indicate where a teleporter will take the party. "A Vikaari" means move up a layer and "Dha Vikaari" means to move down a layer. |
||
|- |
|- |
||
| − | ! |
+ | !Dha |
|Down |
|Down |
||
|- |
|- |
||
| − | ! |
+ | !Vikaari |
|Shift |
|Shift |
||
|- |
|- |
||
| − | ! |
+ | !Si |
|Shift |
|Shift |
||
|- |
|- |
||
| − | ! |
+ | !Ra |
|Shift |
|Shift |
||
|- |
|- |
||
| − | ! |
+ | !Peak |
|Peak |
|Peak |
||
|rowspan="9"|Crystal Peak is obviously the top. Kanbhru, Oldobii, Sirhru, Dhebon, Kabonii, Bhrum, Trahk, and Jula are all named after prehistoric periods, with the oldest coming highest inside the Great Crystal. Crystal Core is obviously the Central Core. |
|rowspan="9"|Crystal Peak is obviously the top. Kanbhru, Oldobii, Sirhru, Dhebon, Kabonii, Bhrum, Trahk, and Jula are all named after prehistoric periods, with the oldest coming highest inside the Great Crystal. Crystal Core is obviously the Central Core. |
||
|- |
|- |
||
| − | ! |
+ | !Kanbhru |
|Cambrian |
|Cambrian |
||
|- |
|- |
||
| − | ! |
+ | !Oldobii |
|Ordovician |
|Ordovician |
||
|- |
|- |
||
| − | ! |
+ | !Sirhru |
|Silurian |
|Silurian |
||
|- |
|- |
||
| − | ! |
+ | !Dhebon |
|Devonian |
|Devonian |
||
|- |
|- |
||
| − | ! |
+ | !Kabonii |
|Carboniferous |
|Carboniferous |
||
|- |
|- |
||
| − | ! |
+ | !Bhrum |
|Permian |
|Permian |
||
|- |
|- |
||
| − | ! |
+ | !Trahk |
|Triassic |
|Triassic |
||
|- |
|- |
||
| − | ! |
+ | !Core |
|Core |
|Core |
||
|- |
|- |
||
|} |
|} |
||
{|class="half-width FFXII article-table" |
{|class="half-width FFXII article-table" |
||
| + | |- |
||
| − | |-class="a" |
||
!width="20%|Name |
!width="20%|Name |
||
!width="20%"|Meaning |
!width="20%"|Meaning |
||
!width="60%"|Purpose |
!width="60%"|Purpose |
||
|- |
|- |
||
| − | ! |
+ | !Udii |
|North |
|North |
||
|rowspan="8"|Udii, Avaa, Praa, and Pratii indicate North, South, East, and West directions in relation to the core. |
|rowspan="8"|Udii, Avaa, Praa, and Pratii indicate North, South, East, and West directions in relation to the core. |
||
|- |
|- |
||
| − | ! |
+ | !Udiipraa |
|Northeast |
|Northeast |
||
|- |
|- |
||
| − | ! |
+ | !Praa |
|East |
|East |
||
|- |
|- |
||
| − | ! |
+ | !Praa'vaa |
|Southeast |
|Southeast |
||
|- |
|- |
||
| − | ! |
+ | !Avaa |
|South |
|South |
||
|- |
|- |
||
| − | ! |
+ | !Pratii'vaa |
|Southwest |
|Southwest |
||
|- |
|- |
||
| − | ! |
+ | !Pratii |
|West |
|West |
||
|- |
|- |
||
| − | ! |
+ | !Pratii'dii |
|Northwest |
|Northwest |
||
|- |
|- |
||
| − | ! |
+ | !Pis |
|Pith |
|Pith |
||
|rowspan="3"|Pis, Jilaam, and Phullam indicate the interior, central and exterior part of a plant and are used to show distance from the core inside the Great Crystal. |
|rowspan="3"|Pis, Jilaam, and Phullam indicate the interior, central and exterior part of a plant and are used to show distance from the core inside the Great Crystal. |
||
|- |
|- |
||
| − | ! |
+ | !Jilaam |
|Xylem |
|Xylem |
||
|- |
|- |
||
| − | ! |
+ | !Phullam |
|Phloem |
|Phloem |
||
|- |
|- |
||
| − | ! |
+ | !Prama |
|Ground |
|Ground |
||
|Crystal Ground is where the Waystone links the player with Giruvegan. |
|Crystal Ground is where the Waystone links the player with Giruvegan. |
||
|- |
|- |
||
| − | ! |
+ | !Sthaana |
|Set |
|Set |
||
|Sthaana indicates a location with a Gate switch. |
|Sthaana indicates a location with a Gate switch. |
||
| Line 169: | Line 166: | ||
==Treasures== |
==Treasures== |
||
{{See|Treasure (Final Fantasy XII)}} |
{{See|Treasure (Final Fantasy XII)}} |
||
| − | The original version |
+ | The original version and the ''Zodiac'' versions have different treasures. In the original, equipping the Diamond Armlet or not determines what the player gets, making it easy to miss something valuable, whereas the ''Zodiac'' versions are more forgiving. The equipment and ability treasures can only be claimed once, bar the [[Gendarme (Final Fantasy XII)|Gendarme]]. The basic item received from chests is also changed from [[Knot of Rust (Final Fantasy XII)|Knot of Rust]] to various versions of the [[Meteorite (A)|Meteorite item]]. |
| + | See [[#Maps|maps]] for more information. |
||
| − | Great Crystal has various good treasures in both versions. Also see [[#Maps|maps]] at the bottom of this page. |
||
===Kabonii Jilaam Pratii'vaa=== |
===Kabonii Jilaam Pratii'vaa=== |
||
;Zodiac |
;Zodiac |
||
{|class="full-width FFXII article-table" style="text-align:center" |
{|class="full-width FFXII article-table" style="text-align:center" |
||
| + | |- |
||
| − | |-class="a" |
||
!style="width:20%"|Chest |
!style="width:20%"|Chest |
||
!style="width:10%"|Spawns |
!style="width:10%"|Spawns |
||
| Line 184: | Line 181: | ||
!style="width:25%" colspan="2"|Diamond Armlet Treasure |
!style="width:25%" colspan="2"|Diamond Armlet Treasure |
||
|- |
|- |
||
| − | ! |
+ | !1{{note|Chest does not respawn.}} |
|100% |
|100% |
||
|0% |
|0% |
||
| Line 190: | Line 187: | ||
|colspan="4"|[[Cloud Staff (Final Fantasy XII)|Cloud Staff]] |
|colspan="4"|[[Cloud Staff (Final Fantasy XII)|Cloud Staff]] |
||
|} |
|} |
||
| − | {{ |
+ | {{annotations}} |
;Original |
;Original |
||
{|class="full-width FFXII article-table" style="text-align:center" |
{|class="full-width FFXII article-table" style="text-align:center" |
||
| + | |- |
||
| − | |-class="a" |
||
!style="width:20%"|Chest |
!style="width:20%"|Chest |
||
!style="width:10%"|Spawns |
!style="width:10%"|Spawns |
||
| Line 200: | Line 197: | ||
!style="width:30%" colspan="3"|Diamond Armlet Treasure |
!style="width:30%" colspan="3"|Diamond Armlet Treasure |
||
|- |
|- |
||
| − | ! |
+ | ! rowspan="2"|1{{note|Chest does not respawn.}} |
|rowspan="2"|100% |
|rowspan="2"|100% |
||
|rowspan="2"|0% |
|rowspan="2"|0% |
||
| − | ! |
+ | ! width="10%"|Gil |
| − | ! |
+ | ! width="10%"|Item 1 |
| − | ! |
+ | ! width="10%"|Item 2 |
| − | ! |
+ | ! width="10%"|Gil |
| − | ! |
+ | ! width="10%"|Common |
| − | ! |
+ | ! width="10%"|Rare |
|- |
|- |
||
|N/A |
|N/A |
||
|Elixir |
|Elixir |
||
| − | |[[Final Fantasy XII |
+ | |[[Black Mask (Final Fantasy XII)|Black Mask]] |
|N/A |
|N/A |
||
| − | |[[Final Fantasy XII |
+ | |[[Black Mask (Final Fantasy XII)|Black Mask]] |
|Knot of Rust |
|Knot of Rust |
||
|} |
|} |
||
| − | {{ |
+ | {{annotations}} |
{{clear}} |
{{clear}} |
||
===Kabonii Jilaam Avaa=== |
===Kabonii Jilaam Avaa=== |
||
| Line 223: | Line 220: | ||
{|class="full-width FFXII article-table" style="text-align:center" |
{|class="full-width FFXII article-table" style="text-align:center" |
||
| + | |- |
||
| − | |-class="a" |
||
!style="width:20%"|Chest |
!style="width:20%"|Chest |
||
!style="width:10%"|Spawns |
!style="width:10%"|Spawns |
||
| Line 231: | Line 228: | ||
!style="width:25%" colspan="2"|Diamond Armlet Treasure |
!style="width:25%" colspan="2"|Diamond Armlet Treasure |
||
|- |
|- |
||
| − | ! |
+ | !2{{note|Chest does not respawn.}} |
|100% |
|100% |
||
|0% |
|0% |
||
| Line 237: | Line 234: | ||
|colspan="4"|[[Thief's Cap (Final Fantasy XII)|Thief's Cap]] |
|colspan="4"|[[Thief's Cap (Final Fantasy XII)|Thief's Cap]] |
||
|} |
|} |
||
| − | {{ |
+ | {{annotations}} |
{{clear}} |
{{clear}} |
||
===Bhrum Pis Avaa=== |
===Bhrum Pis Avaa=== |
||
;Zodiac |
;Zodiac |
||
{|class="full-width FFXII article-table" style="text-align:center" |
{|class="full-width FFXII article-table" style="text-align:center" |
||
| + | |- |
||
| − | |-class="a" |
||
!style="width:20%"|Chest |
!style="width:20%"|Chest |
||
!style="width:10%"|Spawns |
!style="width:10%"|Spawns |
||
| Line 250: | Line 247: | ||
!style="width:25%" colspan="2"|Diamond Armlet Treasure |
!style="width:25%" colspan="2"|Diamond Armlet Treasure |
||
|- |
|- |
||
| − | ! |
+ | !3{{note|Chest does not respawn.}} |
|100% |
|100% |
||
|0% |
|0% |
||
| Line 256: | Line 253: | ||
|colspan="4"|[[Holy Rod (Final Fantasy XII)|Holy Rod]] |
|colspan="4"|[[Holy Rod (Final Fantasy XII)|Holy Rod]] |
||
|} |
|} |
||
| − | {{ |
+ | {{annotations}} |
;Original |
;Original |
||
{|class="full-width FFXII article-table" style="text-align:center" |
{|class="full-width FFXII article-table" style="text-align:center" |
||
| + | |- |
||
| − | |-class="a" |
||
!style="width:20%"|Chest |
!style="width:20%"|Chest |
||
!style="width:10%"|Spawns |
!style="width:10%"|Spawns |
||
| Line 266: | Line 263: | ||
!style="width:30%" colspan="3"|Diamond Armlet Treasure |
!style="width:30%" colspan="3"|Diamond Armlet Treasure |
||
|- |
|- |
||
| − | ! |
+ | ! rowspan="2"|2{{note|Chest does not respawn.}} |
|rowspan="2"|100% |
|rowspan="2"|100% |
||
|rowspan="2"|0% |
|rowspan="2"|0% |
||
| − | ! |
+ | ! width="10%"|Gil |
| − | ! |
+ | ! width="10%"|Item 1 |
| − | ! |
+ | ! width="10%"|Item 2 |
| − | ! |
+ | ! width="10%"|Gil |
| − | ! |
+ | ! width="20%" colspan="2"|Item |
|- |
|- |
||
|N/A |
|N/A |
||
|Knot of Rust |
|Knot of Rust |
||
| − | |[[Final Fantasy XII |
+ | |[[White Robes (Final Fantasy XII)|White Robes]] |
|N/A |
|N/A |
||
|colspan="2"|Knot of Rust |
|colspan="2"|Knot of Rust |
||
|} |
|} |
||
| − | {{ |
+ | {{annotations}} |
{{clear}} |
{{clear}} |
||
===Bhrum Pis Pratii=== |
===Bhrum Pis Pratii=== |
||
| Line 287: | Line 284: | ||
{|class="full-width FFXII article-table" style="text-align:center" |
{|class="full-width FFXII article-table" style="text-align:center" |
||
| + | |- |
||
| − | |-class="a" |
||
!style="width:20%"|Chest |
!style="width:20%"|Chest |
||
!style="width:10%"|Spawns |
!style="width:10%"|Spawns |
||
| Line 295: | Line 292: | ||
!style="width:25%" colspan="2"|Diamond Armlet Treasure |
!style="width:25%" colspan="2"|Diamond Armlet Treasure |
||
|- |
|- |
||
| − | ! |
+ | !4{{note|Chest does not respawn.}} |
|100% |
|100% |
||
|0% |
|0% |
||
| Line 301: | Line 298: | ||
|colspan="4"|[[Gold Hairpin (Final Fantasy XII)|Gold Hairpin]] |
|colspan="4"|[[Gold Hairpin (Final Fantasy XII)|Gold Hairpin]] |
||
|} |
|} |
||
| − | {{ |
+ | {{annotations}} |
{{clear}} |
{{clear}} |
||
===Trahk Jilaam Praa'dii=== |
===Trahk Jilaam Praa'dii=== |
||
;Zodiac |
;Zodiac |
||
{|class="full-width FFXII article-table" style="text-align:center" |
{|class="full-width FFXII article-table" style="text-align:center" |
||
| + | |- |
||
| − | |-class="a" |
||
!style="width:20%"|Chest |
!style="width:20%"|Chest |
||
!style="width:10%"|Spawns |
!style="width:10%"|Spawns |
||
| Line 314: | Line 311: | ||
!style="width:25%" colspan="2"|Diamond Armlet Treasure |
!style="width:25%" colspan="2"|Diamond Armlet Treasure |
||
|- |
|- |
||
| − | ! |
+ | !5{{note|Chest does not respawn.}} |
|100% |
|100% |
||
|0% |
|0% |
||
| Line 320: | Line 317: | ||
|colspan="4"|[[Ninja Gear (Final Fantasy XII)|Ninja Gear]] |
|colspan="4"|[[Ninja Gear (Final Fantasy XII)|Ninja Gear]] |
||
|} |
|} |
||
| − | {{ |
+ | {{annotations}} |
;Original |
;Original |
||
{|class="full-width FFXII article-table" style="text-align:center" |
{|class="full-width FFXII article-table" style="text-align:center" |
||
| + | |- |
||
| − | |-class="a" |
||
!style="width:20%"|Chest |
!style="width:20%"|Chest |
||
!style="width:10%"|Spawns |
!style="width:10%"|Spawns |
||
| Line 330: | Line 327: | ||
!style="width:30%" colspan="3"|Diamond Armlet Treasure |
!style="width:30%" colspan="3"|Diamond Armlet Treasure |
||
|- |
|- |
||
| − | ! |
+ | ! rowspan="2"|3{{note|Chest does not respawn.}} |
|rowspan="2"|100% |
|rowspan="2"|100% |
||
|rowspan="2"|0% |
|rowspan="2"|0% |
||
| − | ! |
+ | ! width="10%"|Gil |
| − | ! |
+ | ! width="10%"|Item 1 |
| − | ! |
+ | ! width="10%"|Item 2 |
| − | ! |
+ | ! width="10%"|Gil |
| − | ! |
+ | ! width="20%" colspan="2"|Item |
|- |
|- |
||
|N/A |
|N/A |
||
| Line 345: | Line 342: | ||
|colspan="2"|Knot of Rust |
|colspan="2"|Knot of Rust |
||
|} |
|} |
||
| − | {{ |
+ | {{annotations}} |
{{clear}} |
{{clear}} |
||
===Trahk Pis Praa=== |
===Trahk Pis Praa=== |
||
| Line 351: | Line 348: | ||
{|class="full-width FFXII article-table" style="text-align:center" |
{|class="full-width FFXII article-table" style="text-align:center" |
||
| + | |- |
||
| − | |-class="a" |
||
!style="width:20%"|Chest |
!style="width:20%"|Chest |
||
!style="width:10%"|Spawns |
!style="width:10%"|Spawns |
||
| Line 359: | Line 356: | ||
!style="width:25%" colspan="2"|Diamond Armlet Treasure |
!style="width:25%" colspan="2"|Diamond Armlet Treasure |
||
|- |
|- |
||
| − | ! |
+ | !6{{note|Chest does not respawn.}} |
|100% |
|100% |
||
|0% |
|0% |
||
| Line 371: | Line 368: | ||
{|class="full-width FFXII article-table" style="text-align:center" |
{|class="full-width FFXII article-table" style="text-align:center" |
||
| + | |- |
||
| − | |-class="a" |
||
!style="width:20%"|Chest |
!style="width:20%"|Chest |
||
!style="width:10%"|Spawns |
!style="width:10%"|Spawns |
||
| Line 379: | Line 376: | ||
!style="width:25%" colspan="2"|Diamond Armlet Treasure |
!style="width:25%" colspan="2"|Diamond Armlet Treasure |
||
|- |
|- |
||
| − | ! |
+ | !7{{note|Chest does not respawn.}} |
|100% |
|100% |
||
|0% |
|0% |
||
| Line 385: | Line 382: | ||
|colspan="4"|[[Caldera (Final Fantasy XII)|Caldera]] |
|colspan="4"|[[Caldera (Final Fantasy XII)|Caldera]] |
||
|- |
|- |
||
| − | | |
+ | | rowspan="2"|8 |
|rowspan="2"|5% |
|rowspan="2"|5% |
||
|rowspan="2"|10% |
|rowspan="2"|10% |
||
|rowspan="2"|≤ 2,000 gil |
|rowspan="2"|≤ 2,000 gil |
||
| − | ! |
+ | ! width="12%"|Item 1 |
| − | ! |
+ | ! width="12%"|Item 2 |
| − | ! |
+ | ! width="12%"|Common |
| − | ! |
+ | ! width="12%"|Rare |
|- |
|- |
||
|Meteorite (B) |
|Meteorite (B) |
||
| Line 399: | Line 396: | ||
|Meteorite (D) |
|Meteorite (D) |
||
|} |
|} |
||
| − | {{ |
+ | {{annotations}} |
{{clear}} |
{{clear}} |
||
===Sirhru Phullam Praa=== |
===Sirhru Phullam Praa=== |
||
| Line 405: | Line 402: | ||
{|class="full-width FFXII article-table" style="text-align:center" |
{|class="full-width FFXII article-table" style="text-align:center" |
||
| + | |- |
||
| − | |-class="a" |
||
!style="width:20%"|Chest |
!style="width:20%"|Chest |
||
!style="width:10%"|Spawns |
!style="width:10%"|Spawns |
||
| Line 413: | Line 410: | ||
!style="width:25%" colspan="2"|Diamond Armlet Treasure |
!style="width:25%" colspan="2"|Diamond Armlet Treasure |
||
|- |
|- |
||
| − | ! |
+ | !9{{note|Chest does not respawn.}} |
|100% |
|100% |
||
|0% |
|0% |
||
| Line 419: | Line 416: | ||
|colspan="4"|[[Caliper]] |
|colspan="4"|[[Caliper]] |
||
|- |
|- |
||
| − | ! |
+ | ! rowspan="2"|10 |
|rowspan="2"|5% |
|rowspan="2"|5% |
||
|rowspan="2"|10% |
|rowspan="2"|10% |
||
|rowspan="2"|≤ 2,000 gil |
|rowspan="2"|≤ 2,000 gil |
||
| − | ! |
+ | ! width="12%"|Item 1 |
| − | ! |
+ | ! width="12%"|Item 2 |
| − | ! |
+ | ! width="12%"|Common |
| − | ! |
+ | ! width="12%"|Rare |
|- |
|- |
||
|Meteorite (B) |
|Meteorite (B) |
||
| Line 433: | Line 430: | ||
|Meteorite (D) |
|Meteorite (D) |
||
|} |
|} |
||
| − | {{ |
+ | {{annotations}} |
{{clear}} |
{{clear}} |
||
===Sirhru Phullam Praa'vaa=== |
===Sirhru Phullam Praa'vaa=== |
||
;Zodiac |
;Zodiac |
||
{|class="full-width FFXII article-table" style="text-align:center" |
{|class="full-width FFXII article-table" style="text-align:center" |
||
| + | |- |
||
| − | |-class="a" |
||
!style="width:20%"|Chest |
!style="width:20%"|Chest |
||
!style="width:10%"|Spawns |
!style="width:10%"|Spawns |
||
| Line 446: | Line 443: | ||
!style="width:25%" colspan="2"|Diamond Armlet Treasure |
!style="width:25%" colspan="2"|Diamond Armlet Treasure |
||
|- |
|- |
||
| − | ! |
+ | !11{{note|Chest does not respawn.}} |
|20% |
|20% |
||
|0% |
|0% |
||
| Line 452: | Line 449: | ||
|colspan="4"|[[Staff of the Magi (Final Fantasy XII)|Staff of the Magi]] |
|colspan="4"|[[Staff of the Magi (Final Fantasy XII)|Staff of the Magi]] |
||
|- |
|- |
||
| − | ! |
+ | ! rowspan="2"|12 |
|rowspan="2"|5% |
|rowspan="2"|5% |
||
|rowspan="2"|10% |
|rowspan="2"|10% |
||
|rowspan="2"|≤ 2,000 gil |
|rowspan="2"|≤ 2,000 gil |
||
| − | ! |
+ | ! width="12%"|Item 1 |
| − | ! |
+ | ! width="12%"|Item 2 |
| − | ! |
+ | ! width="12%"|Common |
| − | ! |
+ | ! width="12%"|Rare |
|- |
|- |
||
|Meteorite (B) |
|Meteorite (B) |
||
| Line 466: | Line 463: | ||
|Meteorite (D) |
|Meteorite (D) |
||
|} |
|} |
||
| − | {{ |
+ | {{annotations}} |
;Original |
;Original |
||
{|class="full-width FFXII article-table" style="text-align:center" |
{|class="full-width FFXII article-table" style="text-align:center" |
||
| + | |- |
||
| − | |-class="a" |
||
!style="width:20%"|Chest |
!style="width:20%"|Chest |
||
!style="width:10%"|Spawns |
!style="width:10%"|Spawns |
||
| Line 476: | Line 473: | ||
!style="width:30%" colspan="3"|Diamond Armlet Treasure |
!style="width:30%" colspan="3"|Diamond Armlet Treasure |
||
|- |
|- |
||
| − | ! |
+ | ! rowspan="2"|4 |
|rowspan="2"|100% |
|rowspan="2"|100% |
||
|rowspan="2"|85% |
|rowspan="2"|85% |
||
| − | ! |
+ | ! width="10%"|Gil |
| − | ! |
+ | ! width="10%"|Item 1 |
| − | ! |
+ | ! width="10%"|Item 2 |
| − | ! |
+ | ! width="10%"|Gil |
| − | ! |
+ | ! width="10%"|Common |
| − | ! |
+ | ! width="10%"|Rare |
|- |
|- |
||
|≤ 2 gil |
|≤ 2 gil |
||
|Knot of Rust |
|Knot of Rust |
||
| − | |[[Final Fantasy XII |
+ | |[[Maximillian (Final Fantasy XII)|Maximillian]] |
|≤ 5,000 gil |
|≤ 5,000 gil |
||
|Knot of Rust |
|Knot of Rust |
||
| Line 498: | Line 495: | ||
;Zodiac |
;Zodiac |
||
{|class="full-width FFXII article-table" style="text-align:center" |
{|class="full-width FFXII article-table" style="text-align:center" |
||
| + | |- |
||
| − | |-class="a" |
||
!style="width:20%"|Chest |
!style="width:20%"|Chest |
||
!style="width:10%"|Spawns |
!style="width:10%"|Spawns |
||
| Line 506: | Line 503: | ||
!style="width:25%" colspan="2"|Diamond Armlet Treasure |
!style="width:25%" colspan="2"|Diamond Armlet Treasure |
||
|- |
|- |
||
| − | ! |
+ | !13{{note|Chest does not respawn.}} |
|100% |
|100% |
||
|0% |
|0% |
||
| Line 512: | Line 509: | ||
|colspan="4"|[[Rubber Suit (Final Fantasy XII)|Rubber Suit]] |
|colspan="4"|[[Rubber Suit (Final Fantasy XII)|Rubber Suit]] |
||
|- |
|- |
||
| − | ! |
+ | ! rowspan="2"|14 |
|rowspan="2"|5% |
|rowspan="2"|5% |
||
|rowspan="2"|10% |
|rowspan="2"|10% |
||
|rowspan="2"|≤ 2,000 gil |
|rowspan="2"|≤ 2,000 gil |
||
| − | ! |
+ | ! width="12%"|Item 1 |
| − | ! |
+ | ! width="12%"|Item 2 |
| − | ! |
+ | ! width="12%"|Common |
| − | ! |
+ | ! width="12%"|Rare |
|- |
|- |
||
|Meteorite (B) |
|Meteorite (B) |
||
| Line 526: | Line 523: | ||
|Meteorite (D) |
|Meteorite (D) |
||
|} |
|} |
||
| − | {{ |
+ | {{annotations}} |
;Original |
;Original |
||
{|class="full-width FFXII article-table" style="text-align:center" |
{|class="full-width FFXII article-table" style="text-align:center" |
||
| + | |- |
||
| − | |-class="a" |
||
!style="width:20%"|Chest |
!style="width:20%"|Chest |
||
!style="width:10%"|Spawns |
!style="width:10%"|Spawns |
||
| Line 537: | Line 534: | ||
!style="width:30%" colspan="3"|Diamond Armlet Treasure |
!style="width:30%" colspan="3"|Diamond Armlet Treasure |
||
|- |
|- |
||
| − | ! |
+ | ! rowspan="2"|5 |
|rowspan="2"|100% |
|rowspan="2"|100% |
||
|rowspan="2"|75% |
|rowspan="2"|75% |
||
| − | ! |
+ | ! width="10%"|Gil |
| − | ! |
+ | ! width="10%"|Item 1 |
| − | ! |
+ | ! width="10%"|Item 2 |
| − | ! |
+ | ! width="10%"|Gil |
| − | ! |
+ | ! width="10%"|Common |
| − | ! |
+ | ! width="10%"|Rare |
|- |
|- |
||
|≤ 2 gil |
|≤ 2 gil |
||
|Knot of Rust |
|Knot of Rust |
||
| − | |[[Final Fantasy XII |
+ | |[[Mirage Vest (Final Fantasy XII)|Mirage Vest]] |
|≤ 5,000 gil |
|≤ 5,000 gil |
||
|Knot of Rust |
|Knot of Rust |
||
| Line 558: | Line 555: | ||
;Zodiac |
;Zodiac |
||
{|class="full-width FFXII article-table" style="text-align:center" |
{|class="full-width FFXII article-table" style="text-align:center" |
||
| + | |- |
||
| − | |-class="a" |
||
!style="width:20%"|Chest |
!style="width:20%"|Chest |
||
!style="width:10%"|Spawns |
!style="width:10%"|Spawns |
||
| Line 566: | Line 563: | ||
!style="width:25%" colspan="2"|Diamond Armlet Treasure |
!style="width:25%" colspan="2"|Diamond Armlet Treasure |
||
|- |
|- |
||
| − | ! |
+ | !15{{note|Chest does not respawn.}} |
|100% |
|100% |
||
|0% |
|0% |
||
| Line 572: | Line 569: | ||
|colspan="4"|[[Shellga (Final Fantasy XII)|Shellga]] |
|colspan="4"|[[Shellga (Final Fantasy XII)|Shellga]] |
||
|- |
|- |
||
| − | ! |
+ | ! rowspan="2"|16 |
|rowspan="2"|5% |
|rowspan="2"|5% |
||
|rowspan="2"|10% |
|rowspan="2"|10% |
||
|rowspan="2"|≤ 2,000 gil |
|rowspan="2"|≤ 2,000 gil |
||
| − | ! |
+ | ! width="12%"|Item 1 |
| − | ! |
+ | ! width="12%"|Item 2 |
| − | ! |
+ | ! width="12%"|Common |
| − | ! |
+ | ! width="12%"|Rare |
|- |
|- |
||
|Meteorite (B) |
|Meteorite (B) |
||
| Line 586: | Line 583: | ||
|Meteorite (D) |
|Meteorite (D) |
||
|} |
|} |
||
| − | {{ |
+ | {{annotations}} |
;Original |
;Original |
||
{|class="full-width FFXII article-table" style="text-align:center" |
{|class="full-width FFXII article-table" style="text-align:center" |
||
| + | |- |
||
| − | |-class="a" |
||
!style="width:20%"|Chest |
!style="width:20%"|Chest |
||
!style="width:10%"|Spawns |
!style="width:10%"|Spawns |
||
| Line 596: | Line 593: | ||
!style="width:30%" colspan="3"|Diamond Armlet Treasure |
!style="width:30%" colspan="3"|Diamond Armlet Treasure |
||
|- |
|- |
||
| − | ! |
+ | ! rowspan="2"|6 |
|rowspan="2"|100% |
|rowspan="2"|100% |
||
|rowspan="2"|70% |
|rowspan="2"|70% |
||
| − | ! |
+ | ! width="10%"|Gil |
| − | ! |
+ | ! width="10%"|Item 1 |
| − | ! |
+ | ! width="10%"|Item 2 |
| − | ! |
+ | ! width="10%"|Gil |
| − | ! |
+ | ! width="10%"|Common |
| − | ! |
+ | ! width="10%"|Rare |
|- |
|- |
||
|≤ 2 gil |
|≤ 2 gil |
||
| Line 611: | Line 608: | ||
|≤ 5,000 gil |
|≤ 5,000 gil |
||
|Knot of Rust |
|Knot of Rust |
||
| − | |[[Final Fantasy XII |
+ | |[[Golden Skullcap (Final Fantasy XII)|Golden Skullcap]] |
|} |
|} |
||
{{clear}} |
{{clear}} |
||
| Line 619: | Line 616: | ||
{|class="full-width FFXII article-table" style="text-align:center" |
{|class="full-width FFXII article-table" style="text-align:center" |
||
| + | |- |
||
| − | |-class="a" |
||
!style="width:20%"|Chest |
!style="width:20%"|Chest |
||
!style="width:10%"|Spawns |
!style="width:10%"|Spawns |
||
| Line 627: | Line 624: | ||
!style="width:25%" colspan="2"|Diamond Armlet Treasure |
!style="width:25%" colspan="2"|Diamond Armlet Treasure |
||
|- |
|- |
||
| − | ! |
+ | !17{{note|Chest does not respawn.}} |
|100% |
|100% |
||
|0% |
|0% |
||
| Line 633: | Line 630: | ||
|colspan="4"|[[Crown of Laurels (Final Fantasy XII)|Crown of Laurels]] |
|colspan="4"|[[Crown of Laurels (Final Fantasy XII)|Crown of Laurels]] |
||
|- |
|- |
||
| − | ! |
+ | ! rowspan="2"|18 |
|rowspan="2"|5% |
|rowspan="2"|5% |
||
|rowspan="2"|10% |
|rowspan="2"|10% |
||
|rowspan="2"|≤ 2,000 gil |
|rowspan="2"|≤ 2,000 gil |
||
| − | ! |
+ | ! width="12%"|Item 1 |
| − | ! |
+ | ! width="12%"|Item 2 |
| − | ! |
+ | ! width="12%"|Common |
| − | ! |
+ | ! width="12%"|Rare |
|- |
|- |
||
|Meteorite (B) |
|Meteorite (B) |
||
| Line 647: | Line 644: | ||
|Meteorite (D) |
|Meteorite (D) |
||
|} |
|} |
||
| − | {{ |
+ | {{annotations}} |
{{clear}} |
{{clear}} |
||
===Sirhru Jilaam Pratii'vaa=== |
===Sirhru Jilaam Pratii'vaa=== |
||
;Zodiac |
;Zodiac |
||
{|class="full-width FFXII article-table" style="text-align:center" |
{|class="full-width FFXII article-table" style="text-align:center" |
||
| + | |- |
||
| − | |-class="a" |
||
!style="width:20%"|Chest |
!style="width:20%"|Chest |
||
!style="width:10%"|Spawns |
!style="width:10%"|Spawns |
||
| Line 660: | Line 657: | ||
!style="width:25%" colspan="2"|Diamond Armlet Treasure |
!style="width:25%" colspan="2"|Diamond Armlet Treasure |
||
|- |
|- |
||
| − | ! |
+ | !19{{note|Chest does not respawn.}} |
|25% |
|25% |
||
|0% |
|0% |
||
| Line 666: | Line 663: | ||
|colspan="4"|[[Yagyu Darkblade (Final Fantasy XII)|Yagyu Darkblade]] |
|colspan="4"|[[Yagyu Darkblade (Final Fantasy XII)|Yagyu Darkblade]] |
||
|- |
|- |
||
| − | ! |
+ | ! rowspan="2"|20 |
|rowspan="2"|5% |
|rowspan="2"|5% |
||
|rowspan="2"|10% |
|rowspan="2"|10% |
||
|rowspan="2"|≤ 2,000 gil |
|rowspan="2"|≤ 2,000 gil |
||
| − | ! |
+ | ! width="12%"|Item 1 |
| − | ! |
+ | ! width="12%"|Item 2 |
| − | ! |
+ | ! width="12%"|Common |
| − | ! |
+ | ! width="12%"|Rare |
|- |
|- |
||
|Meteorite (B) |
|Meteorite (B) |
||
| Line 680: | Line 677: | ||
|Meteorite (D) |
|Meteorite (D) |
||
|} |
|} |
||
| − | {{ |
+ | {{annotations}} |
;Original |
;Original |
||
{|class="full-width FFXII article-table" style="text-align:center" |
{|class="full-width FFXII article-table" style="text-align:center" |
||
| + | |- |
||
| − | |-class="a" |
||
!style="width:20%"|Chest |
!style="width:20%"|Chest |
||
!style="width:10%"|Spawns |
!style="width:10%"|Spawns |
||
| Line 690: | Line 687: | ||
!style="width:30%" colspan="3"|Diamond Armlet Treasure |
!style="width:30%" colspan="3"|Diamond Armlet Treasure |
||
|- |
|- |
||
| − | ! |
+ | ! rowspan="2"|7 |
|rowspan="2"|100% |
|rowspan="2"|100% |
||
|rowspan="2"|80% |
|rowspan="2"|80% |
||
| − | ! |
+ | ! width="10%"|Gil |
| − | ! |
+ | ! width="10%"|Item 1 |
| − | ! |
+ | ! width="10%"|Item 2 |
| − | ! |
+ | ! width="10%"|Gil |
| − | ! |
+ | ! width="10%"|Common |
| − | ! |
+ | ! width="10%"|Rare |
|- |
|- |
||
|≤ 2 gil |
|≤ 2 gil |
||
| Line 705: | Line 702: | ||
|≤ 5,000 gil |
|≤ 5,000 gil |
||
|Knot of Rust |
|Knot of Rust |
||
| − | |[[Final Fantasy XII |
+ | |[[Renewing Morion (Final Fantasy XII)|Renewing Morion]] |
|- |
|- |
||
| − | ! |
+ | !8{{note|Chest does not respawn.}} |
|20% |
|20% |
||
|0% |
|0% |
||
|colspan="6"|[[Excalibur (Final Fantasy XII)|Excalibur]] |
|colspan="6"|[[Excalibur (Final Fantasy XII)|Excalibur]] |
||
|} |
|} |
||
| − | {{ |
+ | {{annotations}} |
{{clear}} |
{{clear}} |
||
===Uldobi Phullam Udiipraa=== |
===Uldobi Phullam Udiipraa=== |
||
;Zodiac |
;Zodiac |
||
{|class="full-width FFXII article-table" style="text-align:center" |
{|class="full-width FFXII article-table" style="text-align:center" |
||
| + | |- |
||
| − | |-class="a" |
||
!style="width:20%"|Chest |
!style="width:20%"|Chest |
||
!style="width:10%"|Spawns |
!style="width:10%"|Spawns |
||
| Line 725: | Line 722: | ||
!style="width:25%" colspan="2"|Diamond Armlet Treasure |
!style="width:25%" colspan="2"|Diamond Armlet Treasure |
||
|- |
|- |
||
| − | ! |
+ | !21{{note|Chest does not respawn.}} |
|100% |
|100% |
||
|0% |
|0% |
||
| Line 731: | Line 728: | ||
|colspan="4"|[[Ring of Renewal (Final Fantasy XII)|Ring of Renewal]] |
|colspan="4"|[[Ring of Renewal (Final Fantasy XII)|Ring of Renewal]] |
||
|- |
|- |
||
| − | ! |
+ | ! rowspan="2"|22 |
|rowspan="2"|5% |
|rowspan="2"|5% |
||
|rowspan="2"|10% |
|rowspan="2"|10% |
||
|rowspan="2"|≤ 2,000 gil |
|rowspan="2"|≤ 2,000 gil |
||
| − | ! |
+ | ! width="12%"|Item 1 |
| − | ! |
+ | ! width="12%"|Item 2 |
| − | ! |
+ | ! width="12%"|Common |
| − | ! |
+ | ! width="12%"|Rare |
|- |
|- |
||
|Meteorite (B) |
|Meteorite (B) |
||
| Line 745: | Line 742: | ||
|Meteorite (D) |
|Meteorite (D) |
||
|} |
|} |
||
| − | {{ |
+ | {{annotations}} |
;Original |
;Original |
||
{|class="full-width FFXII article-table" style="text-align:center" |
{|class="full-width FFXII article-table" style="text-align:center" |
||
| + | |- |
||
| − | |-class="a" |
||
!style="width:20%"|Chest |
!style="width:20%"|Chest |
||
!style="width:10%"|Spawns |
!style="width:10%"|Spawns |
||
| Line 755: | Line 752: | ||
!style="width:30%" colspan="3"|Diamond Armlet Treasure |
!style="width:30%" colspan="3"|Diamond Armlet Treasure |
||
|- |
|- |
||
| − | ! |
+ | ! rowspan="2"|9 |
|rowspan="2"|100% |
|rowspan="2"|100% |
||
|rowspan="2"|80% |
|rowspan="2"|80% |
||
| − | ! |
+ | ! width="10%"|Gil |
| − | ! |
+ | ! width="10%"|Item 1 |
| − | ! |
+ | ! width="10%"|Item 2 |
| − | ! |
+ | ! width="10%"|Gil |
| − | ! |
+ | ! width="10%"|Common |
| − | ! |
+ | ! width="10%"|Rare |
|- |
|- |
||
|≤ 2 gil |
|≤ 2 gil |
||
| Line 770: | Line 767: | ||
|≤ 5,000 gil |
|≤ 5,000 gil |
||
|Knot of Rust |
|Knot of Rust |
||
| − | |[[Final Fantasy XII |
+ | |[[Glimmering Robes (Final Fantasy XII)|Glimmering Robes]] |
|} |
|} |
||
{{clear}} |
{{clear}} |
||
| + | |||
===Crystal Peak=== |
===Crystal Peak=== |
||
| − | These chests only appear in the ''Zodiac'' versions. |
+ | These chests only appear in the ''Zodiac'' versions. Due to the low odds of both spawning and obtaining the Gendarme treasure naturally, it is often exploited via RNG manipulation. The Gendarme itself is a [[Final Fantasy XII armor#Shields|shield]] with highly-beneficial stats and no model, functioning as an Easter egg of sorts that is not mandatory for collection. |
{|class="full-width FFXII article-table" style="text-align:center" |
{|class="full-width FFXII article-table" style="text-align:center" |
||
| + | |- |
||
| − | |-class="a" |
||
!style="width:20%"|Chest |
!style="width:20%"|Chest |
||
!style="width:10%"|Spawns |
!style="width:10%"|Spawns |
||
| Line 785: | Line 783: | ||
!style="width:25%" colspan="2"|Diamond Armlet Treasure |
!style="width:25%" colspan="2"|Diamond Armlet Treasure |
||
|- |
|- |
||
| − | ! |
+ | !23{{note|Chest does not respawn.}} |
|100% |
|100% |
||
|0% |
|0% |
||
| Line 791: | Line 789: | ||
|colspan="4"|[[Excalibur (Final Fantasy XII)|Excalibur]] |
|colspan="4"|[[Excalibur (Final Fantasy XII)|Excalibur]] |
||
|- |
|- |
||
| − | ! |
+ | ! rowspan="2"|24 |
|rowspan="2"|1% |
|rowspan="2"|1% |
||
|rowspan="2"|20% |
|rowspan="2"|20% |
||
|rowspan="2"|≤ 1,000 gil |
|rowspan="2"|≤ 1,000 gil |
||
| − | ! |
+ | ! width="25%" colspan="2"|Item |
| − | ! |
+ | ! width="12%"|Common |
| − | ! |
+ | ! width="12%"|Rare |
|- |
|- |
||
|colspan="2"|Meteorite (B) |
|colspan="2"|Meteorite (B) |
||
| Line 803: | Line 801: | ||
|[[Gendarme (Final Fantasy XII)|Gendarme]] |
|[[Gendarme (Final Fantasy XII)|Gendarme]] |
||
|} |
|} |
||
| − | {{ |
+ | {{annotations}} |
{{clear}} |
{{clear}} |
||
| + | |||
===Uldobi Phullam Pratii=== |
===Uldobi Phullam Pratii=== |
||
;Zodiac |
;Zodiac |
||
{|class="full-width FFXII article-table" style="text-align:center" |
{|class="full-width FFXII article-table" style="text-align:center" |
||
| + | |- |
||
| − | |-class="a" |
||
!style="width:20%"|Chest |
!style="width:20%"|Chest |
||
!style="width:10%"|Spawns |
!style="width:10%"|Spawns |
||
| Line 816: | Line 815: | ||
!style="width:25%" colspan="2"|Diamond Armlet Treasure |
!style="width:25%" colspan="2"|Diamond Armlet Treasure |
||
|- |
|- |
||
| − | ! |
+ | !25{{note|Chest does not respawn.}} |
|100% |
|100% |
||
|0% |
|0% |
||
| Line 822: | Line 821: | ||
|colspan="4"|[[Hastega (Final Fantasy XII)|Hastega]] |
|colspan="4"|[[Hastega (Final Fantasy XII)|Hastega]] |
||
|- |
|- |
||
| − | ! |
+ | ! rowspan="2"|26 |
|rowspan="2"|5% |
|rowspan="2"|5% |
||
|rowspan="2"|10% |
|rowspan="2"|10% |
||
|rowspan="2"|≤ 2,000 gil |
|rowspan="2"|≤ 2,000 gil |
||
| − | ! |
+ | ! width="12%"|Item 1 |
| − | ! |
+ | ! width="12%"|Item 2 |
| − | ! |
+ | ! width="12%"|Common |
| − | ! |
+ | ! width="12%"|Rare |
|- |
|- |
||
|Meteorite (B) |
|Meteorite (B) |
||
| Line 836: | Line 835: | ||
|Meteorite (D) |
|Meteorite (D) |
||
|} |
|} |
||
| − | {{ |
+ | {{annotations}} |
;Original |
;Original |
||
{|class="full-width FFXII article-table" style="text-align:center" |
{|class="full-width FFXII article-table" style="text-align:center" |
||
| + | |- |
||
| − | |-class="a" |
||
!style="width:20%"|Chest |
!style="width:20%"|Chest |
||
!style="width:10%"|Spawns |
!style="width:10%"|Spawns |
||
| Line 846: | Line 845: | ||
!style="width:30%" colspan="3"|Diamond Armlet Treasure |
!style="width:30%" colspan="3"|Diamond Armlet Treasure |
||
|- |
|- |
||
| − | ! |
+ | ! rowspan="2"|10{{note|Chest does not respawn.}} |
|rowspan="2"|20% |
|rowspan="2"|20% |
||
|rowspan="2"|0% |
|rowspan="2"|0% |
||
| − | ! |
+ | ! width="10%"|Gil |
| − | ! |
+ | ! width="10%"|Item 1 |
| − | ! |
+ | ! width="10%"|Item 2 |
| − | ! |
+ | ! width="10%"|Gil |
| − | ! |
+ | ! width="20%" colspan="2"|Item |
|- |
|- |
||
|N/A |
|N/A |
||
|[[Zodiac Escutcheon (Final Fantasy XII)|Zodiac Escutcheon]] |
|[[Zodiac Escutcheon (Final Fantasy XII)|Zodiac Escutcheon]] |
||
| − | |[[Final Fantasy XII |
+ | |[[Brave Suit (Final Fantasy XII)|Brave Suit]] |
|N/A |
|N/A |
||
|colspan="2"|[[Zodiac Escutcheon (Final Fantasy XII)|Zodiac Escutcheon]] |
|colspan="2"|[[Zodiac Escutcheon (Final Fantasy XII)|Zodiac Escutcheon]] |
||
|} |
|} |
||
| − | {{ |
+ | {{annotations}} |
{{clear}} |
{{clear}} |
||
===Uldobi Phullam Pratii'dii=== |
===Uldobi Phullam Pratii'dii=== |
||
| Line 867: | Line 866: | ||
{|class="full-width FFXII article-table" style="text-align:center" |
{|class="full-width FFXII article-table" style="text-align:center" |
||
| + | |- |
||
| − | |-class="a" |
||
!style="width:20%"|Chest |
!style="width:20%"|Chest |
||
!style="width:10%"|Spawns |
!style="width:10%"|Spawns |
||
| Line 875: | Line 874: | ||
!style="width:25%" colspan="2"|Diamond Armlet Treasure |
!style="width:25%" colspan="2"|Diamond Armlet Treasure |
||
|- |
|- |
||
| − | ! |
+ | !27{{note|Chest does not respawn.}} |
|100% |
|100% |
||
|0% |
|0% |
||
| Line 881: | Line 880: | ||
|colspan="4"|[[Artemis Bow (Final Fantasy XII)|Artemis Bow]] |
|colspan="4"|[[Artemis Bow (Final Fantasy XII)|Artemis Bow]] |
||
|- |
|- |
||
| − | ! |
+ | ! rowspan="2"|28 |
|rowspan="2"|5% |
|rowspan="2"|5% |
||
|rowspan="2"|10% |
|rowspan="2"|10% |
||
|rowspan="2"|≤ 2,000 gil |
|rowspan="2"|≤ 2,000 gil |
||
| − | ! |
+ | ! width="12%"|Item 1 |
| − | ! |
+ | ! width="12%"|Item 2 |
| − | ! |
+ | ! width="12%"|Common |
| − | ! |
+ | ! width="12%"|Rare |
|- |
|- |
||
|Meteorite (B) |
|Meteorite (B) |
||
| Line 895: | Line 894: | ||
|Meteorite (D) |
|Meteorite (D) |
||
|} |
|} |
||
| − | {{ |
+ | {{annotations}} |
==Quests== |
==Quests== |
||
| Line 943: | Line 942: | ||
The player should return to Uldobi Jilaam Praa and take the path to the right. At Sthaana Capricorn, the player should touch the Gate Capricorn Stone before returning to Uldobi Jilaam Praa. The player should take the right path to reenter Uldobi Jilaam Praa'dii and take the only path across to return to Dha Vikaari Sirhru, where they should approach Way Stone XVI before entering the first path to the left to return to Sthaana Libra. The player should head right and in Uldobi Jilaam Pratii'vaa, touch Gate Capricorn II on the right but not go through; instead, the player should return to Gate Aquarius I and enter the other path leading to Sthaana Taurus. To get there, the player should take the left at Sthaana Libra, right at Dha Vikaari Sirhru, straight on at Uldobi Jilaam Praa'dii, straight on at Uldobi Jilaam Praa and left at Uldobi Phullam Praa'vaa. |
The player should return to Uldobi Jilaam Praa and take the path to the right. At Sthaana Capricorn, the player should touch the Gate Capricorn Stone before returning to Uldobi Jilaam Praa. The player should take the right path to reenter Uldobi Jilaam Praa'dii and take the only path across to return to Dha Vikaari Sirhru, where they should approach Way Stone XVI before entering the first path to the left to return to Sthaana Libra. The player should head right and in Uldobi Jilaam Pratii'vaa, touch Gate Capricorn II on the right but not go through; instead, the player should return to Gate Aquarius I and enter the other path leading to Sthaana Taurus. To get there, the player should take the left at Sthaana Libra, right at Dha Vikaari Sirhru, straight on at Uldobi Jilaam Praa'dii, straight on at Uldobi Jilaam Praa and left at Uldobi Phullam Praa'vaa. |
||
| − | After activating the Taurus Gate Stone the player can return all the way back to Uldobi Jilaam Pratii'vaa and enter the right path where Gate Capricorn II was at. The path to the left will lead to Gate Carpricorn II and activating it will allow access to the right in the next area that will possibly have a [[Final Fantasy XII |
+ | After activating the Taurus Gate Stone the player can return all the way back to Uldobi Jilaam Pratii'vaa and enter the right path where Gate Capricorn II was at. The path to the left will lead to Gate Carpricorn II and activating it will allow access to the right in the next area that in the original PlayStation 2 version will possibly have a [[Brave Suit (Final Fantasy XII)|Brave Suit]] or the [[Zodiac Escutcheon (Final Fantasy XII)|Zodiac Escutcheon]], one of the best shields in the game, and in the ''Zodiac'' versions, is the [[Hastega (Final Fantasy XII)|Hastega]] spell. Doing this however, the player will have to backtrack all the way to the Capricorn Gate Stone and re-activate it. |
If the player instead wants to open the path to Omega Mark XII right away, they should enter the path directly ahead in Uldobi Jilaam Pratii and activate Gate Capricorn I in Uldobi Phullam Pratii'dii, take the right path after activating the Gate Capricorn to find Way Stone XXI on the platform of Dha Vikaari Sirhru Si. Way Stone XXI will take the party to A Vikaari Uldobi Si, which is one platform away from the Way Stone XXIII that will teleport the party to the platform right before Omega Mark XII. |
If the player instead wants to open the path to Omega Mark XII right away, they should enter the path directly ahead in Uldobi Jilaam Pratii and activate Gate Capricorn I in Uldobi Phullam Pratii'dii, take the right path after activating the Gate Capricorn to find Way Stone XXI on the platform of Dha Vikaari Sirhru Si. Way Stone XXI will take the party to A Vikaari Uldobi Si, which is one platform away from the Way Stone XXIII that will teleport the party to the platform right before Omega Mark XII. |
||
| Line 969: | Line 968: | ||
==Musical themes== |
==Musical themes== |
||
| − | {{ |
+ | {{Main|To Walk Amongst Gods}} |
| + | {{Audio|title="To Walk Amongst Gods" from ''Final Fantasy XII''|filename=To Walk Amongst Gods.ogg}} |
||
| − | The theme of Great Crystal is called "To Walk Amongst Gods" {{J|神々の場所へ|Kamigami no basho e}}. A piano arrangement of the theme is included on the ''[[Piano Collections: Final Fantasy XII]]'' album. A live recording of the track is part of the "Ivalice Landscapes" medley on the ''[[A New World: intimate music from Final Fantasy - Volume II]]'' album{{clear}} |
||
| + | The theme of the Great Crystal is called "To Walk Amongst Gods". |
||
{{clear}} |
{{clear}} |
||
==Maps== |
==Maps== |
||
| − | The Great Crystal is one of two locations in ''Final Fantasy XII'' that have a location sketch instead of a map. The other |
+ | The Great Crystal is one of two locations in ''Final Fantasy XII'' that have a location sketch instead of a map. The other is the [[Sky Fortress Bahamut|Sky Fortress ''Bahamut'']]. |
:[https://jegged.com/Games/Final-Fantasy-XII/Maps/Great-Crystal.html External link] to Jegged.com for a complete ''Zodiac'' version map. |
:[https://jegged.com/Games/Final-Fantasy-XII/Maps/Great-Crystal.html External link] to Jegged.com for a complete ''Zodiac'' version map. |
||
<gallery> |
<gallery> |
||
| − | + | Map 46 The Great Crystal.png|The Great Crystal. |
|
Greatcrystalmap.jpg|Map of lower Great Crystal. |
Greatcrystalmap.jpg|Map of lower Great Crystal. |
||
</gallery> |
</gallery> |
||
Latest revision as of 12:50, 12 September 2023
Ashe: With that much nethicite in one's grasp—Fran: You could destroy all of Ivalice. If you wished it.Ashe and Fran talking about the Great Crystal
The Great Crystal is a location in the land of Ivalice in Final Fantasy XII. It is a large crystal located in the deepest reaches of the Giruvegan.
The core of the crystal is a great orb of magicite, constantly spewing Mist. The party speculates that it might be nethicite. While its purpose is never revealed, the Great Crystal could be the Occuria's deposit of nethicite, or perhaps the source of magicite and Mist. Whatever the case, it acts as a deadly gateway to the Occurian dwelling, filled with powerful monsters and a twisting maze. Also sealed within are the fearsome prisoners, the Espers Ultima and Shemhazai.
Story[]
By this path, and no other, reach ye the Round of the Undying, walk of the Chosen.
Empyrean Way Stone
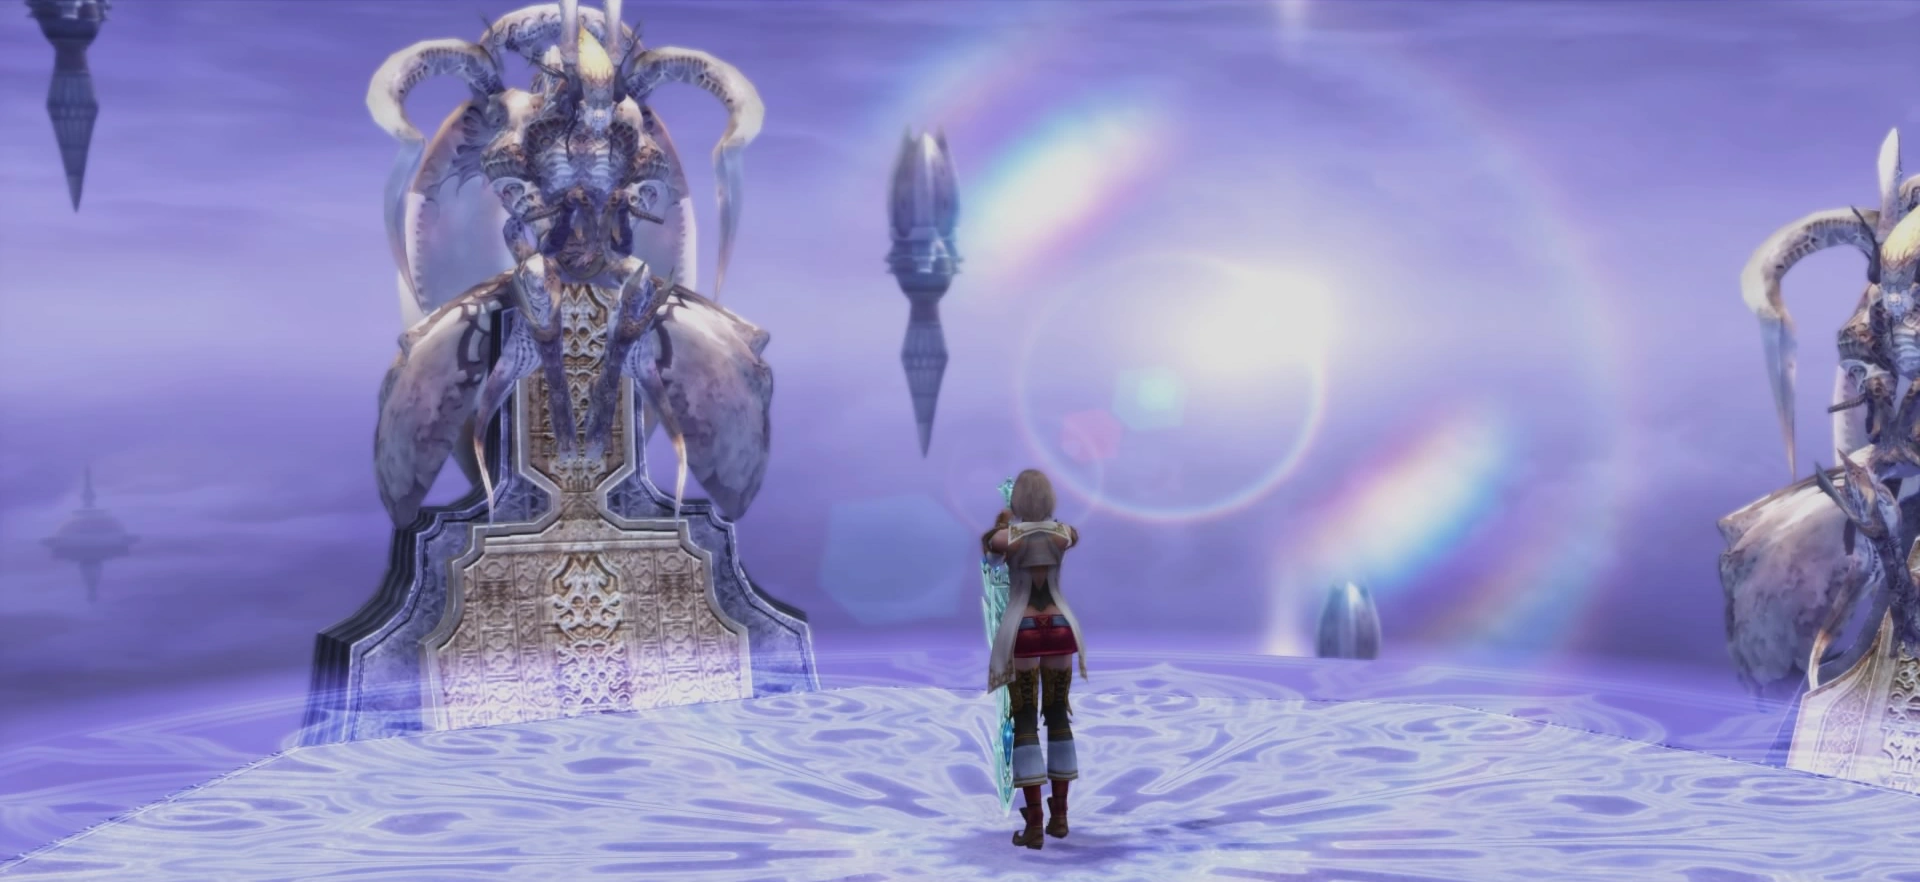
Princess Ashe and her comrades come to the Great Crystal in their hunt for Dr. Cid who claimed he is taking the Empire's pieces of deifacted nethicite with him to Giruvegan. As the party arrives on the gates of the ancient city they can't see Cid, and prompted by an apparition of her late husband, Lord Rasler, Ashe ventures deeper into the ruins where the party finds the Great Crystal at its core.
Ashe receives the Treaty-Blade.
Inside the crystal the final Way Stone takes Ashe to the domain of the Occuria where she speaks with Gerun, the beings' spokesperson, and notes the throne of Venat is empty. Gerun claims Venat is a heretic and has given the secrets of nethicite to the Empire.
To undo the harm Venat has inflicted on the Occuria's goal, Gerun entrusts Ashe with the Treaty-Blade and instructs her to find her way to the Sun-Cryst to cut a piece of deifacted nethicite with it and use it to lay waste onto the Empire. Ashe hesitates, but upon seeing the apparition of Rasler clutching the blade she follows suit, and is transported back to the Great Crystal where she is greeted by her friends, who, although not able to see the Occuria, heard their voice. Ashe takes the Treaty-Blade and, when Balthier realizes Dr. Cid was never coming to Giruvegan, she decides to look for the Sun-Cryst.
Location[]
Not actually located on the world map, the Great Crystal is found in the Ancient City of Giruvegan. The player has to walk down to the deepest reaches of the Gate of Fire and find a waystone, which grants access to the area. The Great Crystal links the Gate of Fire at Giruvegan with the floating Gate of Wind and is the only way the Occuria and Shemhazai can be accessed.
[]
The Great Crystal is divided in two halves: the section that is part of the storyline and rather straightforward, and the optional section that opens up only after the story portion has been completed. In contrast to other locations in the game, the player will not be able to view a detailed map of the area, but a sketch of the outside of the crystal and an indicator showing an approximation of where they are from the outside (near the bottom, as opposed to near the top). The player may use the unique naming system for the crystal's areas as a reference to where they currently are.
Further complicating navigation are the zodiac gates that block some of the paths between areas. Each gate has a stone that deactivates it, indicated by the shared name (e.g. the Pisces Gate Stone deactivates Gate Pisces). In the storyline area, they behave much like those in Giruvegan—once activated, the corresponding gate is removed. However, in the optional area, each stone can open one of two gates (e.g. the Leo Gate Stone can open either Gate Leo I or Gate Leo II).
Crucially, only one of the pair can be open at any one time. When the stone is activated, both gates are closed and a countdown timer activates. The player has to reach whichever gate requires opening, and activate it within the time limit to remove the gate. The time varies between stones, and is sufficient to reach either gate if the player goes directly there without engaging in too much combat. The state of the gates is retained for future visits.
Location names[]
The names of each the areas resemble Sanskrit, but are actually contractions and bastardizations of English words and some scientific terms, which help to indicate where the player is:
| Name | Meaning | Purpose |
|---|---|---|
| A | Up | A, Dha, Si, Ra, and Vikaari are used to indicate where a teleporter will take the party. "A Vikaari" means move up a layer and "Dha Vikaari" means to move down a layer. |
| Dha | Down | |
| Vikaari | Shift | |
| Si | Shift | |
| Ra | Shift | |
| Peak | Peak | Crystal Peak is obviously the top. Kanbhru, Oldobii, Sirhru, Dhebon, Kabonii, Bhrum, Trahk, and Jula are all named after prehistoric periods, with the oldest coming highest inside the Great Crystal. Crystal Core is obviously the Central Core. |
| Kanbhru | Cambrian | |
| Oldobii | Ordovician | |
| Sirhru | Silurian | |
| Dhebon | Devonian | |
| Kabonii | Carboniferous | |
| Bhrum | Permian | |
| Trahk | Triassic | |
| Core | Core |
| Name | Meaning | Purpose |
|---|---|---|
| Udii | North | Udii, Avaa, Praa, and Pratii indicate North, South, East, and West directions in relation to the core. |
| Udiipraa | Northeast | |
| Praa | East | |
| Praa'vaa | Southeast | |
| Avaa | South | |
| Pratii'vaa | Southwest | |
| Pratii | West | |
| Pratii'dii | Northwest | |
| Pis | Pith | Pis, Jilaam, and Phullam indicate the interior, central and exterior part of a plant and are used to show distance from the core inside the Great Crystal. |
| Jilaam | Xylem | |
| Phullam | Phloem | |
| Prama | Ground | Crystal Ground is where the Waystone links the player with Giruvegan. |
| Sthaana | Set | Sthaana indicates a location with a Gate switch. |
| Note: The "Sthaana" Gate switches are named after the corresponding Zodiac gates. | ||
Treasures[]
The original version and the Zodiac versions have different treasures. In the original, equipping the Diamond Armlet or not determines what the player gets, making it easy to miss something valuable, whereas the Zodiac versions are more forgiving. The equipment and ability treasures can only be claimed once, bar the Gendarme. The basic item received from chests is also changed from Knot of Rust to various versions of the Meteorite item.
See maps for more information.
Kabonii Jilaam Pratii'vaa[]
- Zodiac
| Chest | Spawns | Holds Gil% | Gil | Normal Treasure | Diamond Armlet Treasure | ||
|---|---|---|---|---|---|---|---|
| 1[note 1] | 100% | 0% | N/A | Cloud Staff | |||
- ↑ Chest does not respawn.
- Original
| Chest | Spawns | Holds Gil% | Normal Treasure | Diamond Armlet Treasure | ||||
|---|---|---|---|---|---|---|---|---|
| 1[note 1] | 100% | 0% | Gil | Item 1 | Item 2 | Gil | Common | Rare |
| N/A | Elixir | Black Mask | N/A | Black Mask | Knot of Rust | |||
- ↑ Chest does not respawn.
Kabonii Jilaam Avaa[]
This chest only appears in the Zodiac versions.
| Chest | Spawns | Holds Gil% | Gil | Normal Treasure | Diamond Armlet Treasure | ||
|---|---|---|---|---|---|---|---|
| 2[note 1] | 100% | 0% | N/A | Thief's Cap | |||
- ↑ Chest does not respawn.
Bhrum Pis Avaa[]
- Zodiac
| Chest | Spawns | Holds Gil% | Gil | Normal Treasure | Diamond Armlet Treasure | ||
|---|---|---|---|---|---|---|---|
| 3[note 1] | 100% | 0% | N/A | Holy Rod | |||
- ↑ Chest does not respawn.
- Original
| Chest | Spawns | Holds Gil% | Normal Treasure | Diamond Armlet Treasure | ||||
|---|---|---|---|---|---|---|---|---|
| 2[note 1] | 100% | 0% | Gil | Item 1 | Item 2 | Gil | Item | |
| N/A | Knot of Rust | White Robes | N/A | Knot of Rust | ||||
- ↑ Chest does not respawn.
Bhrum Pis Pratii[]
This chest only appears in the Zodiac versions.
| Chest | Spawns | Holds Gil% | Gil | Normal Treasure | Diamond Armlet Treasure | ||
|---|---|---|---|---|---|---|---|
| 4[note 1] | 100% | 0% | N/A | Gold Hairpin | |||
- ↑ Chest does not respawn.
Trahk Jilaam Praa'dii[]
- Zodiac
| Chest | Spawns | Holds Gil% | Gil | Normal Treasure | Diamond Armlet Treasure | ||
|---|---|---|---|---|---|---|---|
| 5[note 1] | 100% | 0% | N/A | Ninja Gear | |||
- ↑ Chest does not respawn.
- Original
| Chest | Spawns | Holds Gil% | Normal Treasure | Diamond Armlet Treasure | ||||
|---|---|---|---|---|---|---|---|---|
| 3[note 1] | 100% | 0% | Gil | Item 1 | Item 2 | Gil | Item | |
| N/A | Knot of Rust | Holy Lance | N/A | Knot of Rust | ||||
- ↑ Chest does not respawn.
Trahk Pis Praa[]
This chest only appears in the Zodiac versions.
| Chest | Spawns | Holds Gil% | Gil | Normal Treasure | Diamond Armlet Treasure | ||
|---|---|---|---|---|---|---|---|
| 6[note 1] | 100% | 0% | N/A | Gaia Gear | |||
Dhebon Jilaam Avaapratii[]
These chests only appear in the Zodiac versions.
| Chest | Spawns | Holds Gil% | Gil | Normal Treasure | Diamond Armlet Treasure | ||
|---|---|---|---|---|---|---|---|
| 7[note 3] | 100% | 0% | N/A | Caldera | |||
| 8 | 5% | 10% | ≤ 2,000 gil | Item 1 | Item 2 | Common | Rare |
| Meteorite (B) | Meteorite (C) | Meteorite (A) | Meteorite (D) | ||||
Sirhru Phullam Praa[]
These chests only appear in the Zodiac versions.
| Chest | Spawns | Holds Gil% | Gil | Normal Treasure | Diamond Armlet Treasure | ||
|---|---|---|---|---|---|---|---|
| 9[note 1] | 100% | 0% | N/A | Caliper | |||
| 10 | 5% | 10% | ≤ 2,000 gil | Item 1 | Item 2 | Common | Rare |
| Meteorite (B) | Meteorite (C) | Meteorite (A) | Meteorite (D) | ||||
- ↑ Chest does not respawn.
Sirhru Phullam Praa'vaa[]
- Zodiac
| Chest | Spawns | Holds Gil% | Gil | Normal Treasure | Diamond Armlet Treasure | ||
|---|---|---|---|---|---|---|---|
| 11[note 1] | 20% | 0% | N/A | Staff of the Magi | |||
| 12 | 5% | 10% | ≤ 2,000 gil | Item 1 | Item 2 | Common | Rare |
| Meteorite (B) | Meteorite (C) | Meteorite (A) | Meteorite (D) | ||||
- ↑ Chest does not respawn.
- Original
| Chest | Spawns | Holds Gil% | Normal Treasure | Diamond Armlet Treasure | ||||
|---|---|---|---|---|---|---|---|---|
| 4 | 100% | 85% | Gil | Item 1 | Item 2 | Gil | Common | Rare |
| ≤ 2 gil | Knot of Rust | Maximillian | ≤ 5,000 gil | Knot of Rust | Demon Shield | |||
Sirhru Jilaam Praa'vaa[]
- Zodiac
| Chest | Spawns | Holds Gil% | Gil | Normal Treasure | Diamond Armlet Treasure | ||
|---|---|---|---|---|---|---|---|
| 13[note 1] | 100% | 0% | N/A | Rubber Suit | |||
| 14 | 5% | 10% | ≤ 2,000 gil | Item 1 | Item 2 | Common | Rare |
| Meteorite (B) | Meteorite (C) | Meteorite (A) | Meteorite (D) | ||||
- ↑ Chest does not respawn.
- Original
| Chest | Spawns | Holds Gil% | Normal Treasure | Diamond Armlet Treasure | ||||
|---|---|---|---|---|---|---|---|---|
| 5 | 100% | 75% | Gil | Item 1 | Item 2 | Gil | Common | Rare |
| ≤ 2 gil | Knot of Rust | Mirage Vest | ≤ 5,000 gil | Knot of Rust | Gungnir | |||
Sirhru Phullam Pratii'vaa[]
- Zodiac
| Chest | Spawns | Holds Gil% | Gil | Normal Treasure | Diamond Armlet Treasure | ||
|---|---|---|---|---|---|---|---|
| 15[note 1] | 100% | 0% | N/A | Shellga | |||
| 16 | 5% | 10% | ≤ 2,000 gil | Item 1 | Item 2 | Common | Rare |
| Meteorite (B) | Meteorite (C) | Meteorite (A) | Meteorite (D) | ||||
- ↑ Chest does not respawn.
- Original
| Chest | Spawns | Holds Gil% | Normal Treasure | Diamond Armlet Treasure | ||||
|---|---|---|---|---|---|---|---|---|
| 6 | 100% | 70% | Gil | Item 1 | Item 2 | Gil | Common | Rare |
| ≤ 2 gil | Knot of Rust | Power Armlet | ≤ 5,000 gil | Knot of Rust | Golden Skullcap | |||
Sirhru Phullam Udiipratii[]
These chests only appear in the Zodiac versions.
| Chest | Spawns | Holds Gil% | Gil | Normal Treasure | Diamond Armlet Treasure | ||
|---|---|---|---|---|---|---|---|
| 17[note 1] | 100% | 0% | N/A | Crown of Laurels | |||
| 18 | 5% | 10% | ≤ 2,000 gil | Item 1 | Item 2 | Common | Rare |
| Meteorite (B) | Meteorite (C) | Meteorite (A) | Meteorite (D) | ||||
- ↑ Chest does not respawn.
Sirhru Jilaam Pratii'vaa[]
- Zodiac
| Chest | Spawns | Holds Gil% | Gil | Normal Treasure | Diamond Armlet Treasure | ||
|---|---|---|---|---|---|---|---|
| 19[note 1] | 25% | 0% | N/A | Yagyu Darkblade | |||
| 20 | 5% | 10% | ≤ 2,000 gil | Item 1 | Item 2 | Common | Rare |
| Meteorite (B) | Meteorite (C) | Meteorite (A) | Meteorite (D) | ||||
- ↑ Chest does not respawn.
- Original
| Chest | Spawns | Holds Gil% | Normal Treasure | Diamond Armlet Treasure | ||||
|---|---|---|---|---|---|---|---|---|
| 7 | 100% | 80% | Gil | Item 1 | Item 2 | Gil | Common | Rare |
| ≤ 2 gil | Knot of Rust | Sage's Ring | ≤ 5,000 gil | Knot of Rust | Renewing Morion | |||
| 8[note 1] | 20% | 0% | Excalibur | |||||
- ↑ Chest does not respawn.
Uldobi Phullam Udiipraa[]
- Zodiac
| Chest | Spawns | Holds Gil% | Gil | Normal Treasure | Diamond Armlet Treasure | ||
|---|---|---|---|---|---|---|---|
| 21[note 1] | 100% | 0% | N/A | Ring of Renewal | |||
| 22 | 5% | 10% | ≤ 2,000 gil | Item 1 | Item 2 | Common | Rare |
| Meteorite (B) | Meteorite (C) | Meteorite (A) | Meteorite (D) | ||||
- ↑ Chest does not respawn.
- Original
| Chest | Spawns | Holds Gil% | Normal Treasure | Diamond Armlet Treasure | ||||
|---|---|---|---|---|---|---|---|---|
| 9 | 100% | 80% | Gil | Item 1 | Item 2 | Gil | Common | Rare |
| ≤ 2 gil | Knot of Rust | Stoneblade | ≤ 5,000 gil | Knot of Rust | Glimmering Robes | |||
Crystal Peak[]
These chests only appear in the Zodiac versions. Due to the low odds of both spawning and obtaining the Gendarme treasure naturally, it is often exploited via RNG manipulation. The Gendarme itself is a shield with highly-beneficial stats and no model, functioning as an Easter egg of sorts that is not mandatory for collection.
| Chest | Spawns | Holds Gil% | Gil | Normal Treasure | Diamond Armlet Treasure | ||
|---|---|---|---|---|---|---|---|
| 23[note 1] | 100% | 0% | N/A | Excalibur | |||
| 24 | 1% | 20% | ≤ 1,000 gil | Item | Common | Rare | |
| Meteorite (B) | Meteorite (A) | Gendarme | |||||
- ↑ Chest does not respawn.
Uldobi Phullam Pratii[]
- Zodiac
| Chest | Spawns | Holds Gil% | Gil | Normal Treasure | Diamond Armlet Treasure | ||
|---|---|---|---|---|---|---|---|
| 25[note 1] | 100% | 0% | N/A | Hastega | |||
| 26 | 5% | 10% | ≤ 2,000 gil | Item 1 | Item 2 | Common | Rare |
| Meteorite (B) | Meteorite (C) | Meteorite (A) | Meteorite (D) | ||||
- ↑ Chest does not respawn.
- Original
| Chest | Spawns | Holds Gil% | Normal Treasure | Diamond Armlet Treasure | ||||
|---|---|---|---|---|---|---|---|---|
| 10[note 1] | 20% | 0% | Gil | Item 1 | Item 2 | Gil | Item | |
| N/A | Zodiac Escutcheon | Brave Suit | N/A | Zodiac Escutcheon | ||||
- ↑ Chest does not respawn.
Uldobi Phullam Pratii'dii[]
These chests only appear in the Zodiac versions.
| Chest | Spawns | Holds Gil% | Gil | Normal Treasure | Diamond Armlet Treasure | ||
|---|---|---|---|---|---|---|---|
| 27[note 1] | 100% | 0% | N/A | Artemis Bow | |||
| 28 | 5% | 10% | ≤ 2,000 gil | Item 1 | Item 2 | Common | Rare |
| Meteorite (B) | Meteorite (C) | Meteorite (A) | Meteorite (D) | ||||
- ↑ Chest does not respawn.
Quests[]
Rare Game[]
Evil Spirit has a 5% chance of appearing instead of a Forbidden.
Larva Eater[]
The Larva Eater is one of the toughest enemies to spawn, mainly because of the criteria required to spawn it.
The spawn method based on the The Zodiac Age Ultimania explains that it appears after the player has killed 256 enemies since their last travel with a Waystone, and will only spawn at Waystones III-X, XIII-XVII and XX, and subsequently after the next 30 to 255 kills. Kills in this case include any enemies that Self-Destruct such as Mom Bombs, and killing enemies that spawn from using Divide such as Necrophobes. Chains are not required to be maintained. As with the Reaper, leaving the Great Crystal or reloading the save file will reset the kill count.
Crystal Knight[]
To find the Crystal Knight the player must have spoken to the "Huntmaster" in Phon Coast and defeated Thalassinon, which will trigger the start of the Rare Game quest. To spawn the Crystal Knight, the player must start at Way Stone XX and run a clockwise loop to the Sagittarius Gate Switch and back. The Crystal Knight appears on the platform with two Forbiddens. Once it has been slain, the Crystal Knight can never be hunted again.
To reach the Sagittarius Gate Switch, from the first area of the Great Crystal the player should move one area to find and open the Scorpio Gate Switch, then move back to the previous area and take the exit to the left of the path to the Scorpio Gate Switch. This takes them to Waystone IX, which teleports the party to Waystone X.
Finding Ultima[]

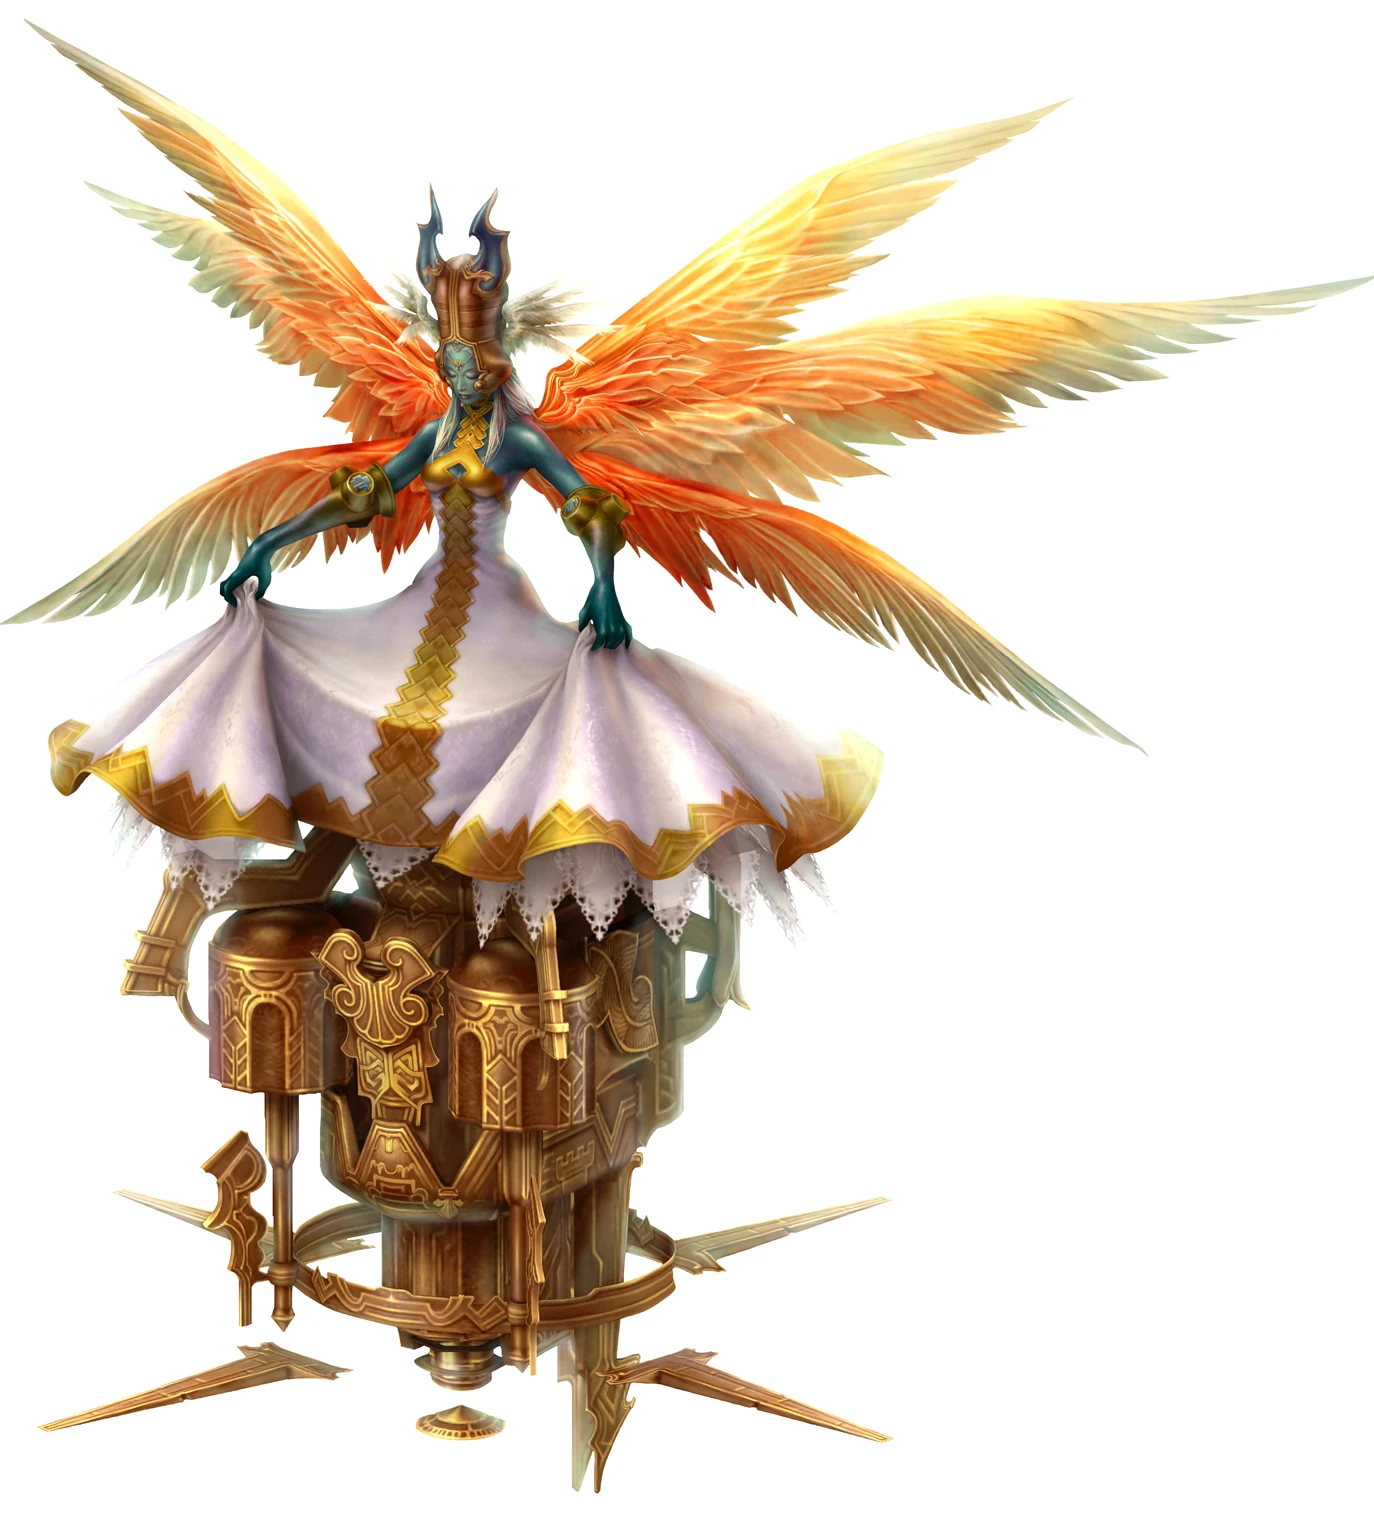
Ultima.
The Esper Ultima can be fought after receiving the Treaty-Blade. The player must return to Waystone VIII, which is the waystone that allows access to Great Crystal from Giruvegan. From the waystone, there are three paths: one goes up, one goes down and another one is sealed by Gate Scorpio. The player must follow the path going up and unseal Gate Scorpio on the following platform, then return to Waystone VIII and head through Gate Scorpio to Waystone IX, which can be used to teleport to Waystone X.
From Waystone X the player reaches Waystone XX. On this platform there are two paths sealed by Gate Sagittarius (Gates I and II), plus another three paths: one going down, two leading up, and the last path is the one the player came in on. From the path they arrived from, the player should head directly across the platform toward the only other path heading down. Eventually they will come to a switch for Gate Sagittarius.
After unsealing the gate there will be a time limit of 71.00 seconds and the player must hurry back to Waystone XX. The player can either go back the way they came, or head up to the next platform, and then take the only path leading down, which will lead back to Waystone XX. (Taking this path is the spawn condition for the Crystal Knight, who will appear next to the Sagittarius gates if the player has started the Phon Coast Hunt Club sidequest.) After reaching Waystone XX the player must open Sagittarius Gate II.
Descending from Sagittarius Gate II leads to Waystone XII, which teleports to Waystone XIV. On this platform there are two paths, one leading up and the other leading down. The player must head up to the Gate Leo switch, then return to the previous platform, as again there will be a time limit, this time of 215.00 seconds. From the platform the player should take the path going down and then take the only possible path on the next platform. On the third platform there are two paths, one leading to Gate Leo II and the other to an Excalibur treasure, which isn't accessible yet.
After passing through Leo II there are two more paths and Gate Gemini. The player can take either path, both leading to Waystone XV that teleports to Waystone XVI.
On Waystone XVI the player must follow the middle path to the switch for Gate Libra (this place will be revisited). The player must push the switch and return to platform XVI. There will be a time limit of 71.00 seconds. Facing Waystone XVI, the player should take the right path upward and on the next platform unseal Gate Libra I. The player should continue to head up from the newly opened gate to reach a platform with three paths; the player should head left and take the only path leading up.
After pushing the switch for Gate Capricorn the player should return to platform XVI (with a time limit of 180.00 seconds). On platform XVI they should take the only path heading down to Gate Capricorn I and the switch for Gate Virgo. After touching the switch the player should quickly return to platform XVI (with a time limit of 108.00 seconds), and on platform XVI follow the middle path, which leads back to the Libra switch; from there the player should follow the path down to two Gates, Capricorn II and Virgo II on the next platform, unseal Gate Virgo II and cross it.
In the next section, from where the player entered, they should take the right path leading up to Waystone XVII that teleports to Waystone XVIII. The path will lead to a Save Crystal. From the Save Crystal there are three paths: the one heading down leads the Aquarius Switch, and the opposite leads to Waystone XIX, which will warp back to Waystone XX. Ultima is sealed down the path in the middle.
Finding Omega Mark XII[]
Omega Mark XII is available to fight once the hunt for Yiazmat has been accepted. The player party can enter Omega's chamber beforehand, but it will be in a dormant state and unresponsive, resembling a giant treasure chest like the Mimics in other dungeons.
The player must have made it to the area before Ultima (see above) and have Way Stone XX activated. Using Way Stone XX the player can teleport to Dha Vikaari Dhebon Ra, then cross Kanbhru Pis and activate the Aquarius Gate Stone in Sthaana Aquarius. The player can now go to Dha Vikaari Uldobi and use Way Stone XVIII to teleport back to A Vikaari Kanbhru.
Once there, the player should head to Uldobi Jilaam Avaa, and take the right path to Uldobi Jilaam Praa'vaa. If Gate Libra 2 is blocking the way the player can either take the left path and hit the Libra Gate Stone, then unlock Gate Libra, backtrack to the Aquarius Gate Stone and come back, or go the long way by moving left through Sthaana Libra, turning right and crossing Dha Vikaari Sirhru, turning right again and crossing Uldobi Jilaam Praa'dii, heading straight to Uldobi Jilaam Praa and on to Uldobi Phullam Praa'vaa back to Aquarius Gate 1. The player should touch it but not enter.
If Gate Libra 2 is unlocked when the player first gets there, they should head straight to Uldobi Jilaam Praa and turn right to enter Uldobi Phullam Praa'vaa, touch Gate Aquarius 1, but not go further.
The player should return to Uldobi Jilaam Praa and take the path to the right. At Sthaana Capricorn, the player should touch the Gate Capricorn Stone before returning to Uldobi Jilaam Praa. The player should take the right path to reenter Uldobi Jilaam Praa'dii and take the only path across to return to Dha Vikaari Sirhru, where they should approach Way Stone XVI before entering the first path to the left to return to Sthaana Libra. The player should head right and in Uldobi Jilaam Pratii'vaa, touch Gate Capricorn II on the right but not go through; instead, the player should return to Gate Aquarius I and enter the other path leading to Sthaana Taurus. To get there, the player should take the left at Sthaana Libra, right at Dha Vikaari Sirhru, straight on at Uldobi Jilaam Praa'dii, straight on at Uldobi Jilaam Praa and left at Uldobi Phullam Praa'vaa.
After activating the Taurus Gate Stone the player can return all the way back to Uldobi Jilaam Pratii'vaa and enter the right path where Gate Capricorn II was at. The path to the left will lead to Gate Carpricorn II and activating it will allow access to the right in the next area that in the original PlayStation 2 version will possibly have a Brave Suit or the Zodiac Escutcheon, one of the best shields in the game, and in the Zodiac versions, is the Hastega spell. Doing this however, the player will have to backtrack all the way to the Capricorn Gate Stone and re-activate it.
If the player instead wants to open the path to Omega Mark XII right away, they should enter the path directly ahead in Uldobi Jilaam Pratii and activate Gate Capricorn I in Uldobi Phullam Pratii'dii, take the right path after activating the Gate Capricorn to find Way Stone XXI on the platform of Dha Vikaari Sirhru Si. Way Stone XXI will take the party to A Vikaari Uldobi Si, which is one platform away from the Way Stone XXIII that will teleport the party to the platform right before Omega Mark XII.
The player may want to save their game before fighting the boss. To get to the closest save crystal, the player should go left at Uldobi Phullam Pratii'dii, straight on at Uldobi Jilaam Pratii, left at Uldobi Jilaam Pratii'vaa, right at Sthaana Libra, right at Uldobi Jilaam Praa'vaa, left at Uldobi Jilaam Avaa, teleport at Way Stone XVII in A Vikaari Kanbhru, head straight on at Dha Vikaari Uldobi to get back at the blue save crystal in Kanbhru Pis.
To get back to Omega Mark XII from the save crystal, the player can teleport at Way Stone XVIII in Dha Vikaari Uldobi, go right at Uldobi Jilaam Avaa, left at Uldobi Jilaam Praa'vaa, left at Sthaana Libra, right at Uldobi Jilaam Pratt'vaa, straight at Uldobi Jilaam Pratii, right at Uldobi Phullam Pratii'dii, take the Way Stone XXI in Dha Vikaari Sirhru Si to A Vikaari Uldobi Si, then walk down the path to Dha Vikaari Dhebon Si and use Way Stone XXIII. The party will end up in A Vikaari Sirhru Si, from where they can go down one more platform to Dhebon Jilaam Avaa and fight Omega Mark XII.
Enemies[]
- Ose
- Reaper
- Mythril Golem
- Mom Bomb
- Necrophobe
- Shadonir
- Ash Wyrm
- Forbidden
- Skulwyrm
- Giruveganus
- Evil Spirit (Rare)
- Larva Eater (Rare)
- Crystal Knight (Rare)
- Omega Mark XII (Superboss)
- Ultima (Hidden Esper)
Musical themes[]
The theme of the Great Crystal is called "To Walk Amongst Gods".
Maps[]
The Great Crystal is one of two locations in Final Fantasy XII that have a location sketch instead of a map. The other is the Sky Fortress Bahamut.
- External link to Jegged.com for a complete Zodiac version map.
")
")
Other appearances[]
Final Fantasy Brave Exvius[]
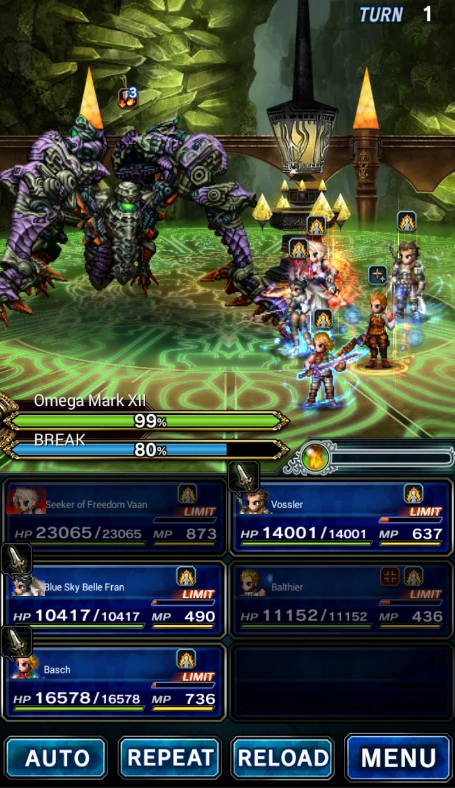
Gallery[]
")
")
")
")
")
")
")
")
")
")
")
")
")