Intangir Bot (talk | contribs) m (updates {{Gallery}} to <gallery>) Tag: apiedit |
No edit summary |
||
| (39 intermediate revisions by 13 users not shown) | |||
| Line 1: | Line 1: | ||
| + | {{sideicon|prime=FFVI|FFXIV|FFD2|PFF|Mobius}} |
||
| − | {{Sideicon|FFVI}} |
||
| + | {{DISPLAYTITLE:Goddess (''Final Fantasy VI'')}} |
||
| − | {{FFVI Enemy |
||
| + | {{infobox enemy |
||
| + | | release = FFVI |
||
| japanese = めがみ |
| japanese = めがみ |
||
| romaji = Megami |
| romaji = Megami |
||
| − | | |
+ | | name = Goddess |
| ⚫ | |||
| ⚫ | |||
| ⚫ | |||
| image = <gallery> |
| image = <gallery> |
||
Goddess-ffvi-ios.png|Mobile/PC |
Goddess-ffvi-ios.png|Mobile/PC |
||
| Line 13: | Line 12: | ||
Goddess.PNG|SNES |
Goddess.PNG|SNES |
||
</gallery> |
</gallery> |
||
| + | |location = [[Kefka's Tower]] |
||
| + | |type = Boss |
||
| + | |formations = true |
||
| + | |aiscript = true |
||
| + | |character=Warring Triad |
||
| + | }} |
||
| ⚫ | |||
| ⚫ | |||
| ⚫ | '''Goddess''' is a [[boss]] in ''[[Final Fantasy VI]]''. She is a member of the [[Warring Triad]], and one of the three [[List of final bosses|final bosses]] in [[Kefka's Tower]] before facing [[Kefka (final boss)|Kefka]] himself. According to the ''[[Final Fantasy III Nintendo Player's Guide]]'', the final battle sequence against the [[Statue of the Gods]] is a rematch of the Warring Triad; the second tier being Goddess.<ref name="iii-p129>''Final Fantasy III Nintendo Player's Guide'', p.129</ref> No official material support this, however; the idea was created by Nintendo of America. |
||
| + | |||
| + | == Stats == |
||
| + | {{infobox enemy stats FFVI |
||
| + | | snes = Goddess |
||
| ⚫ | |||
| ⚫ | |||
| ⚫ | |||
| ios prev = Fiend (Final Fantasy VI) |
| ios prev = Fiend (Final Fantasy VI) |
||
| ios boss = 82 |
| ios boss = 82 |
||
| Line 36: | Line 51: | ||
| holy = Absorb |
| holy = Absorb |
||
| snes location = [[Kefka's Tower]] |
| snes location = [[Kefka's Tower]] |
||
| − | | snes steal 2 = [[ |
+ | | snes steal 2 = [[Final Fantasy VI armor#Minerva Bustier|Minerva]] |
| − | | snes drop 1 = [[ |
+ | | snes drop 1 = [[Final Fantasy VI weapons#Excalibur|Excalibur]] |
| − | | snes drop 2 = [[ |
+ | | snes drop 2 = [[Final Fantasy VI weapons#Excalibur|Excalibur]] |
| morph id = 0 |
| morph id = 0 |
||
| − | | snes special attack = [[ |
+ | | snes special attack = [[Final Fantasy VI enemy abilities#Hit|Hit]] (Level 1 = Attack x 1.5) |
| − | | snes sketch = Battle, [[ |
+ | | snes sketch = Battle, [[Final Fantasy VI enemy abilities#Hit|Hit]] |
| − | | snes control = Battle, [[ |
+ | | snes control = Battle, [[Final Fantasy VI enemy abilities#Hit|Hit]] |
| gba location = [[Kefka's Tower]] |
| gba location = [[Kefka's Tower]] |
||
| − | | gba steal 2 = [[ |
+ | | gba steal 2 = [[Final Fantasy VI armor#Minerva Bustier|Minerva Bustier]] |
| − | | gba drop 1 = [[ |
+ | | gba drop 1 = [[Final Fantasy VI weapons#Excalibur|Excalibur]] |
| − | | gba drop 2 = [[ |
+ | | gba drop 2 = [[Final Fantasy VI weapons#Excalibur|Excalibur]] |
| − | | gba special attack = [[ |
+ | | gba special attack = [[Final Fantasy VI enemy abilities#Hit|Hit]] (Level 1 = Attack x 1.5) |
| − | | gba sketch = Attack, [[ |
+ | | gba sketch = Attack, [[Final Fantasy VI enemy abilities#Hit|Hit]] |
| − | | gba control = Attack, [[ |
+ | | gba control = Attack, [[Final Fantasy VI enemy abilities#Hit|Hit]] |
| blind = Immune |
| blind = Immune |
||
| zombie = Immune |
| zombie = Immune |
||
| Line 71: | Line 86: | ||
| hard escape = true |
| hard escape = true |
||
| cannot escape = true |
| cannot escape = true |
||
| − | | snes normal attack = [[ |
+ | | snes normal attack = [[Final Fantasy VI enemy abilities#Magical Brush|Magical Brsh]] |
| − | | gba normal attack = [[ |
+ | | gba normal attack = [[Final Fantasy VI enemy abilities#Magical Brush|Magical Brush]] |
| − | | snes other abilities = [[ |
+ | | snes other abilities = [[Final Fantasy VI enemy abilities#Thundara|Bolt 2]], [[Final Fantasy VI enemy abilities#Lullaby|Lullaby]], [[Final Fantasy VI enemy abilities#Thundaga|Bolt 3]], [[Final Fantasy VI enemy abilities#Entice|Charm]], [[Final Fantasy VI enemy abilities#Flash Rain|Flash Rain]], [[Final Fantasy VI enemy abilities#Quasar|Quasar]], [[Final Fantasy VI enemy abilities#Overture|Love Token]], [[Final Fantasy VI enemy abilities#Cloudy Heaven|Overcast]] |
| − | | gba other abilities = [[ |
+ | | gba other abilities = [[Final Fantasy VI enemy abilities#Thundara|Thundara]], [[Final Fantasy VI enemy abilities#Lullaby|Lullaby]], [[Final Fantasy VI enemy abilities#Thundaga|Thundaga]], [[Final Fantasy VI enemy abilities#Entice|Entice]], [[Final Fantasy VI enemy abilities#Flash Rain|Flash Rain]], [[Final Fantasy VI enemy abilities#Quasar|Quasar]], [[Final Fantasy VI enemy abilities#Overture|Overture]], [[Final Fantasy VI enemy abilities#Cloudy Heaven|Cloudy Heaven]] |
| − | }} |
+ | }} |
| ⚫ | |||
| ⚫ | |||
| ⚫ | '''Goddess''' is a boss in ''[[Final Fantasy VI]]''. She is a member of the [[Warring Triad]], and one of the three final bosses in [[Kefka's Tower]] before facing [[Kefka (final boss)|Kefka]] himself. According to the ''[[Final Fantasy III Nintendo Player's Guide]]'', the final battle sequence against the [[Statue of the Gods]] is |
||
| ⚫ | |||
| − | {{See Also|Warring Triad}} |
||
| ⚫ | Though Goddess has the lowest [[HP (stat)|HP]] of the three Warring Triad members, she is arguably the most difficult to defeat due to a dangerous attack unique to her that can catch players off-guard. Goddess has inherent [[Shell (status)|Shell]] and [[Haste (status)|Haste]] and she counters any regular [[Attack (command)#Final Fantasy VI|physical attack]] with Overture, which forces the target to take all physical damage for the Goddess. She can use [[Final Fantasy VI enemy abilities#Entice|Entice]], inflicting a [[Confuse (status)|Confuse]]-like status that cannot be healed by spells or items and makes the character attack their allies. She also uses Lullaby. Offensively, the Goddess's normal attacks are not powerful. She uses [[Thundaga (ability)|Thundaga]], [[Thundara (ability)|Thundara]], Flash Rain and Quasar, a rare spell that does [[non-elemental]] damage to the party. |
||
| ⚫ | |||
| ⚫ | Though Goddess has the lowest [[HP (stat)|HP]] of the three Warring Triad members, she is arguably the most difficult to defeat due to a dangerous attack unique to her that can catch players off-guard. Goddess has inherent [[Shell (status)|Shell]] and [[Haste (status)|Haste]] and she counters any regular [[Attack (command)#Final Fantasy VI|physical attack]] with Overture, which forces the target to take all physical damage for the Goddess. She can use [[ |
||
| − | When damaged eight times, Goddess uses Cloudy Heaven, an attack unique to her. From that point forward, all characters who die, for any reason, become [[Zombie (status)|zombies]]. All characters also gain a [[Doom (status)|Doom]] timer, which will quickly zombify the party if not in a position to |
+ | When damaged eight times, Goddess uses Cloudy Heaven, an attack unique to her. From that point forward, all characters who die, for any reason, become [[Zombie (status)|zombies]]. All characters also gain a [[Doom (status)|Doom]] timer, which will quickly zombify the party if not in a position to win the battle quickly enough. The zombification effect lasts until the end of the battle—if a party member is cured of Zombie status and killed again, they become a zombie again. Only the [[Relic (Final Fantasy VI)#Safety Bit|Safety Bit]] and the [[Relic (Final Fantasy VI)#Memento Ring|Memento Ring]] block this move, as Cloudy Heaven is treated as an [[Instant Death|Death]] attack rather than a [[status effect|status]] attack, thus ignoring status immunity to Zombie from relics like the [[Relic (Final Fantasy VI)#Ribbon|Ribbon]]. |
| − | ===Strategy=== |
+ | === Strategy === |
| − | It is best to kill Goddess |
+ | It is best to kill Goddess before Cloudy Heaven. [[Flare (ability)#Final Fantasy VI|Flare]] and [[Ultima (ability)#Final Fantasy VI|Ultima]] will ignore Shell and do full damage, and multi-hit attacks with the [[Relic (Final Fantasy VI)#Master's Scroll|Master's Scroll]] also work well. Equipment that absorbs or negates [[Lightning (element)|Lightning]] will nullify much of the Goddess's attack spells, though the true dangers are her status attacks. |
| − | == |
+ | == Formations == |
| + | {|class="full-width article-table FFVI" style="text-align:center" |
||
| + | |-class="a" |
||
| + | !rowspan="2" style="width:10%"|Number |
||
| + | !rowspan="2" style="width:25%"|Enemies |
||
| + | !colspan="4" style="width:10%"|Encounter flags |
||
| + | !rowspan="2" style="width:10%"|Introduction flag |
||
| + | !rowspan="2" style="width:10%"|Musical theme |
||
| + | !rowspan="2" style="width:5%"|Magic AP |
||
| + | |-class="a" |
||
| + | !style="width:2.5%"|Normal |
||
| + | !style="width:2.5%"|Back |
||
| + | !style="width:2.5%"|Surrounded |
||
| + | !style="width:2.5%"|Side |
||
| + | |- |
||
| + | !class="b" rowspan="2"|{{A|469}} |
||
| + | |Goddess |
||
| ⚫ | |||
| ⚫ | |||
| + | |{{x}} |
||
| + | |{{x}} |
||
| + | |Fade-in type 2 |
||
| + | |[[Battle to the Death (Final Fantasy VI)|Battle to the Death]] |
||
| + | |10 |
||
| + | |- |
||
| + | |colspan="8" style="text-align:left"|Hide start messages. |
||
| + | |- |
||
| + | |} |
||
| + | |||
| + | == AI script == |
||
Attack Turns:<br/> |
Attack Turns:<br/> |
||
1st Turn: Thundara (33%) or Attack (33%) or Lullaby (33%)<br/> |
1st Turn: Thundara (33%) or Attack (33%) or Lullaby (33%)<br/> |
||
| Line 110: | Line 150: | ||
:Cloudy Heaven (100%) |
:Cloudy Heaven (100%) |
||
| − | ==Other |
+ | == Other appearances == |
| − | ===''[[Final Fantasy XIV]]''=== |
+ | === ''[[Final Fantasy XIV]]'' === |
| − | [[File:FFXIV |
+ | [[File:FFXIV Sophia.png|165px|right|Sophia, the Goddess.]] |
| + | {{Main|Sophia (Final Fantasy XIV)}} |
||
| − | {{sideicon|FFXIV}} |
||
| + | Known as "Sophia, the Goddess", she is one of the [[Warring Triad (Final Fantasy XIV)|Warring Triad]], three [[primal]]s that were defeated by the [[Allagan Empire]] and imprisoned as statues for centuries within the floating continent of Azys Lla. During the later events of ''[[Final Fantasy XIV: Heavensward]]'', her seal begins to weaken and the [[Warrior of Light (Final Fantasy XIV)|Warrior of Light]] must fight her within the Containment Bay P1T6. |
||
| − | The Goddess and the other two Warring Triad appear in [[Azys Lla]] in their statue forms. |
||
| ⚫ | |||
| + | In contrast to her original appearance, Sophia has glossy black skin with flowing white hair and a set of white robes with gold ornate. She fights and floats on her signature Medusa-like head. |
||
| ⚫ | |||
| − | {{ |
+ | {{clear}} |
| − | {{summon-stub|Final Fantasy Legends: Toki no Suishō}} |
||
| ⚫ | |||
| ⚫ | |||
| ⚫ | |||
| − | <gallery |
+ | <gallery> |
| + | FFLII_Goddess_Rank_8_Artwork.png|Artwork (Rank 8). |
||
| + | FFLTnS_Goddess_Alt1.png|Phantom Stone (Rank 6). |
||
| + | FFLII_Goddess_Rank_8_Phantom_Stone.png|Phantom Stone (Rank 8). |
||
| + | </gallery> |
||
| + | {{Summon section|Final Fantasy Dimensions II}} |
||
| + | |||
| + | ===''[[Pictlogica Final Fantasy]]''=== |
||
| + | [[File:PFF Goddes.png|right|100px]] |
||
| + | {{Enemy section|Pictlogica Final Fantasy}} |
||
| + | {{clear}} |
||
| + | |||
| + | ===''[[Mobius Final Fantasy]]''=== |
||
| + | [[File:MFF Goddess FFVI.jpg|right|150px]] |
||
| + | {{Section|Mobius Final Fantasy}} |
||
| + | {{clear}} |
||
| + | |||
| + | ==Behind the scenes== |
||
| + | [[File:Yunalesca artwork.jpg|thumb|Yunalesca from ''Final Fantasy X''.]] |
||
| ⚫ | |||
| + | |||
| ⚫ | In ''[[Final Fantasy X]]'', [[Yunalesca]]'s appearance seems to be based on the Goddess. Yunalesca's artwork is in the same position as the Goddess, and her third form has her mounted on the back of a medusa-like head similar to the Goddess and her mount. Like the Goddess, Yunalesca favors turning the party members into zombies. |
||
| + | {{clear}} |
||
| + | |||
| ⚫ | |||
| + | <gallery> |
||
Goddess_ffvi_concept_art.jpg|Concept artwork by Tetsuya Nomura. |
Goddess_ffvi_concept_art.jpg|Concept artwork by Tetsuya Nomura. |
||
FFVI PC Goddess.png|The Goddess in battle (iOS/Android/PC). |
FFVI PC Goddess.png|The Goddess in battle (iOS/Android/PC). |
||
| Line 129: | Line 191: | ||
</gallery> |
</gallery> |
||
| − | ==Etymology== |
+ | == Etymology == |
{{Etym|Goddess}} |
{{Etym|Goddess}} |
||
| − | In the original concept artwork by [[Tetsuya Nomura]], the Warring Triad are |
+ | In the original concept artwork by [[Tetsuya Nomura]], the Warring Triad are named beyond their basic titles. Goddess is Sophia. {{Etym|Sophia}} |
| − | Goddess is the only one of the Warring Triad whose name has remained the same in all official English translations—likely because, unlike the other two, there is little ambiguity in how to translate |
+ | Goddess is the only one of the Warring Triad whose name has remained the same in all official English translations—likely because, unlike the other two, there is little ambiguity in how to translate {{J|[[wiktionary:めがみ|めがみ]]|megami|fmt=j(r)}}. |
| + | {{Etym|Megami}} |
||
| − | ==Trivia== |
||
| ⚫ | |||
| ⚫ | |||
| − | ==Related enemies== |
+ | == Related enemies == |
| − | *[[Fiend (Final Fantasy VI)|Fiend]] |
+ | * [[Fiend (Final Fantasy VI)|Fiend]] |
| − | *[[Demon (Final Fantasy VI)|Demon]] |
+ | * [[Demon (Final Fantasy VI)|Demon]] |
| − | ==References== |
+ | == References == |
{{Reflist}} |
{{Reflist}} |
||
| + | |||
[[de:Dea]] |
[[de:Dea]] |
||
[[ru:Богиня (Final Fantasy VI)]] |
[[ru:Богиня (Final Fantasy VI)]] |
||
| − | [[Category:Final Fantasy VI |
+ | [[Category:Bosses in Final Fantasy VI]] |
Revision as of 17:18, 26 April 2020
Template:Sideicon
In addition to Bolt and like attacks, causes in-fighting in the party with Charm and Love Token. You can block the Overcast attack if you have the Relic Ring.
Final Fantasy VI PlayStation bestiary entry

Goddess is a boss in Final Fantasy VI. She is a member of the Warring Triad, and one of the three final bosses in Kefka's Tower before facing Kefka himself. According to the Final Fantasy III Nintendo Player's Guide, the final battle sequence against the Statue of the Gods is a rematch of the Warring Triad; the second tier being Goddess.[1] No official material support this, however; the idea was created by Nintendo of America.
Stats
Battle
Though Goddess has the lowest HP of the three Warring Triad members, she is arguably the most difficult to defeat due to a dangerous attack unique to her that can catch players off-guard. Goddess has inherent Shell and Haste and she counters any regular physical attack with Overture, which forces the target to take all physical damage for the Goddess. She can use Entice, inflicting a Confuse-like status that cannot be healed by spells or items and makes the character attack their allies. She also uses Lullaby. Offensively, the Goddess's normal attacks are not powerful. She uses Thundaga, Thundara, Flash Rain and Quasar, a rare spell that does non-elemental damage to the party.
When damaged eight times, Goddess uses Cloudy Heaven, an attack unique to her. From that point forward, all characters who die, for any reason, become zombies. All characters also gain a Doom timer, which will quickly zombify the party if not in a position to win the battle quickly enough. The zombification effect lasts until the end of the battle—if a party member is cured of Zombie status and killed again, they become a zombie again. Only the Safety Bit and the Memento Ring block this move, as Cloudy Heaven is treated as an Death attack rather than a status attack, thus ignoring status immunity to Zombie from relics like the Ribbon.
Strategy
It is best to kill Goddess before Cloudy Heaven. Flare and Ultima will ignore Shell and do full damage, and multi-hit attacks with the Master's Scroll also work well. Equipment that absorbs or negates Lightning will nullify much of the Goddess's attack spells, though the true dangers are her status attacks.
Formations
| Number | Enemies | Encounter flags | Introduction flag | Musical theme | Magic AP | |||
|---|---|---|---|---|---|---|---|---|
| Normal | Back | Surrounded | Side | |||||
| 469 | Goddess | Fade-in type 2 | Battle to the Death | 10 | ||||
| Hide start messages. | ||||||||
AI script
Attack Turns:
1st Turn: Thundara (33%) or Attack (33%) or Lullaby (33%)
2nd Turn: Thundaga (33%) or Entice (33%) or Attack (33%)
3rd Turn: Thundara (33%) or Attack (33%) or Thundaga (33%)
If HP <= 32640:
- 1st Turn: Thundaga (33%) or Flash Rain (33%) or Nothing (33%)
- 2nd Turn: Thundaga (66%) or Flash Rain (33%)
- 3rd Turn: Thundaga (33%) or Quasar (66%)
- 4th Turn: Thundaga (66%) or Flash Rain (33%)
If attacked by "Attack": Overture (33%)
- Increase Var3 by 1
If attacked by anything: Thundara (33%)
- Increase Var3 by 1
If Var3 >= 8 (only done once per battle):
- Set Var3 = 0
- Cloudy Heaven (100%)
Other appearances
Final Fantasy XIV
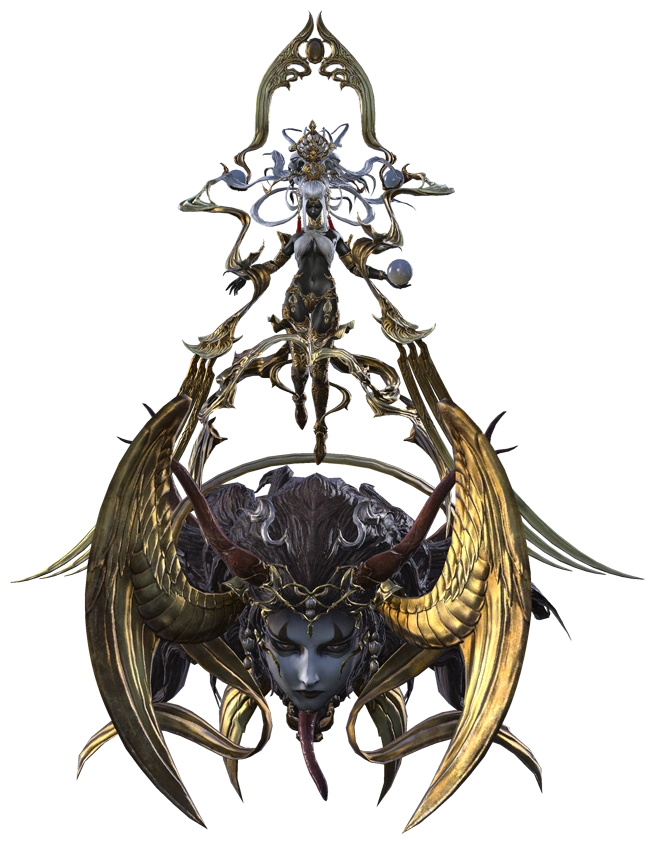
Known as "Sophia, the Goddess", she is one of the Warring Triad, three primals that were defeated by the Allagan Empire and imprisoned as statues for centuries within the floating continent of Azys Lla. During the later events of Final Fantasy XIV: Heavensward, her seal begins to weaken and the Warrior of Light must fight her within the Containment Bay P1T6.
In contrast to her original appearance, Sophia has glossy black skin with flowing white hair and a set of white robes with gold ornate. She fights and floats on her signature Medusa-like head.
Final Fantasy Dimensions II
")
Pictlogica Final Fantasy
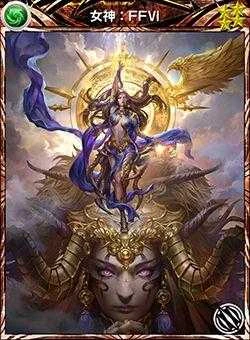
Mobius Final Fantasy
Behind the scenes
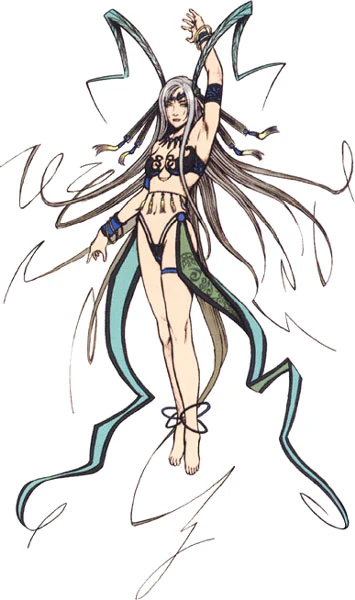
Yunalesca from Final Fantasy X.
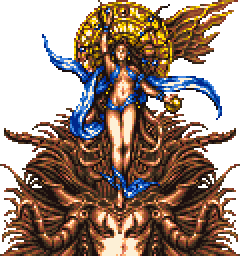
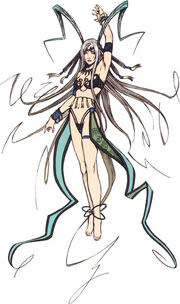
In the North American SNES release, due to tighter censorship, Goddess's clothing was edited for greater coverage of her breasts and upper thighs. The uncensored sprite was used in all other releases until the mobile/Steam remake, which uses a new design.
In Final Fantasy X, Yunalesca's appearance seems to be based on the Goddess. Yunalesca's artwork is in the same position as the Goddess, and her third form has her mounted on the back of a medusa-like head similar to the Goddess and her mount. Like the Goddess, Yunalesca favors turning the party members into zombies.
Gallery
")
")
")
Etymology
A goddess is a female deity with supernatural powers. Goddesses most often have feminine characteristics, but they may be represented with characteristics of both masculinity and femininity or with characteristics that do not conform to any binary gender. In some traditions, such as the Classical Greek and Roman, it was common for personifications of abstract concepts like Victory to default to feminine representations, which may or may not be treated as a goddess in its own right. While goddesses may be associated with any variety of phenomena, including war, destruction, or death, they tend to be associated with the roles and characteristics their cultures of origin assign to femininity, which may include creation, mercy, sexuality and/or sex work, or motherhood.
In the original concept artwork by Tetsuya Nomura, the Warring Triad are named beyond their basic titles. Goddess is Sophia. Sophia, Greek for wisdom, is a central idea in Hellenistic philosophy and religion, Platonism, Gnosticism, Orthodox Christianity, Esoteric Christianity, as well as Christian mysticism, and is commonly represented as a goddess. Sophia is also a primary deity in Gnosticism. As a feminine given name of Greek origin, Sophia retains the meaning of "wisdom", with variant names Sofia and Sophie among others in Western culture.
Goddess is the only one of the Warring Triad whose name has remained the same in all official English translations—likely because, unlike the other two, there is little ambiguity in how to translate めがみ (megami?).
Megami (女神) means "goddess" in Japanese. From two kanji: 女 (onna, woman) and 神 (kami, god).
Related enemies
References
- ↑ Final Fantasy III Nintendo Player's Guide, p.129