(need someone else to go through this >.<) |
Intangir Bot (talk | contribs) m (Bot: Changing template: Q) |
||
| (39 intermediate revisions by 11 users not shown) | |||
| Line 1: | Line 1: | ||
| − | {{sideicon|FFXII}} |
+ | {{sideicon|prime=FFXII}} |
<!-- The image does indeed say "Judge Gabranth" but in the game it is just Gabranth. It is important you DO NOT move the article --> |
<!-- The image does indeed say "Judge Gabranth" but in the game it is just Gabranth. It is important you DO NOT move the article --> |
||
| + | {{infobox enemy |
||
| − | {{IncompleteTable}} |
||
| + | | release = FFXII |
||
| − | {{FFXII Enemy |
||
| − | | |
+ | |name = Gabranth |
| ⚫ | |||
| japanese = ガブラス |
| japanese = ガブラス |
||
| romaji = Gaburasu |
| romaji = Gaburasu |
||
| − | | image = |
+ | | image = XII gabranth render.png |
| ⚫ | |||
| ⚫ | |||
| − | | |
+ | |type = Boss |
| + | |character = [[Gabranth]] |
||
| ⚫ | |||
| − | | |
+ | |aiscript = yes |
| ⚫ | |||
| ⚫ | '''Gabranth''' is a [[boss]] in ''[[Final Fantasy XII]]'' whom the [[party]] fights twice in the main game: first in the [[Pharos (Final Fantasy XII)|Pharos]], and again on board the [[Sky Fortress Bahamut|Sky Fortress ''Bahamut'']]. He is also fought in [[Trial Mode]] at [[Trial Mode#100|Stage 100]] in ''Zodiac'' versions alongside the other [[Archadian Judge|Judge Magisters]]: [[Judge Ghis (boss)#Trial Mode|Ghis]], [[Judge Drace (boss)|Drace]], [[Judge Zargabaath (boss)|Zargabaath]] and [[Judge Bergan (boss)#Trial Mode|Bergan]]. In the Trial Mode, [[Tournesol (Final Fantasy XII)|Tournesol]] can be stolen from him. |
||
| + | |||
| + | The boss is called '''Judge Gabranth''' in the bestiary and official guide, but his name is just "Gabranth" in the battle. |
||
| + | |||
| ⚫ | |||
| + | === Page 1: Observations === |
||
| ⚫ | {{Quote|Being a member of the Order of Judges of the Imperial Archadian Ministry of Law, and Judge Magister of the 9th Bureau.<br/>The 9th Bureau, led by Gabranth, is primarily concerned with the gathering and dissemination of information. As a result, many of the bureau's activities are shrouded in secrecy.<br/>Gabranth, and his power, are respected by other Judge Magisters, and Emperor Gramis himself places great faith in this younger Judge.}} |
||
| + | |||
| + | ==Stats== |
||
| + | {{infobox enemy stats FFXII |
||
| + | | name = Gabranth |
||
| ⚫ | |||
| ⚫ | |||
| + | | genus = Judge |
||
| + | | prev = Rook (Final Fantasy XII) |
||
| ⚫ | |||
| bestiary = 383 |
| bestiary = 383 |
||
| next no = 384 |
| next no = 384 |
||
| − | | next = Doctor Cid ( |
+ | | next = Doctor Cid (boss) |
| ⚫ | |||
| − | | bestiary location = The Archadian Empire |
||
| + | | sec 2 = Sky Fortress ''Bahamut'' |
||
| ⚫ | |||
| − | | |
+ | | sec 3 = Trial Mode |
| − | | |
+ | | libra immune = yes |
| − | | 1 |
+ | | 1 level = 47 |
| − | | 1 |
+ | | 1 evade = 7 |
| − | | 1 |
+ | | 1 hp = 64,049 |
| − | | 1 |
+ | | 1 mp = 999 |
| − | | 1 |
+ | | 1 strength = 45 |
| − | | 1 |
+ | | 1 defense = 33 |
| − | | 1 |
+ | | 1 magick power = 24 |
| − | | 1 |
+ | | 1 magick resist = 31 |
| − | | 1 |
+ | | 1 vitality = 74 |
| − | | 1 |
+ | | 1 speed = 24 |
| − | | 1 |
+ | | 1 attack power = 80 |
| − | | 1 |
+ | | 1 exp = 0 |
| − | | 1 |
+ | | 1 cp = 3,600 |
| − | | 1 |
+ | | 1 gil = 0 |
| − | | |
+ | | 2 level = 49 |
| − | | |
+ | | 2 evade = 10 |
| − | | |
+ | | 2 hp = 70,719 |
| ⚫ | |||
| ⚫ | |||
| ⚫ | |||
| ⚫ | |||
| ⚫ | |||
| ⚫ | |||
| ⚫ | |||
| ⚫ | |||
| ⚫ | |||
| ⚫ | |||
| ⚫ | |||
| ⚫ | |||
| ⚫ | |||
| − | | 1 steal 3 = X-Potion, [[Elixir (Item)|Elixir]] |
||
| ⚫ | |||
| ⚫ | |||
| ⚫ | |||
| ⚫ | |||
| ⚫ | |||
| ⚫ | |||
| ⚫ | |||
| ⚫ | |||
| ⚫ | |||
| ⚫ | |||
| ⚫ | |||
| ⚫ | |||
| ⚫ | |||
| ⚫ | |||
| ⚫ | |||
| − | | 1 attacks = Attack, [[Kick (Ability)|Kick]], Lunge, Circle of Judgment, Guilt, Sentence, Innocence (2nd) |
||
| − | | 1 magicks = [[Protect (Ability)|Protect]], [[Renew]] (2nd) |
||
| − | | 1 technicks = Enrage (2nd) |
||
| − | | 1 innate augments = Safety, Null Knockback, Shield Block |
||
| − | | 1 conditional augments = Attack CT 0 (when Enraged), Magick Shield (first form), Spellbound (second form), Last Stand (second)<br>In second form when HP<50%, 0 Magick CT, Damge Resist, Null Evade |
||
| − | | 1 info = 1st version is immune to [[Slow (Status)|Slow]] and [[Blind (Status)|Blind]],<br/> |
||
| − | 2nd version is immune to [[Oil (Status)|Oil]]. |
||
| ⚫ | |||
| ⚫ | |||
| ⚫ | |||
| ⚫ | |||
| 2 mp = 999 |
| 2 mp = 999 |
||
| − | | 2 strength = |
+ | | 2 strength = 45 |
| − | | 2 |
+ | | 2 defense = 29 |
| − | | 2 |
+ | | 2 magick power = 24 |
| − | | 2 magick |
+ | | 2 magick resist = 32 |
| − | | 2 |
+ | | 2 vitality = 77 |
| − | | 2 |
+ | | 2 speed = 25 |
| − | | 2 |
+ | | 2 attack power = 82 |
| ⚫ | |||
| 2 exp = 0 |
| 2 exp = 0 |
||
| − | | 2 |
+ | | 2 cp = 4,140 |
| ⚫ | |||
| 2 gil = 0 |
| 2 gil = 0 |
||
| + | | 1 location = [[Pharos (Final Fantasy XII)|Pharos]] (Third Ascent - Womb of the Sun-Cryst) |
||
| ⚫ | |||
| + | | 2 location = [[Sky Fortress Bahamut|Sky Fortress ''Bahamut'']] (Central Lift) |
||
| ⚫ | |||
| ⚫ | |||
| ⚫ | |||
| − | | |
+ | | 1 lp = 18 |
| ⚫ | |||
| + | | 1 steal 1 = [[Final Fantasy XII items#Potion|Potion]] |
||
| ⚫ | |||
| + | | 1 steal 3 = [[Final Fantasy XII items#X-Potion|X-Potion]] |
||
| ⚫ | |||
| + | | 2 steal 2 = [[Final Fantasy XII items#X-Potion|X-Potion]] |
||
| + | | 2 steal 3 = [[Final Fantasy XII items#Elixir|Elixir]] |
||
| ⚫ | |||
| ⚫ | |||
| ⚫ | |||
| ⚫ | |||
| ⚫ | |||
| ⚫ | |||
| ⚫ | |||
| ⚫ | |||
| ⚫ | |||
| ⚫ | |||
| ⚫ | |||
| ⚫ | |||
| ⚫ | |||
| + | | lure = Immune |
||
| ⚫ | |||
| + | | 2 oil = Immune |
||
| + | | 1 haste = 100 |
||
| + | | 2 haste = 100 |
||
| + | | 1 technicks = [[Final Fantasy XII enemy abilities#Kick|Kick]], [[Final Fantasy XII enemy abilities#Lunge|Lunge]], [[Final Fantasy XII enemy abilities#Circle of Judgement|Circle of Judgement]], [[Final Fantasy XII enemy abilities#Guilt|Guilt]], [[Final Fantasy XII enemy abilities#Sentence|Sentence]] |
||
| + | | 2 technicks = [[Final Fantasy XII enemy abilities#Circle of Judgement|Circle of Judgement]], [[Final Fantasy XII enemy abilities#Sentence|Sentence]], [[Final Fantasy XII enemy abilities#Innocence|Innocence]], [[Final Fantasy XII enemy abilities#Enrage|Enrage]] |
||
| + | | 1 magicks = [[Final Fantasy XII enemy abilities#Protect|Protect]] |
||
| + | | 2 magicks = [[Final Fantasy XII enemy abilities#Renew|Renew]] |
||
| + | | 1 innate augments = [[Final Fantasy XII enemy abilities#Safety|Safety]], [[Final Fantasy XII enemy abilities#No Knockback|No Knockback]] |
||
| + | | 1 conditional augments = When HP <50%: [[Final Fantasy XII enemy abilities#Anti-Magick|Anti-Magick]] (effect lasts two minutes) |
||
| + | | 2 innate augments = [[Final Fantasy XII enemy abilities#Safety|Safety]], [[Final Fantasy XII enemy abilities#No Knockback|No Knockback]], [[Final Fantasy XII enemy abilities#Low-HP ATK+|Low-HP ATK+]], [[Final Fantasy XII enemy abilities#Low-HP Def+|Low-HP Def+]], [[Final Fantasy XII enemy abilities#Shield+|Shield+]], [[Final Fantasy XII enemy abilities#Status+|Status+]] |
||
| + | | 2 conditional augments = After using Enrage: [[Final Fantasy XII enemy abilities#Attack CT0|Attack CT0]]<br/>When HP <50%: [[Final Fantasy XII enemy abilities#Magick CT0|Magick CT0]], [[Final Fantasy XII enemy abilities#Reduce Damage|Reduce Damage]], and [[Final Fantasy XII enemy abilities#Ignore Evade|Ignore Evade]] |
||
| ⚫ | |||
| ⚫ | |||
| ⚫ | |||
| ⚫ | |||
| + | | 3 strength = 68 |
||
| ⚫ | |||
| ⚫ | |||
| ⚫ | |||
| ⚫ | |||
| ⚫ | |||
| ⚫ | |||
| ⚫ | |||
| ⚫ | |||
| + | | 3 lp = 100 |
||
| ⚫ | |||
| ⚫ | |||
| ⚫ | |||
| ⚫ | |||
| ⚫ | |||
| ⚫ | |||
| + | | 3 combo = 12 |
||
| + | | 3 technicks = [[Final Fantasy XII enemy abilities#Circle of Judgment|Circle of Judgement]], [[Final Fantasy XII enemy abilities#Sentence|Sentence]], [[Final Fantasy XII enemy abilities#Innocence|Innocence]], [[Final Fantasy XII enemy abilities#Enrage|Enrage]] |
||
| + | | 3 items = [[Final Fantasy XII enemy abilities#Elixir|Elixir]], [[Final Fantasy XII enemy abilities#X-Potion|X-Potion]] |
||
| + | | 3 innate augments = [[Final Fantasy XII enemy abilities#Safety|Safety]], [[Final Fantasy XII enemy abilities#No Knockback|No Knockback]], [[Final Fantasy XII enemy abilities#Ignore Evade|Ignore Evade]], [[Final Fantasy XII enemy abilities#Normal Damage+|Normal Damage+]], [[Final Fantasy XII enemy abilities#Low-HP Def+|Low-HP Def+]], [[Final Fantasy XII enemy abilities#Low-HP ATK+|Low-HP ATK+]], [[Final Fantasy XII enemy abilities#Shield+|Shield+]], [[Final Fantasy XII enemy abilities#Status+|Status+]] |
||
| ⚫ | |||
| ⚫ | |||
| + | | 1 combo = 12 |
||
| + | | 1 combo rate = 14 |
||
| + | | 1 charge time = 25 |
||
| 2 combo = 12 |
| 2 combo = 12 |
||
| + | | 2 combo rate = 14 |
||
| − | | 2 technicks = Circle of Judgment, Sentence, Innocence, Enrage, [[Elixir (Item)|Elixir]], [[X-Potion]] |
||
| + | | 2 charge time = 25 |
||
| − | | 2 innate augments = Safety, Null Knockback, Null Evade, Attack Plus, Last Stand, [[Adrenaline]], Shield Block, [[Spellbound]] |
||
| ⚫ | |||
| ⚫ | |||
}} |
}} |
||
| − | {{See Also|Gabranth}} |
||
| ⚫ | '''Gabranth''' is a boss in ''[[Final Fantasy XII]]'' whom the [[party]] fights twice: |
||
| + | ==AI script==<!--info is from Split Infinity's guide: https://gamefaqs.gamespot.com/ps2/459841-final-fantasy-xii/faqs/42270--> |
||
| ⚫ | |||
| + | ===Pharos=== |
||
| + | {{Enemy AI FFXII |
||
| + | |magickname1 = [[Final Fantasy XII enemy abilities#Protect|Protect]] |
||
| + | |magickcond1 = First move (100%) |
||
| + | |technickname1 = [[Final Fantasy XII enemy abilities#Guilt|Guilt]] |
||
| + | |technickcond1 = HP <50%; use on nearest opponent (100%)<br/>Repeat after next 12 commands (100%) |
||
| + | |technickname2 = [[Final Fantasy XII enemy abilities#Kick|Kick]] |
||
| + | |technickcond2 = HP >50% (5%) |
||
| + | |technickname3 = [[Final Fantasy XII enemy abilities#Circle of Judgement|Circle of Judgement]] |
||
| + | |technickcond3 = HP >50% (5%)<br/>HP <50% (25%) |
||
| + | |technickname4 = [[Final Fantasy XII enemy abilities#Sentence|Sentence]] |
||
| + | |technickcond4 = HP >50% (5%)<br/>HP <50% (25%) |
||
| + | |technickname5 = [[Final Fantasy XII enemy abilities#Lunge|Lunge]] |
||
| + | |technickcond5 = HP >50% (5%) |
||
| + | |augmentname1 = [[Final Fantasy XII enemy abilities#Anti-Magick|Anti-Magick]] |
||
| + | |augmentcond1 = When HP <50% |
||
| + | |targeting = Attacks enemy with highest enmity. |
||
| + | }} |
||
| − | === |
+ | ===Sky Fortress ''Bahamut''=== |
| + | {{Enemy AI FFXII |
||
| ⚫ | {{ |
||
| + | |magickname1 = [[Final Fantasy XII enemy abilities#Renew|Renew]] |
||
| + | |magickcond1 = HP <50%; use once (100%) |
||
| + | |technickname1 = [[Final Fantasy XII enemy abilities#Enrage|Enrage]]{{foot|Bestows Attack CT0 augment}} |
||
| + | |technickcond1 = Use once after Renew has been used when HP <50% (100%) |
||
| + | |technickname2 = [[Final Fantasy XII enemy abilities#Innocence|Innocence]] |
||
| + | |technickcond2 = Use after Renew (100%)<br/>Repeat after next 16 commands (100%) |
||
| + | |technickname3 = [[Final Fantasy XII enemy abilities#Circle of Judgement|Circle of Judgement]] |
||
| + | |technickcond3 = HP >50% (25%)<br/>HP <50% (5%) |
||
| + | |technickname4 = [[Final Fantasy XII enemy abilities#Sentence|Sentence]] |
||
| + | |technickcond4 = HP >50% (25%)<br/>HP <50% (5%) |
||
| + | |augmentname1 = [[Final Fantasy XII enemy abilities#Magick CT0|Magick CT0]] |
||
| + | |augmentcond1 = When HP <50% |
||
| + | |augmentname2 = [[Final Fantasy XII enemy abilities#Ignore Evade|Ignore Evade]] |
||
| + | |augmentcond2 = When HP <50% |
||
| + | |augmentname3 = [[Final Fantasy XII enemy abilities#Reduce Damage|Reduce Damage]] |
||
| + | |augmentcond3 = When HP <50% |
||
| + | |targeting = Focuses on Basch if he is in the party, otherwise focuses on whoever draws the most enmity. After using Enrage he tends to focus on the opponent who draws the most enmity even if Basch is present. |
||
| + | }} |
||
| − | == |
+ | == Battle == |
| + | === First encounter === |
||
| − | + | If [[Basch fon Ronsenburg|Basch]] is in the active [[party]], a cutscene will play when Gabranth reaches 50% HP. After the cutscene Gabranth will become immune to magicks for two minutes. |
|
| − | + | Gabranth uses all-out sword attacks, like Guilt, which can cause heavy injury. Gabranth lacks a single deadly move, but has deadly [[Hit (term)#Final Fantasy XII|combo]] attacks. The battle ends when Gabranth has lost 80% of his health. |
|
| − | ===Strategy=== |
+ | ==== Strategy ==== |
| − | The player should cast [[Protectga]], and [[Haste ( |
+ | The player should cast [[Protectga]], and [[Haste (ability)|Haste]] also helps. Gabranth's attacks are strong, but they are all physical attacks, meaning they can be defended against. After Gabranth becomes immune to magicks the player should use this time to reapply buffs or attack him with weapons. |
| − | ==Second |
+ | === Second encounter === |
| − | The second battle is harder because Gabranth will use Innocence, a strong attack with incredible range. At 50% HP, a cutscene between Gabranth and Basch (if he is in the party) will begin. Right after Gabranth casts [[Renew]], he will use Innocence. When his HP reaches 25%, his [[Defense ( |
+ | The second battle is harder because Gabranth will use Innocence, a strong attack with incredible range. At 50% HP, a cutscene between Gabranth and Basch (if he is in the party) will begin. Right after Gabranth casts [[Full Cure (ability)|Renew]], he will use Innocence. When his HP reaches 25%, his [[Defense (stat)|Defense]] increases and he will constantly use Innocence. His attacks get faster and deadlier and he deals combos more often. Gabranth focuses on Basch if he is in the party. |
| − | ===Strategy=== |
+ | ==== Strategy ==== |
| ⚫ | The party should start by [[dispel]]ling Gabranth's [[Final Fantasy XII statuses#Haste|Haste]] and [[Final Fantasy XII statuses#Protect|Protect]]. After Gabranth hits 50% of his HP, the player must dispel Gabranth again and get ready to use [[Curaja]] to combat the Innocence he will use after using Renew. During Gabranth's final quarter of HP the player can use a [[Quickening (ability)|Quickening]] chain and finish him off. |
||
| − | The party should start by [[dispel]]ling Gabranth's Haste and [[Protect (Status)|Protect]]. |
||
| ⚫ | |||
| − | == |
+ | == Trial Mode == |
| − | Gabranth is fought in Stage 100 |
+ | Gabranth is fought in Stage 100 alongside the other four Judge Magisters. Gabranth, along with Bergan, focuses on damaging the party with physical attacks. He will use some special attacks that damage all party members in range, and uses Enrage at low HP. Zargabaath casts [[Bravery (ability)|Bravery]] on him, which should be dispelled to mitigate his damage output. |
| − | If any party members are in [[Reverse]], Gabranth will use [[ |
+ | If any party members are in [[Reverse (status)|Reverse]], Gabranth will use [[Final Fantasy XII items#X-Potion|X-Potions]] on them, dealing 1500 damage. Gabranth uses [[Final Fantasy XII items#Elixir|Elixirs]] on Zargabaath when he is on low HP, and is likewise healed by Zargabaath when his HP get low. |
| − | ===Strategy=== |
+ | === Strategy === |
| + | [[File:Zargabaath-Gabanth-Boss-FFXII-TZA.jpg|thumb|Gabranth and Zargabaath.]] |
||
| − | The easiest way to break through Gabranth and Zargabaath's healing is by casting [[Sleep (Status)|Sleep]] on Zargabaath, making him unable to heal Gabranth. The player should then quickly dispatch Gabranth and take out Zargabaath thereafter. |
||
| + | Gabranth and Zargabaath should be the last two Judges to be taken out. The two will use Elixirs on each other when weak, making it difficult to kill either of them while the other fights. The best way is to inflict [[Final Fantasy XII statuses#Sleep|Sleep]] on Zargabaath, making him unable to heal Gabranth. The player should then quickly dispatch Gabranth and take out Zargabaath thereafter. Sleep will wear off quickly so the player should reapply it regularly; if Zargabaath awakens even for a moment and Gabranth is at low health, he'll toss an Elixir to Gabranth and fully heal him. |
||
| − | Since Gabranth has a high chance of blocking attacks, it's recommended to use the [[ |
+ | Since Gabranth has a high chance of blocking attacks, it's recommended to use the [[Final Fantasy XII accessories#Cameo Belt|Cameo Belt]] accessory (it is found in a [[Treasure (Final Fantasy XII)|treasure]] in the stage with the [[Final Fantasy XII accessories#Diamond Armlet|Diamond Armlet]] equipped if the player doesn't have one already). Since he can do massive combo hits when on low HP, it's also a good idea to take him out quickly. If the player lacks strong weapons, they can [[Steal#Final Fantasy XII|steal]] a Tournesol from Gabranth and equip it to a [[Knight (Final Fantasy XII)|Knight]] for high damage output. |
| − | + | The [[Armor Break (ability)|Expose]] [[technicks|technick]] can reduce Gabranth's Defense so he takes even more damage. The [[Technicks#Wither|Wither]] technick can be used to halve Gabranth's Strength with every successful use. After just a few uses, Gabranth will only be able to deal little damage. Gabranth is vulnerable to [[Final Fantasy XII statuses#Slow|Slow]], which one may exploit to reduce his damage output. However, once Gabranth uses Enrage, his attacks no longer require [[Charge Time|charge time]] and so Slow no longer has any effect. |
|
| − | ==Gallery== |
+ | == Gallery == |
| + | <gallery> |
||
| − | {{Gallery |
||
| − | + | Ffxii-gabranth.jpg|Bestiary entry (PlayStation 2). |
|
| + | FFXII Circle of Judgment.png|Circle of Judgment. |
||
| − | + | FF12 Aggressor Enrage.png|Gabranth uses Enrage. |
|
| ⚫ | |||
| − | + | FFXII Guilt.jpg|Guilt. |
|
| ⚫ | |||
| ⚫ | |||
| − | + | FFXII Innocence.png|Innocence. |
|
| + | FFXII Sentence.png|Sentence. |
||
| ⚫ | |||
| ⚫ | |||
| + | Gabranth-boss2.jpg|Gabranth uses Innocence. |
||
| + | </gallery> |
||
| − | ==Related |
+ | == Related enemies == |
| − | *[[Imperial Swordsman]] |
+ | * [[Imperial Swordsman]] |
| − | *[[Imperial Marksman]] |
+ | * [[Imperial Marksman]] |
| − | *[[Imperial Hoplite]] |
+ | * [[Imperial Hoplite]] |
| − | *[[Imperial Magus]] |
+ | * [[Imperial Magus]] |
| − | *[[Mastiff]] |
+ | * [[Mastiff]] |
| − | *[[Judge (Final Fantasy XII |
+ | * [[Judge (Final Fantasy XII enemy)|Judge]] |
| − | *[[Imperial Gunner]] |
+ | * [[Imperial Gunner]] |
| − | *[[Imperial Pilot]] |
+ | * [[Imperial Pilot]] |
| − | *[[Imperial Beastmaster]] |
+ | * [[Imperial Beastmaster]] |
| − | *[[Rook (Final Fantasy XII)|Rook]] |
+ | * [[Rook (Final Fantasy XII)|Rook]] |
| − | *[[Sphere-Rook]] |
+ | * [[Sphere-Rook]] |
| − | *[[Spinner-Rook]] |
+ | * [[Spinner-Rook (Final Fantasy XII)|Spinner-Rook]] |
| − | *[[Helm-Rook]] |
+ | * [[Helm-Rook]] |
| − | *[[Air Cutter Remora]] (Boss) |
+ | * [[Air Cutter Remora]] (Boss) |
| − | *[[Judge Ghis ( |
+ | * [[Judge Ghis (boss)|Judge Ghis]] (Boss) |
| − | *[[Judge Bergan ( |
+ | * [[Judge Bergan (boss)|Judge Bergan]] (Boss) |
| − | *[[Doctor Cid ( |
+ | * [[Doctor Cid (boss)|Doctor Cid]] (Boss) |
| − | *[[Vayne ( |
+ | * [[Vayne (boss)|Vayne]] (Boss) |
| − | *[[Vayne Novus]] (Boss) |
+ | * [[Vayne Novus]] (Boss) |
| − | *[[Sephira]] (Boss) |
+ | * [[Sephira (Final Fantasy XII)|Sephira]] (Boss) |
| − | *[[The Undying (Final Fantasy XII)|The Undying]] (Final Boss) |
+ | * [[The Undying (Final Fantasy XII)|The Undying]] (Final Boss) |
[[it:Giudice Gabranth (boss)]] |
[[it:Giudice Gabranth (boss)]] |
||
| − | [[Category:Final Fantasy XII |
+ | [[Category:Bosses in Final Fantasy XII]] |
| + | [[Category:Superbosses]] |
||
Revision as of 22:30, 9 January 2020
Template:Sideicon Gabranth is a boss in Final Fantasy XII whom the party fights twice in the main game: first in the Pharos, and again on board the Sky Fortress Bahamut. He is also fought in Trial Mode at Stage 100 in Zodiac versions alongside the other Judge Magisters: Ghis, Drace, Zargabaath and Bergan. In the Trial Mode, Tournesol can be stolen from him.
The boss is called Judge Gabranth in the bestiary and official guide, but his name is just "Gabranth" in the battle.
Bestiary entry
Page 1: Observations
Being a member of the Order of Judges of the Imperial Archadian Ministry of Law, and Judge Magister of the 9th Bureau.
The 9th Bureau, led by Gabranth, is primarily concerned with the gathering and dissemination of information. As a result, many of the bureau's activities are shrouded in secrecy.
Gabranth, and his power, are respected by other Judge Magisters, and Emperor Gramis himself places great faith in this younger Judge.
Stats
Pharos
Sky Fortress Bahamut
Trial Mode
AI script
Pharos
| Abilities | ||
|---|---|---|
| Type | Name | Condition |
| Protect | First move (100%) | |
| Guilt | HP <50%; use on nearest opponent (100%) Repeat after next 12 commands (100%) | |
| Kick | HP >50% (5%) | |
| Circle of Judgement | HP >50% (5%) HP <50% (25%) | |
| Sentence | HP >50% (5%) HP <50% (25%) | |
| Lunge | HP >50% (5%) | |
| Anti-Magick | When HP <50% | |
| Properties | ||
| Type | Property | |
| Targeting | Attacks enemy with highest enmity. | |
| Linking | ||
| Attacks | ||
| Pursuit | ||
Sky Fortress Bahamut
| Abilities | ||
|---|---|---|
| Type | Name | Condition |
| Renew | HP <50%; use once (100%) | |
| Enrage*Bestows Attack CT0 augment | Use once after Renew has been used when HP <50% (100%) | |
| Innocence | Use after Renew (100%) Repeat after next 16 commands (100%) | |
| Circle of Judgement | HP >50% (25%) HP <50% (5%) | |
| Sentence | HP >50% (25%) HP <50% (5%) | |
| Magick CT0 | When HP <50% | |
| Ignore Evade | When HP <50% | |
| Reduce Damage | When HP <50% | |
| Properties | ||
| Type | Property | |
| Targeting | Focuses on Basch if he is in the party, otherwise focuses on whoever draws the most enmity. After using Enrage he tends to focus on the opponent who draws the most enmity even if Basch is present. | |
| Linking | ||
| Attacks | ||
| Pursuit | ||
Battle
First encounter
If Basch is in the active party, a cutscene will play when Gabranth reaches 50% HP. After the cutscene Gabranth will become immune to magicks for two minutes.
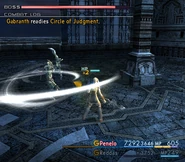
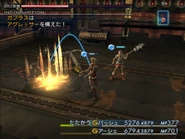
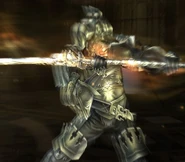
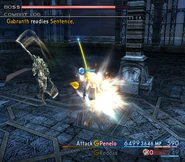
Gabranth uses all-out sword attacks, like Guilt, which can cause heavy injury. Gabranth lacks a single deadly move, but has deadly combo attacks. The battle ends when Gabranth has lost 80% of his health.
Strategy
The player should cast Protectga, and Haste also helps. Gabranth's attacks are strong, but they are all physical attacks, meaning they can be defended against. After Gabranth becomes immune to magicks the player should use this time to reapply buffs or attack him with weapons.
Second encounter
The second battle is harder because Gabranth will use Innocence, a strong attack with incredible range. At 50% HP, a cutscene between Gabranth and Basch (if he is in the party) will begin. Right after Gabranth casts Renew, he will use Innocence. When his HP reaches 25%, his Defense increases and he will constantly use Innocence. His attacks get faster and deadlier and he deals combos more often. Gabranth focuses on Basch if he is in the party.
Strategy
The party should start by dispelling Gabranth's Haste and Protect. After Gabranth hits 50% of his HP, the player must dispel Gabranth again and get ready to use Curaja to combat the Innocence he will use after using Renew. During Gabranth's final quarter of HP the player can use a Quickening chain and finish him off.
Trial Mode
Gabranth is fought in Stage 100 alongside the other four Judge Magisters. Gabranth, along with Bergan, focuses on damaging the party with physical attacks. He will use some special attacks that damage all party members in range, and uses Enrage at low HP. Zargabaath casts Bravery on him, which should be dispelled to mitigate his damage output.
If any party members are in Reverse, Gabranth will use X-Potions on them, dealing 1500 damage. Gabranth uses Elixirs on Zargabaath when he is on low HP, and is likewise healed by Zargabaath when his HP get low.
Strategy
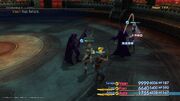
Gabranth and Zargabaath.
Gabranth and Zargabaath should be the last two Judges to be taken out. The two will use Elixirs on each other when weak, making it difficult to kill either of them while the other fights. The best way is to inflict Sleep on Zargabaath, making him unable to heal Gabranth. The player should then quickly dispatch Gabranth and take out Zargabaath thereafter. Sleep will wear off quickly so the player should reapply it regularly; if Zargabaath awakens even for a moment and Gabranth is at low health, he'll toss an Elixir to Gabranth and fully heal him.
Since Gabranth has a high chance of blocking attacks, it's recommended to use the Cameo Belt accessory (it is found in a treasure in the stage with the Diamond Armlet equipped if the player doesn't have one already). Since he can do massive combo hits when on low HP, it's also a good idea to take him out quickly. If the player lacks strong weapons, they can steal a Tournesol from Gabranth and equip it to a Knight for high damage output.
The Expose technick can reduce Gabranth's Defense so he takes even more damage. The Wither technick can be used to halve Gabranth's Strength with every successful use. After just a few uses, Gabranth will only be able to deal little damage. Gabranth is vulnerable to Slow, which one may exploit to reduce his damage output. However, once Gabranth uses Enrage, his attacks no longer require charge time and so Slow no longer has any effect.
Gallery
Related enemies
- Imperial Swordsman
- Imperial Marksman
- Imperial Hoplite
- Imperial Magus
- Mastiff
- Judge
- Imperial Gunner
- Imperial Pilot
- Imperial Beastmaster
- Rook
- Sphere-Rook
- Spinner-Rook
- Helm-Rook
- Air Cutter Remora (Boss)
- Judge Ghis (Boss)
- Judge Bergan (Boss)
- Doctor Cid (Boss)
- Vayne (Boss)
- Vayne Novus (Boss)
- Sephira (Boss)
- The Undying (Final Boss)


