Tag: sourceedit |
mNo edit summary |
||
| (34 intermediate revisions by 11 users not shown) | |||
| Line 1: | Line 1: | ||
| + | {{sideicon|FFI|FFII|FFIII|FFIV|IVCCI|IVTAY|FFV|FFVI|FFVII|VIIBC|VIICC|VIIDoC|FFVIII|FFIX|FFX|X2|FFXI|FFXII|XIIRW|FFXIII|XIII2|LR|FFXIV|FFXV|FFT|FFTA|FFTA2|Type0|FFCC|CCRoF|CCEoT|CCTCB|FFMQ|FFA|FFL|FFL2|FFL3|T4HoL|BravelyD|FFD|DFF2008|D012}} |
||
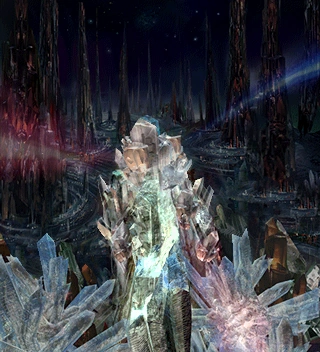
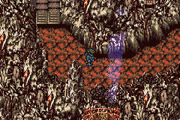
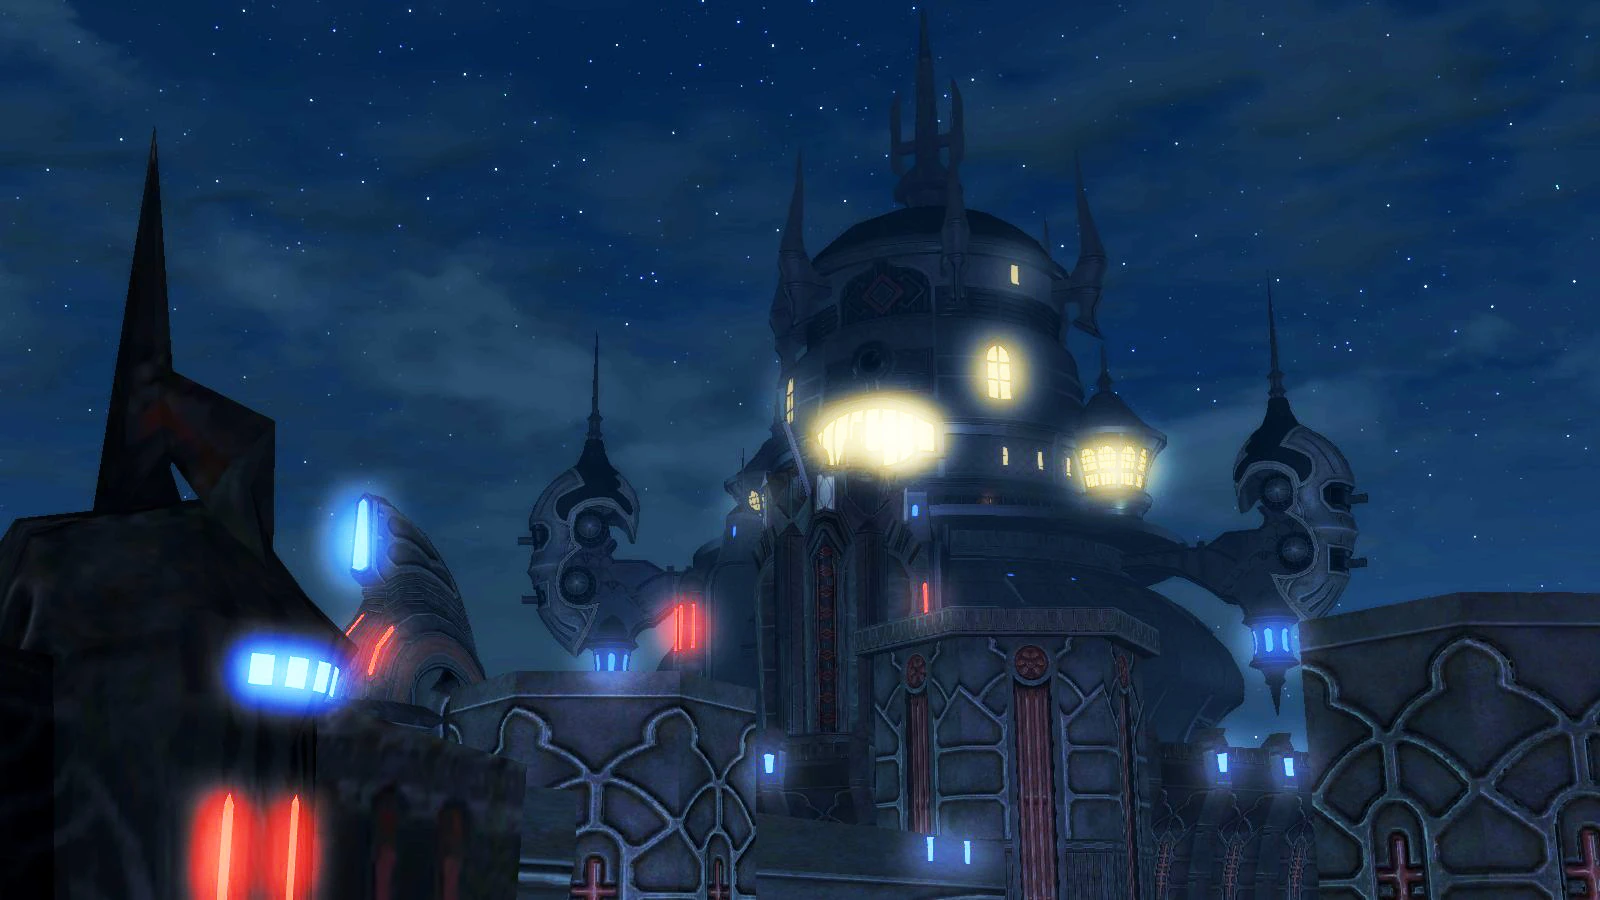
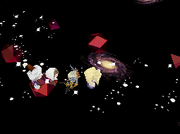
[[File:CrystalWorld4-ffix.png|thumb|Crystal World, final dungeon in ''Final Fantasy IX''.]] |
[[File:CrystalWorld4-ffix.png|thumb|Crystal World, final dungeon in ''Final Fantasy IX''.]] |
||
| − | '''Final dungeons''' are places where [[List of final bosses|final boss |
+ | '''Final dungeons''' are places where [[List of final bosses|final boss battles]] in the [[Final Fantasy series|''Final Fantasy'' series]] take place, generally in a large, twisting [[dungeon]] that has some of the game's most powerful enemies. They are usually the last area visited in a game. More often than not, the strongest equipment in the game can be found there, as well. The game's final boss awaits at the end of the dungeon. |
==List of final dungeons== |
==List of final dungeons== |
||
{{spoiler}} |
{{spoiler}} |
||
===''[[Final Fantasy]]''=== |
===''[[Final Fantasy]]''=== |
||
| ⚫ | |||
| − | {{sideicon|FFI}} |
||
| ⚫ | The Chaos Shrine is the site of the battle with [[Garland (Final Fantasy)|Garland]] at the beginning of the game. As part of his pact with the [[Four Fiends (Final Fantasy)|Four Fiends]], Garland is sent 2,000 years into the past to become [[Chaos (Final Fantasy)|Chaos]]. The shrine's location is significant, as it lies in the geographic center of the four elemental shrines that house the [[Crystal (term)#Final Fantasy|Crystals]]. |
||
| ⚫ | |||
| − | {{main|Chaos Shrine (Final Fantasy)}} |
||
| ⚫ | The Chaos Shrine is the site of the battle with [[Garland (Final Fantasy)|Garland]] at the beginning of the game. As part of his pact with the [[Four Fiends (Final Fantasy)|Four Fiends]], Garland is sent 2,000 years into the past to become [[Chaos (Final Fantasy)|Chaos]]. The shrine's location is significant as it lies in the geographic center of the four elemental shrines that house the [[Crystal (term)#Final Fantasy|Crystals]]. |
||
Using the restored Crystals to channel a [[Dark Crystal (term)|Dark Crystal]] in the shrine's ruins in the present, the [[Warriors of Light]] [[Time travel|travel back in time]] to when the shrine is restored and journey into its basement levels to defeat the Four Fiends again and destroy Chaos. |
Using the restored Crystals to channel a [[Dark Crystal (term)|Dark Crystal]] in the shrine's ruins in the present, the [[Warriors of Light]] [[Time travel|travel back in time]] to when the shrine is restored and journey into its basement levels to defeat the Four Fiends again and destroy Chaos. |
||
| Line 14: | Line 13: | ||
===''[[Final Fantasy II]]''=== |
===''[[Final Fantasy II]]''=== |
||
| − | {{sideicon|FFII}} |
||
[[File:Pandemonium PSP.png|left|thumb|Pandaemonium.]] |
[[File:Pandemonium PSP.png|left|thumb|Pandaemonium.]] |
||
{{main|Pandaemonium (Final Fantasy II)}} |
{{main|Pandaemonium (Final Fantasy II)}} |
||
| Line 23: | Line 21: | ||
===''[[Final Fantasy III]]''=== |
===''[[Final Fantasy III]]''=== |
||
| − | {{sideicon|FFIII}} |
||
[[File:World of Darkness - Beggining.jpg|right|thumb|Luneth in the World of Darkness.]] |
[[File:World of Darkness - Beggining.jpg|right|thumb|Luneth in the World of Darkness.]] |
||
{{main|World of Darkness (Final Fantasy III)}} |
{{main|World of Darkness (Final Fantasy III)}} |
||
| − | The World of Darkness is the site of the final battle with the [[Cloud of Darkness]]. After [[Luneth]] and his friends climb the [[Crystal Tower]] to kill [[Xande]], the Cloud of Darkness appears, summoned by the imbalance of light and darkness Xande has created by destroying the Crystals. |
+ | The World of Darkness is the site of the final battle with the [[Cloud of Darkness]]. After [[Luneth]] and his friends climb the [[Crystal Tower]] to kill [[Xande]], the Cloud of Darkness appears, summoned by the imbalance of light and darkness Xande has created by destroying the [[Crystal (term)#Final Fantasy III|Crystals]]. |
| − | The [[Warriors of Light]] enter the portal to the Dark World that appears and free the [[Warriors of Darkness]] from the four Crystals of the Dark World. The Warriors of Darkness use their power to render the Cloud of Darkness vulnerable, and the Warriors of Light defeat her and cast her back into [[ |
+ | The [[Warriors of Light#Final Fantasy III|Warriors of Light]] enter the portal to the Dark World that appears and free the [[Warriors of Darkness]] from the four Crystals of the Dark World. The Warriors of Darkness use their power to render the Cloud of Darkness vulnerable, and the Warriors of Light defeat her and cast her back into [[The Void (term)|The Void]]. |
{{-}} |
{{-}} |
||
===''[[Final Fantasy IV]]''=== |
===''[[Final Fantasy IV]]''=== |
||
| − | {{sideicon|FFIV}} |
||
[[File:FFIV iOS Lunar Subterrane.png|left|thumb|[[Kain Highwind|Kain]] in the Lunar Subterrane.]] |
[[File:FFIV iOS Lunar Subterrane.png|left|thumb|[[Kain Highwind|Kain]] in the Lunar Subterrane.]] |
||
{{main|Lunar Subterrane}} |
{{main|Lunar Subterrane}} |
||
| − | The Lunar Subterrane is the path that leads to the [[Red Moon]]'s core. It is accessible via a teleport pad in the [[Crystal Palace]] powered by the moon's eight Crystals. At the moon's core, the [[Lunarian]]s sleep along with [[Zemus]]. The path contains many [[ |
+ | The Lunar Subterrane is the path that leads to the [[Red Moon]]'s core. It is accessible via a teleport pad in the [[Crystal Palace]] powered by the moon's eight [[Crystal (term)#Final Fantasy IV|Crystals]]. At the moon's core, the [[Lunarian]]s sleep along with [[Zemus]]. The path contains many [[Final Fantasy IV weapons|weapons]] that once endangered the Lunarians' lives, guarded by Zemus's minions. [[Cecil Harvey|Cecil]] and his friends journey to the core to assist [[Golbez]] and [[Fusoya]] in battling Zemus, whose hatred manifests as [[Zeromus (Final Fantasy IV)|Zeromus]] upon his death. |
{{-}} |
{{-}} |
||
====''[[Final Fantasy IV -Interlude-]]''==== |
====''[[Final Fantasy IV -Interlude-]]''==== |
||
| ⚫ | |||
| − | {{sideicon|IVCCI}} |
||
| ⚫ | |||
====''[[Final Fantasy IV: The After Years]]''==== |
====''[[Final Fantasy IV: The After Years]]''==== |
||
| − | {{sideicon|IVTAY}} |
||
{{main|True Moon}} |
{{main|True Moon}} |
||
| − | The True Moon is a gigantic final dungeon composed of three sections: |
+ | The True Moon is a gigantic final dungeon composed of three sections: the 13-floors long [[Subterrane]] where several bosses from ''Final Fantasy IV'' are fought (the first floors of this area mirror the [[Lunar Subterrane]]); the 29-floors long [[Depths]] and the widest section of the True Moon's underground where bosses from ''Final Fantasy'' to ''Final Fantasy VI'' are fought; and the [[Bottommost Depths]], the final floor, where the [[Creator (The After Years)|Creator]] resides. |
===''[[Final Fantasy V]]''=== |
===''[[Final Fantasy V]]''=== |
||
| − | {{sideicon|FFV}} |
||
[[File:FFV-IR09.png|right|thumb|[[Lenna Charlotte Tycoon|Lenna]] in the Interdimensional Rift.]] |
[[File:FFV-IR09.png|right|thumb|[[Lenna Charlotte Tycoon|Lenna]] in the Interdimensional Rift.]] |
||
{{main|Interdimensional Rift}} |
{{main|Interdimensional Rift}} |
||
| − | The Interdimensional Rift is the gap between dimensions where the [[Void (Final Fantasy V)|Void]] was sealed, and where [[Exdeath]] has gone to seize control of its power. The Rift is a mismatched maze of architecture including locations consumed by the Void and is full of powerful monsters, including members of the [[Demons of the Rift]]. |
+ | The Interdimensional Rift is the gap between dimensions where the [[Void (Final Fantasy V)|Void]] was sealed, and where [[Exdeath]] has gone to seize control of its power. The Rift is a mismatched maze of architecture, including locations consumed by the Void and is full of powerful monsters, including members of the [[Demons of the Rift]]. |
After [[Bartz Klauser|Bartz]] and his friends traverse the Rift's outer layers they find its deepest part a series of crystalline platforms. At the end they destroy [[Exdeath (tree form)|Exdeath's true form]] and the monstrous [[Neo Exdeath (Final Fantasy V)|Neo Exdeath]]. |
After [[Bartz Klauser|Bartz]] and his friends traverse the Rift's outer layers they find its deepest part a series of crystalline platforms. At the end they destroy [[Exdeath (tree form)|Exdeath's true form]] and the monstrous [[Neo Exdeath (Final Fantasy V)|Neo Exdeath]]. |
||
| Line 57: | Line 50: | ||
===''[[Final Fantasy VI]]''=== |
===''[[Final Fantasy VI]]''=== |
||
| − | {{sideicon|FFVI}} |
||
[[File:FFVI Kefka's Tower.png|left|thumb|[[Shadow (Final Fantasy VI)|Shadow]] in Kefka's Tower.]] |
[[File:FFVI Kefka's Tower.png|left|thumb|[[Shadow (Final Fantasy VI)|Shadow]] in Kefka's Tower.]] |
||
{{main|Kefka's Tower}} |
{{main|Kefka's Tower}} |
||
| − | Kefka's Tower is [[Kefka Palazzo|Kefka's]] lair, his monument to death and destruction. The tower is built out of rubble collected from around the world and assembled by magic during the [[end of the world]]. It consists primarily of debris from [[Vector]] and the [[Magitek Research Facility]], and is filled with Kefka's strongest servants, including the [[Warring Triad]]. [[Terra Branford|Terra]] and her friends assault the tower from the air and destroy the Triad before fighting [[Kefka (final boss)|Kefka's god form]]. |
+ | Kefka's Tower is [[Kefka Palazzo|Kefka's]] lair, his monument to death and destruction. The tower is built out of rubble collected from around the world and assembled by magic during the [[end of the world]]. It consists primarily of debris from [[Vector]] and the [[Magitek Research Facility (Final Fantasy VI)|Magitek Research Facility]], and is filled with Kefka's strongest servants, including the [[Warring Triad]]. [[Terra Branford|Terra]] and her friends assault the tower from the air and destroy the Triad before fighting [[Kefka (final boss)|Kefka's god form]]. |
{{-}} |
{{-}} |
||
===''[[Final Fantasy VII]]''=== |
===''[[Final Fantasy VII]]''=== |
||
| − | {{sideicon|FFVII}} |
||
[[File:FFVII-NorthernCrater.jpg|right|thumb|Northern Crater.]] |
[[File:FFVII-NorthernCrater.jpg|right|thumb|Northern Crater.]] |
||
{{main|Northern Cave (Final Fantasy VII)}} |
{{main|Northern Cave (Final Fantasy VII)}} |
||
| − | The complex series of caves |
+ | The complex series of caves descends deep into the [[Gaia (Final Fantasy VII)|Planet]] from the [[North Crater]], and at the core, [[Sephiroth]] is keeping [[Holy (Final Fantasy VII)|Holy]] sealed. [[Cloud Strife|Cloud]] and the rest of [[AVALANCHE]] battle [[Jenova∙SYNTHESIS]], and then [[Bizarro∙Sephiroth]] and the more powerful [[Safer∙Sephiroth]], until Cloud enters the [[Lifestream]] for a mental one-on-one duel against [[Sephiroth (Final Fantasy VII boss)|Sephiroth's spirit]]. |
{{-}} |
{{-}} |
||
====''[[Before Crisis -Final Fantasy VII-]]''==== |
====''[[Before Crisis -Final Fantasy VII-]]''==== |
||
| − | {{sideicon|VIIBC}} |
||
[[File:VIIBC Final Dungeon.png|left|thumb|[[Shotgun (Female)]] in the final dungeon.]] |
[[File:VIIBC Final Dungeon.png|left|thumb|[[Shotgun (Female)]] in the final dungeon.]] |
||
{{stub|Before Crisis -Final Fantasy VII-}} |
{{stub|Before Crisis -Final Fantasy VII-}} |
||
| Line 77: | Line 67: | ||
==== ''[[Crisis Core -Final Fantasy VII-]]''==== |
==== ''[[Crisis Core -Final Fantasy VII-]]''==== |
||
| − | {{sideicon|VIICC}} |
||
[[File:Goddess Materia.jpg|right|thumb|Portal of Severance.]] |
[[File:Goddess Materia.jpg|right|thumb|Portal of Severance.]] |
||
{{main|Banora Underground}} |
{{main|Banora Underground}} |
||
| − | [[Genesis Rhapsodos]] awaits in an underground dungeon beneath [[Banora]] that houses old tablets reciting [[LOVELESS]]. It is called the Portal of Severance. Here, [[Genesis Avatar]] |
+ | [[Genesis Rhapsodos]] awaits in an underground dungeon beneath [[Banora]] that houses old tablets reciting [[LOVELESS]]. It is called the Portal of Severance. Here, [[Genesis Avatar]] is fought by [[Zack Fair|Zack]], and afterward Zack must face him again in [[Genesis (final boss)|human form]]. |
{{-}} |
{{-}} |
||
====''[[Dirge of Cerberus -Final Fantasy VII-]]''==== |
====''[[Dirge of Cerberus -Final Fantasy VII-]]''==== |
||
| − | {{sideicon|VIIDoC}} |
||
[[File:7doc-omega-o.jpg|left|thumb|Omega at Midgar.]] |
[[File:7doc-omega-o.jpg|left|thumb|Omega at Midgar.]] |
||
{{main|Omega (Final Fantasy VII)}} |
{{main|Omega (Final Fantasy VII)}} |
||
| Line 91: | Line 79: | ||
===''[[Final Fantasy VIII]]''=== |
===''[[Final Fantasy VIII]]''=== |
||
| − | {{sideicon|FFVIII}} |
||
[[File:Ultimecia's Castle.jpg|right|thumb|Ultimecia Castle.]] |
[[File:Ultimecia's Castle.jpg|right|thumb|Ultimecia Castle.]] |
||
{{main|Ultimecia Castle}} |
{{main|Ultimecia Castle}} |
||
| − | [[Ultimecia]], in all her forms, is fought atop Ultimecia Castle by [[Squall Leonhart|Squall]] and his party. The castle is a luxurious estate sealed in a magical barrier that voids the party's [[Command Abilities (Final Fantasy VIII)|command abilities]], resurrection and [[Limit Break (Final Fantasy VIII)|Limit Breaks]] until the bosses roaming the castle are killed to |
+ | [[Ultimecia]], in all her forms, is fought atop Ultimecia Castle by [[Squall Leonhart|Squall]] and his party. The castle is a luxurious estate sealed in a magical barrier that voids the party's [[Command Abilities (Final Fantasy VIII)|command abilities]], resurrection and [[Limit Break (Final Fantasy VIII)|Limit Breaks]] until the bosses roaming the castle are killed. There are portals before the castle the player can use to go to the world map, but only sidequest areas are visitable. |
{{-}} |
{{-}} |
||
===''[[Final Fantasy IX]]''=== |
===''[[Final Fantasy IX]]''=== |
||
| − | {{sideicon|FFIX}} |
||
[[File:Memoria.jpg|left|thumb|Memoria.]] |
[[File:Memoria.jpg|left|thumb|Memoria.]] |
||
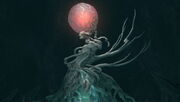
After traveling through [[Memoria (Final Fantasy IX)|Memoria]], a land comprised of [[Gaia (Final Fantasy IX)|Gaia's]] memories, [[Zidane Tribal|Zidane]] and his companions fight [[Trance Kuja]] in the [[Crystal World]], where the [[Crystal (term)#Final Fantasy IX|Crystal]] lies. After [[Kuja]]'s defeat, the party is sent to the [[Hill of Despair]], where the avatar of death, [[Necron]], awaits. |
After traveling through [[Memoria (Final Fantasy IX)|Memoria]], a land comprised of [[Gaia (Final Fantasy IX)|Gaia's]] memories, [[Zidane Tribal|Zidane]] and his companions fight [[Trance Kuja]] in the [[Crystal World]], where the [[Crystal (term)#Final Fantasy IX|Crystal]] lies. After [[Kuja]]'s defeat, the party is sent to the [[Hill of Despair]], where the avatar of death, [[Necron]], awaits. |
||
| Line 104: | Line 90: | ||
===''[[Final Fantasy X]]''=== |
===''[[Final Fantasy X]]''=== |
||
| − | {{sideicon|FFX}} |
||
[[File:Dream's End FFX.png|right|thumb|Inside Sin.]] |
[[File:Dream's End FFX.png|right|thumb|Inside Sin.]] |
||
{{main|Inside Sin}} |
{{main|Inside Sin}} |
||
| Line 111: | Line 96: | ||
====''[[Final Fantasy X-2]]''==== |
====''[[Final Fantasy X-2]]''==== |
||
| − | {{sideicon|X2}} |
||
[[File:Ffx-2 final dungeon.png|left|thumb|The Farplane.]] |
[[File:Ffx-2 final dungeon.png|left|thumb|The Farplane.]] |
||
{{main|Farplane (Final Fantasy X)}} |
{{main|Farplane (Final Fantasy X)}} |
||
| − | [[Yuna]], [[Rikku]], and [[Paine]] descend to the Farplane via the holes in the former [[Chamber of the Fayth|Chambers of the Fayth]] to stop [[Shuyin]] from using the ancient [[Machina (Final Fantasy X)|machina]] weapon [[Vegnagun]] |
+ | [[Yuna]], [[Rikku]], and [[Paine]] descend to the Farplane via the holes in the former [[Chamber of the Fayth|Chambers of the Fayth]] to stop [[Shuyin]] from using the ancient [[Machina (Final Fantasy X)|machina]] weapon [[Vegnagun]] to destroy [[Spira]]. The Farplane is scattered with strong foes and the YRP must navigate through moving platforms and move past gates guarded by strong fiends to get to the heart of Farplane where Vegnagun's various parts and [[Shuyin (boss)|Shuyin's spirit]] lie in wait for them. |
{{-}} |
{{-}} |
||
===''[[Final Fantasy XI]]''=== |
===''[[Final Fantasy XI]]''=== |
||
| − | {{sideicon|FFXI}} |
||
[[File:Xarcabard - ZvahlBails.jpg|thumb|right|Castle Zvahl.]] |
[[File:Xarcabard - ZvahlBails.jpg|thumb|right|Castle Zvahl.]] |
||
| − | Due to the non-linear nature of ''Final Fantasy XI'', there is no ''true'' final dungeon |
+ | Due to the non-linear nature of ''Final Fantasy XI'', there is no ''true'' final dungeon, but "final dungeons" exist as areas preceding the final showdown in a number of mission storylines. |
| − | The final dungeon in the original mission storyline is Castle Zvahl. Players are required to traverse through both [[Castle Zvahl Baileys]] and [[Castle Zvahl Keep]] |
+ | The final dungeon in the original mission storyline is Castle Zvahl. Players are required to traverse through both [[Castle Zvahl Baileys]] and [[Castle Zvahl Keep]] to battle [[Shadow Lord]] in the [[Throne Room]]. |
In ''[[Final Fantasy XI: Rise of the Zilart]]'', players must navigate and defeat the [[Ark Angels]] on the floating island of [[Tu'Lia]] before they can encounter [[Eald'narche]] at the [[Celestial Nexus]]. |
In ''[[Final Fantasy XI: Rise of the Zilart]]'', players must navigate and defeat the [[Ark Angels]] on the floating island of [[Tu'Lia]] before they can encounter [[Eald'narche]] at the [[Celestial Nexus]]. |
||
| Line 129: | Line 112: | ||
===''[[Final Fantasy XII]]''=== |
===''[[Final Fantasy XII]]''=== |
||
| ⚫ | |||
| − | {{sideicon|FFXII}} |
||
| ⚫ | |||
{{main|Sky Fortress Bahamut}} |
{{main|Sky Fortress Bahamut}} |
||
| − | [[Vaan]] and the rest of the party siege the |
+ | [[Vaan]] and the rest of the party siege the Sky Fortress ''Bahamut'' to stop an [[Battle above Rabanastre|all-out war]] between the [[Resistance (Final Fantasy XII)|Resistance]] and the [[Archadia|Archadian Empire]] from breaking out above the [[Rabanastre|Royal City of Rabanastre]]. They infiltrate the fortress with ''[[Strahl]]'' and fight through many Archadian soldiers, Judge [[Gabranth]], and battle [[Vayne (boss)|Vayne Solidor]] in all his forms. |
| + | |||
| + | The ''Bahamut'' is fairly short in comparison to most final dungeons, with only a handful of enemy and boss encounters located therein, and no loot to be found. The [[Pharos (Final Fantasy XII)|Pharos]] that precedes it boasts length and equipment more in line with other final dungeons in the series. This is because the player can't leave once they board the ''Bahamut'', and thus there are no save points there either, as it would not make sense in the storyline for the player to be able to do so. |
||
{{-}} |
{{-}} |
||
====''[[Final Fantasy XII: Revenant Wings]]''==== |
====''[[Final Fantasy XII: Revenant Wings]]''==== |
||
| − | {{sideicon|XIIRW}} |
||
[[File:Map KeepofForgottenTime3 RW.PNG|right|thumb|Keep of Forgotten Time.]] |
[[File:Map KeepofForgottenTime3 RW.PNG|right|thumb|Keep of Forgotten Time.]] |
||
{{main|Womb of Feolthanos}} |
{{main|Womb of Feolthanos}} |
||
| Line 143: | Line 126: | ||
===''[[Final Fantasy XIII]]''=== |
===''[[Final Fantasy XIII]]''=== |
||
| − | {{sideicon|FFXIII}} |
||
[[File:Orphan's Cradle - The Tesseracts.png|left|thumb|Lightning in Orphan's Cradle.]] |
[[File:Orphan's Cradle - The Tesseracts.png|left|thumb|Lightning in Orphan's Cradle.]] |
||
{{main|Orphan's Cradle}} |
{{main|Orphan's Cradle}} |
||
| Line 150: | Line 132: | ||
====''[[Final Fantasy XIII-2]]''==== |
====''[[Final Fantasy XIII-2]]''==== |
||
| − | {{sideicon|XIII2}} |
||
[[File:FFXIII-2 Academia 500 AF 1.png|thumb|Academia -500 AF-.]] |
[[File:FFXIII-2 Academia 500 AF 1.png|thumb|Academia -500 AF-.]] |
||
{{main|Academia}} |
{{main|Academia}} |
||
| − | [[Academia]] |
+ | [[Academia]] 500 AF has become infected with [[Chaos (Final Fantasy XIII)|chaos]] that has turned the city into a maze of various changing platforms [[Serah Farron|Serah]] and [[Noel Kreiss|Noel]] must navigate to face several challenges on their journey to their final confrontation with [[Caius Ballad|Caius]]. |
{{-}} |
{{-}} |
||
====''[[Lightning Returns: Final Fantasy XIII]]''==== |
====''[[Lightning Returns: Final Fantasy XIII]]''==== |
||
| − | {{sideicon|LR}} |
||
{{main|Luxerion Cathedral}} |
{{main|Luxerion Cathedral}} |
||
| − | On the [[ |
+ | On the [[Lightning Returns: Final Fantasy XIII days#Final Day|world's final day]] Lightning must traverse the cathedral and the system of corridors beneath it and pass the Savior's Trials to forge her [[Ultimate weapon (term)|ultimate weapon]] and shield. After passing through the cathedral, Lightning advances to [[Cosmogenesis]] where the final battle takes place. |
{{-}} |
{{-}} |
||
===''[[Final Fantasy XIV/Legacy|Final Fantasy XIV]]''=== |
===''[[Final Fantasy XIV/Legacy|Final Fantasy XIV]]''=== |
||
| − | {{sideicon|FFXIV}} |
||
[[File:FFXIV Mor Dhona.jpg|left|thumb|Mor Dhona.]] |
[[File:FFXIV Mor Dhona.jpg|left|thumb|Mor Dhona.]] |
||
{{main|Mor Dhona}} |
{{main|Mor Dhona}} |
||
| − | Like its online predecessor, the original '' |
+ | Like its online predecessor, the original ''Final Fantasy XIV'' had no true final dungeon. What came the closest to being considered as one is the [[Mor Dhona#Castrum Novus|Castrum Novus]] in Mor Dhona. The player had to journey through this region to reach the Lunar Transmitter and destroy it. After gaining the help of [[Cid nan Garlond|Cid]], the [[Warrior of Light (Final Fantasy XIV)|adventurer]] had to take the ''Enterprise'' to reach the Rivenroad, where his or her final confrontation with [[Nael van Darnus|Nael]] awaited. |
{{-}} |
{{-}} |
||
| + | |||
====''[[Final Fantasy XIV|Final Fantasy XIV: A Realm Reborn]]''==== |
====''[[Final Fantasy XIV|Final Fantasy XIV: A Realm Reborn]]''==== |
||
[[File:Praetorium.jpg|thumb|The Praetorium.]] |
[[File:Praetorium.jpg|thumb|The Praetorium.]] |
||
{{main|Praetorium}} |
{{main|Praetorium}} |
||
| − | The Praetorium is the final dungeon in ''A Realm Reborn''. It is an instanced dungeon which requires a full party (8 members) to enter. A stronghold within another stronghold, the Praetorium is reachable by [[Airship (term)|airship]] after players disable the magitek shields protecting it in the dungeon surrounding it, [[Castrum Meridianum |
+ | The Praetorium is the final dungeon in ''A Realm Reborn''. It is an instanced dungeon which requires a full party (8 members) to enter. A stronghold within another stronghold, the Praetorium is reachable by [[Airship (term)|airship]] after players disable the magitek shields protecting it in the dungeon surrounding it, [[Castrum Meridianum]]. |
| − | As the command center for the [[Garlean Empire |
+ | As the command center for the [[Garlemald|Garlean Empire's]] invasion in [[Eorzea]], the Praetorium is well guarded and houses weaponry, such as Magitek Reapers in its [[Magitek Armor]] Bay. Players battle with [[Gaius van Baelsar]] and the [[Ultima Weapon (Final Fantasy XIV)|Ultima Weapon]] in the Porta Decumana on the Research Level to remove its threat from Eorzea. |
{{-}} |
{{-}} |
||
| + | |||
====''[[Final Fantasy XIV: Heavensward]]''==== |
====''[[Final Fantasy XIV: Heavensward]]''==== |
||
[[File:The Aetherochemical Research Facility.png|thumb|The Aetherochemical Research Facility]] |
[[File:The Aetherochemical Research Facility.png|thumb|The Aetherochemical Research Facility]] |
||
{{main|Aetherochemical Research Facility}} |
{{main|Aetherochemical Research Facility}} |
||
| − | The Aetherochemical Research Facility is the final dungeon of ''Heavensward''. Players enter this ancient [[Allagan Empire|Allagan]] research facility in pursuit of Archbishop [[Thordan VII]]. Fighting through many of the defenses and chimerical creations, they eventually confront the Ascians [[Lahabrea]] and [[Igeyorhm]], who fuse into [[Ascian Prime]]. Completing this dungeon unlocks the final battle, a trial called [[King Thordan|The Singularity Reactor]]. |
+ | The Aetherochemical Research Facility is the final dungeon of ''Heavensward''. Players enter this ancient [[Allagan Empire|Allagan]] research facility in pursuit of Archbishop [[Thordan VII]]. Fighting through many of the defenses and chimerical creations, they eventually confront the Ascians [[Lahabrea]] and [[Igeyorhm]], who fuse into [[Ascian Prime]]. Completing this dungeon unlocks the final battle against [[King Thordan]], in a trial called [[King Thordan|The Singularity Reactor]]. |
{{-}} |
{{-}} |
||
| + | |||
| + | ====''[[Final Fantasy XIV: Stormblood]]''==== |
||
| + | {{main|Ala Mhigo (dungeon)}} |
||
| + | Ala Mhigo is the final dungeon of ''Stormblood''. Players join the final assault by the Eorzean Alliance and make their way into the Royal Palace, where they battle with the viceroy [[Zenos yae Galvus]]. Completing this dungeon unlocks the final battle against [[Shinryu (Final Fantasy XIV)|Shinryu]], in a trial called [[The Royal Menagerie]]. |
||
| + | |||
| + | ====''[[Final Fantasy XIV: Shadowbringers]]''==== |
||
| + | {{main|Amaurot}} |
||
| + | Amaurot is the ancient ruins of the [[Ascian]] civilization and the domain of Emet-Selch. Players must fight through a reenactment of the calamity that befell it. After finishing the dungeon, players must fight Emet-Selch himself in the form of Hades. |
||
| + | |||
| + | ===''[[Final Fantasy XV]]''=== |
||
| + | {{main|Insomnia}} |
||
| + | Insomnia is the final dungeon. The location will be visited 10 years after the start of the game. [[Noctis Lucis Caelum]] and his friends return there to challenge [[Ardyn Izunia]], their final foe, and reclaim the throne of [[Lucis]]. |
||
===''[[Final Fantasy Tactics]]''=== |
===''[[Final Fantasy Tactics]]''=== |
||
| − | {{sideicon|FFT}} |
||
[[File:Graveyard of Airships 3.png|thumb|right|Necrohol of Mullonde.]] |
[[File:Graveyard of Airships 3.png|thumb|right|Necrohol of Mullonde.]] |
||
{{main|Airship Graveyard}} |
{{main|Airship Graveyard}} |
||
| − | [[Ramza Beoulve|Ramza]] and his party follow the [[Lucavi]]-possessed [[Folmarv Tengille]] into the [[Necrohol of Mullonde]] where the arch-demon [[Ultima (Tactics)|Ultima]] is being resurrected. The final battle takes place in the |
+ | [[Ramza Beoulve|Ramza]] and his party follow the [[Lucavi]]-possessed [[Folmarv Tengille]] into the [[Necrohol of Mullonde]] where the arch-demon [[Ultima (Tactics)|Ultima]] is being resurrected. The final battle takes place in the Airship Graveyard. |
{{-}} |
{{-}} |
||
===''[[Final Fantasy Tactics Advance]]''=== |
===''[[Final Fantasy Tactics Advance]]''=== |
||
| − | {{sideicon|FFTA}} |
||
[[File:AmbervaleEntry.png|left|thumb|Ambervale.]] |
[[File:AmbervaleEntry.png|left|thumb|Ambervale.]] |
||
{{main|Ambervale}} |
{{main|Ambervale}} |
||
| Line 196: | Line 187: | ||
====''[[Final Fantasy Tactics A2: Grimoire of the Rift]]''==== |
====''[[Final Fantasy Tactics A2: Grimoire of the Rift]]''==== |
||
| − | {{sideicon|FFTA2}} |
||
[[File:Zellea2.JPG|right|thumb|Zellea.]] |
[[File:Zellea2.JPG|right|thumb|Zellea.]] |
||
{{main|Zellea, the Forbidden Land}} |
{{main|Zellea, the Forbidden Land}} |
||
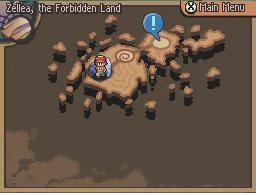
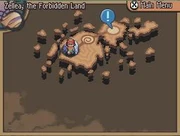
| − | [[Luso Clemens]] and [[Clan Gully]] pursue [[Illua]] to [[Zellea, the Forbidden Land]], a [[Jagd]] thick in |
+ | [[Luso Clemens]] and [[Clan Gully]] pursue [[Illua]] to [[Zellea, the Forbidden Land]], a [[Jagd]] thick in magick from the Rift. After falling in battle at the misty precipice of To Touch the Heavens, Illua summons the demon [[Neukhia]]. |
{{-}} |
{{-}} |
||
===''[[Final Fantasy Type-0]]''=== |
===''[[Final Fantasy Type-0]]''=== |
||
| − | {{sideicon|Type0}} |
||
{{main|Pandæmonium}} |
{{main|Pandæmonium}} |
||
[[File:Palace of all Magic.png|thumb|left|The Land of Judgment, Pandæmonium.]] |
[[File:Palace of all Magic.png|thumb|left|The Land of Judgment, Pandæmonium.]] |
||
| − | The final dungeon is Pandæmonium |
+ | The final dungeon is Pandæmonium, the Land of Judgment where [[The Rursan Arbiter]] waits to test those who seek to become [[Agito (term)|Agito]]. The original twelve members of [[Class Zero]] are challenged to trials set by Marshal [[Cid Aulstyne]] to prove their strength to confront him. |
{{-}} |
{{-}} |
||
===''[[Final Fantasy Crystal Chronicles]]''=== |
===''[[Final Fantasy Crystal Chronicles]]''=== |
||
| − | {{sideicon|FFCC}} |
||
[[File:FFCC-Raem2nd.jpg|left|thumb|Raem.]] |
[[File:FFCC-Raem2nd.jpg|left|thumb|Raem.]] |
||
{{main|Nest of Memories}} |
{{main|Nest of Memories}} |
||
| Line 217: | Line 205: | ||
====''[[Final Fantasy Crystal Chronicles: Ring of Fates]]''==== |
====''[[Final Fantasy Crystal Chronicles: Ring of Fates]]''==== |
||
| − | {{sideicon|CCRoF}} |
||
{{main|Crystal Temple (Ring of Fates)}} |
{{main|Crystal Temple (Ring of Fates)}} |
||
In Story Mode, [[Yuri (Crystal Chronicles)|Yuri]] and his party final battle with [[Galdes]] takes place in the [[Crystal Temple (Ring of Fates)|Lunite Temple]]. This takes place in an alternate world where Galdes controls the world and the Crystal Temple is now the Lunite Temple. In multiplayer mode, the Adventurers final battle with Galdes takes place in the Crystal Temple. |
In Story Mode, [[Yuri (Crystal Chronicles)|Yuri]] and his party final battle with [[Galdes]] takes place in the [[Crystal Temple (Ring of Fates)|Lunite Temple]]. This takes place in an alternate world where Galdes controls the world and the Crystal Temple is now the Lunite Temple. In multiplayer mode, the Adventurers final battle with Galdes takes place in the Crystal Temple. |
||
| Line 223: | Line 210: | ||
====''[[Final Fantasy Crystal Chronicles: Echoes of Time]]''==== |
====''[[Final Fantasy Crystal Chronicles: Echoes of Time]]''==== |
||
| − | {{sideicon|CCEoT}} |
||
{{main|Tower (Echoes of Time)}} |
{{main|Tower (Echoes of Time)}} |
||
{{Locat-stub|Final Fantasy Crystal Chronicles: Echoes of Time}} |
{{Locat-stub|Final Fantasy Crystal Chronicles: Echoes of Time}} |
||
| Line 229: | Line 215: | ||
====''[[Final Fantasy Crystal Chronicles: The Crystal Bearers]]''==== |
====''[[Final Fantasy Crystal Chronicles: The Crystal Bearers]]''==== |
||
| − | {{sideicon|CCTCB}} |
||
Though not really a dungeon, the final trials [[Layle]] must overcome before his confrontation with [[Jegran]] take place in the airship ''[[Alexis]]''. |
Though not really a dungeon, the final trials [[Layle]] must overcome before his confrontation with [[Jegran]] take place in the airship ''[[Alexis]]''. |
||
===''[[Final Fantasy Mystic Quest]]''=== |
===''[[Final Fantasy Mystic Quest]]''=== |
||
| − | {{sideicon|FFMQ}} |
||
[[File:Benjamin and the Dark King.png|right|thumb|Doom Castle.]] |
[[File:Benjamin and the Dark King.png|right|thumb|Doom Castle.]] |
||
{{main|Doom Castle}} |
{{main|Doom Castle}} |
||
| Line 240: | Line 224: | ||
===''[[Final Fantasy Adventure]]''=== |
===''[[Final Fantasy Adventure]]''=== |
||
| − | {{sideicon|FFA}} |
||
[[File:FFA Final Battle.png|left|thumb|Tree of Mana.]] |
[[File:FFA Final Battle.png|left|thumb|Tree of Mana.]] |
||
Atop the [[Temple of Mana]] [[Sumo]] finds himself in [[Mana Shrine]], a garden where the Tree of Mana resides. [[Julius]] is first fought in a separate dimension, but the final battle takes place directly in front of the Mana Tree, which damages and ultimately destroys it. |
Atop the [[Temple of Mana]] [[Sumo]] finds himself in [[Mana Shrine]], a garden where the Tree of Mana resides. [[Julius]] is first fought in a separate dimension, but the final battle takes place directly in front of the Mana Tree, which damages and ultimately destroys it. |
||
| Line 246: | Line 229: | ||
===''[[The Final Fantasy Legend]]''=== |
===''[[The Final Fantasy Legend]]''=== |
||
| − | {{sideicon|FFL}} |
||
{{main|Tower (Legend)}} |
{{main|Tower (Legend)}} |
||
| − | The Tower is both the central and final dungeon |
+ | The Tower is both the central and final dungeon. Throughout the game, the player has climbed this structure from [[Base Town]] in search of [[Paradise]]. As they near the top, the party is dropped down a [[Pitfall (trap)|pitfall]] and forced to climb back up the Tower from Base Town, this time on the outside of the structure: this 23 story climb could be considered a distinct final dungeon in its own right. |
===''[[Final Fantasy Legend II]]''=== |
===''[[Final Fantasy Legend II]]''=== |
||
| − | {{sideicon|FFL2}} |
||
{{main|Final Dungeon (Legend II)}} |
{{main|Final Dungeon (Legend II)}} |
||
| − | "Final Dungeon" is the name of a dungeon |
+ | "Final Dungeon" is the name of a dungeon, but it is in fact merely the penultimate dungeon. It serves to protect the secret, final [[MAGI (Legend II)|MAGI]], and is guarded by [[Final Fantasy Legend II enemies#Warmach|Warmach]]. |
| − | The |
+ | The true final dungeon is the [[Central Shrine]], a castle in the Celestial World. There, the player battles Apollo at the dungeon's entrance, but when his actions risk the destruction of the world, the player descends deeper to repair the damage, ultimately confronting the [[Final Fantasy Legend II enemies#Arsenal|Arsenal]]. |
===''[[Final Fantasy Legend III]]''=== |
===''[[Final Fantasy Legend III]]''=== |
||
| − | {{sideicon|FFL3}} |
||
{{main|Xagor's Castle}} |
{{main|Xagor's Castle}} |
||
Xagor's Castle is the final dungeon that becomes accessible after [[Dion]] destroys the barrier machine in the [[Eastern Ruins]]. [[Arthur (Legend III)|Arthur]] has to go through [[Mt. Goht]] to reach the castle. Residing at the top of the castle is [[Sol (Legend III)|Sol]] who pleas to Arthur to kill him while he's holding Xagor's soul. Xagor appears before the party during battle, claiming to have defeated Sol. |
Xagor's Castle is the final dungeon that becomes accessible after [[Dion]] destroys the barrier machine in the [[Eastern Ruins]]. [[Arthur (Legend III)|Arthur]] has to go through [[Mt. Goht]] to reach the castle. Residing at the top of the castle is [[Sol (Legend III)|Sol]] who pleas to Arthur to kill him while he's holding Xagor's soul. Xagor appears before the party during battle, claiming to have defeated Sol. |
||
| Line 264: | Line 244: | ||
===''[[Final Fantasy: The 4 Heroes of Light]]''=== |
===''[[Final Fantasy: The 4 Heroes of Light]]''=== |
||
| − | {{sideicon|T4HoL}} |
||
[[File:Star Chamber Final Levels.png|left|thumb|The Star Chamber.]] |
[[File:Star Chamber Final Levels.png|left|thumb|The Star Chamber.]] |
||
{{main|Star Chamber}} |
{{main|Star Chamber}} |
||
| Line 271: | Line 250: | ||
===''[[Bravely Default]]''=== |
===''[[Bravely Default]]''=== |
||
| − | {{sideicon|BravelyD}} |
||
{{main|Dark Aurora}} |
{{main|Dark Aurora}} |
||
The final dungeon is the Dark Aurora, which arises above the [[Great Chasm]] and is accessible by a magic portal at the top of the cliff overlooking the chasm. Following the revelation that [[Airy]] had been deceiving the party, she flies off to the Dark Aurora to seek the aid of her master, [[Ouroboros (Bravely Default)|Ouroboros]]. The party is then prompted to stop Airy, as well as Ouroboros himself depending on how the player chose to reach the final chapter. |
The final dungeon is the Dark Aurora, which arises above the [[Great Chasm]] and is accessible by a magic portal at the top of the cliff overlooking the chasm. Following the revelation that [[Airy]] had been deceiving the party, she flies off to the Dark Aurora to seek the aid of her master, [[Ouroboros (Bravely Default)|Ouroboros]]. The party is then prompted to stop Airy, as well as Ouroboros himself depending on how the player chose to reach the final chapter. |
||
| + | {{-}} |
||
| + | |||
| + | ====''[[Bravely Second: End Layer]]''==== |
||
| + | {{main|Via Celestio}} |
||
| + | Via Celestio is the path that bridges [[Luxendarc]] to the [[Celestial Realm]]. The party discovers [[Anne]] is responsible for summoning the [[Ba'al (Bravely Second)|Ba'al]]s to Luxendarc, that her master [[Providence (Bravely Second)|Providence]] would arrive and destroy the world. After Anne is defeated, [[Altair (Bravely Second)|Altair]] reveals to the party that Providence holds [[Vega (Bravely Second)|Vega]]'s soul captive, and they invade the Celestial Realm to defeat Providence and reunite the two souls. |
||
{{-}} |
{{-}} |
||
===''[[Final Fantasy Dimensions]]''=== |
===''[[Final Fantasy Dimensions]]''=== |
||
| − | {{sideicon|FFD}} |
||
{{Main|World of Nil}} |
{{Main|World of Nil}} |
||
World of Nil is accessed through the Dark Gate. It is a world of nothingness devoid of vitality with roads and soil being entirely white and some paths being composed of bones. The World of Nil and its subsections house powerful equipment as well as the strongest random encounters in the game, most involving boss-level threats. |
World of Nil is accessed through the Dark Gate. It is a world of nothingness devoid of vitality with roads and soil being entirely white and some paths being composed of bones. The World of Nil and its subsections house powerful equipment as well as the strongest random encounters in the game, most involving boss-level threats. |
||
===''[[Dissidia Final Fantasy (2008)|Dissidia Final Fantasy]]''=== |
===''[[Dissidia Final Fantasy (2008)|Dissidia Final Fantasy]]''=== |
||
| − | {{sideicon|Dissidia}} |
||
[[File:Chaos Throne.jpg|right|thumb|Edge of Madness - Chaos's Throne.]] |
[[File:Chaos Throne.jpg|right|thumb|Edge of Madness - Chaos's Throne.]] |
||
All final dungeons from the main series up to ''[[Final Fantasy X]]'' are present and serve as battle arenas. Each dungeon has an "Omega" variant which adds special effects that affect the stage layout and the characters' Bravery. |
All final dungeons from the main series up to ''[[Final Fantasy X]]'' are present and serve as battle arenas. Each dungeon has an "Omega" variant which adds special effects that affect the stage layout and the characters' Bravery. |
||
| Line 290: | Line 271: | ||
====''[[Dissidia 012 Final Fantasy]]''==== |
====''[[Dissidia 012 Final Fantasy]]''==== |
||
| − | {{sideicon|D012}} |
||
In addition to the arenas from the previous game, [[Lumoria#Dissidia 012Final Fantasy|Empyreal Paradox]], the ''[[Sky Fortress Bahamut#Dissidia 012 Final Fantasy|Sky Fortress Bahamut]]'', and [[Orphan's Cradle#Dissidia 012 Final Fantasy|Orphan's Cradle]] are added as new arenas. The latter two are the sites of the final battles in their respective games, while the Empyreal Paradox is the site of the final battle of the ''[[Final Fantasy XI: Chains of Promathia|Chains of Promathia]]'' expansion to ''Final Fantasy XI''. |
In addition to the arenas from the previous game, [[Lumoria#Dissidia 012Final Fantasy|Empyreal Paradox]], the ''[[Sky Fortress Bahamut#Dissidia 012 Final Fantasy|Sky Fortress Bahamut]]'', and [[Orphan's Cradle#Dissidia 012 Final Fantasy|Orphan's Cradle]] are added as new arenas. The latter two are the sites of the final battles in their respective games, while the Empyreal Paradox is the site of the final battle of the ''[[Final Fantasy XI: Chains of Promathia|Chains of Promathia]]'' expansion to ''Final Fantasy XI''. |
||
| Line 296: | Line 276: | ||
{{endspoiler}} |
{{endspoiler}} |
||
| + | {{navbox locations}} |
||
| − | {{Locations}} |
||
| − | {{ |
+ | {{navbox recurring}} |
| − | |||
[[Category:Locations]] |
[[Category:Locations]] |
||
| − | [[Category:Recurring gameplay |
+ | [[Category:Recurring gameplay components]] |
Revision as of 21:15, 2 July 2019
Template:Sideicon
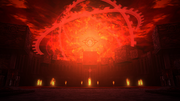
Crystal World, final dungeon in Final Fantasy IX.
Final dungeons are places where final boss battles in the Final Fantasy series take place, generally in a large, twisting dungeon that has some of the game's most powerful enemies. They are usually the last area visited in a game. More often than not, the strongest equipment in the game can be found there, as well. The game's final boss awaits at the end of the dungeon.
List of final dungeons
Final Fantasy
Chaos Shrine of the Past.
The Chaos Shrine is the site of the battle with Garland at the beginning of the game. As part of his pact with the Four Fiends, Garland is sent 2,000 years into the past to become Chaos. The shrine's location is significant, as it lies in the geographic center of the four elemental shrines that house the Crystals.
Using the restored Crystals to channel a Dark Crystal in the shrine's ruins in the present, the Warriors of Light travel back in time to when the shrine is restored and journey into its basement levels to defeat the Four Fiends again and destroy Chaos.
Final Fantasy II
Pandaemonium.
Pandaemonium is the capital of Hell, buried in the earth by the Ultima spell centuries ago to prevent a swarm of demons from invading the land. It is raised to earth by the Emperor when he conquers Hell and rises where Palamecia Castle stood in the mountains. Firion and his party traverse the Jade Passage to enter Pandaemonium from underground and climb to the castle's highest floor where the Emperor awaits to battle them.
In the Soul of Rebirth bonus storyline, the castle of heaven, Arubboth, is where the Light Emperor is fought. It is a mirror image of Pandaemonium with a gold and pink color scheme to contrast Pandaemonium's violet and blue.
Final Fantasy III

Luneth in the World of Darkness.
The World of Darkness is the site of the final battle with the Cloud of Darkness. After Luneth and his friends climb the Crystal Tower to kill Xande, the Cloud of Darkness appears, summoned by the imbalance of light and darkness Xande has created by destroying the Crystals.
The Warriors of Light enter the portal to the Dark World that appears and free the Warriors of Darkness from the four Crystals of the Dark World. The Warriors of Darkness use their power to render the Cloud of Darkness vulnerable, and the Warriors of Light defeat her and cast her back into The Void.
Final Fantasy IV
Kain in the Lunar Subterrane.
The Lunar Subterrane is the path that leads to the Red Moon's core. It is accessible via a teleport pad in the Crystal Palace powered by the moon's eight Crystals. At the moon's core, the Lunarians sleep along with Zemus. The path contains many weapons that once endangered the Lunarians' lives, guarded by Zemus's minions. Cecil and his friends journey to the core to assist Golbez and Fusoya in battling Zemus, whose hatred manifests as Zeromus upon his death.
Final Fantasy IV -Interlude-
The Tower of Babil acts as the final dungeon, where the player will encounter numerous bosses.
Final Fantasy IV: The After Years
The True Moon is a gigantic final dungeon composed of three sections: the 13-floors long Subterrane where several bosses from Final Fantasy IV are fought (the first floors of this area mirror the Lunar Subterrane); the 29-floors long Depths and the widest section of the True Moon's underground where bosses from Final Fantasy to Final Fantasy VI are fought; and the Bottommost Depths, the final floor, where the Creator resides.
Final Fantasy V

Lenna in the Interdimensional Rift.
The Interdimensional Rift is the gap between dimensions where the Void was sealed, and where Exdeath has gone to seize control of its power. The Rift is a mismatched maze of architecture, including locations consumed by the Void and is full of powerful monsters, including members of the Demons of the Rift.
After Bartz and his friends traverse the Rift's outer layers they find its deepest part a series of crystalline platforms. At the end they destroy Exdeath's true form and the monstrous Neo Exdeath.
Final Fantasy VI
Shadow in Kefka's Tower.
Kefka's Tower is Kefka's lair, his monument to death and destruction. The tower is built out of rubble collected from around the world and assembled by magic during the end of the world. It consists primarily of debris from Vector and the Magitek Research Facility, and is filled with Kefka's strongest servants, including the Warring Triad. Terra and her friends assault the tower from the air and destroy the Triad before fighting Kefka's god form.
Final Fantasy VII

Northern Crater.
The complex series of caves descends deep into the Planet from the North Crater, and at the core, Sephiroth is keeping Holy sealed. Cloud and the rest of AVALANCHE battle Jenova∙SYNTHESIS, and then Bizarro∙Sephiroth and the more powerful Safer∙Sephiroth, until Cloud enters the Lifestream for a mental one-on-one duel against Sephiroth's spirit.
Before Crisis -Final Fantasy VII-

Shotgun (Female) in the final dungeon.
Crisis Core -Final Fantasy VII-
Portal of Severance.
Genesis Rhapsodos awaits in an underground dungeon beneath Banora that houses old tablets reciting LOVELESS. It is called the Portal of Severance. Here, Genesis Avatar is fought by Zack, and afterward Zack must face him again in human form.
Dirge of Cerberus -Final Fantasy VII-
Omega at Midgar.
Omega serves as the "final dungeon". Here, Weiss the Immaculate and Omega itself fuse into Omega Weiss, whom Vincent Valentine and Chaos must battle.
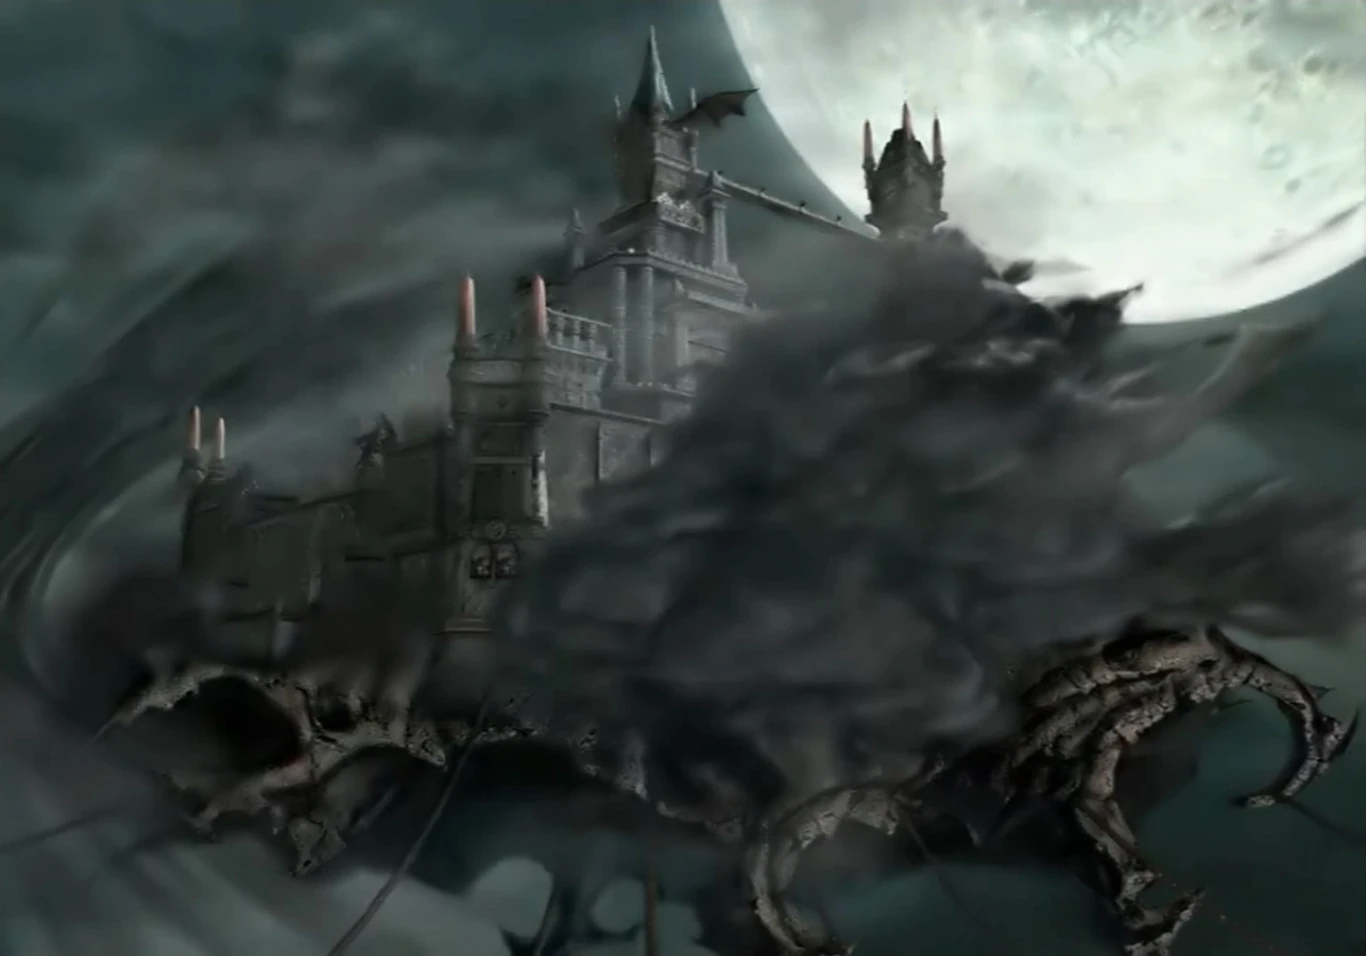
Final Fantasy VIII

Ultimecia Castle.
Ultimecia, in all her forms, is fought atop Ultimecia Castle by Squall and his party. The castle is a luxurious estate sealed in a magical barrier that voids the party's command abilities, resurrection and Limit Breaks until the bosses roaming the castle are killed. There are portals before the castle the player can use to go to the world map, but only sidequest areas are visitable.
Final Fantasy IX
Memoria.
After traveling through Memoria, a land comprised of Gaia's memories, Zidane and his companions fight Trance Kuja in the Crystal World, where the Crystal lies. After Kuja's defeat, the party is sent to the Hill of Despair, where the avatar of death, Necron, awaits.
Final Fantasy X

Inside Sin.
Tidus and the rest of the party travel through the innards of Sin and face Seymour Guado for the final time in his Seymour Omnis form. Inside Sin is a vast dungeon made up of lost cities and infested with fiends. At Dream's End the party battles Braska's Final Aeon and Yu Yevon.
Final Fantasy X-2
The Farplane.
Yuna, Rikku, and Paine descend to the Farplane via the holes in the former Chambers of the Fayth to stop Shuyin from using the ancient machina weapon Vegnagun to destroy Spira. The Farplane is scattered with strong foes and the YRP must navigate through moving platforms and move past gates guarded by strong fiends to get to the heart of Farplane where Vegnagun's various parts and Shuyin's spirit lie in wait for them.
Final Fantasy XI
Castle Zvahl.
Due to the non-linear nature of Final Fantasy XI, there is no true final dungeon, but "final dungeons" exist as areas preceding the final showdown in a number of mission storylines.
The final dungeon in the original mission storyline is Castle Zvahl. Players are required to traverse through both Castle Zvahl Baileys and Castle Zvahl Keep to battle Shadow Lord in the Throne Room.
In Final Fantasy XI: Rise of the Zilart, players must navigate and defeat the Ark Angels on the floating island of Tu'Lia before they can encounter Eald'narche at the Celestial Nexus.
In Chains of Promathia, players must venture deep into the heart of Al'Taieu to reach the Empyreal Paradox, where the final confrontation with the Twilight God Promathia takes place.
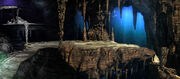
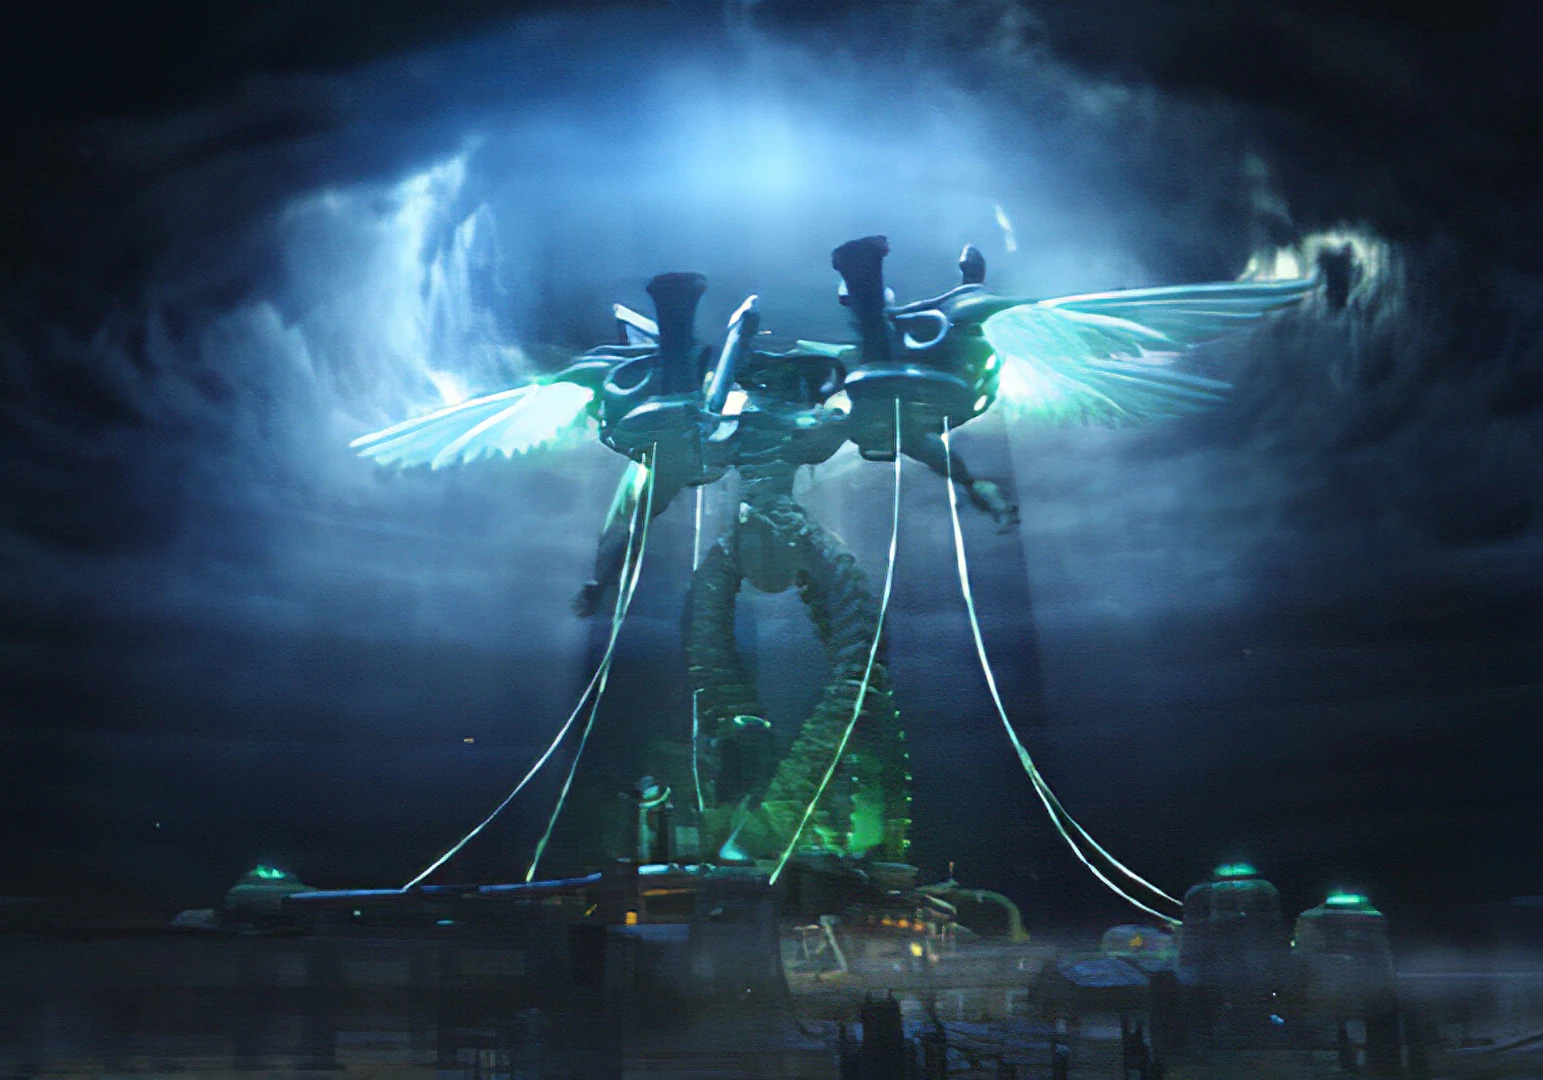
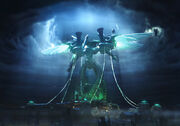
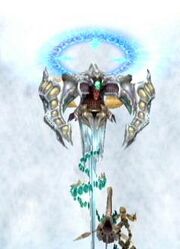
Final Fantasy XII

Sky Fortress Bahamut.
Vaan and the rest of the party siege the Sky Fortress Bahamut to stop an all-out war between the Resistance and the Archadian Empire from breaking out above the Royal City of Rabanastre. They infiltrate the fortress with Strahl and fight through many Archadian soldiers, Judge Gabranth, and battle Vayne Solidor in all his forms.
The Bahamut is fairly short in comparison to most final dungeons, with only a handful of enemy and boss encounters located therein, and no loot to be found. The Pharos that precedes it boasts length and equipment more in line with other final dungeons in the series. This is because the player can't leave once they board the Bahamut, and thus there are no save points there either, as it would not make sense in the storyline for the player to be able to do so.
Final Fantasy XII: Revenant Wings

Keep of Forgotten Time.
Vaan and his friends enter the Keep of Forgotten Time to battle Feolthanos and stop him from sapping the aegyl from their anima. They ultimately defeat Feolthanos Exultant in the Womb of Feolthanos.
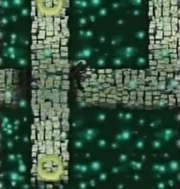
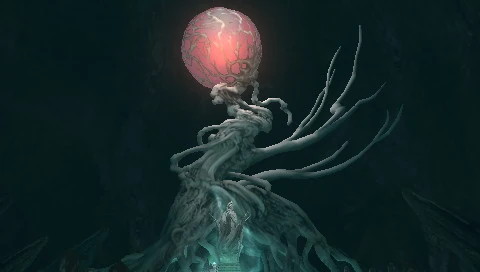
Final Fantasy XIII

Lightning in Orphan's Cradle.
Orphan's Cradle houses the fal'Cie Barthandelus and Orphan. It is a multi-leveled dimension where paths change as Lightning and her fellow l'Cie pursue the fal'Cie Eden's servants. Portals open for the party to return to previous areas, or press further into the Narthex, the final area.
Final Fantasy XIII-2

Academia -500 AF-.
Academia 500 AF has become infected with chaos that has turned the city into a maze of various changing platforms Serah and Noel must navigate to face several challenges on their journey to their final confrontation with Caius.
Lightning Returns: Final Fantasy XIII
On the world's final day Lightning must traverse the cathedral and the system of corridors beneath it and pass the Savior's Trials to forge her ultimate weapon and shield. After passing through the cathedral, Lightning advances to Cosmogenesis where the final battle takes place.
Final Fantasy XIV

Mor Dhona.
Like its online predecessor, the original Final Fantasy XIV had no true final dungeon. What came the closest to being considered as one is the Castrum Novus in Mor Dhona. The player had to journey through this region to reach the Lunar Transmitter and destroy it. After gaining the help of Cid, the adventurer had to take the Enterprise to reach the Rivenroad, where his or her final confrontation with Nael awaited.
Final Fantasy XIV: A Realm Reborn
The Praetorium.
The Praetorium is the final dungeon in A Realm Reborn. It is an instanced dungeon which requires a full party (8 members) to enter. A stronghold within another stronghold, the Praetorium is reachable by airship after players disable the magitek shields protecting it in the dungeon surrounding it, Castrum Meridianum.
As the command center for the Garlean Empire's invasion in Eorzea, the Praetorium is well guarded and houses weaponry, such as Magitek Reapers in its Magitek Armor Bay. Players battle with Gaius van Baelsar and the Ultima Weapon in the Porta Decumana on the Research Level to remove its threat from Eorzea.
Final Fantasy XIV: Heavensward


The Aetherochemical Research Facility
The Aetherochemical Research Facility is the final dungeon of Heavensward. Players enter this ancient Allagan research facility in pursuit of Archbishop Thordan VII. Fighting through many of the defenses and chimerical creations, they eventually confront the Ascians Lahabrea and Igeyorhm, who fuse into Ascian Prime. Completing this dungeon unlocks the final battle against King Thordan, in a trial called The Singularity Reactor.
Final Fantasy XIV: Stormblood
Ala Mhigo is the final dungeon of Stormblood. Players join the final assault by the Eorzean Alliance and make their way into the Royal Palace, where they battle with the viceroy Zenos yae Galvus. Completing this dungeon unlocks the final battle against Shinryu, in a trial called The Royal Menagerie.
Final Fantasy XIV: Shadowbringers
Amaurot is the ancient ruins of the Ascian civilization and the domain of Emet-Selch. Players must fight through a reenactment of the calamity that befell it. After finishing the dungeon, players must fight Emet-Selch himself in the form of Hades.
Final Fantasy XV
Insomnia is the final dungeon. The location will be visited 10 years after the start of the game. Noctis Lucis Caelum and his friends return there to challenge Ardyn Izunia, their final foe, and reclaim the throne of Lucis.
Final Fantasy Tactics

Necrohol of Mullonde.
Ramza and his party follow the Lucavi-possessed Folmarv Tengille into the Necrohol of Mullonde where the arch-demon Ultima is being resurrected. The final battle takes place in the Airship Graveyard.
Final Fantasy Tactics Advance
Ambervale.
Mewt Randell, Llednar Twem, and Queen Remedi head to Ambervale, the summer residence of the Bervenia royalty. Marche Radiuju follows them, and Remedi transforms into the world-thread Li-Grim.
Final Fantasy Tactics A2: Grimoire of the Rift
Zellea.
Luso Clemens and Clan Gully pursue Illua to Zellea, the Forbidden Land, a Jagd thick in magick from the Rift. After falling in battle at the misty precipice of To Touch the Heavens, Illua summons the demon Neukhia.
Final Fantasy Type-0
The Land of Judgment, Pandæmonium.
The final dungeon is Pandæmonium, the Land of Judgment where The Rursan Arbiter waits to test those who seek to become Agito. The original twelve members of Class Zero are challenged to trials set by Marshal Cid Aulstyne to prove their strength to confront him.
Final Fantasy Crystal Chronicles

Raem.
The Tipa Caravanners journey ends in Mount Vellenge, located in The Abyss. Here they battle with the Meteor Parasite and once defeat it, are then transported to the Nest of Memories for a final battle with Raem.
Final Fantasy Crystal Chronicles: Ring of Fates
In Story Mode, Yuri and his party final battle with Galdes takes place in the Lunite Temple. This takes place in an alternate world where Galdes controls the world and the Crystal Temple is now the Lunite Temple. In multiplayer mode, the Adventurers final battle with Galdes takes place in the Crystal Temple.
Final Fantasy Crystal Chronicles: Echoes of Time
Final Fantasy Crystal Chronicles: The Crystal Bearers
Though not really a dungeon, the final trials Layle must overcome before his confrontation with Jegran take place in the airship Alexis.
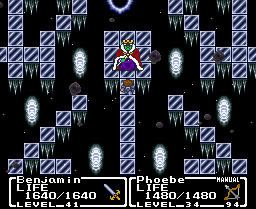
Final Fantasy Mystic Quest

Doom Castle.
Dark King is fought atop Doom Castle, a fortress comprised of architecture resembling the dungeons the Vile Four were fought in. Doom Castle also connects to the Focus Tower, and although the two locations are similar they are not the same.
Final Fantasy Adventure
Tree of Mana.
Atop the Temple of Mana Sumo finds himself in Mana Shrine, a garden where the Tree of Mana resides. Julius is first fought in a separate dimension, but the final battle takes place directly in front of the Mana Tree, which damages and ultimately destroys it.
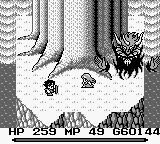
The Final Fantasy Legend
The Tower is both the central and final dungeon. Throughout the game, the player has climbed this structure from Base Town in search of Paradise. As they near the top, the party is dropped down a pitfall and forced to climb back up the Tower from Base Town, this time on the outside of the structure: this 23 story climb could be considered a distinct final dungeon in its own right.
Final Fantasy Legend II
"Final Dungeon" is the name of a dungeon, but it is in fact merely the penultimate dungeon. It serves to protect the secret, final MAGI, and is guarded by Warmach.
The true final dungeon is the Central Shrine, a castle in the Celestial World. There, the player battles Apollo at the dungeon's entrance, but when his actions risk the destruction of the world, the player descends deeper to repair the damage, ultimately confronting the Arsenal.
Final Fantasy Legend III
Xagor's Castle is the final dungeon that becomes accessible after Dion destroys the barrier machine in the Eastern Ruins. Arthur has to go through Mt. Goht to reach the castle. Residing at the top of the castle is Sol who pleas to Arthur to kill him while he's holding Xagor's soul. Xagor appears before the party during battle, claiming to have defeated Sol.
Final Fantasy: The 4 Heroes of Light

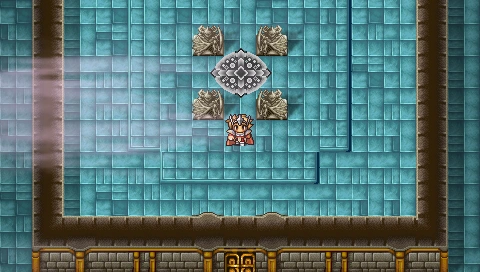
The Star Chamber.
The Star Chamber appears after the servants of Chaos are defeated. The party can only enter the Star Chamber with the help of the Cetus. When the heroes arrive in the dungeon, Chaos takes the party's Crowns away and they must fight his servants to get them back. Chaos is fought at the bottom level.
Bravely Default
The final dungeon is the Dark Aurora, which arises above the Great Chasm and is accessible by a magic portal at the top of the cliff overlooking the chasm. Following the revelation that Airy had been deceiving the party, she flies off to the Dark Aurora to seek the aid of her master, Ouroboros. The party is then prompted to stop Airy, as well as Ouroboros himself depending on how the player chose to reach the final chapter.
Bravely Second: End Layer
Via Celestio is the path that bridges Luxendarc to the Celestial Realm. The party discovers Anne is responsible for summoning the Ba'als to Luxendarc, that her master Providence would arrive and destroy the world. After Anne is defeated, Altair reveals to the party that Providence holds Vega's soul captive, and they invade the Celestial Realm to defeat Providence and reunite the two souls.
Final Fantasy Dimensions
World of Nil is accessed through the Dark Gate. It is a world of nothingness devoid of vitality with roads and soil being entirely white and some paths being composed of bones. The World of Nil and its subsections house powerful equipment as well as the strongest random encounters in the game, most involving boss-level threats.
Dissidia Final Fantasy
Edge of Madness - Chaos's Throne.
All final dungeons from the main series up to Final Fantasy X are present and serve as battle arenas. Each dungeon has an "Omega" variant which adds special effects that affect the stage layout and the characters' Bravery.
The final stage of the game is Shade Impulse, while the arena for the battle with Chaos is an original arena, the Edge of Madness.
Dissidia 012 Final Fantasy
In addition to the arenas from the previous game, Empyreal Paradox, the Sky Fortress Bahamut, and Orphan's Cradle are added as new arenas. The latter two are the sites of the final battles in their respective games, while the Empyreal Paradox is the site of the final battle of the Chains of Promathia expansion to Final Fantasy XI.
The final gateway of the Treachery of the Gods storyline is "To A Foreign World", a path leading to a portal to the Interdimensional Rift. The final Gateway of Light to All and Confessions of the Creator is "Edge of Discord", leading to Chaos's seat of power.