Rayfurtado (talk | contribs) (→Aeris) Tag: sourceedit |
Intangir Bot (talk | contribs) m (Bot: Changing template: Q) |
||
| (28 intermediate revisions by 5 users not shown) | |||
| Line 1: | Line 1: | ||
| − | {{sideicon|FFVII |
+ | {{sideicon|prime=FFVII}} |
| + | {{FA|October 1, 2012}} |
||
| + | {{DISPLAYTITLE:''Final Fantasy VII'' demo}} |
||
:''For the PlayStation 3 tech demo, see: [[Final Fantasy VII technical demo]]''. |
:''For the PlayStation 3 tech demo, see: [[Final Fantasy VII technical demo]]''. |
||
[[File:Ffvii demo Grenadiers.jpg|thumb|250px|The first PlayStation demo.]] |
[[File:Ffvii demo Grenadiers.jpg|thumb|250px|The first PlayStation demo.]] |
||
| − | Four '''demo versions''' of ''[[Final Fantasy VII]]'' have been released |
+ | Four '''demo versions''' of ''[[Final Fantasy VII]]'' have been released: two for the [[PlayStation]] and two for the [[Microsoft Windows|PC]]. |
| − | The two PlayStation demos are often distinguished by the third [[party]] member: [[Aerith Gainsborough|Aeris Gainsborough]] or [[Tifa Lockhart]]. The ''Aeris'' demo released August 2nd 1996 in Japan and September 30th 1996 in North America, was the game's first playable demo. It appeared on ''Square's Preview Extra'', released with '' |
+ | The two PlayStation demos are often distinguished by the third [[party]] member: [[Aerith Gainsborough|Aeris Gainsborough]] or [[Tifa Lockhart]]. The ''Aeris'' demo released August 2nd 1996 in Japan and September 30th 1996 in North America, was the game's first playable demo. It appeared on ''Square's Preview Extra'', released with ''[[wikipedia:Tobal No. 1|Tobal No. 1]]'' in Japan and North America. The disc also contained a video preview of ''[[Final Fantasy Tactics]]'', as well as ''[[wikipedia:Bushido Blade|Bushido Blade]]'' and ''[[wikipedia:SaGa Frontier|SaGa Frontier]]''. The menu for this disc features a remix of the "[[Prelude (theme)#Final Fantasy VII|Prelude]]" theme. |
| − | The ''Tifa'' demo released in mid-1997 was the game's second playable demo that originally appeared in '' |
+ | The ''Tifa'' demo released in mid-1997 was the game's second playable demo that originally appeared in ''[[wikipedia:PlayStation Underground|PlayStation Underground]] 2'' on a dedicated [[Squaresoft]] demo disc. The disc also contained a playable demo of ''Bushido Blade'', as well as video previews of ''Bushido Blade'', ''Saga Frontier'', and ''Final Fantasy Tactics''. Square later re-used this demo disc as their own promotional item. |
| − | Both PlayStation demos include the opening bombing mission right up until the explosion. While the ''Aeris'' demo was made during an earlier stage of the game's [[Final Fantasy VII |
+ | Both PlayStation demos include the opening bombing mission right up until the explosion. While the ''Aeris'' demo was made during an earlier stage of the game's [[Final Fantasy VII development|development]], having numerous differences, the ''Tifa'' version represents the final version with only minor differences. Additionally, both demos include elements not accessible at this point in the final game, such as already-leveled-up [[Materia (Final Fantasy VII)|Materia]], a [[Summon (Final Fantasy VII)|summon]], and a third party member. The purpose of this is probably to show as many features of the final game as possible while keeping the demo reasonably short. |
The PC demos were released in 1998 by Eidos and feature different settings from the PlayStation demos: one puts the player in the [[Mt. Corel]] area, while the other is a simple [[battle system]] demo where the player is pitted against [[Monster (term)|monsters]] in the [[Gold Saucer (Final Fantasy VII)|Gold Saucer]] [[Battle Square]]. |
The PC demos were released in 1998 by Eidos and feature different settings from the PlayStation demos: one puts the player in the [[Mt. Corel]] area, while the other is a simple [[battle system]] demo where the player is pitted against [[Monster (term)|monsters]] in the [[Gold Saucer (Final Fantasy VII)|Gold Saucer]] [[Battle Square]]. |
||
| Line 24: | Line 26: | ||
====''Tifa''==== |
====''Tifa''==== |
||
| − | + | The ''Tifa'' demo has no introductory text and the 1996 now says 1997. Everything is almost identical to how it is in the final version bar the lack of the ® symbol.<!--Final Fantasy probably wasn't a registered trademark outside of Japan at the time the demo was released--> |
|
===Events and restrictions=== |
===Events and restrictions=== |
||
====''Aeris''==== |
====''Aeris''==== |
||
| − | The [[menu]] is not accessible; therefore, Materia and [[ |
+ | The [[menu]] is not accessible; therefore, Materia and [[Final Fantasy VII items|items]] are inaccessible except during [[Battle (term)|battles]]. The characters cannot [[level]] up and will remain at levels 9 (only Aeris) and 10. It is difficult to be [[Knocked Out|knocked out]] unless done deliberately. |
At the start [[Barret Wallace|Barret]] runs on like he does in the final version, but Barret is still present from the first battle, as is Aeris. |
At the start [[Barret Wallace|Barret]] runs on like he does in the final version, but Barret is still present from the first battle, as is Aeris. |
||
[[File:Biggs-demovii.png|thumb|left|200px|Helping Biggs, an event not in the final version.]] |
[[File:Biggs-demovii.png|thumb|left|200px|Helping Biggs, an event not in the final version.]] |
||
| − | Areas are slightly different. The door that [[Biggs and Wedge (Final Fantasy VII)|Wedge]] stands by will be open. [[Jessie]] will get stuck in a different area, just further on her path. [[Biggs and Wedge (Final Fantasy VII)|Biggs]] can be found collapsed in the area next to the stairs, and much like the situation with Jessie, the player will have to use the activate button to get him to move. He will claim he was attacked by a guard from behind. |
+ | Areas are slightly different. The door that [[Biggs and Wedge (Final Fantasy VII)|Wedge]] stands by will be open. [[Jessie (Final Fantasy VII)|Jessie]] will get stuck in a different area, just further on her path. [[Biggs and Wedge (Final Fantasy VII)|Biggs]] can be found collapsed in the area next to the stairs, and much like the situation with Jessie, the player will have to use the activate button to get him to move. He will claim he was attacked by a guard from behind. |
Jessie does not give an explanation on how to use ladders as they are climbed automatically by walking into them. |
Jessie does not give an explanation on how to use ladders as they are climbed automatically by walking into them. |
||
| Line 39: | Line 41: | ||
There is no [[Save point#Final Fantasy VII|save point]], as the player cannot save data in the demo. |
There is no [[Save point#Final Fantasy VII|save point]], as the player cannot save data in the demo. |
||
| − | The scene where the screen goes red and [[Cloud Strife|Cloud]] reacts is missing. If the player runs out of time before they escape the reactor, it will still say Mission Complete. Once the [[timer]] is activated, the player will get just three minutes to escape instead of the ten given in the |
+ | The scene where the screen goes red and [[Cloud Strife|Cloud]] reacts is missing. If the player runs out of time before they escape the reactor, it will still say Mission Complete. Once the [[timer]] is activated, the player will get just three minutes to escape instead of the ten given in the final game. Instead of the timer appearing in the top-right, a message will appear on the screen saying "3 minutes until detonation", "2 minutes remaining" and so on. Time in battles does not count toward the time limit. |
| − | In the ''Aeris'' demo the translation is very different, an example being "Makoro plants" instead of "[[Mako Reactor]]s," and [[SOLDIER]] are spoken of as actual soldiers instead of an organization. [[Gil]] is called GP, like previous entries to the |
+ | In the ''Aeris'' demo the translation is very different, an example being "Makoro plants" instead of "[[Mako Reactor]]s," and [[SOLDIER]] are spoken of as actual soldiers instead of an organization. [[Gil]] is called GP, like previous entries to the [[Final Fantasy series|''Final Fantasy'' series]]. The ''Tifa'' demo changes these and has a translation the same as the final game. The rest of the translation is still off, not using formats of the English language correctly. |
For example: |
For example: |
||
| − | {{ |
+ | {{Quote|Wow! He's an ex-soldier alright!<br/>...Not everyday ya find an ex-soldier in a anti-Shinra group like the 'Avalanche'.|Biggs}} |
====''Tifa''==== |
====''Tifa''==== |
||
| − | Just like the ''Aeris'' demo, the menu is inaccessible. Characters can level up during battles and as with the final game, Cloud will level up |
+ | Just like the ''Aeris'' demo, the menu is inaccessible. Characters can level up during battles and as with the final game, Cloud will level up from the first battle. Tifa starts at Level 2, while Cloud starts at Level 6. Unlike in the ''Aeris'' demo, Barret is not present in the first battle, but the third party member, in this case Tifa, still is. Barret joins in battles after going down the lift. Barret also starts at Level 2. Regardless of levels, the characters have significantly more [[HP (stat)|HP]] than they should in the actual game. |
Since the ''Tifa'' demo was released after the Japanese version of the game was already out, the events remain unchanged from the game's final version, including the scene where the screen goes red and Cloud reacts. Biggs being knocked out is not present, and he is never seen past the terminal room. There is still no Save Point, nor an option to save due to lack of access to the menu. |
Since the ''Tifa'' demo was released after the Japanese version of the game was already out, the events remain unchanged from the game's final version, including the scene where the screen goes red and Cloud reacts. Biggs being knocked out is not present, and he is never seen past the terminal room. There is still no Save Point, nor an option to save due to lack of access to the menu. |
||
| Line 56: | Line 58: | ||
The translation is closer to the final versions, but there are minor differences, such as: |
The translation is closer to the final versions, but there are minor differences, such as: |
||
| − | {|class="full-width table" |
+ | {|class="full-width FFVII article-table" |
| − | |-class=" |
+ | |-class="a" |
!''Tifa'' demo |
!''Tifa'' demo |
||
!Final |
!Final |
||
| − | |-class=" |
+ | |-class="b" |
|Biggs<br/>"Wow! He used to be in SOLDIER all right!<br/>...Not everyday ya find one of them<br/>in a group like AVALANCHE." |
|Biggs<br/>"Wow! He used to be in SOLDIER all right!<br/>...Not everyday ya find one of them<br/>in a group like AVALANCHE." |
||
|Biggs<br/>"Wow! He used to be in SOLDIER all right!<br/>...Not everyday ya find one<br/>in a group like AVALANCHE." |
|Biggs<br/>"Wow! He used to be in SOLDIER all right!<br/>...Not everyday ya find one<br/>in a group like AVALANCHE." |
||
| Line 68: | Line 70: | ||
====''Aeris''==== |
====''Aeris''==== |
||
[[File:Lift-demovii.png|right|thumb|200px|Note the difference in Cloud's eyes.]] |
[[File:Lift-demovii.png|right|thumb|200px|Note the difference in Cloud's eyes.]] |
||
| − | The battle models have slight differences |
+ | The battle and field models have slight differences. The characters' eyes are black ovals instead of the more life-like eyes seen in the game. Cloud's menu portrait uses the young Cloud portrait, as seen during the [[Kalm]] flashback to the [[Nibelheim Incident]] in the final game. Aeris's menu portrait has a more serious expression than in the final game. |
[[File:Win-demovii.png|left|thumb|200px|The after-battle screen.]] |
[[File:Win-demovii.png|left|thumb|200px|The after-battle screen.]] |
||
When a character is speaking their words are not shown beneath their name as in the actual game. Instead, the demo version presents their name, a colon, and then spacing before displaying the dialogue. |
When a character is speaking their words are not shown beneath their name as in the actual game. Instead, the demo version presents their name, a colon, and then spacing before displaying the dialogue. |
||
| − | Messages in battle, such as the name of the enemy attack, appear taller than in the full game and characters face the same direction as they last attacked and even during the [[victory pose]] they will be facing that direction. |
+ | Messages in battle, such as the name of the enemy attack, appear taller than in the full game and characters face the same direction as they last attacked and even during the [[Final Fantasy VII victory poses|victory pose]] they will be facing that direction. |
====''Tifa''==== |
====''Tifa''==== |
||
| − | + | Graphics and display match the final game, having updated the portraits, most notably Cloud's, and improved and altered the character models. Speech is displayed with the name a line above the speech, which itself is packaged in speech marks. The message height is shorter than in the ''Aeris'' demo and the same height as in the final game. |
|
===Music and sound=== |
===Music and sound=== |
||
====''Aeris''==== |
====''Aeris''==== |
||
| − | {{ |
+ | {{audio|filename=Menu-demovii.ogg|title="Menu music"|image=[[File:Controls-demovii.png|200px|Controls screen in the menu]].}} |
Four pieces of music are featured in the demo. The first plays on the demo's opening menu and isn't used in the final version. The next piece plays the same as in the opening of the final version, "[[Opening - Bombing Mission]]", with only minor differences. |
Four pieces of music are featured in the demo. The first plays on the demo's opening menu and isn't used in the final version. The next piece plays the same as in the opening of the final version, "[[Opening - Bombing Mission]]", with only minor differences. |
||
| − | In the same place as the final version, preceding the terminals, "Mako Reactor" will start playing. The demo's version of the track is slightly different to the final. "[[Those Who Fight]]" appears as the [[battle theme|battle music]], again, sounding slightly different to the final version, but using the same notes. Notably, there is no "[[Victory Fanfare]]". |
+ | In the same place as the final version, preceding the terminals, "[[Mako Reactor#Musical themes|Mako Reactor]]" will start playing. The demo's version of the track is slightly different to the final. "[[Those Who Fight]]" appears as the [[battle theme|battle music]], again, sounding slightly different to the final version, but using the same notes. Notably, there is no "[[Victory Fanfare]]". |
During the boss battle the "Opening - Bombing Mission" plays and continues playing until the end of the demo (as it does in the full version). |
During the boss battle the "Opening - Bombing Mission" plays and continues playing until the end of the demo (as it does in the full version). |
||
====''Tifa''==== |
====''Tifa''==== |
||
| − | All music has been changed since the ''Aeris'' demo and now matches the final game, since the game was already released in Japan when the demo came out. The "Victory Fanfare" |
+ | All music has been changed since the ''Aeris'' demo and now matches the final game, since the game was already released in Japan when the demo came out. The "Victory Fanfare" plays after battles beyond the area where the "Mako Reactor" theme plays. |
While not strictly on the demo, in the menu where the player can select to play ''Final Fantasy VII'' among other titles, the "[[Descendant of Shinobi]]" plays. This track appears in the full game in areas after the opening bombing mission. |
While not strictly on the demo, in the menu where the player can select to play ''Final Fantasy VII'' among other titles, the "[[Descendant of Shinobi]]" plays. This track appears in the full game in areas after the opening bombing mission. |
||
| Line 101: | Line 103: | ||
===Items=== |
===Items=== |
||
====''Aeris''==== |
====''Aeris''==== |
||
| − | Just three items appear in the demo. All three are basic, restorative items. The only difference in names is that "[[ |
+ | Just three items appear in the demo. All three are basic, restorative items. The only difference in names is that "[[Final Fantasy VII items#Hi-Potion|Hi-Potion]]" was "Hi potion". All items such as the two [[Final Fantasy VII items#Potion|Potions]] retrieved from the guards at the beginning are not present, nor is the [[Restore (Final Fantasy VII)|Restore]] Materia on the bridge before planting the bomb. Due to this, the [[Treasure chest (object)|chest]] containing the [[Final Fantasy VII items#Phoenix Down|Phoenix Down]] is not there either. Since there is no Phoenix Down item or any form of the [[Life (Final Fantasy VII)|Life]] spell, characters cannot be revived if their [[HP (stat)|HP]] is [[Final Fantasy VII statuses#Death|reduced to 0]]. |
| − | {|class="sortable full-width table" |
+ | {|class="sortable full-width FFVII article-table" |
| − | |-class=" |
+ | |-class="a" |
!style="width:20%"|Demo name |
!style="width:20%"|Demo name |
||
!style="width:20%"|Final name |
!style="width:20%"|Final name |
||
| Line 110: | Line 112: | ||
!style="width:30%"|Final effect |
!style="width:30%"|Final effect |
||
|- |
|- |
||
| − | !class=" |
+ | !class="b"|{{A|Potion}} |
| − | !class=" |
+ | !class="b"|[[Final Fantasy VII items#Potion|Potion]] |
|Restores 100 HP. |
|Restores 100 HP. |
||
|Restores 100 HP. |
|Restores 100 HP. |
||
|- |
|- |
||
| − | !class=" |
+ | !class="b"|{{A|Hi potion}} |
| − | !class=" |
+ | !class="b"|[[Final Fantasy VII items#Hi-Potion|Hi-Potion]] |
|Restores 500 HP. |
|Restores 500 HP. |
||
|Restores 500 HP. |
|Restores 500 HP. |
||
|- |
|- |
||
| − | !class=" |
+ | !class="b"|{{A|Ether}} |
| − | !class=" |
+ | !class="b"|[[Final Fantasy VII items#Ether|Ether]] |
|Restores 50 MP. |
|Restores 50 MP. |
||
|Restores 100 MP. |
|Restores 100 MP. |
||
| Line 127: | Line 129: | ||
====''Tifa''==== |
====''Tifa''==== |
||
| − | Items can be found in the demo, including the Potion found in the room where Jessie gets stuck, and the ones on the guards at the start. The Restore Materia is present on the bridge, and the [[Guard Scorpion (Final Fantasy VII)|Guard Scorpion]] drops the [[ |
+ | Items can be found in the demo, including the Potion found in the room where Jessie gets stuck, and the ones on the guards at the start. The Restore Materia is present on the bridge, and the [[Guard Scorpion (Final Fantasy VII)|Guard Scorpion]] drops the [[Final Fantasy VII weapons#Assault Gun|Assault Gun]]. Neither can be equipped since the menu cannot be accessed, and they cannot be changed in battles. Item names match those found in the final version, as well as their effects. |
===Attacks=== |
===Attacks=== |
||
====''Aeris''==== |
====''Aeris''==== |
||
| − | The [[Attack (command)#Final Fantasy VII|Attack]] command is called "Fight" |
+ | The [[Attack (command)#Final Fantasy VII|Attack]] command is called "Fight", the same as it was called in the previous installments in the series. The [[Limit (Final Fantasy VII)|Limit Break]] command is called "Special", despite still being called "LIMIT BREAK" in the demo's Japanese version. Aeris can only use the [[Healing Wind (ability)|Healing wind]]<!-- Correct case--> special technique, and Barret can only use Heavy shot<!-- Also correct case-->, the demo's name for [[Heavy Shot|Big Shot]]. Cloud has access to both [[Braver]] and [[Cross-slash (Cloud ability)|Cross Slash]]<!-- Correct case-->, however, they function differently to the full game, as Braver temporarily [[Paralysis|paralyzes]] an enemy, and Cross Slash does not—the opposite to the full game. |
====''Tifa''==== |
====''Tifa''==== |
||
| − | The Fight command has been renamed "Attack", and the Special command is now called "Limit". Tifa only has her Beat Rush Limit Break, which works based on the [[Slots#Final Fantasy VII|slots]] machine like the final game. Barret's single Limit Break is still the same, but renamed to Big Shot for the ''Tifa'' demo. Cloud only has access to Braver, which no longer inflicts paralysis. |
+ | The Fight command has been renamed "Attack", and the Special command is now called "Limit". Tifa only has her [[Beat Rush]] Limit Break, which works based on the [[Slots (ability type)#Final Fantasy VII|slots]] machine like the final game. Barret's single Limit Break is still the same, but renamed to Big Shot for the ''Tifa'' demo. Cloud only has access to Braver, which no longer inflicts paralysis. |
===Magic=== |
===Magic=== |
||
====''Aeris''==== |
====''Aeris''==== |
||
| − | Many more spells appear in the demo version |
+ | Many more spells appear in the demo version than are available at this time of the story in the full game. [[Lightning (Final Fantasy VII)|Bolt]], [[Ice (Final Fantasy VII)|Ice]], and [[Fire (Final Fantasy VII)|Fire]] all appear up to their second stages, [[Demi (Final Fantasy VII)|Demi]] appears without an upgrade, though with the same power as [[Demi (Final Fantasy VII)2|Demi2]] has in the final version, and all three levels of the [[Restore (Final Fantasy VII)|Cure]] spell are available, except for [[Regen (Final Fantasy VII)|Regen]], despite being in between [[Cure (Final Fantasy VII)2|Cure2]] and [[Cure (Final Fantasy VII)3|Cure3]] in the full game. Many [[MP (stat)|MP]] costs are far smaller than in the full game, likely due to huge MP consumption they would use otherwise. All the spells' animations are the same, bar [[Ice (Final Fantasy VII ability)2|Ice 2]]. |
| − | The only name differences in [[Magic Materia (Final Fantasy VII)|Magic Materia]] is the lack of spacing between the spell names and their spell levels. So "Ice2" is called "Ice 2" in the demo. When an [[ |
+ | The only name differences in [[Magic Materia (Final Fantasy VII)|Magic Materia]] is the lack of spacing between the spell names and their spell levels. So "Ice2" is called "Ice 2" in the demo. When an [[All (Final Fantasy VII)|All]] Materia is equipped to another, selecting that Materia will give the player the option to cast it on All opponents, or just a single opponent. It will also tell how many more times the player can use the All option, changing depending on the level of the Materia, although it is not possible to level Materia up in the demo. |
| − | {|class="full-width table" style="text-align:center" |
+ | {|class="full-width FFVII article-table" style="text-align:center" |
| − | |-class=" |
+ | |-class="a" |
!style="width:20%"|Demo name |
!style="width:20%"|Demo name |
||
!style="width:20%"|Final name |
!style="width:20%"|Final name |
||
| Line 150: | Line 152: | ||
!style="width:40%"|Effect |
!style="width:40%"|Effect |
||
|- |
|- |
||
| − | !class=" |
+ | !class="b"|{{A|Bolt}} |
| − | !class=" |
+ | !class="b"|[[Bolt (Final Fantasy VII)|Bolt]] |
|4 |
|4 |
||
|4 |
|4 |
||
| − | | |
+ | |style="text-align:left"|Weak [[Lightning (element)|lightning-elemental]] attack. |
|- |
|- |
||
| − | !class=" |
+ | !class="b"|{{A|Bolt 2}} |
| − | !class=" |
+ | !class="b"|[[Bolt (Final Fantasy VII)2|Bolt2]] |
|8 |
|8 |
||
|22 |
|22 |
||
| − | | |
+ | |style="text-align:left"|Moderate lightning-elemental attack. |
|- |
|- |
||
| − | !class=" |
+ | !class="b"|{{A|Cure}} |
| − | !class=" |
+ | !class="b"|[[Cure (Final Fantasy VII)|Cure]] |
|5 |
|5 |
||
|5 |
|5 |
||
| − | | |
+ | |style="text-align:left"|Weak HP restoration. |
|- |
|- |
||
| − | !class=" |
+ | !class="b"|{{A|Cure 2}} |
| − | !class=" |
+ | !class="b"|[[Cure (Final Fantasy VII)2|Cure2]] |
|20 |
|20 |
||
|24 |
|24 |
||
| − | | |
+ | |style="text-align:left"|Moderate HP restoration. |
|- |
|- |
||
| − | !class=" |
+ | !class="b"|{{A|Cure 3}} |
| − | !class=" |
+ | !class="b"|[[Cure (Final Fantasy VII)3|Cure3]] |
|40 |
|40 |
||
|64 |
|64 |
||
| − | | |
+ | |style="text-align:left"|Strong HP restoration. |
|- |
|- |
||
| − | !class=" |
+ | !class="b"|{{A|Demi}} |
| − | !class=" |
+ | !class="b"|[[Demi (Final Fantasy VII)2|Demi2]] |
|5 |
|5 |
||
|33 |
|33 |
||
| − | | |
+ | |style="text-align:left"|Halves target's HP. |
|- |
|- |
||
| − | !class=" |
+ | !class="b"|{{A|Fire}} |
| − | !class=" |
+ | !class="b"|[[Fire (Final Fantasy VII ability)|Fire]] |
|4 |
|4 |
||
|4 |
|4 |
||
| − | | |
+ | |style="text-align:left"|Weak [[Fire (element)|fire-elemental]] damage. |
|- |
|- |
||
| − | !class=" |
+ | !class="b"|{{A|Fire 2}} |
| − | !class=" |
+ | !class="b"|[[Fire (Final Fantasy VII ability)2|Fire2]] |
|8 |
|8 |
||
|22 |
|22 |
||
| − | | |
+ | |style="text-align:left"|Moderate fire-elemental damage. |
|- |
|- |
||
| − | !class=" |
+ | !class="b"|{{A|Ice}} |
| − | !class=" |
+ | !class="b"|[[Ice (Final Fantasy VII ability)|Ice]] |
|4 |
|4 |
||
|4 |
|4 |
||
| − | | |
+ | |style="text-align:left"|Weak [[Ice (element)|ice-elemental]] damage. |
|- |
|- |
||
| − | !class=" |
+ | !class="b"|{{A|Ice 2}} |
| − | !class=" |
+ | !class="b"|[[Ice (Final Fantasy VII ability)2|Ice2]] |
|8 |
|8 |
||
|22 |
|22 |
||
| − | | |
+ | |style="text-align:left"|Moderate ice-elemental damage. |
|} |
|} |
||
| Line 214: | Line 216: | ||
In this demo the player gets access to all three-tiers of the the present three-tier spells. Tifa has a Restore Materia which gives her access to all three levels of Cure, but she does not have Regen despite the Japanese version of the final game released before the demo requiring it to be learned on the Restore Materia before Cure3 can be learned. Another similarity with the ''Aeris'' demo that is different from the final game is the name of leveled Materia still having a space between the spell and its numbered level. |
In this demo the player gets access to all three-tiers of the the present three-tier spells. Tifa has a Restore Materia which gives her access to all three levels of Cure, but she does not have Regen despite the Japanese version of the final game released before the demo requiring it to be learned on the Restore Materia before Cure3 can be learned. Another similarity with the ''Aeris'' demo that is different from the final game is the name of leveled Materia still having a space between the spell and its numbered level. |
||
| − | Cloud has the Life and [[ |
+ | Cloud has the Life and [[Life (Final Fantasy VII)2#Final Fantasy VII|Life2]] spell of the [[Revive (Final Fantasy VII)|Revive]] Materia, the Ice, Ice2, and [[Ice (Final Fantasy VII ability)3|Ice3]] spells of the [[Ice (Final Fantasy VII)|Ice]] Materia, and the Bolt, Bolt2, and [[Bolt (Final Fantasy VII)3|Bolt3]] spells of the [[Lightning (Final Fantasy VII)|Lightning]] Materia, which itself is attached to an All Materia. Tifa has the Cure, Cure2, and Cure3 spells of the Restore Materia, which itself is attached to an All Materia. Barret has no Materia. Cloud has the same Magic Materia, Lightning and Ice, which he starts with in the final game. He also has the Restore Materia, which is the first Materia obtained in the game. Both All Materia found in the demo are mastered as evidenced through all having five uses. |
All animations and MP costs match those found in the final game. |
All animations and MP costs match those found in the final game. |
||
| Line 238: | Line 240: | ||
<!-- HP values, and if possible, other values seen in articles, would be appreciated, there's no way to work it out in the demo except fighting the same enemy twice, taking off two different HP amounts, and killing one but having not killed the other --> |
<!-- HP values, and if possible, other values seen in articles, would be appreciated, there's no way to work it out in the demo except fighting the same enemy twice, taking off two different HP amounts, and killing one but having not killed the other --> |
||
| − | {|class="sortable full-width table" style="text-align:center" |
+ | {|class="sortable full-width FFVII article-table" style="text-align:center" |
| − | |-class=" |
+ | |-class="a" |
!style="width:20%"|Demo name |
!style="width:20%"|Demo name |
||
!style="width:20%"|Final name |
!style="width:20%"|Final name |
||
| Line 247: | Line 249: | ||
!style="width:30%" class="unsortable"|Abilities |
!style="width:30%" class="unsortable"|Abilities |
||
|- |
|- |
||
| − | !class=" |
+ | !class="b"|{{A|Combatants}} |
| − | !class=" |
+ | !class="b"|[[Grunt (Final Fantasy VII)|Grunt]] |
|31 |
|31 |
||
|2 |
|2 |
||
|80 |
|80 |
||
| − | | |
+ | |style="text-align:left"|[[#Beam gun|Beam gun]], ''Handclaw'' |
|- |
|- |
||
| − | !class=" |
+ | !class="b"|{{A|Deenglow}} |
| − | !class=" |
+ | !class="b"|[[Deenglow]] |
|40 |
|40 |
||
|2 |
|2 |
||
|15 |
|15 |
||
| − | | |
+ | |style="text-align:left"|[[#Ice|Ice]], ''Wing Cutter'' |
|- |
|- |
||
| − | !class=" |
+ | !class="b"|{{LA|Grenadiers}} |
| − | !class=" |
+ | !class="b"|N/A |
|24 |
|24 |
||
|2 |
|2 |
||
|40 |
|40 |
||
| − | | |
+ | |style="text-align:left"|[[#Grenade|Grenade]], ''Machine gun'' |
|- |
|- |
||
| − | !class=" |
+ | !class="b"|{{A|Guard Hounds}} |
| − | !class=" |
+ | !class="b"|[[Guard Hound (Final Fantasy VII)|Guard Hound]] |
|18 |
|18 |
||
|1 |
|1 |
||
|20 |
|20 |
||
| − | | |
+ | |style="text-align:left"|''Bite'', [[#Feeler|Feeler]] |
|- |
|- |
||
| − | !class=" |
+ | !class="b"|{{A|Hedgehog Pie}} |
| − | !class=" |
+ | !class="b"|[[Hedgehog Pie (Final Fantasy VII)|Hedgehog Pie]] |
|8 |
|8 |
||
|1 |
|1 |
||
|5 |
|5 |
||
| − | | |
+ | |style="text-align:left"|''Bodyblow'', [[#Fire|Fire]] |
|- |
|- |
||
| − | !class=" |
+ | !class="b"|{{A|Security Troops}} |
| − | !class=" |
+ | !class="b"|[[MP (enemy)|MP]] |
|12 |
|12 |
||
|1 |
|1 |
||
|25 |
|25 |
||
| − | | |
+ | |style="text-align:left"|[[#Machine gun|Machine gun]], ''Tonfa'' |
|- |
|- |
||
| − | !class=" |
+ | !class="b"|{{A|Sweepers}} |
| − | !class=" |
+ | !class="b"|[[Sweeper (Final Fantasy VII)|Sweeper]] |
|289 |
|289 |
||
|2 |
|2 |
||
|200 |
|200 |
||
| − | | |
+ | |style="text-align:left"|[[#Double|Double]], ''Machine gun'', [[#Smoke shot|Smoke shot]] |
|} |
|} |
||
| Line 300: | Line 302: | ||
The CASE used for enemy attacks is different. Instead of "Machine Gun", the attack is called "Machine gun". Other ability names are also different. |
The CASE used for enemy attacks is different. Instead of "Machine Gun", the attack is called "Machine gun". Other ability names are also different. |
||
| − | {|class="sortable full-width table" |
+ | {|class="sortable full-width FFVII article-table" |
| − | |-class=" |
+ | |-class="a" |
!style="width:20%"|Demo name |
!style="width:20%"|Demo name |
||
!style="width:20%"|Final name |
!style="width:20%"|Final name |
||
| Line 307: | Line 309: | ||
!style="width:20%"|Enemies |
!style="width:20%"|Enemies |
||
|- |
|- |
||
| − | !class=" |
+ | !class="b"|{{A|Beam gun}} |
| − | !class=" |
+ | !class="b"|Beam Gun |
|Shoots a blue beam. [[Non-elemental]] attack. |
|Shoots a blue beam. [[Non-elemental]] attack. |
||
|[[#Combatants|Combatants]] |
|[[#Combatants|Combatants]] |
||
|- |
|- |
||
| − | !class=" |
+ | !class="b"|{{A|Double}} |
| − | !class=" |
+ | !class="b"|W Machine Gun |
|Shoots machine gun bullets from both guns. Non-elemental damage. |
|Shoots machine gun bullets from both guns. Non-elemental damage. |
||
|[[#Sweepers|Sweepers]] |
|[[#Sweepers|Sweepers]] |
||
|- |
|- |
||
| − | !class=" |
+ | !class="b"|{{A|Feeler}} |
| − | !class=" |
+ | !class="b"|Tentacle |
|Attacks with tentacle. Non-elemental damage. |
|Attacks with tentacle. Non-elemental damage. |
||
|[[#Guard Hounds|Guard Hounds]] |
|[[#Guard Hounds|Guard Hounds]] |
||
|- |
|- |
||
| − | !class=" |
+ | !class="b"|{{A|Fire}} |
| − | !class=" |
+ | !class="b"|Fire |
|Minor fire-elemental damage. |
|Minor fire-elemental damage. |
||
|[[#Hedgehog Pie|Hedgehog Pie]] |
|[[#Hedgehog Pie|Hedgehog Pie]] |
||
|- |
|- |
||
| − | !class=" |
+ | !class="b"|{{A|Grenade}} |
| − | !class=" |
+ | !class="b"|Hand Grenade |
|Explosive damage to a single target. |
|Explosive damage to a single target. |
||
|[[#Grenadiers|Grenadiers]] |
|[[#Grenadiers|Grenadiers]] |
||
|- |
|- |
||
| − | !class=" |
+ | !class="b"|{{A|Ice}} |
| − | !class=" |
+ | !class="b"|Ice |
|Minor ice-elemental damage. |
|Minor ice-elemental damage. |
||
|[[#Deenglow|Deenglow]] |
|[[#Deenglow|Deenglow]] |
||
|- |
|- |
||
| − | !class=" |
+ | !class="b"|{{A|Machine gun}} |
| − | !class=" |
+ | !class="b"|Machine Gun |
|Fires machine gun. Non-elemental damage. |
|Fires machine gun. Non-elemental damage. |
||
|[[#Security Troops|Security Troops]] |
|[[#Security Troops|Security Troops]] |
||
|- |
|- |
||
| − | !class=" |
+ | !class="b"|{{A|Smoke shot}} |
| − | !class=" |
+ | !class="b"|Smoke Shot |
|Fires smoke. Non-elemental damage. |
|Fires smoke. Non-elemental damage. |
||
|[[#Sweepers|Sweepers]] |
|[[#Sweepers|Sweepers]] |
||
| Line 367: | Line 369: | ||
All enemies from the final game are used in the ''Tifa'' demo, likely because the Japanese version was already out by the time this demo was released. All the names match those in the final version<!--verify? the only videos on the internet showing this demo didn't use the select button during battles-->. Also, the abilities all match the final game. The Sweeper is a normal enemy, and the boss is the Guard Scorpion. Its AI functions exactly the same. As with the final version, the game uses the poor translation, and Cloud directly talks to Barret and does not reference Tifa. |
All enemies from the final game are used in the ''Tifa'' demo, likely because the Japanese version was already out by the time this demo was released. All the names match those in the final version<!--verify? the only videos on the internet showing this demo didn't use the select button during battles-->. Also, the abilities all match the final game. The Sweeper is a normal enemy, and the boss is the Guard Scorpion. Its AI functions exactly the same. As with the final version, the game uses the poor translation, and Cloud directly talks to Barret and does not reference Tifa. |
||
| − | {{ |
+ | {{Quote|Barret be careful!"<br/>"Attack while it's tail's up...<br/>It's gonna counterattack with its laser.|Cloud}} |
=====Formations===== |
=====Formations===== |
||
| Line 376: | Line 378: | ||
[[File:Ffvii-debug-test-battle.png|thumb|Test battle in the hidden debug room on the ''Tifa'' demo disc.]] |
[[File:Ffvii-debug-test-battle.png|thumb|Test battle in the hidden debug room on the ''Tifa'' demo disc.]] |
||
The ''PlayStation Underground'' demo ("Tifa" demo) has two (mostly disabled) debug rooms hidden on the disc, which are somewhat different than the [[Debug Room (Final Fantasy VII)|debug room]] in the final game. The test battle in the final English version of the game is a battle against [[Test 0|yellow pyramids]] on a black background, but on the demo disc it is a battle against [[Deenglow]]s on a battleground with the Shinra logo on the floor and the sky covered in yellow clouds - as it was in the original Japanese release. |
The ''PlayStation Underground'' demo ("Tifa" demo) has two (mostly disabled) debug rooms hidden on the disc, which are somewhat different than the [[Debug Room (Final Fantasy VII)|debug room]] in the final game. The test battle in the final English version of the game is a battle against [[Test 0|yellow pyramids]] on a black background, but on the demo disc it is a battle against [[Deenglow]]s on a battleground with the Shinra logo on the floor and the sky covered in yellow clouds - as it was in the original Japanese release. |
||
| − | {{ |
+ | {{clear}} |
==PC demos== |
==PC demos== |
||
| Line 398: | Line 400: | ||
The three playable characters are Cloud, Barret, and Aeris and they are exploring the [[North Corel]] area. The player has to cross the mountains via the abandoned train tracks and make their way to the town of North Corel, where the player can converse with NPCs and use the [[shop]]s and the [[inn]]. The demo ends when the party boards the ropeway to the Gold Saucer. |
The three playable characters are Cloud, Barret, and Aeris and they are exploring the [[North Corel]] area. The player has to cross the mountains via the abandoned train tracks and make their way to the town of North Corel, where the player can converse with NPCs and use the [[shop]]s and the [[inn]]. The demo ends when the party boards the ropeway to the Gold Saucer. |
||
| − | An assortment of magic is available, including [[ |
+ | An assortment of magic is available, including [[Cure (Final Fantasy VII)|Cure]], [[Life (Final Fantasy VII)|Life]], [[Bolt (Final Fantasy VII)|Bolt]], [[Fire (Final Fantasy VII ability)|Fire]], [[Ice (Final Fantasy VII ability)|Ice]], and the summons [[Choco/Mog (Final Fantasy VII)|Choco/Mog]], [[Ifrit (Final Fantasy VII)|Ifrit]], and [[Bahamut (Final Fantasy VII)|Bahamut]]. [[Final Fantasy VII abilities#Sense|Sense]], [[All (Final Fantasy VII)|All]], and [[Independent Materia (Final Fantasy VII)#Long Range|Long Range]] Materia are also available. Aeris, who is in the [[Row|back row]] by default, has the Long Range Materia in her [[Final Fantasy VII weapons#Striking Staff|Striking Staff]] to compensate. Cloud's weapon in the demo is [[Final Fantasy VII weapons#Force Stealer|Force Stealer]], and Barret wields a [[Final Fantasy VII weapons#Cannon Ball|Cannon Ball]], one of his short-range weapons. Cloud and Barret have their Level 1 Limit Breaks, and Aeris has Healing Wind. |
[[File:Mt-corel-demo-ffvii.png|thumb|left|The demo doesn't let player leave the town.]] |
[[File:Mt-corel-demo-ffvii.png|thumb|left|The demo doesn't let player leave the town.]] |
||
| Line 409: | Line 411: | ||
[[File:Ffvii-battle-square-demo.png|thumb|Cloud fighting Adamantaimai in the Battle Square demo.]] |
[[File:Ffvii-battle-square-demo.png|thumb|Cloud fighting Adamantaimai in the Battle Square demo.]] |
||
| − | The controllable character is Cloud, and he has the following commands available: [[ |
+ | The controllable character is Cloud, and he has the following commands available: [[Final Fantasy VII abilities#2x-Cut|2x-Cut]], [[Limit (Final Fantasy VII)|Limit]] ([[Limit (Final Fantasy VII)#Blade Beam|Blade Beam]] and [[Limit (Final Fantasy VII)#Climhazzard|Climhazzard]]), [[Magic (Final Fantasy VII)|Magic]] ([[Cure (Final Fantasy VII)|Cure]], [[Cure (Final Fantasy VII)2|Cure2]] and [[Regen (Final Fantasy VII)|Regen]], [[Bolt (Final Fantasy VII)|Bolt]] and [[Bolt (Final Fantasy VII)2|Bolt2]] (linked to All), [[Comet (Final Fantasy VII ability)|Comet]] and [[Comet2 (Final Fantasy VII)|Comet2]], [[Summon (Final Fantasy VII)|Summon]] ([[Shiva (Final Fantasy VII)|Shiva]] and [[Hades (Final Fantasy VII)|Hades]]), [[Final Fantasy VII items|Item]], [[Final Fantasy VII abilities#Change|Change]] and [[Final Fantasy VII abilities#Defend|Defend]]. For items, Cloud an assortment of items with [[Final Fantasy VII items#Hi-Potion|Hi-Potions]], [[Final Fantasy VII items#X-Potion|X-Potions]], [[Final Fantasy VII items#Ether|Ethers]], [[Final Fantasy VII items#Turbo Ethers|Turbo Ethers]], [[Final Fantasy VII items#Hi-Potion|Elixirs]], as well as status healing items and other battle items like [[Final Fantasy VII items#Grenade|Grenades]], elemental attack items and even one [[Final Fantasy VII items#Hero Drink|Hero Drink]]. |
If Cloud wins enough battles, the player will "win" the demo and see a special screen. If Cloud's HP goes down to zero, the demo will end. |
If Cloud wins enough battles, the player will "win" the demo and see a special screen. If Cloud's HP goes down to zero, the demo will end. |
||
| Line 424: | Line 426: | ||
==Gallery== |
==Gallery== |
||
| + | <gallery> |
||
| − | {{Gallery|class=FFVIIa |
||
| − | + | FFVII Demo-PSX-NTSC-ENG.jpg|Main menu of the Square Preview demo disc with the ''Tobal No. 1'' issue. |
|
| − | + | Square-demo-disc-FFVII.jpg|Main menu of the Squaresoft demo disc with the ''PlayStation Underground'' Issue 2. |
|
| − | + | Ff7 pc demo pc gamer.jpg|The demo disc released with ''PC Gamer'' that included the "Mt. Corel" demo that requires a Voodoo card. |
|
| − | + | Ff7 pc demo disc2.jpg|Updated version of the "Mt. Corel" demo that no longer requires a Voodoo card to run. |
|
| + | </gallery> |
||
| − | }} |
||
==External Links== |
==External Links== |
||
| Line 440: | Line 442: | ||
*[http://down<!--this link triggers the spam filter-->load.cnet.com/Final-Fantasy-VII-demo/3000-7536_4-10020419.html Battle Square PC demo download] |
*[http://down<!--this link triggers the spam filter-->load.cnet.com/Final-Fantasy-VII-demo/3000-7536_4-10020419.html Battle Square PC demo download] |
||
| − | {{FFVII}} |
+ | {{navbox FFVII}} |
| − | {{demos}} |
+ | {{navbox demos}} |
| + | |||
[[Category:Final Fantasy VII]] |
[[Category:Final Fantasy VII]] |
||
| + | [[Category:Demos]] |
||
Revision as of 23:11, 9 January 2020
Template:Sideicon
- For the PlayStation 3 tech demo, see: Final Fantasy VII technical demo.
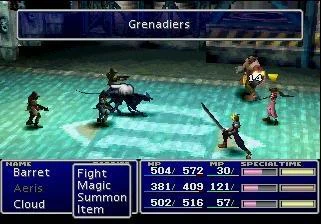
The first PlayStation demo.
Four demo versions of Final Fantasy VII have been released: two for the PlayStation and two for the PC.
The two PlayStation demos are often distinguished by the third party member: Aeris Gainsborough or Tifa Lockhart. The Aeris demo released August 2nd 1996 in Japan and September 30th 1996 in North America, was the game's first playable demo. It appeared on Square's Preview Extra, released with Tobal No. 1 in Japan and North America. The disc also contained a video preview of Final Fantasy Tactics, as well as Bushido Blade and SaGa Frontier. The menu for this disc features a remix of the "Prelude" theme.
The Tifa demo released in mid-1997 was the game's second playable demo that originally appeared in PlayStation Underground 2 on a dedicated Squaresoft demo disc. The disc also contained a playable demo of Bushido Blade, as well as video previews of Bushido Blade, Saga Frontier, and Final Fantasy Tactics. Square later re-used this demo disc as their own promotional item.
Both PlayStation demos include the opening bombing mission right up until the explosion. While the Aeris demo was made during an earlier stage of the game's development, having numerous differences, the Tifa version represents the final version with only minor differences. Additionally, both demos include elements not accessible at this point in the final game, such as already-leveled-up Materia, a summon, and a third party member. The purpose of this is probably to show as many features of the final game as possible while keeping the demo reasonably short.
The PC demos were released in 1998 by Eidos and feature different settings from the PlayStation demos: one puts the player in the Mt. Corel area, while the other is a simple battle system demo where the player is pitted against monsters in the Gold Saucer Battle Square.
PlayStation demos
Opening sequence
Aeris
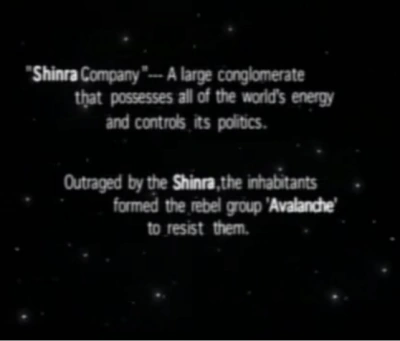
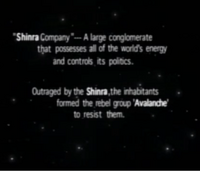
Opening text.
The opening sequence is largely the same as the original. The biggest difference is the text appearing over the starry sky, which explains the setting of Final Fantasy VII. In the game, the story is picked up on as the game proceeds.
- "Shinra Company" --- A large conglomerate that possesses all of the world's energy and controls its politics.
Outraged by the Shinra,the inhabitants formed the rebel group 'Avalanche' to resist them.
After coming into contact with Avalanche in a bar, Cloud joins their demolition mission in return for a large reward.
Their target is the Shinra power plant Makoro."
The only other differences are the text beneath the Square logo, which reads "1996 SQUARE" instead of "1997 SQUARE", and the lack of a the registered trademark symbol, ®, after "FINAL FANTASY".
Tifa
The Tifa demo has no introductory text and the 1996 now says 1997. Everything is almost identical to how it is in the final version bar the lack of the ® symbol.
Events and restrictions
Aeris
The menu is not accessible; therefore, Materia and items are inaccessible except during battles. The characters cannot level up and will remain at levels 9 (only Aeris) and 10. It is difficult to be knocked out unless done deliberately.
At the start Barret runs on like he does in the final version, but Barret is still present from the first battle, as is Aeris.
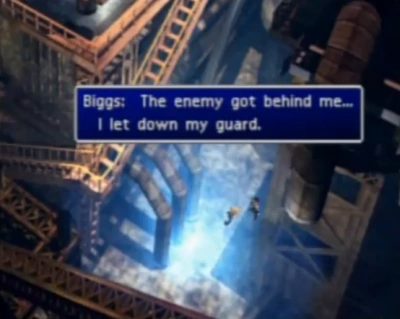
Helping Biggs, an event not in the final version.
Areas are slightly different. The door that Wedge stands by will be open. Jessie will get stuck in a different area, just further on her path. Biggs can be found collapsed in the area next to the stairs, and much like the situation with Jessie, the player will have to use the activate button to get him to move. He will claim he was attacked by a guard from behind.
Jessie does not give an explanation on how to use ladders as they are climbed automatically by walking into them.
There is no save point, as the player cannot save data in the demo.
The scene where the screen goes red and Cloud reacts is missing. If the player runs out of time before they escape the reactor, it will still say Mission Complete. Once the timer is activated, the player will get just three minutes to escape instead of the ten given in the final game. Instead of the timer appearing in the top-right, a message will appear on the screen saying "3 minutes until detonation", "2 minutes remaining" and so on. Time in battles does not count toward the time limit.
In the Aeris demo the translation is very different, an example being "Makoro plants" instead of "Mako Reactors," and SOLDIER are spoken of as actual soldiers instead of an organization. Gil is called GP, like previous entries to the Final Fantasy series. The Tifa demo changes these and has a translation the same as the final game. The rest of the translation is still off, not using formats of the English language correctly.
For example:
Wow! He's an ex-soldier alright!
...Not everyday ya find an ex-soldier in a anti-Shinra group like the 'Avalanche'.Biggs
Tifa
Just like the Aeris demo, the menu is inaccessible. Characters can level up during battles and as with the final game, Cloud will level up from the first battle. Tifa starts at Level 2, while Cloud starts at Level 6. Unlike in the Aeris demo, Barret is not present in the first battle, but the third party member, in this case Tifa, still is. Barret joins in battles after going down the lift. Barret also starts at Level 2. Regardless of levels, the characters have significantly more HP than they should in the actual game.
Since the Tifa demo was released after the Japanese version of the game was already out, the events remain unchanged from the game's final version, including the scene where the screen goes red and Cloud reacts. Biggs being knocked out is not present, and he is never seen past the terminal room. There is still no Save Point, nor an option to save due to lack of access to the menu.
The timer seen in the final game is present in the top-left of the screen in this demo, still counting down when in battles.
When the demo finishes and the reactor explosion scene is shown, the screen displays the words "Coming 09.07.97" in white text on a gray patterned background, with animated shadow and lens flare.
The translation is closer to the final versions, but there are minor differences, such as:
| Tifa demo | Final |
|---|---|
| Biggs "Wow! He used to be in SOLDIER all right! ...Not everyday ya find one of them in a group like AVALANCHE." |
Biggs "Wow! He used to be in SOLDIER all right! ...Not everyday ya find one in a group like AVALANCHE." |
Graphics and display
Aeris

Note the difference in Cloud's eyes.
The battle and field models have slight differences. The characters' eyes are black ovals instead of the more life-like eyes seen in the game. Cloud's menu portrait uses the young Cloud portrait, as seen during the Kalm flashback to the Nibelheim Incident in the final game. Aeris's menu portrait has a more serious expression than in the final game.

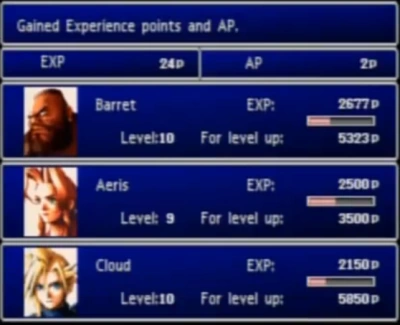
The after-battle screen.
When a character is speaking their words are not shown beneath their name as in the actual game. Instead, the demo version presents their name, a colon, and then spacing before displaying the dialogue.
Messages in battle, such as the name of the enemy attack, appear taller than in the full game and characters face the same direction as they last attacked and even during the victory pose they will be facing that direction.
Tifa
Graphics and display match the final game, having updated the portraits, most notably Cloud's, and improved and altered the character models. Speech is displayed with the name a line above the speech, which itself is packaged in speech marks. The message height is shorter than in the Aeris demo and the same height as in the final game.
Music and sound
Aeris
 .
.Four pieces of music are featured in the demo. The first plays on the demo's opening menu and isn't used in the final version. The next piece plays the same as in the opening of the final version, "Opening - Bombing Mission", with only minor differences.
In the same place as the final version, preceding the terminals, "Mako Reactor" will start playing. The demo's version of the track is slightly different to the final. "Those Who Fight" appears as the battle music, again, sounding slightly different to the final version, but using the same notes. Notably, there is no "Victory Fanfare".
During the boss battle the "Opening - Bombing Mission" plays and continues playing until the end of the demo (as it does in the full version).
Tifa
All music has been changed since the Aeris demo and now matches the final game, since the game was already released in Japan when the demo came out. The "Victory Fanfare" plays after battles beyond the area where the "Mako Reactor" theme plays.
While not strictly on the demo, in the menu where the player can select to play Final Fantasy VII among other titles, the "Descendant of Shinobi" plays. This track appears in the full game in areas after the opening bombing mission.
Characters
Aeris
The characters have the same name as in the final game, except for Jessie, who is named "Jesse." In the demo, players cannot name their characters, so at the start Cloud appears in battle as "Cloud" instead of "Ex-SOLDIER." The primary difference with characters is Aeris's presence in battles, but she does not appear outside of the battle.
Tifa
All the character names remain the same from the Aeris demo, Jessie still being referred to as "Jesse". The most obvious difference is that Tifa appears instead of Aeris as the third playable character. Tifa, like Aeris, does not appear outside of battle.
Items
Aeris
Just three items appear in the demo. All three are basic, restorative items. The only difference in names is that "Hi-Potion" was "Hi potion". All items such as the two Potions retrieved from the guards at the beginning are not present, nor is the Restore Materia on the bridge before planting the bomb. Due to this, the chest containing the Phoenix Down is not there either. Since there is no Phoenix Down item or any form of the Life spell, characters cannot be revived if their HP is reduced to 0.
| Demo name | Final name | Demo effect | Final effect |
|---|---|---|---|
| Potion | Potion | Restores 100 HP. | Restores 100 HP. |
| Hi potion | Hi-Potion | Restores 500 HP. | Restores 500 HP. |
| Ether | Ether | Restores 50 MP. | Restores 100 MP. |
Tifa
Items can be found in the demo, including the Potion found in the room where Jessie gets stuck, and the ones on the guards at the start. The Restore Materia is present on the bridge, and the Guard Scorpion drops the Assault Gun. Neither can be equipped since the menu cannot be accessed, and they cannot be changed in battles. Item names match those found in the final version, as well as their effects.
Attacks
Aeris
The Attack command is called "Fight", the same as it was called in the previous installments in the series. The Limit Break command is called "Special", despite still being called "LIMIT BREAK" in the demo's Japanese version. Aeris can only use the Healing wind special technique, and Barret can only use Heavy shot, the demo's name for Big Shot. Cloud has access to both Braver and Cross Slash, however, they function differently to the full game, as Braver temporarily paralyzes an enemy, and Cross Slash does not—the opposite to the full game.
Tifa
The Fight command has been renamed "Attack", and the Special command is now called "Limit". Tifa only has her Beat Rush Limit Break, which works based on the slots machine like the final game. Barret's single Limit Break is still the same, but renamed to Big Shot for the Tifa demo. Cloud only has access to Braver, which no longer inflicts paralysis.
Magic
Aeris
Many more spells appear in the demo version than are available at this time of the story in the full game. Bolt, Ice, and Fire all appear up to their second stages, Demi appears without an upgrade, though with the same power as Demi2 has in the final version, and all three levels of the Cure spell are available, except for Regen, despite being in between Cure2 and Cure3 in the full game. Many MP costs are far smaller than in the full game, likely due to huge MP consumption they would use otherwise. All the spells' animations are the same, bar Ice 2.
The only name differences in Magic Materia is the lack of spacing between the spell names and their spell levels. So "Ice2" is called "Ice 2" in the demo. When an All Materia is equipped to another, selecting that Materia will give the player the option to cast it on All opponents, or just a single opponent. It will also tell how many more times the player can use the All option, changing depending on the level of the Materia, although it is not possible to level Materia up in the demo.
| Demo name | Final name | Demo MP | Final MP | Effect |
|---|---|---|---|---|
| Bolt | Bolt | 4 | 4 | Weak lightning-elemental attack. |
| Bolt 2 | Bolt2 | 8 | 22 | Moderate lightning-elemental attack. |
| Cure | Cure | 5 | 5 | Weak HP restoration. |
| Cure 2 | Cure2 | 20 | 24 | Moderate HP restoration. |
| Cure 3 | Cure3 | 40 | 64 | Strong HP restoration. |
| Demi | Demi2 | 5 | 33 | Halves target's HP. |
| Fire | Fire | 4 | 4 | Weak fire-elemental damage. |
| Fire 2 | Fire2 | 8 | 22 | Moderate fire-elemental damage. |
| Ice | Ice | 4 | 4 | Weak ice-elemental damage. |
| Ice 2 | Ice2 | 8 | 22 | Moderate ice-elemental damage. |
Tifa
In this demo the player gets access to all three-tiers of the the present three-tier spells. Tifa has a Restore Materia which gives her access to all three levels of Cure, but she does not have Regen despite the Japanese version of the final game released before the demo requiring it to be learned on the Restore Materia before Cure3 can be learned. Another similarity with the Aeris demo that is different from the final game is the name of leveled Materia still having a space between the spell and its numbered level.
Cloud has the Life and Life2 spell of the Revive Materia, the Ice, Ice2, and Ice3 spells of the Ice Materia, and the Bolt, Bolt2, and Bolt3 spells of the Lightning Materia, which itself is attached to an All Materia. Tifa has the Cure, Cure2, and Cure3 spells of the Restore Materia, which itself is attached to an All Materia. Barret has no Materia. Cloud has the same Magic Materia, Lightning and Ice, which he starts with in the final game. He also has the Restore Materia, which is the first Materia obtained in the game. Both All Materia found in the demo are mastered as evidenced through all having five uses.
All animations and MP costs match those found in the final game.
Summon
Aeris
Leviathan features in the demo, who uses the Tsunami attack for a cost of 40 MP. The Tsunami attack is the same as Tidal Wave as seen in the full game, just with a different name. The MP cost is also far less than seen in the full game (78 MP).
Tifa
A greater number of summons appear in the Tifa demo. Barret can use Ifrit and Titan. Tifa has Neo Bahamut. Ifrit uses Hellfire for a cost of 34 MP. Titan uses Anger of the Land for 46 MP. Neo Bahamut uses Giga Flare for a cost of 140 MP. All Summon Materia are level 5, as evidenced through being able to be used five times.
Enemies
Aeris
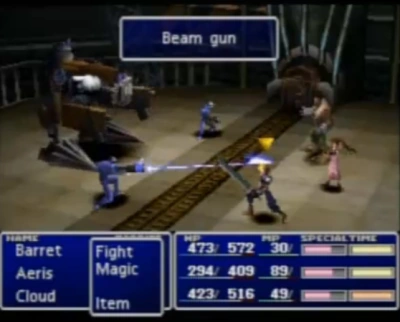

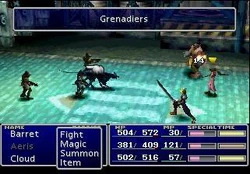
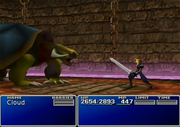
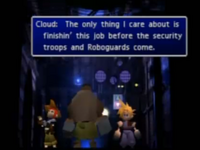
The demo version of the boss battle.
The majority of the enemies appearing in the demo version appear during the bombing mission in the full game, but only two of the enemies retain their name from the this demo version, these being the same enemies that don't appear in the area in the full game. Other enemies have had their enemy name pluralized despite appearing alone.
The Guard Scorpion does not appear as the boss, but is replaced by a larger version of the Sweeper, who is not a normal enemy, accompanied by two Grunts. Only one enemy appears in the demo, which does not in the full game, the Grenadiers, who shares a model and enemy AI with the Underwater MP but serves a different purpose.
1st Ray, Mono Drive, and the ordinary Sweeper are the only random encounters not featured in the demo that do feature in the Sector 1 Reactor mission in the full game.
The below abilities in italics are not named in games, and therefore the name recorded for the full game is used.
| Demo name | Final name | Exp | AP | GP | Abilities |
|---|---|---|---|---|---|
| Combatants | Grunt | 31 | 2 | 80 | Beam gun, Handclaw |
| Deenglow | Deenglow | 40 | 2 | 15 | Ice, Wing Cutter |
| Grenadiers | N/A | 24 | 2 | 40 | Grenade, Machine gun |
| Guard Hounds | Guard Hound | 18 | 1 | 20 | Bite, Feeler |
| Hedgehog Pie | Hedgehog Pie | 8 | 1 | 5 | Bodyblow, Fire |
| Security Troops | MP | 12 | 1 | 25 | Machine gun, Tonfa |
| Sweepers | Sweeper | 289 | 2 | 200 | Double, Machine gun, Smoke shot |
Abilities
The CASE used for enemy attacks is different. Instead of "Machine Gun", the attack is called "Machine gun". Other ability names are also different.
| Demo name | Final name | Description | Enemies |
|---|---|---|---|
| Beam gun | Beam Gun | Shoots a blue beam. Non-elemental attack. | Combatants |
| Double | W Machine Gun | Shoots machine gun bullets from both guns. Non-elemental damage. | Sweepers |
| Feeler | Tentacle | Attacks with tentacle. Non-elemental damage. | Guard Hounds |
| Fire | Fire | Minor fire-elemental damage. | Hedgehog Pie |
| Grenade | Hand Grenade | Explosive damage to a single target. | Grenadiers |
| Ice | Ice | Minor ice-elemental damage. | Deenglow |
| Machine gun | Machine Gun | Fires machine gun. Non-elemental damage. | Security Troops |
| Smoke shot | Smoke Shot | Fires smoke. Non-elemental damage. | Sweepers |
Formations
Enemy formations are largely different. One formation features a Security Troops enemy standing directly next to a Guard Hounds enemy, twice. Another formation is six Hedgehog Pies in a 3-2-1 triangle formation. One of the notable differences is that on average more enemies appear in each battle.
- Security Troops x2 (Fixed)
- Deenglow x5
- Grenadiers x2, Guard Hounds, Security Troops
- Combatants x2, Deenglow x3
- Combatants x2, Hedgehog Pie x2
- Combatants x3
- Combatants x3, Deenglow
- Guard Hounds x2, Security Troops x2
- Guard Hounds x5
- Hedgehog Pie x6
- Sweepers, Combatants x2 (Boss)
Tifa
All enemies from the final game are used in the Tifa demo, likely because the Japanese version was already out by the time this demo was released. All the names match those in the final version. Also, the abilities all match the final game. The Sweeper is a normal enemy, and the boss is the Guard Scorpion. Its AI functions exactly the same. As with the final version, the game uses the poor translation, and Cloud directly talks to Barret and does not reference Tifa.
Barret be careful!"
"Attack while it's tail's up...
It's gonna counterattack with its laser.Cloud
Formations
Enemy formations are closer to the final game.
Debug rooms
Test battle in the hidden debug room on the Tifa demo disc.
The PlayStation Underground demo ("Tifa" demo) has two (mostly disabled) debug rooms hidden on the disc, which are somewhat different than the debug room in the final game. The test battle in the final English version of the game is a battle against yellow pyramids on a black background, but on the demo disc it is a battle against Deenglows on a battleground with the Shinra logo on the floor and the sky covered in yellow clouds - as it was in the original Japanese release.
PC demos
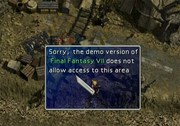
Two demo versions of the PC port of Final Fantasy VII have been released. A regular demo, which plays between Mt. Corel and Gold Saucer, and a Battle Square demo, in which the player fights several monsters in exceedingly difficult stages. The demos only work in Windows 95 or Windows 98, and to make them run in newer systems would require some tweaking. Installing the "Mt. Corel" demo on a PC that already has the full Final Fantasy VII PC version installed will mess up the full game's registry files.
Mt. Corel demo

The PHS and Save options are not available in the demo.
This demo came on a disc bundled with Tomb Raider III or Tomb Raider Gold and was also included in the June 1998 edition of PC Gamer magazine. There are two versions of this demo: the demo was initially impossible to play without a 3dfx Voodoo 3D accelerator card, but an updated version of the demo that no longer required a Voodoo card was released later.
Minimum system requirements:
- Pentium 133 w/ supported 3D accelerator card (4Mb video memory or greater) or P166 w/out supported 3D accelerator card (see below)
- Intel or 100% Intel-compatible CPU
- 32 Mb RAM
- Windows 95
- DirectX 5.1
- DirectMedia 5.2
- DirectX-compatible video and audio cards
The demo was playable with a keyboard or a game controller supported by DirectX 5.1. The default keyboard commands revolved around the Numeric Keypad.
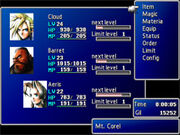
The three playable characters are Cloud, Barret, and Aeris and they are exploring the North Corel area. The player has to cross the mountains via the abandoned train tracks and make their way to the town of North Corel, where the player can converse with NPCs and use the shops and the inn. The demo ends when the party boards the ropeway to the Gold Saucer.
An assortment of magic is available, including Cure, Life, Bolt, Fire, Ice, and the summons Choco/Mog, Ifrit, and Bahamut. Sense, All, and Long Range Materia are also available. Aeris, who is in the back row by default, has the Long Range Materia in her Striking Staff to compensate. Cloud's weapon in the demo is Force Stealer, and Barret wields a Cannon Ball, one of his short-range weapons. Cloud and Barret have their Level 1 Limit Breaks, and Aeris has Healing Wind.

The demo doesn't let player leave the town.
Unlike the other demos, the menu can be accessed, so the player can change their equipment and other settings, although PHS and Save are not available, meaning the player cannot make use of the Save Points they come across. All the same items that can be picked up in the final game are also in the demo.
The game is largely similar to the final PC-version of Final Fantasy VII, but the demo has different music from the final game; the final version of Final Fantasy VII on the PC utilizes MIDI files, but the demo uses streaming WAV music, making the music sound closer to the PS version. The updated version of the demo that no longer requires the user to have a Voodoo card has the music changed to MIDI format, and sounds the same as the final game. The party eventually runs into Tifa and Red XIII, and just like the final game, the option to use PHS is given; however, if the player chooses PHS, they returned to the field, and it's not possible to change party members.
Battle Square demo
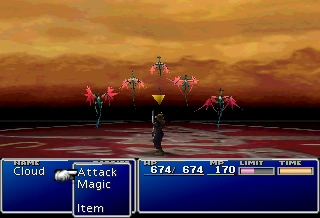
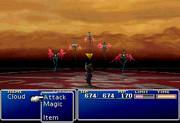
The Battle Square demo was included on the Tomb Raider III bonus disc, and it was also made available to download. This demo is a standalone demonstration of the game's battle system putting the player directly into the Battle Square and the player must win a series of battles to "win" the demo.

Cloud fighting Adamantaimai in the Battle Square demo.
The controllable character is Cloud, and he has the following commands available: 2x-Cut, Limit (Blade Beam and Climhazzard), Magic (Cure, Cure2 and Regen, Bolt and Bolt2 (linked to All), Comet and Comet2, Summon (Shiva and Hades), Item, Change and Defend. For items, Cloud an assortment of items with Hi-Potions, X-Potions, Ethers, Turbo Ethers, Elixirs, as well as status healing items and other battle items like Grenades, elemental attack items and even one Hero Drink.
If Cloud wins enough battles, the player will "win" the demo and see a special screen. If Cloud's HP goes down to zero, the demo will end.
Cloud starts the demo with his Limit bar already full. The following enemies are fought on the demo:
- Round 1: Foulander x3
- Round 2: Adamantaimai x1
- Round 3: Doorbull x1
- Round 4: Vlakorados x1
- Round 5: Shred x3
- Round 6: Stilva x1
- Round 7: Malboro x1
- Round 8: Serpent x1
Gallery
")
")
")
")