Condor War,[1] also known as Simulation Battle (シミュレーションバトル, Shimyurēshon Batoru?),[2] is a basic real-time strategy minigame in Final Fantasy VII that takes place upon the mountain of Fort Condor. The minigame must be played once in a main quest, but the player may play it a finite number of times throughout the game in a sidequest. To begin the sidequest, the player must speak to the old man on the seat in the Village area. The rest of the minigame can be managed by interacting with the lookout in the Watch Room.
The goal is to defend Fort Condor from invading Shinra Electric Power Company troops. New battles become available as the player progresses through the story, and the player needs to backtrack often long distances to be able to partake in the skirmishes that may only be shortly available. The minigame has four main prizes with the rest being consumables.
The minigame was designed by Kazuhiko Yoshioka, programmed by Ryu Moto, with graphics by Hiroyuki Yotsuji.
Battles[]
Battles occur throughout the game. The player can return to Fort Condor after progressing through the story to engage in battles. If the player does not return within a certain window, then the battle will be missed and the player will be informed when they next speak to the lookout.
The player is given the choice to play the battle as a minigame, or allow the fort to handle it themselves. A missed battle is treated as allowing the fort to handle it. There are six battles that are missed mandatorily during the storyline.
If the player does the minigame but loses, they will face an encounter against the enemy Commander: CMD.Grand Horn.
Excluding the storyline battle, there are 14 opportunities for skirmishes. Due to six having to be missed mandatorily, the maximum number of battles is 20. Fewer battles may occur due to the nature of when a missed battle is determined.
Five of the six battles that must be missed occur between the temporary point of no return at Icicle Inn and gaining the Highwind, where at least two weeks of in-game time are said to have passed.
Results[]
The game documents the fort's victories and defeats. The old man will tell how many times the player has been defeated, while the number of victories factors into the Battle Level value. A player's total battles are not counted, and there are battles that can result in neither a victory nor a loss.
If the player succeeds in the minigame, they will earn a victory. If they lose the minigame, but win the CMD.Grand Horn encounter, they will neither win nor lose, unless it is the very first battle (Battle Level 1); winning here earns a victory. If the player loses the encounter, they will earn a defeat.
The player earns a reward for completing the minigame. If the minigame is lost, but the CMD.Grand Horn encounter is won, the party will not get a reward from the lookout, but they may get an item drop and a substantial amount of gil (depending on the variant of CMD.Grand Horn encountered). A victory is required to advance the battle level (and thus required to advance the reward), so choosing to fight CMD.Grand Horn (after the first battle) not only forgoes the reward for that battle, but delays all future rewards as well.
Asking the fort to handle a battle themselves will count as a victory, but will not yield any reward. If the player is informed they have missed battles, victories will be received only for the battles the fort can cover the costs for, and the rest will be marked as defeats. (See the funds section for more details.)
The results of the Huge Materia battle do not follow the above. The old man says there would be repercussions if the player loses too many times, but it just serves as a warning for losing the Huge Materia battle. There are some indications in the game code that the minigame at some point was planned to have a feature where the player could lose the fort by losing too many battles (see here for more information), but in the final game, this can only happen by losing the Huge Materia battle.
None of the rewards of the optional battles are of any real importance to a normal playthrough (though the first reward, Magic Comb, can be handy). Maxing the later rewards requires spending gil and time, and rewards such as X-Potions and Elixirs are perhaps cheaper or easier to acquire through other means. The majority of the minigame rewards could be seen as only worth it for a completionist playthrough or simply for the enjoyment of the minigame itself.
Funds[]
The Fort starts with 15000 gil. Making the fort fight their own battle, or missing a battle, will remove 3000 gil from their funds. If they have 3000 gil, the battle will be a victory, if they have less the battle will be a defeat. When the player plays the minigame, they expend their own money and do not use the fort's funds.
The starting 15000 gil will cover for five of the six mandatorily missed battles. The final missed battle occurs during the switching of party leaders in Mideel, although ultimately this battle is irrelevant. The player is never specifically told they missed the battle (though it may be gathered from the fort's funds), and the result of the battle has no bearing on anything as it is the final battle before the storyline battle.
The player can top up the fort's funds by donating money in predefined quantities. The Fort declines further deposits when they have at least 30000 gil. By increasing the number to just under 30000, the player can donate to a maximum amount of 32767 gil (with gil spent over that being lost).
As a consequence of the PPV mechanic detailed below, missed battles (due to not returning to Fort Condor) occur less frequently than battle opportunities. The war is described below as having 20 numbered battles, but if the player skips returning to the fort, then the number of victories will accrue more slowly and it is only possible for the fort to deduct 3000 gil a maximum of 10 times. This is an important consideration to avoid overfunding if the player plans to not return to the fort for a while.
If the player has given gil to the fort they will get back the deposited gil before the final battle, the strategist saying: "Let's give them all the gil we have!"
Battle Level[]
The Battle Level value determines the difficulty of the minigame and its CMD.Grand Horn encounter. The player starts on Battle Level 2, and for every three victories the player gains a level to a maximum of six. The very first battle will always be Battle Level 1 (if they make the fort fight instead, the player will never do this battle), while the storyline battle is the only time Battle Level 7 is used. If the player wins the Battle Level 1 battle, they only have to win two Battle Level 2 battles to get to Battle Level 3.
The Battle Level updates when the player speaks to the lookout, but the game checks for missed battles after the Battle Level updates. This means that even if the wins from missed battles should take the player over to the next Battle Level, if they enter into the minigame they will be playing at the Battle Level before they were calculated. These victories will be calculated when the player next speaks to the lookout, and the player can update the Battle Level before playing the minigame by exiting the dialogue and speaking to the lookout again.
Battle Level is used as a factor in determining rewards. The first four levels are meant to have a unique one-time reward, and every level is meant to have a repeatable reward. Due to the way the rewards are programmed, this is not how rewards are earned in practice, and the player can lock themselves out of rewards altogether. See the Rewards section for an accurate rewards table.
| Level | Victories | Enemies (PS) | Enemies (PC) | Encounter | Unique reward | Repeatable reward | Notes |
|---|---|---|---|---|---|---|---|
| 1 | - | 11 | 11 | Level 19 | Magic Comb | - | |
| 2 | 0 | 20 | 25 | Varies | Peace Ring | Ether x3 | Introduces Barbarian |
| 3 | 3 | 25 | 30 | Varies | Megalixir | Hi-Potion x5 | Adds Fire Catapult unit |
| 4 | 6 | 30 | 35 | Varies | Superball | Turbo Ether x3 | Adds Tristoner unit |
| 5 | 9 | 35 | 40 | Varies | - | X-Potion x5 | |
| 6 | 12 | 40 | 47 | Varies | - | Elixir x3 | Can only be played twice. |
| 7 | - | 45 | 52 | Level 37 | - | - | See Huge Materia battle for rewards |
If the player has not tracked their wins, they can gather the battle level from the dialogue of the lookout prior to the minigame:
You have 10 enemies. There appear to be many Beasts, so you may want to deploy more Attackers.
Battle Level 1
The Barbarians are mixed during this attack.
There are more than 20. Set up for a balanced-attack or we'll be in trouble.Battle Level 2
A strong unit's on their way. Looks like around 30.
They'll probably climb up here using various routes. Better be careful or we'll be in trouble.
And make sure to deploy Fire Catapults.Battle Level 3
You're probably used to it now, but don't let your guard down.
Deploy Tristoners.Battle Level 4
Looks like the enemy numbers 40. Don't let your guard down.
Battle Level 5
I think you don't need my advice. The rest is up to you.
Battle Level 6
This is the deciding battle. The enemy numbers more than ever before.
Let's give them all the gil we have.Battle Level 7
Availability[]
The player may start the sidequest at any point before Cid becomes the party leader, and new battles become available when the game determines the story has been progressed enough, while battles are missed when the game determines the party has progressed too far.
The game keeps note of a plot progression value (PPV). This value grows as the player does story events, and is referenced by scripts to know what part of the game the player is up to. This value is also used by the fort Condor minigame to note the passing of time. If the PPV has incremented by six since the last battle, a new battle will be available. For every 70 the PPV has incremented by, a battle is missed. The player's first opportunity to start the quest is with a PPV value of 387, while the last is 1110. Therefore, assuming they start at the earliest opportunity, the theoretical minimum number of battles is 11, not including the storyline battle.
The below battle numbers will typically only be true if the player goes to the fort and completes the battle. For example, if the player does the first battle, skips the two Junon ones, and returns for Battle 4 with the buggy, they will be informed they have missed one battle, and therefore the battle will be their third. The Battle Level and rewards are determined by prior rewards and victories in prior battles. The Battle Level below assumes the player wins every battle (otherwise refer to the Battle Level section), and the rewards below assume the player participates in every battle (otherwise refer to the Rewards section).
The purpose of the PPV value is to note when the battle takes place. If the value has increased more than 70 between battles, the player will be informed that a battle has been missed and the fort will have attempted the battle themselves. For example, the Battle 19 is 1033 while the final battle is 1110, hence why Battle 20 is missed.
To participate in the fort Condor battles sometimes requires the player to backtrack long distances.
| Battle | PPV | Battle Level | Target Reward | Availability |
|---|---|---|---|---|
| Battle 1 | 387 | 1 | Magic Comb | Arrive at Fort Condor after the Mythril Mine during "Going After Sephiroth", before resting in Under Junon in "The Stowaway Strategy". This battle can still be won even if all of the player's units are destroyed by fighting a CMD.Grand Horn, but it will change some rewards. |
| Battle 2 | 394 | 2 | Peace Ring | After resting in Under Junon, but before talking to Priscilla on the Beach to get the whistle to call Mr. Dolphin. This is potentially dangerous, as the player must travel from Junon to Fort Condor with Cloud alone. |
| Battle 3 | 400 | 2 | Ether x3 | After getting the whistle in Under Junon, but before Cloud jumps to the top. The player again has to travel from Junon to Fort Condor with Cloud alone. |
| Battle 4 | 469 | 3 | Megalixir | After getting the buggy in "The Desert Prison", but before ascend the western stairs and talk to Red XIII in Cosmo Canyon in "In the Land of the Study of Planet Life". |
| Battle 5 | 502 | 3 | Hi-Potion x5 | After selecting the party for the Cave of the Gi in "In the Land of the Study of Planet Life", but before completing the cave. The only way to access this battle is to park the buggy a distance away from Cosmo Canyon on the first visit so it does not break down, then walk the rest of the way to Cosmo Canyon to progress the story until the Cave of Gi. If the buggy does break down it will not be possible to cross the river to the north, and the player has no way of getting to Fort Condor before the window for this battle expires. |
| Battle 6 | 523 | 3 | Hi-Potion x5 | After completing the Cave of the Gi, before talking to Shera in Rocket Town during "A Sleeping Village Dreaming of Outer Space". |
| Battle 7 | 535 | 4 | Superball | After talking to Shera the first time, but before talking to Shera a second time when Rufus arrives in Rocket Town. |
| Battle 8 | 566 | 4 | Turbo Ether x3 | After getting the Tiny Bronco during "A Sleeping Village Dreaming of Outer Space", before getting the Keystone in "Secret Date". |
| Battle 9 | 604 | 4 | Turbo Ether x3 | After the dating sequence in the Gold Saucer during "Secret Date", before place the Keystone in the altar and descend into the Temple of the Ancients in "Within the Temple of the Ancients". |
| Battle 10 | 641 | 5 | X-Potion x5 | After finishing the Temple of the Ancients, before awakening the Sleeping Forest with the Lunar Harp in "Parting with Aeris". |
| Battle 11 | 652 | 5 | X-Potion x5 | After awakening the Sleeping Forest with the Lunar Harp, before sleeping in the Forgotten Capital in "Parting with Aeris". |
| Battle 12 | 664 | 5 | X-Potion x5 | After sleeping in the Forgotten City (still on Part 1), before the events that lead to the fight with Jenova∙LIFE and the end of Part 1. |
| Battle 13 | 677 | 6 | Elixir x3 | After the fight with Jenova∙LIFE, at the beginning of Part 2, before passing beyond the third atmospheric wall in the Whirlwind Maze in "That Which Waits in the Northernmost Reaches". |
| Battles 14-18 | Cannot be fought. Occurs while Cloud is missing while Tifa and Barret are held captive in Junon for seven days. | |||
| Battle 19 | 1033 | 6 | Elixir x3 | After obtaining the Highwind, before getting close enough to the dog in Mideel in "A Shocking Reunion" that trigger the events for Cid to be the leader. |
| Battle 20 | Cannot be fought. Takes place during the events in Mideel. The only evidence this battle took place is the reduced funds of the fort. | |||
| Final Battle | 1110 | 7 | See: Huge Materia battle | A mandatory battle that must be fought to progress the story. This battle can still be won even if all of the player's units are destroyed by fighting a CMD.Grand Horn. |
Huge Materia battle[]
The Huge Materia battle is the only mandatory play of the Condor War. The minigame is set to the unique Battle Level 7, and the player cannot defer to the fort to fight the battle for them. The outcome of this minigame has a lasting effect on the story. The player does not receive a reward from the lookout for this battle, and as it is the final battle it has no effect on the Battle Level.
Before the battle, the player gets back all the gil Fort Condor has in its funds.
The player is victorious if they win the minigame. If they lose the minigame, they will fight a CMD.Grand Horn, and if that battle is won, they will be seen as victorious. After a victory, a cutscene plays and a Phoenix Materia will be available on the Mountaintop (although it can be avoided if the player wishes to obtain two), and the yellow Huge Materia can be received from the old man. The CMD.Grand Horn (if fought) will always drop an Imperial Guard.
The player is defeated if they lose the battle to the CMD.Grand Horn. Losing to the CMD.Grand Horn will eject the player from the fort and it will no longer be accessible. They will also not earn any of the rewards, although the Phoenix Materia can show up in Bone Village after "Mako Cannon Rampage".
Regardless of the result of this battle, the Condor will have disappeared from the World Map.
It is recommended that the player intentionally lose the minigame and fight the CMD.Grand Horn. The game makes no distinction on the method of victory, the player can save money on buying units, and also obtain the Imperial Guard armor.
Minigame[]
The lookout will allow the player to fight a battle against a wave of attacking forces from Shinra. The player must hire units to fight the invaders. Every unit has HP, which must be depleted to destroy it.
Once every enemy unit has been defeated, the battle is won and a reward is awarded. If the enemy reaches the top the party has to fight a weak enemy called CMD.Grand Horn. If the player loses, there is no Game Over, but no reward is awarded. Even if the player defeats the Grand Horn, they will get a different reward than which they would have won had they beaten the strategy game properly. There are twelve opportunities to play the minigame in all, but only one is mandatory.
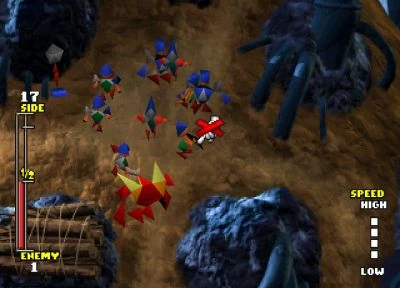
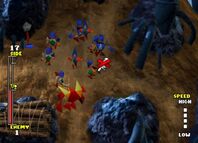
The strategy game in action.
The player can command twenty units at a time. To build a unit, the player must pay for them out of their own personal funds. Money donated to Fort Condor cannot be used to purchase units, so if players donate to Fort Condor, they should be sure to keep enough money to buy units during the minigame. Because playing the game costs gil, the player will not be allowed start unless they have at least 4000 gil. This is enough in the first few battle levels, but it is recommended to bring more to higher-level battles. When the battle is won, the surviving units will be refunded at 200 gil per unit.
Most units can perform only two actions: Move and Attack. Repairers can target an ally unit with its Repair action, which will heal a friendly unit for 10 HP per action while both units remain stationary. Construct units have the "Direction" command to adjust their attack area, and the "Remove" command dismantles them to allow new units to replace them. Workers have a "Bomb" action, which places a bomb where they stand to explode when the enemy touches it. Friendly troops are not damaged by the bomb traps. The Worker can only have one bomb placed at a time, although once its bomb is triggered it can place another. Each unit has different multipliers for dealing damage to each type of enemy. All enemy units deal damage equally regardless of their target, except for units marked as weak or strong against one, who will receive 1.5x or half damage respectively.
Three icons display the unit's current action. The boot icon highlights when a unit is moving; this includes when a unit is moving towards an attack/repair target. The sword icon highlights when a unit is moving to attack a target or is engaged in battle. The sword icon highlights for construct units only while they are attacking, but not in between shots. The heart icon highlights when a Repairer is moving to repair or in the process of repairing a unit.
Units are selected by moving the cursor with the ![]() and pressing
and pressing ![]() . The game speed can be adjusted by
. The game speed can be adjusted by ![]() and
and ![]() on a controller or page up and page down on a keyboard.
on a controller or page up and page down on a keyboard.
The final enemy unit is the "Commander" whose strength and HP are high, and it takes half damage from all attacks. In some battles there are enemies that spawn after the Commander. The Commander will not advance until all other enemies have been defeated, although it will move to attack nearby enemies. It is slow and can easily be defeated by ranged units.
Enemies appear at the bottom of the map at two separate entrances (one to the left and one to the right). The enemies emerge gradually and if the player defeats all enemies on the field, the remaining enemy troops never arrive and the player wins. The enemy cannot have more than 20 enemies on the field at a time. If the Commander unit appears, the battle is won by defeating the Commander.
Units[]
The Speed stat (not listed in the game) in the below tables is used for both movement and attack speed. Attack speed is not relevant for close-combat enemies, as when two units are engaged the combatants take turns. The value is out of 255.Speed is not the only factor in attack speed as there are also small variations in animation length.
The Size stat is how big a unit's hitbox is.
Ally units[]
The Fire Catapult becomes available from Battle Level 3 onward, while the Tristoner becomes available from Battle Level 4 onward. All other units are available from the beginning.
The final four values in this table is the damage multiplier the unit deals to that enemy. To see which enemies deal more or less damage to ally units, see the enemy units table.
| Unit | Image | HP | Attack | Range | Speed | Size | Gil | BST | WYV | BBN | CMD |
|---|---|---|---|---|---|---|---|---|---|---|---|
| Fighter | 200 | 30 | 1 | 224 | 22 | 400 | 100% | 90% | 100% | 50% | |
| Attacker | 180 | 25 | 1 | 234 | 22 | 420 | 160% | 90% | 70% | 50% | |
| Defender | 220 | 35 | 1 | 208 | 26 | 440 | 100% | 70% | 150% | 50% | |
| Shooter | 160 | 20 | 1 - 3 | 212 | 20 | 520 | 50% | 150% | 80% | 30% | |
| Repairer | 160 | 10 | 1 | 212 | 22 | 480 | 100% | 90% | 100% | 50% | |
| Worker | 160 | 15 | 1 | 230 | 22 | 400 | 100% | 90% | 100% | 50% | |
| Stoner | 100 | 20 | 1 - 4 | 188 | 22 | 480 | 100% | 30% | 80% | 50% | |
| Tristoner | 150 | 30 | 1 - 5 | 178 | 44 | 1000 | 100% | 30% | 80% | 50% | |
| Catapult | 100 | 18 | 1 - 5 | 200 | 22 | 480 | 100% | 80% | 80% | 50% | |
| Fire Catapult | 120 | 25 | 1 - 6 | 190 | 22 | 600 | 100% | 80% | 80% | 50% | |
| Worker Bomb | 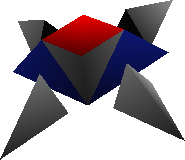
|
N/A | 15 | 1 - 4 | 173 | 10 | N/A | 100% | 85% | 100% | 50% |
Enemy units[]
The Barbarian unit will not appear at Battle Level 1. The "150%" and "50%" columns of the table list the ally (player) unit that the enemy unit deals more/less damage to. The enemy units deal 100% damage to all other units. The damage the enemy units receive from different ally units is listed in the ally units table.
| Unit | Image | HP | Attack (PS) | Attack (PC) | Range | Speed | Size | 150% | 50% |
|---|---|---|---|---|---|---|---|---|---|
| Beast | 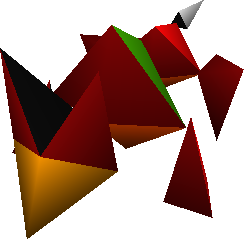
|
230 | 25 | 30 | 1 | 199 | 28 | Shooter | Attacker |
| Wyvern | 190 | 20 | 25 | 1 | 229 | 25 | Defender | Shooter | |
| Barbarian | 
|
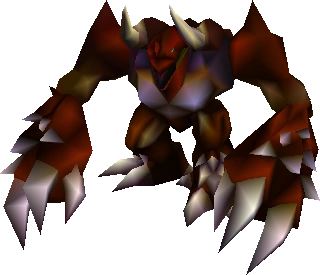
180 | 15 | 20 | 1 - 3 | 207 | 24 | Attacker | Defender |
| Commander | 
|
250 | 50 | 60 | 1 | 207 | 26 | None | None |
Dummied units[]
The data has 24 entries for units. With the selectable player and enemy units, only fourteen are used. The rest of the slots are units named Dummy (ダミー, Damī?). Seven of these unused slots are models of a sloped orange rectangle and were likely never going to be filled. Two of the other slots appear to be of a tower and a ground trap, and the final one is for the Worker's bomb.
")
")
")
Stages[]
PS version[]
The Fort Condor Battle Formations are:
Battle Level 1[]
| 11 Enemies Total | |||||||
|---|---|---|---|---|---|---|---|
| Left | Right | ||||||
| Beast 01 | Beast 02 | ||||||
| Beast 03 | Beast 04 | ||||||
| Wyvern 01 | Wyvern 02 | ||||||
| Beast 05 | Beast 06 | ||||||
| Beast 07 | Wyvern 03 | ||||||
| N/A | Commander 01 | ||||||
Battle Level 2[]
| 20 Enemies Total | |||||||
|---|---|---|---|---|---|---|---|
| Left | Right | ||||||
| Wyvern 01 | Beast 01 | ||||||
| Barbarian 01 | N/A | ||||||
| Wyvern 02 | Beast 02 | ||||||
| N/A | Wyvern 03 | ||||||
| Beast 03 | Beast 04 | ||||||
| Beast 05 | Wyvern 04 | ||||||
| Barbarian 02 | Barbarian 03 | ||||||
| Wyvern 05 | Barbarian 04 | ||||||
| Beast 06 | Wyvern 06 | ||||||
| Barbarian 05 | N/A | ||||||
| N/A | Beast 07 | ||||||
| Beast 08 | N/A | ||||||
| N/A | Commander 01 | ||||||
Battle Level 3[]
| 25 Enemies Total | |||||||
|---|---|---|---|---|---|---|---|
| Left | Right | ||||||
| Beast 01 | Barbarian 01 | ||||||
| N/A | Wyvern 01 | ||||||
| Barbarian 02 | Beast 02 | ||||||
| N/A | Wyvern 02 | ||||||
| Beast 03 | Beast 04 | ||||||
| N/A | Wyvern 03 | ||||||
| Barbarian 03 | Barbarian 04 | ||||||
| N/A | Wyvern 04 | ||||||
| N/A | Wyvern 05 | ||||||
| N/A | Wyvern 06 | ||||||
| N/A | Wyvern 07 | ||||||
| N/A | Wyvern 08 | ||||||
| Barbarian 05 | Barbarian 06 | ||||||
| Beast 05 | Beast 06 | ||||||
| N/A | Beast 07 | ||||||
| Barbarian 07 | N/A | ||||||
| Wyvern 09 | Barbarian 08 | ||||||
| N/A | Commander 01 | ||||||
Battle Level 4[]
| 30 Enemies Total | |||||||
|---|---|---|---|---|---|---|---|
| Left | Right | ||||||
| Wyvern 01 | Wyvern 02 | ||||||
| Barbarian 01 | Barbarian 02 | ||||||
| Beast 01 | Beast 02 | ||||||
| Wyvern 03 | Wyvern 04 | ||||||
| Wyvern 05 | Wyvern 06 | ||||||
| Barbarian 03 | Barbarian 04 | ||||||
| Barbarian 05 | Barbarian 06 | ||||||
| Beast 03 | Beast 04 | ||||||
| Beast 05 | Beast 06 | ||||||
| Barbarian 07 | Beast 07 | ||||||
| Wyvern 07 | Barbarian 08 | ||||||
| Beast 08 | Barbarian 09 | ||||||
| Wyvern 08 | Wyvern 09 | ||||||
| Wyvern 10 | Wyvern 11 | ||||||
| Barbarian 10 | N/A | ||||||
| N/A | Commander 01 | ||||||
Battle Level 5[]
| 35 Enemies Total | |||||||
|---|---|---|---|---|---|---|---|
| Left | Right | ||||||
| Barbarian 01 | Barbarian 02 | ||||||
| Barbarian 03 | N/A | ||||||
| Barbarian 04 | Barbarian 05 | ||||||
| Wyvern 01 | N/A | ||||||
| Wyvern 02 | Wyvern 03 | ||||||
| Wyvern 04 | N/A | ||||||
| Wyvern 05 | Wyvern 06 | ||||||
| Wyvern 07 | Wyvern 08 | ||||||
| N/A | Wyvern 09 | ||||||
| Wyvern 10 | Wyvern 11 | ||||||
| N/A | Beast 01 | ||||||
| Beast 02 | N/A | ||||||
| N/A | Beast 03 | ||||||
| Beast 04 | N/A | ||||||
| N/A | Beast 05 | ||||||
| Beast 06 | N/A | ||||||
| N/A | Beast 07 | ||||||
| Beast 08 | N/A | ||||||
| N/A | Barbarian 06 | ||||||
| N/A | Barbarian 07 | ||||||
| N/A | Barbarian 08 | ||||||
| Wyvern 12 | N/A | ||||||
| N/A | Wyvern 13 | ||||||
| Beast 09 | Beast 10 | ||||||
| Beast 11 | Beast 12 | ||||||
| Beast 13 | N/A | ||||||
| N/A | Commander 01 | ||||||
Battle Level 6[]
| 40 Enemies Total | |||||||
|---|---|---|---|---|---|---|---|
| Left | Right | ||||||
| Beast 01 | Beast 02 | ||||||
| Beast 03 | Beast 04 | ||||||
| Beast 05 | N/A | ||||||
| Barbarian 01 | Barbarian 02 | ||||||
| Barbarian 03 | Barbarian 04 | ||||||
| Barbarian 05 | N/A | ||||||
| Wyvern 01 | Wyvern 02 | ||||||
| Wyvern 03 | Wyvern 04 | ||||||
| Wyvern 05 | N/A | ||||||
| Beast 06 | N/A | ||||||
| Beast 07 | Beast 08 | ||||||
| Beast 09 | Beast 10 | ||||||
| Beast 11 | Beast 12 | ||||||
| Barbarian 06 | N/A | ||||||
| Barbarian 07 | Barbarian 08 | ||||||
| Barbarian 09 | Barbarian 10 | ||||||
| Barbarian 11 | Barbarian 12 | ||||||
| Wyvern 06 | N/A | ||||||
| Wyvern 07 | Wyvern 08 | ||||||
| Wyvern 09 | Wyvern 10 | ||||||
| Wyvern 11 | Wyvern 12 | ||||||
| N/A | Beast 13 | ||||||
| Barbarian 13 | Beast 14 | ||||||
| N/A | Commander 01 | ||||||
Battle Level 7[]
| 45 Enemies Total | |||||||
|---|---|---|---|---|---|---|---|
| Left | Right | ||||||
| N/A | Beast 01 | ||||||
| Barbarian 01 | Beast 02 | ||||||
| Barbarian 02 | Beast 03 | ||||||
| Wyvern 01 | Beast 04 | ||||||
| Beast 05 | Barbarian 03 | ||||||
| Barbarian 04 | Beast 06 | ||||||
| Beast 07 | Barbarian 05 | ||||||
| Beast 08 | N/A | ||||||
| Barbarian 06 | N/A | ||||||
| Wyvern 02 | N/A | ||||||
| Beast 09 | N/A | ||||||
| Barbarian 07 | N/A | ||||||
| Wyvern 03 | N/A | ||||||
| Beast 10 | N/A | ||||||
| Barbarian 08 | N/A | ||||||
| N/A | Wyvern 04 | ||||||
| N/A | Beast 11 | ||||||
| N/A | Barbarian 09 | ||||||
| N/A | Wyvern 05 | ||||||
| N/A | Beast 12 | ||||||
| N/A | Barbarian 10 | ||||||
| Barbarian 11 | Barbarian 12 | ||||||
| Barbarian 13 | Barbarian 14 | ||||||
| Barbarian 15 | Barbarian 16 | ||||||
| Beast 13 | Beast 14 | ||||||
| Beast 15 | Beast 16 | ||||||
| Beast 17 | Beast 18 | ||||||
| Wyvern 06 | Wyvern 07 | ||||||
| Wyvern 08 | Wyvern 09 | ||||||
| Wyvern 10 | N/A | ||||||
| N/A | Commander 01 | ||||||
PC version[]
For illustrations of the paths the enemies take, see the Paths section.
Battle Level 1[]
| Enemy | Path | Lower lane | Mid lane | Upper lane | Delay |
|---|---|---|---|---|---|
| Beast 01 | 1 | Left | Left | Left | 0 |
| Beast 02 | 14 | Right | Right | Right | 0 |
| Beast 03 | 4 | Left | Middle | Mid-right | 80 |
| Beast 04 | 13 | Right | Right | Mid-right | 80 |
| Wyvern 01 | 2 | Left | Left | Mid-right | 120 |
| Wyvern 02 | 11 | Right | Middle | Mid-left | 120 |
| Beast 05 | 1 | Left | Left | Left | 160 |
| Beast 06 | 11 | Right | Middle | Mid-left | 160 |
| Wyvern 03 | 14 | Right | Right | Right | 200 |
| Beast 07 | 6 | Left | Left | Mid-left | 200 |
| Commander 01 | 16 | Right | Middle | Mid-left | 280 |
Battle Level 2[]
| Enemy | Path | Lower lane | Mid lane | Upper lane | Delay |
|---|---|---|---|---|---|
| Wyvern 01 | 1 | Left | Left | Left | 0 |
| Beast 01 | 14 | Right | Right | Right | 0 |
| Barbarian 01 | 6 | Left | Left | Mid-left | 40 |
| Beast 02 | 11 | Right | Middle | Mid-left | 80 |
| Wyvern 02 | 4 | Left | Middle | Mid-right | 80 |
| Wyvern 03 | 12 | Right | Middle | Left | 120 |
| Beast 03 | 4 | Left | Middle | Mid-right | 160 |
| Beast 04 | 13 | Right | Right | Mid-right | 160 |
| Wyvern 04 | 11 | Right | Middle | Mid-left | 200 |
| Beast 05 | 6 | Left | Left | Mid-left | 200 |
| Barbarian 02 | 6 | Left | Left | Mid-left | 240 |
| Barbarian 03 | 10 | Right | Left | Left | 240 |
| Wyvern 05 | 9 | Left | Middle | Mid-left | 280 |
| Barbarian 04 | 13 | Right | Right | Mid-right | 280 |
| Beast 06 | 2 | Left | Left | Mid-right | 320 |
| Wyvern 06 | 12 | Right | Middle | Left | 320 |
| Barbarian 05 | 1 | Left | Left | Left | 360 |
| Beast 07 | 11 | Right | Middle | Mid-left | 400 |
| Beast 08 | 3 | Left | Middle | Left | 440 |
| Beast 09 | 1 | Left | Left | Left | 440 |
| Beast 10 | 14 | Right | Right | Right | 480 |
| Wyvern 07 | 2 | Left | Left | Mid-right | 480 |
| Wyvern 08 | 13 | Right | Right | Mid-right | 520 |
| Barbarian 06 | 4 | Left | Middle | Mid-right | 560 |
| Commander 01 | 16 | Right | Middle | Mid-left | 600 |
Battle Level 3[]
| Enemy | Path | Lower lane | Mid lane | Upper lane | Delay |
|---|---|---|---|---|---|
| Beast 01 | 1 | Left | Left | Left | 0 |
| Barbarian 01 | 11 | Right | Middle | Mid-left | 0 |
| Wyvern 01 | 12 | Right | Middle | Left | 40 |
| Barbarian 02 | 2 | Left | Left | Mid-right | 80 |
| Beast 02 | 13 | Right | Right | Mid-right | 80 |
| Wyvern 02 | 14 | Right | Right | Right | 120 |
| Beast 03 | 3 | Left | Middle | Left | 160 |
| Beast 04 | 11 | Right | Middle | Mid-left | 160 |
| Wyvern 03 | 10 | Right | Left | Left | 200 |
| Barbarian 03 | 6 | Left | Left | Mid-left | 240 |
| Barbarian 04 | 12 | Right | Middle | Left | 240 |
| Wyvern 04 | 10 | Right | Left | Left | 280 |
| Wyvern 05 | 11 | Right | Middle | Mid-left | 320 |
| Wyvern 06 | 12 | Right | Middle | Left | 360 |
| Wyvern 07 | 13 | Right | Right | Mid-right | 400 |
| Wyvern 08 | 14 | Right | Right | Right | 440 |
| Barbarian 05 | 1 | Left | Left | Left | 520 |
| Barbarian 06 | 14 | Right | Right | Right | 520 |
| Beast 05 | 6 | Left | Left | Mid-left | 560 |
| Beast 06 | 13 | Right | Right | Mid-right | 560 |
| Beast 07 | 11 | Right | Middle | Mid-left | 600 |
| Barbarian 07 | 9 | Left | Middle | Mid-left | 640 |
| Wyvern 09 | 6 | Left | Left | Mid-left | 680 |
| Barbarian 08 | 11 | Right | Middle | Mid-left | 680 |
| Barbarian 09 | 13 | Right | Right | Mid-right | 720 |
| Beast 08 | 6 | Left | Left | Mid-left | 760 |
| Beast 09 | 13 | Right | Right | Mid-right | 760 |
| Commander 01 | 16 | Right | Middle | Mid-left | 800 |
| Wyvern 10 | 6 | Left | Left | Mid-left | 880 |
| Wyvern 11 | 13 | Right | Right | Mid-right | 880 |
Battle Level 4[]
| Enemy | Path | Lower lane | Mid lane | Upper lane | Delay |
|---|---|---|---|---|---|
| Wyvern 01 | 2 | Left | Left | Mid-right | 0 |
| Wyvern 02 | 12 | Right | Middle | Left | 0 |
| Barbarian 01 | 2 | Left | Left | Mid-right | 40 |
| Barbarian 02 | 12 | Right | Middle | Left | 40 |
| Beast 01 | 2 | Left | Left | Mid-right | 80 |
| Beast 02 | 12 | Right | Middle | Left | 80 |
| Wyvern 03 | 1 | Left | Left | Left | 160 |
| Wyvern 04 | 14 | Right | Right | Right | 160 |
| Wyvern 05 | 1 | Left | Left | Left | 200 |
| Wyvern 06 | 14 | Right | Right | Right | 200 |
| Barbarian 03 | 1 | Left | Left | Left | 240 |
| Barbarian 04 | 14 | Right | Right | Right | 240 |
| Barbarian 05 | 1 | Left | Left | Left | 280 |
| Barbarian 06 | 14 | Right | Right | Right | 280 |
| Beast 03 | 1 | Left | Left | Left | 320 |
| Beast 04 | 14 | Right | Right | Right | 320 |
| Beast 05 | 1 | Left | Left | Left | 360 |
| Beast 06 | 14 | Right | Right | Right | 360 |
| Barbarian 07 | 9 | Left | Middle | Mid-left | 440 |
| Beast 07 | 11 | Right | Middle | Mid-left | 440 |
| Wyvern 07 | 9 | Left | Middle | Mid-left | 480 |
| Barbarian 08 | 11 | Right | Middle | Mid-left | 480 |
| Beast 08 | 9 | Left | Middle | Mid-left | 520 |
| Barbarian 09 | 11 | Right | Middle | Mid-left | 520 |
| Wyvern 08 | 9 | Left | Middle | Mid-left | 560 |
| Wyvern 09 | 11 | Right | Middle | Mid-left | 560 |
| Wyvern 10 | 9 | Left | Middle | Mid-left | 600 |
| Wyvern 11 | 11 | Right | Middle | Mid-left | 600 |
| Barbarian 10 | 1 | Left | Left | Left | 680 |
| Barbarian 11 | 13 | Right | Right | Mid-right | 680 |
| Beast 09 | 9 | Left | Middle | Mid-left | 720 |
| Beast 10 | 14 | Right | Right | Right | 720 |
| Wyvern 12 | 2 | Left | Left | Mid-right | 760 |
| Wyvern 13 | 11 | Right | Middle | Mid-left | 760 |
| Commander 01 | 16 | Right | Middle | Mid-left | 800 |
Battle Level 5[]
| Enemy | Path | Lower lane | Mid lane | Upper lane | Delay |
|---|---|---|---|---|---|
| Barbarian 01 | 6 | Left | Left | Mid-left | 0 |
| Barbarian 02 | 11 | Right | Middle | Mid-left | 0 |
| Barbarian 03 | 2 | Left | Left | Mid-right | 40 |
| Barbarian 04 | 6 | Left | Left | Mid-left | 80 |
| Barbarian 05 | 11 | Right | Middle | Mid-left | 80 |
| Wyvern 01 | 3 | Left | Middle | Left | 120 |
| Wyvern 02 | 6 | Left | Left | Mid-left | 160 |
| Wyvern 03 | 11 | Right | Middle | Mid-left | 160 |
| Wyvern 04 | 2 | Left | Left | Mid-right | 200 |
| Wyvern 05 | 6 | Left | Left | Mid-left | 240 |
| Wyvern 06 | 11 | Right | Middle | Mid-left | 240 |
| Wyvern 07 | 6 | Left | Left | Mid-left | 280 |
| Wyvern 08 | 11 | Right | Middle | Mid-left | 280 |
| Wyvern 09 | 14 | Right | Right | Right | 320 |
| Wyvern 10 | 6 | Left | Left | Mid-left | 400 |
| Wyvern 11 | 11 | Right | Middle | Mid-left | 400 |
| Beast 01 | 13 | Right | Right | Mid-right | 440 |
| Beast 02 | 1 | Left | Left | Left | 480 |
| Beast 03 | 13 | Right | Right | Mid-right | 520 |
| Beast 04 | 2 | Left | Left | Mid-right | 560 |
| Beast 05 | 13 | Right | Right | Mid-right | 600 |
| Beast 06 | 3 | Left | Middle | Left | 640 |
| Beast 07 | 13 | Right | Right | Mid-right | 680 |
| Beast 08 | 4 | Left | Middle | Mid-right | 720 |
| Barbarian 06 | 13 | Right | Right | Mid-right | 760 |
| Barbarian 07 | 13 | Right | Right | Mid-right | 800 |
| Barbarian 08 | 13 | Right | Right | Mid-right | 840 |
| Wyvern 12 | 5 | Left | Middle | Right | 880 |
| Wyvern 13 | 13 | Right | Right | Mid-right | 920 |
| Beast 09 | 3 | Left | Middle | Left | 960 |
| Beast 10 | 11 | Right | Middle | Mid-left | 960 |
| Beast 11 | 1 | Left | Left | Left | 1000 |
| Beast 12 | 10 | Right | Left | Left | 1000 |
| Beast 13 | 3 | Left | Middle | Left | 1040 |
| Beast 14 | 11 | Right | Middle | Mid-left | 1040 |
| Beast 15 | 2 | Left | Left | Mid-right | 1080 |
| Beast 16 | 12 | Right | Middle | Left | 1120 |
| Barbarian 09 | 10 | Right | Left | Left | 1200 |
| Barbarian 10 | 5 | Left | Middle | Right | 1200 |
| Commander 01 | 16 | Right | Middle | Mid-left | 1280 |
Battle Level 6[]
| Enemy | Path | Lower lane | Mid lane | Upper lane | Delay |
|---|---|---|---|---|---|
| Beast 01 | 8 | Left | Left | Right | 0 |
| Beast 02 | 10 | Right | Left | Left | 0 |
| Beast 03 | 5 | Left | Middle | Right | 40 |
| Beast 04 | 12 | Right | Middle | Left | 40 |
| Beast 05 | 3 | Left | Middle | Left | 80 |
| Barbarian 01 | 8 | Left | Left | Right | 120 |
| Barbarian 02 | 10 | Right | Left | Left | 120 |
| Barbarian 03 | 5 | Left | Middle | Right | 160 |
| Barbarian 04 | 12 | Right | Middle | Left | 160 |
| Barbarian 05 | 3 | Left | Middle | Left | 200 |
| Wyvern 01 | 8 | Left | Left | Right | 240 |
| Wyvern 02 | 10 | Right | Left | Left | 240 |
| Wyvern 03 | 5 | Left | Middle | Right | 280 |
| Wyvern 04 | 12 | Right | Middle | Left | 280 |
| Wyvern 05 | 3 | Left | Middle | Left | 320 |
| Beast 06 | 2 | Left | Left | Mid-right | 360 |
| Beast 07 | 9 | Left | Middle | Mid-left | 400 |
| Beast 08 | 14 | Right | Right | Right | 400 |
| Beast 09 | 6 | Left | Left | Mid-left | 440 |
| Beast 10 | 13 | Right | Right | Mid-right | 440 |
| Beast 11 | 1 | Left | Left | Left | 480 |
| Beast 12 | 11 | Right | Middle | Mid-left | 480 |
| Barbarian 06 | 2 | Left | Left | Mid-right | 520 |
| Barbarian 07 | 9 | Left | Middle | Mid-left | 560 |
| Barbarian 08 | 14 | Right | Right | Right | 560 |
| Barbarian 09 | 6 | Left | Left | Mid-left | 600 |
| Barbarian 10 | 13 | Right | Right | Mid-right | 600 |
| Barbarian 11 | 1 | Left | Left | Left | 640 |
| Barbarian 12 | 11 | Right | Middle | Mid-left | 640 |
| Wyvern 06 | 2 | Left | Left | Mid-right | 760 |
| Wyvern 07 | 9 | Left | Middle | Mid-left | 800 |
| Wyvern 08 | 14 | Right | Right | Right | 800 |
| Wyvern 09 | 6 | Left | Left | Mid-left | 840 |
| Wyvern 10 | 13 | Right | Right | Mid-right | 840 |
| Wyvern 11 | 1 | Left | Left | Left | 880 |
| Wyvern 12 | 11 | Right | Middle | Mid-left | 880 |
| Beast 13 | 11 | Right | Middle | Mid-left | 960 |
| Beast 14 | 11 | Right | Middle | Mid-left | 1000 |
| Barbarian 13 | 4 | Left | Middle | Mid-right | 1000 |
| Barbarian 14 | 4 | Left | Middle | Mid-right | 1040 |
| Beast 15 | 1 | Left | Left | Left | 1120 |
| Beast 16 | 1 | Left | Left | Left | 1160 |
| Barbarian 15 | 12 | Right | Middle | Left | 1160 |
| Barbarian 16 | 12 | Right | Middle | Left | 1200 |
| Wyvern 13 | 4 | Left | Middle | Mid-right | 1240 |
| Wyvern 14 | 14 | Right | Right | Right | 1280 |
| Commander 01 | 16 | Right | Middle | Mid-left | 1400 |
Battle Level 7[]
| Enemy | Path | Lower lane | Mid lane | Upper lane | Delay |
|---|---|---|---|---|---|
| Beast 01 | 12 | Right | Middle | Left | 0 |
| Beast 02 | 12 | Right | Middle | Left | 40 |
| Barbarian 01 | 4 | Left | Middle | Mid-right | 40 |
| Beast 03 | 12 | Right | Middle | Left | 80 |
| Barbarian 02 | 4 | Left | Middle | Mid-right | 80 |
| Beast 04 | 12 | Right | Middle | Left | 120 |
| Wyvern 01 | 4 | Left | Middle | Mid-right | 120 |
| Beast 05 | 6 | Left | Left | Mid-left | 200 |
| Barbarian 03 | 14 | Right | Right | Right | 200 |
| Barbarian 04 | 6 | Left | Left | Mid-left | 240 |
| Beast 06 | 14 | Right | Right | Right | 240 |
| Beast 07 | 6 | Left | Left | Mid-left | 280 |
| Barbarian 05 | 14 | Right | Right | Right | 280 |
| Beast 08 | 1 | Left | Left | Left | 320 |
| Barbarian 06 | 2 | Left | Left | Mid-right | 360 |
| Wyvern 02 | 3 | Left | Middle | Left | 400 |
| Beast 09 | 4 | Left | Middle | Mid-right | 440 |
| Barbarian 07 | 5 | Left | Middle | Right | 480 |
| Wyvern 03 | 6 | Left | Left | Mid-left | 520 |
| Beast 10 | 8 | Left | Left | Right | 560 |
| Barbarian 08 | 9 | Left | Middle | Mid-left | 600 |
| Wyvern 04 | 10 | Right | Left | Left | 640 |
| Beast 11 | 11 | Right | Middle | Mid-left | 680 |
| Barbarian 09 | 12 | Right | Middle | Left | 720 |
| Wyvern 05 | 13 | Right | Right | Mid-right | 760 |
| Beast 12 | 14 | Right | Right | Right | 800 |
| Barbarian 10 | 15 | Right | Righ, Middle, Left | Left, Mid-left, Mid-right | 840 |
| Barbarian 11 | 1 | Left | Left | Left | 880 |
| Barbarian 12 | 14 | Right | Right | Right | 880 |
| Barbarian 13 | 6 | Left | Left | Mid-left | 920 |
| Barbarian 14 | 13 | Right | Right | Mid-right | 920 |
| Barbarian 15 | 4 | Left | Middle | Mid-right | 960 |
| Barbarian 16 | 11 | Right | Middle | Mid-left | 960 |
| Beast 13 | 1 | Left | Left | Left | 1000 |
| Beast 14 | 14 | Right | Right | Right | 1000 |
| Beast 15 | 6 | Left | Left | Mid-left | 1040 |
| Beast 16 | 13 | Right | Right | Mid-right | 1040 |
| Beast 17 | 4 | Left | Middle | Mid-right | 1080 |
| Beast 18 | 11 | Right | Middle | Mid-left | 1080 |
| Wyvern 06 | 1 | Left | Left | Left | 1120 |
| Wyvern 07 | 14 | Right | Right | Right | 1120 |
| Wyvern 08 | 6 | Left | Left | Mid-left | 1160 |
| Wyvern 09 | 13 | Right | Right | Mid-right | 1160 |
| Wyvern 10 | 4 | Left | Middle | Mid-right | 1200 |
| Wyvern 11 | 11 | Right | Middle | Mid-left | 1200 |
| Commander 01 | 16 | Right | Middle | Mid-left | 1320 |
| Beast 19 | 11 | Right | Middle | Mid-left | 1360 |
| Barbarian 17 | 11 | Right | Middle | Mid-left | 1400 |
| Beast 20 | 11 | Right | Middle | Mid-left | 1520 |
| Barbarian 18 | 11 | Right | Middle | Mid-left | 1560 |
| Wyvern 12 | 11 | Right | Middle | Mid-left | 1680 |
| Wyvern 13 | 11 | Right | Middle | Mid-left | 1720 |
Paths[]
The top of the battlefield features four lanes, the middle of the battlefield has three lanes, and the enemies emerge from two lanes. Each enemy follows one of sixteen predefined paths to reach the reactor from one of two spawning points. Path 15 is unique in that it travels up a lane, then down an adjacent lane, before going up a third. It does this twice.
Path 7 and Path 16 are for the Commander units, which have their path terminate shortly after spawning in. The Commander will only switch onto a new path when all other enemies have been defeated. In the images below the stop point is indicated by an enlarged circle, and the continued path is included. Path 7 is never used in the game, and the Commander will always appear from the right lane's spawn point.
")
")
")
")
")
")
")
")
")
")
")
")
")
")
")
")
Strategy[]
The player can place one Fighter (or Shooter, since it moves faster) as low as possible, start the fight, and set the speed to its slowest setting. After the battle has started the player can place another Fighter slightly lower than the first, and repeat to place troops lower and lower.
A red line indicates the lowest level the player can place troops. Once this lowest level is reached, the player can buy more units and place them immediately at this level close to the entrances where the enemy forces arrive.
By quickly overwhelming the enemies currently on the battlefield, the battle can be ended before the majority of enemy troops even appear. This strategy can be expensive, however.
Another option is to place a single Attacker (the fastest moving unit) as low as possible, set the speed to slow, then order the Attacker to move to the bottom of the screen. As the Attacker moves downfield, enemies will begin to enter. As soon as the red line reaches the enemy, which has advanced the furthest, the player can hire and place the mercenary unit that counters it directly in front of it.
This can be repeated as enemies appear, using only the units needed to counter exactly what appears on the field, and only if the player doesn't have the same unit nearby. With this strategy the player can defeat the invasion force using no more than 5-6 mercenaries none of whom should die allowing for a refund of 1000-1200 gil of the money spent in addition to the reward for the battle itself. For additional coverage, a Tristoner can be placed near the left-side entrance once the player's troops have advanced positioned so that it targets the entire corridor.
Enemies spawn in sequence on two spawn points. If the spawn point of the next enemy unit is being blocked by another unit, the next enemy will not spawn. The player can prevent new enemies from spawning by moving a unit onto one of the spawn points, and then only need to deal with the enemies that have already spawned.
Rewards[]
The player will be given a reward recovered from the battlefield by the lookout if they succeed in the minigame (but not if they lose, even in Battle Level 1 where the player can still get a victory from defeating the encounter). The reward depends on the Battle Level, and whether the player has already earned the unique item of that Battle Level. No reward is given for the storyline battle.
The four main rewards are Magic Comb (weapon for Red XIII), Peace Ring (accessory that prevents Berserk, Fury, Sadness, and Confuse), Megalixir (full heal item) and Superball (weapon for Yuffie).
Since the Battle Level is determined by victories regardless of the method, the player can increase the Battle Level without obtaining its unique item. The game requires the player to have earned a previous Battle Level's unique item before the items on the next Battle Level become available. Therefore the reward can be calculated like this:
| Battle Level | - | Got Magic Comb | Got Peace Ring | Got Megalixir | Got Superball |
|---|---|---|---|---|---|
| 1 | Magic Comb | ||||
| 2 | Peace Ring | Ether x3 | |||
| 3 | Megalixir | Hi-Potion x5 | |||
| 4 | Super Ball | Turbo Ether x3 | |||
| 5 | X-Potion x5 | ||||
| 6 | Elixir x3 |
The player can earn victories (and thus increase the Battle Level) by having the fort fight their own battles with at least 3000 gil in funds, although doing so will not yield any reward. It is possible to lock oneself out of rewards. If at least two of the player's first three wins are not via completing the minigame, the player will have moved onto Battle Level 3 without obtaining the Peace Ring and can therefore no longer earn any items from the minigame.
The game tries to avoid these situations by not calculating the Battle Level immediately when returning to the fort after missing battles, allowing an opportunity to play the minigame at the level they would have been after the last battle they were present in Fort Condor for. This can still cause its own troubles, because if they win this minigame and had missed at least two battles, the player will still end up skipping the next Battle Level. It also means that the player does not benefit from the five mandatory missed battles which have the potential to turn the prize of three Turbo Ethers into three Elixirs. However, the player can still force the Battle Level to recalculate by exiting out of the dialogue and re-speaking to the lookout before playing the minigame.
If the player is accruing victories by not returning to the fort, then the victories will accrue significantly more slowly than if the player returned to the fort at each battle opportunity. This is because the game needs to accrue 70 PPV to recognize a "missed battle". This will delay access to the later portions of the rewards table.
The early versions of the game have errors in a few of the dialogue box notifications that notify the player of the reward they have received. The Hi-Potions are referred to as Potions, the Superball is referred to as a "Super Ball", the Ethers are referred to as "Tinctures", and the X-Potions appear as a blank dialogue box (because the dialogue box is not big enough to display the message, which is trying to display the Elixir message). This is fixed in the Switch and PlayStation 4 versions.
Optimal ways to obtain the unique items[]
If the player wishes to have a Vagyrisk Claw instead of three Ethers, they can lose the first minigame but beat the CMD.Grand Horn. The Vagyrisk Claw will be earned as a drop, the Magic Comb will be moved to Battle 2, the Peace Ring will replace the Ethers in Battle 3, and everything else about the game will remain the same.
If the player only desires the unique items and wishes to play the minigame the least possible number of times, the player can return to the fort for each battle, but have the fort fight for them when no item of interest is on offer. The player does not need to return for Battle 3 because a missed battle will be registered when going to the fort for Battle 4 (although they will need to first cancel the dialogue after being told about the missed battle). The player will be done with the optional Fort Condor events before completing Rocket Town after six visits.
To obtain the Magic Comb, Peace Ring, Megalixir, and Superball as early as possible, the player must win the first two battles (get Magic Comb, get Peace Ring), spend gil to win the third, then win the fourth battle and get the Megalixir. Have the fort spend gil and fight the next two, and win the seventh battle and get the Superball as reward.
To earn all unique items with the minimal number of visits, the player needs to use the progression of the plot to auto-win missed battles (remembering to exit the lookout's dialogue once before playing the minigame), and be present for one battle for each of the first four Battle Levels. In this case, the player must attend and win Battle 1, 2, and 4, and then the Superball will become available in Battle 9 before going to the Temple of the Ancients.
If the player wishes to earn all the unique items in the minimal number of visits, but is in no hurry to do so, they can plan their visits for convenient points in the game:
- Battle 1 can be played when passing by on their first visit to Junon.
- Battle 4 can be played after picking up the buggy when the player will likely be seeking the nearby Mythril from the old man's house.
- Battle 9 can be played by taking a short detour when visiting the neighboring island for the Temple of the Ancients. Before playing the minigame the player needs to exit the dialogue after being told about missing battles.
- If the player never gives the fort any funds, they will only win three of the next battles. After escaping Junon on the Highwind, the final available battle (Battle 19) will yield the Superball after exiting the lookout's first dialogue. By this point the Superball is purchasable.
CMD.Grand Horn[]
Failing the minigame by allowing the enemy to reach the fort lets the party face off against CMD.Grand Horn, an easy repeatable boss that provides quick gil. CMD.Grand Horn drops Vagyrisk Claw at level 19, which is difficult to encounter after visiting Costa del Sol and impossible after the battle level reaches 7, or the player can no longer form a party whose average level is less than 25.
Defeating the CMD.Grand Horn only counts as a victory for the Battle Levels 1 and 7 battles (the very first and very last), otherwise it counts as neither a victory nor a defeat. Forgoing the victory to fight a CMD.Grand Horn will mean the player will miss out on obtaining the better rewards, such as Elixirs. Facing the CMD.Grand Horn in the very first battle has no major effect on rewards, effectively trading the three Ethers for the Vagyrisk Claw (and its EXP and gil spoils).
Losing the battle counts as a defeat. A defeat serves no function and isn't any different from a non-victory besides being counted by the old man. The Huge Materia battle is an exception where the player will miss out on the three rewards, and access to Fort Condor.
There are three versions of the CMD.Grand Horn that the player can fight, and the one fought is determined by the Battle Level, the number of combatants, the party's average level, and the number of enemy units remaining.
- If the Battle Level is 1, the Level 19 variant is fought.
- If the Battle Level is 7, the Level 37 variant is fought.
- If there are fewer than three active party members, the Level 19 variant is fought.
- If the active party's average level is less than 19, the Level 19 variant is fought.
- If the active party's average level is greater than 24, the Level 25 variant is fought.
- If the active party's average level is from 19 to 24:
- If the Battle Level is 2, the Level 19 variant is fought.
- If the Battle Level is 3:
- If more than 15 enemies have been defeated, the Level 19 variant is fought
- If fewer than 15 enemies have been defeated, the Level 25 variant is fought
- If the Battle Level is 4:
- If more than 20 enemies have been defeated, the Level 19 variant is fought
- If fewer than 20 enemies have been defeated, the Level 25 variant is fought
- If the Battle Level is 5 or 6:
- If more than 25 enemies have been defeated, the Level 19 variant is fought
- If fewer than 25 enemies have been defeated, the Level 25 variant is fought
In the above, "active party members" refers to those in the player's battle party. The average party level does not include Aeris's level, so a party including Aeris calculates the average of the other two.
If the player attends every battle, regardless of the player's level, the first three CMD.Grand Horn levels will be 19 because the first battle is Battle Level 1, and the following two involve a party of only Cloud.
References[]
- ↑ Final Fantasy VII, credits
- ↑ Final Fantasy 20th Anniversary Ultimania File 2: Scenario, p.273