Oh, shut up and help me remodel the The Final Steps of Faith page!
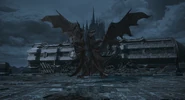
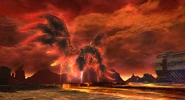
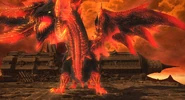
The Final Steps of Faith is the ![]() Trial where the party faces off against Nidhogg, the final boss of Revenge of the Horde.
Trial where the party faces off against Nidhogg, the final boss of Revenge of the Horde.
Story[]
Normal[]
Imbued with Hraesvelgr's last sliver of hope, you stand at the forefront of your allies as the last bastion against the raging shade of Nidhogg. Have you the resolve to conquer the great wyrm at the height of his power, or will Ishgard perish in fire and ruin? Here, on the battle-stricken Steps of Faith, your deeds shall decide how the final verse of a thousand-year dirge of grief and vengeance will be sung.
In-game Description
This battle concludes the Dragonsong War. After it concludes, the player can report his victory to the Wandering Minstrel, who will provide the party with the opportunity to face off against his own retelling of the battle: The Minstrel's Ballad: Nidhogg's Rage.
The Minstrel's Ballad: Nidhogg's Rage[]
Scarcely had Nidhogg fallen on the Steps of Faith, when taverns across Eorzea began to rumble with the rumors of your victory. In one such establishment did you regale a certain story-starved bard with the true details of your accomplishment—a humble account that he soon expanded into a flowery ballad of heroic proportions. Even as the lilting notes fade away, your mind is carried off by recollections of a monstrous foe, writ considerably more terrifying by the wandering minstrel's exaggerated poetry...
In-game Description, The Minstrel's Ballad: Nidhogg's Rage
Progression[]
Normal[]
The Minstrel's Ballad: Nidhogg's Rage[]
Phase 1[]
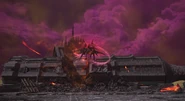
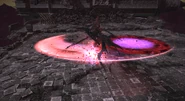
Nidhogg will occasionally use Scarlet Whisper on the tank which is a frontal cleave. He will also use Deafening Bellow and cause raid wide damage to the party. Sometime in this phase Nidhogg will leave the arena and appear on a side of the arena and in a few moments fly through with Cauterize. At the same time Horrid Roar will cause AoE's to appear under players, and cause hysteria if anyone stands in it. The best thing to do during this part is stack until the AoE's appear and dodge cauterize. Once he returns to the arena Hot Tail or Hot Wings will be cast, making the sides of the boss safe for hot tail and the middle of the boss safe for hot wings.
At 80% HP Nidhogg will flee the arena and summon three dragon enemies, one tank should pick up the Shadow Brobynak and the other should pick up the Shadow Falak, both of these enemies give stacking debuffs and should be killed quickly, the Shadow Dragon has no telegraph abilities, and will attack the furthest player with a fireball, and lift his claw up to cleave. Once defeated, Players will be knocked back by Mortal Chorus and begin casting Final Chorus Dealing raid wide damage and starting phase 2.
Phase 2[]
In this phase Nidhogg will use Drachenlance on the main tank and cleave anybody else in its range. After that four players will be marked with High Jump and must move to the far south side to drop their puddles, and run to bait the Geirskogul AoE's. One player will be tethered with Soul Tether, and the off tank will have to pick it up and take it away as it does AoE damage. After this the main tank will be hit with Ala Morn and need to use a cooldown to survive.
Once these mechanics are done two enemies will spawn known as Nighogg's Claw (Red) and Nidhogg's Fang (Blue) players must take as much damage as possible if they have red tethers to defeat the claw, and blue tethers should avoid damage or it heals the fang. Both of these cast self destruct so they must be defeated quickly, tether colors can swap after a while. Nidhogg will cast Eye of the Tyrant and players with red tethers must stack. After a repeat of mechanics four towers will spawn and if no player stands in one then massive damage will be taken from Darkdragon Dive. Both healers will be targeted with high jump and soul tether, and each tank should be nearby to pick up the tethers. When these mechanics are going out a proximity from Super Jump will appear on one side of the platform and players should be as far as possible. After a few tankbusters, Nidhogg will leave and return dealing raid wide damage with Bloodrage.
Phase 3[]
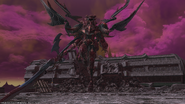
The Cauterize mechanic from the first phase will appear first in this phase and after he returns to the battlefield Akh Morn will be cast immediately. Players should stack for this and stay stacked as it will hit repeatedly. During this phase the main tank will gain stacks of Bitter hate and should tank swap after 3 stacks. After Akh Morn the boss will use Sable Price and spawn orbs in clumps of three that explode in a "+" shaped pattern after a short while, Horrid Roar AoE's will appear under players and they must avoid those and the orbs at the same time. These mechanics will repeat until the boss is defeated or players are killed by an overpowered Akh Morn.
Enemies[]
- Nidhogg
- Shadow Brobynak
- Shadow Falak
- Shadow Dragon
- Nidhogg's Claw
- Nidhogg's Fang
Loot[]
Normal[]
| Name | Type | iLv | Description |
|---|---|---|---|
| Equip | Patch | ||
| Materials | Crafting | ||
| Nidhogg Card | Triple Triad Card | 1 | A legendary (★★★★★) card used in the game Triple Triad. |
| 1 | 3.0 | ||
The Minstrel's Ballad: Nidhogg's Rage[]
A chest contains one of the following items:
| Name | Type | iLv | Description |
|---|---|---|---|
| Equip | Patch | ||
| Materials | Crafting | ||
| Horde Axe | Marauder's Arm | 235 | Auto Attack: 90.58 |
| MRD WAR 60 | 3.3 | ||
| Horde Blade | Gladiator's Arm | 235 | Auto Attack: 58.98 |
| GLA PLD 60 | 3.3 | ||
| Horde Bow | Archer's Arm | 235 | Auto Attack: 80.05 |
| ARC BRD 60 | 3.3 | ||
| Horde Cane | Two-handed Conjurer's Arm | 235 | Auto Attack: 90.58 |
| CNJ WHM 60 | 3.3 | ||
| Horde Codex | Scholar's Arm | 235 | Auto Attack: 82.16 |
| SCH 60 | 3.3 | ||
| Horde Daggers | Rogue's Arm | 235 | Auto Attack: 67.41 |
| ROG NIN 60 | 3.3 | ||
| Horde Grimoire | Arcanist's Grimoire | 235 | Auto Attack: 82.16 |
| ACN SMN 60 | 3.3 | ||
| Horde Guillotine | Dark Knight's Arm | 235 | Auto Attack: 77.94 |
| DRK 60 | 3.3 | ||
| Horde Handgonne | Machinist's Arm | 235 | Auto Attack: 69.52 |
| MCH 60 | 3.3 | ||
| Horde Knuckles | Pugilist's Arm | 235 | Auto Attack: 67.41 |
| PGL MNK 60 | 3.3 | ||
| Horde Rod | Two-handed Thaumaturge's Arm | 235 | Auto Attack: 86.37 |
| THM BLM 60 | 3.3 | ||
| Horde Spear | Lancer's Arm | 235 | Auto Attack: 75.84 |
| LNC DRG 60 | 3.3 | ||
| Horde Star Globe | Astrologian's Arm | 235 | Auto Attack: 84.26 |
| AST 60 | 3.3 | ||
| Horde Shield | Shield | 235 | Block Rate: 380 |
| GLA PLD 60 | 3.3 | ||
| Dark Lanner Whistle | Other | 1 | This whistle emits a shrill tone that is said to summon a legendary falcon of rage. |
| 1 | 3.3 | ||
| Faded Copy of Revenge of the Horde | Orchestrion Roll | 1 | Timeworn pages of sheet music containing the full score for Revenge of the Horde. |
| 1 | 3.3 | ||
| Nidhogg's Scale | Bone | 220 | A dragon scale pulsating with dark energies. Believed to have fallen from the great wyrm, Nidhogg. |
| 1 | 3.3 | ||
The following items each have a fixed, independent drop rate:
| Name | Type | iLv | Description |
|---|---|---|---|
| Equip | Patch | ||
| Materials | Crafting | ||
| Horde Totem | Miscellany | 235 | This horn-carved idol resembling the wyrm Nidhogg is used by heretics during their bloody sacrament. |
| 1 | 3.3 | ||
| Nidhogg Card | Triple Triad Card | 1 | A legendary (★★★★★) card used in the game Triple Triad. |
| 1 | 3.0 | ||
Musical themes[]
The theme "Dragonsong" plays during the first phase of the fight; until Nidhogg casts The Final Chorus, signalling the beginning of the second phase, during which the song "Freefall" plays. After enough damage is dealt, Nidhogg will enter its third phase, and "Revenge of the Horde" will play.

