Tag: sourceedit |
No edit summary |
||
| (38 intermediate revisions by 13 users not shown) | |||
| Line 1: | Line 1: | ||
| − | {{sideicon|FFXII}} |
+ | {{sideicon|prime=FFXII|FFRK}} |
| + | {{infobox location |
||
| − | {{Expand|Adding a Locations section, with images and brief descriptions of the areas within the location}} |
||
| + | |name=Feywood |
||
| − | [[File:Feywood.png|right|thumb|Feywood.]] |
||
| + | |release=FFXII |
||
| − | [[File:Feywood 010 0001.jpg|right|thumb|Wall of thick mist in Feywood.]] |
||
| + | |japanese=幻妖の森 |
||
| − | {{Q|South of the vast Golmore jungle in Kerwon there lies a place known as the 'Feywood'. The Mist there is far denser than most, and even should you make it through that, there's no guarantee you'll make it past what lies beyond.|Rikken}} |
||
| + | |romaji=Gen'you no Mori |
||
| − | The '''Feywood''' {{J|幻妖の森|Gen'you no Mori|Forest of the Fairies}} is a location in the land of [[Ivalice (Final Fantasy XII)|Ivalice]] in ''[[Final Fantasy XII]]''. It is an ancient forest that provides a passageway to the holy city of [[Giruvegan]]. Parts of the wood are blocked by a thick wall of [[Mist (Final Fantasy XII)|Mist]], until after the events in the [[Draklor Laboratory]]. |
||
| + | |lit=Forest of the Fairies |
||
| + | |image=Feyood-FFXII-TZA.png |
||
| + | |type=[[Forest]] |
||
| + | |region=[[Jagd Difohr]] |
||
| + | |items=*[[#Treasures|Treasures]] |
||
| + | |enemies=*[[Cerberus (Final Fantasy XII)|Cerberus]] |
||
| + | *[[Deadly Nightshade (Final Fantasy XII)|Deadly Nightshade]] |
||
| + | *[[Golem (Final Fantasy XII)|Golem]] |
||
| + | *[[Mirrorknight (Final Fantasy XII)|Mirrorknight]] |
||
| + | *[[Tartarus]] |
||
| + | *[[Mu (Final Fantasy XII)|Mu]] |
||
| + | *[[Basilisk (Final Fantasy XII)|Basilisk]] |
||
| + | *[[Behemoth (Final Fantasy XII)|Behemoth]] |
||
| + | *[[Preying Mantis (Final Fantasy XII)|Preying Mantis]] |
||
| + | *[[Giruveganus]] |
||
| + | *[[Holy Elemental]] |
||
| + | *[[Mandragora Prince (Final Fantasy XII)|Mandragora Prince]] |
||
| + | *[[Alraune King]] |
||
| + | *[[Onion Queen]] |
||
| + | *[[Pumpkin Star]] |
||
| + | *[[Topstalk]] |
||
| + | *[[Rafflesia (Final Fantasy XII)|Rafflesia]] (Boss) |
||
| + | *Hunts and Rares |
||
| + | |quests=*[[#Opening the way to Giruvegan|Opening the way to Giruvegan]] |
||
| + | *[[#Spawning the mandragoras|Spawning the mandragoras]] |
||
| + | *[[#Hunts|Hunts]]: [[Wild Malboro]], [[Behemoth King (Final Fantasy XII)|Behemoth King]] |
||
| + | *[[#Rare Game|Rare Game]]: [[Dreadguard (Final Fantasy XII)|Dreadguard]], [[Crypt Bunny]], [[Juggernaut (Final Fantasy XII)|Juggernaut]] |
||
| + | }} |
||
| + | {{Quote|South of the vast Golmore jungle in Kerwon there lies a place known as the 'Feywood'. The Mist there is far denser than most, and even should you make it through that, there's no guarantee you'll make it past what lies beyond.|Rikken}} |
||
| + | The '''Feywood''' is a location in the land of [[Ivalice (Final Fantasy XII)|Ivalice]] in ''[[Final Fantasy XII]]''. It is an ancient forest that provides a passageway to the holy city of [[Giruvegan]]. Parts of the wood are blocked by a thick wall of [[Mist (Final Fantasy XII)|Mist]], until after the events in the [[Draklor Laboratory]]. The Feywood is similar to the [[Snowfly Forest]] in ''[[Vagrant Story]]'', also directed by [[Yasumi Matsuno]]. |
||
| − | ==[[Sage Knowledge]]== |
+ | == [[Sage Knowledge]] == |
| − | {{ |
+ | {{Quote|An ancient wood deep in the jungles of Golmore. The combination of dense Mist and regular snow, the latter a product of the region's elevation, is enough to keep away even the [[viera]]. Many of the trees have stood for several thousands of years, and some have begun to petrify. Numerous plants once thought extinct grow here, and many rare birds and animals can be seen in their primitive forms, unchanged for millennia.|[[Sage Knowledge 53-78#SK 73: The Feywood|Sage Knowledge piece 73]]}} |
| − | == |
+ | == Locations == |
| − | The Feywood is located just to the southwest of [[Golmore Jungle]]. |
+ | The Feywood is located just to the southwest of [[Golmore Jungle]]. This area can be visited as soon as the player obtains the [[Lente's Tear]], but the player needs to complete the events at the [[Draklor Laboratory]] to investigate further from the Antiquity's End. |
Areas within the Feywood are: |
Areas within the Feywood are: |
||
| − | *Walk of Flitting Rifts - leads to the [[Golmore Jungle]] and the [[Paramina Rift]]. |
+ | * Walk of Flitting Rifts - leads to the [[Golmore Jungle]] and the [[Paramina Rift]]. |
[[File:Penelofeywood.jpg|thumb|right|Feywood - Walk of Dancing Shadows.]] |
[[File:Penelofeywood.jpg|thumb|right|Feywood - Walk of Dancing Shadows.]] |
||
| − | *Walk of Stolen Truths - the only place where Cerberus are found. |
+ | * Walk of Stolen Truths - the only place where Cerberus are found. |
| − | *Walk of Dancing Shadows - leads to the [[Henne Mines]]. |
+ | * Walk of Dancing Shadows - leads to the [[Henne Mines]]. |
| − | *Antiquity's End - contains a [[Save point#Final Fantasy XII|Save Crystal]]. |
+ | * Antiquity's End - contains a [[Save point#Final Fantasy XII|Save Crystal]]. |
| − | *Redolent Glade - area where Rafflesia is fought. |
+ | * Redolent Glade - area where Rafflesia is fought. |
| − | *White Magick's Embrace |
+ | * White Magick's Embrace |
| − | *Ice Field of Clearsight |
+ | * Ice Field of Clearsight |
| − | *The Edge of Reason - leads to the Ancient City of Giruvegan. |
+ | * The Edge of Reason - leads to the Ancient City of Giruvegan. |
| − | ===[[Weather]]=== |
+ | === [[Weather]] === |
The weather in Feywood never changes; the areas have fixed weather: |
The weather in Feywood never changes; the areas have fixed weather: |
||
| − | *Cloudy (Walk of the Flitting Rifts area) |
+ | * Cloudy (Walk of the Flitting Rifts area) |
| − | *Heavy Fog (all the other areas) |
+ | * Heavy Fog (all the other areas) |
In heavy fog [[Water (element)|Water]] attacks deal more damage than normal. Because Feywood is of snow terrain, [[Ice (element)|Ice]] damage is always boosted. |
In heavy fog [[Water (element)|Water]] attacks deal more damage than normal. Because Feywood is of snow terrain, [[Ice (element)|Ice]] damage is always boosted. |
||
| − | == |
+ | == Treasures == |
| − | {{See |
+ | {{See|Treasure (Final Fantasy XII)}} |
[[File:FF12 - Treasure Urn (Snow).png|left|100px]] |
[[File:FF12 - Treasure Urn (Snow).png|left|100px]] |
||
| − | Treasures in the Feywood are never [[gil]]. All the treasures before going through the wall of thick mist are either [[ |
+ | Treasures in the Feywood are never [[gil]]. All the treasures before going through the wall of thick mist are either [[Final Fantasy XII items#Hi-Potion|Hi-Potion]]/[[Final Fantasy XII items#Hi-Ether|Hi-Ether]] or a [[Gambits|gambit]]. With the [[Final Fantasy XII accessories#Diamond Armlet|Diamond Armlet]] equipped the regular item treasure is [[Final Fantasy XII items#Knot of Rust|Knot of Rust]] and the rare item is [[Final Fantasy XII items#Elixir|Elixir]]. The gambits which can be found in the area include the G-Foe: char MP >= X% gambits in the Walk of Flitting Rifts and Walk of Stolen Truths areas, and G-Foe: HP >= X gambits and gambits for foes with [[Bravery (status)|Bravery]] and [[Faith (status)|Faith]] in Walk of Dancing Shadow area. |
After the wall of thick mist has dissolved, the player can enter deeper into the Feywood. In the White Magicks Embrace there is a treasure in the southeastern corner that may be an Elixir even without the Diamond Armlet, and the treasure also respawns, but its spawn rate is only 30%. |
After the wall of thick mist has dissolved, the player can enter deeper into the Feywood. In the White Magicks Embrace there is a treasure in the southeastern corner that may be an Elixir even without the Diamond Armlet, and the treasure also respawns, but its spawn rate is only 30%. |
||
[[File:Ensanguine-Shield-Treasure.jpg|thumb|Ensanguined Shield found.]] |
[[File:Ensanguine-Shield-Treasure.jpg|thumb|Ensanguined Shield found.]] |
||
| − | In Ice Field of Clearsight all the treasures are along the edges and some may contain equipment. The treasures that contain equipment have low spawn rates, only 30%. When going straight east from the northern exit the treasure that spawns there may have the [[ |
+ | In Ice Field of Clearsight all the treasures are along the edges and some may contain equipment. The treasures that contain equipment have low spawn rates, only 30%. When going straight east from the northern exit the treasure that spawns there may have the [[Morning Star (Final Fantasy XII)|Morning Star]]. The treasure that spawns straight to west from the northern exit can be the [[Doom Mace (Final Fantasy XII)|Doom Mace]]. The treasure that spawns in the very middle of the southern border can be the [[Final Fantasy XII armor#Celebrant's Miter|Celebrant's Miter]]. |
| − | In the Edge of Reason there is a group of three treasures that spawn in the middle of the area, a bit northeast from the exit to Giruvegan. One of them only has 25% chance to spawn and will always have the [[ |
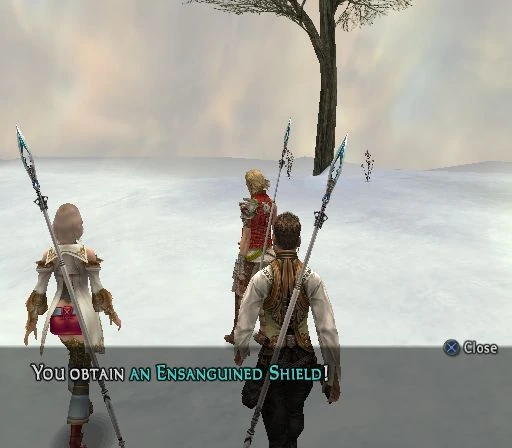
+ | In the Edge of Reason there is a group of three treasures that spawn in the middle of the area, a bit northeast from the exit to Giruvegan. One of them only has 25% chance to spawn and will always have the [[Final Fantasy XII armor#Ensanguined Shield|Ensanguined Shield]], with or without the Diamond Armlet. Once claimed, this treasure will not respawn. Of the other treasures one has an [[X-Potion]] and the last one can have either a Hi-Potion or [[Deathbringer (Final Fantasy XII)|Deathbringer]]. |
| − | In the '' |
+ | In the ''Zodiac'' versions, near the [[Save point#Final Fantasy XII|Save Crystal]], there is a treasure with an [[Embroidered Tippet (Final Fantasy XII)|Embroidered Tippet]]. |
| − | === |
+ | === Walk of Flitting Rifts === |
| + | ;Zodiac |
||
| − | <div class="tabber"> |
||
| + | {|class="full-width FFXII article-table" style="text-align:center" |
||
| − | <div class="tabbertab" title="FFXII"> |
||
| − | {|class="full-width FFXII table" style="text-align:center" |
||
| − | |-class="a" |
||
| − | !style="width:20%"|Chest |
||
| − | !style="width:10%"|Spawns |
||
| − | !style="width:10%"|Holds Gil% |
||
| − | !style="width:30%" colspan="2"|Normal Treasure |
||
| − | !style="width:30%" colspan="2"|Diamond Armlet Treasure |
||
| − | |- |
||
| − | |class="b" rowspan="2"|1 |
||
| − | |rowspan="2"|45% |
||
| − | |rowspan="2"|0% |
||
| − | |class="a" width="15%"|Item 1 |
||
| − | |class="a" width="15%"|Item 2 |
||
| − | |class="a" width="15%"|Common |
||
| − | |class="a" width="15%"|Rare |
||
| − | |- |
||
| − | |Hi-Potion |
||
| − | |G-Foe: chr MP >= 90% |
||
| − | |Knot of Rust |
||
| − | |Elixir |
||
| − | |- |
||
| − | |class="b" rowspan="2"|2 |
||
| − | |rowspan="2"|45% |
||
| − | |rowspan="2"|0% |
||
| − | |class="a" width="15%"|Item 1 |
||
| − | |class="a" width="15%"|Item 2 |
||
| − | |class="a" width="15%"|Common |
||
| − | |class="a" width="15%"|Rare |
||
| − | |- |
||
| − | |Hi-Potion |
||
| − | |G-Foe: chr MP >= 70% |
||
| − | |Knot of Rust |
||
| − | |Elixir |
||
| − | |- |
||
| − | |class="b" rowspan="2"|3 |
||
| − | |rowspan="2"|45% |
||
| − | |rowspan="2"|0% |
||
| − | |class="a" width="15%"|Item 1 |
||
| − | |class="a" width="15%"|Item 2 |
||
| − | |class="a" width="15%"|Common |
||
| − | |class="a" width="15%"|Rare |
||
| − | |- |
||
| − | |Hi-Potion |
||
| − | |G-Foe: chr MP >= 50% |
||
| − | |Knot of Rust |
||
| − | |Elixir |
||
| − | |- |
||
| − | |class="b" rowspan="2"|4 |
||
| − | |rowspan="2"|45% |
||
| − | |rowspan="2"|0% |
||
| − | |class="a" width="15%"|Item 1 |
||
| − | |class="a" width="15%"|Item 2 |
||
| − | |class="a" width="15%"|Common |
||
| − | |class="a" width="15%"|Rare |
||
| − | |- |
||
| − | |Hi-Potion |
||
| − | |G-Foe: chr MP >= 30% |
||
| − | |Knot of Rust |
||
| − | |Elixir |
||
| − | |- |
||
| − | |class="b" rowspan="2"|5 |
||
| − | |rowspan="2"|45% |
||
| − | |rowspan="2"|0% |
||
| − | |class="a" width="15%"|Item 1 |
||
| − | |class="a" width="15%"|Item 2 |
||
| − | |class="a" width="15%"|Common |
||
| − | |class="a" width="15%"|Rare |
||
| − | |- |
||
| − | |Hi-Potion |
||
| − | |G-Foe: chr MP >= 10% |
||
| − | |Knot of Rust |
||
| − | |Elixir |
||
| − | |}</div> |
||
| − | <div class="tabbertab" title="IZJS"> |
||
| − | {|class="full-width FFXII table" style="text-align:center" |
||
|-class="a" |
|-class="a" |
||
!style="width:20%"|Chest |
!style="width:20%"|Chest |
||
| Line 153: | Line 108: | ||
|class="a" width="12%"|Rare |
|class="a" width="12%"|Rare |
||
|- |
|- |
||
| − | | |
+ | |Rime Fang |
|Handkerchief |
|Handkerchief |
||
|Knot of Rust |
|Knot of Rust |
||
| Line 167: | Line 122: | ||
|class="a" width="12%"|Rare |
|class="a" width="12%"|Rare |
||
|- |
|- |
||
| − | | |
+ | |Rime Fang |
|Gold Needle |
|Gold Needle |
||
|Knot of Rust |
|Knot of Rust |
||
| Line 182: | Line 137: | ||
|- |
|- |
||
|Ether |
|Ether |
||
| + | |Prince's Kiss |
||
| − | |Alarm Clock |
||
|Knot of Rust |
|Knot of Rust |
||
|Meteorite (A) |
|Meteorite (A) |
||
| Line 265: | Line 220: | ||
|class="a" width="12%"|Rare |
|class="a" width="12%"|Rare |
||
|- |
|- |
||
| − | | |
+ | |Lightning Fang |
|Phoenix Down |
|Phoenix Down |
||
|Knot of Rust |
|Knot of Rust |
||
| Line 279: | Line 234: | ||
|class="a" width="12%"|Rare |
|class="a" width="12%"|Rare |
||
|- |
|- |
||
| − | | |
+ | |Lightning Fang |
|Echo Herbs |
|Echo Herbs |
||
|Knot of Rust |
|Knot of Rust |
||
|Meteorite (A) |
|Meteorite (A) |
||
| + | |} |
||
| − | |}</div></div> |
||
| + | ;Original |
||
| − | |||
| + | {|class="full-width FFXII article-table" style="text-align:center" |
||
| − | ====Walk of Stolen Rifts==== |
||
| − | <div class="tabber"> |
||
| − | <div class="tabbertab" title="FFXII"> |
||
| − | {|class="full-width FFXII table" style="text-align:center" |
||
|-class="a" |
|-class="a" |
||
!style="width:20%"|Chest |
!style="width:20%"|Chest |
||
| Line 296: | Line 248: | ||
!style="width:30%" colspan="2"|Diamond Armlet Treasure |
!style="width:30%" colspan="2"|Diamond Armlet Treasure |
||
|- |
|- |
||
| − | |class="b" rowspan="2"| |
+ | |class="b" rowspan="2"|1 |
|rowspan="2"|45% |
|rowspan="2"|45% |
||
|rowspan="2"|0% |
|rowspan="2"|0% |
||
| Line 309: | Line 261: | ||
|Elixir |
|Elixir |
||
|- |
|- |
||
| − | |class="b" rowspan="2"| |
+ | |class="b" rowspan="2"|2 |
|rowspan="2"|45% |
|rowspan="2"|45% |
||
|rowspan="2"|0% |
|rowspan="2"|0% |
||
| Line 317: | Line 269: | ||
|class="a" width="15%"|Rare |
|class="a" width="15%"|Rare |
||
|- |
|- |
||
| − | |Hi- |
+ | |Hi-Potion |
|G-Foe: chr MP >= 70% |
|G-Foe: chr MP >= 70% |
||
|Knot of Rust |
|Knot of Rust |
||
|Elixir |
|Elixir |
||
|- |
|- |
||
| − | |class="b" rowspan="2"| |
+ | |class="b" rowspan="2"|3 |
|rowspan="2"|45% |
|rowspan="2"|45% |
||
|rowspan="2"|0% |
|rowspan="2"|0% |
||
| Line 330: | Line 282: | ||
|class="a" width="15%"|Rare |
|class="a" width="15%"|Rare |
||
|- |
|- |
||
| − | |Hi- |
+ | |Hi-Potion |
|G-Foe: chr MP >= 50% |
|G-Foe: chr MP >= 50% |
||
|Knot of Rust |
|Knot of Rust |
||
|Elixir |
|Elixir |
||
|- |
|- |
||
| − | |class="b" rowspan="2"| |
+ | |class="b" rowspan="2"|4 |
|rowspan="2"|45% |
|rowspan="2"|45% |
||
|rowspan="2"|0% |
|rowspan="2"|0% |
||
| Line 343: | Line 295: | ||
|class="a" width="15%"|Rare |
|class="a" width="15%"|Rare |
||
|- |
|- |
||
| − | |Hi- |
+ | |Hi-Potion |
|G-Foe: chr MP >= 30% |
|G-Foe: chr MP >= 30% |
||
|Knot of Rust |
|Knot of Rust |
||
|Elixir |
|Elixir |
||
|- |
|- |
||
| − | |class="b" rowspan="2"| |
+ | |class="b" rowspan="2"|5 |
|rowspan="2"|45% |
|rowspan="2"|45% |
||
|rowspan="2"|0% |
|rowspan="2"|0% |
||
| Line 360: | Line 312: | ||
|Knot of Rust |
|Knot of Rust |
||
|Elixir |
|Elixir |
||
| − | |} |
+ | |} |
| + | {{clear}} |
||
| − | <div class="tabbertab" title="IZJS"> |
||
| + | |||
| − | {|class="full-width FFXII table" style="text-align:center" |
||
| + | === Walk of Stolen Truths=== |
||
| + | ;Zodiac |
||
| + | {|class="full-width FFXII article-table" style="text-align:center" |
||
|-class="a" |
|-class="a" |
||
!style="width:20%"|Chest |
!style="width:20%"|Chest |
||
| Line 381: | Line 336: | ||
|- |
|- |
||
|Ether |
|Ether |
||
| + | |Prince's Kiss |
||
| − | |Alarm Clock |
||
|Knot of Rust |
|Knot of Rust |
||
|Meteorite (B) |
|Meteorite (B) |
||
| Line 395: | Line 350: | ||
|- |
|- |
||
|Ether |
|Ether |
||
| + | |Serum |
||
| − | |C9H8O4 |
||
|Knot of Rust |
|Knot of Rust |
||
|Meteorite (A) |
|Meteorite (A) |
||
| Line 409: | Line 364: | ||
|- |
|- |
||
|Ether |
|Ether |
||
| + | |Serum |
||
| − | |C9H8O4 |
||
|Knot of Rust |
|Knot of Rust |
||
|Meteorite (A) |
|Meteorite (A) |
||
| Line 436: | Line 391: | ||
|class="a" width="12%"|Rare |
|class="a" width="12%"|Rare |
||
|- |
|- |
||
| − | | |
+ | |Rime Fang |
|Hi-Ether |
|Hi-Ether |
||
|Knot of Rust |
|Knot of Rust |
||
| Line 451: | Line 406: | ||
|- |
|- |
||
|Ether |
|Ether |
||
| + | |Nu Khai Sand |
||
| − | |Smelling Salts |
||
|Knot of Rust |
|Knot of Rust |
||
|Meteorite (A) |
|Meteorite (A) |
||
| Line 479: | Line 434: | ||
|- |
|- |
||
|Ether |
|Ether |
||
| + | |Serum |
||
| − | |C9H8O4 |
||
|Knot of Rust |
|Knot of Rust |
||
|Meteorite (A) |
|Meteorite (A) |
||
| Line 506: | Line 461: | ||
|class="a" width="12%"|Rare |
|class="a" width="12%"|Rare |
||
|- |
|- |
||
| − | | |
+ | |Soleil Fang |
| + | |Serum |
||
| − | |C9H8O4 |
||
|Knot of Rust |
|Knot of Rust |
||
|Meteorite (A) |
|Meteorite (A) |
||
| + | |} |
||
| − | |}</div></div> |
||
| + | ;Original |
||
| − | |||
| + | {|class="full-width FFXII article-table" style="text-align:center" |
||
| − | ====Walk of Dancing Shadow==== |
||
| − | <div class="tabber"> |
||
| − | <div class="tabbertab" title="FFXII"> |
||
| − | {|class="full-width FFXII table" style="text-align:center" |
||
|-class="a" |
|-class="a" |
||
!style="width:20%"|Chest |
!style="width:20%"|Chest |
||
| Line 523: | Line 475: | ||
!style="width:30%" colspan="2"|Diamond Armlet Treasure |
!style="width:30%" colspan="2"|Diamond Armlet Treasure |
||
|- |
|- |
||
| − | |class="b" rowspan="2"| |
+ | |class="b" rowspan="2"|6 |
| − | |rowspan="2"|40% |
||
| − | |rowspan="2"|0% |
||
| − | |class="a" width="15%"|Item 1 |
||
| − | |class="a" width="15%"|Item 2 |
||
| − | |class="a" width="15%"|Common |
||
| − | |class="a" width="15%"|Rare |
||
| − | |- |
||
| − | |Hi-Ether |
||
| − | |G-Foe:chr status = FAI |
||
| − | |Knot of Rust |
||
| − | |Elixir |
||
| − | |- |
||
| − | |class="b" rowspan="2"|12 |
||
|rowspan="2"|45% |
|rowspan="2"|45% |
||
|rowspan="2"|0% |
|rowspan="2"|0% |
||
| Line 545: | Line 484: | ||
|- |
|- |
||
|Hi-Potion |
|Hi-Potion |
||
| − | |G-Foe: |
+ | |G-Foe: chr MP >= 90% |
|Knot of Rust |
|Knot of Rust |
||
|Elixir |
|Elixir |
||
|- |
|- |
||
| − | |class="b" rowspan="2"| |
+ | |class="b" rowspan="2"|7 |
| − | |rowspan="2"| |
+ | |rowspan="2"|45% |
|rowspan="2"|0% |
|rowspan="2"|0% |
||
|class="a" width="15%"|Item 1 |
|class="a" width="15%"|Item 1 |
||
| Line 557: | Line 496: | ||
|class="a" width="15%"|Rare |
|class="a" width="15%"|Rare |
||
|- |
|- |
||
| − | |Hi- |
+ | |Hi-Ether |
| − | |G-Foe: |
+ | |G-Foe: chr MP >= 70% |
|Knot of Rust |
|Knot of Rust |
||
|Elixir |
|Elixir |
||
|- |
|- |
||
| − | |class="b" rowspan="2"| |
+ | |class="b" rowspan="2"|8 |
|rowspan="2"|45% |
|rowspan="2"|45% |
||
|rowspan="2"|0% |
|rowspan="2"|0% |
||
| Line 571: | Line 510: | ||
|- |
|- |
||
|Hi-Ether |
|Hi-Ether |
||
| − | |G-Foe: |
+ | |G-Foe: chr MP >= 50% |
|Knot of Rust |
|Knot of Rust |
||
|Elixir |
|Elixir |
||
|- |
|- |
||
| − | |class="b" rowspan="2"| |
+ | |class="b" rowspan="2"|9 |
| − | |rowspan="2"| |
+ | |rowspan="2"|45% |
|rowspan="2"|0% |
|rowspan="2"|0% |
||
|class="a" width="15%"|Item 1 |
|class="a" width="15%"|Item 1 |
||
| Line 584: | Line 523: | ||
|- |
|- |
||
|Hi-Ether |
|Hi-Ether |
||
| − | |G-Foe: |
+ | |G-Foe: chr MP >= 30% |
|Knot of Rust |
|Knot of Rust |
||
|Elixir |
|Elixir |
||
|- |
|- |
||
| − | |class="b" rowspan="2"| |
+ | |class="b" rowspan="2"|10 |
| − | |rowspan="2"| |
+ | |rowspan="2"|45% |
|rowspan="2"|0% |
|rowspan="2"|0% |
||
|class="a" width="15%"|Item 1 |
|class="a" width="15%"|Item 1 |
||
| Line 597: | Line 536: | ||
|- |
|- |
||
|Hi-Potion |
|Hi-Potion |
||
| − | |G-Foe:chr |
+ | |G-Foe: chr MP >= 10% |
|Knot of Rust |
|Knot of Rust |
||
|Elixir |
|Elixir |
||
| − | |} |
+ | |} |
| + | {{clear}} |
||
| − | <div class="tabbertab" title="IZJS"> |
||
| + | |||
| − | {|class="full-width FFXII table" style="text-align:center" |
||
| + | === Walk of Dancing Shadow === |
||
| + | ;Zodiac |
||
| + | {|class="full-width FFXII article-table" style="text-align:center" |
||
|-class="a" |
|-class="a" |
||
!style="width:20%"|Chest |
!style="width:20%"|Chest |
||
| Line 620: | Line 562: | ||
|class="a" width="12%"|Rare |
|class="a" width="12%"|Rare |
||
|- |
|- |
||
| − | | |
+ | |Rime Fang |
| + | |Nu Khai Sand |
||
| − | |Smelling Salts |
||
|Knot of Rust |
|Knot of Rust |
||
|Meteorite (B) |
|Meteorite (B) |
||
| Line 662: | Line 604: | ||
|class="a" width="12%"|Rare |
|class="a" width="12%"|Rare |
||
|- |
|- |
||
| − | | |
+ | |Lightning Fang |
|Hi-Ether |
|Hi-Ether |
||
|Knot of Rust |
|Knot of Rust |
||
| Line 676: | Line 618: | ||
|class="a" width="12%"|Rare |
|class="a" width="12%"|Rare |
||
|- |
|- |
||
| − | | |
+ | |Rime Fang |
|Chronos Tear |
|Chronos Tear |
||
|Knot of Rust |
|Knot of Rust |
||
| Line 732: | Line 674: | ||
|class="a" width="12%"|Rare |
|class="a" width="12%"|Rare |
||
|- |
|- |
||
| − | | |
+ | |Rime Fang |
|Phoenix Down |
|Phoenix Down |
||
|Knot of Rust |
|Knot of Rust |
||
| Line 764: | Line 706: | ||
|Knot of Rust |
|Knot of Rust |
||
|Meteorite (A) |
|Meteorite (A) |
||
| + | |} |
||
| − | |}</div></div> |
||
| + | ;Original |
||
| + | {|class="full-width FFXII article-table" style="text-align:center" |
||
| + | |-class="a" |
||
| + | !style="width:20%"|Chest |
||
| + | !style="width:10%"|Spawns |
||
| + | !style="width:10%"|Holds Gil% |
||
| + | !style="width:30%" colspan="2"|Normal Treasure |
||
| + | !style="width:30%" colspan="2"|Diamond Armlet Treasure |
||
| + | |- |
||
| + | |class="b" rowspan="2"|11 |
||
| + | |rowspan="2"|40% |
||
| + | |rowspan="2"|0% |
||
| + | |class="a" width="15%"|Item 1 |
||
| + | |class="a" width="15%"|Item 2 |
||
| + | |class="a" width="15%"|Common |
||
| + | |class="a" width="15%"|Rare |
||
| + | |- |
||
| + | |Hi-Ether |
||
| + | |G-Foe:chr status = FAI |
||
| + | |Knot of Rust |
||
| + | |Elixir |
||
| + | |- |
||
| + | |class="b" rowspan="2"|12 |
||
| + | |rowspan="2"|45% |
||
| + | |rowspan="2"|0% |
||
| + | |class="a" width="15%"|Item 1 |
||
| + | |class="a" width="15%"|Item 2 |
||
| + | |class="a" width="15%"|Common |
||
| + | |class="a" width="15%"|Rare |
||
| + | |- |
||
| + | |Hi-Potion |
||
| + | |G-Foe: HP < 10000 |
||
| + | |Knot of Rust |
||
| + | |Elixir |
||
| + | |- |
||
| + | |class="b" rowspan="2"|13 |
||
| + | |rowspan="2"|50% |
||
| + | |rowspan="2"|0% |
||
| + | |class="a" width="15%"|Item 1 |
||
| + | |class="a" width="15%"|Item 2 |
||
| + | |class="a" width="15%"|Common |
||
| + | |class="a" width="15%"|Rare |
||
| + | |- |
||
| + | |Hi-Potion |
||
| + | |G-Foe: HP < 5000 |
||
| + | |Knot of Rust |
||
| + | |Elixir |
||
| + | |- |
||
| + | |class="b" rowspan="2"|14 |
||
| + | |rowspan="2"|45% |
||
| + | |rowspan="2"|0% |
||
| + | |class="a" width="15%"|Item 1 |
||
| + | |class="a" width="15%"|Item 2 |
||
| + | |class="a" width="15%"|Common |
||
| + | |class="a" width="15%"|Rare |
||
| + | |- |
||
| + | |Hi-Ether |
||
| + | |G-Foe: HP >= 10000 |
||
| + | |Knot of Rust |
||
| + | |Elixir |
||
| + | |- |
||
| + | |class="b" rowspan="2"|15 |
||
| + | |rowspan="2"|50% |
||
| + | |rowspan="2"|0% |
||
| + | |class="a" width="15%"|Item 1 |
||
| + | |class="a" width="15%"|Item 2 |
||
| + | |class="a" width="15%"|Common |
||
| + | |class="a" width="15%"|Rare |
||
| + | |- |
||
| + | |Hi-Ether |
||
| + | |G-Foe: HP >= 5000 |
||
| + | |Knot of Rust |
||
| + | |Elixir |
||
| + | |- |
||
| + | |class="b" rowspan="2"|16 |
||
| + | |rowspan="2"|40% |
||
| + | |rowspan="2"|0% |
||
| + | |class="a" width="15%"|Item 1 |
||
| + | |class="a" width="15%"|Item 2 |
||
| + | |class="a" width="15%"|Common |
||
| + | |class="a" width="15%"|Rare |
||
| + | |- |
||
| + | |Hi-Potion |
||
| + | |G-Foe:chr status = BRA |
||
| + | |Knot of Rust |
||
| + | |Elixir |
||
| + | |} |
||
| + | {{clear}} |
||
| − | === |
+ | === Antiquity's End === |
| − | + | ThIs chest only appears in the ''Zodiac'' versions. It does not respawn. |
|
| − | {|class="full-width FFXII table" style="text-align:center" |
+ | {|class="full-width FFXII article-table" style="text-align:center" |
|-class="a" |
|-class="a" |
||
!style="width:20%"|Chest |
!style="width:20%"|Chest |
||
| Line 782: | Line 812: | ||
|0% |
|0% |
||
|N/A |
|N/A |
||
| − | |colspan="4"|[[ |
+ | |colspan="4"|[[Final Fantasy XII accessories#Embroidered Tippet|Embroidered Tippet]] |
|} |
|} |
||
| + | {{clear}} |
||
| − | === |
+ | === Redolent Glade === |
| − | These chests only appear in the '' |
+ | These chests only appear in the ''Zodiac'' versions. They do not respawn. |
| − | {|class="full-width FFXII table" style="text-align:center" |
+ | {|class="full-width FFXII article-table" style="text-align:center" |
|-class="a" |
|-class="a" |
||
!style="width:20%"|Chest |
!style="width:20%"|Chest |
||
| Line 801: | Line 832: | ||
|0% |
|0% |
||
|N/A |
|N/A |
||
| − | |colspan="4"| |
+ | |colspan="4"|Domaine Calvados |
|- |
|- |
||
|class="b"|35<sup>[[#1|[1]]]</sup> |
|class="b"|35<sup>[[#1|[1]]]</sup> |
||
| Line 809: | Line 840: | ||
|colspan="4"|X-Potion |
|colspan="4"|X-Potion |
||
|} |
|} |
||
| − | *'''''{{A|1}}''''' - Chest does not respawn. |
+ | * '''''{{A|1}}''''' - Chest does not respawn. |
| + | {{clear}} |
||
| − | === |
+ | === White Magick's Embrace === |
| + | ;Zodiac |
||
| − | <div class="tabber"> |
||
| + | {|class="full-width FFXII article-table" style="text-align:center" |
||
| − | <div class="tabbertab" title="FFXII"> |
||
| − | {|class="full-width FFXII table" style="text-align:center" |
||
| − | |-class="a" |
||
| − | !style="width:20%"|Chest |
||
| − | !style="width:10%"|Spawns |
||
| − | !style="width:10%"|Holds Gil% |
||
| − | !style="width:30%" colspan="2"|Normal Treasure |
||
| − | !style="width:30%" colspan="2"|Diamond Armlet Treasure |
||
| − | |- |
||
| − | |class="b" rowspan="2"|17 |
||
| − | |rowspan="2"|60% |
||
| − | |rowspan="2"|0% |
||
| − | |rowspan="2" colspan="2" width=30%"|Hi-Potion |
||
| − | |class="a" width="15%"|Common |
||
| − | |class="a" width="15%"|Rare |
||
| − | |- |
||
| − | |Knot of Rust |
||
| − | |Elixir |
||
| − | |- |
||
| − | |class="b" rowspan="2"|18 |
||
| − | |rowspan="2"|30% |
||
| − | |rowspan="2"|0% |
||
| − | |class="a" width="15%"|Item 1 |
||
| − | |class="a" width="15%"|Item 2 |
||
| − | |class="a" width="15%"|Common |
||
| − | |class="a" width="15%"|Rare |
||
| − | |- |
||
| − | |Hi-Potion |
||
| − | |Elixir |
||
| − | |Knot of Rust |
||
| − | |Elixir |
||
| − | |}</div> |
||
| − | <div class="tabbertab" title="IZJS"> |
||
| − | {|class="full-width FFXII table" style="text-align:center" |
||
|-class="a" |
|-class="a" |
||
!style="width:20%"|Chest |
!style="width:20%"|Chest |
||
| Line 912: | Line 911: | ||
|class="a" width="12%"|Rare |
|class="a" width="12%"|Rare |
||
|- |
|- |
||
| − | | |
+ | |Rime Fang |
|Hi-Potion |
|Hi-Potion |
||
|Knot of Rust |
|Knot of Rust |
||
| Line 940: | Line 939: | ||
|class="a" width="12%"|Rare |
|class="a" width="12%"|Rare |
||
|- |
|- |
||
| − | | |
+ | |Rime Fang |
|Hi-Ether |
|Hi-Ether |
||
|Knot of Rust |
|Knot of Rust |
||
| Line 949: | Line 948: | ||
|0% |
|0% |
||
|N/A |
|N/A |
||
| − | |colspan="4"|[[ |
+ | |colspan="4"|[[Final Fantasy XII accessories#Golden Amulet|Golden Amulet]] |
|- |
|- |
||
|class="b" rowspan="2"|44 |
|class="b" rowspan="2"|44 |
||
| Line 965: | Line 964: | ||
|Meteorite (A) |
|Meteorite (A) |
||
|} |
|} |
||
| − | *'''''{{A|1}}''''' - Chest does not respawn. |
+ | * '''''{{A|1}}''''' - Chest does not respawn. |
| + | ;Original |
||
| − | |||
| + | {|class="full-width FFXII article-table" style="text-align:center" |
||
| − | ====Ice Field of Clearsight==== |
||
| − | <div class="tabber"> |
||
| − | <div class="tabbertab" title="FFXII"> |
||
| − | {|class="full-width FFXII table" style="text-align:center" |
||
|-class="a" |
|-class="a" |
||
!style="width:20%"|Chest |
!style="width:20%"|Chest |
||
| Line 978: | Line 974: | ||
!style="width:30%" colspan="2"|Diamond Armlet Treasure |
!style="width:30%" colspan="2"|Diamond Armlet Treasure |
||
|- |
|- |
||
| − | |class="b" rowspan="2"| |
+ | |class="b" rowspan="2"|17 |
| − | |rowspan="2"| |
+ | |rowspan="2"|60% |
|rowspan="2"|0% |
|rowspan="2"|0% |
||
| − | | |
+ | |rowspan="2" colspan="2" width=30%"|Hi-Potion |
| − | |class="a" width="15%"|Item 2 |
||
|class="a" width="15%"|Common |
|class="a" width="15%"|Common |
||
|class="a" width="15%"|Rare |
|class="a" width="15%"|Rare |
||
|- |
|- |
||
| − | |Hi-Potion |
||
| − | |[[List of Final Fantasy XII weapons#Morning Star|Morning Star]] |
||
|Knot of Rust |
|Knot of Rust |
||
|Elixir |
|Elixir |
||
|- |
|- |
||
| − | |class="b" rowspan="2"| |
+ | |class="b" rowspan="2"|18 |
| − | |rowspan="2"|45% |
||
| − | |rowspan="2"|0% |
||
| − | |class="a" width="15%"|Item 1 |
||
| − | |class="a" width="15%"|Item 2 |
||
| − | |class="a" width="15%"|Common |
||
| − | |class="a" width="15%"|Rare |
||
| − | |- |
||
| − | |Hi-Potion |
||
| − | |Hi-Ether |
||
| − | |Knot of Rust |
||
| − | |Elixir |
||
| − | |- |
||
| − | |class="b" rowspan="2"|21 |
||
|rowspan="2"|30% |
|rowspan="2"|30% |
||
|rowspan="2"|0% |
|rowspan="2"|0% |
||
| Line 1,013: | Line 993: | ||
|- |
|- |
||
|Hi-Potion |
|Hi-Potion |
||
| − | |[[List of Final Fantasy armor#Celebrant's Miter|Celebrant's Miter]] |
||
| − | |Knot of Rust |
||
|Elixir |
|Elixir |
||
| − | |- |
||
| − | |class="b" rowspan="2"|22 |
||
| − | |rowspan="2"|30% |
||
| − | |rowspan="2"|0% |
||
| − | |class="a" width="15%"|Item 1 |
||
| − | |class="a" width="15%"|Item 2 |
||
| − | |class="a" width="15%"|Common |
||
| − | |class="a" width="15%"|Rare |
||
| − | |- |
||
| − | |Hi-Potion |
||
| − | |[[List of Final Fantasy weapons#Doom Mace|Doom Mace]] |
||
|Knot of Rust |
|Knot of Rust |
||
|Elixir |
|Elixir |
||
| − | | |
+ | |} |
| + | {{clear}} |
||
| − | |class="b" rowspan="2"|23 |
||
| + | |||
| − | |rowspan="2"|45% |
||
| + | === Ice Field of Clearsight === |
||
| − | |rowspan="2"|0% |
||
| + | ;Zodiac |
||
| − | |rowspan="2" colspan="2" width="30%"|Hi-Potion |
||
| + | {|class="full-width FFXII article-table" style="text-align:center" |
||
| − | |class="a" width="15%"|Common |
||
| − | |class="a" width="15%"|Rare |
||
| − | |- |
||
| − | |Knot of Rust |
||
| − | |Elixir |
||
| − | |- |
||
| − | |class="b" rowspan="2"|24 |
||
| − | |rowspan="2"|45% |
||
| − | |rowspan="2"|0% |
||
| − | |rowspan="2" colspan="2" width="30%"|Hi-Potion |
||
| − | |class="a" width="15%"|Common |
||
| − | |class="a" width="15%"|Rare |
||
| − | |- |
||
| − | |Knot of Rust |
||
| − | |Elixir |
||
| − | |- |
||
| − | |class="b" rowspan="2"|25 |
||
| − | |rowspan="2"|45% |
||
| − | |rowspan="2"|0% |
||
| − | |class="a" width="15%"|Item 1 |
||
| − | |class="a" width="15%"|Item 2 |
||
| − | |class="a" width="15%"|Common |
||
| − | |class="a" width="15%"|Rare |
||
| − | |- |
||
| − | |Hi-Potion |
||
| − | |Hi-Ether |
||
| − | |Knot of Rust |
||
| − | |Elixir |
||
| − | |}</div> |
||
| − | <div class="tabbertab" title="IZJS"> |
||
| − | {|class="full-width FFXII table" style="text-align:center" |
||
|-class="a" |
|-class="a" |
||
!style="width:20%"|Chest |
!style="width:20%"|Chest |
||
| Line 1,083: | Line 1,020: | ||
|- |
|- |
||
|Ether |
|Ether |
||
| − | |[[ |
+ | |[[Final Fantasy XII armor#Giant's Helmet|Giant's Helmet]] |
|Knot of Rust |
|Knot of Rust |
||
|Meteorite (A) |
|Meteorite (A) |
||
| Line 1,097: | Line 1,034: | ||
|- |
|- |
||
|Ether |
|Ether |
||
| − | |[[ |
+ | |[[Final Fantasy XII armor#Carabineer Mail|Carabineer Mail]] |
|Knot of Rust |
|Knot of Rust |
||
|Meteorite (A) |
|Meteorite (A) |
||
| Line 1,111: | Line 1,048: | ||
|- |
|- |
||
|Ether |
|Ether |
||
| − | |[[ |
+ | |[[Final Fantasy XII armor#Chakra Band|Chakra Band]] |
|Knot of Rust |
|Knot of Rust |
||
|Meteorite (A) |
|Meteorite (A) |
||
| Line 1,124: | Line 1,061: | ||
|class="a" width="12%"|Rare |
|class="a" width="12%"|Rare |
||
|- |
|- |
||
| − | | |
+ | |Rime Fang |
|Remedy |
|Remedy |
||
|Knot of Rust |
|Knot of Rust |
||
| Line 1,133: | Line 1,070: | ||
|0% |
|0% |
||
|N/A |
|N/A |
||
| − | |colspan="4"|[[ |
+ | |colspan="4"|[[Final Fantasy XII accessories#Bubble Belt|Bubble Belt]] |
|- |
|- |
||
|class="b" rowspan="2"|50 |
|class="b" rowspan="2"|50 |
||
| Line 1,145: | Line 1,082: | ||
|- |
|- |
||
|Soleil Fang |
|Soleil Fang |
||
| − | |[[ |
+ | |[[Final Fantasy XII armor#Jade Gown|Jade Gown]] |
|Knot of Rust |
|Knot of Rust |
||
|Meteorite (A) |
|Meteorite (A) |
||
| Line 1,159: | Line 1,096: | ||
|- |
|- |
||
|Soleil Fang |
|Soleil Fang |
||
| − | |[[ |
+ | |[[Final Fantasy XII armor#Hypnocrown|Hypnocrown]] |
|Knot of Rust |
|Knot of Rust |
||
|Meteorite (B) |
|Meteorite (B) |
||
| Line 1,172: | Line 1,109: | ||
|class="a" width="12%"|Rare |
|class="a" width="12%"|Rare |
||
|- |
|- |
||
| − | | |
+ | |Rime Fang |
|Hi-Ether |
|Hi-Ether |
||
|Knot of Rust |
|Knot of Rust |
||
| Line 1,187: | Line 1,124: | ||
|- |
|- |
||
|Ether |
|Ether |
||
| − | |[[ |
+ | |[[Final Fantasy XII accessories#Power Vest|Power Vest]] |
|Knot of Rust |
|Knot of Rust |
||
|Meteorite (A) |
|Meteorite (A) |
||
| Line 1,200: | Line 1,137: | ||
|class="a" width="12%"|Rare |
|class="a" width="12%"|Rare |
||
|- |
|- |
||
| − | | |
+ | |Rime Fang |
| + | |Serum |
||
| − | |C9H8O4 |
||
|Knot of Rust |
|Knot of Rust |
||
|Meteorite (C) |
|Meteorite (C) |
||
| Line 1,215: | Line 1,152: | ||
|- |
|- |
||
|Ether |
|Ether |
||
| − | |[[ |
+ | |[[Final Fantasy XII armor#Kaiser Shield|Kaiser Shield]] |
|Knot of Rust |
|Knot of Rust |
||
|Meteorite (B) |
|Meteorite (B) |
||
| Line 1,229: | Line 1,166: | ||
|- |
|- |
||
|Ether |
|Ether |
||
| − | |[[ |
+ | |[[Final Fantasy XII accessories#Power Armlet|Power Armlet]] |
|Knot of Rust |
|Knot of Rust |
||
|Meteorite (A) |
|Meteorite (A) |
||
|} |
|} |
||
| − | *'''''{{A|1}}''''' - Chest does not respawn. |
+ | * '''''{{A|1}}''''' - Chest does not respawn. |
| + | ;Original |
||
| − | |||
| + | {|class="full-width FFXII article-table" style="text-align:center" |
||
| − | ====The Edge of Reason==== |
||
| − | <div class="tabber"> |
||
| − | <div class="tabbertab" title="FFXII"> |
||
| − | {|class="full-width FFXII table" style="text-align:center" |
||
|-class="a" |
|-class="a" |
||
!style="width:20%"|Chest |
!style="width:20%"|Chest |
||
| Line 1,246: | Line 1,180: | ||
!style="width:30%" colspan="2"|Diamond Armlet Treasure |
!style="width:30%" colspan="2"|Diamond Armlet Treasure |
||
|- |
|- |
||
| − | |class="b" rowspan="2"| |
+ | |class="b" rowspan="2"|19 |
|rowspan="2"|30% |
|rowspan="2"|30% |
||
|rowspan="2"|0% |
|rowspan="2"|0% |
||
| Line 1,255: | Line 1,189: | ||
|- |
|- |
||
|Hi-Potion |
|Hi-Potion |
||
| − | |[[ |
+ | |[[Morning Star (Final Fantasy XII)|Morning Star]] |
|Knot of Rust |
|Knot of Rust |
||
|Elixir |
|Elixir |
||
|- |
|- |
||
| − | |class="b" rowspan="2"| |
+ | |class="b" rowspan="2"|20 |
|rowspan="2"|45% |
|rowspan="2"|45% |
||
|rowspan="2"|0% |
|rowspan="2"|0% |
||
| − | | |
+ | |class="a" width="15%"|Item 1 |
| + | |class="a" width="15%"|Item 2 |
||
|class="a" width="15%"|Common |
|class="a" width="15%"|Common |
||
|class="a" width="15%"|Rare |
|class="a" width="15%"|Rare |
||
|- |
|- |
||
| + | |Hi-Potion |
||
| + | |Hi-Ether |
||
|Knot of Rust |
|Knot of Rust |
||
|Elixir |
|Elixir |
||
|- |
|- |
||
| − | |class="b"| |
+ | |class="b" rowspan="2"|21 |
| + | |rowspan="2"|30% |
||
| − | |25% |
||
| + | |rowspan="2"|0% |
||
| − | |0% |
||
| + | |class="a" width="15%"|Item 1 |
||
| − | |colspan="4"|[[List of Final Fantasy XII armor#Ensanguined Shield|Ensanguined Shield]] |
||
| + | |class="a" width="15%"|Item 2 |
||
| − | |}</div> |
||
| − | + | |class="a" width="15%"|Common |
|
| − | + | |class="a" width="15%"|Rare |
|
| + | |- |
||
| + | |Hi-Potion |
||
| + | |[[Final Fantasy armor#Celebrant's Miter|Celebrant's Miter]] |
||
| + | |Knot of Rust |
||
| + | |Elixir |
||
| + | |- |
||
| + | |class="b" rowspan="2"|22 |
||
| + | |rowspan="2"|30% |
||
| + | |rowspan="2"|0% |
||
| + | |class="a" width="15%"|Item 1 |
||
| + | |class="a" width="15%"|Item 2 |
||
| + | |class="a" width="15%"|Common |
||
| + | |class="a" width="15%"|Rare |
||
| + | |- |
||
| + | |Hi-Potion |
||
| + | |[[Doom Mace (Final Fantasy XII)|Doom Mace]] |
||
| + | |Knot of Rust |
||
| + | |Elixir |
||
| + | |- |
||
| + | |class="b" rowspan="2"|23 |
||
| + | |rowspan="2"|45% |
||
| + | |rowspan="2"|0% |
||
| + | |rowspan="2" colspan="2" width="30%"|Hi-Potion |
||
| + | |class="a" width="15%"|Common |
||
| + | |class="a" width="15%"|Rare |
||
| + | |- |
||
| + | |Knot of Rust |
||
| + | |Elixir |
||
| + | |- |
||
| + | |class="b" rowspan="2"|24 |
||
| + | |rowspan="2"|45% |
||
| + | |rowspan="2"|0% |
||
| + | |rowspan="2" colspan="2" width="30%"|Hi-Potion |
||
| + | |class="a" width="15%"|Common |
||
| + | |class="a" width="15%"|Rare |
||
| + | |- |
||
| + | |Knot of Rust |
||
| + | |Elixir |
||
| + | |- |
||
| + | |class="b" rowspan="2"|25 |
||
| + | |rowspan="2"|45% |
||
| + | |rowspan="2"|0% |
||
| + | |class="a" width="15%"|Item 1 |
||
| + | |class="a" width="15%"|Item 2 |
||
| + | |class="a" width="15%"|Common |
||
| + | |class="a" width="15%"|Rare |
||
| + | |- |
||
| + | |Hi-Potion |
||
| + | |Hi-Ether |
||
| + | |Knot of Rust |
||
| + | |Elixir |
||
| + | |} |
||
| + | {{clear}} |
||
| + | |||
| + | === The Edge of Reason === |
||
| + | ;Zodiac |
||
| + | {|class="full-width FFXII article-table" style="text-align:center" |
||
|-class="a" |
|-class="a" |
||
!style="width:20%"|Chest |
!style="width:20%"|Chest |
||
| Line 1,294: | Line 1,288: | ||
|- |
|- |
||
|Ether |
|Ether |
||
| − | |[[ |
+ | |[[Platinum Dagger (Final Fantasy XII)|Platinum Dagger]] |
|Knot of Rust |
|Knot of Rust |
||
|Meteorite (A) |
|Meteorite (A) |
||
| Line 1,302: | Line 1,296: | ||
|0% |
|0% |
||
|N/A |
|N/A |
||
| − | |colspan="4"|[[ |
+ | |colspan="4"|[[Defender (Final Fantasy XII)|Defender]] |
|- |
|- |
||
|class="b" rowspan="2"|59 |
|class="b" rowspan="2"|59 |
||
| Line 1,314: | Line 1,308: | ||
|- |
|- |
||
|Ether |
|Ether |
||
| − | |[[ |
+ | |[[Trident (Final Fantasy XII)|Trident]] |
|Knot of Rust |
|Knot of Rust |
||
|Meteorite (A) |
|Meteorite (A) |
||
| Line 1,327: | Line 1,321: | ||
|class="a" width="12%"|Rare |
|class="a" width="12%"|Rare |
||
|- |
|- |
||
| − | | |
+ | |Lightning Fang |
|Ether |
|Ether |
||
|Knot of Rust |
|Knot of Rust |
||
| + | |Baltoro's Seed |
||
| − | |''Barutoro no Tane'' |
||
|- |
|- |
||
|class="b" rowspan="2"|61 |
|class="b" rowspan="2"|61 |
||
| Line 1,342: | Line 1,336: | ||
|- |
|- |
||
|Ether |
|Ether |
||
| − | |[[ |
+ | |[[Spica (Final Fantasy XII)|Spica]] |
|Knot of Rust |
|Knot of Rust |
||
|Meteorite (A) |
|Meteorite (A) |
||
| Line 1,356: | Line 1,350: | ||
|- |
|- |
||
|Ether |
|Ether |
||
| − | |[[ |
+ | |[[Morning Star (Final Fantasy XII)|Morning Star]] |
|Knot of Rust |
|Knot of Rust |
||
|Meteorite (C) |
|Meteorite (C) |
||
| Line 1,376: | Line 1,370: | ||
|- |
|- |
||
|Soleil Fang |
|Soleil Fang |
||
| − | |[[ |
+ | |[[Deathbringer (Final Fantasy XII)|Deathbringer]] |
|Knot of Rust |
|Knot of Rust |
||
|Meteorite (B) |
|Meteorite (B) |
||
| Line 1,390: | Line 1,384: | ||
|- |
|- |
||
|Ether |
|Ether |
||
| − | |[[ |
+ | |[[Ivory Pole (Final Fantasy XII)|Ivory Pole]] |
|Knot of Rust |
|Knot of Rust |
||
|Meteorite (A) |
|Meteorite (A) |
||
| Line 1,403: | Line 1,397: | ||
|class="a" width="12%"|Rare |
|class="a" width="12%"|Rare |
||
|- |
|- |
||
| − | | |
+ | |Lightning Fang |
| − | |[[ |
+ | |[[Traitor's Bow (Final Fantasy XII)|Traitor's Bow]] |
|Knot of Rust |
|Knot of Rust |
||
|Meteorite (A) |
|Meteorite (A) |
||
| Line 1,418: | Line 1,412: | ||
|- |
|- |
||
|Remedy |
|Remedy |
||
| + | |Serum |
||
| − | |C9H8O4 |
||
|Knot of Rust |
|Knot of Rust |
||
|Meteorite (B) |
|Meteorite (B) |
||
|} |
|} |
||
| − | *'''''{{A|1}}''''' - Chest does not respawn. |
+ | * '''''{{A|1}}''''' - Chest does not respawn. |
| + | ;Original |
||
| + | {|class="full-width FFXII article-table" style="text-align:center" |
||
| + | |-class="a" |
||
| + | !style="width:20%"|Chest |
||
| + | !style="width:10%"|Spawns |
||
| + | !style="width:10%"|Holds Gil% |
||
| + | !style="width:30%" colspan="2"|Normal Treasure |
||
| + | !style="width:30%" colspan="2"|Diamond Armlet Treasure |
||
| + | |- |
||
| + | |class="b" rowspan="2"|26 |
||
| + | |rowspan="2"|30% |
||
| + | |rowspan="2"|0% |
||
| + | |class="a" width="15%"|Item 1 |
||
| + | |class="a" width="15%"|Item 2 |
||
| + | |class="a" width="15%"|Common |
||
| + | |class="a" width="15%"|Rare |
||
| + | |- |
||
| + | |Hi-Potion |
||
| + | |[[Deathbringer (Final Fantasy XII)|Deathbringer]] |
||
| + | |Knot of Rust |
||
| + | |Elixir |
||
| + | |- |
||
| + | |class="b" rowspan="2"|27 |
||
| + | |rowspan="2"|45% |
||
| + | |rowspan="2"|0% |
||
| + | |rowspan="2" colspan="2" width="30%"|X-Potion |
||
| + | |class="a" width="15%"|Common |
||
| + | |class="a" width="15%"|Rare |
||
| + | |- |
||
| + | |Knot of Rust |
||
| + | |Elixir |
||
| + | |- |
||
| + | |class="b"|28<sup>[[#1|[1]]]</sup> |
||
| + | |25% |
||
| + | |0% |
||
| + | |colspan="4"|[[Final Fantasy XII armor#Ensanguined Shield|Ensanguined Shield]] |
||
| + | |} |
||
| + | {{clear}} |
||
| − | ==Story== |
+ | == Story == |
{{spoiler}} |
{{spoiler}} |
||
[[File:Rasler's-Ghost-Feywood.png|thumb|An apparition of Rasler clears the path.]] |
[[File:Rasler's-Ghost-Feywood.png|thumb|An apparition of Rasler clears the path.]] |
||
| − | After the events at the Draklor Laboratory, the party follows [[Cidolfus Demen Bunansa|Dr. Cid]] to the ancient city of Giruvegan, but must go through the Feywood first. They are blocked by a wall of thick Mist, but [[Rasler Heios Nabradia|Rasler's]] ghost unlocks the way. A carnivorous plant, [[Rafflesia (Final Fantasy XII)|Rafflesia]], fights the party and after it is defeated, the party are blocked by an illusion puzzle. |
+ | After the events at the Draklor Laboratory, the party follows [[Cidolfus Demen Bunansa|Dr. Cid]] to the ancient city of Giruvegan, but must go through the Feywood first. They are blocked by a wall of thick Mist, but [[Rasler Heios Nabradia|Rasler's]] ghost unlocks the way. A carnivorous plant, [[Rafflesia (Final Fantasy XII)|Rafflesia]], fights the party and after it is defeated, the party are blocked by an illusion puzzle. The party completes the puzzle and summons Belias to unlock the gate to Giruvegan. |
| + | |||
| − | {{-}} |
||
| + | Later, the Wild Malboro from the 'A Wild Stench' Hunt can be found where the Rafflesia was defeated. |
||
| + | {{clear}} |
||
{{Endspoiler}} |
{{Endspoiler}} |
||
| − | ==Quests== |
+ | == Quests == |
| − | ===Opening the way to Giruvegan=== |
+ | === Opening the way to Giruvegan === |
| + | {{Quote|In this sanctum shall the pilgrim find truth and illusion both. Illusion betokens the true way.|Feywood Glyph}} |
||
| − | The puzzle consists in standing in the middle of "shrines", and following the forest path revealed in one of the shrine's entrances. The player has to do it twice: first, to find the exit of the first area, and again to find the gate to Giruvegan. Once Gate Gigas is located, it needs a gigas to open it; [[Summon (command)#Final Fantasy XII|summoning]] [[Belias#Final Fantasy XII|Belias]] opens the way. |
||
| + | The puzzle consists of following a set path through and between "shrines". The shrines are in the shape of a [[Wikipedia:Gazebo|Gazebo]], with six thin pillars supporting a hexagonal roof, effectively making six "doorways". In the middle, the player can examine a "Feywood Glyph" to receive the "truth and illusion" message. An "illusion" of a forest path can be seen through one of the gaps, and the player must exit the shrine on that side to find the "true way", and keep going in that same direction to find the next shrine and its illusory pathway. The player has to do this whole process twice: first, to find the exit of the first area, and again to find the gate to Giruvegan. Once Gate Gigas is located, it needs a gigas to open it; [[Summon (command)#Final Fantasy XII|summoning]] [[Belias (Final Fantasy XII)|Belias]] opens the way. |
||
| + | ===Spawning the mandragoras=== |
||
| − | ===Hunts=== |
||
| + | [[Mandragora Prince (Final Fantasy XII)|Mandragora Prince]], [[Alraune King]], [[Onion Queen]], [[Pumpkin Star]] and [[Topstalk]] spawn in the Feywood (they were originally fought in the [[Sochen Cave Palace]]). Repeatedly killing them in the Feywood is needed to reveal all pages of their [[Bestiary (Final Fantasy XII)|bestiary]] entry. |
||
| − | {{See Also|Hunt (Final Fantasy XII)}} |
||
| + | |||
| + | To [[Spawning enemies|spawn]] the mandragoras in the Feywood, the player must clear out all 29 enemies in the Ice Field of Clearsight area, zone to the White Magick's Embrace area and then return. To respawn them after they have been defeated, the player must zone to the Redolent Glade area and then back to Ice Field of Clearsight without leaving the Feywood. All five of the mandragora-type enemies will have reappeared, and the player can [[Chain (term)#Final Fantasy XII|chain]] them to get better chance of their [[Item drop#Final Fantasy XII|rare drops]]. |
||
| + | |||
| + | They run away to the shrines. They boost their level when they spend too much time away from the party, potentially reaching the max of 99, making them potentially highly dangerous. |
||
| + | |||
| + | === Hunts === |
||
| + | {{See|Hunt (Final Fantasy XII)}} |
||
The [[Wild Malboro]] is a Rank VI Mark whose hunt becomes available after the events in Giruvegan. It can be found in the Redolent Glade area, the place where [[Rafflesia (Final Fantasy XII)|Rafflesia]] was fought. Wild Malboro is flanked with a few [[Malboro (Final Fantasy XII)|Malboros]], and both monsters will inflict a plethora of status ailments. The hunt is petitioned by Rena in [[Eruyt Village]]. |
The [[Wild Malboro]] is a Rank VI Mark whose hunt becomes available after the events in Giruvegan. It can be found in the Redolent Glade area, the place where [[Rafflesia (Final Fantasy XII)|Rafflesia]] was fought. Wild Malboro is flanked with a few [[Malboro (Final Fantasy XII)|Malboros]], and both monsters will inflict a plethora of status ailments. The hunt is petitioned by Rena in [[Eruyt Village]]. |
||
| − | The [[Behemoth King (Final Fantasy XII)|Behemoth King]] is an Elite Mark whose hunt becomes available after the marks up to [[Fafnir (Final Fantasy XII)|Fafnir]] have been vanquished. Behemoth King can be found in the Edge of Reason area of the Feywood and is petitioned by Koqmihn in [[Rabanastre]]'s Lowtown. This mark can be tedious to spawn, since all of the monsters in Ice Field of Clearsight, and the Giruveganus in Edge of Reason, must be cleared, including respawn(ed) enemies. The quickest way of doing this is by killing the Giruveganus enemy in the Edge of Reason section first, then returning and killing the 29 enemies in the Ice Field of Clearsight and Behemoth King will spawn in place of the Giruveganus. The player does not need to kill any other enemies in Edge of Reason apart from Giruveganus, or spawn the Mandragoras, to fight Behemoth King. |
+ | The [[Behemoth King (Final Fantasy XII)|Behemoth King]] is an Elite Mark whose hunt becomes available after the marks up to [[Fafnir (Final Fantasy XII)|Fafnir]] have been vanquished. Behemoth King can be found in the Edge of Reason area of the Feywood and is petitioned by Koqmihn in [[Rabanastre]]'s [[Lowtown]]. This mark can be tedious to spawn, since all of the monsters in Ice Field of Clearsight, and the Giruveganus in Edge of Reason, must be cleared, including respawn(ed) enemies. The quickest way of doing this is by killing the Giruveganus enemy in the Edge of Reason section first, then returning and killing the 29 enemies in the Ice Field of Clearsight and Behemoth King will spawn in place of the Giruveganus. The player does not need to kill any other enemies in Edge of Reason apart from Giruveganus, or spawn the Mandragoras, to fight Behemoth King. |
| − | ===Rare Game=== |
+ | === Rare Game === |
| − | {{See |
+ | {{See|Rare Game}} |
To find the [[Dreadguard (Final Fantasy XII)|Dreadguard]] the player must have spoken to the "Huntmaster" in [[Phon Coast]] and defeated [[Thalassinon (Final Fantasy XII)|Thalassinon]], which will trigger the start of the Rare Game quest. Dreadguard then has a 40% chance of spawning in the Walk Of Dancing Shadow per entry. When it [[Spawning enemies|spawns]], it replaces a regular [[Mirrorknight (Final Fantasy XII)|Mirrorknight]]. If the Dreadguard doesn't spawn, the player must walk away two screens and return, to respawn the enemies. |
To find the [[Dreadguard (Final Fantasy XII)|Dreadguard]] the player must have spoken to the "Huntmaster" in [[Phon Coast]] and defeated [[Thalassinon (Final Fantasy XII)|Thalassinon]], which will trigger the start of the Rare Game quest. Dreadguard then has a 40% chance of spawning in the Walk Of Dancing Shadow per entry. When it [[Spawning enemies|spawns]], it replaces a regular [[Mirrorknight (Final Fantasy XII)|Mirrorknight]]. If the Dreadguard doesn't spawn, the player must walk away two screens and return, to respawn the enemies. |
||
| Line 1,449: | Line 1,491: | ||
[[Juggernaut (Final Fantasy XII)|Juggernaut]] spawns in the White Magick's Embrace area along the trees when the game clock's minute shows a number between 0 to 10. |
[[Juggernaut (Final Fantasy XII)|Juggernaut]] spawns in the White Magick's Embrace area along the trees when the game clock's minute shows a number between 0 to 10. |
||
| − | ==Enemies== |
+ | == Enemies == |
[[File:Rafflesiaf.png|thumb|right|200px|Rafflesia appears.]] |
[[File:Rafflesiaf.png|thumb|right|200px|Rafflesia appears.]] |
||
| − | *[[Cerberus (Final Fantasy XII)|Cerberus]] |
+ | * [[Cerberus (Final Fantasy XII)|Cerberus]] |
| − | *[[Deadly Nightshade (Final Fantasy XII)|Deadly Nightshade]] |
+ | * [[Deadly Nightshade (Final Fantasy XII)|Deadly Nightshade]] |
| − | *[[Golem (Final Fantasy XII)|Golem]] |
+ | * [[Golem (Final Fantasy XII)|Golem]] |
| − | *[[Mirrorknight (Final Fantasy XII)|Mirrorknight]] |
+ | * [[Mirrorknight (Final Fantasy XII)|Mirrorknight]] |
| − | *[[Tartarus]] |
+ | * [[Tartarus]] |
| − | *[[Mu (Final Fantasy XII)|Mu]] |
+ | * [[Mu (Final Fantasy XII)|Mu]] |
| − | *[[Basilisk (Final Fantasy XII)|Basilisk]] |
+ | * [[Basilisk (Final Fantasy XII)|Basilisk]] |
| − | *[[Behemoth (Final Fantasy XII)|Behemoth]] |
+ | * [[Behemoth (Final Fantasy XII)|Behemoth]] |
| − | *[[Preying Mantis (Final Fantasy XII)|Preying Mantis]] |
+ | * [[Preying Mantis (Final Fantasy XII)|Preying Mantis]] |
| − | *[[Giruveganus]] |
+ | * [[Giruveganus]] |
| − | *[[Holy Elemental]] |
+ | * [[Holy Elemental]] |
| − | *[[Mandragora Prince (Final Fantasy XII)|Mandragora Prince]] |
+ | * [[Mandragora Prince (Final Fantasy XII)|Mandragora Prince]] |
| − | *[[Alraune King]] |
+ | * [[Alraune King]] |
| − | *[[Onion Queen]] |
+ | * [[Onion Queen]] |
| − | *[[Pumpkin Star]] |
+ | * [[Pumpkin Star]] |
| − | *[[Topstalk]] |
+ | * [[Topstalk]] |
| − | *[[Crypt Bunny]] (Rare) |
+ | * [[Crypt Bunny]] (Rare) |
| − | *[[Juggernaut (Final Fantasy XII)|Juggernaut]] (Rare) |
+ | * [[Juggernaut (Final Fantasy XII)|Juggernaut]] (Rare) |
| − | *[[Dreadguard (Final Fantasy XII)|Dreadguard]] (Rare) |
+ | * [[Dreadguard (Final Fantasy XII)|Dreadguard]] (Rare) |
| − | *[[Wild Malboro]] (Mark) |
+ | * [[Wild Malboro]] (Mark) |
| − | *[[Behemoth King (Final Fantasy XII)|Behemoth King]] (Elite Mark) |
+ | * [[Behemoth King (Final Fantasy XII)|Behemoth King]] (Elite Mark) |
| − | *[[Rafflesia (Final Fantasy XII)|Rafflesia]] (Boss) |
+ | * [[Rafflesia (Final Fantasy XII)|Rafflesia]] (Boss) |
| − | ==Musical themes== |
+ | == Musical themes == |
| − | {{ |
+ | {{audio|filename=The feywood.ogg|title="The Feywood" in ''Final Fantasy XII''}} |
The theme of Feywood is called "The Feywood". |
The theme of Feywood is called "The Feywood". |
||
| − | {{ |
+ | {{clear}} |
| + | |||
| + | == Map == |
||
| + | The map can be found in at a dead-end in northeast of the Walk of Stolen Truths. |
||
| + | |||
| + | The candle to reveal the full map can be found in White Magick's Embrace along the eastern wall. |
||
| − | ==Map== |
||
<div style="overflow:auto; width: 100%; height:300px"> |
<div style="overflow:auto; width: 100%; height:300px"> |
||
[[File:FF12 Map - Feywood.png]]</div> |
[[File:FF12 Map - Feywood.png]]</div> |
||
| + | [[:File:FF12 Map - Feywood.png|Map of the original version of ''Final Fantasy XII'' with treasure information]] |
||
| − | ==Other appearances== |
||
| + | |||
| − | ===''[[Final Fantasy Record Keeper]]''=== |
||
| + | == Other appearances == |
||
| − | {{sideicon|FFRK}} |
||
| − | + | === ''[[Final Fantasy Record Keeper]]'' === |
|
| + | {{Location section|Final Fantasy Record Keeper}} |
||
| − | ==Gallery== |
+ | == Gallery == |
| − | <gallery |
+ | <gallery> |
| + | Feywood 010 0001.jpg|Mist wall. |
||
Feywood-Glyph.jpg|Feywood Glyph. |
Feywood-Glyph.jpg|Feywood Glyph. |
||
Belias-opens-Gate-Gigas.png|Belias opens the Gate Gigas at the edge of Feywood. |
Belias-opens-Gate-Gigas.png|Belias opens the Gate Gigas at the edge of Feywood. |
||
</gallery> |
</gallery> |
||
| − | ==Etymology== |
+ | == Etymology == |
{{Etym|Fey}} |
{{Etym|Fey}} |
||
| + | {{navbox setting FFXII}} |
||
| − | ==Trivia== |
||
| + | [[Category:Locations in Final Fantasy XII]] |
||
| − | *The Feywood is similar to the [[Snowfly Forest]] in ''[[Vagrant Story]]'', also set in Ivalice. |
||
| − | |||
| − | {{FFXII}} |
||
| − | [[Category:Final Fantasy XII Locations]] |
||
[[Category:Forests]] |
[[Category:Forests]] |
||
Revision as of 02:37, 25 April 2020
Template:Sideicon
South of the vast Golmore jungle in Kerwon there lies a place known as the 'Feywood'. The Mist there is far denser than most, and even should you make it through that, there's no guarantee you'll make it past what lies beyond.
Rikken
The Feywood is a location in the land of Ivalice in Final Fantasy XII. It is an ancient forest that provides a passageway to the holy city of Giruvegan. Parts of the wood are blocked by a thick wall of Mist, until after the events in the Draklor Laboratory. The Feywood is similar to the Snowfly Forest in Vagrant Story, also directed by Yasumi Matsuno.
Sage Knowledge
An ancient wood deep in the jungles of Golmore. The combination of dense Mist and regular snow, the latter a product of the region's elevation, is enough to keep away even the viera. Many of the trees have stood for several thousands of years, and some have begun to petrify. Numerous plants once thought extinct grow here, and many rare birds and animals can be seen in their primitive forms, unchanged for millennia.
Locations
The Feywood is located just to the southwest of Golmore Jungle. This area can be visited as soon as the player obtains the Lente's Tear, but the player needs to complete the events at the Draklor Laboratory to investigate further from the Antiquity's End.
Areas within the Feywood are:
- Walk of Flitting Rifts - leads to the Golmore Jungle and the Paramina Rift.

Feywood - Walk of Dancing Shadows.
- Walk of Stolen Truths - the only place where Cerberus are found.
- Walk of Dancing Shadows - leads to the Henne Mines.
- Antiquity's End - contains a Save Crystal.
- Redolent Glade - area where Rafflesia is fought.
- White Magick's Embrace
- Ice Field of Clearsight
- The Edge of Reason - leads to the Ancient City of Giruvegan.
Weather
The weather in Feywood never changes; the areas have fixed weather:
- Cloudy (Walk of the Flitting Rifts area)
- Heavy Fog (all the other areas)
In heavy fog Water attacks deal more damage than normal. Because Feywood is of snow terrain, Ice damage is always boosted.
Treasures

Treasures in the Feywood are never gil. All the treasures before going through the wall of thick mist are either Hi-Potion/Hi-Ether or a gambit. With the Diamond Armlet equipped the regular item treasure is Knot of Rust and the rare item is Elixir. The gambits which can be found in the area include the G-Foe: char MP >= X% gambits in the Walk of Flitting Rifts and Walk of Stolen Truths areas, and G-Foe: HP >= X gambits and gambits for foes with Bravery and Faith in Walk of Dancing Shadow area.
After the wall of thick mist has dissolved, the player can enter deeper into the Feywood. In the White Magicks Embrace there is a treasure in the southeastern corner that may be an Elixir even without the Diamond Armlet, and the treasure also respawns, but its spawn rate is only 30%.

Ensanguined Shield found.
In Ice Field of Clearsight all the treasures are along the edges and some may contain equipment. The treasures that contain equipment have low spawn rates, only 30%. When going straight east from the northern exit the treasure that spawns there may have the Morning Star. The treasure that spawns straight to west from the northern exit can be the Doom Mace. The treasure that spawns in the very middle of the southern border can be the Celebrant's Miter.
In the Edge of Reason there is a group of three treasures that spawn in the middle of the area, a bit northeast from the exit to Giruvegan. One of them only has 25% chance to spawn and will always have the Ensanguined Shield, with or without the Diamond Armlet. Once claimed, this treasure will not respawn. Of the other treasures one has an X-Potion and the last one can have either a Hi-Potion or Deathbringer.
In the Zodiac versions, near the Save Crystal, there is a treasure with an Embroidered Tippet.
Walk of Flitting Rifts
- Zodiac
| Chest | Spawns | Holds Gil% | Gil | Normal Treasure | Diamond Armlet Treasure | ||
|---|---|---|---|---|---|---|---|
| 1 | 65% | 50% | ≤ 250 gil | Item 1 | Item 2 | Common | Rare |
| Ether | Bacchus's Wine | Knot of Rust | Meteorite (A) | ||||
| 2 | 65% | 50% | ≤ 250 gil | Item 1 | Item 2 | Common | Rare |
| Rime Fang | Handkerchief | Knot of Rust | Meteorite (B) | ||||
| 3 | 65% | 50% | ≤ 250 gil | Item 1 | Item 2 | Common | Rare |
| Rime Fang | Gold Needle | Knot of Rust | Meteorite (A) | ||||
| 4 | 65% | 50% | ≤ 250 gil | Item 1 | Item 2 | Common | Rare |
| Ether | Prince's Kiss | Knot of Rust | Meteorite (A) | ||||
| 5 | 65% | 50% | ≤ 250 gil | Item 1 | Item 2 | Common | Rare |
| Soleil Fang | Antidote | Knot of Rust | Meteorite (A) | ||||
| 6 | 65% | 50% | ≤ 250 gil | Item 1 | Item 2 | Common | Rare |
| Ether | Hi-Ether | Knot of Rust | Meteorite (A) | ||||
| 7 | 65% | 50% | ≤ 250 gil | Item 1 | Item 2 | Common | Rare |
| Ether | Hi-Ether | Knot of Rust | Meteorite (A) | ||||
| 8 | 65% | 50% | ≤ 250 gil | Item 1 | Item 2 | Common | Rare |
| Ether | Remedy | Knot of Rust | Meteorite (A) | ||||
| 9 | 60% | 50% | ≤ 300 gil | Item 1 | Item 2 | Common | Rare |
| Ether | Eye Drops | Knot of Rust | Meteorite (B) | ||||
| 10 | 65% | 50% | ≤ 250 gil | Item 1 | Item 2 | Common | Rare |
| Lightning Fang | Phoenix Down | Knot of Rust | Meteorite (C) | ||||
| 11 | 60% | 50% | ≤ 300 gil | Item 1 | Item 2 | Common | Rare |
| Lightning Fang | Echo Herbs | Knot of Rust | Meteorite (A) | ||||
- Original
| Chest | Spawns | Holds Gil% | Normal Treasure | Diamond Armlet Treasure | ||
|---|---|---|---|---|---|---|
| 1 | 45% | 0% | Item 1 | Item 2 | Common | Rare |
| Hi-Potion | G-Foe: chr MP >= 90% | Knot of Rust | Elixir | |||
| 2 | 45% | 0% | Item 1 | Item 2 | Common | Rare |
| Hi-Potion | G-Foe: chr MP >= 70% | Knot of Rust | Elixir | |||
| 3 | 45% | 0% | Item 1 | Item 2 | Common | Rare |
| Hi-Potion | G-Foe: chr MP >= 50% | Knot of Rust | Elixir | |||
| 4 | 45% | 0% | Item 1 | Item 2 | Common | Rare |
| Hi-Potion | G-Foe: chr MP >= 30% | Knot of Rust | Elixir | |||
| 5 | 45% | 0% | Item 1 | Item 2 | Common | Rare |
| Hi-Potion | G-Foe: chr MP >= 10% | Knot of Rust | Elixir | |||
Walk of Stolen Truths
- Zodiac
| Chest | Spawns | Holds Gil% | Gil | Normal Treasure | Diamond Armlet Treasure | ||
|---|---|---|---|---|---|---|---|
| 12 | 75% | 50% | ≤ 300 gil | Item 1 | Item 2 | Common | Rare |
| Ether | Prince's Kiss | Knot of Rust | Meteorite (B) | ||||
| 13 | 75% | 50% | ≤ 300 gil | Item 1 | Item 2 | Common | Rare |
| Ether | Serum | Knot of Rust | Meteorite (A) | ||||
| 14 | 75% | 50% | ≤ 300 gil | Item 1 | Item 2 | Common | Rare |
| Ether | Serum | Knot of Rust | Meteorite (A) | ||||
| 15 | 75% | 50% | ≤ 300 gil | Item 1 | Item 2 | Common | Rare |
| Ether | Chronos Tear | Knot of Rust | Meteorite (A) | ||||
| 16 | 75% | 50% | ≤ 300 gil | Item 1 | Item 2 | Common | Rare |
| Rime Fang | Hi-Ether | Knot of Rust | Meteorite (A) | ||||
| 17 | 75% | 50% | ≤ 300 gil | Item 1 | Item 2 | Common | Rare |
| Ether | Nu Khai Sand | Knot of Rust | Meteorite (A) | ||||
| 18 | 75% | 50% | ≤ 300 gil | Item 1 | Item 2 | Common | Rare |
| Ether | Handkerchief | Knot of Rust | Meteorite (A) | ||||
| 19 | 75% | 50% | ≤ 300 gil | Item 1 | Item 2 | Common | Rare |
| Ether | Serum | Knot of Rust | Meteorite (A) | ||||
| 20 | 75% | 50% | ≤ 300 gil | Item 1 | Item 2 | Common | Rare |
| Soleil Fang | Phoenix Down | Knot of Rust | Meteorite (B) | ||||
| 21 | 75% | 50% | ≤ 300 gil | Item 1 | Item 2 | Common | Rare |
| Soleil Fang | Serum | Knot of Rust | Meteorite (A) | ||||
- Original
| Chest | Spawns | Holds Gil% | Normal Treasure | Diamond Armlet Treasure | ||
|---|---|---|---|---|---|---|
| 6 | 45% | 0% | Item 1 | Item 2 | Common | Rare |
| Hi-Potion | G-Foe: chr MP >= 90% | Knot of Rust | Elixir | |||
| 7 | 45% | 0% | Item 1 | Item 2 | Common | Rare |
| Hi-Ether | G-Foe: chr MP >= 70% | Knot of Rust | Elixir | |||
| 8 | 45% | 0% | Item 1 | Item 2 | Common | Rare |
| Hi-Ether | G-Foe: chr MP >= 50% | Knot of Rust | Elixir | |||
| 9 | 45% | 0% | Item 1 | Item 2 | Common | Rare |
| Hi-Ether | G-Foe: chr MP >= 30% | Knot of Rust | Elixir | |||
| 10 | 45% | 0% | Item 1 | Item 2 | Common | Rare |
| Hi-Potion | G-Foe: chr MP >= 10% | Knot of Rust | Elixir | |||
Walk of Dancing Shadow
- Zodiac
| Chest | Spawns | Holds Gil% | Gil | Normal Treasure | Diamond Armlet Treasure | ||
|---|---|---|---|---|---|---|---|
| 22 | 75% | 50% | ≤ 300 gil | Item 1 | Item 2 | Common | Rare |
| Rime Fang | Nu Khai Sand | Knot of Rust | Meteorite (B) | ||||
| 23 | 75% | 50% | ≤ 300 gil | Item 1 | Item 2 | Common | Rare |
| Ether | Bacchus's Fang | Knot of Rust | Meteorite (A) | ||||
| 24 | 75% | 50% | ≤ 300 gil | Item 1 | Item 2 | Common | Rare |
| Ether | Gold Needle | Knot of Rust | Meteorite (A) | ||||
| 25 | 75% | 50% | ≤ 300 gil | Item 1 | Item 2 | Common | Rare |
| Lightning Fang | Hi-Ether | Knot of Rust | Meteorite (A) | ||||
| 26 | 75% | 50% | ≤ 300 gil | Item 1 | Item 2 | Common | Rare |
| Rime Fang | Chronos Tear | Knot of Rust | Meteorite (B) | ||||
| 27 | 75% | 50% | ≤ 300 gil | Item 1 | Item 2 | Common | Rare |
| Ether | Hi-Potion | Knot of Rust | Meteorite (C) | ||||
| 28 | 75% | 50% | ≤ 300 gil | Item 1 | Item 2 | Common | Rare |
| Ether | Remedy | Knot of Rust | Meteorite (A) | ||||
| 29 | 75% | 50% | ≤ 300 gil | Item 1 | Item 2 | Common | Rare |
| Ether | Chronos Tear | Knot of Rust | Meteorite (A) | ||||
| 30 | 75% | 50% | ≤ 300 gil | Item 1 | Item 2 | Common | Rare |
| Rime Fang | Phoenix Down | Knot of Rust | Meteorite (A) | ||||
| 31 | 75% | 50% | ≤ 300 gil | Item 1 | Item 2 | Common | Rare |
| Ether | Gold Needle | Knot of Rust | Meteorite (A) | ||||
| 32 | 75% | 50% | ≤ 300 gil | Item 1 | Item 2 | Common | Rare |
| Ether | Chronos Tear | Knot of Rust | Meteorite (A) | ||||
- Original
| Chest | Spawns | Holds Gil% | Normal Treasure | Diamond Armlet Treasure | ||
|---|---|---|---|---|---|---|
| 11 | 40% | 0% | Item 1 | Item 2 | Common | Rare |
| Hi-Ether | G-Foe:chr status = FAI | Knot of Rust | Elixir | |||
| 12 | 45% | 0% | Item 1 | Item 2 | Common | Rare |
| Hi-Potion | G-Foe: HP < 10000 | Knot of Rust | Elixir | |||
| 13 | 50% | 0% | Item 1 | Item 2 | Common | Rare |
| Hi-Potion | G-Foe: HP < 5000 | Knot of Rust | Elixir | |||
| 14 | 45% | 0% | Item 1 | Item 2 | Common | Rare |
| Hi-Ether | G-Foe: HP >= 10000 | Knot of Rust | Elixir | |||
| 15 | 50% | 0% | Item 1 | Item 2 | Common | Rare |
| Hi-Ether | G-Foe: HP >= 5000 | Knot of Rust | Elixir | |||
| 16 | 40% | 0% | Item 1 | Item 2 | Common | Rare |
| Hi-Potion | G-Foe:chr status = BRA | Knot of Rust | Elixir | |||
Antiquity's End
ThIs chest only appears in the Zodiac versions. It does not respawn.
| Chest | Spawns | Holds Gil% | Gil | Normal Treasure | Diamond Armlet Treasure | ||
|---|---|---|---|---|---|---|---|
| 33 | 25% | 0% | N/A | Embroidered Tippet | |||
Redolent Glade
These chests only appear in the Zodiac versions. They do not respawn.
| Chest | Spawns | Holds Gil% | Gil | Normal Treasure | Diamond Armlet Treasure | ||
|---|---|---|---|---|---|---|---|
| 34[1] | 100% | 0% | N/A | Domaine Calvados | |||
| 35[1] | 100% | 0% | N/A | X-Potion | |||
- 1 - Chest does not respawn.
White Magick's Embrace
- Zodiac
| Chest | Spawns | Holds Gil% | Gil | Normal Treasure | Diamond Armlet Treasure | ||
|---|---|---|---|---|---|---|---|
| 36 | 75% | 50% | ≤ 300 gil | Item 1 | Item 2 | Common | Rare |
| Ether | Chronos Tear | Knot of Rust | Meteorite (B) | ||||
| 37 | 75% | 50% | ≤ 300 gil | Item 1 | Item 2 | Common | Rare |
| Ether | Hi-Potion | Knot of Rust | Meteorite (A) | ||||
| 38 | 75% | 50% | ≤ 300 gil | Item 1 | Item 2 | Common | Rare |
| Ether | Hi-Potion | Knot of Rust | Meteorite (A) | ||||
| 39[1] | 100% | 0% | N/A | Dispelga | |||
| 40 | 75% | 50% | ≤ 300 gil | Item 1 | Item 2 | Common | Rare |
| Rime Fang | Hi-Potion | Knot of Rust | Meteorite (C) | ||||
| 41 | 75% | 50% | ≤ 300 gil | Item 1 | Item 2 | Common | Rare |
| Ether | Phoenix Down | Knot of Rust | Meteorite (A) | ||||
| 42 | 75% | 50% | ≤ 300 gil | Item 1 | Item 2 | Common | Rare |
| Rime Fang | Hi-Ether | Knot of Rust | Meteorite (A) | ||||
| 43[1] | 100% | 0% | N/A | Golden Amulet | |||
| 44 | 75% | 50% | ≤ 300 gil | Item 1 | Item 2 | Common | Rare |
| Ether | Hi-Potion | Knot of Rust | Meteorite (A) | ||||
- 1 - Chest does not respawn.
- Original
| Chest | Spawns | Holds Gil% | Normal Treasure | Diamond Armlet Treasure | ||
|---|---|---|---|---|---|---|
| 17 | 60% | 0% | Hi-Potion | Common | Rare | |
| Knot of Rust | Elixir | |||||
| 18 | 30% | 0% | Item 1 | Item 2 | Common | Rare |
| Hi-Potion | Elixir | Knot of Rust | Elixir | |||
Ice Field of Clearsight
- Zodiac
| Chest | Spawns | Holds Gil% | Gil | Normal Treasure | Diamond Armlet Treasure | ||
|---|---|---|---|---|---|---|---|
| 45 | 75% | 50% | ≤ 300 gil | Item 1 | Item 2 | Common | Rare |
| Ether | Giant's Helmet | Knot of Rust | Meteorite (A) | ||||
| 46 | 75% | 50% | ≤ 300 gil | Item 1 | Item 2 | Common | Rare |
| Ether | Carabineer Mail | Knot of Rust | Meteorite (A) | ||||
| 47 | 75% | 50% | ≤ 300 gil | Item 1 | Item 2 | Common | Rare |
| Ether | Chakra Band | Knot of Rust | Meteorite (A) | ||||
| 48 | 75% | 50% | ≤ 300 gil | Item 1 | Item 2 | Common | Rare |
| Rime Fang | Remedy | Knot of Rust | Meteorite (A) | ||||
| 49[1] | 100% | 0% | N/A | Bubble Belt | |||
| 50 | 75% | 50% | ≤ 300 gil | Item 1 | Item 2 | Common | Rare |
| Soleil Fang | Jade Gown | Knot of Rust | Meteorite (A) | ||||
| 51 | 75% | 50% | ≤ 300 gil | Item 1 | Item 2 | Common | Rare |
| Soleil Fang | Hypnocrown | Knot of Rust | Meteorite (B) | ||||
| 52 | 75% | 50% | ≤ 300 gil | Item 1 | Item 2 | Common | Rare |
| Rime Fang | Hi-Ether | Knot of Rust | Meteorite (A) | ||||
| 53 | 75% | 50% | ≤ 300 gil | Item 1 | Item 2 | Common | Rare |
| Ether | Power Vest | Knot of Rust | Meteorite (A) | ||||
| 54 | 75% | 50% | ≤ 300 gil | Item 1 | Item 2 | Common | Rare |
| Rime Fang | Serum | Knot of Rust | Meteorite (C) | ||||
| 55 | 75% | 50% | ≤ 300 gil | Item 1 | Item 2 | Common | Rare |
| Ether | Kaiser Shield | Knot of Rust | Meteorite (B) | ||||
| 56 | 75% | 50% | ≤ 300 gil | Item 1 | Item 2 | Common | Rare |
| Ether | Power Armlet | Knot of Rust | Meteorite (A) | ||||
- 1 - Chest does not respawn.
- Original
| Chest | Spawns | Holds Gil% | Normal Treasure | Diamond Armlet Treasure | ||
|---|---|---|---|---|---|---|
| 19 | 30% | 0% | Item 1 | Item 2 | Common | Rare |
| Hi-Potion | Morning Star | Knot of Rust | Elixir | |||
| 20 | 45% | 0% | Item 1 | Item 2 | Common | Rare |
| Hi-Potion | Hi-Ether | Knot of Rust | Elixir | |||
| 21 | 30% | 0% | Item 1 | Item 2 | Common | Rare |
| Hi-Potion | Celebrant's Miter | Knot of Rust | Elixir | |||
| 22 | 30% | 0% | Item 1 | Item 2 | Common | Rare |
| Hi-Potion | Doom Mace | Knot of Rust | Elixir | |||
| 23 | 45% | 0% | Hi-Potion | Common | Rare | |
| Knot of Rust | Elixir | |||||
| 24 | 45% | 0% | Hi-Potion | Common | Rare | |
| Knot of Rust | Elixir | |||||
| 25 | 45% | 0% | Item 1 | Item 2 | Common | Rare |
| Hi-Potion | Hi-Ether | Knot of Rust | Elixir | |||
The Edge of Reason
- Zodiac
| Chest | Spawns | Holds Gil% | Gil | Normal Treasure | Diamond Armlet Treasure | ||
|---|---|---|---|---|---|---|---|
| 57 | 75% | 50% | ≤ 300 gil | Item 1 | Item 2 | Common | Rare |
| Ether | Platinum Dagger | Knot of Rust | Meteorite (A) | ||||
| 58[1] | 100% | 0% | N/A | Defender | |||
| 59 | 75% | 50% | ≤ 300 gil | Item 1 | Item 2 | Common | Rare |
| Ether | Trident | Knot of Rust | Meteorite (A) | ||||
| 60 | 5% | 50% | ≤ 200 gil | Item 1 | Item 2 | Common | Rare |
| Lightning Fang | Ether | Knot of Rust | Baltoro's Seed | ||||
| 61 | 75% | 70% | ≤ 300 gil | Item 1 | Item 2 | Common | Rare |
| Ether | Spica | Knot of Rust | Meteorite (A) | ||||
| 62 | 75% | 70% | ≤ 300 gil | Item 1 | Item 2 | Common | Rare |
| Ether | Morning Star | Knot of Rust | Meteorite (C) | ||||
| 63[1] | 100% | 0% | N/A | Reflectga | |||
| 64 | 75% | 50% | ≤ 300 gil | Item 1 | Item 2 | Common | Rare |
| Soleil Fang | Deathbringer | Knot of Rust | Meteorite (B) | ||||
| 65 | 75% | 50% | ≤ 300 gil | Item 1 | Item 2 | Common | Rare |
| Ether | Ivory Pole | Knot of Rust | Meteorite (A) | ||||
| 66 | 75% | 50% | ≤ 300 gil | Item 1 | Item 2 | Common | Rare |
| Lightning Fang | Traitor's Bow | Knot of Rust | Meteorite (A) | ||||
| 67 | 75% | 40% | ≤ 300 gil | Item 1 | Item 2 | Common | Rare |
| Remedy | Serum | Knot of Rust | Meteorite (B) | ||||
- 1 - Chest does not respawn.
- Original
| Chest | Spawns | Holds Gil% | Normal Treasure | Diamond Armlet Treasure | ||
|---|---|---|---|---|---|---|
| 26 | 30% | 0% | Item 1 | Item 2 | Common | Rare |
| Hi-Potion | Deathbringer | Knot of Rust | Elixir | |||
| 27 | 45% | 0% | X-Potion | Common | Rare | |
| Knot of Rust | Elixir | |||||
| 28[1] | 25% | 0% | Ensanguined Shield | |||
Story
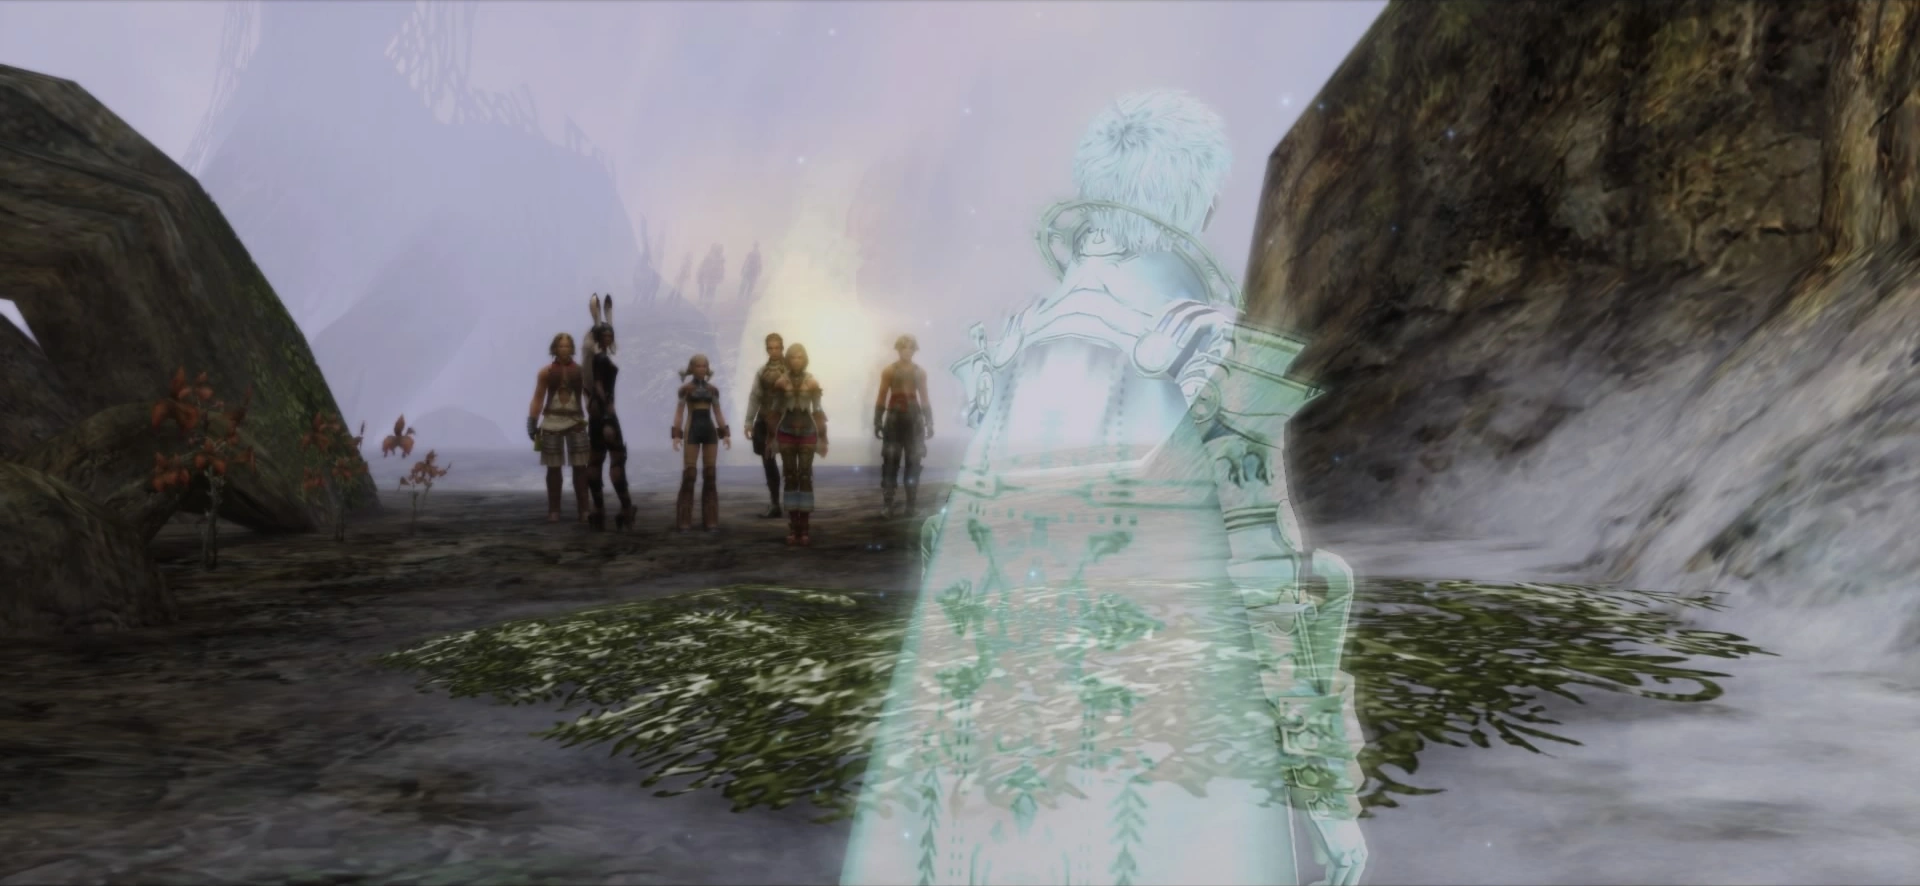
An apparition of Rasler clears the path.
After the events at the Draklor Laboratory, the party follows Dr. Cid to the ancient city of Giruvegan, but must go through the Feywood first. They are blocked by a wall of thick Mist, but Rasler's ghost unlocks the way. A carnivorous plant, Rafflesia, fights the party and after it is defeated, the party are blocked by an illusion puzzle. The party completes the puzzle and summons Belias to unlock the gate to Giruvegan.
Later, the Wild Malboro from the 'A Wild Stench' Hunt can be found where the Rafflesia was defeated.
Quests
Opening the way to Giruvegan
In this sanctum shall the pilgrim find truth and illusion both. Illusion betokens the true way.
Feywood Glyph
The puzzle consists of following a set path through and between "shrines". The shrines are in the shape of a Gazebo, with six thin pillars supporting a hexagonal roof, effectively making six "doorways". In the middle, the player can examine a "Feywood Glyph" to receive the "truth and illusion" message. An "illusion" of a forest path can be seen through one of the gaps, and the player must exit the shrine on that side to find the "true way", and keep going in that same direction to find the next shrine and its illusory pathway. The player has to do this whole process twice: first, to find the exit of the first area, and again to find the gate to Giruvegan. Once Gate Gigas is located, it needs a gigas to open it; summoning Belias opens the way.
Spawning the mandragoras
Mandragora Prince, Alraune King, Onion Queen, Pumpkin Star and Topstalk spawn in the Feywood (they were originally fought in the Sochen Cave Palace). Repeatedly killing them in the Feywood is needed to reveal all pages of their bestiary entry.
To spawn the mandragoras in the Feywood, the player must clear out all 29 enemies in the Ice Field of Clearsight area, zone to the White Magick's Embrace area and then return. To respawn them after they have been defeated, the player must zone to the Redolent Glade area and then back to Ice Field of Clearsight without leaving the Feywood. All five of the mandragora-type enemies will have reappeared, and the player can chain them to get better chance of their rare drops.
They run away to the shrines. They boost their level when they spend too much time away from the party, potentially reaching the max of 99, making them potentially highly dangerous.
Hunts
The Wild Malboro is a Rank VI Mark whose hunt becomes available after the events in Giruvegan. It can be found in the Redolent Glade area, the place where Rafflesia was fought. Wild Malboro is flanked with a few Malboros, and both monsters will inflict a plethora of status ailments. The hunt is petitioned by Rena in Eruyt Village.
The Behemoth King is an Elite Mark whose hunt becomes available after the marks up to Fafnir have been vanquished. Behemoth King can be found in the Edge of Reason area of the Feywood and is petitioned by Koqmihn in Rabanastre's Lowtown. This mark can be tedious to spawn, since all of the monsters in Ice Field of Clearsight, and the Giruveganus in Edge of Reason, must be cleared, including respawn(ed) enemies. The quickest way of doing this is by killing the Giruveganus enemy in the Edge of Reason section first, then returning and killing the 29 enemies in the Ice Field of Clearsight and Behemoth King will spawn in place of the Giruveganus. The player does not need to kill any other enemies in Edge of Reason apart from Giruveganus, or spawn the Mandragoras, to fight Behemoth King.
Rare Game
To find the Dreadguard the player must have spoken to the "Huntmaster" in Phon Coast and defeated Thalassinon, which will trigger the start of the Rare Game quest. Dreadguard then has a 40% chance of spawning in the Walk Of Dancing Shadow per entry. When it spawns, it replaces a regular Mirrorknight. If the Dreadguard doesn't spawn, the player must walk away two screens and return, to respawn the enemies.
To spawn the Crypt Bunny, the player must kill at least six Cerberus and all the Tartarus in the Walk of Stolen Truths area. The Crypt Bunny then has a 20% chance of spawning at the eastern side. The Wolf genus enemies respawn at a faster rate than usual and when they stop respawning, the Crypt Bunny appears. There appear to be multiple potential spawn points. Two confirmed locations are by the Southern Golem in the icy gorge-like area, and on the northernmost path.
Juggernaut spawns in the White Magick's Embrace area along the trees when the game clock's minute shows a number between 0 to 10.
Enemies

Rafflesia appears.
- Cerberus
- Deadly Nightshade
- Golem
- Mirrorknight
- Tartarus
- Mu
- Basilisk
- Behemoth
- Preying Mantis
- Giruveganus
- Holy Elemental
- Mandragora Prince
- Alraune King
- Onion Queen
- Pumpkin Star
- Topstalk
- Crypt Bunny (Rare)
- Juggernaut (Rare)
- Dreadguard (Rare)
- Wild Malboro (Mark)
- Behemoth King (Elite Mark)
- Rafflesia (Boss)
Musical themes
The theme of Feywood is called "The Feywood".
Map
The map can be found in at a dead-end in northeast of the Walk of Stolen Truths.
The candle to reveal the full map can be found in White Magick's Embrace along the eastern wall.

Map of the original version of Final Fantasy XII with treasure information
Other appearances
Final Fantasy Record Keeper
Gallery
")
")
")
Etymology
Fey comes from Middle English meaning "doomed, or fated to die". It is also an alternate word for "fairy".