Intangir Bot (talk | contribs) m (Bot: Automated text replacement (-[[Leshy (Final Fantasy IV) +[[Leshy (Final Fantasy IV 2D))) |
Intangir Bot (talk | contribs) m (Bot: Changing template: Locat-stub) |
||
| (22 intermediate revisions by 4 users not shown) | |||
| Line 25: | Line 25: | ||
{{spoiler}} |
{{spoiler}} |
||
=== ''[[Final Fantasy IV]]'' === |
=== ''[[Final Fantasy IV]]'' === |
||
| − | |||
[[File:FF4 PSP Fabul Castle.png|right]] |
[[File:FF4 PSP Fabul Castle.png|right]] |
||
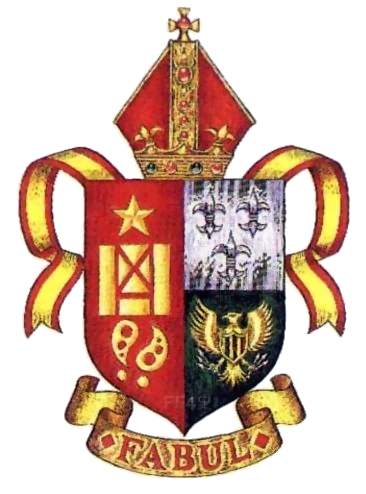
[[File:Fabulcoat.png|right|100px|Crest of Fabul.]] |
[[File:Fabulcoat.png|right|100px|Crest of Fabul.]] |
||
[[File:FabulSFCManual.PNG|thumb|left|An aerial view of Fabul as seen in the Super Famicom manual.]] |
[[File:FabulSFCManual.PNG|thumb|left|An aerial view of Fabul as seen in the Super Famicom manual.]] |
||
| − | {{See |
+ | {{See|First Battle of Fabul}} |
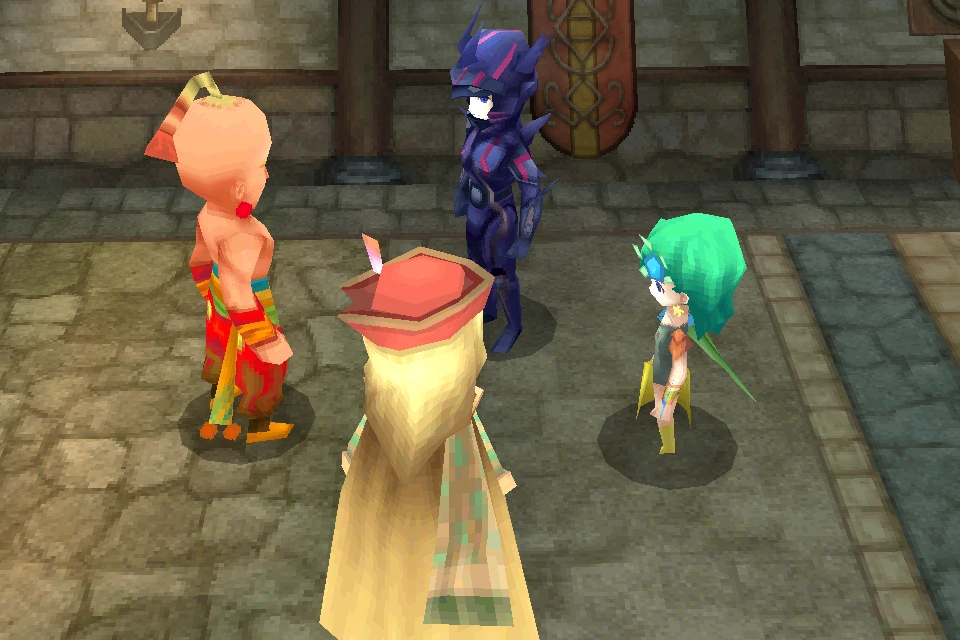
[[Cecil Harvey]], [[Rosa Joanna Farrell]], [[Edward Chris von Muir]] and [[Rydia]] arrive at the castle with Yang, warning the king that [[Baron (Final Fantasy IV)|Baron]] is seeking Fabul's Wind Crystal. The king does not believe them, as he does not trust the [[Dark Knight]] Cecil. Yang and Edward convince the king Cecil is trustworthy, and the party helps Yang defend the castle against Baron. |
[[Cecil Harvey]], [[Rosa Joanna Farrell]], [[Edward Chris von Muir]] and [[Rydia]] arrive at the castle with Yang, warning the king that [[Baron (Final Fantasy IV)|Baron]] is seeking Fabul's Wind Crystal. The king does not believe them, as he does not trust the [[Dark Knight]] Cecil. Yang and Edward convince the king Cecil is trustworthy, and the party helps Yang defend the castle against Baron. |
||
| Line 39: | Line 38: | ||
=== ''[[Final Fantasy IV -Interlude-]]'' === |
=== ''[[Final Fantasy IV -Interlude-]]'' === |
||
| − | |||
While Yang and others are away at [[Damcyan]] celebrating its reconstruction, Sheila goes into labor. A pair of [[Monk (The After Years)|monks]] cross [[Mt. Hobs]] to inform Yang, and he returns to Fabul with Cecil and Rosa. Sheila gives birth to a baby girl, and Yang asks Cecil to be her godfather and name her. Cecil names the baby [[Ursula]]. |
While Yang and others are away at [[Damcyan]] celebrating its reconstruction, Sheila goes into labor. A pair of [[Monk (The After Years)|monks]] cross [[Mt. Hobs]] to inform Yang, and he returns to Fabul with Cecil and Rosa. Sheila gives birth to a baby girl, and Yang asks Cecil to be her godfather and name her. Cecil names the baby [[Ursula]]. |
||
=== ''[[Final Fantasy IV: The After Years]]'' === |
=== ''[[Final Fantasy IV: The After Years]]'' === |
||
| ⚫ | |||
| − | |||
| ⚫ | |||
{{Main|Second Battle of Fabul}} |
{{Main|Second Battle of Fabul}} |
||
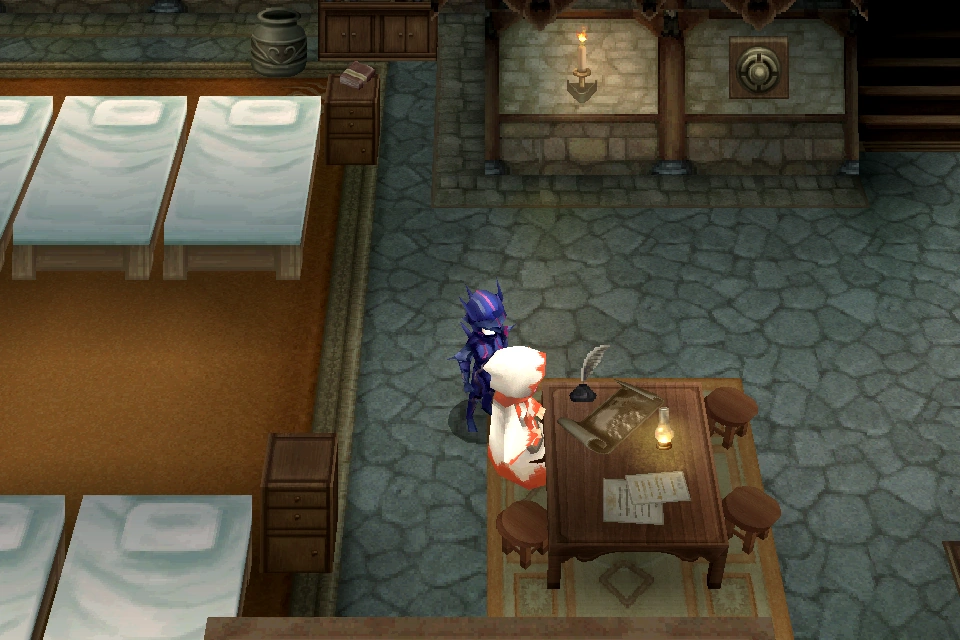
During Yang's tale, Yang is training with three [[Monk (The After Years)|Monks]] but refuses to train Ursula, believing her status as a princess makes her unfit for combat. While Yang speaks to Fabul's chancellor about Baron and rumors they are again seeking the Crystals, Ursula flees the castle and heads to Mt. Hobs to inspect the [[Impact Crater|impact crater]] of a shooting star she saw fall to the west of the mountains. |
During Yang's tale, Yang is training with three [[Monk (The After Years)|Monks]] but refuses to train Ursula, believing her status as a princess makes her unfit for combat. While Yang speaks to Fabul's chancellor about Baron and rumors they are again seeking the Crystals, Ursula flees the castle and heads to Mt. Hobs to inspect the [[Impact Crater|impact crater]] of a shooting star she saw fall to the west of the mountains. |
||
| Line 57: | Line 54: | ||
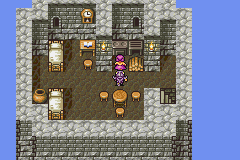
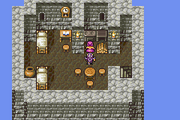
[[File:Fabul Throne room part ios.PNG|thumb|right|The party inside the throne room.]] |
[[File:Fabul Throne room part ios.PNG|thumb|right|The party inside the throne room.]] |
||
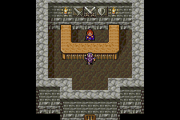
When the player enters the throne room, a cutscene with the king will start. Cecil warns the king of the upcoming danger and Golbez's attack. The king places his trust on the party, and will ask Cecil to help defend his country. Yang, Edward, and Cecil are assigned to be the commanders of the castle's fortifications, while Rosa and Rydia are assigned to help with the wounded. |
When the player enters the throne room, a cutscene with the king will start. Cecil warns the king of the upcoming danger and Golbez's attack. The king places his trust on the party, and will ask Cecil to help defend his country. Yang, Edward, and Cecil are assigned to be the commanders of the castle's fortifications, while Rosa and Rydia are assigned to help with the wounded. |
||
| − | {{ |
+ | {{clear}} |
=== Inn === |
=== Inn === |
||
[[File:Fabul Inn ios.PNG|thumb|right|The party inside the Fabul inn.]] |
[[File:Fabul Inn ios.PNG|thumb|right|The party inside the Fabul inn.]] |
||
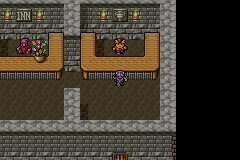
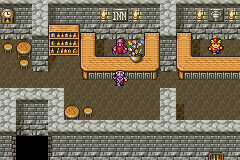
It is the first right from 1F's entrance. [[Namingway|Livingway]] can be found here, and he has become Recordingway the Journalist. After the siege, the party will get a free stay to replenish their strength. They make their plans to rescue Rosa: Cecil says that their only hope is to obtain one of Cid's airships. Yang then proposes to ask the king for a ship. |
It is the first right from 1F's entrance. [[Namingway|Livingway]] can be found here, and he has become Recordingway the Journalist. After the siege, the party will get a free stay to replenish their strength. They make their plans to rescue Rosa: Cecil says that their only hope is to obtain one of Cid's airships. Yang then proposes to ask the king for a ship. |
||
| − | {{ |
+ | {{clear}} |
=== Infirmary === |
=== Infirmary === |
||
[[File:Infirmary Fabul ios.PNG|thumb|right|The castle infirmary.]] |
[[File:Infirmary Fabul ios.PNG|thumb|right|The castle infirmary.]] |
||
Fabul's infirmary is located on the west tower's 2F. Before the siege, it wards no monks and the white mage in charge, if spoken to, will ask if the player is injured. After the siege, a number of injured monks will be recovering here. The white mage reveals she idolizes Rosa for how strong her magic is. |
Fabul's infirmary is located on the west tower's 2F. Before the siege, it wards no monks and the white mage in charge, if spoken to, will ask if the player is injured. After the siege, a number of injured monks will be recovering here. The white mage reveals she idolizes Rosa for how strong her magic is. |
||
| − | {{ |
+ | {{clear}} |
=== Sheila and Yang's Room === |
=== Sheila and Yang's Room === |
||
[[File:Shiela and Yang's Room ios.PNG|thumb|right|Sheila and Yang's Room.]] |
[[File:Shiela and Yang's Room ios.PNG|thumb|right|Sheila and Yang's Room.]] |
||
The couple's room is in the last floor of the west tower. Before the siege, Yang will introduce the party to Sheila, and tells her of their aid as well; Sheila thanks them. After the siege, she says she chased out the monsters and Baron soldiers with her frying pan. Later in the game, if the player has gone to the Sylph Cave and spoken to Yang, Sheila will hand over a frying pan should the player talk to her. If the player has spoken to Yang again and used the frying pan, and then return here, Sheila will give the Knife as a gift, the most powerful throwing weapon for Edge. |
The couple's room is in the last floor of the west tower. Before the siege, Yang will introduce the party to Sheila, and tells her of their aid as well; Sheila thanks them. After the siege, she says she chased out the monsters and Baron soldiers with her frying pan. Later in the game, if the player has gone to the Sylph Cave and spoken to Yang, Sheila will hand over a frying pan should the player talk to her. If the player has spoken to Yang again and used the frying pan, and then return here, Sheila will give the Knife as a gift, the most powerful throwing weapon for Edge. |
||
| − | {{ |
+ | {{clear}} |
=== Pub === |
=== Pub === |
||
[[File:Fabul Pub ios.PNG|thumb|right|The castle Pub.]] |
[[File:Fabul Pub ios.PNG|thumb|right|The castle Pub.]] |
||
It is located in the east tower's 2F. The dancing girl is a monk in disguise. The man at the counter will welcome Yang and ask him if he's back from training. |
It is located in the east tower's 2F. The dancing girl is a monk in disguise. The man at the counter will welcome Yang and ask him if he's back from training. |
||
| − | {{ |
+ | {{clear}} |
=== King's Bedchamber === |
=== King's Bedchamber === |
||
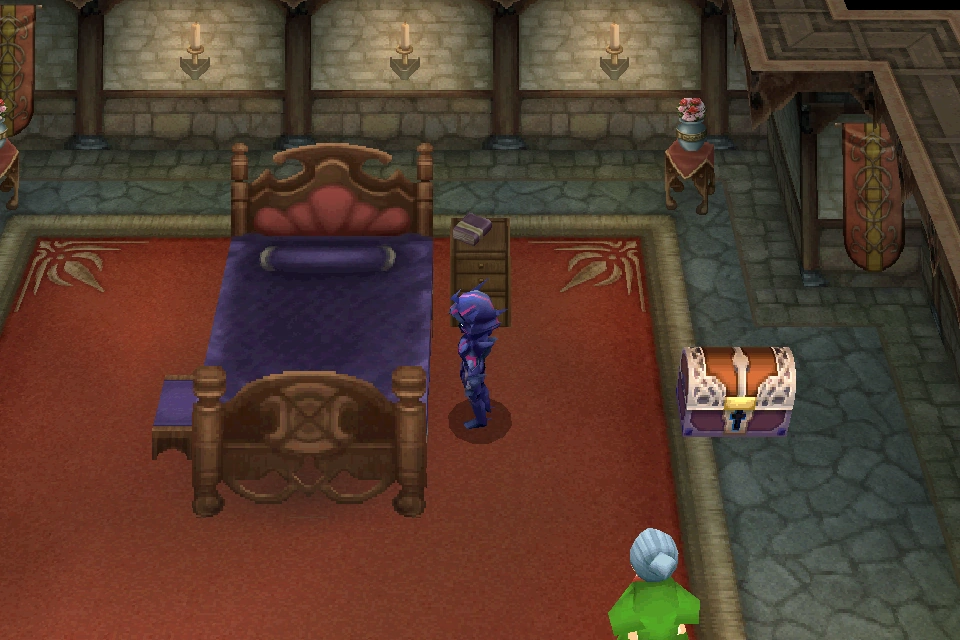
[[File:King's Chamber Fabul ios.PNG|thumb|right|The king's bedchamber.]] |
[[File:King's Chamber Fabul ios.PNG|thumb|right|The king's bedchamber.]] |
||
Just upstairs the pub, it is the king's private chambers. The player can get a free rest on the bed before the siege. After the siege and after the Inn cutscene, the player must go here to inform the king of their plans. The king is injured, but is recovering, and agrees to give the party a ship with crew. He hands the Deathbringer to Cecil. |
Just upstairs the pub, it is the king's private chambers. The player can get a free rest on the bed before the siege. After the siege and after the Inn cutscene, the player must go here to inform the king of their plans. The king is injured, but is recovering, and agrees to give the party a ship with crew. He hands the Deathbringer to Cecil. |
||
| − | {{ |
+ | {{clear}} |
== Quests == |
== Quests == |
||
| Line 96: | Line 93: | ||
* [[Tent]] x2 |
* [[Tent]] x2 |
||
* [[Remedy (item)|Remedy]] |
* [[Remedy (item)|Remedy]] |
||
| − | * [[ |
+ | * [[Final Fantasy IV weapons#Black Sword|Black Sword]] |
| − | * [[ |
+ | * [[Final Fantasy IV armor#Black Shield|Black Shield]] |
| + | |||
| + | ;3D versions |
||
| + | *Antarctic Wind |
||
| + | *Bacchus's Wine |
||
| + | *Bomb Fragment |
||
| + | *Potion |
||
| + | *Tent |
||
| + | *Zeus's Wrath |
||
| + | *Counter Augment |
||
| + | *[[Final Fantasy IV 3D weapons#Deathbringer|Deathbringer]] |
||
| + | *[[Final Fantasy IV 3D armor#Demon Shield|Demon Shield]] |
||
| + | *Ether |
||
| + | *Hermes Sandals |
||
| + | *Spider Silk |
||
=== ''[[Final Fantasy IV -Interlude-]]'' === |
=== ''[[Final Fantasy IV -Interlude-]]'' === |
||
| Line 129: | Line 140: | ||
* [[Bacchus's Wine]] |
* [[Bacchus's Wine]] |
||
* [[Hi-Potion]] |
* [[Hi-Potion]] |
||
| − | * [[ |
+ | * [[Final Fantasy IV: The After Years items#Small Tail|Small Tail]] |
* [[Cottage]] |
* [[Cottage]] |
||
| − | * [[ |
+ | * [[Final Fantasy IV: The After Years items#Decoy|Decoy]] |
* Frying Pan |
* Frying Pan |
||
* Ladle |
* Ladle |
||
| Line 199: | Line 210: | ||
|60 gil |
|60 gil |
||
|} |
|} |
||
| − | {{ |
+ | {{clear}} |
[[File:FFIV Fabul Weapon Armor Shop GBA.png|thumb|right|Fabul's Armor and Weapon Shop.]] |
[[File:FFIV Fabul Weapon Armor Shop GBA.png|thumb|right|Fabul's Armor and Weapon Shop.]] |
||
{|class="FFIV article-table" style="text-align:center" |
{|class="FFIV article-table" style="text-align:center" |
||
| Line 211: | Line 222: | ||
!width="20%"|DS/iOS |
!width="20%"|DS/iOS |
||
|- |
|- |
||
| − | !class="b"|[[ |
+ | !class="b"|[[Final Fantasy IV weapons#Flame Claws|Flame Claws]] |
|350 GP |
|350 GP |
||
|350 gil |
|350 gil |
||
|350 gil |
|350 gil |
||
|- |
|- |
||
| − | !class="b"|[[ |
+ | !class="b"|[[Final Fantasy IV weapons#Ice Claws|Ice Claws]] |
|350 GP |
|350 GP |
||
|450 gil |
|450 gil |
||
|450 gil |
|450 gil |
||
|- |
|- |
||
| − | !class="b"|[[ |
+ | !class="b"|[[Final Fantasy IV weapons#Lightning Claws|Lightning Claws]] |
|550 GP |
|550 GP |
||
|550 gil |
|550 gil |
||
|550 gil |
|550 gil |
||
|- |
|- |
||
| − | !class="b"|[[ |
+ | !class="b"|[[Final Fantasy IV armor#Demon Helm|Demon Helm]] |
|980 GP |
|980 GP |
||
|980 gil |
|980 gil |
||
|980 gil |
|980 gil |
||
|- |
|- |
||
| − | !class="b"|[[ |
+ | !class="b"|[[Final Fantasy IV armor#Demon Armor|Demon Armor]] |
|3000 GP |
|3000 GP |
||
|3000 gil |
|3000 gil |
||
|3000 gil |
|3000 gil |
||
|- |
|- |
||
| − | !class="b"|[[ |
+ | !class="b"|[[Final Fantasy IV armor#Demon Gloves|Demon Gloves]] |
|800 GP |
|800 GP |
||
|800 gil |
|800 gil |
||
|800 gil |
|800 gil |
||
|} |
|} |
||
| − | {{ |
+ | {{clear}} |
=== ''[[Final Fantasy IV -Interlude-]]'' === |
=== ''[[Final Fantasy IV -Interlude-]]'' === |
||
{{multicol-begin|1}} |
{{multicol-begin|1}} |
||
{|class="IVCCI article-table" style="text-align:center" |
{|class="IVCCI article-table" style="text-align:center" |
||
| − | |+'''[[ |
+ | |+'''[[Final Fantasy IV items|Items]]''' |
|-class="a" |
|-class="a" |
||
!width="60%"|Item |
!width="60%"|Item |
||
| Line 279: | Line 290: | ||
|} |
|} |
||
{|class="IVCCI article-table" style="text-align:center" |
{|class="IVCCI article-table" style="text-align:center" |
||
| − | |+'''[[ |
+ | |+'''[[Final Fantasy IV -Interlude- weapons|Weapons]]''' |
|-class="a" |
|-class="a" |
||
!width="60%"|Item |
!width="60%"|Item |
||
!width="40%"|Price |
!width="40%"|Price |
||
|- |
|- |
||
| − | !class="b"|[[ |
+ | !class="b"|[[Final Fantasy IV -Interlude- weapons#Faerie Claws|Faerie Claws]] |
|600 gil |
|600 gil |
||
|- |
|- |
||
| − | !class="b"|[[ |
+ | !class="b"|[[Final Fantasy IV -Interlude- weapons#Hell Claws|Hell Claws]] |
|650 gil |
|650 gil |
||
|- |
|- |
||
| − | !class="b"|[[ |
+ | !class="b"|[[Final Fantasy IV -Interlude- weapons#Power Staff|Power Staff]] |
|2,000 gil |
|2,000 gil |
||
|- |
|- |
||
| − | !class="b"|[[ |
+ | !class="b"|[[Final Fantasy IV -Interlude- weapons#Flame Sword|Flame Sword]] |
|14,000 gil |
|14,000 gil |
||
|- |
|- |
||
| − | !class="b"|[[ |
+ | !class="b"|[[Final Fantasy IV -Interlude- weapons#Fire Arrows|Fire Arrows]] |
|30 gil |
|30 gil |
||
|- |
|- |
||
| − | !class="b"|[[ |
+ | !class="b"|[[Final Fantasy IV -Interlude- weapons#Ice Arrows|Ice Arrows]] |
|30 gil |
|30 gil |
||
|- |
|- |
||
| − | !class="b"|[[ |
+ | !class="b"|[[Final Fantasy IV -Interlude- weapons#Lightning Arrows|Lightning Arrows]] |
|30 gil |
|30 gil |
||
|} |
|} |
||
{|class="IVCCI article-table" style="text-align:center" |
{|class="IVCCI article-table" style="text-align:center" |
||
| − | |+'''[[ |
+ | |+'''[[Final Fantasy IV -Interlude- armor|Armor]]''' |
|-class="a" |
|-class="a" |
||
!width="60%"|Item |
!width="60%"|Item |
||
!width="40%"|Price |
!width="40%"|Price |
||
|- |
|- |
||
| − | !class="b"|[[ |
+ | !class="b"|[[Final Fantasy IV -Interlude- armor#Flame Shield|Flame Shield]] |
|1,250 gil |
|1,250 gil |
||
|- |
|- |
||
| − | !class="b"|[[ |
+ | !class="b"|[[Final Fantasy IV -Interlude- armor#Ice Shield|Ice Shield]] |
|10,000 gil |
|10,000 gil |
||
|- |
|- |
||
| − | !class="b"|[[ |
+ | !class="b"|[[Final Fantasy IV -Interlude- armor#Flame Mail|Flame Mail]] |
|30,000 gil |
|30,000 gil |
||
|- |
|- |
||
| − | !class="b"|[[ |
+ | !class="b"|[[Final Fantasy IV -Interlude- armor#Ice Armor|Ice Armor]] |
|35,000 gil |
|35,000 gil |
||
|- |
|- |
||
| − | !class="b"|[[ |
+ | !class="b"|[[Final Fantasy IV -Interlude- armor#Rune Armlet|Rune Armlet]] |
|2,000 gil |
|2,000 gil |
||
|- |
|- |
||
| − | !class="b"|[[ |
+ | !class="b"|[[Final Fantasy IV -Interlude- armor#Ruby Ring|Ruby Ring]] |
|1,000 gil |
|1,000 gil |
||
|- |
|- |
||
| − | !class="b"|[[ |
+ | !class="b"|[[Final Fantasy IV -Interlude- armor#Silver Armlet|Silver Armlet]] |
|650 gil |
|650 gil |
||
|} |
|} |
||
{{multicol-end|1}} |
{{multicol-end|1}} |
||
| − | {{ |
+ | {{clear}} |
=== ''[[Final Fantasy IV: The After Years]]'' === |
=== ''[[Final Fantasy IV: The After Years]]'' === |
||
| Line 339: | Line 350: | ||
{{multicol-begin|1}} |
{{multicol-begin|1}} |
||
{|class="IVTAY article-table" style="text-align:center" |
{|class="IVTAY article-table" style="text-align:center" |
||
| − | |+'''[[ |
+ | |+'''[[Final Fantasy IV: The After Years items|Items]]''' |
|-class="a" |
|-class="a" |
||
!width="60%"|Item |
!width="60%"|Item |
||
| Line 386: | Line 397: | ||
|100 gil |
|100 gil |
||
|- |
|- |
||
| − | !class="b"|[[ |
+ | !class="b"|[[Final Fantasy IV: The After Years items#Bestiary|Bestiary]] |
|50 gil |
|50 gil |
||
|- |
|- |
||
| − | !class="b"|[[ |
+ | !class="b"|[[Final Fantasy IV: The After Years items#Gnomish Bread|Gnomish Bread]]{{foot|3D only}} |
|100 gil |
|100 gil |
||
|} |
|} |
||
{|class="IVTAY article-table" style="text-align:center" |
{|class="IVTAY article-table" style="text-align:center" |
||
| − | |+'''[[ |
+ | |+'''[[Final Fantasy IV: The After Years weapons|Weapons]]''' |
|-class="a" |
|-class="a" |
||
!width="60%"|Weapon |
!width="60%"|Weapon |
||
!width="40%"|Price |
!width="40%"|Price |
||
|- |
|- |
||
| − | !class="b"|[[ |
+ | !class="b"|[[Final Fantasy IV: The After Years weapons#Flame Claws|Flame Claws]] |
|350 gil |
|350 gil |
||
|- |
|- |
||
| − | !class="b"|[[ |
+ | !class="b"|[[Final Fantasy IV: The After Years weapons#Ice Claws|Ice Claws]] |
|450 gil |
|450 gil |
||
|- |
|- |
||
| − | !class="b"|[[ |
+ | !class="b"|[[Final Fantasy IV: The After Years weapons#Lightning Claws|Lightning Claws]] |
|550 gil |
|550 gil |
||
|- |
|- |
||
| − | !class="b"|[[ |
+ | !class="b"|[[Final Fantasy IV: The After Years weapons#Metal Knuckles|Metal Knuckles]]{{foot|After the Second Battle of Fabul.}} |
|600 gil |
|600 gil |
||
|- |
|- |
||
|} |
|} |
||
| − | {{ |
+ | {{clear}} |
{|class="IVTAY article-table" style="text-align:center" |
{|class="IVTAY article-table" style="text-align:center" |
||
| − | |+'''[[ |
+ | |+'''[[Final Fantasy IV: The After Years armor|Armor]]''' |
|-class="a" |
|-class="a" |
||
!width="60%"|Armor |
!width="60%"|Armor |
||
!width="40%"|Price |
!width="40%"|Price |
||
|- |
|- |
||
| − | !class="b"|[[ |
+ | !class="b"|[[Final Fantasy IV: The After Years armor#Leather Cap|Leather Cap]] |
|100 gil |
|100 gil |
||
|- |
|- |
||
| Line 424: | Line 435: | ||
|330 gil |
|330 gil |
||
|- |
|- |
||
| − | !class="b"|[[ |
+ | !class="b"|[[Final Fantasy IV: The After Years armor#Headband|Headband]]{{foot|After the Second Battle of Fabul.}} |
|450 gil |
|450 gil |
||
|- |
|- |
||
| − | !class="b"|[[ |
+ | !class="b"|[[Final Fantasy IV: The After Years armor#Leather Clothing|Leather Clothing]] |
|200 gil |
|200 gil |
||
|- |
|- |
||
| − | !class="b"|[[ |
+ | !class="b"|[[Final Fantasy IV: The After Years armor#Bronze Breastplate|Bronze Breastplate]] |
|450 gil |
|450 gil |
||
|- |
|- |
||
| − | !class="b"|[[ |
+ | !class="b"|[[Final Fantasy IV: The After Years armor#Kenpo Gi|Kenpo Gi]]{{foot|After the Second Battle of Fabul.}} |
|4,000 gil |
|4,000 gil |
||
|- |
|- |
||
| − | !class="b"|[[ |
+ | !class="b"|[[Final Fantasy IV: The After Years armor#Iron Armlet|Iron Armlet]] |
|100 gil |
|100 gil |
||
|- |
|- |
||
| − | !class="b"|[[ |
+ | !class="b"|[[Final Fantasy IV: The After Years armor#Silver Armlet|Silver Armlet]]{{foot|Second Battle of Fabul.}} |
|650 gil |
|650 gil |
||
|} |
|} |
||
{{multicol-end|1}} |
{{multicol-end|1}} |
||
| − | {{ |
+ | {{clear}} |
==== The Crystals ==== |
==== The Crystals ==== |
||
{{multicol-begin|1}} |
{{multicol-begin|1}} |
||
{|class="IVTAY article-table" style="text-align:center" |
{|class="IVTAY article-table" style="text-align:center" |
||
| − | |+'''[[ |
+ | |+'''[[Final Fantasy IV: The After Years items|Items]]''' |
|-class="a" |
|-class="a" |
||
!width="60%"|Item |
!width="60%"|Item |
||
| Line 492: | Line 503: | ||
|200 gil |
|200 gil |
||
|- |
|- |
||
| − | !class="b"|[[ |
+ | !class="b"|[[Final Fantasy IV: The After Years items#Bestiary|Bestiary]] |
|50 gil |
|50 gil |
||
|- |
|- |
||
| − | !class="b"|[[ |
+ | !class="b"|[[Final Fantasy IV: The After Years items#Gnomish Bread|Gnomish Bread]]{{foot|3D only}} |
|100 gil |
|100 gil |
||
|- |
|- |
||
|} |
|} |
||
{|class="IVTAY article-table" style="text-align:center" |
{|class="IVTAY article-table" style="text-align:center" |
||
| − | |+'''[[ |
+ | |+'''[[Final Fantasy IV: The After Years weapons|Weapons]]''' |
|-class="a" |
|-class="a" |
||
!width="60%"|Weapon |
!width="60%"|Weapon |
||
!width="40%"|Price |
!width="40%"|Price |
||
|- |
|- |
||
| − | !class="b"|[[ |
+ | !class="b"|[[Final Fantasy IV: The After Years weapons#Flame Claws|Flame Claws]] |
|350 gil |
|350 gil |
||
|- |
|- |
||
| − | !class="b"|[[ |
+ | !class="b"|[[Final Fantasy IV: The After Years weapons#Ice Claws|Ice Claws]] |
|450 gil |
|450 gil |
||
|- |
|- |
||
| − | !class="b"|[[ |
+ | !class="b"|[[Final Fantasy IV: The After Years weapons#Lightning Claws|Lightning Claws]] |
|550 gil |
|550 gil |
||
|- |
|- |
||
| − | !class="b"|[[ |
+ | !class="b"|[[Final Fantasy IV: The After Years weapons#Metal Knuckle|Metal Knuckle]] |
|600 gil |
|600 gil |
||
|} |
|} |
||
{|class="IVTAY article-table" style="text-align:center" |
{|class="IVTAY article-table" style="text-align:center" |
||
| − | |+'''[[ |
+ | |+'''[[Final Fantasy IV: The After Years armor|Armor]]''' |
|-class="a" |
|-class="a" |
||
!width="60%"|Armor |
!width="60%"|Armor |
||
!width="40%"|Price |
!width="40%"|Price |
||
|- |
|- |
||
| − | !class="b"|[[ |
+ | !class="b"|[[Final Fantasy IV: The After Years armor#Leather Cap|Leather Cap]] |
|100 gil |
|100 gil |
||
|- |
|- |
||
| − | !class="b"|[[ |
+ | !class="b"|[[Final Fantasy IV: The After Years armor#Feathered Cap|Feathered Cap]] |
|330 gil |
|330 gil |
||
|- |
|- |
||
| − | !class="b"|[[ |
+ | !class="b"|[[Final Fantasy IV: The After Years armor#Headband|Headband]] |
|450 gil |
|450 gil |
||
|- |
|- |
||
| − | !class="b"|[[ |
+ | !class="b"|[[Final Fantasy IV: The After Years armor#Leather Clothing|Leather Clothing]] |
|200 gil |
|200 gil |
||
|- |
|- |
||
| − | !class="b"|[[ |
+ | !class="b"|[[Final Fantasy IV: The After Years armor#Bronze Breastplate|Bronze Breastplate]] |
|450 gil |
|450 gil |
||
|- |
|- |
||
| − | !class="b"|[[ |
+ | !class="b"|[[Final Fantasy IV: The After Years armor#Kenpo Gi|Kenpo Gi]] |
|4,000 gil |
|4,000 gil |
||
|- |
|- |
||
| − | !class="b"|[[ |
+ | !class="b"|[[Final Fantasy IV: The After Years armor#Iron Armlet|Iron Armlet]] |
|100 gil |
|100 gil |
||
|- |
|- |
||
| − | !class="b"|[[ |
+ | !class="b"|[[Final Fantasy IV: The After Years armor#Silver Armlet|Silver Armlet]] |
|650 gil |
|650 gil |
||
|} |
|} |
||
{{multicol-end|1}} |
{{multicol-end|1}} |
||
| − | {{ |
+ | {{clear}} |
== Enemies == |
== Enemies == |
||
| Line 554: | Line 565: | ||
=== ''[[Final Fantasy IV]]'' === |
=== ''[[Final Fantasy IV]]'' === |
||
==== Fabul Area ==== |
==== Fabul Area ==== |
||
| + | ;2D versions |
||
| − | {|class="full-width FFIV article-table" |
||
| ⚫ | |||
| − | |-class="a" |
||
| ⚫ | |||
| − | !width="33%"|SNES |
||
| ⚫ | |||
| − | !width="33%"|PS |
||
| ⚫ | |||
| − | !width="33%"|GBA |
||
| ⚫ | |||
| − | |- |
||
| − | |[[Domovoi (Final Fantasy IV 2D)|Imp Cap.]] x3, [[Gatlinghog (Final Fantasy IV 2D)|Needler]] x3 |
||
| − | |[[Domovoi (Final Fantasy IV 2D)|Imp Cap.]] x3, [[Gatlinghog (Final Fantasy IV 2D)|Needler]] x3 |
||
| ⚫ | |||
| − | |- |
||
| − | |[[Sword Rat (Final Fantasy IV)|SwordRat]] x3 [[Gatlinghog (Final Fantasy IV 2D)|Needler]] x3 |
||
| − | |[[Sword Rat (Final Fantasy IV)|SwordRat]] x3 [[Gatlinghog (Final Fantasy IV 2D)|Needler]] x3 |
||
| ⚫ | |||
| − | |- |
||
| − | |[[Cockatrice (Final Fantasy IV enemy)|Cocktric]] x3 |
||
| − | |[[Cockatrice (Final Fantasy IV enemy)|Cocatris]] x3 |
||
| ⚫ | |||
| − | |- |
||
| − | |[[Gargoyle (Final Fantasy IV 2D)|Gargoyle]], [[Cockatrice (Final Fantasy IV enemy)|Cocktric]] x2 |
||
| − | |[[Gargoyle (Final Fantasy IV 2D)|Gargoyle]], [[Cockatrice (Final Fantasy IV enemy)|Cocatris]] x2 |
||
| ⚫ | |||
| − | |- |
||
| − | |[[Bomb (Final Fantasy IV 2D)|Bomb]] x2, [[Gray Bomb (Final Fantasy IV 2D)|GrayBomb]] x2 |
||
| − | |[[Bomb (Final Fantasy IV 2D)|Bomb]] x2, [[Gray Bomb (Final Fantasy IV 2D)|GrayBomb]] x2 |
||
| ⚫ | |||
| − | |} |
||
[[File:FFIV Yang's Room.png|thumb|right|Yang's room.]] |
[[File:FFIV Yang's Room.png|thumb|right|Yang's room.]] |
||
| + | ;3D versions |
||
| − | ===== 3D remake version formations ===== |
||
| − | * [[Domovoi (Final Fantasy IV |
+ | * [[Domovoi (Final Fantasy IV 3D)|Domovoi]] x2, [[Gray Bomb (Final Fantasy IV 3D)|Gray Bomb]] x1 |
| − | * [[Bomb (Final Fantasy IV |
+ | * [[Bomb (Final Fantasy IV 3D)|Bomb]] x3 |
| − | * [[Sword Rat (Final Fantasy IV)|Sword Rat]] x3 |
+ | * [[Sword Rat (Final Fantasy IV 3D)|Sword Rat]] x3 |
| − | * [[Cockatrice (Final Fantasy IV |
+ | * [[Cockatrice (Final Fantasy IV 3D)|Cockatrice]] x2, [[Gatlinghog (Final Fantasy IV 3D)|Gatlinghog]] x1 |
| ⚫ | |||
| ⚫ | |||
==== Battle against Baron ==== |
==== Battle against Baron ==== |
||
| + | ;2D versions |
||
| − | {|class="full-width FFIV article-table" |
||
| ⚫ | |||
| − | |-class="a" |
||
| ⚫ | |||
| − | !width="33%"|SNES |
||
| ⚫ | |||
| − | !width="33%"|PS |
||
| − | !width="33%"|GBA |
||
| − | |- |
||
| − | |[[General (Final Fantasy IV 2D)|Officer]], [[Baron Marine (Final Fantasy IV 2D)|Fighter]] x2 |
||
| − | |[[General (Final Fantasy IV 2D)|Officer]], [[Baron Marine (Final Fantasy IV 2D)|Fighter]] x2 |
||
| ⚫ | |||
| − | |- |
||
| − | |[[Leshy (Final Fantasy IV 2D)|Weeper]], [[Sahagin (Final Fantasy IV)|Water Hag]], [[Domovoi (Final Fantasy IV 2D)|Imp Cap.]] |
||
| − | |[[Leshy (Final Fantasy IV 2D)|Weeper]], [[Sahagin (Final Fantasy IV)|Water Hag]], [[Domovoi (Final Fantasy IV 2D)|Imp Cap.]] |
||
| ⚫ | |||
| − | |- |
||
| ⚫ | |||
| ⚫ | |||
| − | |[[Gargoyle (Final Fantasy IV 2D)|Gargoyle]] |
||
| − | |} |
||
| + | ;3D versions |
||
| − | With the exception of the Gargoyle, the waves will alternate between the two formations. |
||
| ⚫ | |||
| − | |||
| ⚫ | |||
| − | ===== 3D remake versions ===== |
||
| ⚫ | |||
| − | {|class="half-width FFIV article-table" |
||
| − | |-class="a" |
||
| − | !width="40%"|Battle # |
||
| − | !width="60%"|Formation |
||
| − | |- |
||
| − | |Battle 1, 3, & 6 |
||
| ⚫ | |||
| − | |- |
||
| − | |Battle 2 & 5 |
||
| ⚫ | |||
| − | |- |
||
| − | |Battle 4 |
||
| − | |[[Gargoyle (Final Fantasy IV 2D)|Gargoyle]] |
||
| − | |} |
||
=== ''[[Final Fantasy IV -Interlude-]]'' === |
=== ''[[Final Fantasy IV -Interlude-]]'' === |
||
==== Fabul Area ==== |
==== Fabul Area ==== |
||
* [[Gatlinghog (Final Fantasy IV -Interlude-)|Gatlinghog]], [[Domovoi (Final Fantasy IV -Interlude-)|Domovoi]] x3 |
* [[Gatlinghog (Final Fantasy IV -Interlude-)|Gatlinghog]], [[Domovoi (Final Fantasy IV -Interlude-)|Domovoi]] x3 |
||
| − | * Domovoi x4, [[Goblin (Final Fantasy IV -Interlude-)|Goblin]] x2 |
+ | * Domovoi x4, [[Goblin (Final Fantasy IV -Interlude- enemy)|Goblin]] x2 |
* Domovoi x3, Gatlinghog x3 |
* Domovoi x3, Gatlinghog x3 |
||
* [[Balloon (Final Fantasy IV -Interlude-)|Balloon]], [[Gray Bomb (Final Fantasy IV -Interlude-)|Gray Bomb]] x2 |
* [[Balloon (Final Fantasy IV -Interlude-)|Balloon]], [[Gray Bomb (Final Fantasy IV -Interlude-)|Gray Bomb]] x2 |
||
| Line 638: | Line 604: | ||
{{multicol-begin}} |
{{multicol-begin}} |
||
;Fabul Area |
;Fabul Area |
||
| − | * [[Basilisk (The After Years)|Basilisk]], [[Goblin (The After Years)|Goblin]] x3 |
+ | * [[Basilisk (The After Years)|Basilisk]], [[Goblin (The After Years enemy)|Goblin]] x3 |
| − | * [[Bomb (The After Years)|Bomb]] x2, [[Gray Bomb (The After Years)|Gray Bomb]] x2 |
+ | * [[Bomb (The After Years enemy)|Bomb]] x2, [[Gray Bomb (The After Years)|Gray Bomb]] x2 |
| − | * [[Bomb (The After Years)|Bomb]] x3 |
+ | * [[Bomb (The After Years enemy)|Bomb]] x3 |
* [[Domovoi (The After Years)|Domovoi]], [[Gatlinghog (The After Years)|Gatlinghog]] x3 |
* [[Domovoi (The After Years)|Domovoi]], [[Gatlinghog (The After Years)|Gatlinghog]] x3 |
||
* [[Gargoyle (The After Years)|Gargoyle]] x2 |
* [[Gargoyle (The After Years)|Gargoyle]] x2 |
||
| Line 657: | Line 623: | ||
{{audio|filename=FFIV_Fabul.ogg|title="Fabul" from ''Final Fantasy IV'' (DS)}} |
{{audio|filename=FFIV_Fabul.ogg|title="Fabul" from ''Final Fantasy IV'' (DS)}} |
||
The background music that plays in Fabul is its eponymous theme, "Fabul". |
The background music that plays in Fabul is its eponymous theme, "Fabul". |
||
| − | {{ |
+ | {{clear}} |
== Other appearances == |
== Other appearances == |
||
=== ''[[Final Fantasy XIV]]'' === |
=== ''[[Final Fantasy XIV]]'' === |
||
| ⚫ | |||
| − | |||
| ⚫ | |||
=== ''[[Final Fantasy Airborne Brigade]]'' === |
=== ''[[Final Fantasy Airborne Brigade]]'' === |
||
| − | |||
[[File:Fabul Region Brigade.png|100px|right]] |
[[File:Fabul Region Brigade.png|100px|right]] |
||
| − | Fabul Region is a location |
+ | Fabul Region is a location. |
| − | {{ |
+ | {{Location section|Final Fantasy Airborne Brigade}} |
| − | {{ |
+ | {{clear}} |
=== ''[[Final Fantasy Record Keeper]]'' === |
=== ''[[Final Fantasy Record Keeper]]'' === |
||
| − | |||
[[File:FFRK Fabul Castle FFIV.png|right|thumb|Painting image.]] |
[[File:FFRK Fabul Castle FFIV.png|right|thumb|Painting image.]] |
||
| − | {{ |
+ | {{Quote|Its monk warriors decimated, Fabul is in dire straits. Cecil and Edward come to stand with Yang against the forces of Baron.|Description}} |
Fabul Castle is unlocked by completing [[Mt. Hobs#Final Fantasy Record Keeper|Mount Hobs]] in the ''[[Final Fantasy IV]]'' realm. Completion of this dungeon unlocks [[Baron Castle#Final Fantasy Record Keeper|Baron Castle]] in the ''Final Fantasy IV'' realm. |
Fabul Castle is unlocked by completing [[Mt. Hobs#Final Fantasy Record Keeper|Mount Hobs]] in the ''[[Final Fantasy IV]]'' realm. Completion of this dungeon unlocks [[Baron Castle#Final Fantasy Record Keeper|Baron Castle]] in the ''Final Fantasy IV'' realm. |
||
| − | {{ |
+ | {{clear}} |
{{infobox dungeon info FFRK |
{{infobox dungeon info FFRK |
||
| Line 713: | Line 676: | ||
|stage 7 rounds=1 |
|stage 7 rounds=1 |
||
|enemies=[[File:FFRK Baron Marine FFIV.png|32px|link=Baron Marine (Final Fantasy IV 2D)|Baron Marine]] |
|enemies=[[File:FFRK Baron Marine FFIV.png|32px|link=Baron Marine (Final Fantasy IV 2D)|Baron Marine]] |
||
| − | [[File:FFRK Captain FFIV.png|32px|link=Captain (Final Fantasy IV)|Captain]] |
+ | [[File:FFRK Captain FFIV.png|32px|link=Captain (Final Fantasy IV 2D)|Captain]] |
| − | [[File:FFRK Domovoi FFIV.png|32px|link=Domovoi (Final Fantasy IV)|Domovoi]] |
+ | [[File:FFRK Domovoi FFIV.png|32px|link=Domovoi (Final Fantasy IV 2D)|Domovoi]] |
| − | [[File:FFRK Gargoyle FFIV.png|50px|link=Gargoyle (Final Fantasy IV)|Gargoyle]] |
+ | [[File:FFRK Gargoyle FFIV.png|50px|link=Gargoyle (Final Fantasy IV 2D)|Gargoyle]] |
| − | [[File:FFRK Leshy FFIV.png|50px|link=Leshy (Final Fantasy IV)|Leshy]] |
+ | [[File:FFRK Leshy FFIV.png|50px|link=Leshy (Final Fantasy IV 2D)|Leshy]] |
| − | [[File:FFRK Sahagin FFIV.png|32px|link=Sahagin (Final Fantasy IV)|Sahagin]] |
+ | [[File:FFRK Sahagin FFIV.png|32px|link=Sahagin (Final Fantasy IV 2D)|Sahagin]] |
|bosses=[[File:FFRK Dragoon FFIV.png|50px|link=Dragoon (boss)#Final Fantasy Record Keeper|Kain]] |
|bosses=[[File:FFRK Dragoon FFIV.png|50px|link=Dragoon (boss)#Final Fantasy Record Keeper|Kain]] |
||
|target scores=;Fabul Castle - Final Battle |
|target scores=;Fabul Castle - Final Battle |
||
| Line 732: | Line 695: | ||
|- |
|- |
||
!class="b" rowspan="2"|First Time Completion |
!class="b" rowspan="2"|First Time Completion |
||
| − | |[[Rydia |
+ | |[[Rydia/Record Keeper|Rydia]] |
|1 |
|1 |
||
|- |
|- |
||
| Line 776: | Line 739: | ||
|} |
|} |
||
{{multicol-end}} |
{{multicol-end}} |
||
| − | {{ |
+ | {{clear}} |
=== ''[[Final Fantasy Brave Exvius]]'' === |
=== ''[[Final Fantasy Brave Exvius]]'' === |
||
| ⚫ | |||
| − | |||
| ⚫ | |||
== Gallery == |
== Gallery == |
||
| Line 805: | Line 767: | ||
Fabul Monk NPC render ffiv ios.PNG|Render of a Fabul Monk (DS/iOS). |
Fabul Monk NPC render ffiv ios.PNG|Render of a Fabul Monk (DS/iOS). |
||
FF4 Interlude Fabul.PNG|The throne room in ''Final Fantasy IV Interlude'' for ''[[Final Fantasy IV Complete Collection|Complete Collection]]''. |
FF4 Interlude Fabul.PNG|The throne room in ''Final Fantasy IV Interlude'' for ''[[Final Fantasy IV Complete Collection|Complete Collection]]''. |
||
| − | FFRK Fabul Castle JP FFIV.png|The |
+ | FFRK Fabul Castle JP FFIV.png|The Japanese dungeon image for ''Fabul Castle'' in ''[[Final Fantasy Record Keeper]]''. |
</gallery> |
</gallery> |
||
| Line 812: | Line 774: | ||
* In the SNES version, after Golbez's siege on Fabul, the two guards on Floor 2 right before the King's Room both say nothing but "T". |
* In the SNES version, after Golbez's siege on Fabul, the two guards on Floor 2 right before the King's Room both say nothing but "T". |
||
* In ''Final Fantasy IX'', [[Cid Fabool IX]], the regent of [[Lindblum (Final Fantasy IX)|Lindblum]], is an allusion to Fabul. Lindblum, similar to Fabul, is a giant castle with the town within it. |
* In ''Final Fantasy IX'', [[Cid Fabool IX]], the regent of [[Lindblum (Final Fantasy IX)|Lindblum]], is an allusion to Fabul. Lindblum, similar to Fabul, is a giant castle with the town within it. |
||
| − | * Though no longer considered canon, the ''Settei Shiryuu Hen'' guide book gives background details on the world of ''Final Fantasy IV'' that feature several [[Final Fantasy IV |
+ | * Though no longer considered canon, the ''Settei Shiryuu Hen'' guide book gives background details on the world of ''Final Fantasy IV'' that feature several [[Final Fantasy IV allusions|allusions]] to ''Final Fantasy II'', including the name of the Dark Knight who left the Deathbringer in Fabul being named [[Leon (Final Fantasy II)|Leonhart]]. |
{{navbox setting FFIV}} |
{{navbox setting FFIV}} |
||
| Line 818: | Line 780: | ||
{{navbox setting IVTAY}} |
{{navbox setting IVTAY}} |
||
{{navbox realms FFRK}} |
{{navbox realms FFRK}} |
||
| ⚫ | |||
| − | |||
| ⚫ | |||
[[Category:Castles]] |
[[Category:Castles]] |
||
| − | [[Category:Final Fantasy IV: The After Years |
+ | [[Category:Locations in Final Fantasy IV: The After Years]] |
| − | [[Category:Final Fantasy IV -Interlude- |
+ | [[Category:Locations in Final Fantasy IV -Interlude-]] |
| − | [[Category:Final Fantasy IV |
+ | [[Category:Organizations in Final Fantasy IV]] |
Revision as of 18:42, 13 January 2020
Template:Sideicon Fabul is a kingdom in Final Fantasy IV. The castle contains the city of Fabul within its walls for the safety of its citizens. The kingdom is populated and defended by a squadron of monks, and Yang Fang Leiden is their leader, while the King of Fabul rules the kingdom. Fabul is the nation that holds the Wind Crystal.
Story
Final Fantasy IV


An aerial view of Fabul as seen in the Super Famicom manual.
Cecil Harvey, Rosa Joanna Farrell, Edward Chris von Muir and Rydia arrive at the castle with Yang, warning the king that Baron is seeking Fabul's Wind Crystal. The king does not believe them, as he does not trust the Dark Knight Cecil. Yang and Edward convince the king Cecil is trustworthy, and the party helps Yang defend the castle against Baron.
The First Battle of Fabul begins with bombing from the Red Wings, and the monks retreat. Many of the monks are defeated by the monsters, which now make up much of the Baronian army. Cecil, Edward and Yang are the only ones left standing, and retreat to the crystal room. Kain Highwind enters, and Cecil asks for his assistance. Kain is now working for Golbez, and duels Cecil. Kain wins and Golbez shows up. Rosa and Rydia come to the rescue, but Golbez wounds Yang and Edward, and takes Rosa as a hostage, after which Kain steals the Crystal.
Cecil, Rydia, Edward and Yang ponder for a way to get Rosa back. Cecil decides they should go see Cid Pollendina in Baron, who will give them an airship. Yang asks the King of Fabul if they can borrow a sailing ship to take them to Baron. The king agrees, and gives Cecil the Deathbringer, which instantly kills any creature Cecil strikes with it, although the king notes it cannot work on true evil.
Later, Cecil returns to Fabul after visiting the Sylph Cave in the Underworld and speak to Yang's wife, Sheila. She will give Cecil a frying pan to wake Yang up. The king eventually abdicates the throne to Yang and becomes a Duke Consort.
Final Fantasy IV -Interlude-
While Yang and others are away at Damcyan celebrating its reconstruction, Sheila goes into labor. A pair of monks cross Mt. Hobs to inform Yang, and he returns to Fabul with Cecil and Rosa. Sheila gives birth to a baby girl, and Yang asks Cecil to be her godfather and name her. Cecil names the baby Ursula.
Final Fantasy IV: The After Years

Fabul's Throne.
During Yang's tale, Yang is training with three Monks but refuses to train Ursula, believing her status as a princess makes her unfit for combat. While Yang speaks to Fabul's chancellor about Baron and rumors they are again seeking the Crystals, Ursula flees the castle and heads to Mt. Hobs to inspect the impact crater of a shooting star she saw fall to the west of the mountains.
They investigate the star and begin their journey back when they witness the Red Wings approaching Fabul. The group returns in time to defend the kingdom from attack as the Second Battle of Fabul ensues. Ursula and Yang battle Kain in the crystal room to protect the Crystal, but Kain leaps over them and seizes it before escaping. Yang prepares a ship and with the help of his trainee monks, he and Ursula set out to Baron.
In The Crystals chapter, after the party finds Yang and Ursula being cared for in Kaipo, Sheila will give them a Frying Pan and a Ladle with which to revive them.
Locations
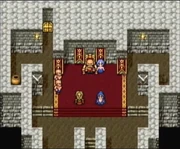
Throne Room

The party inside the throne room.
When the player enters the throne room, a cutscene with the king will start. Cecil warns the king of the upcoming danger and Golbez's attack. The king places his trust on the party, and will ask Cecil to help defend his country. Yang, Edward, and Cecil are assigned to be the commanders of the castle's fortifications, while Rosa and Rydia are assigned to help with the wounded.
Inn

The party inside the Fabul inn.
It is the first right from 1F's entrance. Livingway can be found here, and he has become Recordingway the Journalist. After the siege, the party will get a free stay to replenish their strength. They make their plans to rescue Rosa: Cecil says that their only hope is to obtain one of Cid's airships. Yang then proposes to ask the king for a ship.
Infirmary

The castle infirmary.
Fabul's infirmary is located on the west tower's 2F. Before the siege, it wards no monks and the white mage in charge, if spoken to, will ask if the player is injured. After the siege, a number of injured monks will be recovering here. The white mage reveals she idolizes Rosa for how strong her magic is.
Sheila and Yang's Room

Sheila and Yang's Room.
The couple's room is in the last floor of the west tower. Before the siege, Yang will introduce the party to Sheila, and tells her of their aid as well; Sheila thanks them. After the siege, she says she chased out the monsters and Baron soldiers with her frying pan. Later in the game, if the player has gone to the Sylph Cave and spoken to Yang, Sheila will hand over a frying pan should the player talk to her. If the player has spoken to Yang again and used the frying pan, and then return here, Sheila will give the Knife as a gift, the most powerful throwing weapon for Edge.
Pub

The castle Pub.
It is located in the east tower's 2F. The dancing girl is a monk in disguise. The man at the counter will welcome Yang and ask him if he's back from training.
King's Bedchamber

The king's bedchamber.
Just upstairs the pub, it is the king's private chambers. The player can get a free rest on the bed before the siege. After the siege and after the Inn cutscene, the player must go here to inform the king of their plans. The king is injured, but is recovering, and agrees to give the party a ship with crew. He hands the Deathbringer to Cecil.
Quests
Final Fantasy IV
Knife
Returning to Fabul talking to Sheila after Yang has been woken with the frying pan, allows Cecil to get a Knife, the most powerful throwing weapon for Edge. If thrown, it will deal 9999 damage regardless of the enemy's defenses, although it can still miss the untransformed Zeromus.
Treasure
Final Fantasy IV
- 500 accumulated gil
- Potion x4
- Ether
- Tent x2
- Remedy
- Black Sword
- Black Shield
- 3D versions
- Antarctic Wind
- Bacchus's Wine
- Bomb Fragment
- Potion
- Tent
- Zeus's Wrath
- Counter Augment
- Deathbringer
- Demon Shield
- Ether
- Hermes Sandals
- Spider Silk
Final Fantasy IV -Interlude-
- Potion
- Ether
- Elixir
- Zeus's Wrath
- Bomb Fragment
- Antarctic Wind
- Spider Silk
- Tent
- Hermes Sandals
- Bacchus's Wine
Final Fantasy IV: The After Years
- Yang's Tale
- The Crystals
- Hermes Sandals
- Phoenix Down x2
- Cross
- Bacchus's Wine
- Hi-Potion
- Small Tail
- Cottage
- Decoy
- Frying Pan
- Ladle
Shops
Final Fantasy IV

Fabul's Item Shop.
| Item | Price | ||
|---|---|---|---|
| SNES | GBA | DS/iOS | |
| Potion | 30 GP | 30 gil | 30 gil |
| Phoenix Down | 150 GP | 100 gil | 100 gil |
| Tent | 200 GP | 100 gil | 100 gil |
| Gysahl Greens | 50 GP | 50 gil | 50 gil |
| Remedy | 100 GP | N/A | N/A |
| Ether | 10000 GP | N/A | N/A |
| Antidote | N/A | 40 gil | 40 gil |
| Eye Drops | N/A | 30 gil | 30 gil |
| Gold Needle | N/A | 400 gil | 80 gil |
| Maiden's Kiss | N/A | 60 gil | 60 gil |

Fabul's Armor and Weapon Shop.
| Item | Price | ||
|---|---|---|---|
| SNES | GBA | DS/iOS | |
| Flame Claws | 350 GP | 350 gil | 350 gil |
| Ice Claws | 350 GP | 450 gil | 450 gil |
| Lightning Claws | 550 GP | 550 gil | 550 gil |
| Demon Helm | 980 GP | 980 gil | 980 gil |
| Demon Armor | 3000 GP | 3000 gil | 3000 gil |
| Demon Gloves | 800 GP | 800 gil | 800 gil |
Final Fantasy IV -Interlude-
| Item | Price |
|---|---|
| Potion | 30 gil |
| Hi-Potion | 150 gil |
| X-Potion | 3,000 gil |
| Phoenix Down | 100 gil |
| Gold Needle | 400 gil |
| Maiden's Kiss | 60 gil |
| Eye Drops | 30 gil |
| Antidote | 40 gil |
| Tent | 100 gil |
| Item | Price |
|---|---|
| Faerie Claws | 600 gil |
| Hell Claws | 650 gil |
| Power Staff | 2,000 gil |
| Flame Sword | 14,000 gil |
| Fire Arrows | 30 gil |
| Ice Arrows | 30 gil |
| Lightning Arrows | 30 gil |
| Item | Price |
|---|---|
| Flame Shield | 1,250 gil |
| Ice Shield | 10,000 gil |
| Flame Mail | 30,000 gil |
| Ice Armor | 35,000 gil |
| Rune Armlet | 2,000 gil |
| Ruby Ring | 1,000 gil |
| Silver Armlet | 650 gil |
Final Fantasy IV: The After Years
Yang's Tale
| Item | Price |
|---|---|
| Potion | 30 gil |
| Hi-Potion | 150 gil |
| Phoenix Down | 100 gil |
| Gold Needle | 400 gil |
| Maiden's Kiss | 60 gil |
| Eye Drops | 30 gil |
| Antidote | 40 gil |
| Echo Herbs | 50 gil |
| Tent | 100 gil |
| Cottage | 500 gil |
| Bomb Fragment | 200 gil |
| Antarctic Wind | 200 gil |
| Zeus's Wrath | 200 gil |
| Spider Silk | 100 gil |
| Bestiary | 50 gil |
| Gnomish Bread*3D only | 100 gil |
| Weapon | Price |
|---|---|
| Flame Claws | 350 gil |
| Ice Claws | 450 gil |
| Lightning Claws | 550 gil |
| Metal Knuckles*After the Second Battle of Fabul. | 600 gil |
| Armor | Price |
|---|---|
| Leather Cap | 100 gil |
| Feathered Cap | 330 gil |
| Headband*After the Second Battle of Fabul. | 450 gil |
| Leather Clothing | 200 gil |
| Bronze Breastplate | 450 gil |
| Kenpo Gi*After the Second Battle of Fabul. | 4,000 gil |
| Iron Armlet | 100 gil |
| Silver Armlet*Second Battle of Fabul. | 650 gil |
The Crystals
| Item | Price |
|---|---|
| Potion | 30 gil |
| Hi-Potion | 150 gil |
| Phoenix Down | 100 gil |
| Gold Needle | 400 gil |
| Maiden's Kiss | 60 gil |
| Eye Drops | 30 gil |
| Antidote | 40 gil |
| Echo Herbs | 50 gil |
| Tent | 100 gil |
| Cottage | 500 gil |
| Bomb Fragment | 200 gil |
| Antarctic Wind | 200 gil |
| Zeus's Wrath | 200 gil |
| Bestiary | 50 gil |
| Gnomish Bread*3D only | 100 gil |
| Weapon | Price |
|---|---|
| Flame Claws | 350 gil |
| Ice Claws | 450 gil |
| Lightning Claws | 550 gil |
| Metal Knuckle | 600 gil |
| Armor | Price |
|---|---|
| Leather Cap | 100 gil |
| Feathered Cap | 330 gil |
| Headband | 450 gil |
| Leather Clothing | 200 gil |
| Bronze Breastplate | 450 gil |
| Kenpo Gi | 4,000 gil |
| Iron Armlet | 100 gil |
| Silver Armlet | 650 gil |
Enemies

Fabul's Inn.
Final Fantasy IV
Fabul Area
- 2D versions
- Domovoi x3, Gatlinger x3
- Sword Rat x3 Gatlinger x3
- Cockatrice x3
- Gargoyle, Cockatrice x2
- Bomb x2, Gray Bomb x2
Yang's room.
- 3D versions
- Domovoi x2, Gray Bomb x1
- Bomb x3
- Sword Rat x3
- Cockatrice x2, Gatlinghog x1
- Gatlinghog x2, Domovoi x1
- Bomb x2, Gray Bomb x1
Battle against Baron
- 2D versions
- 3D versions
Final Fantasy IV -Interlude-
Fabul Area
- Gatlinghog, Domovoi x3
- Domovoi x4, Goblin x2
- Domovoi x3, Gatlinghog x3
- Balloon, Gray Bomb x2
- Fledgling Rukh x3
- Gargoyle, Fledgling Rukh x2
Final Fantasy IV: The After Years
- Fabul Area
Musical themes
The background music that plays in Fabul is its eponymous theme, "Fabul".
Other appearances
Final Fantasy XIV
One of the original servers was named Fabul. It was merged with the Besaid server into the Balmung server.
Final Fantasy Airborne Brigade

Fabul Region is a location.
Final Fantasy Record Keeper
Painting image.
Its monk warriors decimated, Fabul is in dire straits. Cecil and Edward come to stand with Yang against the forces of Baron.
Description
Fabul Castle is unlocked by completing Mount Hobs in the Final Fantasy IV realm. Completion of this dungeon unlocks Baron Castle in the Final Fantasy IV realm.
- Classic Rewards
| Completion Type | Item | Quantity |
|---|---|---|
| First Time Completion | Rydia | 1 |
| Mythril | 1 | |
| Completion Reward | Gil | 700 |
| Mastery Reward | Minor Lightning Orb | 5 |
| Stamina Shard | 1 |
- Elite Rewards
| Completion Type | Item | Quantity |
|---|---|---|
| First Time Completion | Mythril | 1 |
| Stamina Shard | 1 | |
| Completion Reward | Gil | 3,500 |
| Mastery Reward | Greater Black Orb | 3 |
| Stamina Shard | 1 |
Final Fantasy Brave Exvius
Gallery
")
")
")
")
")
")
")
")
")
")
")
")
")
")
")
")
")
")
")
")
")
")
Trivia

The two guards.
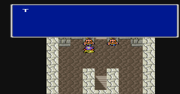
- In the SNES version, after Golbez's siege on Fabul, the two guards on Floor 2 right before the King's Room both say nothing but "T".
- In Final Fantasy IX, Cid Fabool IX, the regent of Lindblum, is an allusion to Fabul. Lindblum, similar to Fabul, is a giant castle with the town within it.
- Though no longer considered canon, the Settei Shiryuu Hen guide book gives background details on the world of Final Fantasy IV that feature several allusions to Final Fantasy II, including the name of the Dark Knight who left the Deathbringer in Fabul being named Leonhart.