Intangir Bot (talk | contribs) m (Robot: Automated text replacement (-X-2a +X2a)) |
m (prob needs disambiguating due to Bone Village...?) |
||
| (45 intermediate revisions by 15 users not shown) | |||
| Line 1: | Line 1: | ||
| − | {{sideicon| |
+ | {{sideicon|X2}} |
| − | [[File:Digging at Bikanel Desert.jpg|thumb|Digging |
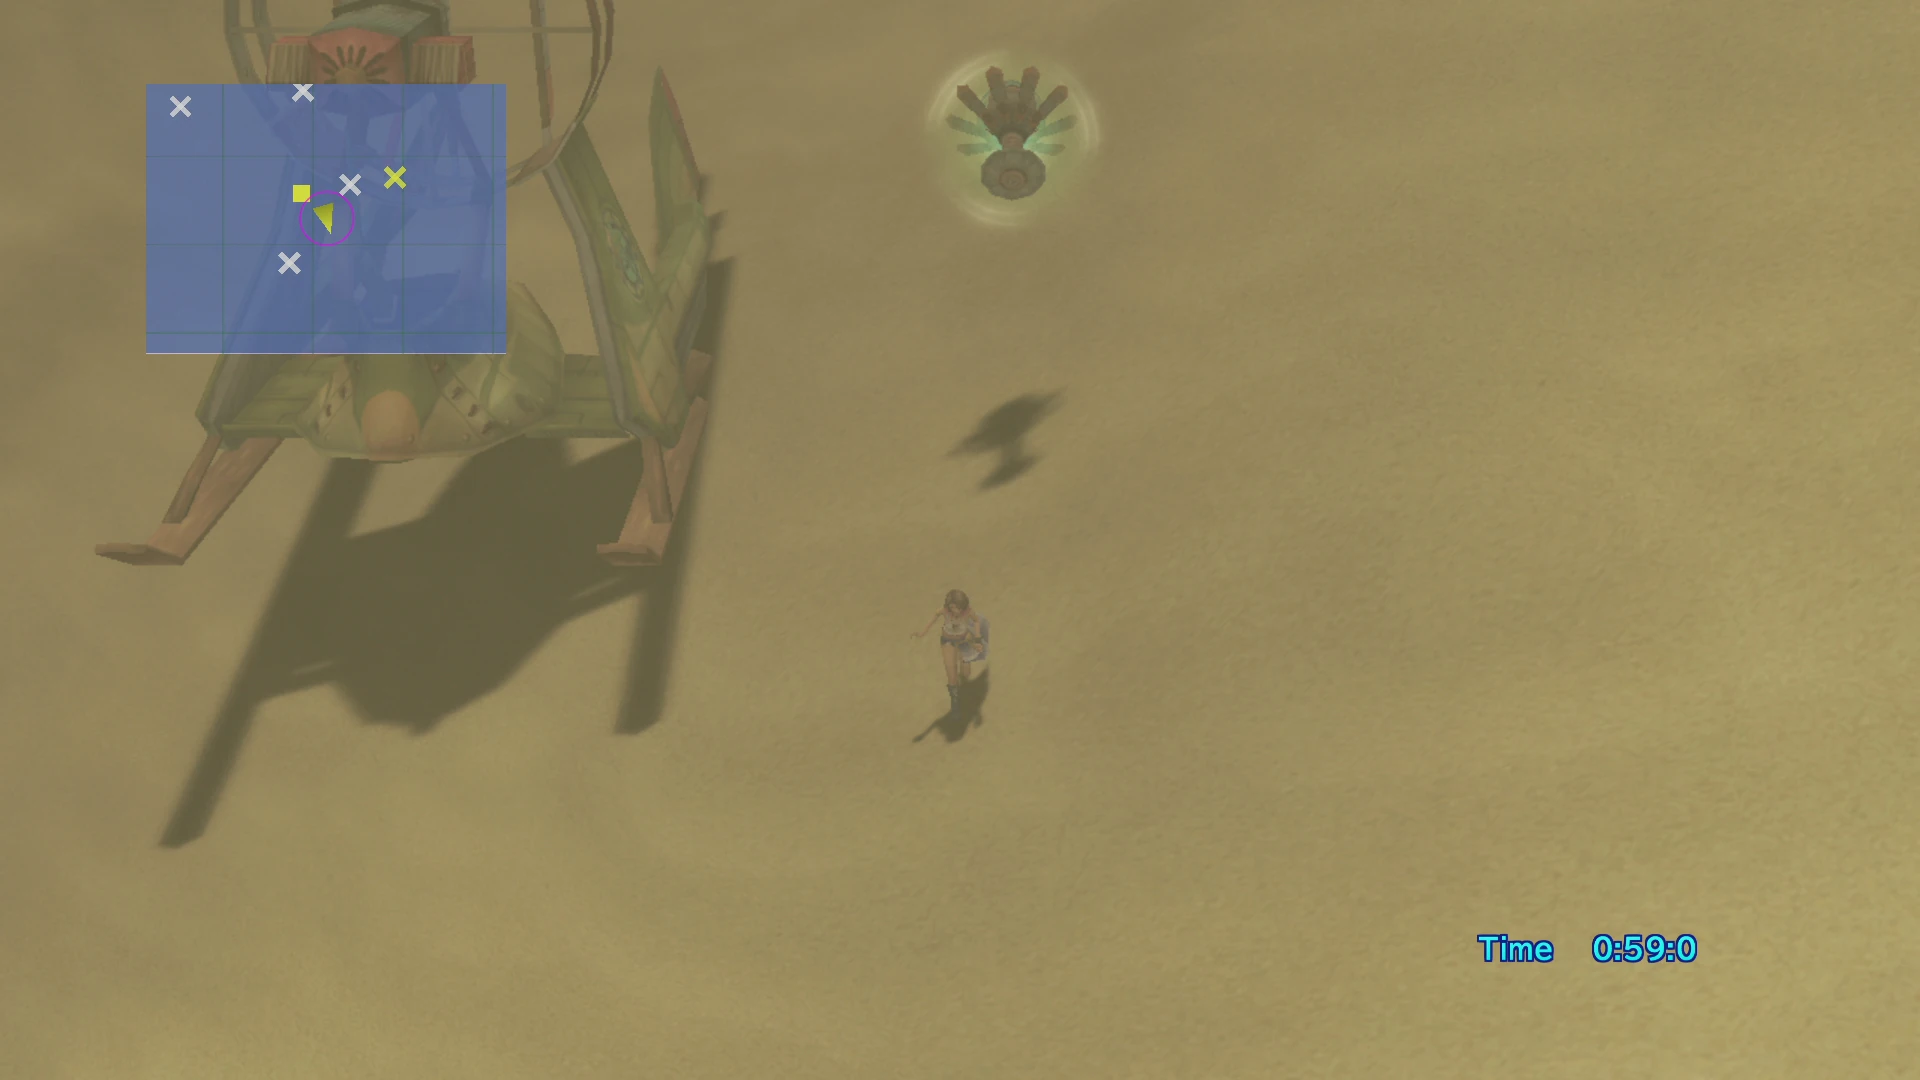
+ | [[File:Digging at Bikanel Desert.jpg|thumb|250px|Digging in the desert.]] |
| − | The |
+ | The '''excavation minigame''' can be played in Chapters 1, 2, 3 and 5 of ''[[Final Fantasy X-2]]''. It involves searching for hidden treasures in various parts of the [[Bikanel|Bikanel Desert]], with [[Picket]] advising the player of danger. |
| − | To initiate the |
+ | To initiate the minigame the player must visit [[Djose Temple]] and get enlisted by the [[Machine Faction]] by talking to [[Gippal]] and answering "We're sure" when the option comes up. He will give the [[Gullwings]] the Letter of Introduction key item. This will make Bikanel a Hotspot when the Gullwings return to the ''[[Celsius]]''. |
| − | Visiting Bikanel and talking to [[Nhadala]] will initiate the minigame. In Chapter 2 she will send the Gullwings to the Oasis to investigate some suspicious activity. |
+ | Visiting Bikanel and talking to [[Nhadala]] will initiate the minigame. In Chapter 2, she will send the Gullwings to the Oasis to investigate some suspicious activity. |
==Digging== |
==Digging== |
||
| − | The player is given |
+ | The player is given 60 seconds to find a golden X on the map and dig up the mission-critical item. This will be either an assembly piece, which will affect the strength of [[Experiment (Final Fantasy X-2)|Experiment]] in Chapter 5, or a piece of Scrap Metal. There will also be four silver X on the map the player may also hunt for. These will either award the player an item, an [[Al Bhed Primer]], a [[Sphere Break]] coin, or will initiate a [[Battle (term)|battle]]. Successfully finding the mission-critical item and returning to the hover before the [[timer]] runs out rewards the party with gil depending on their wage. The golden X will always appear with at least 25 seconds remaining. |
| − | Once the assembly piece is uncovered |
+ | Once the assembly piece is uncovered the player should return to the hover before the time runs out. If the player fails to make it back in time, [[Yuna]] will collapse and lose all they have obtained during the dig. Failing to retrieve the mission-critical item also results in a loss. In the Western Expanse and the Central Expanse the player will also have to compete with other diggers for the treasures. |
| − | Occasionally |
+ | Occasionally after three to ten seconds have passed, the screen may flash red with a warning of an unidentified object approaching the area. Later on in the dig a red reticule may appear on the map heading for Yuna. If the reticule meets Yuna a battle will initiate. In Chapters 1, 2 and 3 this will be a battle against the [[superboss]] [[Angra Mainyu (Final Fantasy X-2)|Angra Mainyu]], and the player cannot yet defeat it at this point as it will always [[eject]] the party. In Chapter 5 a battle against monsters indigenous to the area will initiate instead. |
| + | |||
| + | ==Guide Map Legend== |
||
| + | The player will find the following icons on the guide map: |
||
| + | *Yellow Square: The [[Hover (Final Fantasy X)|Hover]]. |
||
| + | *Golden X: Mission-critical item. |
||
| + | *Silver X: Gil, Al Bhed Primers, monsters, assembly piece, sphere break coins, or items. |
||
| + | *Green X: Event battle against [[Machina Hunter]]s, one time only (Eastern Expanse). |
||
| + | *Red Arrow in a circle: A red arrow coming towards the party is [[Angra Mainyu (Final Fantasy X-2)|Angra Mainyu]] or an indigenous encounter. Picket will warn the party of an unidentified object approaching (Anywhere the player can dig). |
||
| + | *Silver Blinking Arrow in a circle: An Al Bhed digger (Western Expanse). |
||
| + | *Yellow Arrow in a circle: [[Yuna]]. |
||
| + | |||
| + | ==Areas== |
||
| + | At certain points of the game, new areas will be unlocked. |
||
| + | *Western Expanse: Unlocked after mission "Can you Dig It?" in Chapter 1. |
||
| + | *Southern Expanse: Unlocked after mission "Water we doing here? in Chapter 2. |
||
| + | *Eastern Expanse: Unlocked when the mission "The Cactuar Connection" is started in Chapter 3. |
||
| + | *Northern Expanse: Unlocked when the mission "The Cactuar Connection" is started in Chapter 3. |
||
| + | *Central Expanse: Unlocked after a chocobo is sent from the ranch to Bikanel. |
||
==Treasures== |
==Treasures== |
||
| − | There are numerous |
+ | There are numerous treasures to find. Different items are found in different areas, and will be found at the white crosses on the map. |
| − | {| |
+ | {|class="full-width X2 article-table" style="text-align:center" |
| − | |- |
+ | |-class="a" |
!width="20%"|Western Expanse |
!width="20%"|Western Expanse |
||
!width="20%"|Southern Expanse |
!width="20%"|Southern Expanse |
||
| Line 39: | Line 57: | ||
|1000 Gil |
|1000 Gil |
||
|1000 gil |
|1000 gil |
||
| − | |[[ |
+ | |[[Al Bhed Primer]]* |
| − | |[[ |
+ | |[[Al Bhed Primer]]* |
| − | |[[ |
+ | |[[Al Bhed Primer]]* |
|- |
|- |
||
|3000 gil |
|3000 gil |
||
| + | |4000 Gil |
||
| ⚫ | |||
| − | |Echo Screen |
+ | |[[Final Fantasy X-2 items#Echo Screen|Echo Screen]] |
| − | |Candle of Life |
+ | |[[Final Fantasy X-2 items#Candle of Life|Candle of Life]] |
| − | |Desert Key** |
+ | |[[Final Fantasy X-2 items#Desert Key|Desert Key]]** |
|- |
|- |
||
| − | |[[ |
+ | |[[Al Bhed Primer]]* |
| ⚫ | |||
| − | |Antarctic Wind |
||
| ⚫ | |||
| − | |Ether |
||
| − | |Chocobo Feather |
+ | |[[Final Fantasy X-2 items#Chocobo Feather|Chocobo Feather]] |
| − | |Dispel Tonic |
+ | |[[Final Fantasy X-2 items#Dispel Tonic|Dispel Tonic]] |
|- |
|- |
||
| + | |[[Final Fantasy X-2 items#Antidote|Antidote]] |
||
| − | |Antidote |
||
| + | |[[Final Fantasy X-2 items#Antarctic Wind|Antarctic Wind]] |
||
| − | |Arctic Wind |
||
| − | |Eye Drops |
+ | |[[Final Fantasy X-2 items#Eye Drops|Eye Drops]] |
| − | |Chocobo Wing |
+ | |[[Final Fantasy X-2 items#Chocobo Wing|Chocobo Wing]] |
| + | |[[Final Fantasy X-2 items#Ether|Ether]] |
||
| − | |Ether |
||
|- |
|- |
||
| − | |Echo Screen |
+ | |[[Final Fantasy X-2 items#Echo Screen|Echo Screen]] |
| + | |[[Final Fantasy X-2 items#Arctic Wind|Arctic Wind]] |
||
| − | |[[Bomb Core]] |
||
| − | |[[Hi-Potion]] |
+ | |[[Final Fantasy X-2 items#Hi-Potion|Hi-Potion]] |
| − | |Hi-Potion |
+ | |[[Final Fantasy X-2 items#Hi-Potion|Hi-Potion]] |
| − | |Farplane Shadow |
+ | |[[Final Fantasy X-2 items#Farplane Shadow|Farplane Shadow]] |
|- |
|- |
||
| + | |[[Final Fantasy X-2 items#Ether|Ether]] |
||
| − | |Ether |
||
| + | |[[Final Fantasy X-2 items#Bomb Core|Bomb Core]] |
||
| − | |[[Bomb Fragment]] |
||
| − | |Mega Phoenix |
+ | |[[Final Fantasy X-2 items#Mega Phoenix|Mega Phoenix]] |
| − | |Light Curtain |
+ | |[[Final Fantasy X-2 items#Light Curtain|Light Curtain]] |
| + | |[[Final Fantasy X-2 items#Grenade|Grenade]] |
||
| − | |Grenade |
||
|- |
|- |
||
| − | |Eye Drops |
+ | |[[Final Fantasy X-2 items#Eye Drops|Eye Drops]] |
| + | |[[Final Fantasy X-2 items#Bomb Fragment|Bomb Fragment]] |
||
| − | |Budget Grenade |
||
| − | |Phoenix Down |
+ | |[[Final Fantasy X-2 items#Phoenix Down|Phoenix Down]] |
| − | |Lunar Curtain |
+ | |[[Final Fantasy X-2 items#Lunar Curtain|Lunar Curtain]] |
| − | |Hi-Potion |
+ | |[[Final Fantasy X-2 items#Hi-Potion|Hi-Potion]] |
|- |
|- |
||
| − | |Hi-Potion |
+ | |[[Final Fantasy X-2 items#Hi-Potion|Hi-Potion]] |
| + | |[[Final Fantasy X-2 items#Budget Grenade|Budget Grenade]] |
||
| − | |Dark Grenade |
||
| + | |[[Final Fantasy X-2 items#Potion|Potion]] |
||
| − | |Potion |
||
| − | |Phoenix Down |
+ | |[[Final Fantasy X-2 items#Phoenix Down|Phoenix Down]] |
| + | |[[Final Fantasy X-2 items#M-Bomb|M-Bomb]] |
||
| − | |M-Bomb |
||
|- |
|- |
||
| − | |Holy Water |
+ | |[[Final Fantasy X-2 items#Holy Water|Holy Water]] |
| + | |[[Final Fantasy X-2 items#Dark Grenade|Dark Grenade]] |
||
| − | |Dragon Scale |
||
| + | |[[Final Fantasy X-2 items#Power Gloves|Power Gloves]] |
||
| − | |Remedy |
||
| + | |[[Final Fantasy X-2 items#Potion|Potion]] |
||
| − | |Potion |
||
| − | |Mega Potion |
+ | |[[Final Fantasy X-2 items#Mega Potion|Mega Potion]] |
|- |
|- |
||
| − | |Phoenix Down |
+ | |[[Final Fantasy X-2 items#Phoenix Down|Phoenix Down]] |
| + | |[[Final Fantasy X-2 items#Dragon Scale|Dragon Scale]] |
||
| − | |Electro Marble |
||
| + | |[[Final Fantasy X-2 items#Remedy|Remedy]] |
||
| − | |Soft |
||
| − | |Silver Hourglass |
+ | |[[Final Fantasy X-2 items#Silver Hourglass|Silver Hourglass]] |
| − | |Nature's Tome |
+ | |[[Final Fantasy X-2 accessories#Nature's Tome|Nature's Tome]] |
|- |
|- |
||
| + | |[[Final Fantasy X-2 items#Potion|Potion]] |
||
| − | |Potion |
||
| + | |[[Final Fantasy X-2 items#Electro Marble|Electro Marble]] |
||
| − | |Fish Scale |
||
| + | |[[Final Fantasy X-2 items#Soft|Soft]] |
||
| − | |Star Curtain |
||
| + | | |
||
| − | |Twin Stars |
||
| − | |Poison Fang |
+ | |[[Final Fantasy X-2 items#Poison Fang|Poison Fang]] |
|- |
|- |
||
| + | |[[Final Fantasy X-2 items#Soft|Soft]] |
||
| − | |Remedy |
||
| + | |[[Final Fantasy X-2 items#Fish Scale|Fish Scale]] |
||
| − | |Grenade |
||
| |
| |
||
| |
| |
||
| + | |[[Final Fantasy X-2 items#Potion|Potion]] |
||
| − | |Potion |
||
|- |
|- |
||
| + | | |
||
| − | |Soft |
||
| + | |[[Final Fantasy X-2 items#Grenade|Grenade]] |
||
| − | |L-Bomb |
||
| |
| |
||
| |
| |
||
| + | |[[Final Fantasy X-2 items#S-Bomb|S-Bomb]] |
||
| − | |S-Bomb |
||
|- |
|- |
||
| |
| |
||
| + | |[[Final Fantasy X-2 items#L-Bomb|L-Bomb]] |
||
| − | |Lightning Marble |
||
| |
| |
||
| |
| |
||
| Line 122: | Line 140: | ||
|- |
|- |
||
| |
| |
||
| + | |[[Final Fantasy X-2 items#Lightning Marble|Lightning Marble]] |
||
| − | |M-Bomb |
||
| |
| |
||
| |
| |
||
| Line 128: | Line 146: | ||
|- |
|- |
||
| |
| |
||
| + | |[[Final Fantasy X-2 items#M-Bomb|M-Bomb]] |
||
| − | |Petrify Grenade |
||
| |
| |
||
| |
| |
||
| Line 134: | Line 152: | ||
|- |
|- |
||
| |
| |
||
| + | |[[Final Fantasy X-2 items#Petrify Grenade|Petrify Grenade]] |
||
| − | |Potion |
||
| |
| |
||
| |
| |
||
| Line 140: | Line 158: | ||
|- |
|- |
||
| |
| |
||
| + | |[[Final Fantasy X-2 items#Potion|Potion]] |
||
| − | |S-Bomb |
||
| |
| |
||
| |
| |
||
| Line 146: | Line 164: | ||
|- |
|- |
||
| |
| |
||
| + | |[[Final Fantasy X-2 items#S-Bomb|S-Bomb]] |
||
| − | |Silence Grenade |
||
| + | | |
||
| + | | |
||
| + | | |
||
| + | |- |
||
| + | | |
||
| + | |[[Final Fantasy X-2 items#Silence Grenade|Silence Grenade]] |
||
| |
| |
||
| |
| |
||
| |
| |
||
|} |
|} |
||
| − | <nowiki>*</nowiki> - The player may only have one copy of each Al Bhed Primer. |
+ | :<nowiki>*</nowiki> - The player may only have one copy of each Al Bhed Primer. |
| − | <nowiki>**</nowiki> - Desert Key can only be found once. This will open the chest at the campsite. |
+ | :<nowiki>**</nowiki> - Desert Key can only be found once. This will open the chest at the campsite. |
==Sphere Break Coins== |
==Sphere Break Coins== |
||
| − | Among the treasures |
+ | Among the treasures the player will find, they may also find Sphere Break Coins. Different coins can be found in different areas. |
| − | {| |
+ | {|class="full-width X2 article-table" style="text-align:center" |
| − | |- |
+ | |-class="a" |
!width="33%"|Western Expanse & Southern Expanse |
!width="33%"|Western Expanse & Southern Expanse |
||
!width="33%"|Eastern Expanse & Northern Expanse |
!width="33%"|Eastern Expanse & Northern Expanse |
||
| Line 169: | Line 193: | ||
|[[Behemoth (Final Fantasy X-2)|Behemoth]] |
|[[Behemoth (Final Fantasy X-2)|Behemoth]] |
||
|[[Bomb (Final Fantasy X-2)|Bomb]] |
|[[Bomb (Final Fantasy X-2)|Bomb]] |
||
| − | |[[Chocobo (Final Fantasy X-2)|Chocobo]] |
+ | |[[Chocobo (Final Fantasy X-2 enemy)|Chocobo]] |
|- |
|- |
||
| − | |[[Blade (Final Fantasy X)|Blade]] |
+ | |[[Blade (Final Fantasy X enemy family)|Blade]] |
|[[Cactuar (Final Fantasy X-2)|Cactuar]] |
|[[Cactuar (Final Fantasy X-2)|Cactuar]] |
||
|[[Dinictus]] |
|[[Dinictus]] |
||
|- |
|- |
||
|[[Chimera#Final Fantasy X-2|Chimera]] |
|[[Chimera#Final Fantasy X-2|Chimera]] |
||
| − | |[[Creeper]] |
+ | |[[Creeper (Final Fantasy X-2)|Creeper]] |
|[[Eater (Final Fantasy X)|Eater]] |
|[[Eater (Final Fantasy X)|Eater]] |
||
|- |
|- |
||
|[[Coeurl (Final Fantasy X-2)|Coeurl]] |
|[[Coeurl (Final Fantasy X-2)|Coeurl]] |
||
| − | |[[Dragon ( |
+ | |[[Dragon (enemy)#Final Fantasy X-2|Dragon]] |
|[[Evrae]] |
|[[Evrae]] |
||
|- |
|- |
||
| − | |[[Coyote]] |
+ | |[[Coyote (Final Fantasy X-2)|Coyote]] |
|[[Fungus (Final Fantasy X)|Fungus]] |
|[[Fungus (Final Fantasy X)|Fungus]] |
||
|[[Gel]] |
|[[Gel]] |
||
| Line 191: | Line 215: | ||
|[[Haizhe]] |
|[[Haizhe]] |
||
|- |
|- |
||
| − | |[[Defender (Final Fantasy X)|Defender]] |
+ | |[[Defender (Final Fantasy X enemy family)|Defender]] |
|[[Pairika]] |
|[[Pairika]] |
||
|[[Hermit (Final Fantasy X)|Hermit]] |
|[[Hermit (Final Fantasy X)|Hermit]] |
||
| Line 199: | Line 223: | ||
|[[Omega Weapon (Final Fantasy X-2)|Omega Weapon]] |
|[[Omega Weapon (Final Fantasy X-2)|Omega Weapon]] |
||
|- |
|- |
||
| − | |[[Elemental ( |
+ | |[[Elemental (enemy)#Final Fantasy X-2|Elemental]] |
|[[Sahagin (Final Fantasy X-2)|Sahagin]] |
|[[Sahagin (Final Fantasy X-2)|Sahagin]] |
||
|[[Tentacles (Final Fantasy X-2)|Tentacles]] |
|[[Tentacles (Final Fantasy X-2)|Tentacles]] |
||
|- |
|- |
||
| − | |[[Flan#Final Fantasy X-2|Flan]] |
+ | |[[Flan (enemy family)#Final Fantasy X-2|Flan]] |
| − | |[[Stalwart]] |
+ | |[[Stalwart (Final Fantasy X-2)|Stalwart]] |
|[[Ultima Weapon (Final Fantasy X-2)|Ultima Weapon]] |
|[[Ultima Weapon (Final Fantasy X-2)|Ultima Weapon]] |
||
|- |
|- |
||
| Line 215: | Line 239: | ||
| |
| |
||
|- |
|- |
||
| − | |[[Kukulcan]] |
+ | |[[Kukulcan (Final Fantasy X-2)|Kukulcan]] |
| |
| |
||
| |
| |
||
| Line 227: | Line 251: | ||
| |
| |
||
|- |
|- |
||
| − | |[[Ogre ( |
+ | |[[Ogre (enemy)#Final Fantasy X-2|Ogre]] |
| |
| |
||
| |
| |
||
| Line 260: | Line 284: | ||
|} |
|} |
||
| + | ==Ranks== |
||
| − | {{Sidequests}} |
||
| + | There are several ranks obtained through accumulating successful digs. Failing digs will count against gaining a rank. The ranks do not affect payment or unlocking new areas. |
||
| + | |||
| + | {|class="half-width X2 article-table" style="text-align:center" |
||
| + | |-class="a" |
||
| + | !width="50%"|Digs |
||
| + | !width="50%"|Rank |
||
| + | |- |
||
| + | !class="b"|0 |
||
| + | |Sandbox League |
||
| + | |- |
||
| + | !class="b"|15 |
||
| + | |Beach Comber |
||
| + | |- |
||
| + | !class="b"|30 |
||
| + | |Sand Blaster |
||
| + | |- |
||
| + | !class="b"|60 |
||
| + | |Zen Master of Digging |
||
| + | |} |
||
| + | {{navbox X2}} |
||
| ⚫ | |||
| + | {{navbox minigames}} |
||
| − | [[Category:Minigames]] |
+ | [[Category:Minigames in Final Fantasy X-2]] |
Revision as of 13:38, 10 March 2019
Template:Sideicon
Digging in the desert.
The excavation minigame can be played in Chapters 1, 2, 3 and 5 of Final Fantasy X-2. It involves searching for hidden treasures in various parts of the Bikanel Desert, with Picket advising the player of danger.
To initiate the minigame the player must visit Djose Temple and get enlisted by the Machine Faction by talking to Gippal and answering "We're sure" when the option comes up. He will give the Gullwings the Letter of Introduction key item. This will make Bikanel a Hotspot when the Gullwings return to the Celsius.
Visiting Bikanel and talking to Nhadala will initiate the minigame. In Chapter 2, she will send the Gullwings to the Oasis to investigate some suspicious activity.
Digging
The player is given 60 seconds to find a golden X on the map and dig up the mission-critical item. This will be either an assembly piece, which will affect the strength of Experiment in Chapter 5, or a piece of Scrap Metal. There will also be four silver X on the map the player may also hunt for. These will either award the player an item, an Al Bhed Primer, a Sphere Break coin, or will initiate a battle. Successfully finding the mission-critical item and returning to the hover before the timer runs out rewards the party with gil depending on their wage. The golden X will always appear with at least 25 seconds remaining.
Once the assembly piece is uncovered the player should return to the hover before the time runs out. If the player fails to make it back in time, Yuna will collapse and lose all they have obtained during the dig. Failing to retrieve the mission-critical item also results in a loss. In the Western Expanse and the Central Expanse the player will also have to compete with other diggers for the treasures.
Occasionally after three to ten seconds have passed, the screen may flash red with a warning of an unidentified object approaching the area. Later on in the dig a red reticule may appear on the map heading for Yuna. If the reticule meets Yuna a battle will initiate. In Chapters 1, 2 and 3 this will be a battle against the superboss Angra Mainyu, and the player cannot yet defeat it at this point as it will always eject the party. In Chapter 5 a battle against monsters indigenous to the area will initiate instead.
Guide Map Legend
The player will find the following icons on the guide map:
- Yellow Square: The Hover.
- Golden X: Mission-critical item.
- Silver X: Gil, Al Bhed Primers, monsters, assembly piece, sphere break coins, or items.
- Green X: Event battle against Machina Hunters, one time only (Eastern Expanse).
- Red Arrow in a circle: A red arrow coming towards the party is Angra Mainyu or an indigenous encounter. Picket will warn the party of an unidentified object approaching (Anywhere the player can dig).
- Silver Blinking Arrow in a circle: An Al Bhed digger (Western Expanse).
- Yellow Arrow in a circle: Yuna.
Areas
At certain points of the game, new areas will be unlocked.
- Western Expanse: Unlocked after mission "Can you Dig It?" in Chapter 1.
- Southern Expanse: Unlocked after mission "Water we doing here? in Chapter 2.
- Eastern Expanse: Unlocked when the mission "The Cactuar Connection" is started in Chapter 3.
- Northern Expanse: Unlocked when the mission "The Cactuar Connection" is started in Chapter 3.
- Central Expanse: Unlocked after a chocobo is sent from the ranch to Bikanel.
Treasures
There are numerous treasures to find. Different items are found in different areas, and will be found at the white crosses on the map.
| Western Expanse | Southern Expanse | Eastern Expanse | Northern Expanse | Central Expanse |
|---|---|---|---|---|
| 200 Gil | 200 Gil | 1000 Gil | 400 Gil | 1000 Gil |
| 500 Gil | 400 gil | 5000 gil | 5000 gil | 2000 gil |
| 1000 Gil | 1000 gil | Al Bhed Primer* | Al Bhed Primer* | Al Bhed Primer* |
| 3000 gil | 4000 Gil | Echo Screen | Candle of Life | Desert Key** |
| Al Bhed Primer* | Al Bhed Primer* | Ether | Chocobo Feather | Dispel Tonic |
| Antidote | Antarctic Wind | Eye Drops | Chocobo Wing | Ether |
| Echo Screen | Arctic Wind | Hi-Potion | Hi-Potion | Farplane Shadow |
| Ether | Bomb Core | Mega Phoenix | Light Curtain | Grenade |
| Eye Drops | Bomb Fragment | Phoenix Down | Lunar Curtain | Hi-Potion |
| Hi-Potion | Budget Grenade | Potion | Phoenix Down | M-Bomb |
| Holy Water | Dark Grenade | Power Gloves | Potion | Mega Potion |
| Phoenix Down | Dragon Scale | Remedy | Silver Hourglass | Nature's Tome |
| Potion | Electro Marble | Soft | Poison Fang | |
| Soft | Fish Scale | Potion | ||
| Grenade | S-Bomb | |||
| L-Bomb | ||||
| Lightning Marble | ||||
| M-Bomb | ||||
| Petrify Grenade | ||||
| Potion | ||||
| S-Bomb | ||||
| Silence Grenade |
- * - The player may only have one copy of each Al Bhed Primer.
- ** - Desert Key can only be found once. This will open the chest at the campsite.
Sphere Break Coins
Among the treasures the player will find, they may also find Sphere Break Coins. Different coins can be found in different areas.
| Western Expanse & Southern Expanse | Eastern Expanse & Northern Expanse | Central Expanse |
|---|---|---|
| Adamantoise | Arachnid | Azi Dahaka |
| Behemoth | Bomb | Chocobo |
| Blade | Cactuar | Dinictus |
| Chimera | Creeper | Eater |
| Coeurl | Dragon | Evrae |
| Coyote | Fungus | Gel |
| Daeva | Magic Urn | Haizhe |
| Defender | Pairika | Hermit |
| Drake | Piranha | Omega Weapon |
| Elemental | Sahagin | Tentacles |
| Flan | Stalwart | Ultima Weapon |
| Helm | Tonberry | |
| Iron Giant | ||
| Kukulcan | ||
| Malboro | ||
| Ochu | ||
| Ogre | ||
| Phantom | ||
| Purpurea | ||
| Ruminant | ||
| Tomb | ||
| Worm | ||
| Zu | ||
| Zurvan |
Ranks
There are several ranks obtained through accumulating successful digs. Failing digs will count against gaining a rank. The ranks do not affect payment or unlocking new areas.
| Digs | Rank |
|---|---|
| 0 | Sandbox League |
| 15 | Beach Comber |
| 30 | Sand Blaster |
| 60 | Zen Master of Digging |