Shockstorm (talk | contribs) mNo edit summary |
Intangir Bot (talk | contribs) m (relinking, replaced: [[Petrify| → [[Petrify (Status)| (2)) |
||
| Line 120: | Line 120: | ||
|- |
|- |
||
|bgcolor="#1E90FF"|'''Status Immunity''' |
|bgcolor="#1E90FF"|'''Status Immunity''' |
||
| − | |[[Instant Death|Death]], [[Petrify|Petrification]], [[Silence (Status)|Silence]], [[Blind (Status)|Darkness]], [[Poison (Status)|Poison]], [[Confusion]], [[Berserk (Status)|Berserk]], [[Curse (Status)|Curse]], [[Eject]], [[Slow (Status)|Slow]], [[Stop (Status)|Stop]], [[Doom (Status)|Doom]], [[Delay Attack|Delay]], Preparation Interruption, Multiple Damage |
+ | |[[Instant Death|Death]], [[Petrify (Status)|Petrification]], [[Silence (Status)|Silence]], [[Blind (Status)|Darkness]], [[Poison (Status)|Poison]], [[Confusion]], [[Berserk (Status)|Berserk]], [[Curse (Status)|Curse]], [[Eject]], [[Slow (Status)|Slow]], [[Stop (Status)|Stop]], [[Doom (Status)|Doom]], [[Delay Attack|Delay]], Preparation Interruption, Multiple Damage |
|- |
|- |
||
|bgcolor="#1E90FF"|'''Other Information''' |
|bgcolor="#1E90FF"|'''Other Information''' |
||
| Line 232: | Line 232: | ||
|- |
|- |
||
|bgcolor="#1E90FF"|'''Status Immunity''' |
|bgcolor="#1E90FF"|'''Status Immunity''' |
||
| − | |[[Instant Death|Death]], [[Petrify|Petrification]], [[Sleep (Status)|Sleep]], [[Silence (Status)|Silence]], [[Blind (Status)|Darkness]], [[Poison (Status)|Poison]], [[Confusion]], [[Berserk (Status)|Berserk]], [[Curse (Status)|Curse]], [[Eject]], [[Slow (Status)|Slow]], [[Stop (Status)|Stop]], [[Doom (Status)|Doom]], [[Delay Attack|Delay]], Preparation Interruption, Multiple Damage |
+ | |[[Instant Death|Death]], [[Petrify (Status)|Petrification]], [[Sleep (Status)|Sleep]], [[Silence (Status)|Silence]], [[Blind (Status)|Darkness]], [[Poison (Status)|Poison]], [[Confusion]], [[Berserk (Status)|Berserk]], [[Curse (Status)|Curse]], [[Eject]], [[Slow (Status)|Slow]], [[Stop (Status)|Stop]], [[Doom (Status)|Doom]], [[Delay Attack|Delay]], Preparation Interruption, Multiple Damage |
|- |
|- |
||
|bgcolor="#1E90FF"|'''Other Information''' |
|bgcolor="#1E90FF"|'''Other Information''' |
||
Revision as of 04:20, 1 November 2012
| Final Fantasy X-2 Boss | ||||||||||||||||||||||||||||||||||||||||||||||||||||||||||||||||||||||||||||||||||||||||||||||||||||||||||||||||||||
|---|---|---|---|---|---|---|---|---|---|---|---|---|---|---|---|---|---|---|---|---|---|---|---|---|---|---|---|---|---|---|---|---|---|---|---|---|---|---|---|---|---|---|---|---|---|---|---|---|---|---|---|---|---|---|---|---|---|---|---|---|---|---|---|---|---|---|---|---|---|---|---|---|---|---|---|---|---|---|---|---|---|---|---|---|---|---|---|---|---|---|---|---|---|---|---|---|---|---|---|---|---|---|---|---|---|---|---|---|---|---|---|---|---|---|---|---|
| Elma | ||||||||||||||||||||||||||||||||||||||||||||||||||||||||||||||||||||||||||||||||||||||||||||||||||||||||||||||||||||
| ||||||||||||||||||||||||||||||||||||||||||||||||||||||||||||||||||||||||||||||||||||||||||||||||||||||||||||||||||||
| None | ||||||||||||||||||||||||||||||||||||||||||||||||||||||||||||||||||||||||||||||||||||||||||||||||||||||||||||||||||||
| Japanese | エルマ | |||||||||||||||||||||||||||||||||||||||||||||||||||||||||||||||||||||||||||||||||||||||||||||||||||||||||||||||||||
| Romaji | Eruma | |||||||||||||||||||||||||||||||||||||||||||||||||||||||||||||||||||||||||||||||||||||||||||||||||||||||||||||||||||
| ||||||||||||||||||||||||||||||||||||||||||||||||||||||||||||||||||||||||||||||||||||||||||||||||||||||||||||||||||||
| ||||||||||||||||||||||||||||||||||||||||||||||||||||||||||||||||||||||||||||||||||||||||||||||||||||||||||||||||||||
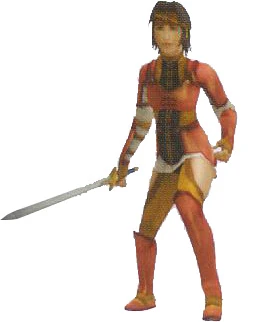
Elma is a boss enemy in Final Fantasy X-2. She is encountered during Chapter 2 if the Awesome Sphere was given to New Yevon, and during Chapter 5 if the player accepts the tournament mission. At both times she can be fought, she is fought in Mushroom Rock Road.
Strategy
First Encounter
A warrior of the Youth League. She wasn't planning to fight Yuna, but she certainly seems to be enjoying the challenge.
Scan
Elma is not that much of a threat to deal with, though her biggest threat will be her Haste spell. The party should focus on taking out her companions first before targeting Elma herself. If anyone's HP falls below 300, one should heal with a Hi-Potion. If anyone has learned the Songstress ability Sleepy Shuffle, it will make this fight even easier, since Elma is not immune to the Sleep status.
Second Encounter
A warrior of the Youth League. She is Lucil's most promising pupil, demonstrating great prowess in battle. She can get a bit hyper from time to time.
Scan
This battle is much more difficult in comparison to the first battle. Elma now uses all four -"ra" elemental spells, so if possible, one should aim to equip any dressphere, Garment Grid, or accessory (preferably Force of Nature) to absorb elemental damage. It's not worth casting positive statuses, as Elma simply dispels them. It is also best to not use any heavy magic-using dresspheres (Black Mage, White Mage, and Gun Mage in particular), since there is a great chance of them being silenced by Hush Grenade. If Elma uses Not-So-Mighty Guard one should counter with Dispel on Elma.
Template:Gallery
Template:FFX-2 Enemies
Coliseum
Template:Sec-stub
Related enemies
- Lucil
- Yaibal