No edit summary |
Intangir Bot (talk | contribs) m (Bot: Changing template: Locat-stub) |
||
| (47 intermediate revisions by 11 users not shown) | |||
| Line 1: | Line 1: | ||
| − | {{sideicon|LR}} |
+ | {{sideicon|LR|TFFCC|FFAB}} |
[[File:LRFFXIII - Dead Dunes.jpg|thumb|250px|The Dead Dunes.]] |
[[File:LRFFXIII - Dead Dunes.jpg|thumb|250px|The Dead Dunes.]] |
||
| − | {{ |
+ | {{Quote|A lifeless desert within which rests a holy relic.<br/>This region is covered with endless desert sands as far as the eye can see. Within it can be found the shanties which form a base for treasure hunters seeking their fortune in the arid wilderness, as well as ancient ruins said to conceal a divine treasure.<br/>Many monsters with a character unique to the area appear in this region, such as the sand swimming fiends of the open desert and the undead horrors that lurk within the ruins.|Official description<ref>http://lightningreturns.com/world/dunes</ref>}} |
| − | The '''Dead Dunes''' {{J|デッドデューン|Deddo |
+ | The '''Dead Dunes''' {{J|デッドデューン|Deddo Dyūn}} is the [[Desert (location)|desert continent]] in [[Nova Chrysalia]] in ''[[Lightning Returns: Final Fantasy XIII]]''. The area is dotted with ruins and [[Lightning (Final Fantasy XIII)|Lightning]] can slide down the steep dunes. An oasis village serves as a base for the local bandit group called [[Monoculus]]. The [[fal'Cie]] [[Atomos (Final Fantasy XIII)|Atomos]] and parts of [[Titan (Final Fantasy XIII)|Titan]] are found among the sand, rendered immobile, suggesting the Dead Dunes was once the [[Archylte Steppe]]. |
| + | |||
| + | This area is much more sparsely populated than the other areas of Nova Chrysalia and has fewer [[Lightning Returns: Final Fantasy XIII quests|quests]]. The desert is considered more dangerous during the day time, when the toughest enemies come out. The ruins below the desert don't have a [[day and night cycle]]. The player can fast-travel the area via the red cactuar waystones, which are scattered around the desert and in the ruins below. |
||
==Datalog== |
==Datalog== |
||
| − | {{See |
+ | {{See|Datalog (Final Fantasy XIII)/Locations}} |
''The fringes of this desolate desert are lapped by the ocean of Chaos. It is not a place meant for human inhabitation, but thanks to the ancient ruins that are scattered among the dunes, many lawless bandits have come here to plunder the treasure within.'' |
''The fringes of this desolate desert are lapped by the ocean of Chaos. It is not a place meant for human inhabitation, but thanks to the ancient ruins that are scattered among the dunes, many lawless bandits have come here to plunder the treasure within.'' |
||
''In the desert, wild monsters are most active during daylight hours. Unlike other parts of the world, nights in the desert are blessed by relative peace and quiet.'' |
''In the desert, wild monsters are most active during daylight hours. Unlike other parts of the world, nights in the desert are blessed by relative peace and quiet.'' |
||
| Line 14: | Line 16: | ||
{{spoiler}} |
{{spoiler}} |
||
[[File:LRFFXIII Crux.png|thumb|Lightning activates a crux.]] |
[[File:LRFFXIII Crux.png|thumb|Lightning activates a crux.]] |
||
| − | Lightning arrives on the Dead Dunes following the rumors that an artifact called the holy clavis is buried somewhere in the desert. Suspecting the local bandits know something |
+ | Lightning arrives on the Dead Dunes following the rumors that an artifact called the [[holy clavis]] is buried somewhere in the desert. Suspecting the local bandits know something about it, she locates their settlement, [[Ruffian (Lightning Returns)|Ruffian]]. Lightning speaks with a Monoculus member named [[Adonis]], who says they won't divulge anything until Lightning joins their gang. As a trial, Adonis tasks Lightning with stopping the sandstorm known as [[God's Wrath]] that blocks a path to the settlement. After defeating a [[Gurangatch (Lightning Returns)|Gurangatch]], Lightning obtains a crux which helps her operate a monument to quell God's Wrath. |
| − | Adonis accepts Lightning as a part of Monoculus and reveals the group's boss is a woman who knows Lightning and has been keeping tabs on her ever since she got off the |
+ | Adonis accepts Lightning as a part of Monoculus and reveals the group's boss is a woman who knows Lightning and has been keeping tabs on her ever since she got off the [[monorail]] at the station. Back in the Ruffian, Adonis introduces Lightning to the boss, her old friend [[Oerba Yun Fang|Fang]]. Fang explains she left the [[Order of Salvation]] in [[Luxerion]] and is now looking for the clavis, and asks Lightning's help. |
| + | Fang and Lightning team up and head for the [[Temple Ruins]], an ancient maze under the desert. As Lightning is the [[Savior (Lightning Returns)|savior]] can open the doorway. Fang and Lightning locate tablets from shrines around the desert and use them to activate murals within the ruins to open the chamber where the clavis is kept. The murals spell humanity's creation story, showing how Goddess [[Etro]]'s blood birthed mankind, whose [[Soul (Fabula Nova Crystallis)|souls]] would cycle between death and rebirth. The god [[Bhunivelze (character)|Bhunivelze]], however, saw death as impure, and thus the souls of the dead as tainted. |
||
| − | Lightning and Fang reach the clavis and to Lightning's surprise Fang sets out to destroy it, but Lightning stops her. Fang explains Vanille wants to use the clavis to draw in the anguished souls of the dead from the Chaos so that the Order can destroy them for good, but the ritual would kill her. Lightning is shocked the Order wants to eradicate the souls of the dead, and that Vanille is onboard with their plan. |
||
| − | + | Lightning and Fang reach the clavis and to Lightning's surprise Fang sets out to destroy it. Lightning stops her. Fang explains her friend [[Oerba Dia Vanille|Vanille]] wants to use the clavis to draw in the anguished souls of the dead from the [[Chaos (Final Fantasy XIII)|Chaos]] so that the Order can destroy them, but the ritual would kill her. Lightning is shocked the Order wants to eradicate the souls of the dead, and that Vanille is onboard with their plan. |
|
| + | |||
| + | The Order's military branch, the Secutors, arrive to claim the clavis and send a monster after Lightning and Fang. The two defeat the monster, but meanwhile the Secutors nab the clavis and seal the pair within the chamber. The mysterious [[Lumina]] appears, gloating how she led the Secutors to them. She looks forward to Vanille performing the [[Soulsong (Lightning Returns)|Soulsong]] on the world's [[Lightning Returns: Final Fantasy XIII days|final day]] to obliterate the souls of the dead, including Lightning's sister [[Serah Farron|Serah]]. Lumina opens the chamber's door and disappears. |
||
Lightning tells Fang she cannot save Vanille if she is bent on dying, and says Fang is the only one who can convince her. Fang departs, saying the Monoculus is officially disbanded, and the two promise to meet in Luxerion on the eve of the [[Apocalypse (Lightning Returns)|Apocalypse]]. |
Lightning tells Fang she cannot save Vanille if she is bent on dying, and says Fang is the only one who can convince her. Fang departs, saying the Monoculus is officially disbanded, and the two promise to meet in Luxerion on the eve of the [[Apocalypse (Lightning Returns)|Apocalypse]]. |
||
| − | {{ |
+ | {{clear}} |
{{Endspoiler}} |
{{Endspoiler}} |
||
==Locations== |
==Locations== |
||
===Ruffian=== |
===Ruffian=== |
||
| + | {{main|Ruffian (Lightning Returns)}} |
||
[[File:LRFFXIII - Oasis Village.jpg|150px|right|Ruffian.]] |
[[File:LRFFXIII - Oasis Village.jpg|150px|right|Ruffian.]] |
||
| + | The headquarters of Monoculus is located here. The settlement has [[Lightning Returns: Final Fantasy XIII shops/Dead Dunes|shops]], an inn, a sorcery shop, a boy who will appraise the Unappraised Items the player can collect from the lizards on the desert and the skeletons in the ruins, and a restaurant. |
||
| − | The headquarters of Monoculus is located here. |
||
| − | {{ |
+ | {{clear}} |
===Giant's Sandbox=== |
===Giant's Sandbox=== |
||
| + | The large area where the monorail stops is known as Giant's Sandbox. [[Chocolina]]'s [[Canvas of Prayers]] is found just outside the station with a [[Lightning Returns: Final Fantasy XIII shops/Dead Dunes|merchant and an outfitter]]. |
||
| − | {{sec-stub}} |
||
| + | |||
| + | Entrances to different parts of the Temple Ruins are found at the sandbox, and the [[superboss]] [[Aeronite (Lightning Returns)|Aeronite]] patrols the dunes here after [[Lightning Returns: Final Fantasy XIII days|Day 7]]. A merchant is camping out here next to the north entrance to the Temple Ruins, who is part of a mission the player can start with the item shop owner in Ruffian. |
||
| + | |||
| + | ===Grave of the Colossi=== |
||
| + | There is Bhakti's Oil under the skeleton of an [[oretoise]], and a shrine where one of the tablets that activates a mural in the ruins is located. If the player quells a sandstorm near here, they can open a new area that has a quest item and a treasure sphere locked by Lumina that requires [[Energy Points]] to open. |
||
===Atomos's Sands=== |
===Atomos's Sands=== |
||
| − | Area of the Dead Dunes where the fal'Cie Atomos's remains lie. It is assumed that Atomos had felt [[Bhunivelze|God's]] presence, |
+ | Area of the Dead Dunes where the fal'Cie Atomos's remains lie. It is assumed that Atomos had felt [[Bhunivelze (character)|God's]] presence, prompting it to enter into a form of stasis while it waits for the world to end. The people residing within the Dead Dunes view the area as a "public dumping ground," prompting Adonis to post a bulletin about littering. Lightning can find a loupe on the ground near here for the boy who wants to appraise items back in Ruffian. There is also a shrine for one of the tablets needed to activate murals in the Temple Ruins here with a cactuar waystone outside it. |
| + | |||
| + | ===Oasis Lighthouse=== |
||
| + | The way to the lighthouse is blocked by a sandstorm that has a [[Cactair]] caught in it. Defeating it earns one of [[Dajh Katzroy]]'s soul fragments needed for a main quest in the [[Wildlands]]. The player can battle [[Cactuar (Lightning Returns)|Cactuars]] here who drop good [[gil]] and locate the quest giver for the game's most arduous quest: to fell every [[Last One]] enemy. Because some enemies only appear in the [[Final dungeon (term)|final dungeon]] this quest cannot be completed until in [[New Game Plus#Lightning Returns: Final Fantasy XIII|New Game Plus]]. |
||
| + | |||
| + | ===Dry Floodplains=== |
||
| + | There is a shrine for one of the tablets needed to activate a mural in the Temple Ruins here. Otherwise it is a large and empty sandy area that has been left abandoned. There is a look-out post Lightning can climb, but no one else ever ventures out there but Lightning. |
||
===Temple Ruins=== |
===Temple Ruins=== |
||
| + | {{main|Temple Ruins}} |
||
[[File:Temple-Ruins-LRFFXIII.png|150px|right|Temple Ruins.]] |
[[File:Temple-Ruins-LRFFXIII.png|150px|right|Temple Ruins.]] |
||
| − | Temple Ruins is an expansive |
+ | Temple Ruins is an expansive maze below the sands. The structure is ancient, predating [[Cocoon (Final Fantasy XIII)|Cocoon]], and nobody knows who built it or why. The ruins are said to hold the holy clavis, an artifact that can draw in the souls of the dead. The ruins are littered with murals that spell the creation story of mankind. The temple is filled with sealed doors that operate via magic and mystical tablets and cruxes are needed to delve deeper into the ruins. The skeletons standing guard can be torn apart to reveal Unappraised Items and Yellowed Skulls, but sometimes this also [[Skeleton (Lightning Returns)|initiates a battle]]. |
| − | {{ |
+ | {{clear}} |
==Map== |
==Map== |
||
| Line 48: | Line 65: | ||
==Quests== |
==Quests== |
||
| − | + | {{Main|Dead Dunes/Quests}} |
|
| − | {{spoiler}} |
||
| − | ====4-1 Bandits of the Desert==== |
||
| − | :''Somewhere in the Dead Dunes lies the holy clavis, a treasure with the power to draw the souls of the dead and open doors to the otherworld. The Order is anxious to find it--perhaps Lightning should search, too. Bandits operate in the desert, making a living from plundering the ruins. They might have information about the clavis. Lightning should seek them out.'' |
||
| − | <!--next entry--> |
||
| − | :''The barren sands of the Dead Dunes are not a fit place for human habitation. People are drawn here only for some powerful reason--and in the case of the bandits who form the majority of desert dwellers, that reason is treasure. If anyone knows where the clavis is, it is them. The question is: will they share their knowledge with an outsider?'' |
||
| − | <!--the next e try--> |
||
| − | :''The settlement of Ruffian is run by a bandit gang calling itself Monoculus. They are a cagey, secretive group, and they are not willing to share information about the clavis with strangers. Lightning does not particularly want to join the gang, but she has little choice. She is going to have to take this trial that Adonis has presented to her.'' |
||
| − | <!--next entry--> |
||
| − | :''Lightning isn't going to get information about the clavis or anything else until she joins the Monoculus gang, She has little choice but to take their absurd trial, however impossible it sounds. She must find the sandstorm known as God's Wrath that rages near the bandit settlement...and somehow make it stop.'' |
||
| + | ==Shops== |
||
| − | After arriving to the Dead Dunes Lightning is to seek out the bandits' hideout, which is marked onto the map as the next destination. The shortest way there is blocked by a sandstorm, and Lightning must navigate her way to the west to find an alternate route. After finding the bandits' hideout, called Ruffian, Lightning is to speak to Adonis inside who says she must join their group to get any information out of them, but Lightning must first pass a test: [[#Adonis's Audition|Adonis's Audition]]. |
||
| + | {{Main|Lightning Returns: Final Fantasy XIII shops/Dead Dunes}} |
||
| − | ====4-2 Aspiring Bandit==== |
||
| − | :''If Lightning wants to join the bandit gang, she must quell God's Wrath, a sandstorm that rages near Ruffian. The key to breaking it is held by a monster that can be found nearby. No ordinary human has ever been able to make the key work, but then, the savior is no ordinary human. God's Wrath rages in the area around the Giant's Sandbox.'' |
||
| − | <!--next entry--> |
||
| − | :''Lightning does something that no human has ever done: she activates the crux and ends the storm. Adonis is impressed--but not exactly surprised. Apparently, his boss had already determined that Lightning possesses special powers. In any case, Lightning is now part of the gang. She should follow Adonis back to the settlement and meet her new boss.'' |
||
| − | <!--next entry--> |
||
| − | :''Lightning has become an official member of the Monoculus gang. When she is taken to meet the bandits' leader, she finds herself face-to-face with Fang, an old comrade from centuries past. Fang has also been searching for the clavis--she wants to find it before the Order does. But she doesn't explain why, nor does she offer a reason for leaving Vanille alone with the Order, back in Luxerion...'' |
||
| − | |||
| − | After accepting the trial, Lightning must complete the quest [[#Adonis's Audition|Adonis's Audition]] to quell the sandstorm. After the sandstorm is dealt with, Adonis welcomes Lightning into Monoculus and rushes back to Ruffian. Talking to him again has him introduce Lightning to Fang, who joins Lightning's party as a guest. |
||
| − | |||
| − | ====4-3 Where the Clavis Lies==== |
||
| − | :''Fang has been using her position as head of the bandit gang to search for the clavis, but she does not disclose why she wants an ancient relic that gathers the souls of the dead. Meanwhile, the Order is redoubling their efforts to find the clavis. If Lightning and Fang are to reach it first, they must head quickly to the ruins in which it is buried. The entrance stands near the Giant's Hand.'' |
||
| − | <!--next entry--> |
||
| − | :''Fang is unwilling to discuss her reasons for wanting the clavis. She does reveal that it is ultimately meant for Vanille, but why, and for what purpose, she remains silent. Fang will reveal all in her own good time; for now, Lightning needs to concentrate on the search. Inside the ruins is a sealed door that Fang and her gang have not been able to open. It seems the obvious place to begin...'' |
||
| − | <!--next entry--> |
||
| − | :''Within the desert ruins, Fang and Lightning at last arrive at the place where they believe the clavis rests. They can feel powerful energy surging within the chamber, but the way is barred by a massive door, sealed shut. Somewhere else in the ruins are strange murals that hold the key to breaking the seal. Lightning has to find them.'' |
||
| − | |||
| − | Lightning and Fang's destination is on the far east side of the desert, in an area marked on the map, known as the Giant's Hand. Lightning and Fang locate the Temple Ruins by the sea and Fang explains she is searching for the clavis for Vanille's sake. Lightning must follow the path until reaching a larger room with a teleport stone. Continuing south, there is a pit in an adjacent room. Before jumping in, there is a [[List of Lightning Returns: Final Fantasy XIII Accessories#Guard's Cravat|Guard's Cravat]] on the right. |
||
| − | |||
| − | After descending into the pit Lightning and Fang emerge at Chamber of Dusk — Lower Level. This area has time doors that open and close at certain times of the day. The doors don't take too long to open, but it wastes time to get trapped behind closed doors. [[Chronostasis]] allows one to manipulate the doors; otherwise the player has to hope to get lucky. Checking the stone monuments near time doors to registers them on the map. |
||
| − | |||
| − | Past the time doors and down some corridors there is a doorway blocked by skeletons. Tearing through these finds either [[List of Lightning Returns: Final Fantasy XIII Items#Unappraised Item|Unappraised Items]] or [[List of Lightning Returns: Final Fantasy XIII Items#Yellowed Skull|Yellowed Skulls]]. |
||
| − | |||
| − | Up ahead is a time door and behind it there is a [[Armor Break (Ability)#Lightning Returns: Final Fantasy XIII|Deprotect Lv. 2]] and a [[Slow (Ability)#Lightning Returns: Final Fantasy XIII|Slow Lv. 2]], as well as another time door. Through the large, northern chamber is another pit. Going down, there is another time door connecting to the previous chamber, as well as a [[List of Lightning Returns: Final Fantasy XIII Accessories#Nacre Cameo|Nacre Cameo]]. |
||
| − | |||
| − | At the bottom is a long hallway. There are time doors ahead on the left and right; to the west there is a [[Mental Break (Ability)#Lightning Returns: Final Fantasy XIII|Deshell Lv. 2]], to the east a [[List of Lightning Returns: Final Fantasy XIII Accessories#White Strap|White Strap]]. To the left there is an [[Earth Eater (Lightning Returns)|Earth Eater]] guarding a [[List of Lightning Returns: Final Fantasy XIII Accessories#Warding Talisman|Warding Talisman]]. There is a time door at the south end of the hallway. If the player forgoes fighting the Earth Eater, they can wait for the door to open and get at the Warding Talisman this way instead. The party can also surprise attack the Earth Eater from here. Here is an open hallway leading to a red device. After activating it the nearby door leads to Path of Vicissitude. |
||
| − | |||
| − | The player should follow the path until it splits. Fang run ahead urging Lightning to follow her. There's a teleport stone and a closed door that can only be opened by first viewing three murals. |
||
| − | |||
| − | ====4-4 Murals of the Gods==== |
||
| − | :''Three murals depicting events of the crystal legends are the key to unsealing the door to the clavis chamber. Only those who have seen the three murals and know the deeds of the gods may pass through the Sacred Gate and into the presence of the holy treasure. Each mural is displayed in its own gallery, located in different parts of the ruins. Lightning must visit each one in turn.'' |
||
| − | <!--next entry--> |
||
| − | :''The holy clavis is in a chamber beyond the sealed Sacred Gate. By inspecting the murals in the ruins, Lightning can collect fragments of a special crux that, when assembled, should break the seal. Certain tablets are needed to view the murals. There are three Shrines of the Tablet in the desert--Lightning's task is to explore each one, recover the tablets, view the murals, and obtain the three fragments of the crux.'' |
||
| − | <!--next entry--> |
||
| − | :''Once Lightning has assembled all the pieces of the crux, she will be able to break the seal that holds the Sacred Gate shut tight. To do that, she must use a third tablet from the Shrines of the Tablet to view one more mural and recover the final crux fragment.'' |
||
| − | <!--next entry--> |
||
| − | :''When Lightning sets eyes on the final mural, she understands what the Order is trying to do. They hope to use the clavis in a special ritual called the Soulsong. The Soulsong will summon the souls of the dead to the clavis, and Vanille herself will perform it. It is a role she has willingly embraced--but Fang does not appear to agree with her choice.'' |
||
| − | |||
| − | Turning back from the door and running back through the Temple Ruins, there was a split earlier Fang asked Lightning to ignore. Taking a right at the Chamber of Flame and following a winding path the party will appear in the Sacred Grove. There is a [[List of Lightning Returns: Final Fantasy XIII Items#Pilgrim's Crux|Pilgrim's Crux]] nearby that can be used on the wall ahead to open a path to the south of Ruffian. |
||
| − | |||
| − | Returning to the Sacred Grove, in the room to the left as coming back down, there is a room with an archaeologist. North, there is another a Pilgrim's Crux and a quest with a robot, [[#The Life of a Machine|The Life of a Machine]]. South is a long hallway. Heading to the hallway and walking partway down, there are two rooms, the other being behind a time door. The first one holds a Pilgrim's Crux. The party should register the time door and inside is a [[List of Lightning Returns: Final Fantasy XIII Items#Study of the Savage|Study of the Savage]], as well as yet another Pilgrim's Crux. |
||
| − | |||
| − | Turning north at the end of the hallway there is a device that opens the door the party just passed. This northbound hallway leads to a Twilight Gallery that has a mural, but it requires a tablet to open. The party will need to track down three tablets to view the three murals. The player can continue further into the ruins, but there's not much point if the party lack the tablets. |
||
| − | |||
| − | The Shrines of the Tablet are scattered all over the Dead Dunes. In Grave of the Colossi, north of Ruffian, there is a set ruins near the teleport stone. Inside there's a Bandit's Bloodseal by the entrance and once inside, using a Pilgrim's Crux opens the way. (If the party doesn't have any Pilgrim's Cruxes, they can be bought from a man in Ruffian's main building.) There's a Tablet at the bottom and the party will have to kill a number of Skeletons on the way back out. |
||
| − | |||
| − | Atomos's Sands is north of Ruffian. The shrine is built into the base of fal'Cie Atomos's resting place, and and there is a teleport stone outside. Down the entrance and to the left there is some [[List of Lightning Returns: Final Fantasy XIII Items#Bhakti's Oil|Bhakti's Oil]], and near the bottom there is a [[List of Lightning Returns: Final Fantasy XIII Accessories#Pretty Orb|Pretty Orb]] in the antechamber before the Tablet's chamber. |
||
| − | |||
| − | The Dry Floodlands cover the west of the desert, and are connected to Atomos's Sands. The shrine is southwest of the Oasis Lighthouse built against the left of two clumps of rock. There is a teleport stone beside it. The shrine's larger chamber has a Bhakti's Oil and a sphere containing a [[List of Lightning Returns: Final Fantasy XIII Accessories#Pain Dampener|Pain Dampener]] on the way back out. |
||
| − | |||
| − | [[File:Murals-of-the-Gods.JPG|thumb|A mural.]] |
||
| − | With the three Tablets it is time to return to the Temple Ruins. Heading to the room north of the red device the party used earlier, inserting a Tablet activates the mural and the party receives the [[List of Lightning Returns: Final Fantasy XIII Items#Crux Body|Crux Body]]. Going through the door with the red markings to the west, and following the path there, leads to room to the right that is protected by a Gurangatch. Defeating it and going through the passage finds a [[List of Lightning Returns: Final Fantasy XIII Accessories#Collector Catalog|Collector Catalog]]. Jumping down into an adjacent room finds a ladder, a monument for a time door, and a Pilgrim's Crux. There is a pit down right below this point, but Lightning can just take the ladder up if she fell too far down. Going up the ladder next to where the Pilgrim's Crux was leads to the Golden Chamber. The party can also go past the earlier Gurangatch and reach the same general area. |
||
| − | |||
| − | Golden Chamber is large and complex. The party enters a cross-shaped area and following the path along the upper wall past some bars in the west, the party should hop down a level. There is a treasure sphere containing a [[List of Lightning Returns: Final Fantasy XIII Accessories#Demon Claw|Demon Claw]]. Entering the adjacent room to the west, and hopping through the hole in the room north, the party comes to a room with a dead tree in the middle. The party must head south, then east through the first time door. There is an Earth Eater guarding a door ahead. Defeating it leads to the lower levels of the complex, but it doesn't lead to a mural. The party should head north and there is a teleport stone. Heading east one chamber, there is a [[List of Lightning Returns: Final Fantasy XIII Accessories#Thorn of Speed|Thorn of Speed]] near the ladder leading back upstairs. |
||
| − | |||
| − | The party must reach a chamber two rooms south of the teleport stone. The player can either head east, go back upstairs and sweep around via the central corridor to reach it, or move through the southern time doors on the lower level. Once inside, Lightning can trigger the device to open the door in the eastern corridor. Running through the adjacent room east and climbing up to the treasure sphere on the crates finds a [[List of Lightning Returns: Final Fantasy XIII Accessories#Satin Scrunchie|Satin Scrunchie]]. Besides this is a Pilgrim's Crux, and beside that a route to the opened door. North of the door with red markings is a treasure sphere for Poison Lv. 2. |
||
| − | |||
| − | The party winds up in a larger room that has a Pilgrim's Crux. Ahead is a door opened by the Crux and beyond is a teleport stone. Past here is a path up to the desert. Heading east leads to Path of the Dead. Ahead, there is a split and taking a right locates the second mural chamber, Gallery of Creation, resulting in [[List of Lightning Returns: Final Fantasy XIII Items#Crux Tip|Crux Tip]]. |
||
| − | |||
| − | Heading back out and continuing north, at the end of the passage there is a Pilgrim's Crux, and a red gate that cannot be opened yet. Returning to the teleport stone located earlier, the party can teleport to the Sacred Gate. At the Sacred Gate the way ahead still isn't open, but the door beside it is. Going through locates the final mural at the Gallery of Forgetfulness and the [[List of Lightning Returns: Final Fantasy XIII Items#Crux Base|Crux Base]]; it will turn into a [[List of Lightning Returns: Final Fantasy XIII Items#Saint's Crux|Saint's Crux]]. |
||
| − | |||
| − | ====4-5 The Holy Clavis==== |
||
| − | :''Lightning and Fang have seen the three murals. They have the three pieces of the crux, and now they can open the Sacred Gate. Soon, the holy clavis will be in their hands. But the Order is closing in on the treasure as well. The pair will have to hurry to the chamber if they are to claim the prize and keep it out of the Order's hands.'' |
||
| − | <!--next entry--> |
||
| − | :''For the first time in centuries, the door to the chamber swings open. A great power beyond all human understanding thrums within, a beckoning force that draws the souls of the dead toward it. There can be no doubt. They are in the presence of the holy clavis. The Order Secutors are close. Lightning and Fang must hurry to claim their prize.'' |
||
| − | <!--next entry--> |
||
| − | :''The order plans to use the clavis in the Soulsong. The ceremony will not ease the suffering of the dead--it will obliterate them once and for all. Vanille does not know this, but she does know the ceremony will kill her. There is one more chilling fact: if the Soulsong is carried out, Lightning will lose all hope of finding Serah again.'' |
||
| − | |||
| − | There is a boss battle ahead, and afterward Fang will permanently leave the party. If the player wants her to stay and help out in side quests, it is best to forgo completing the main quest yet. |
||
| − | |||
| − | Back at the Sacred Gate examining it opens the door. Examining the clock at the far end pits the party against a boss; depending on the day it will be either [[Grendel (Lightning Returns)|Grendel]] or [[Parandus]]. After vanquishing the boss, Lightning can pick up the [[List of Lightning Returns: Final Fantasy XIII Accessories#Preta Hood|Preta Hood]] and exit the ruins. |
||
| − | |||
| − | :'''First Time Rewards:''' Max HP +540, Max ATB +10, Strength +28, Magic +56, Recovery Item Capacity +1 |
||
| − | :'''Subsequent Rewards:''' Max HP +192, Strength +5, Magic +5 |
||
| − | {{-}} |
||
| − | {{endspoiler}} |
||
| − | |||
| − | ===Side Quests=== |
||
| − | ====Canvas of Prayers==== |
||
| − | {{Main|Canvas of Prayers}} |
||
| − | There is a Canvas of Prayers located outside the train station where Lightning can do quests. These do not earn Eradia, but completing them awards with gil and adornments, as well as stat boosts. |
||
| − | |||
| − | ====The Life of a Machine==== |
||
| − | ;Quest Begins |
||
| − | :''In an isolated chamber of the Sacred Grove in the Temple Ruins, Lightning finds an exploratory rover bot called Bhakti. It seems he is almost out of fuel, but Lightning might be able to help.'' This quest has a time limit. |
||
| − | <!--next entry--> |
||
| − | :''The energia Bhakti needs can be found in three locations: Tobias's General Store in Ruffian, next to the Shrine of the Tablet in the Grave of the Colossi, and the foot of the Oasis Lighthouse. There might be other supplies elsewhere, too. Once Lightning has three energia of fuel, she should take them to Bhakti.'' |
||
| − | |||
| − | :'''Difficulty:''' ★★ |
||
| − | :'''Requirements:''' Available after completing main quest [[#4-3 Where the Clavis Lies|4-3 Where the Clavis Lies]] |
||
| − | :'''First Time Rewards:''' [[List of Lightning Returns: Final Fantasy XIII Adornments#Cyber Scanners|Cyber Scanners]], Max HP +80, Strength +4, Magic +4 |
||
| − | :'''Subsequent Rewards:''' Max HP +20, Strength +2, Magic +4 |
||
| − | |||
| − | In Sacred Grove area of the Temple Ruins, Lightning runs into [[Bhakti]] and must bring three [[List of Lightning Returns: Final Fantasy XIII Items#Bhakti's Oil|Bhakti's Oils]] to it. If Lightning takes too long she will fail the quest. Bhakti gives clues on where to find them, but the fastest way is collecting three oils from Oasis Lighthouse. When Bhakti is oiled up Lightning must examine the door it points to to find the pile of bones in the next room. The bones hold 1200 gil, Bhakti's Oil, and a Pilgrim's Crux. Talking to Bhakti again completes the quest. |
||
| − | |||
| − | ;Quest Complete |
||
| − | :''Fully mobile once again, Bhakti finally manages to open the chamber where he believes his comrades are waiting for him. But those comrades are not robots; they are humans, and long dead. When Bhakti learns his friends cannot be repaired, his own systems shut down and he falls silent for good. Who can say if machines have souls? What is clear, is that in his final moments, Bhakti knew what it meant to be human.'' |
||
| − | {{-}} |
||
| − | |||
| − | ====Old Rivals==== |
||
| − | ;Quest Begins |
||
| − | :''Tobias is a wealthy merchant who runs several shops across the Dead Dunes. But the lack of competitors out in the desert means his selection is poor and his customer service worse. Tobias just can't bring himself to get excited about his business without competitors to spur him on. People like Ramon, for example, who was once a fierce rival but now does nothing but loiter around the Giant's Sandbox.'' |
||
| − | |||
| − | :'''Difficulty:''' ★ |
||
| − | :'''Requirements:''' None |
||
| − | :'''First Time Rewards:''' 500 gil, [[List of Lightning Returns: Final Fantasy XIII Adornments#Snakeskin Hat|Snakeskin Hat]], Max HP +50, Strength +4, Magic +2 |
||
| − | :'''Subsequent Rewards:''' 750 gil, Max HP +20, Strength +4 |
||
| − | |||
| − | After talking with Tobias at the Ruffian settlement's general store, Lightning must seek out Ramon in Giant's Sandbox, near a teleport stone in Temple Ruins North Gate. After starting and completing [[#His Wife's Dream|His Wife's Dream]] quest, returning to Tobias completes the quest. He will now offer more items for sale. |
||
| − | |||
| − | ;Quest Complete |
||
| − | :''Now that Ramon has reopened his shop, Tobias is fired about his business again--it's the competition that he really loved. His soul is released from the ennui that had gripped him, and now Lightning can expect to find much better wares in his shop. Maybe Lightning should visit Tobias's General Store some time and see what new merchandise is available.'' |
||
| − | {{-}} |
||
| − | |||
| − | ====His Wife's Dream==== |
||
| − | ;Quest Begins |
||
| − | :''Ramon was once a hardworking businessman, but he abandoned his shop and now spends his days lounging near the north entrance to the Temple Ruins. The only reason he hasn't left the Dead Dunes is because he is still hoping to find the arithmometer that belonged to his departed wife, Monica. Perhaps Lightning can help.'' |
||
| − | <!--next entry--> |
||
| − | :''Ramon's wife, Monica, was killed by a monster out in the desert. Perhaps the monster that did the deed is still prowling the sands. Lightning should search for evidence of monster attacks on merchants and caravans. If Lightning can find Monica's arithmometer, she should take it to Ramon, who lounges near the north entrance to the Temple Ruins.'' |
||
| − | |||
| − | :'''Difficulty:''' ★★ |
||
| − | :'''Requirements:''' Available after starting [[#Old Rivals|Old Rivals]] quest |
||
| − | :'''First Time Rewards:''' 1300 gil, [[List of Lightning Returns: Final Fantasy XIII Adornments#Gold Padlock|Gold Padlock]], Max HP +100, Strength +6, Magic +2 |
||
| − | :'''Subsequent Rewards:''' 1950 gil, Max HP +40, Strength +4, Magic +2 |
||
| − | |||
| − | Ramon near the north entrance to the Temple Ruins wants to find a memento of his wife who was killed by a monster. In the Grave of the Colossi area, near the tablet shrine, Lightning needs to use a [[List of Lightning Returns: Final Fantasy XIII Items#Pilgrim's Crux|Pilgrim's Crux]] to unseal the stone by the eastern sandstorm to quell it. The clearing holds a battle against three [[Goblot]]s to obtain an [[List of Lightning Returns: Final Fantasy XIII Items#Arithmometer|arithmometer]]. If you had already led to the extinction of all the Goblots, you'll find the arithmometer on the ground, near the skeleton of Monica. Giving the item to Ramon completes the quest. He opens a shop Lightning can use. |
||
| − | |||
| − | ;Quest Complete |
||
| − | :''With his wife's arithmometer in his hands at last, Ramon remembers the dream Monica had for the both of them, in which they built a shop out here in the desert and made it a grand success. Ramon resolves to take up the dream once more. He reopens his shop, Ramon's Essentials, and Lightning becomes his first customer.'' |
||
| − | {{-}} |
||
| − | |||
| − | ====Tool of the Trade==== |
||
| − | ;Quest Begins |
||
| − | :''In Ruffian, Lightning meets a young man who speaks in a strange code. Elmer first came to the Dead Dunes to unlock the secrets of the ruins, and although he has given up on his research, he still knows a great deal about them. Lightning may help rekindle his motivation if she finds his old appraising tool, the loupe.'' Hint: The bandits discard their garbage in the Atomos's Sands area. |
||
| − | |||
| − | :'''Difficulty:''' ★ |
||
| − | :'''Requirements:''' None |
||
| − | :'''First Time Rewards:''' 400 gil, [[List of Lightning Returns: Final Fantasy XIII Adornments#Retro Scopes|Retro Scopes]], Max HP +50, Strength +2, Magic +4 |
||
| − | :'''Subsequent Rewards:''' 600 gil, Max HP +20, Strength +2, Magic +2 |
||
| − | |||
| − | Elmer is found in the second floor of the Ruffian, where he says he has discarded his equipment. The [[List of Lightning Returns: Final Fantasy XIII Items#Loupe|Loupe]] is found in Atomos's Sands, north from Ruffian. Climbing the nearby observation post lets Lightning spot something glimmering on the ground. Handing the Loupe to Elmer completes the quest. |
||
| − | |||
| − | ;Quest Complete |
||
| − | :''The loupe that Elmer discarded belonged to his father. When his father died, he fell into despair and abandoned the dream he had of becoming a scholar like his father wanted. That was when he threw away the tools of his trade. But dreams are not discarded so easily. Elmer says that if he could be born again, he would become a great scholar and unlock the secrets of the ruins. Now, thanks to the savior's intervention, he may do exactly that--in the new world to come.'' |
||
| − | |||
| − | :In the days that follow... |
||
| − | :''Elmer learned many things from his father. If Lightning finds any unappraised items, she can bring them to Ruffian to have Elmer appraise them. Who knows, some mystery items might turn out to be valuable treasures? Unappraised items can be recovered from lizards and the remains of hapless adventurers.'' |
||
| − | |||
| − | After completing the quest Elmer will appraise unappraised items for Lightning: |
||
| − | *1 unit: [[List of Lightning Returns: Final Fantasy XIII Items#Pilgrim's Crux|Pilgrim's Crux]] |
||
| − | *5 units: [[List of Lightning Returns: Final Fantasy XIII Items#Gold Dust|Gold Dust]] |
||
| − | *10 units: [[List of Lightning Returns: Final Fantasy XIII Items#Ether|Ether]] |
||
| − | *20 units: [[List of Lightning Returns: Final Fantasy XIII Items#Platinum Ore|Platinum Ore]] |
||
| − | *50 units: [[List of Lightning Returns: Final Fantasy XIII Items#Turbo Ether|Turbo Ether]] |
||
| − | |||
| − | Lightning also receives a random amount of [[List of Lightning Returns: Final Fantasy XIII Items#Bronzed Medal|Bronzed]], [[List of Lightning Returns: Final Fantasy XIII Items#Silvered Medal|Silvered]] or [[List of Lightning Returns: Final Fantasy XIII Items#Crystal Medal|Crystal Medals]]. |
||
| − | {{-}} |
||
| − | |||
| − | ====Adonis's Audition==== |
||
| − | ;Quest Begins |
||
| − | :''In the outlaw settlement of Ruffian, Lightning encounters a character called Adonis, who appears to be an important figure in the bandit gang known as Monoculus. He tells her that they have information about the holy clavis, but they will only share it if she joins the gang. Monoculus runs everything in the desert. If Lightning wants to accomplish anything while she is here, it might be a good idea to do what Adonis suggests.'' |
||
| − | <!--next entry--> |
||
| − | :''Out in the desert, a storm called God's Wrath rages endlessly. If someone can activate the monument that stands nearby, the storm will finally cease--or so the locals believe. Lightning must battle the Gurangatch that prowls nearby and recover the key that activates the monument.'' |
||
| − | |||
| − | [[File:Adonis's-Audition.JPG|thumb|Lightning faces against a Gurangatch.]] |
||
| − | :'''Difficulty:''' ★★ |
||
| − | :'''Requirements:''' None |
||
| − | :'''First Time Rewards:''' 1500 gil, [[List of Lightning Returns: Final Fantasy XIII Adornments#Monoculus Mask|Monoculus Mask]], Max HP +100, Strength +4, Magic +8 |
||
| − | :'''Subsequent Rewards:''' 2300 gil, Max HP +50, Strength +4, Magic +6 |
||
| − | |||
| − | After talking to Adonis in Ruffian Lightning can accept the trail to join the Monoculus. Her task is to quell a sandstorm. The location is marked on the map, and the fastest way to get there is by warping to the nearby teleport stone: Near God's Wrath. After battling a [[Gurangatch (Lightning Returns)|Gurangatch]], Adonis congratulates Lightning on her success and she uses the crux to quell the storm. Adonis rushes back to Ruffian and finding him there and talking to him again completes the quest. |
||
| − | |||
| − | ;Quest Complete |
||
| − | :''As soon as Lightning gains possession of the Anchorite's Crux, the monument is activated, and the storm that no one could calm suddenly grows still. This is proof that she is indeed a messenger from God. Lightning has passed the trial. Now it is time to return to Ruffian, talk to Adonis, and be introduced to the bandit boss.'' |
||
| − | {{-}} |
||
| − | |||
| − | ====What Rough Beast Slouches==== |
||
| − | ;Quest Begins |
||
| − | :''Inside the southern entrance to the Temple Ruins, on the upper level of Scorched Earth, Lightning meets a man who presents Lightning with a perilous mission. He claims that a terrible beast has appeared to herald the end of the world, and he wants Lightning to find this beast, the Aeronite, hunt it down, and bring back a sample of its flesh.'' |
||
| − | |||
| − | :'''Difficulty:''' ★★★ |
||
| − | :'''Requirements:''' Available after completing main quest [[#4-3 Where the Clavis Lies|4-3 Where the Clavis Lies]] |
||
| − | :'''First Time Rewards:''' 8200 gil, [[List of Lightning Returns: Final Fantasy XIII Adornments#Pro's Beret|Pro's Beret]], Max HP +160, Strength +12, Magic +16 |
||
| − | :'''Subsequent Rewards:''' 12300 gil, Max HP +90, Strength +6, Magic +10 |
||
| − | |||
| − | The client is found within the fenced off bit when entering the Temple Ruins from the southern ruins entrance (the door must be opened from the inside). To get to this bit, Lightning must go through the path leading east from the previous location that is guarded by an Earth Eater, south from the area's teleport stone. Upon accepting the quest Lightning obtains [[List of Lightning Returns: Final Fantasy XIII Items#Study of Despair|Study of Despair]] notes. |
||
| − | |||
| − | To complete the quest, Lightning must defeat [[Aeronite (Lightning Returns)|Aeronite]] that appears in Giant's Sandbox from Day 7 onward. Like the rare enemies in ''[[Final Fantasy XIII-2]]'', it appears as a distortion. If struck first it starts with 10% HP already lost, but preempting it for a 25% HP loss is impossible. Lightning must deal consistent damage and stagger it four times, otherwise it flies away and Lightning must find it again and start the battle from the beginning. When it's defeated, Lightning obtains [[List of Lightning Returns: Final Fantasy XIII Items#Monster Flesh|Monster Flesh]]. It also drops a [[List of Lightning Returns: Final Fantasy XIII Accessories#Falcon Charm|Falcon Charm]] on the ground after battle. Giving the Monster Flesh to the client completes the quest. |
||
| − | {{-}} |
||
| − | |||
| − | ====Skeletons in the Closet==== |
||
| − | ;Quest Begins |
||
| − | :''In Ruffian, Lightning encounters a former bandit by the name of Jamus. He is a tormented soul, who cannot forget the day when Skeletons attacked him and his children and left him as the only survivor. Jamus's life is in tatters, and the only thing that might save him is revenge. Lightning agrees to seek out all the Skeletons and destroy them once and for all.'' |
||
| − | |||
| − | :'''Difficulty:''' ★★★ |
||
| − | :'''Requirements:''' Available after completing main quest [[#4-3 Where the Clavis Lies|4-3 Where the Clavis Lies]], and collecting [[List of Lightning Returns@ Final Fantasy XIII Items#Crux Body|Crux Body]] |
||
| − | :'''First Time Reward:''' 4500 gil, [[List of Lightning Returns: Final Fantasy XIII Adornments#Pioneer's Eyepatch|Pioneer's Eyepatch]], Max HP +140, Strength +14, Magic +12 |
||
| − | :'''Subsequent Rewards:''' 6750 gil, Max HP +60, Strength +6, Magic +6 |
||
| − | |||
| − | Lightning must exterminate the Skeleton species by defeating [[Skeleton Ω]]. To make Skeleton Ω appear, she must slay 60 of them (the number remaining is displayed on the quest's page in the menu), or, alternatively, fight the Skeleton Ω in [[Ultimate Lair]]. After vanquishing the foe, returning to Jamus in Ruffian main building completes the quest. |
||
| − | |||
| − | ;Quest Complete |
||
| − | :''Lightning has destroyed every last Skeleton in the world. It does not end Jamus's pain, but it does allow him to face his grief at last. Jamus declares that he will visit the graves of his children and tell them that the skeletons are no more. The children are lost, but at least Lightning has saved the soul of a father.'' |
||
| − | {{-}} |
||
| − | |||
| − | ====Last One Standing==== |
||
| − | ;Quest Begins |
||
| − | :''At the foot of the Oasis Lighthouse, Lightning meets a man called Zanford who claims to be the last researcher. Not the last remaining researcher, he clarifies, but someone who investigates the phenomenon of Last Ones. Last One monsters are fearsome beasts that concentrate the strength of their fellow predecessors into one last ultimate incarnation. Lightning's task is simple, yet surely impossible. Can she eradicate all monster species and slay every last Last One incarnation?'' |
||
| − | <!--next entry--> |
||
| − | :''Lightning must slay every single Last One monster, fill every page of her Bestiary, and then report to Zanford, who waits for news by the Oasis Lighthouse. This is an incredibly difficult quest that requires all of Lightning's hardened battle skills. But there is a way to make Last One monsters appear without killing every individual of the species first. If Lightning can find out how, her task will not be quite so daunting.'' |
||
| − | |||
| − | :'''Difficulty:''' ★★★ |
||
| − | :'''Requirements:''' None |
||
| − | :'''First Time Rewards:''' 12000 gil, [[List of Lightning Returns: Final Fantasy XIII Weapons#Bladed Lance|Bladed Lance]], [[List of Lightning Returns: Final Fantasy XIII Adornments#Hermit's Cap|Hermit's Cap]], Max HP +160, Strength +18, Magic +16 |
||
| − | :'''Subsequent Rewards:''' 18000 gil, Max HP +100, Strength +10, Magic +8 |
||
| − | |||
| − | This quest cannot be completed on the first playthrough. Lightning must kill every Last One enemy in the game, and three of them only appear in last storyline dungeon. She must also kill [[Cactair]] and [[Ereshkigal]] on floor 33 of Ultimate Lair. [[Aeronite (Lightning Returns)|Aeronite]] doesn't count. On New Game+, Lightning can approach the client, start the quest and immediately complete it. |
||
| − | {{-}} |
||
| − | |||
| − | ==Shops== |
||
===Forge (Rare)=== |
===Forge (Rare)=== |
||
{{Main|Forge (Rare)}} |
{{Main|Forge (Rare)}} |
||
| + | ==Treasures== |
||
| − | ===The Dead Dunes Station=== |
||
| + | *[[Lightning Returns: Final Fantasy XIII accessories#Angel's Headband|Angel's Headband]] (at Oasis Lighthouse) |
||
| − | ====Peach Dreams General Store==== |
||
| + | *[[Lightning Returns: Final Fantasy XIII items#Arithmometer|Arithmometer]] (in Grave of the Colossi behind the sandstorm) |
||
| − | {|class="half-width LR table" |
||
| + | *[[Lightning Returns: Final Fantasy XIII items#Bandit's Bloodseal|Bandit's Bloodseal]] (in the entrance to the Shrine of the Tablet: Grave of the Colossi) |
||
| − | |-class="a" |
||
| + | *[[Lightning Returns: Final Fantasy XIII accessories#Corsair Scarf|Corsair Scarf]] (treasure sphere on south end cliff in Ruffian) |
||
| − | !Item |
||
| + | *[[Lightning Returns: Final Fantasy XIII items#Crux Body|Crux Body]] (obtained after activating a mural within Temple Ruins) |
||
| − | !Price |
||
| + | *Defaith Lv. 2 (north of Giant's Sandbox) |
||
| − | !Availability |
||
| + | *Debrave Lv. 2 (under an arch of ruin in northern Giant's Sandbox) |
||
| − | |- |
||
| + | *Earth Eater's Notes (in the ruins near path leading to Ruffian in the Grave of the Colossi area) |
||
| − | !class="b"|[[List of Lightning Returns: Final Fantasy XIII Items#Potion|Potion]] |
||
| + | *[[Lightning Returns: Final Fantasy XIII items#Key to the Sand Gate|Key to the Sand Gate]] (at Oasis Lighthouse) |
||
| − | |360 gil |
||
| + | *[[Lightning Returns: Final Fantasy XIII items#Loupe|Loupe]] (north of Ruffian) |
||
| − | |From Day 1 to Day 5 |
||
| + | *[[Lightning Returns: Final Fantasy XIII items#Lizard Tail|Lizard Tail]] (obtained by killing the lizards wandering around the desert) |
||
| − | |- |
||
| − | + | *[[Lightning Returns: Final Fantasy XIII items#Pilgrim's Crux|Pilgrim's Crux]] (found in various places in the Dead Dunes. Can also be bought from a man in Ruffian) |
|
| + | *[[Lightning Returns: Final Fantasy XIII accessories#Rainbow Gem|Rainbow Gem]] (treasure sphere in Atomos's Sands, east of the Tobias's Branch Store) |
||
| − | |480 gil |
||
| + | *[[Lightning Returns: Final Fantasy XIII accessories#Serenity Sachet|Serenity Sachet]] (treasure sphere in the Grave of the Colossi west) |
||
| − | |From Day 6 |
||
| + | *[[Lightning Returns: Final Fantasy XIII accessories#Silk Scarf|Silk Scarf]] (open the 4 EP cost treasure sphere in the dead end of the Grave of the Colossi) |
||
| − | |- |
||
| − | + | *[[Lightning Returns: Final Fantasy XIII accessories#Silver Barrette|Silver Barrette]] (Oasis Lighthouse in a 4 EP cost treasure sphere) |
|
| + | *[[Lightning Returns: Final Fantasy XIII accessories#Star Bracelet|Star Bracelet]] (treasure sphere in Dry Floodlands south) |
||
| − | |640 gil |
||
| + | *[[Lightning Returns: Final Fantasy XIII items#Study of the Depths|Study of the Depths]] (Giant's Sandbox area south from the general shop, east from the Temple Ruins: South Gate) |
||
| − | |From Day 11 |
||
| + | *[[Lightning Returns: Final Fantasy XIII items#Tablet|Tablet]] (in shrines in Atomos's Sands, Dry Floodlands and the Grave of the Colossi. |
||
| − | |- |
||
| − | + | *[[Lightning Returns: Final Fantasy XIII items#Unappraised Item|Unappraised Item]] (found by killing lizards and destroying skeleton statues) |
|
| + | *[[Lightning Returns: Final Fantasy XIII items#Yellowed Skull|Yellowed Skull]] (destroy skeleton statues in the Temple Ruins and Shrines) |
||
| − | |580 gil |
||
| − | |Default |
||
| − | |- |
||
| − | !class="b"|[[List of Lightning Returns: Final Fantasy XIII Items#Phoenix Down|Phoenix Down]] |
||
| − | |1280 gil |
||
| − | |Default |
||
| − | |- |
||
| − | !class="b"|[[List of Lightning Returns: Final Fantasy XIII Items#Protect Potion|Protect Potion]] |
||
| − | |640 gil |
||
| − | |Default |
||
| − | |- |
||
| − | !class="b"|[[List of Lightning Returns: Final Fantasy XIII Items#Veil Potion|Veil Potion]] |
||
| − | |480 gil |
||
| − | |Default |
||
| − | |} |
||
| + | [[File:Lizard Lariat.png|right|70px|Trophy icon.]] |
||
| − | ====One Star Outfitters==== |
||
| + | Lightning can slash lizards that wander the desert for unappraised items and lizard tails. Slashing 30 lizards in the Dead Dunes earns the [[Lightning Returns: Final Fantasy XIII achievements and trophies#Lizard Lariat|Lizard Lariat]] achievement. |
||
| − | {|class="half-width LR table" |
||
| + | {{clear}} |
||
| − | |-class="a" |
||
| − | !Item |
||
| − | !Type |
||
| − | !Price |
||
| − | !Availability |
||
| − | |- |
||
| − | !class="b"|[[List of Lightning Returns: Final Fantasy XIII Garbs#Passion Rouge|Passion Rouge]] |
||
| − | |Garb |
||
| − | |1250 gil |
||
| − | |Default |
||
| − | |- |
||
| − | !class="b"|[[List of Lightning Returns: Final Fantasy XIII Garbs#Dust and Shadow|Dust and Shadow]] |
||
| − | |Garb |
||
| − | |1250 gil |
||
| − | |Default |
||
| − | |- |
||
| − | !class="b"|[[List of Lightning Returns: Final Fantasy XIII Garbs#Déjà Vu|Déjà Vu]] |
||
| − | |Garb |
||
| − | |5000 gil |
||
| − | |From Day 8 |
||
| − | |- |
||
| − | !class="b"|[[List of Lightning Returns: Final Fantasy XIII Garbs#Sun and Bloom|Sun and Bloom]] |
||
| − | |Garb |
||
| − | |100000 gil |
||
| − | |Hard Mode |
||
| − | |- |
||
| − | !class="b"|[[List of Lightning Returns: Final Fantasy XIII Adornments#Elegant Shades|Elegant Shades]] |
||
| − | |Adornment |
||
| − | |260 gil |
||
| − | |Default |
||
| − | |- |
||
| − | !class="b"|[[List of Lightning Returns: Final Fantasy XIII Adornments#City Shades|City Shades]] |
||
| − | |Adornment |
||
| − | |280 gil |
||
| − | |Default |
||
| − | |- |
||
| − | !class="b"|[[List of Lightning Returns: Final Fantasy XIII Adornments#Wild Shades|Wild Shades]] |
||
| − | |Adornment |
||
| − | |280 gil |
||
| − | |Default |
||
| − | |- |
||
| − | !class="b"|[[List of Lightning Returns: Final Fantasy XIII Adornments#Whimsy Shades|Whimsy Shades]] |
||
| − | |Adornment |
||
| − | |280 gil |
||
| − | |Default |
||
| − | |- |
||
| − | !class="b"|[[List of Lightning Returns: Final Fantasy XIII Adornments#Killer Shades|Killer Shades]] |
||
| − | |Adornment |
||
| − | |280 gil |
||
| − | |Default |
||
| − | |} |
||
| − | |||
| − | ===Giant's Sandbox=== |
||
| − | ====Tobias's Branch Store==== |
||
| − | {|class="half-width LR table" |
||
| − | |-class="a" |
||
| − | !Item |
||
| − | !Price |
||
| − | !Availability |
||
| − | |- |
||
| − | !class="b"|[[List of Lightning Returns: Final Fantasy XIII Items#Potion|Potion]] |
||
| − | |360 gil |
||
| − | |From Day 1 to Day 5 |
||
| − | |- |
||
| − | !class="b"|[[List of Lightning Returns: Final Fantasy XIII Items#Hi-Potion|Hi-Potion]] |
||
| − | |480 gil |
||
| − | |From Day 6 |
||
| − | |- |
||
| − | !class="b"|[[List of Lightning Returns: Final Fantasy XIII Items#Remedy|Remedy]] |
||
| − | |580 gil |
||
| − | |Default |
||
| − | |- |
||
| − | !class="b"|[[List of Lightning Returns: Final Fantasy XIII Items#Veil Potion|Veil Potion]] |
||
| − | |480 gil |
||
| − | |Default |
||
| − | |- |
||
| − | !class="b"|[[List of Lightning Returns: Final Fantasy XIII Items#X-Potion|X-Potion]] |
||
| − | |640 gil |
||
| − | |From Day 11 |
||
| − | |} |
||
| − | |||
| − | ====Ramon's Essentials==== |
||
| − | The shop becomes available after completing [[#His Wife's Dream|His Wife's Dream]] quest. |
||
| − | |||
| − | {|class="half-width LR table" |
||
| − | |-class="a" |
||
| − | !Item |
||
| − | !Price |
||
| − | !Availability |
||
| − | |- |
||
| − | !class="b"|[[List of Lightning Returns: Final Fantasy XIII Items#Goblot Notes|Goblot Notes]] |
||
| − | |120 gil |
||
| − | |Default |
||
| − | |- |
||
| − | !class="b"|[[List of Lightning Returns: Final Fantasy XIII Items#Desert Sahagin Notes|Desert Sahagin Notes]] |
||
| − | |120 gil |
||
| − | |Default |
||
| − | |- |
||
| − | !class="b"|[[List of Lightning Returns: Final Fantasy XIII Items#Skeleton Notes|Skeleton Notes]] |
||
| − | |120 gil |
||
| − | |Default |
||
| − | |- |
||
| − | !class="b"|[[List of Lightning Returns: Final Fantasy XIII Items#Cactuar Notes|Cactuar Notes]] |
||
| − | |180 gil |
||
| − | |Default |
||
| − | |} |
||
| − | |||
| − | ===Ruffian=== |
||
| − | ====Tobias's General Store==== |
||
| − | {|class="half-width LR table" |
||
| − | |-class="a" |
||
| − | !Item |
||
| − | !Price |
||
| − | !Availability |
||
| − | |- |
||
| − | !class="b"|[[List of Lightning Returns: Final Fantasy XIII Items#Potion|Potion]] |
||
| − | |360 gil |
||
| − | |From Day 1 to Day 5 |
||
| − | |- |
||
| − | !class="b"|[[List of Lightning Returns: Final Fantasy XIII Items#Hi-Potion|Hi-Potion]] |
||
| − | |480 gil |
||
| − | |From Day 6 |
||
| − | |- |
||
| − | !class="b"|[[List of Lightning Returns: Final Fantasy XIII Items#X-Potion|X-Potion]] |
||
| − | |640 gil |
||
| − | |From Day 11 |
||
| − | |- |
||
| − | !class="b"|[[List of Lightning Returns: Final Fantasy XIII Items#Remedy|Remedy]] |
||
| − | |580 gil |
||
| − | |Default |
||
| − | |- |
||
| − | !class="b"|[[List of Lightning Returns: Final Fantasy XIII Items#Mega Remedy|Mega Remedy]] |
||
| − | |980 gil |
||
| − | |From Day 11, Complete Roadworks III quest |
||
| − | |- |
||
| − | !class="b"|[[List of Lightning Returns: Final Fantasy XIII Items#Phoenix Down|Phoenix Down]] |
||
| − | |1280 gil |
||
| − | |Default |
||
| − | |- |
||
| − | !class="b"|[[List of Lightning Returns: Final Fantasy XIII Items#Veil Potion|Veil Potion]] |
||
| − | |480 gil |
||
| − | |From Day 11, Complete Roadworks II quest |
||
| − | |- |
||
| − | !class="b"|[[List of Lightning Returns: Final Fantasy XIII Items#Regen Potion|Regen Potion]] |
||
| − | |980 gil |
||
| − | |From Day 11, Complete Roadworks II quest |
||
| − | |- |
||
| − | !class="b"|[[List of Lightning Returns: Final Fantasy XIII Items#Enaero Potion|Enaero Potion]] |
||
| − | |640 gil |
||
| − | |From Day 11, Complete Roadworks II quest |
||
| − | |} |
||
| − | |||
| − | ====Lady Luck Forge==== |
||
| − | {|class="half-width LR table" |
||
| − | |-class="a" |
||
| − | !Item |
||
| − | !Type |
||
| − | !Price |
||
| − | !Availability |
||
| − | |- |
||
| − | !class="b"|[[List of Lightning Returns: Final Fantasy XIII Weapons#Liberator|Liberator]] |
||
| − | |Weapon |
||
| − | |4900 gil |
||
| − | |From Day 1 to Day 7 |
||
| − | |- |
||
| − | !class="b"|[[List of Lightning Returns: Final Fantasy XIII Weapons#Salvation|Salvation]] |
||
| − | |Weapon |
||
| − | |72000 gil |
||
| − | |From Day 1 to Day 7 |
||
| − | |- |
||
| − | !class="b"|[[List of Lightning Returns: Final Fantasy XIII Shields#Prytwen|Prytwen]] |
||
| − | |Shield |
||
| − | |500 gil |
||
| − | |From Day 1 to Day 7 |
||
| − | |- |
||
| − | !class="b"|[[List of Lightning Returns: Final Fantasy XIII Weapons#Femme Fatale|Femme Fatale]] |
||
| − | |Weapon |
||
| − | |4000 gil |
||
| − | |From Day 1 to Day 9 |
||
| − | |- |
||
| − | !class="b"|[[List of Lightning Returns: Final Fantasy XIII Weapons#Delilah's Temptation|Delilah's Temptation]] |
||
| − | |Weapon |
||
| − | |45000 gil |
||
| − | |From Day 8 |
||
| − | |- |
||
| − | !class="b"|[[List of Lightning Returns: Final Fantasy XIII Weapons#Wyvern Lance|Wyvern Lance]] |
||
| − | |Weapon |
||
| − | |4000 gil |
||
| − | |From Day 1 to Day 9 |
||
| − | |- |
||
| − | !class="b"|[[List of Lightning Returns: Final Fantasy XIII Weapons#Seagod's Spear|Seagod's Spear]] |
||
| − | |Weapon |
||
| − | |45000 gil |
||
| − | |From Day 8 |
||
| − | |- |
||
| − | !class="b"|[[List of Lightning Returns: Final Fantasy XIII Shields#Pendragon|Pendragon]] |
||
| − | |Shield |
||
| − | |2600 gil |
||
| − | |From Day 1 to Day 9 |
||
| − | |- |
||
| − | !class="b"|[[List of Lightning Returns: Final Fantasy XIII Shields#Dame du Lac|Dame du Lac]] |
||
| − | |Shield |
||
| − | |36000 gil |
||
| − | |From Day 1 to Day 9 |
||
| − | |- |
||
| − | !class="b"|[[List of Lightning Returns: Final Fantasy XIII Shields#Aquamarine Waltz|Aquamarine Waltz]] |
||
| − | |Shield |
||
| − | |4000 gil |
||
| − | |From Day 8 |
||
| − | |- |
||
| − | !class="b"|[[List of Lightning Returns: Final Fantasy XIII Shields#Amethyst Anthem|Amethyst Anthem]] |
||
| − | |Shield |
||
| − | |4000 gil |
||
| − | |From Day 8 |
||
| − | |- |
||
| − | !class="b"|[[List of Lightning Returns: Final Fantasy XIII Weapons#Carmen's Dance|Carmen's Dance]] |
||
| − | |Weapon |
||
| − | |88000 gil |
||
| − | |From Day 10 |
||
| − | |- |
||
| − | !class="b"|[[List of Lightning Returns: Final Fantasy XIII Weapons#Demon Claw|Demon Claw]] |
||
| − | |Weapon |
||
| − | |88000 gil |
||
| − | |From Day 10 |
||
| − | |- |
||
| − | !class="b"|[[List of Lightning Returns: Final Fantasy XIII Shields#Carnelian Choir|Carnelian Choir]] |
||
| − | |Shield |
||
| − | |32000 gil |
||
| − | |From Day 10 |
||
| − | |- |
||
| − | !class="b"|[[List of Lightning Returns: Final Fantasy XIII Shields#Emerald Ensemble|Emerald Ensemble]] |
||
| − | |Shield |
||
| − | |32000 gil |
||
| − | |From Day 10 |
||
| − | |- |
||
| − | !class="b"|[[List of Lightning Returns: Final Fantasy XIII Weapons#Salome's Kiss|Salome's Kiss]] |
||
| − | |Weapon |
||
| − | |196000 gil |
||
| − | |Hard Mode |
||
| − | |- |
||
| − | !class="b"|[[List of Lightning Returns: Final Fantasy XIII Weapons#Morgan le Fay|Morgan le Fay]] |
||
| − | |Weapon |
||
| − | |420000 gil |
||
| − | |Hard Mode |
||
| − | |- |
||
| − | !class="b"|[[List of Lightning Returns: Final Fantasy XIII Weapons#Ramuh's Horn|Ramuh's Horn]] |
||
| − | |Weapon |
||
| − | |196000 gil |
||
| − | |Hard Mode |
||
| − | |- |
||
| − | !class="b"|[[List of Lightning Returns: Final Fantasy XIII Weapons#Hades' Fang|Hades' Fang]] |
||
| − | |Weapon |
||
| − | |420000 gil |
||
| − | |Hard Mode |
||
| − | |- |
||
| − | !class="b"|[[List of Lightning Returns: Final Fantasy XIII Shields#Crystal Silence|Crystal Silence]] |
||
| − | |Shield |
||
| − | |360000 gil |
||
| − | |Hard Mode |
||
| − | |- |
||
| − | !class="b"|[[List of Lightning Returns: Final Fantasy XIII Shields#Dark Discord|Dark Discord]] |
||
| − | |Shield |
||
| − | |360000 gil |
||
| − | |Hard Mode |
||
| − | |- |
||
| − | |} |
||
| − | |||
| − | ====Bandits' Best Outfitters==== |
||
| − | {|class="half-width LR table" |
||
| − | |-class="a" |
||
| − | !Item |
||
| − | !Type |
||
| − | !Price |
||
| − | !Availability |
||
| − | |- |
||
| − | !class="b"|[[List of Lightning Returns: Final Fantasy XIII Garbs#Bold Vanguard|Bold Vanguard]] |
||
| − | |Garb |
||
| − | |1250 gil |
||
| − | |Default |
||
| − | |- |
||
| − | !class="b"|[[List of Lightning Returns: Final Fantasy XIII Garbs#Dangerous Blossom|Dangerous Blossom]] |
||
| − | |Garb |
||
| − | |1250 gil |
||
| − | |Default |
||
| − | |- |
||
| − | !class="b"|[[List of Lightning Returns: Final Fantasy XIII Garbs#Divergence|Divergence]] |
||
| − | |Garb |
||
| − | |5000 gil |
||
| − | |From Day 8 |
||
| − | |- |
||
| − | !class="b"|[[List of Lightning Returns: Final Fantasy XIII Garbs#Sand Fox|Sand Fox]] |
||
| − | |Garb |
||
| − | |5000 gil |
||
| − | |From Day 8 |
||
| − | |- |
||
| − | !class="b"|[[List of Lightning Returns: Final Fantasy XIII Garbs#La Fouldre|La Fouldre]] |
||
| − | |Garb |
||
| − | |100000 gil |
||
| − | |Hard Mode |
||
| − | |- |
||
| − | !class="b"|[[List of Lightning Returns: Final Fantasy XIII Adornments#Lovely Eyepatch|Lovely Eyepatch]] |
||
| − | |Adornment |
||
| − | |320 gil |
||
| − | |Default |
||
| − | |- |
||
| − | !class="b"|[[List of Lightning Returns: Final Fantasy XIII Adornments#Sailor's Tricorne|Sailor's Tricorne]] |
||
| − | |Adornment |
||
| − | |380 gil |
||
| − | |Default |
||
| − | |- |
||
| − | !class="b"|[[List of Lightning Returns: Final Fantasy XIII Adornments#Hotblooded Tricorne|Hotblooded Tricorne]] |
||
| − | |Adornment |
||
| − | |380 gil |
||
| − | |Default |
||
| − | |- |
||
| − | !class="b"|[[List of Lightning Returns: Final Fantasy XIII Adornments#Witch's Pointy Hat|Witch's Pointy Hat]] |
||
| − | |Adornment |
||
| − | |350 gil |
||
| − | |Default |
||
| − | |- |
||
| − | !class="b"|[[List of Lightning Returns: Final Fantasy XIII Adornments#Scholar's Peaked Hat|Scholar's Peaked Hat]] |
||
| − | |Adornment |
||
| − | |350 gil |
||
| − | |Default |
||
| − | |- |
||
| − | !class="b"|[[List of Lightning Returns: Final Fantasy XIII Adornments#Dapper Hat|Dapper Hat]] |
||
| − | |Adornment |
||
| − | |350 gil |
||
| − | |Default |
||
| − | |} |
||
| − | |||
| − | ====Barkeep==== |
||
| − | {|class="half-width LR table" |
||
| − | |-class="a" |
||
| − | !Food |
||
| − | !Type |
||
| − | !Price |
||
| − | |- |
||
| − | !class="b"|Cactuar Tequila |
||
| − | |Restores some HP. |
||
| − | |170 gil |
||
| − | |- |
||
| − | !class="b"|Lizard Meat Nachos |
||
| − | |Restores a great deal of HP. |
||
| − | |300 gil |
||
| − | |- |
||
| − | !class="b"|Sahagin Jerky |
||
| − | |Fully restores HP. |
||
| − | |450 gil |
||
| − | |} |
||
| − | |||
| − | ==Treasures== |
||
| − | *[[List of Lightning Returns: Final Fantasy XIII Accessories#Angel's Headband|Angel's Headband]] – Found at Oasis Lighthouse. |
||
| − | *[[List of Lightning Returns: Final Fantasy XIII Items#Arithmometer|Arithmometer]] – Found in Grave of the Colossi behind the sandstorm as part of the [[#His Wife's Dream|His Wife's Dream]] quest. |
||
| − | *[[List of Lightning Returns: Final Fantasy XIII Items#Bandit's Bloodseal|Bandit's Bloodseal]] – Found at the entrance to the Shrine of the Tablet at the Grave of the Colossi in the Dead Dunes. |
||
| − | *[[List of Lightning Returns: Final Fantasy XIII Accessories#Corsair Scarf|Corsair Scarf]] – Found in a treasure sphere in the Dead Dunes, Ruffian on the south end of the cliff. |
||
| − | *[[List of Lightning Returns: Final Fantasy XIII Items#Crux Body|Crux Body]] – Obtained after activating a mural within the Temple Ruins. |
||
| − | *Defaith Lv. 2 – Found in the north of Giant's Sandbox. |
||
| − | *Debrave Lv. 2 – Found under an arch of ruin in northern Giant's Sandbox. |
||
| − | *Earth Eater's Notes – Found in the Grave of the Colossi area, in the ruins near the path that leads to Ruffian. |
||
| − | *[[List of Lightning Returns: Final Fantasy XIII Items#Key to the Sand Gate|Key to the Sand Gate]] – Found at Oasis Lighthouse. |
||
| − | *[[List of Lightning Returns: Final Fantasy XIII Items#Loupe|Loupe]] – Found north of Ruffian. |
||
| − | *[[List of Lightning Returns: Final Fantasy XIII Items#Lizard Tail|Lizard Tail]] – Obtained by killing the lizards wandering around the desert. |
||
| − | *[[List of Lightning Returns: Final Fantasy XIII Items#Pilgrim's Crux|Pilgrim's Crux]] – Found in various places in the Dead Dunes. Can also be bought from a man in Ruffian. |
||
| − | *[[List of Lightning Returns: Final Fantasy XIII Accessories#Rainbow Gem|Rainbow Gem]] – Found in a treasure sphere in Atomos's Sands, east from the Tobias's Branch Store. |
||
| − | *[[List of Lightning Returns: Final Fantasy XIII Accessories#Serenity Sachet|Serenity Sachet]] – Found in a treasure sphere in the Dead Dunes, Grave of the Colossi west. |
||
| − | *[[List of Lightning Returns: Final Fantasy XIII Accessories#Silk Scarf|Silk Scarf]] – Open the 4 EP cost treasure sphere in the dead end of the Grave of the Colossi area in the Dead Dunes. |
||
| − | *[[List of Lightning Returns: Final Fantasy XIII Accessories#Silver Barrette|Silver Barrette]] – Found at Oasis Lighthouse in a 4 EP cost treasure sphere. |
||
| − | *[[List of Lightning Returns: Final Fantasy XIII Accessories#Star Bracelet|Star Bracelet]] – Found in a treasure sphere in Dead Dunes, Dry Floodlands south. |
||
| − | *[[List of Lightning Returns: Final Fantasy XIII Items#Study of the Depths|Study of the Depths]] – Found in Giant's Sandbox area of the Dead Dunes; south from the general shop, east from the Temple Ruins: South Gate |
||
| − | *[[List of Lightning Returns: Final Fantasy XIII Items#Tablet|Tablet]] – Found in shrines in Atomos's Sands, Dry Floodlands and the Grave of the Colossi. |
||
| − | *[[List of Lightning Returns: Final Fantasy XIII Items#Unappraised Item|Unappraised Item]] – Found from killing lizards and destroying skeleton statues. |
||
| − | *[[List of Lightning Returns: Final Fantasy XIII Items#Yellowed Skull|Yellowed Skull]] – Destroy skeleton statues in the Temple Ruins and Shrines. |
||
==Enemies== |
==Enemies== |
||
| Line 709: | Line 113: | ||
*[[Skeleton (Lightning Returns)|Skeleton]] (Temple Ruins) |
*[[Skeleton (Lightning Returns)|Skeleton]] (Temple Ruins) |
||
| − | ==Creation and |
+ | ==Creation and development== |
The Dead Dunes were inspired by real-world location Cairo.<ref>http://www.gamasutra.com/view/pressreleases/209903/LIGHTNING_RETURNS_FINAL_FANTASY_XIII_FEATURED_INGAMESTOPrsquoS_POWER_UP_REWARDS_EPIC_REWARDS_GIVEAWAY.php</ref> Early screenshots of Dead Dunes differ from the gameplay demo shown during Japan Expo 2013: while early screenshots suggest Lightning was meant to look for a hidden treasure, the treasure became the holy clavis artefact. In early screenshots, Adonis wears silver as opposed to his final red color. |
The Dead Dunes were inspired by real-world location Cairo.<ref>http://www.gamasutra.com/view/pressreleases/209903/LIGHTNING_RETURNS_FINAL_FANTASY_XIII_FEATURED_INGAMESTOPrsquoS_POWER_UP_REWARDS_EPIC_REWARDS_GIVEAWAY.php</ref> Early screenshots of Dead Dunes differ from the gameplay demo shown during Japan Expo 2013: while early screenshots suggest Lightning was meant to look for a hidden treasure, the treasure became the holy clavis artefact. In early screenshots, Adonis wears silver as opposed to his final red color. |
||
| − | {{ |
+ | {{clear}} |
| − | ==Musical |
+ | ==Musical themes== |
| − | The theme that plays depends on the [[Time (Lightning Returns)|time]] of day. "[[Lightning Returns: Final Fantasy XIII: Original Soundtrack#Desert Awakening|Desert Awakening]]" plays in the morning, "[[Lightning Returns: Final Fantasy XIII: Original Soundtrack#The Dead Dunes|The Dead Dunes]]" plays in the afternoon and "Desert Lullaby" plays in the evening. "[[Lightning Returns: Final Fantasy XIII: Original Soundtrack#Graveyard of Dreams|Graveyard of Dreams]]" plays during the night. "[[Lightning Returns: Final Fantasy XIII: Original Soundtrack#Bandit Gang Monoculus|Bandit Gang Monoculus]]" plays when Lightning reunites with Fang and "[[Lightning Returns: Final Fantasy XIII: Original Soundtrack#Fang's Theme ~The Boss~|Fang's Theme ~The Boss~]]" is Fang's leitmotif that plays in scenes associated with her. "[[Lightning Returns: Final Fantasy XIII: Original Soundtrack#Treasures Within|Treasures Within]]" plays in the Temple Ruins. |
+ | The theme that plays depends on the [[Time (Lightning Returns)|time]] of day. "[[Lightning Returns: Final Fantasy XIII: Original Soundtrack#Desert Awakening|Desert Awakening]]" plays in the morning, "[[Lightning Returns: Final Fantasy XIII: Original Soundtrack#The Dead Dunes|The Dead Dunes]]" plays in the afternoon and "[[Desert Lullaby (theme)|Desert Lullaby]]" plays in the evening. "[[Lightning Returns: Final Fantasy XIII: Original Soundtrack#Graveyard of Dreams|Graveyard of Dreams]]" plays during the night. "[[Lightning Returns: Final Fantasy XIII: Original Soundtrack#Bandit Gang Monoculus|Bandit Gang Monoculus]]" plays when Lightning reunites with Fang and "[[Lightning Returns: Final Fantasy XIII: Original Soundtrack#Fang's Theme ~The Boss~|Fang's Theme ~The Boss~]]" is Fang's leitmotif that plays in scenes associated with her. "[[Lightning Returns: Final Fantasy XIII: Original Soundtrack#Treasures Within|Treasures Within]]" plays in the Temple Ruins. "[[Village and Void]]" plays in the Grave of the Colossi area during the day. |
| − | In the Ruffian bar a singer performs a vocal arrangement of "[[Eternal Wind]]", the theme of ''[[Final Fantasy III]]''. A full arrangement of the song appears on the game's ''[[Lightning Returns: Final Fantasy XIII: Original Soundtrack PLUS|Original Soundtrack PLUS]]''. |
+ | In the Ruffian bar a singer performs a vocal arrangement of "[[Eternal Wind (theme)|Eternal Wind]]", the theme of ''[[Final Fantasy III]]''. A full arrangement of the song appears on the game's ''[[Lightning Returns: Final Fantasy XIII: Original Soundtrack PLUS|Original Soundtrack PLUS]]''. |
| − | ==Other |
+ | ==Other appearances== |
| − | ===''[[Theatrhythm Final Fantasy |
+ | ===''[[Theatrhythm Final Fantasy Curtain Call]]''=== |
| + | |||
| − | {{sideicon|TFFCC}} |
||
| − | [[File:Dead Dunes.png|thumb|Dead Dunes.]] |
+ | [[File:Dead Dunes.png|thumb|The Dead Dunes in ''Theatrhythm Final Fantasy Curtain Call''.]] |
| − | Dead Dunes appear |
+ | The Dead Dunes appear as the background for the [[Field Music Sequence]] of its eponymous theme. |
| + | {{clear}} |
||
| − | {{Locat-stub|Theatrhythm Final Fantasy: Curtain Call}} |
||
| + | |||
| − | {{-}} |
||
| + | ===''[[Final Fantasy Airborne Brigade]]''=== |
||
| + | |||
| + | [[File:FFAB Dead Dunes LRFFXIII.png|right]] |
||
| + | {{Location section|Final Fantasy Airborne Brigade}} |
||
==Gallery== |
==Gallery== |
||
| + | ;Artworks |
||
| − | {{Gallery|title=Artworks|class=LRa|collapse=hide |
||
| − | + | <gallery>LRFFXIII_Artwork_-_The_Dead_Dunes.JPG|The Dead Dunes. |
|
| − | + | LRFFXIII_Artwork_-_Ruffian.jpg|Monoculus settlement Ruffian. |
|
| − | + | Lightning Returns - Oasis Town.png|Oasis town Ruffian. |
|
| − | + | Lightning_at_Dead_Dunes_Concept_Art.jpg|The Dead Dunes ruins. |
|
| − | + | LRFFXIII_Artwork_-_Fang%27s_Room.jpg|Monoculus leader Fang's Room. |
|
| − | + | LRFFXIII_Artwork_-_The_Clavis_Chamber.JPG|Clavis Chamber. |
|
| − | + | LRFFXIII Dead Dunes Aqueducts Ruins Concept.jpg|Concept of ruined aqueducts. |
|
| − | + | LRFFXIII Dead Dunes Lighthouse Concept.jpg|Concept of a lighthouse. |
|
| − | + | LRFFXIII Dead Dunes Lighthouse Art.jpeg|Concept of a lighthouse. |
|
| − | + | LRFFXIII Dead Dunes Labyrinth Entrance Art.jpeg|Labyrinth entrance. |
|
| − | + | LRFFXIII - Dead Dunes Logo.jpeg|Logo of the Dead Dunes viewable through mobile devices on the official Japanese site. |
|
| − | + | Dead-Dunes-HD-Logo.png|Logo of the Dead Dunes as seen in the location's trailer. |
|
| − | + | DeadDunes-lrffxiii-icon.png|Dead Dunes's icon. |
|
| − | + | Crux-Artwork-LRFFXIII.JPG|Crux artworks. |
|
| − | + | LRFFXIII Gimmick Gate (Normal).jpeg|Door artwork. |
|
| + | </gallery> |
||
| − | }} |
||
| − | + | ;Screenshots |
|
| − | + | <gallery>Dead-Dunes-Train-Station.png|Train station. |
|
| − | + | LRFFXIII - Oasis Village.jpg|Ruffian. |
|
| − | + | LRFFXIII_-_Location_Concept_2.jpg|Grave of the Colossi (Shrine of Long Gui in early demo). |
|
| − | + | LRFFXIII Dead Dunes Monster.jpg|Battle with Earth Eater. |
|
| − | + | LRFFXIII - Fight in the Dead Dunes.jpg|Lightning fighting Vali and Hanuman in the Dead Dunes. |
|
| − | + | LRFFXIII - Stolen Treasure.jpg|Early story element concept, now replaced with crux which is used to stop God's Wrath. |
|
| − | + | Lightning-Returns-Dead-Dunes-Desert-Ruins.png|A view of ruins in the desert. |
|
| − | + | LRFFXIII - Dead Dunes Ancient.png|A view of the location marked as "Ancient" on the official Japanese site. |
|
| − | + | Dead-Dunes-Bar.png|A bar. |
|
| − | + | Dead-Dunes-night-LRFFXIII.png|Dead Dunes at night. |
|
| + | </gallery> |
||
| − | }} |
||
==Trivia== |
==Trivia== |
||
| − | *The Dead Dunes are likely the dried remains of the Pulsian [[Archylte Steppe]]. Evidence to this can be seen by the oretoise skeleton, creatures which were only found on the Steppe in both ''[[Final Fantasy XIII]]'' and ''[[Final Fantasy XIII-2]]'', as well as |
+ | * The Dead Dunes are likely the dried remains of the [[Gran Pulse|Pulsian]] [[Archylte Steppe]]. Evidence to this can be seen by the [[oretoise]] skeleton, creatures which were only found on the Steppe in both ''[[Final Fantasy XIII]]'' and ''[[Final Fantasy XIII-2]]'', as well as cactuar waystones being present. The dormant fal'Cie Atomos and pieces of Titan are also found here, and the Steppe and its [[Mah'habara Subterra]] were where they resided and toiled over a thousand years ago. |
| − | *The small lizards roaming the sands use the same model as a staggered Gurangatch. |
+ | * The small lizards roaming the sands use the same model as a staggered Gurangatch. |
==References== |
==References== |
||
{{reflist}} |
{{reflist}} |
||
| − | {{LR}} |
+ | {{navbox setting LR}} |
| + | |||
| − | [[de:Klagende Dünen]] |
||
[[Category:Deserts]] |
[[Category:Deserts]] |
||
| − | [[Category:Lightning Returns: Final Fantasy XIII |
+ | [[Category:Locations in Lightning Returns: Final Fantasy XIII]] |
| + | |||
| + | [[de:Klagende Dünen]] |
||
Revision as of 19:25, 13 January 2020
Template:Sideicon
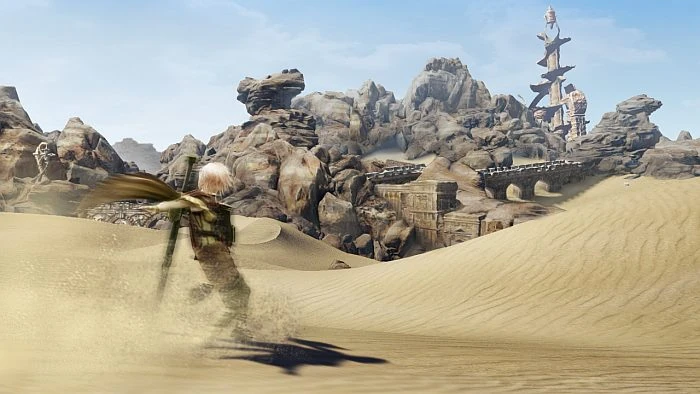

The Dead Dunes.
A lifeless desert within which rests a holy relic.
This region is covered with endless desert sands as far as the eye can see. Within it can be found the shanties which form a base for treasure hunters seeking their fortune in the arid wilderness, as well as ancient ruins said to conceal a divine treasure.
Many monsters with a character unique to the area appear in this region, such as the sand swimming fiends of the open desert and the undead horrors that lurk within the ruins.Official description[1]
The Dead Dunes (デッドデューン, Deddo Dyūn?) is the desert continent in Nova Chrysalia in Lightning Returns: Final Fantasy XIII. The area is dotted with ruins and Lightning can slide down the steep dunes. An oasis village serves as a base for the local bandit group called Monoculus. The fal'Cie Atomos and parts of Titan are found among the sand, rendered immobile, suggesting the Dead Dunes was once the Archylte Steppe.
This area is much more sparsely populated than the other areas of Nova Chrysalia and has fewer quests. The desert is considered more dangerous during the day time, when the toughest enemies come out. The ruins below the desert don't have a day and night cycle. The player can fast-travel the area via the red cactuar waystones, which are scattered around the desert and in the ruins below.
Datalog
The fringes of this desolate desert are lapped by the ocean of Chaos. It is not a place meant for human inhabitation, but thanks to the ancient ruins that are scattered among the dunes, many lawless bandits have come here to plunder the treasure within. In the desert, wild monsters are most active during daylight hours. Unlike other parts of the world, nights in the desert are blessed by relative peace and quiet.
Centuries of plundering have emptied most of the ruins, but one legendary treasure—the holy clavis—still sits beyond a seal that no one has been able to break.
Story
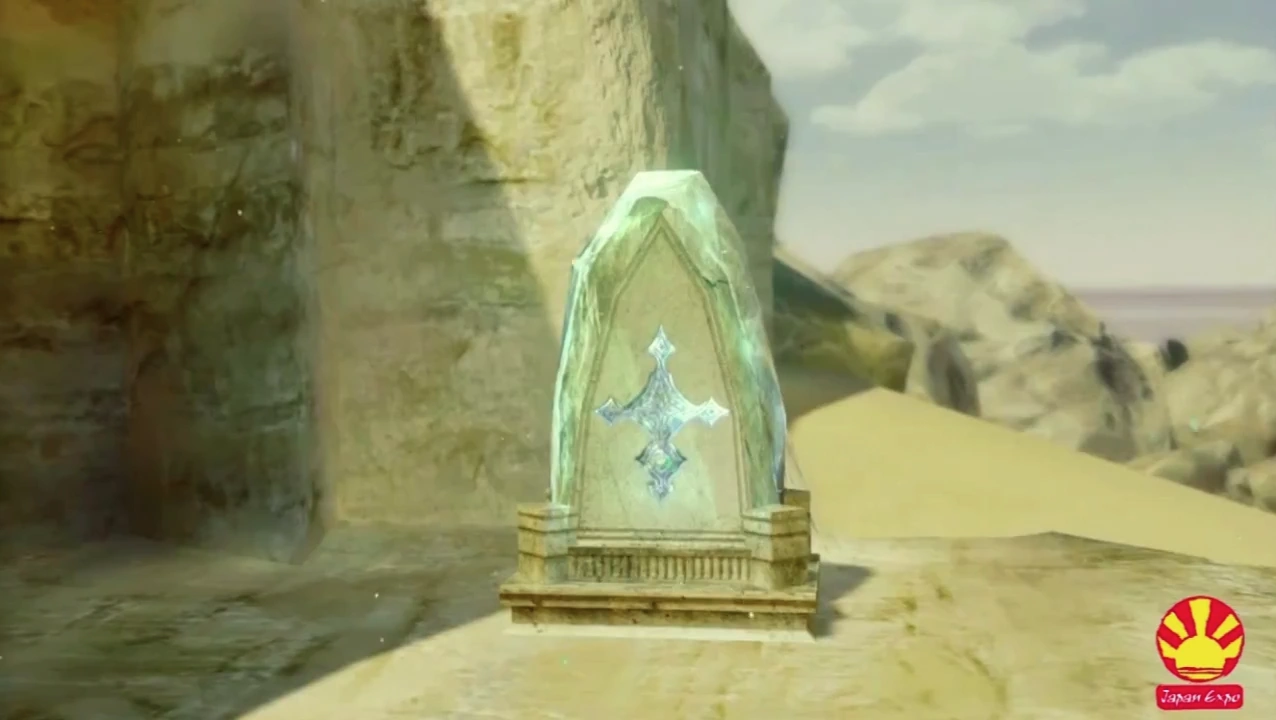

Lightning activates a crux.
Lightning arrives on the Dead Dunes following the rumors that an artifact called the holy clavis is buried somewhere in the desert. Suspecting the local bandits know something about it, she locates their settlement, Ruffian. Lightning speaks with a Monoculus member named Adonis, who says they won't divulge anything until Lightning joins their gang. As a trial, Adonis tasks Lightning with stopping the sandstorm known as God's Wrath that blocks a path to the settlement. After defeating a Gurangatch, Lightning obtains a crux which helps her operate a monument to quell God's Wrath.
Adonis accepts Lightning as a part of Monoculus and reveals the group's boss is a woman who knows Lightning and has been keeping tabs on her ever since she got off the monorail at the station. Back in the Ruffian, Adonis introduces Lightning to the boss, her old friend Fang. Fang explains she left the Order of Salvation in Luxerion and is now looking for the clavis, and asks Lightning's help.
Fang and Lightning team up and head for the Temple Ruins, an ancient maze under the desert. As Lightning is the savior can open the doorway. Fang and Lightning locate tablets from shrines around the desert and use them to activate murals within the ruins to open the chamber where the clavis is kept. The murals spell humanity's creation story, showing how Goddess Etro's blood birthed mankind, whose souls would cycle between death and rebirth. The god Bhunivelze, however, saw death as impure, and thus the souls of the dead as tainted.
Lightning and Fang reach the clavis and to Lightning's surprise Fang sets out to destroy it. Lightning stops her. Fang explains her friend Vanille wants to use the clavis to draw in the anguished souls of the dead from the Chaos so that the Order can destroy them, but the ritual would kill her. Lightning is shocked the Order wants to eradicate the souls of the dead, and that Vanille is onboard with their plan.
The Order's military branch, the Secutors, arrive to claim the clavis and send a monster after Lightning and Fang. The two defeat the monster, but meanwhile the Secutors nab the clavis and seal the pair within the chamber. The mysterious Lumina appears, gloating how she led the Secutors to them. She looks forward to Vanille performing the Soulsong on the world's final day to obliterate the souls of the dead, including Lightning's sister Serah. Lumina opens the chamber's door and disappears.
Lightning tells Fang she cannot save Vanille if she is bent on dying, and says Fang is the only one who can convince her. Fang departs, saying the Monoculus is officially disbanded, and the two promise to meet in Luxerion on the eve of the Apocalypse.
Locations
Ruffian
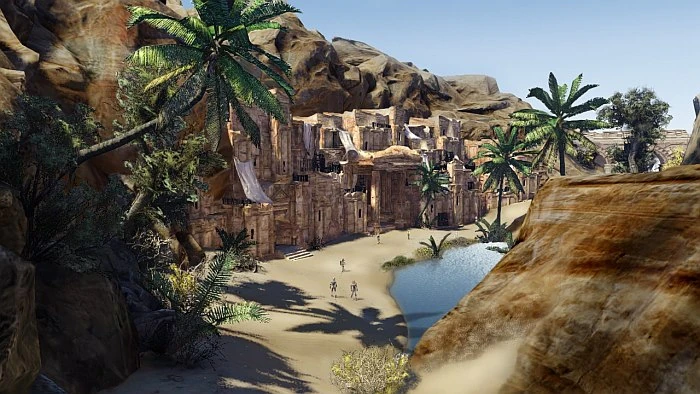
The headquarters of Monoculus is located here. The settlement has shops, an inn, a sorcery shop, a boy who will appraise the Unappraised Items the player can collect from the lizards on the desert and the skeletons in the ruins, and a restaurant.
Giant's Sandbox
The large area where the monorail stops is known as Giant's Sandbox. Chocolina's Canvas of Prayers is found just outside the station with a merchant and an outfitter.
Entrances to different parts of the Temple Ruins are found at the sandbox, and the superboss Aeronite patrols the dunes here after Day 7. A merchant is camping out here next to the north entrance to the Temple Ruins, who is part of a mission the player can start with the item shop owner in Ruffian.
Grave of the Colossi
There is Bhakti's Oil under the skeleton of an oretoise, and a shrine where one of the tablets that activates a mural in the ruins is located. If the player quells a sandstorm near here, they can open a new area that has a quest item and a treasure sphere locked by Lumina that requires Energy Points to open.
Atomos's Sands
Area of the Dead Dunes where the fal'Cie Atomos's remains lie. It is assumed that Atomos had felt God's presence, prompting it to enter into a form of stasis while it waits for the world to end. The people residing within the Dead Dunes view the area as a "public dumping ground," prompting Adonis to post a bulletin about littering. Lightning can find a loupe on the ground near here for the boy who wants to appraise items back in Ruffian. There is also a shrine for one of the tablets needed to activate murals in the Temple Ruins here with a cactuar waystone outside it.
Oasis Lighthouse
The way to the lighthouse is blocked by a sandstorm that has a Cactair caught in it. Defeating it earns one of Dajh Katzroy's soul fragments needed for a main quest in the Wildlands. The player can battle Cactuars here who drop good gil and locate the quest giver for the game's most arduous quest: to fell every Last One enemy. Because some enemies only appear in the final dungeon this quest cannot be completed until in New Game Plus.
Dry Floodplains
There is a shrine for one of the tablets needed to activate a mural in the Temple Ruins here. Otherwise it is a large and empty sandy area that has been left abandoned. There is a look-out post Lightning can climb, but no one else ever ventures out there but Lightning.
Temple Ruins
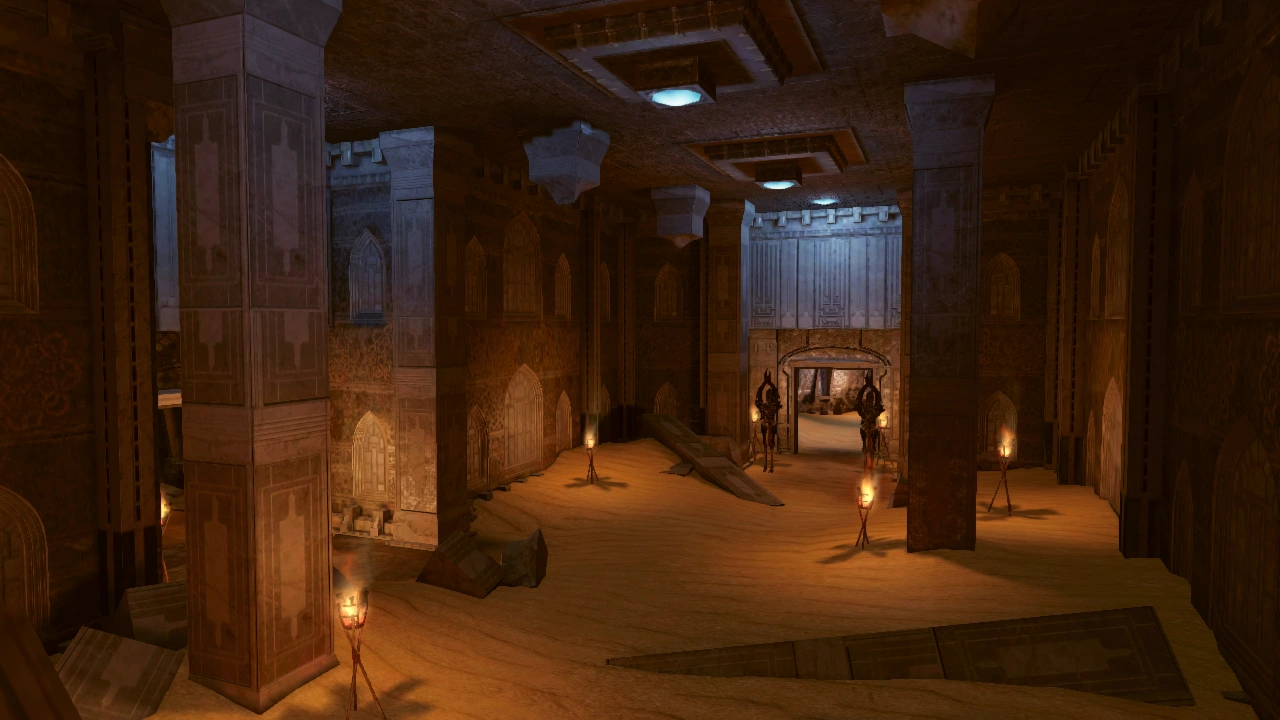
Temple Ruins is an expansive maze below the sands. The structure is ancient, predating Cocoon, and nobody knows who built it or why. The ruins are said to hold the holy clavis, an artifact that can draw in the souls of the dead. The ruins are littered with murals that spell the creation story of mankind. The temple is filled with sealed doors that operate via magic and mystical tablets and cruxes are needed to delve deeper into the ruins. The skeletons standing guard can be torn apart to reveal Unappraised Items and Yellowed Skulls, but sometimes this also initiates a battle.
Map
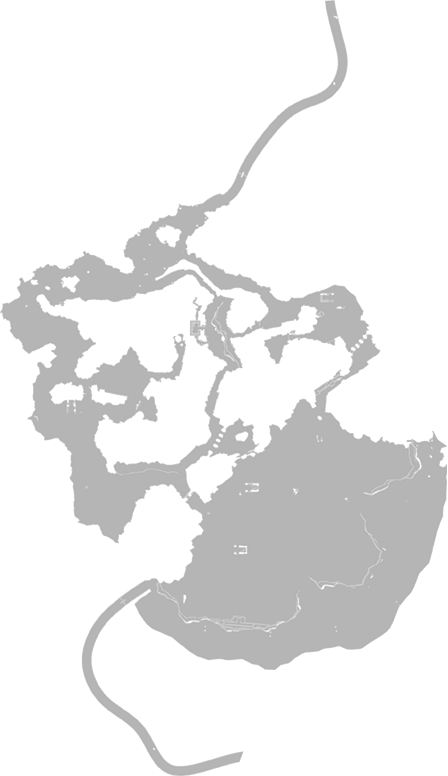
Quests
Shops
Forge (Rare)
Treasures
- Angel's Headband (at Oasis Lighthouse)
- Arithmometer (in Grave of the Colossi behind the sandstorm)
- Bandit's Bloodseal (in the entrance to the Shrine of the Tablet: Grave of the Colossi)
- Corsair Scarf (treasure sphere on south end cliff in Ruffian)
- Crux Body (obtained after activating a mural within Temple Ruins)
- Defaith Lv. 2 (north of Giant's Sandbox)
- Debrave Lv. 2 (under an arch of ruin in northern Giant's Sandbox)
- Earth Eater's Notes (in the ruins near path leading to Ruffian in the Grave of the Colossi area)
- Key to the Sand Gate (at Oasis Lighthouse)
- Loupe (north of Ruffian)
- Lizard Tail (obtained by killing the lizards wandering around the desert)
- Pilgrim's Crux (found in various places in the Dead Dunes. Can also be bought from a man in Ruffian)
- Rainbow Gem (treasure sphere in Atomos's Sands, east of the Tobias's Branch Store)
- Serenity Sachet (treasure sphere in the Grave of the Colossi west)
- Silk Scarf (open the 4 EP cost treasure sphere in the dead end of the Grave of the Colossi)
- Silver Barrette (Oasis Lighthouse in a 4 EP cost treasure sphere)
- Star Bracelet (treasure sphere in Dry Floodlands south)
- Study of the Depths (Giant's Sandbox area south from the general shop, east from the Temple Ruins: South Gate)
- Tablet (in shrines in Atomos's Sands, Dry Floodlands and the Grave of the Colossi.
- Unappraised Item (found by killing lizards and destroying skeleton statues)
- Yellowed Skull (destroy skeleton statues in the Temple Ruins and Shrines)

Lightning can slash lizards that wander the desert for unappraised items and lizard tails. Slashing 30 lizards in the Dead Dunes earns the Lizard Lariat achievement.
Enemies
- Anubys
- Cactair (One encounter per playthrough)
- Cactuar
- Desert Sahagin
- Earth Eater
- Gaunt (Temple Ruins)
- Goblot
- Gorgonopsid
- Gurangatch
- Schrodinger (Temple Ruins)
- Skeleton (Temple Ruins)
Creation and development
The Dead Dunes were inspired by real-world location Cairo.[2] Early screenshots of Dead Dunes differ from the gameplay demo shown during Japan Expo 2013: while early screenshots suggest Lightning was meant to look for a hidden treasure, the treasure became the holy clavis artefact. In early screenshots, Adonis wears silver as opposed to his final red color.
Musical themes
The theme that plays depends on the time of day. "Desert Awakening" plays in the morning, "The Dead Dunes" plays in the afternoon and "Desert Lullaby" plays in the evening. "Graveyard of Dreams" plays during the night. "Bandit Gang Monoculus" plays when Lightning reunites with Fang and "Fang's Theme ~The Boss~" is Fang's leitmotif that plays in scenes associated with her. "Treasures Within" plays in the Temple Ruins. "Village and Void" plays in the Grave of the Colossi area during the day.
In the Ruffian bar a singer performs a vocal arrangement of "Eternal Wind", the theme of Final Fantasy III. A full arrangement of the song appears on the game's Original Soundtrack PLUS.
Other appearances
Theatrhythm Final Fantasy Curtain Call

The Dead Dunes in Theatrhythm Final Fantasy Curtain Call.
The Dead Dunes appear as the background for the Field Music Sequence of its eponymous theme.
Final Fantasy Airborne Brigade
Gallery
- Artworks
")
")
")
")
")
")
")
")
")
")
")
.jpeg "LRFFXIII Gimmick Gate (Normal).jpeg (0 bytes)")
- Screenshots
")
")
")
")
")
")
")
")
")
")
Trivia
- The Dead Dunes are likely the dried remains of the Pulsian Archylte Steppe. Evidence to this can be seen by the oretoise skeleton, creatures which were only found on the Steppe in both Final Fantasy XIII and Final Fantasy XIII-2, as well as cactuar waystones being present. The dormant fal'Cie Atomos and pieces of Titan are also found here, and the Steppe and its Mah'habara Subterra were where they resided and toiled over a thousand years ago.
- The small lizards roaming the sands use the same model as a staggered Gurangatch.