Tag: sourceedit |
Castlefania (talk | contribs) (Missing word.) Tag: Source edit |
||
| (31 intermediate revisions by 9 users not shown) | |||
| Line 1: | Line 1: | ||
| − | {{sideicon|FFIX}} |
+ | {{sideicon|prime=FFIX|FFRK}} |
{{FA|May 1, 2013}} |
{{FA|May 1, 2013}} |
||
| + | {{infobox location |
||
| − | {{Location |
||
|name=Dali |
|name=Dali |
||
|release=FFIX |
|release=FFIX |
||
| Line 11: | Line 11: | ||
|affiliation=[[Alexandria]] |
|affiliation=[[Alexandria]] |
||
|items=*30371 Gil (total) |
|items=*30371 Gil (total) |
||
| − | *[[ |
+ | *[[Potion (Final Fantasy IX)|Potion]] x4 |
| − | *[[ |
+ | *[[Antidote (Final Fantasy IX)|Antidote]] |
| − | *[[ |
+ | *[[Elixir (Final Fantasy IX)|Elixir]] x2 |
| − | *[[ |
+ | *[[Stellazzio#Aries|Aries]] |
| − | *[[ |
+ | *[[Cachusha (Final Fantasy IX)|Cachusha]] |
| ⚫ | |||
| − | *[[List of Final Fantasy IX items#Elixir|Elixir]] |
||
| + | *[[Mini-Brahne]] |
||
| ⚫ | |||
| + | *[[Mayor's Key]] |
||
| − | *[[List of Final Fantasy IX items#Mini-Brahne|Mini-Brahne]] |
||
| − | *[[ |
+ | *[[Eye Drops (Final Fantasy IX)|Eye Drops]] |
| − | *[[ |
+ | *[[Ether (Final Fantasy IX)|Ether]] |
| − | *[[ |
+ | *[[Leather Wrist (Final Fantasy IX)|Leather Wrist]] |
| − | *[[ |
+ | *[[Iron Helm (Final Fantasy IX)|Iron Helm]] |
| − | *[[ |
+ | *[[Phoenix Down (Final Fantasy IX)|Phoenix Down]] |
| − | *[[ |
+ | *[[Phoenix Pinion (Final Fantasy IX)|Phoenix Pinion]] |
| − | *[[List of Final Fantasy IX items#Phoenix Pinion|Phoenix Pinion]] |
||
*Many found in [[#Shops|shops]] |
*Many found in [[#Shops|shops]] |
||
| − | |enemies= |
+ | |enemies={{collapsible text|header=Dali's Underground|content= |
*[[Vice (Final Fantasy IX)|Vice]] |
*[[Vice (Final Fantasy IX)|Vice]] |
||
*[[Ghost (Final Fantasy IX)|Ghost]] |
*[[Ghost (Final Fantasy IX)|Ghost]] |
||
| + | }} |
||
| − | </div> |
||
| − | + | {{collapsible text|header=Cargo Ship Loading Area|content= |
|
*[[Black Waltz 2]] (boss) |
*[[Black Waltz 2]] (boss) |
||
| + | }} |
||
| − | </div> |
||
| − | + | {{collapsible text|header=Nolrich Heights|content= |
|
*[[Carve Spider (Final Fantasy IX)|Carve Spider]] |
*[[Carve Spider (Final Fantasy IX)|Carve Spider]] |
||
*[[Mu (Final Fantasy IX)|Friendly Mu]] |
*[[Mu (Final Fantasy IX)|Friendly Mu]] |
||
*[[Python (Final Fantasy IX)|Python]] |
*[[Python (Final Fantasy IX)|Python]] |
||
| + | }} |
||
| − | </div> |
||
|quests=*[[#Village events|Village events]] |
|quests=*[[#Village events|Village events]] |
||
*[[#Mognet|Mognet]] |
*[[#Mognet|Mognet]] |
||
*[[#Active Time Events|Active Time Events]] |
*[[#Active Time Events|Active Time Events]] |
||
*[[#Tetra Master|Tetra Master]] |
*[[#Tetra Master|Tetra Master]] |
||
| − | *[[#Friendly |
+ | *[[#Friendly monsters|Friendly monsters]] |
*[[#Blu Mag|Blu Mag]] |
*[[#Blu Mag|Blu Mag]] |
||
*[[#Color fortunes|Color fortunes]] |
*[[#Color fortunes|Color fortunes]] |
||
| ⚫ | |||
| − | *[[#Elixir in the field|Elixir in the field]] |
||
| − | *[[#Entering the mayor's house|Entering the mayor's house]] |
||
| − | *[[#Windmill items|Windmill items]] |
||
| ⚫ | |||
}} |
}} |
||
| − | '''Dali''' is a small village near the geographical center of the [[Mist Continent]], in the world of [[Gaia (Final Fantasy IX)|Gaia]] |
+ | '''Dali''' is a small village in ''[[Final Fantasy IX]]'' near the geographical center of the [[Mist Continent]], in the world of [[Gaia (Final Fantasy IX)|Gaia]]. It is located in the territory of [[Alexandria]], near [[Aerbs Mountains#South Gate|South Gate]] and above the [[Mist (term)|Mist]]. The village has a large windmill within the village, and an [[Observatory Mountain]] nearby. |
== Story == |
== Story == |
||
| Line 58: | Line 54: | ||
[[File:FFIX_Dali.png|thumb|200px|The streets of Dali.]] |
[[File:FFIX_Dali.png|thumb|200px|The streets of Dali.]] |
||
| − | [[Zidane Tribal|Zidane]], [[Adelbert Steiner|Steiner]], [[Garnet Til Alexandros XVII|Garnet]], and [[Vivi Ornitier|Vivi]] arrive in Dali to rest and find a way to travel to [[Lindblum (Final Fantasy IX)|Lindblum]]. They stay the night at the [[inn]], but the innkeeper notices Vivi, and how he is similar in appearance to the black mages being produced. |
+ | [[Zidane Tribal|Zidane]], [[Adelbert Steiner|Steiner]], [[Garnet Til Alexandros XVII|Garnet]], and [[Vivi Ornitier|Vivi]] arrive in Dali to rest and find a way to travel to [[Lindblum (Final Fantasy IX)|Lindblum]]. They stay the night at the [[inn]], but the innkeeper notices Vivi, and how he is similar in appearance to the black mages being produced in the village's secret underground factory. |
| − | The next day, Garnet and Vivi explore the town, and Steiner tries to find a way to get back to Alexandria. Garnet tries to blend in with the villagers as |
+ | The next day, Garnet and Vivi explore the town, and Steiner tries to find a way to get back to Alexandria. Garnet tries to blend in with the villagers as a commoner, going by the nickname "Dagger". Vivi becomes fascinated with the windmill, but a villager grabs him, thinking he has escaped from the factory. Zidane returns to the inn after looking around the village. When Vivi does not return, Zidane and Garnet go out to look for him. They hear him crying, and find a secret entrance to a base below the windmill. Garnet notices a symbol, which she saw in [[Alexandria Castle]] on a crate, and becomes suspicious. They find Vivi kidnapped and rescue him, and discover machines producing black mages, distressing Vivi. |
| − | Zidane, Vivi and Garnet sneak into a crate so they wouldn't be seen and are almost accidentally loaded onto the [[Cargo Ship (Final Fantasy IX)|cargo ship]]. Steiner scares off the villagers and halts them from loading the ship. The four |
+ | Zidane, Vivi and Garnet sneak into a crate so they wouldn't be seen and are almost accidentally loaded onto the [[Cargo Ship (Final Fantasy IX)|cargo ship]]. Steiner scares off the villagers and halts them from loading the ship. The four are attacked by [[Black Waltz 2]], and after defeating him, the group boards the [[Airship (term)|airship]], Steiner hoping to return to Alexandria while Zidane plans to divert the airship to Lindblum. |
| − | If the party returns to Dali later they find the people working in the farms again. |
+ | If the party returns to Dali later, they will find the people working in the farms again. |
| − | {{ |
+ | {{clear}} |
{{endspoiler}} |
{{endspoiler}} |
||
== Locations == |
== Locations == |
||
[[File:DaliVillageRoad.png|right|250px|thumb|Village Road.]] |
[[File:DaliVillageRoad.png|right|250px|thumb|Village Road.]] |
||
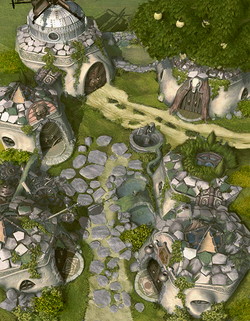
| − | Dali is a small village and most areas can be accessed from the [[#Village Road|Village Road]]. Underneath the village is |
+ | Dali is a small village and most areas can be accessed from the [[#Village Road|Village Road]]. Underneath the village is a [[#Dali's Underground|factory]], a linear cavern system, which can be [[Unrevisitable locations|entered once]] from the inside of the [[#Windmill|Windmill]] as part of the story. |
| − | Dali features two exits to the [[world map]], one from the Village Road and the other from the [[#Field|Field]]. The player |
+ | Dali features two exits to the [[world map]], one from the Village Road and the other from the [[#Field|Field]]. The player cannot to exit to the world map on their first visit until Garnet rejoins the party. |
=== Village Road === |
=== Village Road === |
||
| − | The Village Road is Dali's main area and is the central location for |
+ | The Village Road is Dali's main area and is the central location for the other areas of the village. It it one of the areas that leads out onto the world map and the area where the player will arrive at when entering. |
The road starts south of the screen. The first area on the left leads into the [[#Weapon Shop|Weapon Shop]]. Next on the left is an entrance to the [[#Mayor's House|Mayor's House]], and at the top-left is the entrance to the [[#Windmill|Windmill]]. In the south-right is the entrance to the [[#Inn|Inn]], while the north-right leads to the [[#Field|Field]]. At the top of the screen is the entrance to the [[#Pub|Pub]]. |
The road starts south of the screen. The first area on the left leads into the [[#Weapon Shop|Weapon Shop]]. Next on the left is an entrance to the [[#Mayor's House|Mayor's House]], and at the top-left is the entrance to the [[#Windmill|Windmill]]. In the south-right is the entrance to the [[#Inn|Inn]], while the north-right leads to the [[#Field|Field]]. At the top of the screen is the entrance to the [[#Pub|Pub]]. |
||
| Line 83: | Line 79: | ||
Beside the weapon shop (left of its door) the player can find 120 Gil. Next to this area is a wheel that can be inspected, and Zidane will comment on how it is big enough to be used for an airship engine, and questions its pertinence on a farm. In the center of the town is a [[well]]. |
Beside the weapon shop (left of its door) the player can find 120 Gil. Next to this area is a wheel that can be inspected, and Zidane will comment on how it is big enough to be used for an airship engine, and questions its pertinence on a farm. In the center of the town is a [[well]]. |
||
| − | Upon first arrival |
+ | Upon first arrival the player is taken to the Village Road, perceived at a different angle from the norm. A scene takes place here, and the game takes the player into the [[#Inn|Inn]]. After the events of the inn, the player can view an [[Active Time Event]], [[#Active Time Events|Vivi, Confused]]. The Active Time Event shows the children of Dali reacting fearfully to him. Regardless of whether this was watched, the player can find Vivi in the north of the town by a wall. Moving toward him will start a scene (taking place on the [[#Beside the Windmill|beside the windmill]]) where Vivi hears [[chocobo]] noises. |
| − | |||
| − | After the events of the inn, the player can view an [[Active Time Event]], [[#Active Time Events|Vivi, Confused]]. The Active Time Event shows the children of Dali reacting fearfully to Vivi. Regardless of whether this was watched, the player can find Vivi in the north of the town by a wall. Moving toward him will start a scene (taking place on the [[#Beside the Windmill|beside the windmill]]) where Vivi hears [[chocobo]] noises. |
||
After Zidane exits the scene, Vivi is taken away by a worker. The same area is revisited later by Zidane and Garnet when searching for Vivi when they hear his cries through a hole leading to the underground. After this scene, Zidane can interact with the hole to talk to Vivi. |
After Zidane exits the scene, Vivi is taken away by a worker. The same area is revisited later by Zidane and Garnet when searching for Vivi when they hear his cries through a hole leading to the underground. After this scene, Zidane can interact with the hole to talk to Vivi. |
||
=== Inn === |
=== Inn === |
||
| − | [[File:DaliInn1.png|right|250px|thumb|Reception area of Inn.]] |
+ | [[File:DaliInn1.png|right|250px|thumb|Reception area of the Inn.]] |
| − | The inn is entered from the [[#Village Road|Village Road]]. It is split into two areas—the reception area and the guest room. |
+ | The inn is entered from the [[#Village Road|Village Road]]. It is split into two areas—the reception area and the guest room. Innkeeper Hal is one of the few adults who work and stay in the village. He is often found sleeping at his desk and the player cannot rest at the inn during the Dali events due to this. The innkeeper does not appear here when the player can return to Dali later in the game. Instead, he is replaced by Snot-nosed Gudo, his son, found in the [[#Rooms|rooms]] where he will charge 100 Gil to rest. |
;{{A|Reception area}} |
;{{A|Reception area}} |
||
This is the entrance to the inn. The door at the top of the screen leads to the [[#Rooms|rooms]], while the door in the bottom-left exits back out onto the [[#Village Road|Village Road]]. |
This is the entrance to the inn. The door at the top of the screen leads to the [[#Rooms|rooms]], while the door in the bottom-left exits back out onto the [[#Village Road|Village Road]]. |
||
| − | This area has a [[Moogle (race)|moogle]] named [[ |
+ | This area has a [[Moogle (race)|moogle]] named [[Final Fantasy IX characters#Gumo|Gumo]] standing in the top-left. As part of the [[#Mognet|Mognet]] sidequest, if Zidane received a letter from Mois in the [[Ice Cavern (Final Fantasy IX)|Ice Cavern]], he can give it to Gumo. |
| − | A cat |
+ | A [[cat]] in this area sits on the heater. There are two [[#Active Time Events|Active Time Events]] that take place in this room—Cat's Eye and Cat's Eye 2—that show the innkeeper planning to have Vivi "returned" to the factory to please his brother, Mayor Kapu. In these scenes, the cat starts on the heater and walks over the desk. This correlates to the two locations of items in the [[#Mayor's House|Mayor's House]], which are only accessible later in the game. |
| − | In the bottom-right area |
+ | In the bottom-right area is an indicator showing a message on the table: |
| − | <div style=" |
+ | <div style="display:inline-block;background:#666666;border:3px outset #BBBBBB;color:white;padding:10px;text-shadow:1px 1px black;border-radius:10px"><span style="color:#66CCCC>* Dali Inn's Breakfast Service! *</span><br/><br/>A delicious breakfast for 20 Gil!<br/><br/>-Cold water, fresh from the well<br/>-Fresh scrambled eggs<br/>-Vegetables, fresh from the farm<br/><br/><span style="color:#66CCCC">*</span> <span style="color:#CC6666">This is a sample menu.</span> <span style="color:#66CCCC">*</span></div> |
| + | |||
| − | {{-}} |
||
| − | The first time the party rests at the inn, |
+ | The first time the party rests at the inn, Zidane wakes the innkeeper who looks up and stares at Vivi. Zidane scolds him thinking he is staring at Garnet, which the innkeeper denies, before allowing the party to use the room. After the events of Dali, the player can choose to either board the cargo ship or return to rest. If the player rests, then upon returning to the inn, the scene will play out again almost identically. |
;{{A|Rooms}} |
;{{A|Rooms}} |
||
| − | [[File:DaliInn2.png|right|200px|thumb|Rooms of Inn.]] |
+ | [[File:DaliInn2.png|right|200px|thumb|Rooms of the Inn.]] |
| − | The room where the party rests has |
+ | The room where the party rests has one exit towards the bottom, back out to the reception area. While the reception area can be accessed only from that entrance, Zidane can "view the room" from the [[#Village Road|village road]] by looking through the window. This allows Zidane to see who is in the room, such as when Garnet spends time here later on. From this perspective, it is seen at a different angle (the same angle used in an event when the player first enters) and shows off the location of one of the [[Treasure chest (object)|chests]] more clearly. |
| − | + | The well hidden chest in the bottom-left behind a plant contains a [[Potion (Final Fantasy IX)|Potion]]. In the bottom-right the more clearly visible chest contains an [[Antidote (Final Fantasy IX)|Antidote]]. |
|
In the top-right the player can inspect a bookshelf: |
In the top-right the player can inspect a bookshelf: |
||
| − | <div style=" |
+ | <div style="display:inline-block;background:#666666;border:3px outset #BBBBBB;color:white;padding:10px;text-shadow:1px 1px black;border-radius:10px"><span style="color:#66CCCC">Dali Inn Library</span><br/>* For your reading pleasure *<br/>How to Save One Million Gil<br/>Earn Money the Easy Way<br/>Makin' Crazy Money! Vol. 2</div> |
| − | {{-}} |
||
| − | Zidane comments, "These books suck". The book titles |
+ | Zidane comments, "These books suck". The book titles allude to the innkeeper's desperate desire to make money, which is mentioned in the Active Time Events. |
| − | On the left-hand side |
+ | On the left-hand side is a question-mark indicator about [[#Color fortunes|Color Fortunes]]. Zidane comments on how it was a fad in Lindblum a few years ago. The player can spend 10 Gil per "Divination". This is a [[Final Fantasy IX allusions|reference]] to [[Cait Sith (Final Fantasy VII)|Cait Sith's]] faulty fortunes in ''[[Final Fantasy VII]]''. Another reference to previous [[Final Fantasy series|''Final Fantasy'' games]] is the position of the beds, which mirrors the inn layout from Nintendo era ''Final Fantasy'' games. |
When the party first enters the room, a scene plays out, and Zidane awakens the next morning as the sole party member. |
When the party first enters the room, a scene plays out, and Zidane awakens the next morning as the sole party member. |
||
| Line 124: | Line 117: | ||
=== Weapon Shop === |
=== Weapon Shop === |
||
[[File:DaliWeaponShop.png|right|200px|thumb|Wpn. Shop]] |
[[File:DaliWeaponShop.png|right|200px|thumb|Wpn. Shop]] |
||
| − | The Weapon Shop, |
+ | The Weapon Shop, known as Wpn. Shop in the [[Menu (Final Fantasy IX)|menu]], is the place for a minor storyline event. The player can buy weapons and armor from [[#Weapons|Shopkeeper Eve's shop]]. The shop is entered from the [[#Village Road|Village Road]] and the aforementioned place is exited out onto through the exit to the right of the screen. |
This shop is the player's first accessible weapon shop and there is information that can be read from an indicator found at the bottom of the screen. It also gives information about playing cards, relevant as Shopkeeper Eve is the only person who plays [[#Tetra Master|Tetra Master]] in Dali. |
This shop is the player's first accessible weapon shop and there is information that can be read from an indicator found at the bottom of the screen. It also gives information about playing cards, relevant as Shopkeeper Eve is the only person who plays [[#Tetra Master|Tetra Master]] in Dali. |
||
| − | Depending on the conversation choice Dagger picks during the "Dagger tries harder" ATE, later in the game when the player goes to Treno controlling Dagger and has an option of stopping by Dali, the shopkeeper Eve's reaction to Dagger may become more friendly. To get the friendlier reaction the player must ask Eve to show her wares. |
+ | Depending on the conversation choice Dagger picks during the "Dagger tries harder" ATE, later in the game when the player goes to [[Treno]] controlling Dagger and has an option of stopping by Dali, the shopkeeper Eve's reaction to Dagger may become more friendly. To get the friendlier reaction the player must ask Eve to show her wares. |
| + | |||
| + | <div style="display:inline-block;background:#666666;border:3px outset #BBBBBB;color:white;padding:10px;text-shadow:1px 1px black;border-radius:10px"><div style="text-align:center">- Useful Information -</div><br/>Think before equipping your new weapon<br/>and armor!<div style="color:#66CCCC;text-align:center">Check to see if you are about to<br/>learn a new ability.</div><br/>It's up to you whether you equip the<br/>new item right away or wait until<br/>you've learned the abilities, but if<br/>you are short of money, please remember<br/>that we also buy items!</div> |
||
| + | |||
| ⚫ | <div style="display:inline-block;background:#666666;border:3px outset #BBBBBB;color:white;padding:10px;text-shadow:1px 1px black;border-radius:10px"><div style="text-align:center">- Product Information -</div><br/>Press {{button|ps|select}} to see detailed<br/>information on our products.<br/><br/>For example, you'll see that our famous<br/><span style="color:#CCCC33">Mage Masher</span> has an<br/><span style="color:#66CCCC">added silence effect</span>.<br/><br/><span style="color:#CC6666">You need an 'Add Status' ability to<br/>use added status effects.</span></div> |
||
| − | <div style=" |
+ | <div style="display:inline-block;background:#666666;border:3px outset #BBBBBB;color:white;padding:10px;text-shadow:1px 1px black;border-radius:10px"><div style="text-align:center">- Hobby Info -<br/><br/>Do you play cards?</div><br/>My theory is that the first number<br/>written on the card represents the<br/>card's attack power.<br/>The third and fourth numbers are<br/>probably defense power. I still don't<br/>know what the second character means.<br/> Please press {{button|ps|square symbol}} to play a game with me.<br/><div style="margin-left:100px">by Eve Subboard</div></div> |
| − | {{-}} |
||
| ⚫ | <div style=" |
||
| − | {{-}} |
||
| − | <div style="float:left;background:#666666;border:3px outset #BBBBBB;color:white;padding:10px;text-shadow:1px 1px black;border-radius:10px"><div style="text-align:center">- Hobby Info -<br/><br/>Do you play cards?</div><br/>My theory is that the first number<br/>written on the card represents the<br/>card's attack power.<br/>The third and fourth numbers are<br/>probably defense power. I still don't<br/>know what the second character means.<br/> Please press {{button|ps|square symbol}} to play a game with me.<br/><div style="margin-left:100px">by Eve Subboard</div></div> |
||
| − | {{-}} |
||
The Weapon Shop is the location of the Active Time Event, [[#Active Time Events|Dagger Tries Harder]] where Garnet listens in on a discussion between two characters to try to pick up on mannerisms to hide the way she speaks. |
The Weapon Shop is the location of the Active Time Event, [[#Active Time Events|Dagger Tries Harder]] where Garnet listens in on a discussion between two characters to try to pick up on mannerisms to hide the way she speaks. |
||
| Line 141: | Line 133: | ||
=== Pub === |
=== Pub === |
||
[[File:DaliPub.png|right|thumb|200px|Pub.]] |
[[File:DaliPub.png|right|thumb|200px|Pub.]] |
||
| − | The pub is tended by a young girl, Dutiful Daughter Slai. The location does not act as a pub until late at night when adults |
+ | The pub is tended by a young girl, Dutiful Daughter Slai. The location does not act as a pub until late at night when adults return to the village. Until then, it is used as [[#Shop|Dutiful Daughter Slai's medicine shop]]. If the player attempts to move the character behind the bar, the tender will tell them they are not allowed. |
| − | Zidane will ask Slai if Garnet entered if he does not request the medicine and has not yet found her. Doing the same again will have Zidane question the field patterns outside Dali but she responds she is busy, and when Zidane offers to help, the tender |
+ | Zidane will ask Slai if Garnet entered if he does not request the medicine and has not yet found her. Doing the same again will have Zidane question the field patterns outside Dali, but she responds she is busy, and when Zidane offers to help, the tender wonders whether it was a trend because another man was helping her. This is later revealed to be Steiner in a forced Active Time Event, [[#Active Time Events|Queen Brahne's Steiner]]. |
A menu on the left side of the bar: |
A menu on the left side of the bar: |
||
| − | <div style=" |
+ | <div style="display:inline-block;background:#666666;border:3px outset #BBBBBB;color:white;padding:10px;text-shadow:1px 1px black;border-radius:10px"><div style="text-align:center">* Menu *</div>1. Pickles: 8 Gil<br/>2. Vegetables stir-fry: <span style="color:#CC6666">Out of stock</span><br/>3. Pumpkin salad: <span style="color:#CC6666">Out of stock</span><br/>4. Dried potatoes: 4 Gil<br/>5. Kebabs: 10 Gil<br/>6. Lindblum pickles: 9 Gil<br/><span style="color:#CC99FF">Cash only</span><br/><span style="color:#66CCCC">* We sell medicine</span></div> |
| − | {{-}} |
||
A menu on the right side of the bar: |
A menu on the right side of the bar: |
||
| − | <div style=" |
+ | <div style="display:inline-block;background:#666666;border:3px outset #BBBBBB;color:white;padding:10px;text-shadow:1px 1px black;border-radius:10px"><div style="text-align:center">* Menu *</div>1. Black ale: 5 Gil<br/>2. White ale: 8 Gil<br/>3. Red wine: 7 Gil<br/>4. White wine: 9 Gil<br/>5. Water: 1 Gil<br/>6. Gysahl liqueur: 11 Gil<br/><span style="color:#CC99FF">No underage drinking allowed!<br/>Cash only</span><br/><span style="color:#66CCCC">* We sell medicine</span></div> |
| − | {{-}} |
||
=== Field === |
=== Field === |
||
[[File:DaliField.png|right|200px|thumb|Field.]] |
[[File:DaliField.png|right|200px|thumb|Field.]] |
||
| − | The Field can be entered from the [[#Village Road|Village Road]], and the exit in the bottom-right of the Field will lead |
+ | The Field can be entered from the [[#Village Road|Village Road]], and the exit in the bottom-right of the Field will lead back to it. The exit on the right leads onto the world map at most points in the game. When Zidane first visits he cannot leave until Garnet joins the party. If the player chooses to rest at the inn and not go on the cargo ship immediately, the player will be taken to this gate. Exiting through the gate at this point leads back to the [[#Cargo Ship Loading Area|cargo ship loading area]]. |
| − | + | The chest here contains an [[Elixir (Final Fantasy IX)|Elixir]], but it is only accessible at [[Permanently missable content|one opportunity]] on disc 2. A woman blocks access to the chest at all other times. The opportunity to open it is when controlling Dagger after defeating [[Black Waltz 3]]: instead of heading to Treno, the player must visit Dali, and the old woman is in a different position. The player can talk to her and she asks if Garnet thinks Queen Brahne's changes are too drastic. |
|
The [[#Active Time Events|Active Time Event]], Dagger Tries, takes place here. |
The [[#Active Time Events|Active Time Event]], Dagger Tries, takes place here. |
||
| Line 163: | Line 153: | ||
=== Windmill === |
=== Windmill === |
||
[[File:DaliWindmill1.png|right|thumb|250px|Windmill 1F.]] |
[[File:DaliWindmill1.png|right|thumb|250px|Windmill 1F.]] |
||
| − | The Windmill is a structure in the top-right of the town. It can be entered from the [[#Village Road|Village Road]] or through the [[#Mayor's House|Mayor's House]] which is structurally linked to the Windmill. The Windmill harbors the entrance to the [[#Dali's Underground|underground factory]] where the adults of Dali work |
+ | The Windmill is a structure in the top-right of the town. It can be entered from the [[#Village Road|Village Road]] or through the [[#Mayor's House|Mayor's House]], which is structurally linked to the Windmill. The Windmill harbors the entrance to the [[#Dali's Underground|underground factory]] where the adults of Dali work. |
;{{A|Windmill 1F}} |
;{{A|Windmill 1F}} |
||
The Windmill 1F is the area first entered inside the windmill. It leads back out into the Village Road via the exit in the bottom-right, and to the Mayor's House via the exit at the bottom. |
The Windmill 1F is the area first entered inside the windmill. It leads back out into the Village Road via the exit in the bottom-right, and to the Mayor's House via the exit at the bottom. |
||
| − | There is an exit to another area through a door in the top-right. This door |
+ | There is an exit to another area through a door in the top-right. This door opens with the [[Mayor's Key]]. The entrance to [[#Dali's Underground|Dali's Underground]] is found here via a liftable lid. When the player is first here, a man named Yaff guards the entrance. Later when Dagger is in the party, Yaff will not be there, and the player can enter. After the events underground, the party will opt not to venture in again, and later in the game when the factory has been closed down, it will be sealed shut. |
The player can climb the ladder on the left to get to [[#Windmill 2F|Windmill 2F]]. |
The player can climb the ladder on the left to get to [[#Windmill 2F|Windmill 2F]]. |
||
| − | The player can find the [[ |
+ | The player can find the [[Stellazzio#Aries|Aries]] item behind the rotor for the [[Stellazzio]] quest. |
If the player has [[#Entering the Mayor's House|obtained the Mayor's Key item]] they can exit through the door in the top-right to explore the area [[#Beside the Windmill|beside the windmill]]. |
If the player has [[#Entering the Mayor's House|obtained the Mayor's Key item]] they can exit through the door in the top-right to explore the area [[#Beside the Windmill|beside the windmill]]. |
||
| Line 178: | Line 168: | ||
;{{A|Windmill 2F}} |
;{{A|Windmill 2F}} |
||
[[File:DaliWindmill2.png|right|thumb|200px|Windmill 2F.]] |
[[File:DaliWindmill2.png|right|thumb|200px|Windmill 2F.]] |
||
| ⚫ | The second floor is reached from the the ladder in [[#Windmill 1F|Windmill 1F]]. There are two chests found here, however, on the first visit neither are accessible due to the turning windmill. The uppermost chest contains a [[Cachusha (Final Fantasy IX)|Cachusha]] [[Add-on (Final Fantasy IX)|add-on]], while the other chest contains an [[Elixir (Final Fantasy IX)|Elixir]]. The windmill stops turning after the party returns to the Mist Continent from the [[Outer Continent]], but restarts after the event where the player passes through the [[Shimmering Island]] portal, so the player must loot the chests [[Permanently missable content|during that time frame]]. |
||
| − | The second floor of the Windmill is lead up to from the first floor, [[#Windmill 1F|Windmill 1F]], from the ladder. The same ladder (found on the right of the screen) will logically take the player back down. |
||
| − | |||
| ⚫ | There are two chests found here, however on the first visit neither |
||
;{{A|Beside the Windmill}} |
;{{A|Beside the Windmill}} |
||
[[File:Dali-Windmill-ffix-backarea.png|right|200px|thumb|Beside the Windmill.]] |
[[File:Dali-Windmill-ffix-backarea.png|right|200px|thumb|Beside the Windmill.]] |
||
| − | There is a small area beside the Windmill. |
+ | There is a small area beside the Windmill. A wall separates the two sides. On the bottom-side of the wall is the area found also in the [[#Village Road|Village Road]] and where the Vivi events take place on the first visit to Dali. This side of the wall is used only in events. |
| − | Later in the game the player can get |
+ | Later in the game the player can get to the other side of the wall by entering through the door on [[#Windmill 1F|Windmill 1F]]. On the right hand side is a chest containing 30,000 Gil. If the player makes contact with this chest again they can look underneath it to find the [[#Morrid's Coffee|Burman Coffee]] for [[Morrid]]. |
A chocobo is found in this area. The exit on the left leads back to [[#Windmill 1F|Windmill 1F]]. |
A chocobo is found in this area. The exit on the left leads back to [[#Windmill 1F|Windmill 1F]]. |
||
| Line 192: | Line 180: | ||
=== Mayor's House === |
=== Mayor's House === |
||
[[File:DaliMayor'sHouse.png|right|thumb|200px|Mayor's House.]] |
[[File:DaliMayor'sHouse.png|right|thumb|200px|Mayor's House.]] |
||
| − | The Mayor's House can be entered from two locations. The [[#Village Road|Village Road]] leads |
+ | The Mayor's House can be entered from two locations. The [[#Village Road|Village Road]] leads in from the bottom-right exit, and the [[#Windmill|Windmill]] leads here from the top exit. |
| − | On the player's first visit |
+ | On the player's first visit they can enter but are told to leave by the mayor. When Dagger joins the party the player can go in once for an extended scene, but are then not allowed to reenter until later in the game. |
| − | If the player returns here |
+ | If the player returns here during the card competition in Treno on disc 3, the player can enter while the mayor is not in, however, the child still is. The player is given a list of four locations: the desk, ladder, heater, or shelf. On the first inspection all locations yield no items except the desk that scores the [[Mini-Brahne]] key item. The player must explore the desk again. A third time and the child will say "ZZZ". On this opportunity the player can check the heater to receive the [[Mayor's Key]]. Once Zidane has completed the card tournament in Treno, [[Permanently missable content|this key is no longer accessible]]. The Mini-Brahne key item, however, can still be found, though it will have changed location, being now found at the top of the ladder. |
| ⚫ | |||
| − | On the first inspection all locations will yield no item except the Desk which will score the player the [[List of Final Fantasy IX items#Mini-Brahne|Mini-Brahne]] key item. The player must explore the Desk again. A further two times and the child will say "ZZZ". On this opportunity the player can check the heater to receive the [[List of Final Fantasy IX items#Mayor's Key|Mayor's Key]]. Once Zidane has completed the tournament in Treno this key is no longer accessible. |
||
| − | |||
| ⚫ | |||
=== Cargo Ship Loading Area === |
=== Cargo Ship Loading Area === |
||
[[File:DaliEvent8.png|right|thumb|200px|Loading area for the cargo ship.]] |
[[File:DaliEvent8.png|right|thumb|200px|Loading area for the cargo ship.]] |
||
| − | The cargo ship loading area is where the [[Cargo Ship (Final Fantasy IX)|cargo ship]] lands in the fields of Dali. The |
+ | The cargo ship loading area is where the [[Cargo Ship (Final Fantasy IX)|cargo ship]] lands in the fields of Dali. The [[#Packaging Room|packaging room]] of the [[#Production Area|production area]] should lead here, however, in the game such a transition never takes places, and instead the game makes the player take control of Steiner at this point. |
| ⚫ | This area includes numerous field screens. When the player exits [[Observatory Mountain]] with Steiner as party leader on disc 1, they are not taken to the world map as the usual circumstance would be, but are taken to a field with the cargo ship in view where he meets Zidane, Vivi and Dagger. After the next event, Black Waltz 2 is fought by the four, and afterward the player is given the option to rest at the inn or board the cargo ship. Boarding the ship will take them onto the [[Cargo Ship (Final Fantasy IX)|Cargo Ship]] while resting at the inn will take the player to the [[#Field|Field]] (from the exit that would usually lead to the world map). The player can roam the town, and they return to the cargo ship via the Field, which will take them back to this area and immediately start the scene where the party boards the ship. |
||
| − | Theoretically, the [[#Packaging Room|packaging room]] of the [[#Production Area|production area]] leads here, however in the game such a transition is never seen and instead the game will make the player take control of the other party, Steiner, at this point. |
||
| − | |||
| − | This area includes numerous field screens. When the player exits [[Observatory Mountain]] with Steiner as party leader on disc 1, they are not taken to the world map as the usual circumstance would be, but are taken to a field with the cargo ship in view. This event plays on and Steiner will meet the rest of the party in the area just below the cargo ship. |
||
| − | |||
| ⚫ | After the next event, Black Waltz 2 |
||
=== Dali's Underground<!--Name from Ultimania--> === |
=== Dali's Underground<!--Name from Ultimania--> === |
||
[[File:DaliEntrance.png|250px|right|thumb|Entrance.]] |
[[File:DaliEntrance.png|250px|right|thumb|Entrance.]] |
||
| − | Dali's Underground {{J|ダリの地下|Dari no Chika}} is a system beneath the village entered from a hidden passage covered by a lid in the [[#Windmill|Windmill]]. Queen Brahne ordered that Dali become a factory for creating black mages, which are delivered to Alexandria Castle by cargo ship. Most of the adults in the town work in this factory. |
+ | Dali's Underground {{J|ダリの地下|Dari no Chika}} is a system beneath the village entered from a hidden passage covered by a lid in the [[#Windmill|Windmill]]. Queen Brahne ordered that Dali become a factory for creating black mages, which are delivered to [[Alexandria Castle]] by cargo ship. Most of the adults in the town work in this factory. |
| − | The factory |
+ | The factory is visited once. After the player exits at the end, the player character will never agree to go down here again. Later the entrance to the factory is sealed when Dali returns to being a farming town. |
==== Entrance ==== |
==== Entrance ==== |
||
| − | The entrance connects to the [[#Windmill 1F|Windmill 1F]] via a ladder in the top-left of the screen. The area has two levels which are traversed between by a lift. The path on the right-hand side |
+ | The entrance connects to the [[#Windmill 1F|Windmill 1F]] via a ladder in the top-left of the screen. The area has two levels which are traversed between by a lift. The path on the right-hand side leads to the [[#Production Area|Production Area]]. |
There is a chest by the lift containing 156 Gil. |
There is a chest by the lift containing 156 Gil. |
||
| Line 225: | Line 207: | ||
==== Underground (1) ==== |
==== Underground (1) ==== |
||
[[File:DaliUnderground1.png|right|thumb|200px|Underground.]] |
[[File:DaliUnderground1.png|right|thumb|200px|Underground.]] |
||
| − | The first Underground area |
+ | The first Underground area appears to be the entrance to the factory and possibly an office or staff room. The exit at the bottom leads back to the [[#Entrance|Entrance]], while the exit at the top leads to the [[#Storage Area|Storage Area]]. |
| − | |||
| ⚫ | |||
| ⚫ | |||
| − | When the player first enters here they find two workers discussing Vivi with Vivi in the room. The player is taken back into the Entrance area briefly as part of the scene. |
||
| − | + | When the player first enters here they find two workers discussing Vivi with Vivi in the room. The player is taken back into the Entrance area briefly as part of the scene. Garnet has seen the logo on a barrel here in the area in Alexandria Castle. When the player is in control they can inspect the barrel. |
|
==== Storage Area ==== |
==== Storage Area ==== |
||
[[File:DaliStorageArea1.png|right|250px|thumb|Pathway in Storage Area.]] |
[[File:DaliStorageArea1.png|right|250px|thumb|Pathway in Storage Area.]] |
||
| − | The Storage Area is where |
+ | The Storage Area is where the containers are stored. The player first enters into the [[#Storage Area Path|Path]]. |
;{{A|Storage Area Path|Path}} |
;{{A|Storage Area Path|Path}} |
||
| − | The path is a small room |
+ | The path is a small room with containers. The exit at the bottom of the screen leads to the [[#Underground (1)|first Underground area]], while the exit at the top leads to an [[#Open Room|open room]] of the Storage Area. |
| − | A barrel on the left of the path contains a moogle named [[ |
+ | A barrel on the left of the path contains a moogle named [[Final Fantasy IX characters#Kumop|Kumop]]. As part of the [[#Mognet|Mognet]] sidequest the player can pick up a letter from Kumop and give to Mogki in [[Lindblum (Final Fantasy IX)|Lindblum]]. |
| − | Behind the barrel the player can jump on a crate, which will |
+ | Behind the barrel the player can jump on a crate, which will allow them to jump on to another crate where a chest containing an [[Ether (Final Fantasy IX)|Ether]] item is. |
| − | By the north exit there is a wheel pulley-system. If Zidane inspects it they can kick it to drop a chest previously suspended above |
+ | By the north exit there is a wheel pulley-system. If Zidane inspects it they can kick it to drop a chest previously suspended above and out of reach. This chest contains a [[Potion (Final Fantasy IX)|Potion]]. |
The player can inspect a container and Zidane will comment its shape resembles a coffin. |
The player can inspect a container and Zidane will comment its shape resembles a coffin. |
||
| Line 250: | Line 230: | ||
;{{A|Open Room}} |
;{{A|Open Room}} |
||
[[File:DaliStorageArea2.png|right|thumb|200px|Open part of Storage Area.]] |
[[File:DaliStorageArea2.png|right|thumb|200px|Open part of Storage Area.]] |
||
| − | The open room is a large storage site with many crates. Despite the area being open there is still a path down the middle. The exit in the bottom-left side |
+ | The open room is a large storage site with many crates. Despite the area being open there is still a path down the middle. The exit in the bottom-left side leads to the [[#Storage Area Path|Storage Area path]] while the exit in the top-right leads to the [[#Production Area|Production Area]]. |
| − | On the right of the central path is a chest containing a [[ |
+ | On the right of the central path is a chest containing a [[Leather Wrist (Final Fantasy IX)|Leather Wrist]] armor. If the player climbs on the crates on the left of the path (from either end) they can reach a chest containing the [[Iron Helm (Final Fantasy IX)|Iron Helm]]. |
==== Production Area ==== |
==== Production Area ==== |
||
| Line 259: | Line 239: | ||
;{{A|First Room}} |
;{{A|First Room}} |
||
| − | The exit on the left leads to the [[#Open Room|open room]] of the [[#Storage Area|Storage Area]]. The exit across the bridge on the right leads to the [[#Conveyor Belt|conveyor belt]] area. The door at the top of the screen can be inspected. |
+ | The exit on the left leads to the [[#Open Room|open room]] of the [[#Storage Area|Storage Area]]. The exit across the bridge on the right leads to the [[#Conveyor Belt|conveyor belt]] area. The door at the top of the screen can be inspected. There is [[Mist (term)|Mist]] coming from under the door and the player can open it to battle [[#Enemies|two Ghost enemies]], which gains access to [[#Underground|an underground area]]. |
When the player first enters this area a scene will play out where the player releases Vivi from a box. He then joins the party. |
When the player first enters this area a scene will play out where the player releases Vivi from a box. He then joins the party. |
||
| Line 265: | Line 245: | ||
A chest by the door at the top of the screen contains 95 gil. |
A chest by the door at the top of the screen contains 95 gil. |
||
| − | The player can inspect two coffins |
+ | The player can inspect two coffins, one in the bottom left below the exit and one on the bottom-right down a small set of stairs. They contain nothing. |
;{{A|Conveyor Belt}} |
;{{A|Conveyor Belt}} |
||
[[File:DaliProductionArea2.png|right|200px|thumb|Exclusively conveyor belt section of Production Area.]] |
[[File:DaliProductionArea2.png|right|200px|thumb|Exclusively conveyor belt section of Production Area.]] |
||
| − | The conveyor belt |
+ | The conveyor belt shows the production process continue into another machine. The exit at the bottom-left leads to the [[#First Room|first room]] of the production area, while the exit on the top of the screen leads to the [[#Packaging Room|packaging room]]. The split in the path goes right, leading to something that resembles a boiler. The player cannot inspect this. |
| − | + | The player can inspect the machine and Zidane will say it is powered by a chocobo running on a wheel (a [[Gysahl Green]] is held on a stick in front of it). This can only be inspected once. The player can also inspect the machine at the north-end where Zidane comments how it looks like the Mist engine of the ''[[Prima Vista]]''. This can also be inspected only once. |
|
When the player first tries to move to the next area a scene plays where Zidane tries to peer into the machine. |
When the player first tries to move to the next area a scene plays where Zidane tries to peer into the machine. |
||
| Line 277: | Line 257: | ||
;{{A|Packaging Room}} |
;{{A|Packaging Room}} |
||
[[File:DaliEvent6.png|right|thumb|200px|Packaging room in Production Area.]] |
[[File:DaliEvent6.png|right|thumb|200px|Packaging room in Production Area.]] |
||
| − | The packaging room is a small area |
+ | The packaging room is a small area where the party discovers the machine was producing black mages. Although the party do not know what they are at this time, they understand they resemble Vivi. |
| − | To hide from the workers the party |
+ | To hide from the workers the party go inside a box, which is put in a barrel and taken to the [[#Cargo Ship Loading Area|cargo ship loading area]]. The player now takes control of Steiner at Observatory Mountain. |
This area is not explorable by the party. |
This area is not explorable by the party. |
||
| Line 287: | Line 267: | ||
The second Underground area is an area full of Mist. A single exit at the bottom of the screen leads back into the [[#First Room|first room]] of the Production Area. |
The second Underground area is an area full of Mist. A single exit at the bottom of the screen leads back into the [[#First Room|first room]] of the Production Area. |
||
| − | Where the player first stands when entering the room is a spot that allows the |
+ | Where the player first stands when entering the room is a spot that allows the inspection of the machine. Zidane comments it sends Mist to the machine in the previous room. |
| − | A chest to the left of this spot contains a [[ |
+ | A chest to the left of this spot contains a [[Phoenix Down (Final Fantasy IX)|Phoenix Down]]. On the right-side of the screen a chest slightly obscured by the machine contains a [[Potion (Final Fantasy IX)|Potion]]. To the right, completely hidden behind the machine, is a chest containing a [[Phoenix Pinion (Final Fantasy IX)|Phoenix Pinion]]. |
== Quests == |
== Quests == |
||
=== Village events === |
=== Village events === |
||
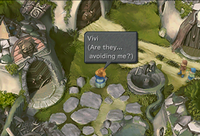
[[File:FFIX Vivi Windmill.png|thumb|right|250px|Vivi seeing the windmill.]] |
[[File:FFIX Vivi Windmill.png|thumb|right|250px|Vivi seeing the windmill.]] |
||
| − | When the player first enters the village the party |
+ | When the player first enters the village, the party splits up at the inn. The player controls Zidane. To advance the story, the player must return Garnet to the inn and engage in the scene with Vivi. To do the former, the player must have watched the [[#Active Time Events|Dagger Tries Harder]] Active Time Event and then visit her at the weapon shop. Vivi, meanwhile, is standing to the north of the town. |
| − | To |
+ | To trigger the Dagger Tries Harder scene the player must terminate the [[#Active Time Events|Dagger Tries]] Active Time Event and then check in on the inn in one of two ways. The player can terminate the Dagger Tries event either by watching it or visiting the [[#Field|Field]] (where the Dagger Tries event takes place). Since terminating it, the player must have zoned in or out of areas a number of times before the Dagger Tries Harder event can become available. The event can only happen in the reception area of the [[#Inn|Inn]] or by peering through the window of the Inn from the [[#Village Road|Village Road]]. After watching the Active Time Event, the player can find Garnet in the [[#Weapon Shop|Weapon Shop]], and talking with her there returns her to the Inn. |
| − | The quickest way to complete the village events is to either exit the Inn, go to the Field, return to Village Road and watch the Vivi scene, then zone in, out, and in of the Inn to get the Dagger Tries Harder event and watch it, ''or'' after watching the Vivi scene instead going through to the bed area of the Inn and then back into the reception to receive the event. |
+ | The quickest way to complete the village events is to either exit the Inn, go to the Field, return to Village Road and watch the Vivi scene, then zone in, out, and in of the Inn to get the Dagger Tries Harder event and watch it, ''or'' after watching the Vivi scene instead going through to the bed area of the Inn and then back into the reception to receive the event. After watching the event, the player can then run across into the weapon shop, watch the scene with Garnet, then return to the rooms of the Inn and watch the next scene, and then head into town to watch the next scene, and then into the windmill to find the entrance to the underground. |
| − | |||
| − | After watching the event the player can then run across into the weapon shop, watch the scene with Garnet, then head back to the rooms of the inn and watch the next scene, and then head into town to watch the next scene, and then head into the windmill to find the entrance to the underground. |
||
=== Mognet === |
=== Mognet === |
||
{{main|Mognet (Final Fantasy IX)}} |
{{main|Mognet (Final Fantasy IX)}} |
||
| − | Dali features two moogles, Gumo who resides in the [[#Inn|Inn]] and Kumop who resides in the one-time visit [[#Storage Area|Storage Area]] beneath Dali. Both |
+ | Dali features two moogles, Gumo who resides in the [[#Inn|Inn]] and Kumop who resides in the [[Unrevisitable locations|one-time visit]] [[#Storage Area|Storage Area]] beneath Dali. Both are involved in the sidequest. |
| − | If the player earlier received the [[Mognet (Final Fantasy IX)#Trapped In Ice!|Trapped In Ice!]] letter they can give it to Gumo. |
+ | If the player earlier received the [[Mognet (Final Fantasy IX)#Trapped In Ice!|Trapped In Ice!]] letter, they can give it to Gumo. In the factory beneath Dali the player can pick up a letter from Kumop, the [[Mognet (Final Fantasy IX)#Stiltzkin Visited Me!|Stiltzkin Visited Me!]] addressed for Mogki in the [[Lindblum (Final Fantasy IX)#Guest Room|Guest Room]] of [[Lindblum (Final Fantasy IX)|Lindblum]]. |
=== Active Time Events === |
=== Active Time Events === |
||
{{main|Active Time Event}} |
{{main|Active Time Event}} |
||
| − | There are six Active Time Events available to watch in Dali. One |
+ | There are six Active Time Events available to watch in Dali. One always starts as part of the story, while another must be acquired and watched for game progression. The other four are optional, and offer no special benefits gameplay-wise. |
| − | + | [[#Active Time Event#Dagger Tries|Dagger Tries]] and [[Active Time Event#Vivi, Confused|Vivi, Confused]] are available after resting in the [[#Inn|Inn]]. The player can only view one at this point, but moving into the next room of the inn makes the other available. Vivi, Confused becomes unavailable when exiting the Inn, while Dagger Tries becomes unavailable by visiting the [[#Field|Field]]. |
|
[[File:Cats FFIX Art.jpg|right|150px|Cat concept art.]] |
[[File:Cats FFIX Art.jpg|right|150px|Cat concept art.]] |
||
| − | The [[Active Time Event#Cat's Eye|Cat's Eye]] |
+ | The [[Active Time Event#Cat's Eye|Cat's Eye]] ATE appears when the player gets to the [[#Village Road|Village Road]] after exiting the [[#Inn|Inn]]. The player cannot watch the ATE while in the Inn. The scene alludes to the locations of the key items found in the [[#Mayor's House|Mayor's House]] later as the cat sits on the heater and the desk, the locations for the key items. |
| − | The [[Active Time Event#Cat's Eye 2|Cat's Eye 2]] |
+ | The [[Active Time Event#Cat's Eye 2|Cat's Eye 2]] ATE appears after watching the Vivi scene in the [[#Village Road|Village Road]]. |
| − | The [[Active Time Event#Dagger Tries Harder|Dagger Tries Harder]] |
+ | The [[Active Time Event#Dagger Tries Harder|Dagger Tries Harder]] ATE appears after dismissing the Dagger Tries ATE and then exploring the village. After a while the ATE will become available, but not if the player is in the [[#Weapon Shop|Weapon Shop]] or the [[#Village Road|Village Road]]. The player must view this Active Time Event for Dagger to be found in the Weapon Shop, which is necessary for continuing the story. |
| − | The [[Active Time Event#Queen Brahne's Steiner|Queen Brahne's Steiner]] |
+ | The [[Active Time Event#Queen Brahne's Steiner|Queen Brahne's Steiner]] ATE is watched automatically after Dagger and Zidane reunite at the [[#Inn|Inn]]. |
=== Tetra Master === |
=== Tetra Master === |
||
{{main|Tetra Master (minigame)}} |
{{main|Tetra Master (minigame)}} |
||
| − | Only one person in Dali plays Tetra Master: the [[#Weapon Shop|Weapon Shop's]] owner, Shopkeeper Eve. There is a note |
+ | Only one person in Dali plays Tetra Master: the [[#Weapon Shop|Weapon Shop's]] owner, Shopkeeper Eve. There is a note in the shop that gives advice on weapons, armor, abilities, and also some information about Tetra Master cards. |
| − | {|class="half-width FFIX table" style="text-align:center" |
+ | {|class="half-width FFIX article-table" style="text-align:center" |
!style="width:20%" rowspan="3"|[[File:ShopkeeperEve-ffix.png|60x100px]] |
!style="width:20%" rowspan="3"|[[File:ShopkeeperEve-ffix.png|60x100px]] |
||
!class="a" colspan="2"|{{A|Shopkeeper Eve}} |
!class="a" colspan="2"|{{A|Shopkeeper Eve}} |
||
| Line 338: | Line 316: | ||
|} |
|} |
||
| − | === Friendly |
+ | === Friendly monsters === |
| − | {{main| |
+ | {{main|Friendly monsters}} |
The [[Mu (Final Fantasy IX)|Mu]] enemy can be encountered on the grass areas of the [[#Nolrich Heights|Nolrich Heights]] if it has not already been defeated. |
The [[Mu (Final Fantasy IX)|Mu]] enemy can be encountered on the grass areas of the [[#Nolrich Heights|Nolrich Heights]] if it has not already been defeated. |
||
=== Blu Mag === |
=== Blu Mag === |
||
{{main|Blu Mag (Final Fantasy IX)}} |
{{main|Blu Mag (Final Fantasy IX)}} |
||
| − | On the first visit to this area, [[Quina Quen|Quina]] is not available |
+ | On the first visit to this area, [[Quina Quen/Gameplay|Quina]] is not available. If the party returns here later, the player can [[Eat (command)|eat]] a number of enemies in Nolrich Heights. The [[Python (Final Fantasy IX)|Python]] for the [[Pumpkin Head (ability)|Pumpkin Head]] ability, and the [[Carve Spider (Final Fantasy IX)|Carve Spider]] for the [[LV3 Def-Less]] ability. |
=== Color fortunes === |
=== Color fortunes === |
||
| − | The player can "play" Color Fortunes in the [[#Rooms|rooms of the Inn]] |
+ | The player can "play" Color Fortunes in the [[#Rooms|rooms of the Inn]] for 10 Gil per turn. Each time one of five "omens" will display, followed by the player's lucky color (randomized each play) followed by an advertisement for a shop in Lindblum. |
{|style="text-align:center" |
{|style="text-align:center" |
||
| Line 359: | Line 337: | ||
|} |
|} |
||
| − | <div style=" |
+ | <div style="display:inline-block;background:#666666;border:3px outset #BBBBBB;color:white;padding:10px;text-shadow:1px 1px black;border-radius:10px">Your lucky color for<br/>today is "{color}"!</div> |
| + | |||
| − | {{-}} |
||
Each time Color Fortunes is played the game randomizes the color of red, white, blue, green, or yellow. |
Each time Color Fortunes is played the game randomizes the color of red, white, blue, green, or yellow. |
||
| − | <div style=" |
+ | <div style="display:inline-block;background:#666666;border:3px outset #BBBBBB;color:white;padding:10px;text-shadow:1px 1px black;border-radius:10px;text-align:center">Want to buy a gem in your lucky color?<br/>We have all colors!<br/>{{char|♥ <nowiki/>|4}}<br/>Come visit our store in Lindblum's<br/>Theater District! We're located near<br/>the air cab terminal. Look for the<br/>big clock!</div> |
| − | {{-}} |
||
| − | |||
| − | === Elixir in the field === |
||
| − | When the player is first in Dali, a chest in the [[#Field|Field]] can be seen, however a woman always stands in the way. There is only one opportunity to get the item. Near the start of disc 2 when the player controls Dagger, the player can head to Dali before they go to Treno. If the player ventures to Dali the old woman blocking the chest will have moved and the chest containing the Elixir will be available. |
||
| − | |||
| − | === Entering the mayor's house === |
||
| − | [[File:Dali-Mayors-Key.png|thumb|Zidane obtaining the Mayor's Key.]] |
||
| − | When the player is first in Dali, each time the player enters the [[#Mayor's House|Mayor's House]], they will be turned away by the mayor. During the party's trips to Treno with Zidane and Vivi on Disc 3, the player can go to Dali with either of these characters where they can enter the house without being immediately told to exit. The player can choose to look in four locations. In the Desk the player will find Mini-Brahne. The player must then check the Desk twice to find nothing before searching the Heater for the Mayor's Key. |
||
| − | |||
| − | On the third time his son will say "ZZZ". On this opportunity the player can check the heater to receive the Mayor's Key. Once Zidane starts playing in the tournament in Treno this key is no longer accessible. |
||
| + | Receiving a Very Good Omen from a color fortune yields the [[Final Fantasy IX achievements and trophies#Your Lucky Day|Your Lucky Day]] achievement/trophy in the latest versions of ''Final Fantasy IX''. |
||
| − | === Windmill items === |
||
| − | When the player is first in Dali, the windmill is turning, preventing chests in [[#Windmill 2F|Windmill 2F]] from being obtained. The windmill stops turning on disc 3, so the player will be able to pick up the Elixir and Cachusha items from the chests, at earliest with Vivi and Zidane if they leave Treno in the event on disc 3. |
||
=== Morrid's coffee === |
=== Morrid's coffee === |
||
[[File:Burman_Coffee.jpg|thumb|Burman Coffee.]] |
[[File:Burman_Coffee.jpg|thumb|Burman Coffee.]] |
||
| − | {{Main|Observatory Mountain#Quests}} |
+ | {{Main|Observatory Mountain#Quests|t1=Morrid's coffee quest}} |
One of the three varieties of coffee beans is located in Dali; after finding the Mayor's Key (see above) it is possible to open a locked room in the windmill where the player can find the Burman Coffee. |
One of the three varieties of coffee beans is located in Dali; after finding the Mayor's Key (see above) it is possible to open a locked room in the windmill where the player can find the Burman Coffee. |
||
| − | {{ |
+ | {{clear}} |
== Shops == |
== Shops == |
||
| + | {{multicol-begin}} |
||
| − | <div class="multicolumn"> |
||
| ⚫ | |||
| − | <div> |
||
| ⚫ | |||
Found at [[#Weapon Shop|Weapon Shop]] owned by Shopkeeper Eve. |
Found at [[#Weapon Shop|Weapon Shop]] owned by Shopkeeper Eve. |
||
| − | {|class="FFIX table" style="text-align:center" |
+ | {|class="FFIX article-table" style="text-align:center" |
|-class="a" |
|-class="a" |
||
!style="width:100px"|Item |
!style="width:100px"|Item |
||
!style="width:75px"|Price |
!style="width:75px"|Price |
||
|- |
|- |
||
| − | !class="b"|[[ |
+ | !class="b"|[[Dagger (Final Fantasy IX weapon)|Dagger]] |
|320 |
|320 |
||
|- |
|- |
||
| − | !class="b"|[[ |
+ | !class="b"|[[Mage Masher (Final Fantasy IX)|Mage Masher]] |
|500 |
|500 |
||
|- |
|- |
||
| − | !class="b"|[[ |
+ | !class="b"|[[Broadsword (Final Fantasy IX)|Broadsword]] |
|330 |
|330 |
||
|- |
|- |
||
| − | !class="b"|[[ |
+ | !class="b"|[[Iron Sword (Final Fantasy IX)|Iron Sword]] |
|660 |
|660 |
||
|- |
|- |
||
| − | !class="b"|[[ |
+ | !class="b"|[[Rod (Final Fantasy IX)|Rod]] |
|260 |
|260 |
||
|- |
|- |
||
| − | !class="b"|[[ |
+ | !class="b"|[[Mage Staff (Final Fantasy IX)|Mage Staff]] |
|320 |
|320 |
||
|- |
|- |
||
| − | !class="b"|[[ |
+ | !class="b"|[[Wrist]] |
|130 |
|130 |
||
|- |
|- |
||
| − | !class="b"|[[ |
+ | !class="b"|[[Leather Wrist (Final Fantasy IX)|Leather Wrist]] |
|200 |
|200 |
||
|- |
|- |
||
| − | !class="b"|[[ |
+ | !class="b"|[[Bronze Gloves (Final Fantasy IX)|Bronze Gloves]] |
|480 |
|480 |
||
|- |
|- |
||
| − | !class="b"|[[ |
+ | !class="b"|[[Leather Hat (Final Fantasy IX)|Leather Hat]] |
|150 |
|150 |
||
|- |
|- |
||
| − | !class="b"|[[ |
+ | !class="b"|[[Feather Hat (Final Fantasy IX)|Feather Hat]] |
|200 |
|200 |
||
|- |
|- |
||
| − | !class="b"|[[ |
+ | !class="b"|[[Rubber Helm]] |
|250 |
|250 |
||
|- |
|- |
||
| − | !class="b"|[[ |
+ | !class="b"|[[Bronze Helm (Final Fantasy IX)|Bronze Helm]] |
|330 |
|330 |
||
|- |
|- |
||
| − | !class="b"|[[ |
+ | !class="b"|[[Leather Shirt (Final Fantasy IX)|Leather Shirt]] |
|270 |
|270 |
||
|- |
|- |
||
| − | !class="b"|[[ |
+ | !class="b"|[[Silk Shirt (Final Fantasy IX)|Silk Shirt]] |
|400 |
|400 |
||
|- |
|- |
||
| − | !class=" |
+ | !class="b"|[[Bronze Armor (Final Fantasy IX)|Bronze Armor]] |
|650 |
|650 |
||
|} |
|} |
||
| + | {{multicol-separator}} |
||
| − | </div> |
||
| ⚫ | |||
| − | <div> |
||
| ⚫ | |||
[[#Pub|Pub]] owned by Dutiful Daughter Slai. |
[[#Pub|Pub]] owned by Dutiful Daughter Slai. |
||
| − | {|class="FFIX table" style="text-align:center" |
+ | {|class="FFIX article-table" style="text-align:center" |
|-class="a" |
|-class="a" |
||
!style="width:100px"|Item |
!style="width:100px"|Item |
||
!style="width:75px"|Price |
!style="width:75px"|Price |
||
|- |
|- |
||
| − | !class="b"|[[ |
+ | !class="b"|[[Potion (Final Fantasy IX)|Potion]] |
|50 |
|50 |
||
|- |
|- |
||
| − | !class="b"|[[ |
+ | !class="b"|[[Phoenix Down (Final Fantasy IX)|Phoenix Down]] |
|150 |
|150 |
||
|- |
|- |
||
| − | !class="b"|[[ |
+ | !class="b"|[[Antidote (Final Fantasy IX)|Antidote]] |
|50 |
|50 |
||
|- |
|- |
||
| − | !class="b"|[[ |
+ | !class="b"|[[Eye Drops (Final Fantasy IX)|Eye Drops]] |
|50 |
|50 |
||
|- |
|- |
||
| − | !class="b"|[[ |
+ | !class="b"|[[Tent (Final Fantasy IX)|Tent]] |
|800 |
|800 |
||
|} |
|} |
||
| + | {{multicol-end}} |
||
| − | </div> |
||
| − | </div> |
||
== Items == |
== Items == |
||
| − | {|class="full-width FFIX table" |
+ | {|class="full-width FFIX article-table" |
|-class="a" |
|-class="a" |
||
!style="width:20%"|Item |
!style="width:20%"|Item |
||
| Line 480: | Line 444: | ||
|[[#Village Road|Village Road]] |
|[[#Village Road|Village Road]] |
||
|- |
|- |
||
| − | !class="b"|[[ |
+ | !class="b"|[[Potion (Final Fantasy IX)|Potion]] |
|Inn / [[#Rooms|Rooms]] |
|Inn / [[#Rooms|Rooms]] |
||
|- |
|- |
||
| − | !class="b"|[[ |
+ | !class="b"|[[Antidote (Final Fantasy IX)|Antidote]] |
|Inn / [[#Rooms|Rooms]] |
|Inn / [[#Rooms|Rooms]] |
||
|- |
|- |
||
| − | !class="b"|[[ |
+ | !class="b"|[[Elixir (Final Fantasy IX)|Elixir]] |
| − | |[[#Field|Field]]. |
+ | |[[#Field|Field]]. Only on disc 2. |
|- |
|- |
||
| − | !class="b"|[[ |
+ | !class="b"|[[Stellazzio#Aries|Aries]] |
|Windmill / [[#Windmill 1F|Windmill 1F]] |
|Windmill / [[#Windmill 1F|Windmill 1F]] |
||
|- |
|- |
||
| − | !class="b"|[[ |
+ | !class="b"|[[Cachusha (Final Fantasy IX)|Cachusha]] |
| − | |Windmill / [[#Windmill 2F|Windmill 2F]]. |
+ | |Windmill / [[#Windmill 2F|Windmill 2F]]. Only on disc 3. |
|- |
|- |
||
| − | !class="b"|[[ |
+ | !class="b"|[[Elixir (Final Fantasy IX)|Elixir]] |
| − | |Windmill / [[#Windmill 2F|Windmill 2F]]. |
+ | |Windmill / [[#Windmill 2F|Windmill 2F]]. Only on disc 3. |
|- |
|- |
||
!class="b"|30000 Gil |
!class="b"|30000 Gil |
||
|Windmill / [[#Beside the Windmill|Beside the Windmill]] |
|Windmill / [[#Beside the Windmill|Beside the Windmill]] |
||
|- |
|- |
||
| − | !class="b"|[[# |
+ | !class="b"|[[#Morrid's coffee|Burman Coffee]] |
|Windmill / [[#Beside the Windmill|Beside the Windmill]] |
|Windmill / [[#Beside the Windmill|Beside the Windmill]] |
||
|- |
|- |
||
| − | !class="b"|[[ |
+ | !class="b"|[[Mini-Brahne]] |
| − | |[[#Mayor's House|Mayor's House]]. |
+ | |[[#Mayor's House|Mayor's House]]. From disc 3 on. |
|- |
|- |
||
| − | !class="b"|[[ |
+ | !class="b"|[[Mayor's Key]] |
| − | |[[#Mayor's House|Mayor's House]]. Only on disc 3 |
+ | |[[#Mayor's House|Mayor's House]]. Only on disc 3 during card competition in Treno. |
|- |
|- |
||
!class="b"|156 Gil |
!class="b"|156 Gil |
||
|Dali Underground / [[#Entrance|Entrance]] |
|Dali Underground / [[#Entrance|Entrance]] |
||
|- |
|- |
||
| − | !class="b"|[[ |
+ | !class="b"|[[Potion (Final Fantasy IX)|Potion]] |
|Dali Underground / [[#Underground (1)|Underground (1)]] |
|Dali Underground / [[#Underground (1)|Underground (1)]] |
||
|- |
|- |
||
| − | !class="b"|[[ |
+ | !class="b"|[[Eye Drops (Final Fantasy IX)|Eye Drops]] |
|Dali Underground / [[#Underground (1)|Underground (1)]] |
|Dali Underground / [[#Underground (1)|Underground (1)]] |
||
|- |
|- |
||
| − | !class="b"|[[ |
+ | !class="b"|[[Ether (Final Fantasy IX)|Ether]] |
|Dali Underground / Storage Area / [[#Path|Path]] |
|Dali Underground / Storage Area / [[#Path|Path]] |
||
|- |
|- |
||
| − | !class="b"|[[ |
+ | !class="b"|[[Potion (Final Fantasy IX)|Potion]] |
|Dali Underground / Storage Area / [[#Path|Path]] |
|Dali Underground / Storage Area / [[#Path|Path]] |
||
|- |
|- |
||
| − | !class="b"|[[ |
+ | !class="b"|[[Leather Wrist (Final Fantasy IX)|Leather Wrist]] |
|Dali Underground / Storage Area / [[#Open Room|Open Room]] |
|Dali Underground / Storage Area / [[#Open Room|Open Room]] |
||
|- |
|- |
||
| − | !class="b"|[[ |
+ | !class="b"|[[Iron Helm (Final Fantasy IX)|Iron Helm]] |
|Dali Underground / Storage Area / [[#Open Room|Open Room]] |
|Dali Underground / Storage Area / [[#Open Room|Open Room]] |
||
|- |
|- |
||
| Line 534: | Line 498: | ||
|Dali Underground / Production Area / [[#First Room|First Room]] |
|Dali Underground / Production Area / [[#First Room|First Room]] |
||
|- |
|- |
||
| − | !class="b"|[[ |
+ | !class="b"|[[Phoenix Down (Final Fantasy IX)|Phoenix Down]] |
|Dali Underground / [[#Underground (2)|Underground (2)]] |
|Dali Underground / [[#Underground (2)|Underground (2)]] |
||
|- |
|- |
||
| − | !class="b"|[[ |
+ | !class="b"|[[Potion (Final Fantasy IX)|Potion]] |
|Dali Underground / [[#Underground (2)|Underground (2)]] |
|Dali Underground / [[#Underground (2)|Underground (2)]] |
||
|- |
|- |
||
| − | !class="b"|[[ |
+ | !class="b"|[[Phoenix Pinion (Final Fantasy IX)|Phoenix Pinion]] |
|Dali Underground / [[#Underground (2)|Underground (2)]] |
|Dali Underground / [[#Underground (2)|Underground (2)]] |
||
|} |
|} |
||
| Line 547: | Line 511: | ||
=== [[#Dali's Underground|Dali's Underground]] === |
=== [[#Dali's Underground|Dali's Underground]] === |
||
[[File:BelowDali2-ffix-battlebg.png|right|thumb|175px|Battle background.]] |
[[File:BelowDali2-ffix-battlebg.png|right|thumb|175px|Battle background.]] |
||
| − | Enemies appear in [[#Dali's Underground|Dali's Underground]] if the door to the [[#Underground (2)|second Underground area]] is opened from the [[#First Room|first room]] of the [[#Production Area|Production Area]]. The enemies can be fought in that area, all areas thereafter, and also in the [[#Open Room|open room]] of the [[#Storage Area|Storage Area]]. When the player first attempts to open the door to the second Underground area, a pair of Ghost enemies |
+ | Enemies appear in [[#Dali's Underground|Dali's Underground]] if the door to the [[#Underground (2)|second Underground area]] is opened from the [[#First Room|first room]] of the [[#Production Area|Production Area]]. The enemies can be fought in that area, all areas thereafter, and also in the [[#Open Room|open room]] of the [[#Storage Area|Storage Area]]. When the player first attempts to open the door to the second Underground area, a pair of Ghost enemies are fought in a fixed encounter. |
* [[Vice (Final Fantasy IX)|Vice]] |
* [[Vice (Final Fantasy IX)|Vice]] |
||
| Line 553: | Line 517: | ||
* [[Ghost (Final Fantasy IX)|Ghost]] x2 |
* [[Ghost (Final Fantasy IX)|Ghost]] x2 |
||
* [[Ghost (Final Fantasy IX)|Ghost]] x3 |
* [[Ghost (Final Fantasy IX)|Ghost]] x3 |
||
| − | * [[Ghost (Final Fantasy IX)|Ghost]] x2 ( |
+ | * [[Ghost (Final Fantasy IX)|Ghost]] x2 (fixed) |
=== [[#Cargo Ship Loading Area|Cargo Ship Loading Area]] === |
=== [[#Cargo Ship Loading Area|Cargo Ship Loading Area]] === |
||
[[File:Dali-ffix-battlebg.png|thumb|175px|right|Battle background.]] |
[[File:Dali-ffix-battlebg.png|thumb|175px|right|Battle background.]] |
||
| − | The Black Waltz 2 is fought as part of the events at the cargo ship loading area before the party |
+ | The Black Waltz 2 is fought as part of the events at the cargo ship loading area before the party boards the cargo ship. The battle takes place after Steiner rejoins with the rest of the party. |
| − | * [[Black Waltz 2]] ( |
+ | * [[Black Waltz 2]] (boss) |
=== Nolrich Heights === |
=== Nolrich Heights === |
||
| − | The |
+ | The friendly Mu appears here as part of the [[friendly monsters]] sidequest. He appears in the [[Grass]] areas and requests an [[Ore (Final Fantasy IX)|Ore]]. Once satisfied, he will never appear again. |
* [[Mu (Final Fantasy IX)|Mu]] (Friendly) |
* [[Mu (Final Fantasy IX)|Mu]] (Friendly) |
||
| Line 570: | Line 534: | ||
* [[Carve Spider (Final Fantasy IX)|Carve Spider]] x2 |
* [[Carve Spider (Final Fantasy IX)|Carve Spider]] x2 |
||
* [[Carve Spider (Final Fantasy IX)|Carve Spider]], [[Python (Final Fantasy IX)|Python]] |
* [[Carve Spider (Final Fantasy IX)|Carve Spider]], [[Python (Final Fantasy IX)|Python]] |
||
| + | |||
| ⚫ | |||
| ⚫ | |||
| ⚫ | |||
| + | |||
| ⚫ | |||
== Other appearances == |
== Other appearances == |
||
=== ''[[Final Fantasy Record Keeper]]'' === |
=== ''[[Final Fantasy Record Keeper]]'' === |
||
| − | {{sideicon|FFRK}} |
||
[[File:FFRK Village of Dali FFIX.png|right|150px]] |
[[File:FFRK Village of Dali FFIX.png|right|150px]] |
||
After escaping pursuit and passing along the slippery paths of the Ice Cavern, Garnet takes the name Dagger to conceal her identity. The party arrives in the small village of Dali. |
After escaping pursuit and passing along the slippery paths of the Ice Cavern, Garnet takes the name Dagger to conceal her identity. The party arrives in the small village of Dali. |
||
| − | {{ |
+ | {{Location section|Final Fantasy Record Keeper}} |
| + | ==Behind the scenes== |
||
| ⚫ | |||
| ⚫ | |||
| ⚫ | |||
| ⚫ | The game details a strained romance between Part Time Worker Mary, owner of the Vega Shop in northern station of South Gate, and Jobless Jeff, operator of the Altair Shop in the southern station, which [[Final Fantasy IX allusions|mirrors the real-life Tanabata legend]]. In endgame the two are found at the item shop in Dali. |
||
| ⚫ | |||
| + | If the player visits Dali later in the game (after they have returned from the [[Outer Continent]]) the mother and daughter at the shop mention they want to take a trip and ask Zidane to watch over the shop. The player can answer yes or no, either choice yields the same result with different dialogue. In endgame the mother and daughter are absent, having left a note that they are on a trip and don't wish to be found. The shop is now operated by Part time Mary and Jeff, who needed a place to work after leaving South Gate. |
||
| ⚫ | |||
== Gallery == |
== Gallery == |
||
| − | <gallery |
+ | <gallery> |
Ice Cavern Exit FFIX Art.jpg|View of Dali from the Ice Cavern. |
Ice Cavern Exit FFIX Art.jpg|View of Dali from the Ice Cavern. |
||
Dali-Artwork.JPG|Concept art of Dali. |
Dali-Artwork.JPG|Concept art of Dali. |
||
| Line 601: | Line 570: | ||
</gallery> |
</gallery> |
||
| + | {{navbox setting FFIX}} |
||
| − | ==Trivia== |
||
| ⚫ | |||
| ⚫ | |||
| − | {{-}} |
||
| − | |||
| − | {{FFIX}} |
||
[[de:Dali]] |
[[de:Dali]] |
||
[[es:Dali]] |
[[es:Dali]] |
||
| − | [[Category:Final Fantasy IX |
+ | [[Category:Locations in Final Fantasy IX]] |
[[Category:Towns]] |
[[Category:Towns]] |
||
Revision as of 13:16, 16 September 2020
Template:Sideicon
Dali is a small village in Final Fantasy IX near the geographical center of the Mist Continent, in the world of Gaia. It is located in the territory of Alexandria, near South Gate and above the Mist. The village has a large windmill within the village, and an Observatory Mountain nearby.
Story
Dali was primarily a farming community, but after Queen Brahne began manufacturing black mages, the villagers abandoned farming in favor of the more profitable black mage production. The children and elders are responsible for running the town and keeping the secret.

The streets of Dali.
Zidane, Steiner, Garnet, and Vivi arrive in Dali to rest and find a way to travel to Lindblum. They stay the night at the inn, but the innkeeper notices Vivi, and how he is similar in appearance to the black mages being produced in the village's secret underground factory.
The next day, Garnet and Vivi explore the town, and Steiner tries to find a way to get back to Alexandria. Garnet tries to blend in with the villagers as a commoner, going by the nickname "Dagger". Vivi becomes fascinated with the windmill, but a villager grabs him, thinking he has escaped from the factory. Zidane returns to the inn after looking around the village. When Vivi does not return, Zidane and Garnet go out to look for him. They hear him crying, and find a secret entrance to a base below the windmill. Garnet notices a symbol, which she saw in Alexandria Castle on a crate, and becomes suspicious. They find Vivi kidnapped and rescue him, and discover machines producing black mages, distressing Vivi.
Zidane, Vivi and Garnet sneak into a crate so they wouldn't be seen and are almost accidentally loaded onto the cargo ship. Steiner scares off the villagers and halts them from loading the ship. The four are attacked by Black Waltz 2, and after defeating him, the group boards the airship, Steiner hoping to return to Alexandria while Zidane plans to divert the airship to Lindblum.
If the party returns to Dali later, they will find the people working in the farms again.
Locations

Village Road.
Dali is a small village and most areas can be accessed from the Village Road. Underneath the village is a factory, a linear cavern system, which can be entered once from the inside of the Windmill as part of the story.
Dali features two exits to the world map, one from the Village Road and the other from the Field. The player cannot to exit to the world map on their first visit until Garnet rejoins the party.
Village Road
The Village Road is Dali's main area and is the central location for the other areas of the village. It it one of the areas that leads out onto the world map and the area where the player will arrive at when entering.
The road starts south of the screen. The first area on the left leads into the Weapon Shop. Next on the left is an entrance to the Mayor's House, and at the top-left is the entrance to the Windmill. In the south-right is the entrance to the Inn, while the north-right leads to the Field. At the top of the screen is the entrance to the Pub.
The Village Road has a number of other features: near the back area of the inn is a small pond; a path over the pond leads to the window facing the inn's room. The player can listen and peer into from the outside.
Beside the weapon shop (left of its door) the player can find 120 Gil. Next to this area is a wheel that can be inspected, and Zidane will comment on how it is big enough to be used for an airship engine, and questions its pertinence on a farm. In the center of the town is a well.
Upon first arrival the player is taken to the Village Road, perceived at a different angle from the norm. A scene takes place here, and the game takes the player into the Inn. After the events of the inn, the player can view an Active Time Event, Vivi, Confused. The Active Time Event shows the children of Dali reacting fearfully to him. Regardless of whether this was watched, the player can find Vivi in the north of the town by a wall. Moving toward him will start a scene (taking place on the beside the windmill) where Vivi hears chocobo noises.
After Zidane exits the scene, Vivi is taken away by a worker. The same area is revisited later by Zidane and Garnet when searching for Vivi when they hear his cries through a hole leading to the underground. After this scene, Zidane can interact with the hole to talk to Vivi.
Inn
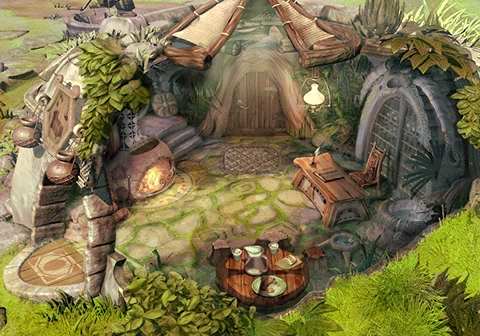

Reception area of the Inn.
The inn is entered from the Village Road. It is split into two areas—the reception area and the guest room. Innkeeper Hal is one of the few adults who work and stay in the village. He is often found sleeping at his desk and the player cannot rest at the inn during the Dali events due to this. The innkeeper does not appear here when the player can return to Dali later in the game. Instead, he is replaced by Snot-nosed Gudo, his son, found in the rooms where he will charge 100 Gil to rest.
- Reception area
This is the entrance to the inn. The door at the top of the screen leads to the rooms, while the door in the bottom-left exits back out onto the Village Road.
This area has a moogle named Gumo standing in the top-left. As part of the Mognet sidequest, if Zidane received a letter from Mois in the Ice Cavern, he can give it to Gumo.
A cat in this area sits on the heater. There are two Active Time Events that take place in this room—Cat's Eye and Cat's Eye 2—that show the innkeeper planning to have Vivi "returned" to the factory to please his brother, Mayor Kapu. In these scenes, the cat starts on the heater and walks over the desk. This correlates to the two locations of items in the Mayor's House, which are only accessible later in the game.
In the bottom-right area is an indicator showing a message on the table:
A delicious breakfast for 20 Gil!
-Cold water, fresh from the well
-Fresh scrambled eggs
-Vegetables, fresh from the farm
* This is a sample menu. *
The first time the party rests at the inn, Zidane wakes the innkeeper who looks up and stares at Vivi. Zidane scolds him thinking he is staring at Garnet, which the innkeeper denies, before allowing the party to use the room. After the events of Dali, the player can choose to either board the cargo ship or return to rest. If the player rests, then upon returning to the inn, the scene will play out again almost identically.
- Rooms

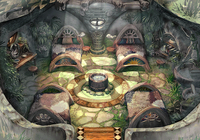
Rooms of the Inn.
The room where the party rests has one exit towards the bottom, back out to the reception area. While the reception area can be accessed only from that entrance, Zidane can "view the room" from the village road by looking through the window. This allows Zidane to see who is in the room, such as when Garnet spends time here later on. From this perspective, it is seen at a different angle (the same angle used in an event when the player first enters) and shows off the location of one of the chests more clearly.
The well hidden chest in the bottom-left behind a plant contains a Potion. In the bottom-right the more clearly visible chest contains an Antidote.
In the top-right the player can inspect a bookshelf:
* For your reading pleasure *
How to Save One Million Gil
Earn Money the Easy Way
Makin' Crazy Money! Vol. 2
Zidane comments, "These books suck". The book titles allude to the innkeeper's desperate desire to make money, which is mentioned in the Active Time Events.
On the left-hand side is a question-mark indicator about Color Fortunes. Zidane comments on how it was a fad in Lindblum a few years ago. The player can spend 10 Gil per "Divination". This is a reference to Cait Sith's faulty fortunes in Final Fantasy VII. Another reference to previous Final Fantasy games is the position of the beds, which mirrors the inn layout from Nintendo era Final Fantasy games.
When the party first enters the room, a scene plays out, and Zidane awakens the next morning as the sole party member.
Weapon Shop

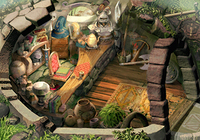
Wpn. Shop
The Weapon Shop, known as Wpn. Shop in the menu, is the place for a minor storyline event. The player can buy weapons and armor from Shopkeeper Eve's shop. The shop is entered from the Village Road and the aforementioned place is exited out onto through the exit to the right of the screen.
This shop is the player's first accessible weapon shop and there is information that can be read from an indicator found at the bottom of the screen. It also gives information about playing cards, relevant as Shopkeeper Eve is the only person who plays Tetra Master in Dali.
Depending on the conversation choice Dagger picks during the "Dagger tries harder" ATE, later in the game when the player goes to Treno controlling Dagger and has an option of stopping by Dali, the shopkeeper Eve's reaction to Dagger may become more friendly. To get the friendlier reaction the player must ask Eve to show her wares.
Think before equipping your new weapon
and armor!
learn a new ability.
It's up to you whether you equip the
new item right away or wait until
you've learned the abilities, but if
you are short of money, please remember
that we also buy items!
Press
information on our products.
For example, you'll see that our famous
Mage Masher has an
added silence effect.
You need an 'Add Status' ability to
use added status effects.
Do you play cards?
My theory is that the first number
written on the card represents the
card's attack power.
The third and fourth numbers are
probably defense power. I still don't
know what the second character means.
Please press
The Weapon Shop is the location of the Active Time Event, Dagger Tries Harder where Garnet listens in on a discussion between two characters to try to pick up on mannerisms to hide the way she speaks.
Pub
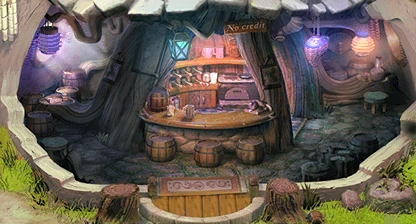

Pub.
The pub is tended by a young girl, Dutiful Daughter Slai. The location does not act as a pub until late at night when adults return to the village. Until then, it is used as Dutiful Daughter Slai's medicine shop. If the player attempts to move the character behind the bar, the tender will tell them they are not allowed.
Zidane will ask Slai if Garnet entered if he does not request the medicine and has not yet found her. Doing the same again will have Zidane question the field patterns outside Dali, but she responds she is busy, and when Zidane offers to help, the tender wonders whether it was a trend because another man was helping her. This is later revealed to be Steiner in a forced Active Time Event, Queen Brahne's Steiner.
A menu on the left side of the bar:
2. Vegetables stir-fry: Out of stock
3. Pumpkin salad: Out of stock
4. Dried potatoes: 4 Gil
5. Kebabs: 10 Gil
6. Lindblum pickles: 9 Gil
Cash only
* We sell medicine
A menu on the right side of the bar:
2. White ale: 8 Gil
3. Red wine: 7 Gil
4. White wine: 9 Gil
5. Water: 1 Gil
6. Gysahl liqueur: 11 Gil
No underage drinking allowed!
Cash only
* We sell medicine
Field

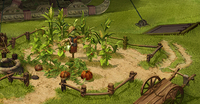
Field.
The Field can be entered from the Village Road, and the exit in the bottom-right of the Field will lead back to it. The exit on the right leads onto the world map at most points in the game. When Zidane first visits he cannot leave until Garnet joins the party. If the player chooses to rest at the inn and not go on the cargo ship immediately, the player will be taken to this gate. Exiting through the gate at this point leads back to the cargo ship loading area.
The chest here contains an Elixir, but it is only accessible at one opportunity on disc 2. A woman blocks access to the chest at all other times. The opportunity to open it is when controlling Dagger after defeating Black Waltz 3: instead of heading to Treno, the player must visit Dali, and the old woman is in a different position. The player can talk to her and she asks if Garnet thinks Queen Brahne's changes are too drastic.
The Active Time Event, Dagger Tries, takes place here.
Windmill

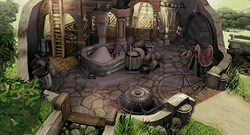
Windmill 1F.
The Windmill is a structure in the top-right of the town. It can be entered from the Village Road or through the Mayor's House, which is structurally linked to the Windmill. The Windmill harbors the entrance to the underground factory where the adults of Dali work.
- Windmill 1F
The Windmill 1F is the area first entered inside the windmill. It leads back out into the Village Road via the exit in the bottom-right, and to the Mayor's House via the exit at the bottom.
There is an exit to another area through a door in the top-right. This door opens with the Mayor's Key. The entrance to Dali's Underground is found here via a liftable lid. When the player is first here, a man named Yaff guards the entrance. Later when Dagger is in the party, Yaff will not be there, and the player can enter. After the events underground, the party will opt not to venture in again, and later in the game when the factory has been closed down, it will be sealed shut.
The player can climb the ladder on the left to get to Windmill 2F.
The player can find the Aries item behind the rotor for the Stellazzio quest.
If the player has obtained the Mayor's Key item they can exit through the door in the top-right to explore the area beside the windmill.
- Windmill 2F
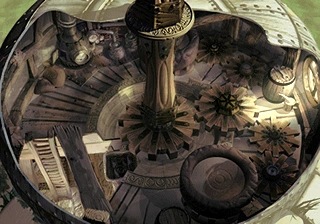

Windmill 2F.
The second floor is reached from the the ladder in Windmill 1F. There are two chests found here, however, on the first visit neither are accessible due to the turning windmill. The uppermost chest contains a Cachusha add-on, while the other chest contains an Elixir. The windmill stops turning after the party returns to the Mist Continent from the Outer Continent, but restarts after the event where the player passes through the Shimmering Island portal, so the player must loot the chests during that time frame.
- Beside the Windmill

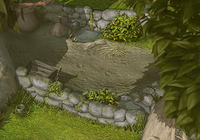
Beside the Windmill.
There is a small area beside the Windmill. A wall separates the two sides. On the bottom-side of the wall is the area found also in the Village Road and where the Vivi events take place on the first visit to Dali. This side of the wall is used only in events.
Later in the game the player can get to the other side of the wall by entering through the door on Windmill 1F. On the right hand side is a chest containing 30,000 Gil. If the player makes contact with this chest again they can look underneath it to find the Burman Coffee for Morrid.
A chocobo is found in this area. The exit on the left leads back to Windmill 1F.
Mayor's House
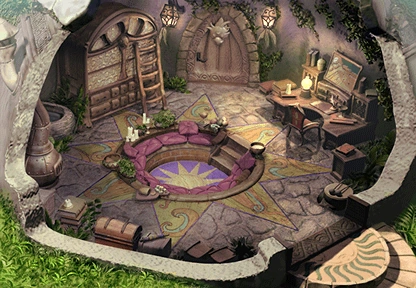

Mayor's House.
The Mayor's House can be entered from two locations. The Village Road leads in from the bottom-right exit, and the Windmill leads here from the top exit.
On the player's first visit they can enter but are told to leave by the mayor. When Dagger joins the party the player can go in once for an extended scene, but are then not allowed to reenter until later in the game.
If the player returns here during the card competition in Treno on disc 3, the player can enter while the mayor is not in, however, the child still is. The player is given a list of four locations: the desk, ladder, heater, or shelf. On the first inspection all locations yield no items except the desk that scores the Mini-Brahne key item. The player must explore the desk again. A third time and the child will say "ZZZ". On this opportunity the player can check the heater to receive the Mayor's Key. Once Zidane has completed the card tournament in Treno, this key is no longer accessible. The Mini-Brahne key item, however, can still be found, though it will have changed location, being now found at the top of the ladder.
The key gives the player access to the area behind the Windmill.
Cargo Ship Loading Area


Loading area for the cargo ship.
The cargo ship loading area is where the cargo ship lands in the fields of Dali. The packaging room of the production area should lead here, however, in the game such a transition never takes places, and instead the game makes the player take control of Steiner at this point.
This area includes numerous field screens. When the player exits Observatory Mountain with Steiner as party leader on disc 1, they are not taken to the world map as the usual circumstance would be, but are taken to a field with the cargo ship in view where he meets Zidane, Vivi and Dagger. After the next event, Black Waltz 2 is fought by the four, and afterward the player is given the option to rest at the inn or board the cargo ship. Boarding the ship will take them onto the Cargo Ship while resting at the inn will take the player to the Field (from the exit that would usually lead to the world map). The player can roam the town, and they return to the cargo ship via the Field, which will take them back to this area and immediately start the scene where the party boards the ship.
Dali's Underground
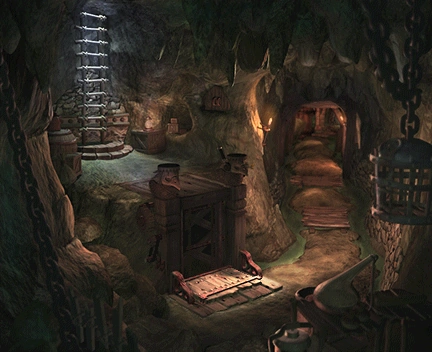

Entrance.
Dali's Underground (ダリの地下, Dari no Chika?) is a system beneath the village entered from a hidden passage covered by a lid in the Windmill. Queen Brahne ordered that Dali become a factory for creating black mages, which are delivered to Alexandria Castle by cargo ship. Most of the adults in the town work in this factory.
The factory is visited once. After the player exits at the end, the player character will never agree to go down here again. Later the entrance to the factory is sealed when Dali returns to being a farming town.
Entrance
The entrance connects to the Windmill 1F via a ladder in the top-left of the screen. The area has two levels which are traversed between by a lift. The path on the right-hand side leads to the Production Area.
There is a chest by the lift containing 156 Gil.
Underground (1)
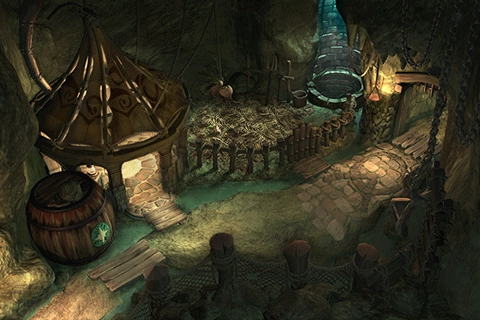

Underground.
The first Underground area appears to be the entrance to the factory and possibly an office or staff room. The exit at the bottom leads back to the Entrance, while the exit at the top leads to the Storage Area.
Inside the hut is a chest containing a Potion. Across from the hut, slightly obscured by the fence, is a chest containing Eye Drops.
When the player first enters here they find two workers discussing Vivi with Vivi in the room. The player is taken back into the Entrance area briefly as part of the scene. Garnet has seen the logo on a barrel here in the area in Alexandria Castle. When the player is in control they can inspect the barrel.
Storage Area

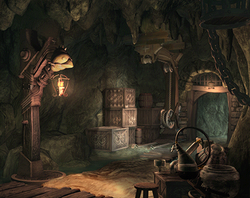
Pathway in Storage Area.
The Storage Area is where the containers are stored. The player first enters into the Path.
- Path
The path is a small room with containers. The exit at the bottom of the screen leads to the first Underground area, while the exit at the top leads to an open room of the Storage Area.
A barrel on the left of the path contains a moogle named Kumop. As part of the Mognet sidequest the player can pick up a letter from Kumop and give to Mogki in Lindblum.
Behind the barrel the player can jump on a crate, which will allow them to jump on to another crate where a chest containing an Ether item is.
By the north exit there is a wheel pulley-system. If Zidane inspects it they can kick it to drop a chest previously suspended above and out of reach. This chest contains a Potion.
The player can inspect a container and Zidane will comment its shape resembles a coffin.
- Open Room
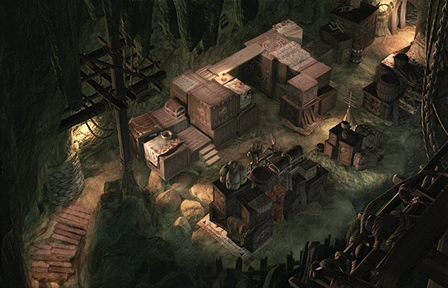

Open part of Storage Area.
The open room is a large storage site with many crates. Despite the area being open there is still a path down the middle. The exit in the bottom-left side leads to the Storage Area path while the exit in the top-right leads to the Production Area.
On the right of the central path is a chest containing a Leather Wrist armor. If the player climbs on the crates on the left of the path (from either end) they can reach a chest containing the Iron Helm.
Production Area

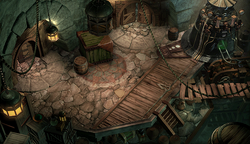
The beginning of the Production Area.
The production area are areas pertaining to the creation of black mages.
- First Room
The exit on the left leads to the open room of the Storage Area. The exit across the bridge on the right leads to the conveyor belt area. The door at the top of the screen can be inspected. There is Mist coming from under the door and the player can open it to battle two Ghost enemies, which gains access to an underground area.
When the player first enters this area a scene will play out where the player releases Vivi from a box. He then joins the party.
A chest by the door at the top of the screen contains 95 gil.
The player can inspect two coffins, one in the bottom left below the exit and one on the bottom-right down a small set of stairs. They contain nothing.
- Conveyor Belt
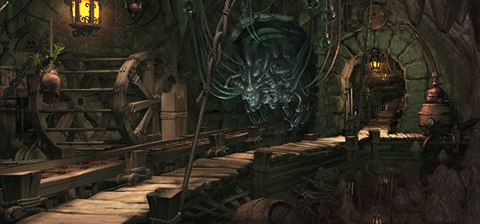

Exclusively conveyor belt section of Production Area.
The conveyor belt shows the production process continue into another machine. The exit at the bottom-left leads to the first room of the production area, while the exit on the top of the screen leads to the packaging room. The split in the path goes right, leading to something that resembles a boiler. The player cannot inspect this.
The player can inspect the machine and Zidane will say it is powered by a chocobo running on a wheel (a Gysahl Green is held on a stick in front of it). This can only be inspected once. The player can also inspect the machine at the north-end where Zidane comments how it looks like the Mist engine of the Prima Vista. This can also be inspected only once.
When the player first tries to move to the next area a scene plays where Zidane tries to peer into the machine.
- Packaging Room
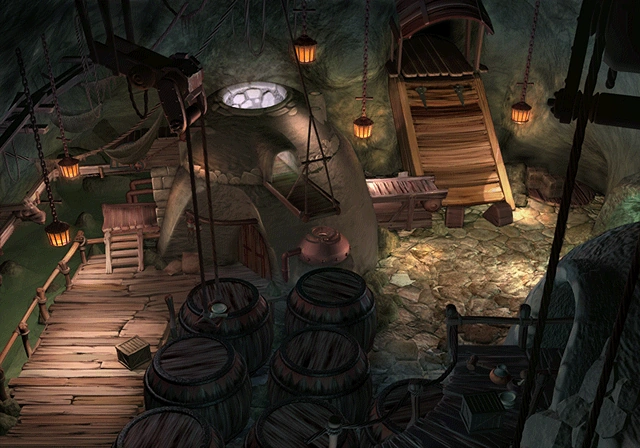
Packaging room in Production Area.
The packaging room is a small area where the party discovers the machine was producing black mages. Although the party do not know what they are at this time, they understand they resemble Vivi.
To hide from the workers the party go inside a box, which is put in a barrel and taken to the cargo ship loading area. The player now takes control of Steiner at Observatory Mountain.
This area is not explorable by the party.
Underground (2)
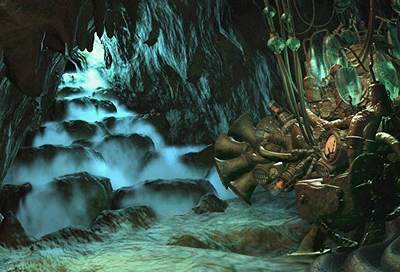

Underground.
The second Underground area is an area full of Mist. A single exit at the bottom of the screen leads back into the first room of the Production Area.
Where the player first stands when entering the room is a spot that allows the inspection of the machine. Zidane comments it sends Mist to the machine in the previous room.
A chest to the left of this spot contains a Phoenix Down. On the right-side of the screen a chest slightly obscured by the machine contains a Potion. To the right, completely hidden behind the machine, is a chest containing a Phoenix Pinion.
Quests
Village events
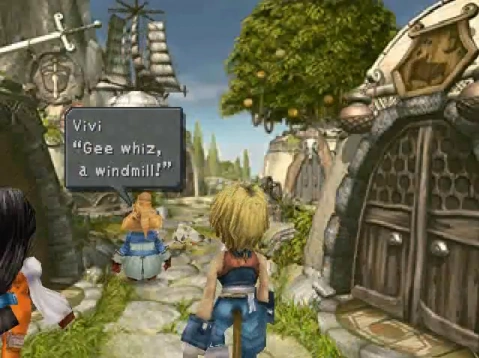

Vivi seeing the windmill.
When the player first enters the village, the party splits up at the inn. The player controls Zidane. To advance the story, the player must return Garnet to the inn and engage in the scene with Vivi. To do the former, the player must have watched the Dagger Tries Harder Active Time Event and then visit her at the weapon shop. Vivi, meanwhile, is standing to the north of the town.
To trigger the Dagger Tries Harder scene the player must terminate the Dagger Tries Active Time Event and then check in on the inn in one of two ways. The player can terminate the Dagger Tries event either by watching it or visiting the Field (where the Dagger Tries event takes place). Since terminating it, the player must have zoned in or out of areas a number of times before the Dagger Tries Harder event can become available. The event can only happen in the reception area of the Inn or by peering through the window of the Inn from the Village Road. After watching the Active Time Event, the player can find Garnet in the Weapon Shop, and talking with her there returns her to the Inn.
The quickest way to complete the village events is to either exit the Inn, go to the Field, return to Village Road and watch the Vivi scene, then zone in, out, and in of the Inn to get the Dagger Tries Harder event and watch it, or after watching the Vivi scene instead going through to the bed area of the Inn and then back into the reception to receive the event. After watching the event, the player can then run across into the weapon shop, watch the scene with Garnet, then return to the rooms of the Inn and watch the next scene, and then head into town to watch the next scene, and then into the windmill to find the entrance to the underground.
Mognet
Dali features two moogles, Gumo who resides in the Inn and Kumop who resides in the one-time visit Storage Area beneath Dali. Both are involved in the sidequest.
If the player earlier received the Trapped In Ice! letter, they can give it to Gumo. In the factory beneath Dali the player can pick up a letter from Kumop, the Stiltzkin Visited Me! addressed for Mogki in the Guest Room of Lindblum.
Active Time Events
There are six Active Time Events available to watch in Dali. One always starts as part of the story, while another must be acquired and watched for game progression. The other four are optional, and offer no special benefits gameplay-wise.
Dagger Tries and Vivi, Confused are available after resting in the Inn. The player can only view one at this point, but moving into the next room of the inn makes the other available. Vivi, Confused becomes unavailable when exiting the Inn, while Dagger Tries becomes unavailable by visiting the Field.
The Cat's Eye ATE appears when the player gets to the Village Road after exiting the Inn. The player cannot watch the ATE while in the Inn. The scene alludes to the locations of the key items found in the Mayor's House later as the cat sits on the heater and the desk, the locations for the key items.
The Cat's Eye 2 ATE appears after watching the Vivi scene in the Village Road.
The Dagger Tries Harder ATE appears after dismissing the Dagger Tries ATE and then exploring the village. After a while the ATE will become available, but not if the player is in the Weapon Shop or the Village Road. The player must view this Active Time Event for Dagger to be found in the Weapon Shop, which is necessary for continuing the story.
The Queen Brahne's Steiner ATE is watched automatically after Dagger and Zidane reunite at the Inn.
Tetra Master
Only one person in Dali plays Tetra Master: the Weapon Shop's owner, Shopkeeper Eve. There is a note in the shop that gives advice on weapons, armor, abilities, and also some information about Tetra Master cards.
| Shopkeeper Eve | ||
|---|---|---|
| Location | Dali/Wpn. Shop | |
| Cards | Goblin, Flan, Zaghnol, Lizard Man, Zombie, Yeti, Zuu, Cactuar, Stroper | |
Friendly monsters
The Mu enemy can be encountered on the grass areas of the Nolrich Heights if it has not already been defeated.
Blu Mag
On the first visit to this area, Quina is not available. If the party returns here later, the player can eat a number of enemies in Nolrich Heights. The Python for the Pumpkin Head ability, and the Carve Spider for the LV3 Def-Less ability.
Color fortunes
The player can "play" Color Fortunes in the rooms of the Inn for 10 Gil per turn. Each time one of five "omens" will display, followed by the player's lucky color (randomized each play) followed by an advertisement for a shop in Lindblum.
Good Omen
— — — — — Today will be filled with deja vu. ※ You will see familiar sights and eat foods that you tasted long ago. You may find a long-lost friend. ※ Take a moment to recall good memories. |
Good Omen
— — — — — A good day filled with many of life's simple pleasures. ※ A nice breeze will greet you as you step out. You will make new friends and replace a lost item with a new one. ※ Be yourself and let good fortune come to you. |
Very Good Omen
— — — — — An auspicious day for you to go out and have fun! ※ You'll find lost money and lost items. You'll also eat lots of yummy food, and meet interesting people. ※ Go out and share your luck with the ones you love! |
Bad Omen
— — — — — There are good days, and there are bad days. ※ You may be prone to injury and sickness today. Be careful of losing items and meeting strangers. ※ You are better off staying home today. |
Good Omen
— — — — — A nice day to relax and put your mind at ease. ※ Lost things will be returned to you, and you will eat foods that are gentle to your body. ※ A good day to spend indoors or out! |
today is "{color}"!
Each time Color Fortunes is played the game randomizes the color of red, white, blue, green, or yellow.
We have all colors!
♥ ♥ ♥ ♥
Come visit our store in Lindblum's
Theater District! We're located near
the air cab terminal. Look for the
big clock!
Receiving a Very Good Omen from a color fortune yields the Your Lucky Day achievement/trophy in the latest versions of Final Fantasy IX.
Morrid's coffee

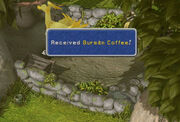
Burman Coffee.
One of the three varieties of coffee beans is located in Dali; after finding the Mayor's Key (see above) it is possible to open a locked room in the windmill where the player can find the Burman Coffee.
Shops
Weapons*Sells both weapons and armor despite the name
Found at Weapon Shop owned by Shopkeeper Eve.
| Item | Price |
|---|---|
| Dagger | 320 |
| Mage Masher | 500 |
| Broadsword | 330 |
| Iron Sword | 660 |
| Rod | 260 |
| Mage Staff | 320 |
| Wrist | 130 |
| Leather Wrist | 200 |
| Bronze Gloves | 480 |
| Leather Hat | 150 |
| Feather Hat | 200 |
| Rubber Helm | 250 |
| Bronze Helm | 330 |
| Leather Shirt | 270 |
| Silk Shirt | 400 |
| Bronze Armor | 650 |
Items
| Item | Location |
|---|---|
| 120 Gil | Village Road |
| Potion | Inn / Rooms |
| Antidote | Inn / Rooms |
| Elixir | Field. Only on disc 2. |
| Aries | Windmill / Windmill 1F |
| Cachusha | Windmill / Windmill 2F. Only on disc 3. |
| Elixir | Windmill / Windmill 2F. Only on disc 3. |
| 30000 Gil | Windmill / Beside the Windmill |
| Burman Coffee | Windmill / Beside the Windmill |
| Mini-Brahne | Mayor's House. From disc 3 on. |
| Mayor's Key | Mayor's House. Only on disc 3 during card competition in Treno. |
| 156 Gil | Dali Underground / Entrance |
| Potion | Dali Underground / Underground (1) |
| Eye Drops | Dali Underground / Underground (1) |
| Ether | Dali Underground / Storage Area / Path |
| Potion | Dali Underground / Storage Area / Path |
| Leather Wrist | Dali Underground / Storage Area / Open Room |
| Iron Helm | Dali Underground / Storage Area / Open Room |
| 95 Gil | Dali Underground / Production Area / First Room |
| Phoenix Down | Dali Underground / Underground (2) |
| Potion | Dali Underground / Underground (2) |
| Phoenix Pinion | Dali Underground / Underground (2) |
Enemies
Dali's Underground
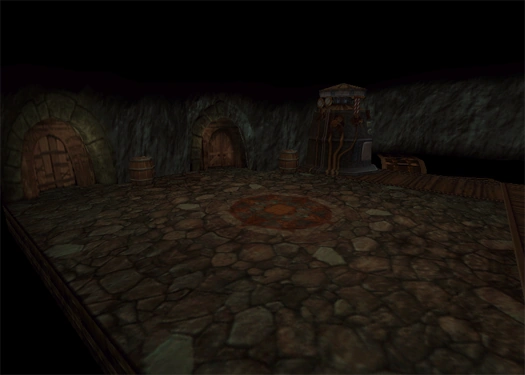
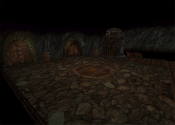
Battle background.
Enemies appear in Dali's Underground if the door to the second Underground area is opened from the first room of the Production Area. The enemies can be fought in that area, all areas thereafter, and also in the open room of the Storage Area. When the player first attempts to open the door to the second Underground area, a pair of Ghost enemies are fought in a fixed encounter.
Cargo Ship Loading Area
Battle background.
The Black Waltz 2 is fought as part of the events at the cargo ship loading area before the party boards the cargo ship. The battle takes place after Steiner rejoins with the rest of the party.
- Black Waltz 2 (boss)
Nolrich Heights
The friendly Mu appears here as part of the friendly monsters sidequest. He appears in the Grass areas and requests an Ore. Once satisfied, he will never appear again.
- Mu (Friendly)
- Python x2
- Python x3
- Carve Spider
- Carve Spider x2
- Carve Spider, Python
Musical themes
The music in Dali is called "Frontier Village Dali" (辺境の村 ダリ, Henkyō no Mura Dari?) A piano arrangement is found on the Piano Collections: Final Fantasy IX album.
"Beyond the Twilight" (黄昏の彼方に, Tasogare no Kanata ni?) plays in Dali's Underground.
Other appearances
Final Fantasy Record Keeper
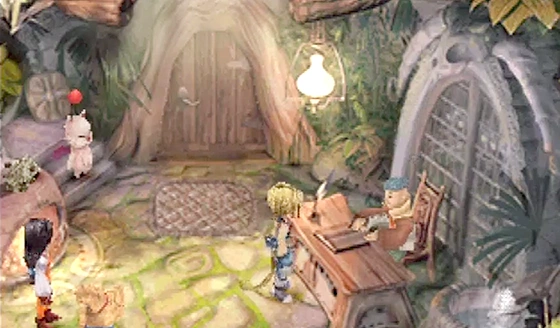
After escaping pursuit and passing along the slippery paths of the Ice Cavern, Garnet takes the name Dagger to conceal her identity. The party arrives in the small village of Dali.
Behind the scenes
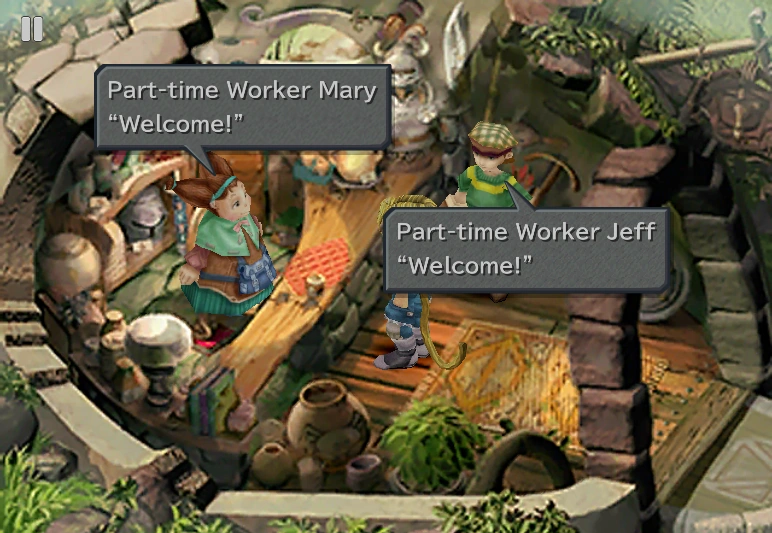

Mary and Jeff in Dali.
The game details a strained romance between Part Time Worker Mary, owner of the Vega Shop in northern station of South Gate, and Jobless Jeff, operator of the Altair Shop in the southern station, which mirrors the real-life Tanabata legend. In endgame the two are found at the item shop in Dali.
If the player visits Dali later in the game (after they have returned from the Outer Continent) the mother and daughter at the shop mention they want to take a trip and ask Zidane to watch over the shop. The player can answer yes or no, either choice yields the same result with different dialogue. In endgame the mother and daughter are absent, having left a note that they are on a trip and don't wish to be found. The shop is now operated by Part time Mary and Jeff, who needed a place to work after leaving South Gate.
Gallery
")
")
")
")
")
")
")
")
")
")
")
")
")