mNo edit summary |
Tag: Visual edit |
||
| (16 intermediate revisions by 7 users not shown) | |||
| Line 9: | Line 9: | ||
|type=Plains |
|type=Plains |
||
|region=[[Archadia]] |
|region=[[Archadia]] |
||
| − | |residents=Wyrm Philosopher |
+ | |residents=[[Wyrm Philosopher]] |
|items= |
|items= |
||
*[[#Treasures|Treasures]] |
*[[#Treasures|Treasures]] |
||
| − | *[[Final Fantasy XII |
+ | *[[Hi-Ether (Final Fantasy XII)|Hi-Ether]] from the [[#Windmills|windmills]] |
|enemies=*[[Bandercoeurl (Final Fantasy XII)|Bandercoeurl]] |
|enemies=*[[Bandercoeurl (Final Fantasy XII)|Bandercoeurl]] |
||
*[[Shield Wyrm]] |
*[[Shield Wyrm]] |
||
| Line 30: | Line 30: | ||
The '''Cerobi Steppe''' is a location in the land of [[Ivalice (Final Fantasy XII)|Ivalice]] in ''[[Final Fantasy XII]]''. It is flat wilderland that needs to be crossed to reach the [[Balfonheim Port]] by land. The Wyrm Philosopher is located here by one of the windmills, and he is a key element in fighting [[Hell Wyrm]]. |
The '''Cerobi Steppe''' is a location in the land of [[Ivalice (Final Fantasy XII)|Ivalice]] in ''[[Final Fantasy XII]]''. It is flat wilderland that needs to be crossed to reach the [[Balfonheim Port]] by land. The Wyrm Philosopher is located here by one of the windmills, and he is a key element in fighting [[Hell Wyrm]]. |
||
| − | Cerobi Steppe is normally accessible after the events in [[Draklor Laboratory]], but it is actually possible to enter Cerobi Steppe before going to [[Archades]], by taking a [[Chocobo (Final Fantasy XII)|chocobo]] from [[Phon Coast]] and riding it over [[Tchita Uplands]] all the way east to the The Shaded Path. The player must talk to the "Game Hunter" standing near the debris, then ascend the debris to enter Cerobi Steppe. However, the Balfonheim Port will be blocked by the Sky Watch |
+ | Cerobi Steppe is normally accessible after the events in [[Draklor Laboratory]], but it is actually possible to enter Cerobi Steppe before going to [[Archades]], by taking a [[Chocobo (Final Fantasy XII)|chocobo]] from [[Phon Coast]] and riding it over [[Tchita Uplands]] all the way east to the The Shaded Path. The player must talk to the "Game Hunter" standing near the debris, then ascend the debris to enter Cerobi Steppe. However, the Balfonheim Port will be blocked by the Sky Watch. |
== [[Sage Knowledge]] == |
== [[Sage Knowledge]] == |
||
| − | {{ |
+ | {{Quote|Hilly highlands area in the east of Archadia, through which the highroad to Balfonheim Port passes. Air currents are notoriously unstable between Cerobi and Balfonheim, making land routes here as popular as those of the air. In the past, villagers in the region erected windmills to catch the winds from the Naldoan Sea, and used them to mill grain from the harvest. With advancements in the use of magicks and machineries, however, the windmills fell into disuse and now stand merely as a reminder of the past.|Sage Knowledge 61, Cerobi Steppe}} |
== Locations == |
== Locations == |
||
| Line 46: | Line 46: | ||
* Feddik River |
* Feddik River |
||
* The Northsward |
* The Northsward |
||
| − | {{ |
+ | {{Location section|Final Fantasy XII}} |
=== [[Weather]] === |
=== [[Weather]] === |
||
| Line 54: | Line 54: | ||
* Rain |
* Rain |
||
| − | The weather changes when zoning between the areas within the Steppe. During rain, [[Fire (element)|Fire]] attacks deal half damage and [[Lightning ( |
+ | The weather changes when zoning between the areas within the Steppe. During rain, [[Fire (Final Fantasy XII element)|Fire]] attacks deal half damage and [[Lightning (Final Fantasy XII)|Lightning]] damage is boosted. |
| − | The [[Undin Entite]] can be found |
+ | The [[Undin Entite]] can be found in North Liavell Hills and The Terraced Bank areas during the rain. |
== Treasures == |
== Treasures == |
||
| − | {{See |
+ | {{See|Treasure (Final Fantasy XII)}} |
[[File:Ribbon-in-Cerobi-Steppe.jpg|thumb|Ribbon found on the Cerobi Steppe.]] |
[[File:Ribbon-in-Cerobi-Steppe.jpg|thumb|Ribbon found on the Cerobi Steppe.]] |
||
| − | Cerobi Steppe is littered in treasures that have a small chance of containing a special rare item when the [[Final Fantasy XII |
+ | Cerobi Steppe is littered in treasures that have a small chance of containing a special rare item when the [[Diamond Armlet (Final Fantasy XII)|Diamond Armlet]] is equipped. The treasures spawn 50% of the time. When a Diamond Armlet is equipped the treasures contain a small amount of [[gil]] 50% of the time, and if the treasure does not contain gil, it will either contain a [[Knot of Rust (Final Fantasy XII)|Knot of Rust]], or a rare item. |
| − | The chance of obtaining the rare item is only 10% when the treasure is set to contain items rather than gil, meaning the actual chance to obtain the rare item is small. It is possible to exploit the so-called [[Treasure (Final Fantasy XII)#Random |
+ | The chance of obtaining the rare item is only 10% when the treasure is set to contain items rather than gil, meaning the actual chance to obtain the rare item is small. It is possible to exploit the so-called [[Treasure (Final Fantasy XII)#Random number generator method|RNG method]], which lets the player obtain the rare item 100% of the time by exploiting the game console's predictable "random number generator". |
It is also possible to farm Hi-Ethers at the Feddik River area. All of the 10 chests in the area spawn 50% of the time, with 50% chance of containing items, one such being a Leather Gorget, and, 50% to give a Hi-Ether if the treasure is items, without equipping the Diamond Armlet. |
It is also possible to farm Hi-Ethers at the Feddik River area. All of the 10 chests in the area spawn 50% of the time, with 50% chance of containing items, one such being a Leather Gorget, and, 50% to give a Hi-Ether if the treasure is items, without equipping the Diamond Armlet. |
||
| Line 117: | Line 117: | ||
|- |
|- |
||
|Knot of Rust |
|Knot of Rust |
||
| − | |[[Final Fantasy XII |
+ | |[[Ninja Gear (Final Fantasy XII)|Ninja Gear]] |
|- |
|- |
||
|class="b" rowspan="2"|5 |
|class="b" rowspan="2"|5 |
||
| Line 161: | Line 161: | ||
|- |
|- |
||
|Knot of Rust |
|Knot of Rust |
||
| − | |[[Final Fantasy XII |
+ | |[[Gaia Gear (Final Fantasy XII)|Gaia Gear]] |
|- |
|- |
||
|class="b" rowspan="2"|9 |
|class="b" rowspan="2"|9 |
||
| Line 205: | Line 205: | ||
|- |
|- |
||
|Knot of Rust |
|Knot of Rust |
||
| − | |[[Final Fantasy XII |
+ | |[[Gold Hairpin (Final Fantasy XII)|Gold Hairpin]] |
|- |
|- |
||
|class="b" rowspan="2"|13 |
|class="b" rowspan="2"|13 |
||
| Line 266: | Line 266: | ||
|≤ 3,000 gil |
|≤ 3,000 gil |
||
|Knot of Rust |
|Knot of Rust |
||
| − | |Megalixir |
+ | |[[Megalixir (Final Fantasy XII)|Megalixir]] |
|- |
|- |
||
|class="b" rowspan="2"|2 |
|class="b" rowspan="2"|2 |
||
| Line 298: | Line 298: | ||
|≤ 3,000 gil |
|≤ 3,000 gil |
||
|Knot of Rust |
|Knot of Rust |
||
| − | |Megalixir |
+ | |[[Megalixir (Final Fantasy XII)|Megalixir]] |
|- |
|- |
||
|class="b" rowspan="2"|4 |
|class="b" rowspan="2"|4 |
||
| Line 311: | Line 311: | ||
|- |
|- |
||
|≤ 300 gil |
|≤ 300 gil |
||
| − | |X-Potion |
+ | |[[X-Potion (Final Fantasy XII)|X-Potion]] |
| − | |Vanishga Mote |
+ | |[[Vanishga Mote]] |
|≤ 3,000 gil |
|≤ 3,000 gil |
||
|Knot of Rust |
|Knot of Rust |
||
| Line 332: | Line 332: | ||
|≤ 3,000 gil |
|≤ 3,000 gil |
||
|Knot of Rust |
|Knot of Rust |
||
| − | |Hastega Mote |
+ | |[[Hastega Mote]] |
|- |
|- |
||
|class="b" rowspan="2"|6 |
|class="b" rowspan="2"|6 |
||
| Line 344: | Line 344: | ||
|- |
|- |
||
|≤ 300 gil |
|≤ 300 gil |
||
| − | |colspan="2"|X-Potion |
+ | |colspan="2"|[[X-Potion (Final Fantasy XII)|X-Potion]] |
|≤ 3,000 gil |
|≤ 3,000 gil |
||
|Knot of Rust |
|Knot of Rust |
||
| Line 377: | Line 377: | ||
|- |
|- |
||
|≤ 300 gil |
|≤ 300 gil |
||
| − | |[[Final Fantasy XII armor#Leather Gorget|Leather Gorget]] |
+ | |[[Final Fantasy XII armor/Original#Leather Gorget|Leather Gorget]] |
|Hastega Mote |
|Hastega Mote |
||
|≤ 3,000 gil |
|≤ 3,000 gil |
||
| Line 398: | Line 398: | ||
|≤ 3,000 gil |
|≤ 3,000 gil |
||
|Knot of Rust |
|Knot of Rust |
||
| − | |[[Final Fantasy XII accessories#Nishijin Belt|Nishijin Belt]] |
+ | |[[Final Fantasy XII accessories/Original#Nishijin Belt|Nishijin Belt]] |
|- |
|- |
||
|class="b" rowspan="2"|10 |
|class="b" rowspan="2"|10 |
||
| Line 438: | Line 438: | ||
|- |
|- |
||
|Knot of Rust |
|Knot of Rust |
||
| − | |[[Final Fantasy XII |
+ | |[[Dragon Helm (Final Fantasy XII)|Dragon Helm]] |
|- |
|- |
||
|class="b" rowspan="2"|17 |
|class="b" rowspan="2"|17 |
||
| Line 449: | Line 449: | ||
|- |
|- |
||
|Knot of Rust |
|Knot of Rust |
||
| − | |Dark Energy |
+ | |[[Dark Energy (item)|Dark Energy]] |
|- |
|- |
||
|class="b" rowspan="2"|18 |
|class="b" rowspan="2"|18 |
||
| Line 460: | Line 460: | ||
|- |
|- |
||
|Knot of Rust |
|Knot of Rust |
||
| − | |[[Final Fantasy XII |
+ | |[[White Mask (Final Fantasy XII)|White Mask]] |
|- |
|- |
||
|class="b" rowspan="2"|18 |
|class="b" rowspan="2"|18 |
||
| Line 471: | Line 471: | ||
|- |
|- |
||
|Knot of Rust |
|Knot of Rust |
||
| − | |[[Final Fantasy XII |
+ | |[[Rubber Suit (Final Fantasy XII)|Rubber Suit]] |
|- |
|- |
||
|class="b" rowspan="2"|20 |
|class="b" rowspan="2"|20 |
||
| Line 493: | Line 493: | ||
|- |
|- |
||
|Knot of Rust |
|Knot of Rust |
||
| − | |[[Final Fantasy XII |
+ | |[[Minerva Bustier (Final Fantasy XII)|Minerva Bustier]] |
|- |
|- |
||
|class="b" rowspan="2"|22 |
|class="b" rowspan="2"|22 |
||
| Line 593: | Line 593: | ||
|≤ 300 gil |
|≤ 300 gil |
||
|X-Potion |
|X-Potion |
||
| − | |[[Final Fantasy XII accessories#Gillie Boots|Gillie Boots]] |
+ | |[[Final Fantasy XII accessories/Original#Gillie Boots|Gillie Boots]] |
|≤ 3,000 gil |
|≤ 3,000 gil |
||
|Knot of Rust |
|Knot of Rust |
||
| − | |[[Final Fantasy XII accessories#Blazer Gloves|Blazer Gloves]] |
+ | |[[Final Fantasy XII accessories/Original#Blazer Gloves|Blazer Gloves]] |
|- |
|- |
||
|class="b" rowspan="2"|12 |
|class="b" rowspan="2"|12 |
||
| Line 658: | Line 658: | ||
|- |
|- |
||
|≤ 300 gil |
|≤ 300 gil |
||
| − | |[[Final Fantasy XII accessories#Golden Amulet|Golden Amulet]] |
+ | |[[Final Fantasy XII accessories/Original#Golden Amulet|Golden Amulet]] |
|Warp Mote |
|Warp Mote |
||
|≤ 3,000 gil |
|≤ 3,000 gil |
||
| Line 674: | Line 674: | ||
|- |
|- |
||
|≤ 300 gil |
|≤ 300 gil |
||
| − | |colspan="2"|[[Final Fantasy XII accessories#Embroidered Tippet|Embroidered Tippet]] |
+ | |colspan="2"|[[Final Fantasy XII accessories/Original#Embroidered Tippet|Embroidered Tippet]] |
|≤ 3,000 gil |
|≤ 3,000 gil |
||
|Knot of Rust |
|Knot of Rust |
||
| − | |[[Final Fantasy XII armor#Celebrant's Miter|Celebrant's Miter]] |
+ | |[[Final Fantasy XII armor/Original#Celebrant's Miter|Celebrant's Miter]] |
|- |
|- |
||
|class="b" rowspan="2"|17 |
|class="b" rowspan="2"|17 |
||
| Line 725: | Line 725: | ||
|≤ 300 gil |
|≤ 300 gil |
||
|Ether |
|Ether |
||
| − | |[[Final Fantasy XII accessories#Quasimodo Boots|Quasimodo Boots]] |
+ | |[[Final Fantasy XII accessories/Original#Quasimodo Boots|Quasimodo Boots]] |
|≤ 3,000 gil |
|≤ 3,000 gil |
||
|Knot of Rust |
|Knot of Rust |
||
| − | |[[Final Fantasy XII accessories#Firefly|Firefly]] |
+ | |[[Final Fantasy XII accessories/Original#Firefly|Firefly]] |
|- |
|- |
||
|class="b" rowspan="2"|20 |
|class="b" rowspan="2"|20 |
||
| Line 768: | Line 768: | ||
|- |
|- |
||
|Knot of Rust |
|Knot of Rust |
||
| − | |Dark Matter |
+ | |[[Dark Matter (Final Fantasy XII)|Dark Matter]] |
|- |
|- |
||
|class="b" rowspan="2"|30 |
|class="b" rowspan="2"|30 |
||
| Line 823: | Line 823: | ||
|- |
|- |
||
|Knot of Rust |
|Knot of Rust |
||
| − | |[[Final Fantasy XII |
+ | |[[Black Robes (Final Fantasy XII)|Black Robes]] |
|- |
|- |
||
|class="b" rowspan="2"|35 |
|class="b" rowspan="2"|35 |
||
| Line 836: | Line 836: | ||
|[[Golden Axe (Final Fantasy XII)|Golden Axe]] |
|[[Golden Axe (Final Fantasy XII)|Golden Axe]] |
||
|- |
|- |
||
| − | |class="b"|36 |
+ | |class="b"|36{{note|Chest does not respawn}} |
|20% |
|20% |
||
|0% |
|0% |
||
|N/A |
|N/A |
||
| − | |colspan="4"|[[Cleanse]] |
+ | |colspan="4"|[[Cleanse (Final Fantasy XII)|Cleanse]] |
|- |
|- |
||
|class="b" rowspan="2"|37 |
|class="b" rowspan="2"|37 |
||
| Line 851: | Line 851: | ||
|- |
|- |
||
|Knot of Rust |
|Knot of Rust |
||
| − | |[[Final Fantasy XII |
+ | |[[Black Mask (Final Fantasy XII)|Black Mask]] |
|- |
|- |
||
|class="b" rowspan="2"|38 |
|class="b" rowspan="2"|38 |
||
| Line 908: | Line 908: | ||
|[[Iga Blade (Final Fantasy XII)|Iga Blade]] |
|[[Iga Blade (Final Fantasy XII)|Iga Blade]] |
||
|} |
|} |
||
| + | {{Notelist}} |
||
| − | * '''''{{A|1}}''''' - Chest does not respawn. |
||
| + | |||
;Original |
;Original |
||
{|class="full-width FFXII article-table" style="text-align:center" |
{|class="full-width FFXII article-table" style="text-align:center" |
||
| Line 1,032: | Line 1,033: | ||
|≤ 300 gil |
|≤ 300 gil |
||
|Ether |
|Ether |
||
| − | |[[Final Fantasy XII armor#Mirror Mail|Mirror Mail]] |
+ | |[[Final Fantasy XII armor/Original#Mirror Mail|Mirror Mail]] |
|≤ 3,000 gil |
|≤ 3,000 gil |
||
|Knot of Rust |
|Knot of Rust |
||
| Line 1,175: | Line 1,176: | ||
|- |
|- |
||
|Knot of Rust |
|Knot of Rust |
||
| − | |[[Final Fantasy XII |
+ | |[[Maximillian (Final Fantasy XII)|Maximillian]] |
|- |
|- |
||
|class="b" rowspan="2"|50 |
|class="b" rowspan="2"|50 |
||
| Line 1,208: | Line 1,209: | ||
|- |
|- |
||
|Knot of Rust |
|Knot of Rust |
||
| − | |[[Final Fantasy XII |
+ | |[[Grand Helm (Final Fantasy XII)|Grand Helm]] |
|- |
|- |
||
|class="b" rowspan="2"|53 |
|class="b" rowspan="2"|53 |
||
| Line 1,219: | Line 1,220: | ||
|- |
|- |
||
|Knot of Rust |
|Knot of Rust |
||
| − | |[[Final Fantasy XII |
+ | |[[Brave Suit (Final Fantasy XII)|Brave Suit]] |
|- |
|- |
||
|class="b" rowspan="2"|54 |
|class="b" rowspan="2"|54 |
||
| Line 1,252: | Line 1,253: | ||
|- |
|- |
||
|Knot of Rust |
|Knot of Rust |
||
| − | |[[Final Fantasy XII |
+ | |[[Mirage Vest (Final Fantasy XII)|Mirage Vest]] |
|- |
|- |
||
|class="b" rowspan="2"|57 |
|class="b" rowspan="2"|57 |
||
| Line 1,263: | Line 1,264: | ||
|- |
|- |
||
|Knot of Rust |
|Knot of Rust |
||
| − | |Meteorite (D) |
+ | |[[Meteorite (D)]] |
|} |
|} |
||
;Original |
;Original |
||
| Line 1,340: | Line 1,341: | ||
|≤ 3,000 gil |
|≤ 3,000 gil |
||
|Knot of Rust |
|Knot of Rust |
||
| − | |[[Final Fantasy XII accessories#Nishijin Belt|Nishijin Belt]] |
+ | |[[Final Fantasy XII accessories/Original#Nishijin Belt|Nishijin Belt]] |
|- |
|- |
||
|class="b" rowspan="2"|35 |
|class="b" rowspan="2"|35 |
||
| Line 1,357: | Line 1,358: | ||
|≤ 3,000 gil |
|≤ 3,000 gil |
||
|Knot of Rust |
|Knot of Rust |
||
| − | |[[Final Fantasy XII accessories#Quasimodo Boots|Quasimodo Boots]] |
+ | |[[Final Fantasy XII accessories/Original#Quasimodo Boots|Quasimodo Boots]] |
|- |
|- |
||
|class="b" rowspan="2"|36 |
|class="b" rowspan="2"|36 |
||
| Line 1,371: | Line 1,372: | ||
|≤ 300 gil |
|≤ 300 gil |
||
|Hi-Ether |
|Hi-Ether |
||
| − | |[[Final Fantasy XII armor#Leather Gorget|Leather Gorget]] |
+ | |[[Final Fantasy XII armor/Original#Leather Gorget|Leather Gorget]] |
|≤ 3,000 gil |
|≤ 3,000 gil |
||
|Knot of Rust |
|Knot of Rust |
||
| Line 1,465: | Line 1,466: | ||
|- |
|- |
||
|Knot of Rust |
|Knot of Rust |
||
| − | |[[Final Fantasy XII |
+ | |[[Golden Skullcap (Final Fantasy XII)|Golden Skullcap]] |
|- |
|- |
||
|class="b" rowspan="2"|59 |
|class="b" rowspan="2"|59 |
||
| Line 1,476: | Line 1,477: | ||
|- |
|- |
||
|Knot of Rust |
|Knot of Rust |
||
| − | |[[Final Fantasy XII |
+ | |[[Glimmering Robes (Final Fantasy XII)|Glimmering Robes]] |
|- |
|- |
||
|class="b" rowspan="2"|60 |
|class="b" rowspan="2"|60 |
||
| Line 1,487: | Line 1,488: | ||
|- |
|- |
||
|Knot of Rust |
|Knot of Rust |
||
| − | |[[Final Fantasy XII |
+ | |[[Magepower Shishak (Final Fantasy XII)|Magepower Shishak]] |
|- |
|- |
||
|class="b" rowspan="2"|61 |
|class="b" rowspan="2"|61 |
||
| Line 1,509: | Line 1,510: | ||
|- |
|- |
||
|Knot of Rust |
|Knot of Rust |
||
| − | |[[Final Fantasy XII |
+ | |[[Shell Shield (Final Fantasy XII)|Shell Shield]] |
|- |
|- |
||
|class="b" rowspan="2"|63 |
|class="b" rowspan="2"|63 |
||
| Line 1,531: | Line 1,532: | ||
|- |
|- |
||
|Knot of Rust |
|Knot of Rust |
||
| − | |[[Final Fantasy XII |
+ | |[[Venetian Shield (Final Fantasy XII)|Venetian Shield]] |
|- |
|- |
||
|class="b" rowspan="2"|65 |
|class="b" rowspan="2"|65 |
||
| Line 1,542: | Line 1,543: | ||
|- |
|- |
||
|Knot of Rust |
|Knot of Rust |
||
| − | |Baltoro's Seed |
+ | |[[Baltoro's Seed]] |
|- |
|- |
||
|class="b" rowspan="2"|66 |
|class="b" rowspan="2"|66 |
||
| Line 1,553: | Line 1,554: | ||
|- |
|- |
||
|Knot of Rust |
|Knot of Rust |
||
| − | |[[Final Fantasy XII |
+ | |[[Grand Armor (Final Fantasy XII)|Grand Armor]] |
|- |
|- |
||
|class="b" rowspan="2"|67 |
|class="b" rowspan="2"|67 |
||
| Line 1,575: | Line 1,576: | ||
|- |
|- |
||
|Knot of Rust |
|Knot of Rust |
||
| − | |[[Final Fantasy XII |
+ | |[[Lordly Robes (Final Fantasy XII)|Lordly Robes]] |
|- |
|- |
||
|class="b" rowspan="2"|69 |
|class="b" rowspan="2"|69 |
||
| Line 1,668: | Line 1,669: | ||
|≤ 3,000 gil |
|≤ 3,000 gil |
||
|Knot of Rust |
|Knot of Rust |
||
| − | |[[Final Fantasy XII armor#Black Robes|Black Robes]] |
+ | |[[Final Fantasy XII armor/Original#Black Robes|Black Robes]] |
|- |
|- |
||
|class="b" rowspan="2"|44 |
|class="b" rowspan="2"|44 |
||
| Line 1,698: | Line 1,699: | ||
|≤ 3,000 gil |
|≤ 3,000 gil |
||
|Knot of Rust |
|Knot of Rust |
||
| − | |[[Final Fantasy XII armor#Dragon Mail|Dragon Mail]] |
+ | |[[Final Fantasy XII armor/Original#Dragon Mail|Dragon Mail]] |
|- |
|- |
||
|class="b" rowspan="2"|46 |
|class="b" rowspan="2"|46 |
||
| Line 1,749: | Line 1,750: | ||
|≤ 3,000 gil |
|≤ 3,000 gil |
||
|Knot of Rust |
|Knot of Rust |
||
| − | |[[Final Fantasy XII accessories#Agate Ring|Agate Ring]] |
+ | |[[Final Fantasy XII accessories/Original#Agate Ring|Agate Ring]] |
|- |
|- |
||
|class="b" rowspan="2"|49 |
|class="b" rowspan="2"|49 |
||
| Line 1,806: | Line 1,807: | ||
|- |
|- |
||
|Knot of Rust |
|Knot of Rust |
||
| − | |[[Final Fantasy XII |
+ | |[[Circlet (Final Fantasy XII)|Circlet]] |
|- |
|- |
||
|class="b" rowspan="2"|73 |
|class="b" rowspan="2"|73 |
||
| Line 1,839: | Line 1,840: | ||
|- |
|- |
||
|Knot of Rust |
|Knot of Rust |
||
| − | |[[ |
+ | |[[Renewing Morion]] |
|- |
|- |
||
|class="b" rowspan="2"|76 |
|class="b" rowspan="2"|76 |
||
| Line 1,850: | Line 1,851: | ||
|- |
|- |
||
|Knot of Rust |
|Knot of Rust |
||
| − | |[[Final Fantasy XII |
+ | |[[Dueling Mask (Final Fantasy XII)|Dueling Mask]] |
|- |
|- |
||
|class="b" rowspan="2"|77 |
|class="b" rowspan="2"|77 |
||
| Line 1,905: | Line 1,906: | ||
|- |
|- |
||
|Knot of Rust |
|Knot of Rust |
||
| − | |[[ |
+ | |[[Chaperon]] |
|- |
|- |
||
|class="b" rowspan="2"|82 |
|class="b" rowspan="2"|82 |
||
| Line 1,916: | Line 1,917: | ||
|- |
|- |
||
|Knot of Rust |
|Knot of Rust |
||
| − | |[[Final Fantasy XII |
+ | |[[Aegis Shield (Final Fantasy XII)|Aegis Shield]] |
|- |
|- |
||
|class="b" rowspan="2"|83 |
|class="b" rowspan="2"|83 |
||
| Line 1,927: | Line 1,928: | ||
|- |
|- |
||
|Knot of Rust |
|Knot of Rust |
||
| − | |[[Final Fantasy XII |
+ | |[[Demon Shield (Final Fantasy XII)|Demon Shield]] |
|- |
|- |
||
|class="b" rowspan="2"|84 |
|class="b" rowspan="2"|84 |
||
| Line 1,973: | Line 1,974: | ||
|≤ 3,000 gil |
|≤ 3,000 gil |
||
|Knot of Rust |
|Knot of Rust |
||
| − | |[[Final Fantasy XII accessories#Winged Boots|Winged Boots]] |
+ | |[[Final Fantasy XII accessories/Original#Winged Boots|Winged Boots]] |
|- |
|- |
||
|class="b" rowspan="2"|52 |
|class="b" rowspan="2"|52 |
||
| Line 1,990: | Line 1,991: | ||
|≤ 3,000 gil |
|≤ 3,000 gil |
||
|Knot of Rust |
|Knot of Rust |
||
| − | |[[Final Fantasy XII accessories#Ribbon|Ribbon]] |
+ | |[[Final Fantasy XII accessories/Original#Ribbon|Ribbon]] |
|- |
|- |
||
|class="b" rowspan="2"|53 |
|class="b" rowspan="2"|53 |
||
| Line 2,107: | Line 2,108: | ||
|≤ 3,000 gil |
|≤ 3,000 gil |
||
|Knot of Rust |
|Knot of Rust |
||
| − | |[[Final Fantasy XII armor#Venetian Shield|Venetian Shield]] |
+ | |[[Final Fantasy XII armor/Original#Venetian Shield|Venetian Shield]] |
|- |
|- |
||
|class="b" rowspan="2"|60 |
|class="b" rowspan="2"|60 |
||
| Line 2,147: | Line 2,148: | ||
|- |
|- |
||
|Knot of Rust |
|Knot of Rust |
||
| − | |[[Final Fantasy XII |
+ | |[[White Robes (Final Fantasy XII)|White Robes]] |
|- |
|- |
||
|class="b" rowspan="2"|87 |
|class="b" rowspan="2"|87 |
||
| Line 2,158: | Line 2,159: | ||
|- |
|- |
||
|Knot of Rust |
|Knot of Rust |
||
| − | |[[ |
+ | |[[Crown of Laurels (Final Fantasy XII)|Crown of Laurels]] |
|- |
|- |
||
|class="b" rowspan="2"|88 |
|class="b" rowspan="2"|88 |
||
| Line 2,191: | Line 2,192: | ||
|- |
|- |
||
|Knot of Rust |
|Knot of Rust |
||
| − | |[[Final Fantasy XII |
+ | |[[Dragon Mail (Final Fantasy XII)|Dragon Mail]] |
|- |
|- |
||
|class="b" rowspan="2"|91 |
|class="b" rowspan="2"|91 |
||
| Line 2,257: | Line 2,258: | ||
|- |
|- |
||
|Knot of Rust |
|Knot of Rust |
||
| − | |[[ |
+ | |[[Thief's Cap (Final Fantasy XII)|Thief's Cap]] |
|- |
|- |
||
|class="b" rowspan="2"|97 |
|class="b" rowspan="2"|97 |
||
| Line 2,303: | Line 2,304: | ||
|[[Blood Sword (Final Fantasy XII)|Blood Sword]] |
|[[Blood Sword (Final Fantasy XII)|Blood Sword]] |
||
|- |
|- |
||
| − | |class="b"|101 |
+ | |class="b"|101{{note|Does not respawn}} |
|100% |
|100% |
||
|0% |
|0% |
||
| Line 2,309: | Line 2,310: | ||
|colspan="3"|[[Telekinesis (Final Fantasy XII)|Telekinesis]] |
|colspan="3"|[[Telekinesis (Final Fantasy XII)|Telekinesis]] |
||
|} |
|} |
||
| + | {{Notelist}} |
||
| − | * '''''{{A|1}}''''' - Chest does not respawn. |
||
;Original |
;Original |
||
{|class="full-width FFXII article-table" style="text-align:center" |
{|class="full-width FFXII article-table" style="text-align:center" |
||
| Line 2,351: | Line 2,352: | ||
|≤ 3,000 gil |
|≤ 3,000 gil |
||
|Knot of Rust |
|Knot of Rust |
||
| − | |[[Final Fantasy XII armor#Magepower Shishak|Magepower Shishak]] |
+ | |[[Final Fantasy XII armor/Original#Magepower Shishak|Magepower Shishak]] |
|- |
|- |
||
|class="b" rowspan="2"|63 |
|class="b" rowspan="2"|63 |
||
| Line 2,402: | Line 2,403: | ||
|≤ 3,000 gil |
|≤ 3,000 gil |
||
|Knot of Rust |
|Knot of Rust |
||
| − | |[[Final Fantasy XII armor#Golden Skullcap|Golden Skullcap]] |
+ | |[[Final Fantasy XII armor/Original#Golden Skullcap|Golden Skullcap]] |
|- |
|- |
||
|class="b" rowspan="2"|66 |
|class="b" rowspan="2"|66 |
||
| Line 2,416: | Line 2,417: | ||
|≤ 300 gil |
|≤ 300 gil |
||
|X-Potion |
|X-Potion |
||
| − | |[[Final Fantasy XII accessories#Armguard|Armguard]] |
+ | |[[Final Fantasy XII accessories/Original#Armguard|Armguard]] |
|≤ 3,000 gil |
|≤ 3,000 gil |
||
|Knot of Rust |
|Knot of Rust |
||
| Line 2,451: | Line 2,452: | ||
|≤ 3,000 gil |
|≤ 3,000 gil |
||
|Knot of Rust |
|Knot of Rust |
||
| − | |[[Final Fantasy XII armor#Mirage Vest|Mirage Vest]] |
+ | |[[Final Fantasy XII armor/Original#Mirage Vest|Mirage Vest]] |
|- |
|- |
||
|class="b" rowspan="2"|69 |
|class="b" rowspan="2"|69 |
||
| Line 2,493: | Line 2,494: | ||
=== Hunts === |
=== Hunts === |
||
| − | {{See |
+ | {{See|Hunt (Final Fantasy XII)}} |
The [[Vyraal (Final Fantasy XII)|Vyraal]] is a Rank V Mark whose hunt can be undertaken after the events in [[Draklor Laboratory]] are complete. The Vyraal can be found in The Northsward area and enemies will be cleared out when the player enters it. The hunt is petitioned by the [[Viera Wayfarer]] in the Whitecap pub in Balfonheim. The player will also receive the Viera Rucksack after the battle, which the Viera Wayfarer will take back when the hunt is reported. She lets the player keep the Dragon Scale, item part of the Wyrm Philosopher quest (see below). |
The [[Vyraal (Final Fantasy XII)|Vyraal]] is a Rank V Mark whose hunt can be undertaken after the events in [[Draklor Laboratory]] are complete. The Vyraal can be found in The Northsward area and enemies will be cleared out when the player enters it. The hunt is petitioned by the [[Viera Wayfarer]] in the Whitecap pub in Balfonheim. The player will also receive the Viera Rucksack after the battle, which the Viera Wayfarer will take back when the hunt is reported. She lets the player keep the Dragon Scale, item part of the Wyrm Philosopher quest (see below). |
||
=== Rare Game === |
=== Rare Game === |
||
| − | {{See |
+ | {{See|Rare Game}} |
| − | The player must have spoken to the "Huntmaster" in [[Phon Coast]] and defeated [[Thalassinon (Final Fantasy XII)|Thalassinon]] and spoken to one of the three bangaa outfitters, which will trigger the start of the Rare Game quest. [[Aspidochelon (Final Fantasy XII)|Aspidochelon]] then has a 40% chance of [[Spawning enemies|spawning]] among the [[Adamantitan (Final Fantasy XII)|Adamantitans]] in the Feddik River (three-way split area) area of the Cerobi Steppe. |
+ | The player must have spoken to the "Huntmaster" in [[Phon Coast]] and defeated [[Thalassinon (Final Fantasy XII)|Thalassinon]] and spoken to one of the three [[bangaa]] outfitters, which will trigger the start of the Rare Game quest. [[Aspidochelon (Final Fantasy XII)|Aspidochelon]] then has a 40% chance of [[Spawning enemies|spawning]] among the [[Adamantitan (Final Fantasy XII)|Adamantitans]] in the Feddik River (three-way split area) area of the Cerobi Steppe. |
| − | The best idea is to [[steal |
+ | The best idea is to [[steal (Final Fantasy XII)|steal]] [[Scarletite (Final Fantasy XII)|Scarletite]] from it, then leave the area without killing it, as once killed, Aspidochelon will never respawn. That way the player can get more than one Scarletite from the rare game. Scarletite is an essential Loot item in the making of the [[Tournesol (Final Fantasy XII)|Tournesol]]. |
Once the player has hunted and vanquished all the foes in the Northsward area, [[Etherian]] will drop from the sky to the spot where the last foe is killed. It spawns no matter what the present weather conditions are. |
Once the player has hunted and vanquished all the foes in the Northsward area, [[Etherian]] will drop from the sky to the spot where the last foe is killed. It spawns no matter what the present weather conditions are. |
||
| − | To find the [[Bluesang]] the player must have spoken to the "Huntmaster" in Phon Coast and defeated |
+ | To find the [[Bluesang]] the player must have spoken to the "Huntmaster" in Phon Coast and defeated Thalassinon; Bluesang then has a 40% chance of appearing in the Crossfield area between the windmills. If the player is trying to get the Tournesol, the Bluesang is one of the earlier and easier sources of one required [[Bazaar (Final Fantasy XII)|Bazaar]] ingredient, [[Gemsteel (Final Fantasy XII)|Gemsteel]]. The player can acquire the [[Damascus Steel (Final Fantasy XII)|Damascus Steel]] by stealing the item once, exiting two areas and repeating the process, until six Damascus Steel are obtained. Being a Trophy Rare Game, the Bluesang does not reappear after being killed. |
=== Windmills === |
=== Windmills === |
||
[[File:Windmill-Cerobi-Steppe-FFXII-TZA.jpg|thumb|The player stops a windmill.]] |
[[File:Windmill-Cerobi-Steppe-FFXII-TZA.jpg|thumb|The player stops a windmill.]] |
||
| − | There are ten windmills scattered around the area. After having fixed the gate leading to [[Phon Coast]], the [[Moogle (race)|moogles]] of the Craftsmen's Guild can be found in the windmills. During the [[Fishing (Final Fantasy XII)|fishing]] minigame/sidequest, the player gets a hint to stop certain windmills to get a [[Final Fantasy XII |
+ | There are ten windmills scattered around the area. After having fixed the gate leading to [[Phon Coast]], the [[Moogle (race)|moogles]] of the Craftsmen's Guild can be found in the windmills. During the [[Fishing (Final Fantasy XII)|fishing]] minigame/sidequest, the player gets a hint to stop certain windmills to get a [[Hi-Ether (Final Fantasy XII)|Hi-Ether]] and a hint for the Matamune Fishing rod quest. The windmills that must turned on are: No.1, No.2, No.5, No.7 and No.9. |
| − | {{ |
+ | {{clear}} |
=== Wyrm Philosopher === |
=== Wyrm Philosopher === |
||
[[File:Wyrm philosopher2.jpg|thumb|Wyrm Philosopher is found in Windmill #10.]] |
[[File:Wyrm philosopher2.jpg|thumb|Wyrm Philosopher is found in Windmill #10.]] |
||
| − | The Wyrm Philosopher can be found in Windmill #10 in the Northsward zone of the Steppe after slaying the [[Hunt (Final Fantasy XII)#Marks|Mark]] [[Vyraal (Final Fantasy XII)|Vyraal]], and getting the Dragon Scale reward from the [[viera]]. After giving the Dragon Scale to Wyrm Philosopher he will reward the party with the Age Worn Key, a key that opens the Hall of Wroth God in [[Sochen Cave Palace]], leading to Hell Wyrm. |
+ | The [[Wyrm Philosopher]] can be found in Windmill #10 in the Northsward zone of the Steppe after slaying the [[Hunt (Final Fantasy XII)#Marks|Mark]] [[Vyraal (Final Fantasy XII)|Vyraal]], and getting the Dragon Scale reward from the [[viera]]. After giving the Dragon Scale to Wyrm Philosopher he will reward the party with the Age Worn Key, a key that opens the Hall of Wroth God in [[Sochen Cave Palace]], leading to Hell Wyrm. |
| − | {{ |
+ | {{clear}} |
== Enemies == |
== Enemies == |
||
| Line 2,533: | Line 2,534: | ||
== Musical themes == |
== Musical themes == |
||
{{audio|filename=FFXII The Cerobi Steppe.ogg|title="The Cerobi Steppe"}} |
{{audio|filename=FFXII The Cerobi Steppe.ogg|title="The Cerobi Steppe"}} |
||
| − | The theme that plays on Cerobi Steppe is simply called "The Cerobi Steppe" |
+ | The theme that plays on Cerobi Steppe is simply called "The Cerobi Steppe". This theme returns in ''[[Final Fantasy XII: Revenant Wings]]'' as the theme for exploring [[Lemurés]]' overworld. |
In the ''Zodiac Job System'' version, the [[Nam-Yensa Sandsea]] also uses the "Cerobi Steppe" theme. |
In the ''Zodiac Job System'' version, the [[Nam-Yensa Sandsea]] also uses the "Cerobi Steppe" theme. |
||
| + | |||
| − | {{-}} |
||
| + | A live recording of the track is part of the "Ivalice Landscapes" medley on the ''[[A New World: intimate music from Final Fantasy - Volume II]]'' album{{clear}} |
||
== Map == |
== Map == |
||
| Line 2,543: | Line 2,545: | ||
<div style="overflow:auto; width: 100%; height:300px"> |
<div style="overflow:auto; width: 100%; height:300px"> |
||
[[File:FF12 Map - Cerobi Steppe.png]]</div> |
[[File:FF12 Map - Cerobi Steppe.png]]</div> |
||
| + | [[:File:Map_04_Cerobi_Steppe.png|Map for the original ''Final Fantasy XII'' that includes all treasure information.]] |
||
| + | |||
| + | ==Behind the scenes== |
||
| ⚫ | |||
| ⚫ | If the player finds the [[Seitengrat (Final Fantasy XII)|Seitengrat]], an ultimate secret bow added to the ''Zodiac'' versions, an arrow (currently equipped arrow type) will appear in the Cerobi Steppe suspended a few feet in the air while the bow is equipped. It is found near the entrance to Old Elanise Road from the Tchita Uplands. |
||
| + | |||
| ⚫ | |||
== Gallery == |
== Gallery == |
||
| Line 2,551: | Line 2,560: | ||
</gallery> |
</gallery> |
||
| − | == |
+ | ==External links== |
| + | *[https://www.neoseeker.com/final-fantasy-xii/faqs/156507-perfect-ashe10.html Final Fantasy XII Perfect Game FAQ by Ashe10] with Cerobi Steppe treasure information for the original version of ''Final Fantasy XII'' |
||
| ⚫ | |||
| ⚫ | |||
| ⚫ | |||
{{navbox setting FFXII}} |
{{navbox setting FFXII}} |
||
| Line 2,561: | Line 2,568: | ||
[[de:Cerobi-Steppe]] |
[[de:Cerobi-Steppe]] |
||
[[Category:Plains]] |
[[Category:Plains]] |
||
| − | [[Category:Final Fantasy XII |
+ | [[Category:Locations in Final Fantasy XII]] |
Revision as of 21:44, 13 September 2020
Template:Sideicon

Oh, shut up and help me remodel the Cerobi Steppe page!
- Adding a Locations section, with images and brief descriptions of the areas within the location.
This request can be discussed on the associated discussion page. Remove this notice upon completion.
The Cerobi Steppe is a location in the land of Ivalice in Final Fantasy XII. It is flat wilderland that needs to be crossed to reach the Balfonheim Port by land. The Wyrm Philosopher is located here by one of the windmills, and he is a key element in fighting Hell Wyrm.
Cerobi Steppe is normally accessible after the events in Draklor Laboratory, but it is actually possible to enter Cerobi Steppe before going to Archades, by taking a chocobo from Phon Coast and riding it over Tchita Uplands all the way east to the The Shaded Path. The player must talk to the "Game Hunter" standing near the debris, then ascend the debris to enter Cerobi Steppe. However, the Balfonheim Port will be blocked by the Sky Watch.
Sage Knowledge
Hilly highlands area in the east of Archadia, through which the highroad to Balfonheim Port passes. Air currents are notoriously unstable between Cerobi and Balfonheim, making land routes here as popular as those of the air. In the past, villagers in the region erected windmills to catch the winds from the Naldoan Sea, and used them to mill grain from the harvest. With advancements in the use of magicks and machineries, however, the windmills fell into disuse and now stand merely as a reminder of the past.
Sage Knowledge 61, Cerobi Steppe
Locations
The Cerobi Steppe is located between the Tchita Uplands and Balfonheim Port.
- South Liavell Hills (to Balfonheim Port)
- North Liavell Hills
- The Terraced Bank
- Journey's Rest
- Crossfield
- Old Elanise Road (to the Tchita Uplands)
- Feddik River
- The Northsward
Weather
Cerobi Steppe has three weather conditions:
- Sunny
- Cloudy
- Rain
The weather changes when zoning between the areas within the Steppe. During rain, Fire attacks deal half damage and Lightning damage is boosted.
The Undin Entite can be found in North Liavell Hills and The Terraced Bank areas during the rain.
Treasures

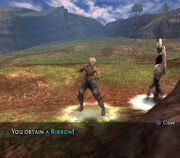
Ribbon found on the Cerobi Steppe.
Cerobi Steppe is littered in treasures that have a small chance of containing a special rare item when the Diamond Armlet is equipped. The treasures spawn 50% of the time. When a Diamond Armlet is equipped the treasures contain a small amount of gil 50% of the time, and if the treasure does not contain gil, it will either contain a Knot of Rust, or a rare item.
The chance of obtaining the rare item is only 10% when the treasure is set to contain items rather than gil, meaning the actual chance to obtain the rare item is small. It is possible to exploit the so-called RNG method, which lets the player obtain the rare item 100% of the time by exploiting the game console's predictable "random number generator".
It is also possible to farm Hi-Ethers at the Feddik River area. All of the 10 chests in the area spawn 50% of the time, with 50% chance of containing items, one such being a Leather Gorget, and, 50% to give a Hi-Ether if the treasure is items, without equipping the Diamond Armlet.
In the Zodiac versions, there is a chest in Cerobi Steppe that contains the spell Cleanse.
South Liavell Hills
- Zodiac
| Chest | Spawns | Holds Gil% | Gil | Normal Treasure | Diamond Armlet Treasure | |
|---|---|---|---|---|---|---|
| 1[1][2] | 100% | 0% | N/A | Claymore | ||
| 2 | 20% | 20% | ≤ 1,000 gil | Knot of Rust | Common | Rare |
| Knot of Rust | Arc Scale | |||||
| 3 | 20% | 20% | ≤ 1,000 gil | Knot of Rust | Common | Rare |
| Knot of Rust | Cross Scale | |||||
| 4 | 20% | 20% | ≤ 1,000 gil | Knot of Rust | Common | Rare |
| Knot of Rust | Ninja Gear | |||||
| 5 | 20% | 20% | ≤ 1,000 gil | Knot of Rust | Common | Rare |
| Knot of Rust | Perseus Bow | |||||
| 6 | 20% | 20% | ≤ 1,000 gil | Knot of Rust | Common | Rare |
| Knot of Rust | Ashura | |||||
| 7 | 20% | 20% | ≤ 1,000 gil | Knot of Rust | Common | Rare |
| Knot of Rust | Sweep | |||||
| 8 | 20% | 20% | ≤ 1,000 gil | Knot of Rust | Common | Rare |
| Knot of Rust | Gaia Gear | |||||
| 9 | 20% | 20% | ≤ 1,000 gil | Knot of Rust | Common | Rare |
| Knot of Rust | Multiscale | |||||
| 10 | 20% | 20% | ≤ 1,000 gil | Knot of Rust | Common | Rare |
| Knot of Rust | Hornito | |||||
| 11 | 20% | 20% | ≤ 1,000 gil | Knot of Rust | Common | Rare |
| Knot of Rust | Fumarole | |||||
| 12 | 20% | 20% | ≤ 1,000 gil | Knot of Rust | Common | Rare |
| Knot of Rust | Gold Hairpin | |||||
| 13 | 20% | 20% | ≤ 1,000 gil | Knot of Rust | Common | Rare |
| Knot of Rust | Sakura-saezuri | |||||
| 14 | 20% | 50% | ≤ 1,000 gil | Knot of Rust | Common | Rare |
| Knot of Rust | Dark Shot | |||||
| 15 | 20% | 50% | ≤ 1,000 gil | Knot of Rust | Common | Rare |
| Knot of Rust | Sapping Bolts | |||||
- 1 - Chest does not respawn.
- 2 - Opening this chest causes Chest #6 in the Draklor Laboratory to disappear forever. Inversely, if Draklor Laboratory chest #6 has been opened, this chest will disappear forever as well. However, both chests contain the same treasure.
- Original
| Chest | Spawns | Holds Gil% | Normal Treasure | Diamond Armlet Treasure | ||||
|---|---|---|---|---|---|---|---|---|
| 1 | 50% | 50% | Gil | Item 1 | Item 2 | Gil | Common | Rare |
| ≤ 300 gil | X-Potion | Potion | ≤ 3,000 gil | Knot of Rust | Megalixir | |||
| 2 | 50% | 60% | Gil | Item | Gil | Common | Rare | |
| ≤ 300 gil | Lightning Arrows | ≤ 3,000 gil | Knot of Rust | Megalixir | ||||
| 3 | 50% | 50% | Gil | Item 1 | Item 2 | Gil | Common | Rare |
| ≤ 300 gil | Ether | Warp Mote | ≤ 3,000 gil | Knot of Rust | Megalixir | |||
| 4 | 50% | 50% | Gil | Item 1 | Item 2 | Gil | Common | Rare |
| ≤ 300 gil | X-Potion | Vanishga Mote | ≤ 3,000 gil | Knot of Rust | Stone Shot | |||
| 5 | 50% | 65% | Gil | Item 1 | Item 2 | Gil | Common | Rare |
| ≤ 300 gil | Wyrmfire Shot | Hi-Ether | ≤ 3,000 gil | Knot of Rust | Hastega Mote | |||
| 6 | 50% | 50% | Gil | Item | Gil | Common | Rare | |
| ≤ 300 gil | X-Potion | ≤ 3,000 gil | Knot of Rust | Sapping Bolts | ||||
| 7 | 50% | 50% | Gil | Item 1 | Item 2 | Gil | Common | Rare |
| ≤ 300 gil | Ether | Aero Mote | ≤ 3,000 gil | Knot of Rust | Megalixir | |||
| 8 | 50% | 60% | Gil | Item 1 | Item 2 | Gil | Common | Rare |
| ≤ 300 gil | Leather Gorget | Hastega Mote | ≤ 3,000 gil | Knot of Rust | Penetrator Crossbow | |||
| 9 | 50% | 65% | Gil | Item 1 | Item 2 | Gil | Common | Rare |
| ≤ 300 gil | Mud Shot | Hi-Ether | ≤ 3,000 gil | Knot of Rust | Nishijin Belt | |||
| 10 | 50% | 60% | Gil | Item 1 | Item 2 | Gil | Common | Rare |
| ≤ 300 gil | Lead Bolts | Reflectga Mote | ≤ 3,000 gil | Knot of Rust | Hastega Mote | |||
North Liavell Hills
- Zodiac
| Chest | Spawns | Holds Gil% | Gil | Normal Treasure | Diamond Armlet Treasure | |
|---|---|---|---|---|---|---|
| 16 | 20% | 50% | ≤ 1,000 gil | Knot of Rust | Common | Rare |
| Knot of Rust | Dragon Helm | |||||
| 17 | 20% | 80% | ≤ 1,000 gil | Knot of Rust | Common | Rare |
| Knot of Rust | Dark Energy | |||||
| 18 | 20% | 80% | ≤ 1,000 gil | Knot of Rust | Common | Rare |
| Knot of Rust | White Mask | |||||
| 18 | 20% | 50% | ≤ 1,000 gil | Knot of Rust | Common | Rare |
| Knot of Rust | Rubber Suit | |||||
| 20 | 20% | 20% | ≤ 1,000 gil | Knot of Rust | Common | Rare |
| Knot of Rust | Cloud Staff | |||||
| 21 | 20% | 50% | ≤ 1,000 gil | Knot of Rust | Common | Rare |
| Knot of Rust | Minerva Bustier | |||||
| 22 | 20% | 50% | ≤ 1,000 gil | Knot of Rust | Common | Rare |
| Knot of Rust | Caldera | |||||
| 23 | 20% | 50% | ≤ 1,000 gil | Knot of Rust | Common | Rare |
| Knot of Rust | Caliper | |||||
| 24 | 10% | 80% | ≤ 1,000 gil | Knot of Rust | Common | Rare |
| Knot of Rust | Arcturus | |||||
| 25 | 10% | 80% | ≤ 1,000 gil | Knot of Rust | Common | Rare |
| Knot of Rust | Eight-fluted Pole | |||||
| 26 | 20% | 50% | ≤ 1,000 gil | Knot of Rust | Common | Rare |
| Knot of Rust | Zwill Crossblade | |||||
| 27 | 20% | 50% | ≤ 1,000 gil | Knot of Rust | Common | Rare |
| Knot of Rust | Water Bombs | |||||
| 28 | 20% | 20% | ≤ 1,000 gil | Knot of Rust | Common | Rare |
| Knot of Rust | Kagenui | |||||
- Original
| Chest | Spawns | Holds Gil% | Normal Treasure | Diamond Armlet Treasure | ||||
|---|---|---|---|---|---|---|---|---|
| 11 | 50% | 65% | Gil | Item 1 | Item 2 | Gil | Common | Rare |
| ≤ 300 gil | X-Potion | Gillie Boots | ≤ 3,000 gil | Knot of Rust | Blazer Gloves | |||
| 12 | 50% | 50% | Gil | Item 1 | Item 2 | Gil | Common | Rare |
| ≤ 300 gil | Ether | Holy Mote | ≤ 3,000 gil | Knot of Rust | Megalixir | |||
| 13 | 50% | 50% | Gil | Item 1 | Item 2 | Gil | Common | Rare |
| ≤ 300 gil | Ether | Aero Mote | ≤ 3,000 gil | Knot of Rust | Megalixir | |||
| 14 | 50% | 50% | Gil | Item | Gil | Common | Rare | |
| ≤ 300 gil | X-Potion | ≤ 3,000 gil | Knot of Rust | Kaiser Shield | ||||
| 15 | 50% | 65% | Gil | Item 1 | Item 2 | Gil | Common | Rare |
| ≤ 300 gil | Golden Amulet | Warp Mote | ≤ 3,000 gil | Knot of Rust | Megalixir | |||
| 16 | 50% | 80% | Gil | Item | Gil | Common | Rare | |
| ≤ 300 gil | Embroidered Tippet | ≤ 3,000 gil | Knot of Rust | Celebrant's Miter | ||||
| 17 | 50% | 50% | Gil | Item 1 | Item 2 | Gil | Common | Rare |
| ≤ 300 gil | Ether | Float Mote | ≤ 3,000 gil | Knot of Rust | Time Bolts | |||
| 18 | 50% | 50% | Gil | Item 1 | Item 2 | Gil | Common | Rare |
| ≤ 300 gil | X-Potion | Hi-Ether | ≤ 3,000 gil | Knot of Rust | Megalixir | |||
| 19 | 50% | 65% | Gil | Item 1 | Item 2 | Gil | Common | Rare |
| ≤ 300 gil | Ether | Quasimodo Boots | ≤ 3,000 gil | Knot of Rust | Firefly | |||
| 20 | 50% | 50% | Gil | Item 1 | Item 2 | Gil | Common | Rare |
| ≤ 300 gil | Ether | Reflectga Mote | ≤ 3,000 gil | Knot of Rust | Dragon Whisker | |||
The Terraced Bank
- Zodiac
| Chest | Spawns | Holds Gil% | Gil | Normal Treasure | Diamond Armlet Treasure | ||
|---|---|---|---|---|---|---|---|
| 29 | 20% | 80% | ≤ 1,000 gil | Knot of Rust | Common | Rare | |
| Knot of Rust | Dark Matter | ||||||
| 30 | 20% | 80% | ≤ 1,000 gil | Knot of Rust | Common | Rare | |
| Knot of Rust | Dark Matter | ||||||
| 31 | 20% | 50% | ≤ 1,000 gil | Knot of Rust | Common | Rare | |
| Knot of Rust | Zeus Mace | ||||||
| 32 | 10% | 80% | ≤ 1,000 gil | Knot of Rust | Common | Rare | |
| Knot of Rust | Rod of Faith | ||||||
| 33 | 10% | 80% | ≤ 1,000 gil | Knot of Rust | Common | Rare | |
| Knot of Rust | Durandal | ||||||
| 34 | 20% | 50% | ≤ 1,000 gil | Knot of Rust | Common | Rare | |
| Knot of Rust | Black Robes | ||||||
| 35 | 20% | 50% | ≤ 1,000 gil | Knot of Rust | Common | Rare | |
| Knot of Rust | Golden Axe | ||||||
| 36[note 1] | 20% | 0% | N/A | Cleanse | |||
| 37 | 20% | 50% | ≤ 1,000 gil | Knot of Rust | Common | Rare | |
| Knot of Rust | Black Mask | ||||||
| 38 | 20% | 80% | ≤ 1,000 gil | Knot of Rust | Common | Rare | |
| Knot of Rust | Megalixir | ||||||
| 39 | 20% | 50% | ≤ 1,000 gil | Knot of Rust | Common | Rare | |
| Knot of Rust | Muramasa | ||||||
| 40 | 10% | 80% | ≤ 1,000 gil | Knot of Rust | Common | Rare | |
| Knot of Rust | Stoneblade | ||||||
| 41 | 20% | 50% | ≤ 1,000 gil | Knot of Rust | Common | Rare | |
| Knot of Rust | Stone Shot | ||||||
| 42 | 20% | 50% | ≤ 1,000 gil | Knot of Rust | Common | Rare | |
| Knot of Rust | Iga Blade | ||||||
Template:Notelist
- Original
| Chest | Spawns | Holds Gil% | Normal Treasure | Diamond Armlet Treasure | ||||
|---|---|---|---|---|---|---|---|---|
| 21 | 50% | 50% | Gil | Item 1 | Item 2 | Gil | Common | Rare |
| ≤ 300 gil | Ether | Holy Mote | ≤ 3,000 gil | Knot of Rust | Castellanos | |||
| 22 | 50% | 50% | Gil | Item 1 | Item 2 | Gil | Common | Rare |
| ≤ 300 gil | Ether | X-Potion | ≤ 3,000 gil | Knot of Rust | Shell Shield | |||
| 23 | 50% | 50% | Gil | Item 1 | Item 2 | Gil | Common | Rare |
| ≤ 300 gil | Ether | Warp Mote | ≤ 3,000 gil | Knot of Rust | Artemis Arrows | |||
| 24 | 50% | 50% | Gil | Item 1 | Item 2 | Gil | Common | Rare |
| ≤ 300 gil | Ether | Float Mote | ≤ 3,000 gil | Knot of Rust | Hastega Mote | |||
| 25 | 50% | 50% | Gil | Item 1 | Item 2 | Gil | Common | Rare |
| ≤ 300 gil | Ether | X-Potion | ≤ 3,000 gil | Knot of Rust | Megalixir | |||
| 26 | 50% | 70% | Gil | Item 1 | Item 2 | Gil | Common | Rare |
| ≤ 300 gil | Ether | Empyrean Rod | ≤ 3,000 gil | Knot of Rust | Megalixir | |||
| 27 | 50% | 80% | Gil | Item 1 | Item 2 | Gil | Common | Rare |
| ≤ 300 gil | Ether | Mirror Mail | ≤ 3,000 gil | Knot of Rust | Megalixir | |||
| 28 | 50% | 80% | Gil | Item 1 | Item 2 | Gil | Common | Rare |
| ≤ 300 gil | Ether | Megalixir | ≤ 3,000 gil | Knot of Rust | Euclid's Sextant | |||
| 29 | 50% | 50% | Gil | Item 1 | Item 2 | Gil | Common | Rare |
| ≤ 300 gil | Ether | Balance Mote | ≤ 3,000 gil | Knot of Rust | Grand Bolts | |||
| 30 | 50% | 50% | Gil | Item 1 | Item 2 | Gil | Common | Rare |
| ≤ 300 gil | Ether | Water Mote | ≤ 3,000 gil | Knot of Rust | Cloud Staff | |||
Feddik River
- Zodiac
| Chest | Spawns | Holds Gil% | Gil | Normal Treasure | Diamond Armlet Treasure | |
|---|---|---|---|---|---|---|
| 43 | 20% | 50% | ≤ 1,000 gil | Knot of Rust | Common | Rare |
| Knot of Rust | Claymore | |||||
| 44 | 20% | 80% | ≤ 1,000 gil | Knot of Rust | Common | Rare |
| Knot of Rust | Mythril Blade | |||||
| 45 | 10% | 80% | ≤ 1,000 gil | Knot of Rust | Common | Rare |
| Knot of Rust | Grand Mace | |||||
| 46 | 10% | 80% | ≤ 1,000 gil | Knot of Rust | Common | Rare |
| Knot of Rust | Bonebreaker | |||||
| 47 | 20% | 50% | ≤ 1,000 gil | Knot of Rust | Common | Rare |
| Knot of Rust | Koga Blade | |||||
| 48 | 20% | 80% | ≤ 1,000 gil | Knot of Rust | Common | Rare |
| Knot of Rust | Whale Whisker | |||||
| 49 | 20% | 80% | ≤ 1,000 gil | Knot of Rust | Common | Rare |
| Knot of Rust | Maximillian | |||||
| 50 | 20% | 80% | ≤ 1,000 gil | Knot of Rust | Common | Rare |
| Knot of Rust | Dragon Whisker | |||||
| 51 | 10% | 80% | ≤ 1,000 gil | Knot of Rust | Common | Rare |
| Knot of Rust | Dark Energy | |||||
| 52 | 10% | 80% | ≤ 1,000 gil | Knot of Rust | Common | Rare |
| Knot of Rust | Grand Helm | |||||
| 53 | 20% | 80% | ≤ 1,000 gil | Knot of Rust | Common | Rare |
| Knot of Rust | Brave Suit | |||||
| 54 | 20% | 80% | ≤ 1,000 gil | Knot of Rust | Common | Rare |
| Knot of Rust | Fomalhaut | |||||
| 55 | 20% | 80% | ≤ 1,000 gil | Knot of Rust | Common | Rare |
| Knot of Rust | Megalixir | |||||
| 56 | 20% | 80% | ≤ 1,000 gil | Knot of Rust | Common | Rare |
| Knot of Rust | Mirage Vest | |||||
| 57 | 10% | 80% | ≤ 1,000 gil | Knot of Rust | Common | Rare |
| Knot of Rust | Meteorite (D) | |||||
- Original
| Chest | Spawns | Holds Gil% | Normal Treasure | Diamond Armlet Treasure | ||||
|---|---|---|---|---|---|---|---|---|
| 31 | 50% | 50% | Gil | Item 1 | Item 2 | Gil | Common | Rare |
| ≤ 300 gil | Hi-Ether | Holy Mote | ≤ 3,000 gil | Knot of Rust | Water Bombs | |||
| 32 | 50% | 50% | Gil | Item 1 | Item 2 | Gil | Common | Rare |
| ≤ 300 gil | Hi-Ether | X-Potion | ≤ 3,000 gil | Knot of Rust | Megalixir | |||
| 33 | 50% | 50% | Gil | Item 1 | Item 2 | Gil | Common | Rare |
| ≤ 300 gil | Hi-Ether | X-Potion | ≤ 3,000 gil | Knot of Rust | Zwill Crossblade | |||
| 34 | 50% | 50% | Gil | Item 1 | Item 2 | Gil | Common | Rare |
| ≤ 300 gil | Hi-Ether | Hastega Mote | ≤ 3,000 gil | Knot of Rust | Nishijin Belt | |||
| 35 | 50% | 50% | Gil | Item 1 | Item 2 | Gil | Common | Rare |
| ≤ 300 gil | Hi-Ether | Reflectga Mote | ≤ 3,000 gil | Knot of Rust | Quasimodo Boots | |||
| 36 | 50% | 65% | Gil | Item 1 | Item 2 | Gil | Common | Rare |
| ≤ 300 gil | Hi-Ether | Leather Gorget | ≤ 3,000 gil | Knot of Rust | Megalixir | |||
| 37 | 50% | 50% | Gil | Item 1 | Item 2 | Gil | Common | Rare |
| ≤ 300 gil | Hi-Ether | Aero Mote | ≤ 3,000 gil | Knot of Rust | Lightning Arrows | |||
| 38 | 50% | 50% | Gil | Item 1 | Item 2 | Gil | Common | Rare |
| ≤ 300 gil | Hi-Ether | Float Mote | ≤ 3,000 gil | Knot of Rust | Holy Rod | |||
| 39 | 50% | 50% | Gil | Item 1 | Item 2 | Gil | Common | Rare |
| ≤ 300 gil | Hi-Ether | Ether | ≤ 3,000 gil | Knot of Rust | Morning Star | |||
| 40 | 50% | 50% | Gil | Item 1 | Item 2 | Gil | Common | Rare |
| ≤ 300 gil | Hi-Ether | Warp Mote | ≤ 3,000 gil | Knot of Rust | Megalixir | |||
The Northsward
- Zodiac
| Chest | Spawns | Holds Gil% | Gil | Normal Treasure | Diamond Armlet Treasure | |
|---|---|---|---|---|---|---|
| 58 | 20% | 80% | ≤ 1,000 gil | Knot of Rust | Common | Rare |
| Knot of Rust | Golden Skullcap | |||||
| 59 | 20% | 80% | ≤ 1,000 gil | Knot of Rust | Common | Rare |
| Knot of Rust | Glimmering Robes | |||||
| 60 | 20% | 80% | ≤ 1,000 gil | Knot of Rust | Common | Rare |
| Knot of Rust | Magepower Shishak | |||||
| 61 | 20% | 80% | ≤ 1,000 gil | Knot of Rust | Common | Rare |
| Knot of Rust | Orochi | |||||
| 62 | 20% | 80% | ≤ 1,000 gil | Knot of Rust | Common | Rare |
| Knot of Rust | Shell Shield | |||||
| 63 | 20% | 80% | ≤ 1,000 gil | Knot of Rust | Common | Rare |
| Knot of Rust | Bone of Byblos | |||||
| 64 | 10% | 80% | ≤ 1,000 gil | Knot of Rust | Common | Rare |
| Knot of Rust | Venetian Shield | |||||
| 65 | 10% | 80% | ≤ 1,000 gil | Knot of Rust | Common | Rare |
| Knot of Rust | Baltoro's Seed | |||||
| 66 | 10% | 80% | ≤ 1,000 gil | Knot of Rust | Common | Rare |
| Knot of Rust | Grand Armor | |||||
| 67 | 10% | 80% | ≤ 1,000 gil | Knot of Rust | Common | Rare |
| Knot of Rust | Shikari Nagasa | |||||
| 68 | 20% | 80% | ≤ 1,000 gil | Knot of Rust | Common | Rare |
| Knot of Rust | Lordly Robes | |||||
| 69 | 20% | 80% | ≤ 1,000 gil | Knot of Rust | Common | Rare |
| Knot of Rust | Megalixir | |||||
| 70 | 10% | 80% | ≤ 1,000 gil | Knot of Rust | Common | Rare |
| Knot of Rust | Volcano | |||||
| 71 | 20% | 50% | ≤ 1,000 gil | Knot of Rust | Common | Rare |
| Knot of Rust | Artemis Arrows | |||||
- Original
| Chest | Spawns | Holds Gil% | Normal Treasure | Diamond Armlet Treasure | ||||
|---|---|---|---|---|---|---|---|---|
| 41 | 50% | 50% | Gil | Item 1 | Item 2 | Gil | Common | Rare |
| ≤ 300 gil | X-Potion | Warp Mote | ≤ 3,000 gil | Knot of Rust | Megalixir | |||
| 42 | 50% | 50% | Gil | Item 1 | Item 2 | Gil | Common | Rare |
| ≤ 300 gil | X-Potion | Holy Mote | ≤ 3,000 gil | Knot of Rust | Megalixir | |||
| 43 | 50% | 50% | Gil | Item 1 | Item 2 | Gil | Common | Rare |
| ≤ 300 gil | X-Potion | Float Mote | ≤ 3,000 gil | Knot of Rust | Black Robes | |||
| 44 | 50% | 50% | Gil | Item | Gil | Common | Rare | |
| ≤ 300 gil | X-Potion | ≤ 3,000 gil | Knot of Rust | Megalixir | ||||
| 45 | 50% | 50% | Gil | Item | Gil | Common | Rare | |
| ≤ 300 gil | X-Potion | ≤ 3,000 gil | Knot of Rust | Dragon Mail | ||||
| 46 | 50% | 50% | Gil | Item 1 | Item 2 | Gil | Common | Rare |
| ≤ 300 gil | X-Potion | Scathe Mote | ≤ 3,000 gil | Knot of Rust | Assassin's Arrows | |||
| 47 | 50% | 50% | Gil | Item 1 | Item 2 | Gil | Common | Rare |
| ≤ 300 gil | X-Potion | Balance Mote | ≤ 3,000 gil | Knot of Rust | Hastega Mote | |||
| 48 | 50% | 50% | Gil | Item 1 | Item 2 | Gil | Common | Rare |
| ≤ 300 gil | X-Potion | Hastega Mote | ≤ 3,000 gil | Knot of Rust | Agate Ring | |||
| 49 | 50% | 50% | Gil | Item 1 | Item 2 | Gil | Common | Rare |
| ≤ 300 gil | X-Potion | Reflectga Mote | ≤ 3,000 gil | Knot of Rust | Fomalhaut | |||
| 50 | 50% | 50% | Gil | Item 1 | Item 2 | Gil | Common | Rare |
| ≤ 300 gil | X-Potion | Vanishga Mote | ≤ 3,000 gil | Knot of Rust | Megalixir | |||
Crossfield
- Zodiac
| Chest | Spawns | Holds Gil% | Gil | Normal Treasure | Diamond Armlet Treasure | |
|---|---|---|---|---|---|---|
| 72 | 20% | 80% | ≤ 1,000 gil | Knot of Rust | Common | Rare |
| Knot of Rust | Circlet | |||||
| 73 | 10% | 80% | ≤ 1,000 gil | Knot of Rust | Common | Rare |
| Knot of Rust | Ultima Blade | |||||
| 74 | 10% | 80% | ≤ 1,000 gil | Knot of Rust | Common | Rare |
| Knot of Rust | Yagyu Darkblade | |||||
| 75 | 20% | 80% | ≤ 1,000 gil | Knot of Rust | Common | Rare |
| Knot of Rust | Renewing Morion | |||||
| 76 | 20% | 80% | ≤ 1,000 gil | Knot of Rust | Common | Rare |
| Knot of Rust | Dueling Mask | |||||
| 77 | 10% | 80% | ≤ 1,000 gil | Knot of Rust | Common | Rare |
| Knot of Rust | Euclid's Sextant | |||||
| 78 | 10% | 80% | ≤ 1,000 gil | Knot of Rust | Common | Rare |
| Knot of Rust | Sagittarius | |||||
| 79 | 20% | 80% | ≤ 1,000 gil | Knot of Rust | Common | Rare |
| Knot of Rust | Mythril Sword | |||||
| 80 | 10% | 80% | ≤ 1,000 gil | Knot of Rust | Common | Rare |
| Knot of Rust | Scorpion Tail | |||||
| 81 | 20% | 50% | ≤ 1,000 gil | Knot of Rust | Common | Rare |
| Knot of Rust | Chaperon | |||||
| 82 | 20% | 50% | ≤ 1,000 gil | Knot of Rust | Common | Rare |
| Knot of Rust | Aegis Shield | |||||
| 83 | 20% | 50% | ≤ 1,000 gil | Knot of Rust | Common | Rare |
| Knot of Rust | Demon Shield | |||||
| 84 | 10% | 80% | ≤ 1,000 gil | Knot of Rust | Common | Rare |
| Knot of Rust | Dark Energy | |||||
| 85 | 20% | 50% | ≤ 1,000 gil | Knot of Rust | Common | Rare |
| Knot of Rust | Grand Bolts | |||||
- Original
| Chest | Spawns | Holds Gil% | Normal Treasure | Diamond Armlet Treasure | ||||
|---|---|---|---|---|---|---|---|---|
| 51 | 50% | 70% | Gil | Item | Gil | Common | Rare | |
| ≤ 300 gil | Parallel Arrows | ≤ 3,000 gil | Knot of Rust | Winged Boots | ||||
| 52 | 50% | 70% | Gil | Item 1 | Item 2 | Gil | Common | Rare |
| ≤ 300 gil | X-Potion | Scathe Mote | ≤ 3,000 gil | Knot of Rust | Ribbon | |||
| 53 | 50% | 50% | Gil | Item | Gil | Common | Rare | |
| ≤ 300 gil | X-Potion | ≤ 3,000 gil | Knot of Rust | Dark Shot | ||||
| 54 | 50% | 60% | Gil | Item 1 | Item 2 | Gil | Common | Rare |
| ≤ 300 gil | Long Bolts | Balance Mote | ≤ 3,000 gil | Knot of Rust | Fomalhaut | |||
| 55 | 50% | 50% | Gil | Item 1 | Item 2 | Gil | Common | Rare |
| ≤ 300 gil | X-Potion | Holy Mote | ≤ 3,000 gil | Knot of Rust | Megalixir | |||
| 56 | 50% | 50% | Gil | Item 1 | Item 2 | Gil | Common | Rare |
| ≤ 300 gil | X-Potion | Vanishga Mote | ≤ 3,000 gil | Knot of Rust | Castellanos | |||
| 57 | 50% | 60% | Gil | Item 1 | Item 2 | Gil | Common | Rare |
| ≤ 300 gil | Poison Bombs | Reflectga Mote | ≤ 3,000 gil | Knot of Rust | Hastega Mote | |||
| 58 | 50% | 60% | Gil | Item 1 | Item 2 | Gil | Common | Rare |
| ≤ 300 gil | Silent Shot | Hastega Mote | ≤ 3,000 gil | Knot of Rust | Icecloud Arrows | |||
| 59 | 50% | 50% | Gil | Item 1 | Item 2 | Gil | Common | Rare |
| ≤ 300 gil | X-Potion | Warp Mote | ≤ 3,000 gil | Knot of Rust | Venetian Shield | |||
| 60 | 50% | 50% | Gil | Item 1 | Item 2 | Gil | Common | Rare |
| ≤ 300 gil | X-Potion | Float Mote | ≤ 3,000 gil | Knot of Rust | Hastega Mote | |||
Old Elanise Road
- Zodiac
| Chest | Spawns | Holds Gil% | Gil | Normal Treasure | Diamond Armlet Treasure | |
|---|---|---|---|---|---|---|
| 86 | 20% | 50% | ≤ 1,000 gil | Knot of Rust | Common | Rare |
| Knot of Rust | White Robes | |||||
| 87 | 20% | 50% | ≤ 1,000 gil | Knot of Rust | Common | Rare |
| Knot of Rust | Crown of Laurels | |||||
| 88 | 10% | 80% | ≤ 1,000 gil | Knot of Rust | Common | Rare |
| Knot of Rust | Staff of the Magi | |||||
| 89 | 20% | 50% | ≤ 1,000 gil | Knot of Rust | Common | Rare |
| Knot of Rust | Defender | |||||
| 90 | 20% | 50% | ≤ 1,000 gil | Knot of Rust | Common | Rare |
| Knot of Rust | Dragon Mail | |||||
| 91 | 20% | 50% | ≤ 1,000 gil | Knot of Rust | Common | Rare |
| Knot of Rust | Stink Bombs | |||||
| 92 | 10% | 80% | ≤ 1,000 gil | Knot of Rust | Common | Rare |
| Knot of Rust | Artemis Bow | |||||
| 93 | 20% | 20% | ≤ 1,000 gil | Knot of Rust | Common | Rare |
| Knot of Rust | Antares | |||||
| 94 | 20% | 50% | ≤ 1,000 gil | Knot of Rust | Common | Rare |
| Knot of Rust | Icecloud Arrows | |||||
| 95 | 10% | 80% | ≤ 1,000 gil | Knot of Rust | Common | Rare |
| Knot of Rust | Gastrophetes | |||||
| 96 | 20% | 20% | ≤ 1,000 gil | Knot of Rust | Common | Rare |
| Knot of Rust | Thief's Cap | |||||
| 97 | 20% | 20% | ≤ 1,000 gil | Knot of Rust | Common | Rare |
| Knot of Rust | Tumulus | |||||
| 98 | 20% | 20% | ≤ 1,000 gil | Knot of Rust | Common | Rare |
| Knot of Rust | Gilt Measure | |||||
| 99 | 20% | 20% | ≤ 1,000 gil | Knot of Rust | Common | Rare |
| Knot of Rust | Holy Rod | |||||
| 100 | 20% | 20% | ≤ 1,000 gil | Knot of Rust | Common | Rare |
| Knot of Rust | Blood Sword | |||||
| 101[note 2] | 100% | 0% | N/A | Telekinesis | ||
Template:Notelist
- Original
| Chest | Spawns | Holds Gil% | Normal Treasure | Diamond Armlet Treasure | ||||
|---|---|---|---|---|---|---|---|---|
| 61 | 50% | 50% | Gil | Item 1 | Item 2 | Gil | Common | Rare |
| ≤ 300 gil | X-Potion | Warp Mote | ≤ 3,000 gil | Knot of Rust | Windslicer Shot | |||
| 62 | 50% | 50% | Gil | Item 1 | Item 2 | Gil | Common | Rare |
| ≤ 300 gil | X-Potion | Float Mote | ≤ 3,000 gil | Knot of Rust | Magepower Shishak | |||
| 63 | 50% | 80% | Gil | Item 1 | Item 2 | Gil | Common | Rare |
| ≤ 300 gil | X-Potion | Kiku-ichimonji | ≤ 3,000 gil | Knot of Rust | Megalixir | |||
| 64 | 50% | 50% | Gil | Item 1 | Item 2 | Gil | Common | Rare |
| ≤ 300 gil | X-Potion | Aero Mote | ≤ 3,000 gil | Knot of Rust | Grand Bolts | |||
| 65 | 50% | 50% | Gil | Item 1 | Item 2 | Gil | Common | Rare |
| ≤ 300 gil | X-Potion | Reflectga Mote | ≤ 3,000 gil | Knot of Rust | Golden Skullcap | |||
| 66 | 50% | 70% | Gil | Item 1 | Item 2 | Gil | Common | Rare |
| ≤ 300 gil | X-Potion | Armguard | ≤ 3,000 gil | Knot of Rust | Megalixir | |||
| 67 | 50% | 50% | Gil | Item 1 | Item 2 | Gil | Common | Rare |
| ≤ 300 gil | X-Potion | Aero Mote | ≤ 3,000 gil | Knot of Rust | Megalixir | |||
| 68 | 50% | 50% | Gil | Item | Gil | Common | Rare | |
| ≤ 300 gil | X-Potion | ≤ 3,000 gil | Knot of Rust | Mirage Vest | ||||
| 69 | 50% | 50% | Gil | Item | Gil | Common | Rare | |
| ≤ 300 gil | X-Potion | ≤ 3,000 gil | Knot of Rust | Megalixir | ||||
| 70 | 50% | 50% | Gil | Item 1 | Item 2 | Gil | Common | Rare |
| ≤ 300 gil | X-Potion | Holy Mote | ≤ 3,000 gil | Knot of Rust | Castellanos | |||
Quests
Chocobo paths
South Liavell Hills (the area that leads to Balfonheim) has a chocobo path to the Northsward. From Northsward, a chocobo path leads to the west to Old Elanise Road (the area connecting to Tchita Uplands). It is possible to go from Balfonheim to Tchita Uplands with a chocobo in ~20 seconds using these shortcuts.
It is possible to visit Cerobi Steppe early, even before going to the Sochen Cave Palace, by riding a chocobo from Phon Coast to the west to Tchita Uplands across another chocobo path.
Hunts
The Vyraal is a Rank V Mark whose hunt can be undertaken after the events in Draklor Laboratory are complete. The Vyraal can be found in The Northsward area and enemies will be cleared out when the player enters it. The hunt is petitioned by the Viera Wayfarer in the Whitecap pub in Balfonheim. The player will also receive the Viera Rucksack after the battle, which the Viera Wayfarer will take back when the hunt is reported. She lets the player keep the Dragon Scale, item part of the Wyrm Philosopher quest (see below).
Rare Game
The player must have spoken to the "Huntmaster" in Phon Coast and defeated Thalassinon and spoken to one of the three bangaa outfitters, which will trigger the start of the Rare Game quest. Aspidochelon then has a 40% chance of spawning among the Adamantitans in the Feddik River (three-way split area) area of the Cerobi Steppe.
The best idea is to steal Scarletite from it, then leave the area without killing it, as once killed, Aspidochelon will never respawn. That way the player can get more than one Scarletite from the rare game. Scarletite is an essential Loot item in the making of the Tournesol.
Once the player has hunted and vanquished all the foes in the Northsward area, Etherian will drop from the sky to the spot where the last foe is killed. It spawns no matter what the present weather conditions are.
To find the Bluesang the player must have spoken to the "Huntmaster" in Phon Coast and defeated Thalassinon; Bluesang then has a 40% chance of appearing in the Crossfield area between the windmills. If the player is trying to get the Tournesol, the Bluesang is one of the earlier and easier sources of one required Bazaar ingredient, Gemsteel. The player can acquire the Damascus Steel by stealing the item once, exiting two areas and repeating the process, until six Damascus Steel are obtained. Being a Trophy Rare Game, the Bluesang does not reappear after being killed.
Windmills
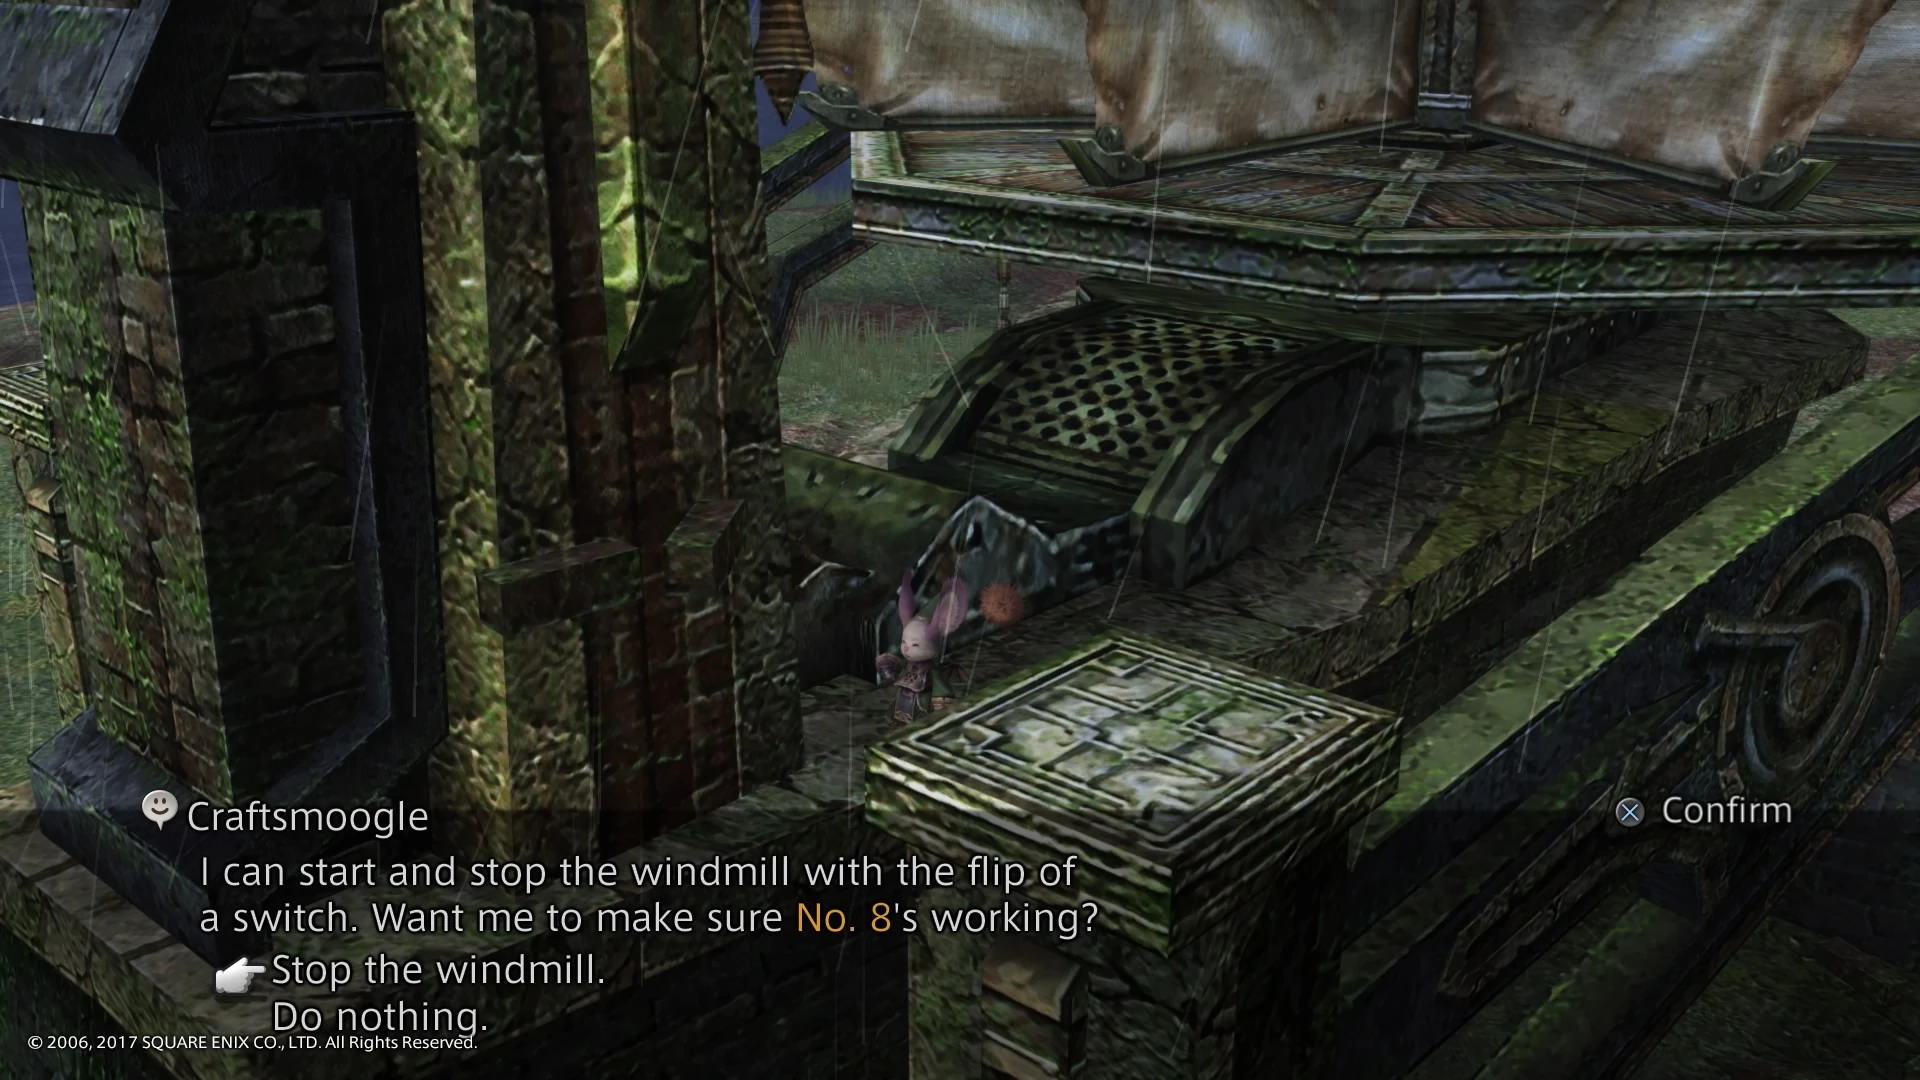
The player stops a windmill.
There are ten windmills scattered around the area. After having fixed the gate leading to Phon Coast, the moogles of the Craftsmen's Guild can be found in the windmills. During the fishing minigame/sidequest, the player gets a hint to stop certain windmills to get a Hi-Ether and a hint for the Matamune Fishing rod quest. The windmills that must turned on are: No.1, No.2, No.5, No.7 and No.9.
Wyrm Philosopher


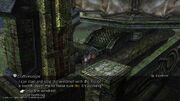
Wyrm Philosopher is found in Windmill #10.
The Wyrm Philosopher can be found in Windmill #10 in the Northsward zone of the Steppe after slaying the Mark Vyraal, and getting the Dragon Scale reward from the viera. After giving the Dragon Scale to Wyrm Philosopher he will reward the party with the Age Worn Key, a key that opens the Hall of Wroth God in Sochen Cave Palace, leading to Hell Wyrm.
Enemies
- Bandercoeurl
- Shield Wyrm
- Adamantitan
- Charybterix
- Bellwyvern
- Silver Lobo
- Bangaa Thief
- Seeq Explorer (Passive)
- Undin Entite (Rain only)
- Vyraal (Mark)
- Aspidochelon (Rare)
- Etherian (Rare)
- Bluesang (Rare)
Musical themes
The theme that plays on Cerobi Steppe is simply called "The Cerobi Steppe". This theme returns in Final Fantasy XII: Revenant Wings as the theme for exploring Lemurés' overworld.
In the Zodiac Job System version, the Nam-Yensa Sandsea also uses the "Cerobi Steppe" theme.
A live recording of the track is part of the "Ivalice Landscapes" medley on the A New World: intimate music from Final Fantasy - Volume II album
Map
The map can be bought in Sea Breeze Lane for 4,100 gil.
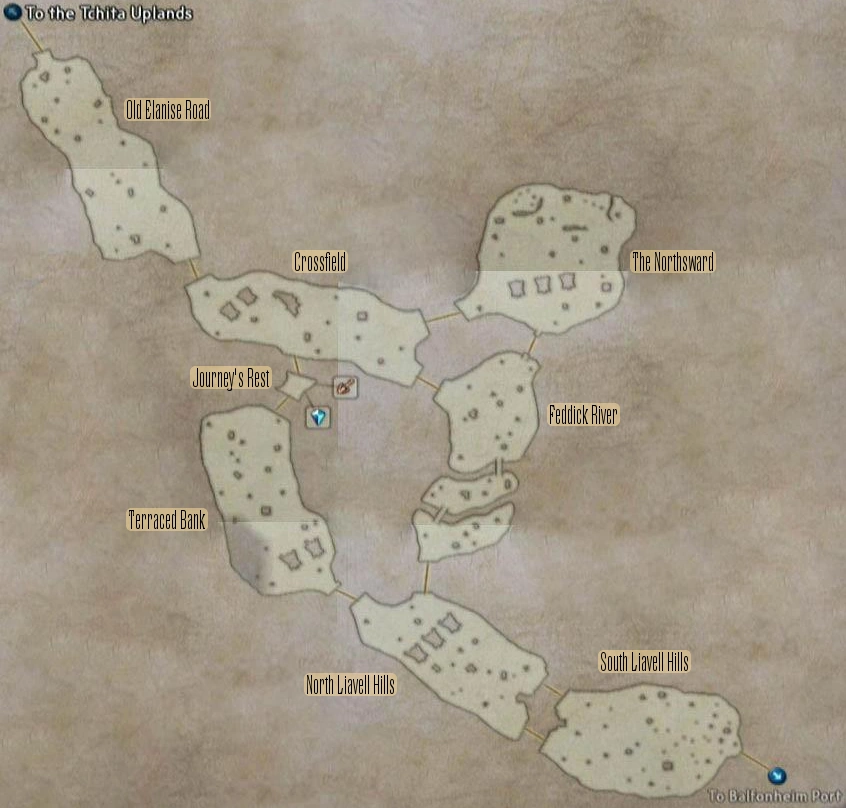
Map for the original Final Fantasy XII that includes all treasure information.
Behind the scenes


Arrow on the Cerobi Steppe.
If the player finds the Seitengrat, an ultimate secret bow added to the Zodiac versions, an arrow (currently equipped arrow type) will appear in the Cerobi Steppe suspended a few feet in the air while the bow is equipped. It is found near the entrance to Old Elanise Road from the Tchita Uplands.
The area where Slyt is fought in Pharos seems to be the rock circle in the pond situated in the middle of Cerobi Steppe. This landmark can be viewed from the Crossfield, Feddik River, North Liavell Hills, Terraced Bank, and Journey's Rest zones.
Gallery
")
")
")
External links
- Final Fantasy XII Perfect Game FAQ by Ashe10 with Cerobi Steppe treasure information for the original version of Final Fantasy XII
Cite error: <ref> tags exist for a group named "note", but no corresponding <references group="note"/> tag was found